


Why Read This Article?
Finish Nailer Repair - Replacing the Driver Guide (Ridgid Part # 79004001022)
Article Breakdown
Finish Nailer Repair - Replacing the Driver Guide (Ridgid Part # 79004001022)
Video

Tools & Materials
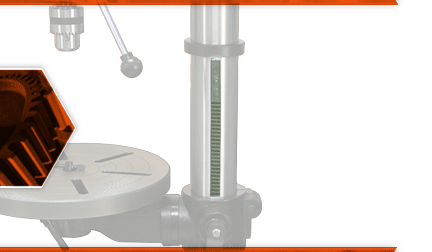
The rack attaches to the drill press column and works with the worm pinion to raise and lower the work table. Most problems with the rack are the result of accidental damage, such as the press tipping over, or a workpiece striking the rack. After many years of use, the rack can wear, until there is excessive play between it and the worm pinion when you adjust the table.
Let's get started.
REMOVING THE RACK 1. Remove the head assembly.
a. Loosen the set-screws securing the head assembly to the column.
b. With the help of an assistant, carefully lift the head assembly away from the column.
2. Remove the rack ring.
a. Loosen the set-screw securing the rack ring to the column.
b. Slide the rack ring (up and) away from column.
3. Remove the table.
a. Loosen the table lock handle.
b. Lift the table away from the table bracket assembly.
4. Remove the rack.
a. The rack is surrounded by (and secured to) the column by the locking collar assembly. To remove the rack, youll need to slide the table bracket assembly, locking collar, and the rack itself away from the column (as a single unit).
b. Remove the rack from the locking collar.
INSTALLING THE NEW RACK
5. Install the rack.
a. Install the new rack into the locking collar. (There is an arrow stamped into the metal indicating which end of the rack is the top.)
b. Adjust the new rack until its teeth engage the worm pinion on the locking collar.
c. Install the locking collar, the table bracket, and the new rack onto the column (as a single unit).
d. Lower the entire assembly until the bottom of the rack engages the groove in the base of the column.
REASSEMBLING THE UNIT
6. Reinstall the rack ring.
a. Install the rack ring onto the column.
b. Slide the rack ring down the column until the ring engages the top of the new rack.
c. Level the rack ring (as close to level as possible).
d. Temporarily tighten the set-screws to secure the rack ring.
e. Rotate the table bracket and inspect the rack ring. The table should rotate smoothly around the column (without binding against the top of the rack). Loosen the set-screws (if necessary) and raise or lower the rack ring (as-needed) to bring it into alignment. Be careful not to raise the rack ring too high, because the rack itself will then pull away from the column.
f. Once the rack ring is properly aligned, tighten the set-screws.
7. Reinstall the table.
a. Install the table onto the table bracket assembly.
b. Secure the table with the table lock handle.
8. Reinstall the head assembly.
a. With the help of an assistant, install the head assembly back onto the column.
b. Rotate and align the head assembly with the base of the drill press.
c. Secure the head assembly with the two set-screws.
