


Why Read This Article?
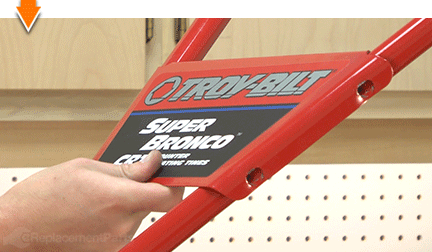
Finish Nailer Repair - Replacing the Driver Guide (Ridgid Part # 79004001022)
Article Breakdown
Finish Nailer Repair - Replacing the Driver Guide (Ridgid Part # 79004001022)
Tools & Materials

Tiller hard to handle? It's time to face the fix. Whether you are a casual cultivator or a legendary landscaper, eReplacementParts.com provides the parts, procedures and facts you need to fearlessly fix what fails you.
The upper handle assembly enables you to control your Super Bronco tiller in several ways. Foremost, it provides leverage, which enables you to move, stabilize and steer the unit during operation. It also houses the forward clutch bail and the reverse handle assembly (as well as secures the cables for both).
While the upper handle is designed to withstand significant amounts of torque (generated by the tines and the action of the tiller), it is possible to damage the assembly with heavy use. Damage can also occur if the tiller is used (or transported) improperly.
This article provides step-by-step instructions for removing and installing the upper handle on a Troy-Bilt Super Bronco tiller.
Let's get started.
 REMOVING THE UPPER HANDLE [top]
1. Remove the reverse handle.
REMOVING THE UPPER HANDLE [top]
1. Remove the reverse handle.
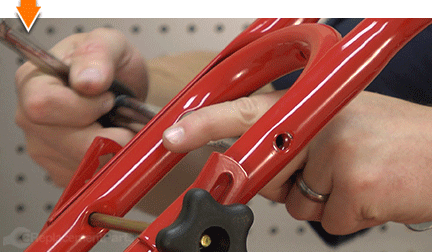
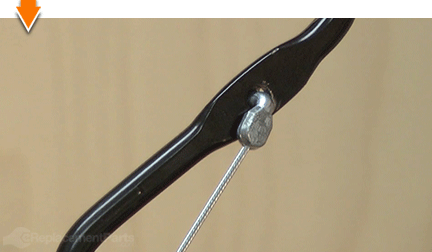
Disconnect the reverse cable (Z-connector) from the reverse handle.
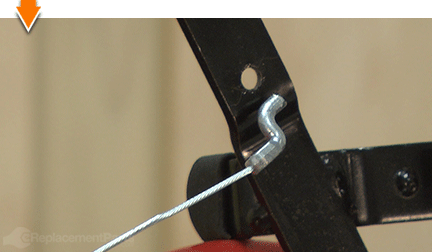
Remove the nut securing the reverse handle to the upper handle.
Remove the reverse handle assembly from the upper handle.
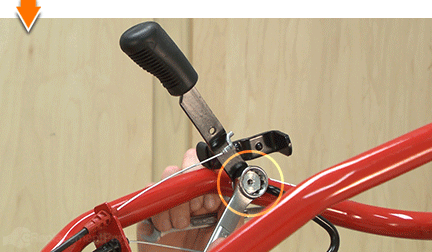
2. Remove the forward clutch bail.
Disconnect the Z-connector from the forward clutch bail.
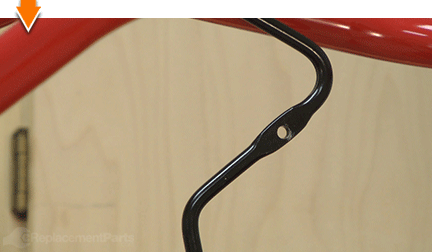
Remove the forward clutch bail from the upper handle.
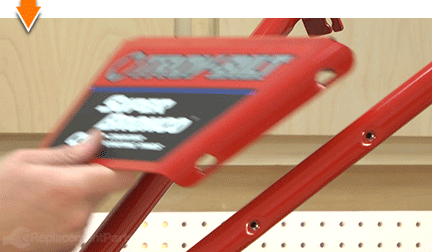
3. Remove the handle panel from the upper handle.
Remove the (4) bolts securing the panel to the upper handle.
Remove the handle panel from the upper handle.
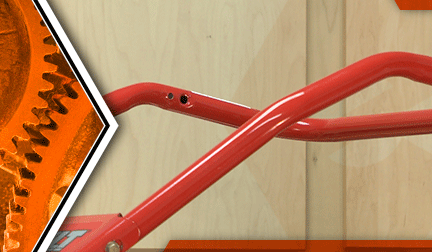
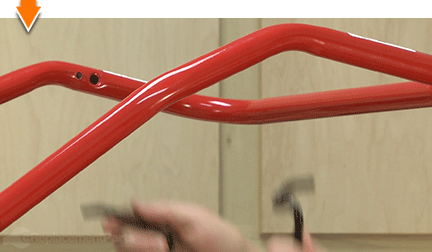
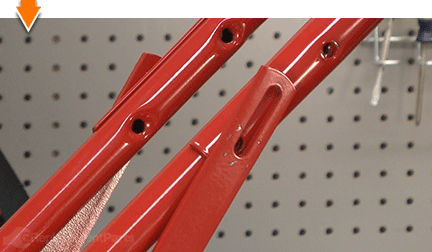
4. Remove the upper handle.
Remove the (2) hex screws and flange lock nuts securing the upper handle to the lower handle.
Remove the adjustment knob and the bell washer.
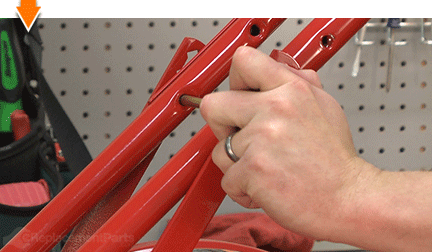
Slide the carriage bolt out of the handle assembly (use a rubber mallet to tap the bolt, if necessary).
Remove the upper handle from the unit.
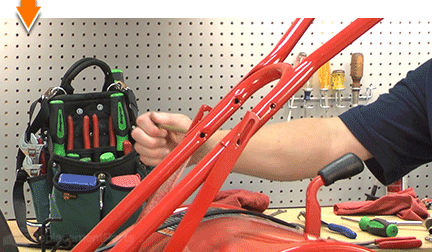
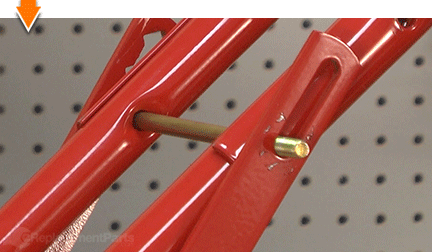
INSTALLING THE NEW UPPER HANDLE [top] 5. Install the upper handle.
Install the new upper handle and align the mounting holes with the holes on the lower handle.

Align the lower mounting holes with the support brackets.
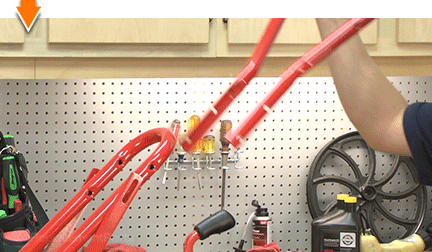
Install the carriage bolt.
Install the bell washer onto the carriage bolt.
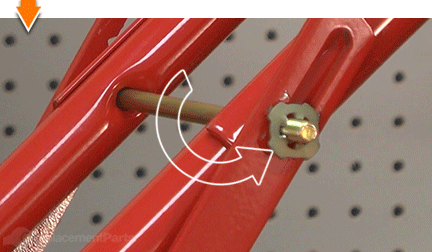
Secure the carriage bolt with adjustment knob.
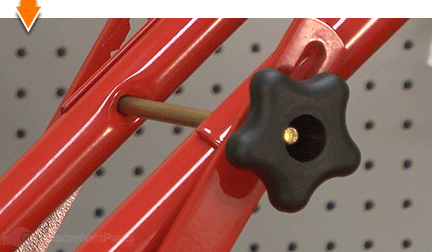
Secure the upper handle with the (2) hex screws and flange lock nuts.

REASSEMBLING THE UNIT [top] 6. Reinstall the handle panel.
Install the handle panel.
Secure the handle panel with the (4) bolts and nuts.

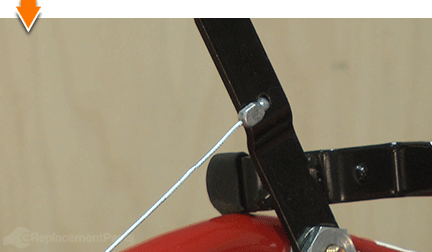
7. Reinstall the forward clutch bail.
Install the forward clutch bail onto the upper handle.
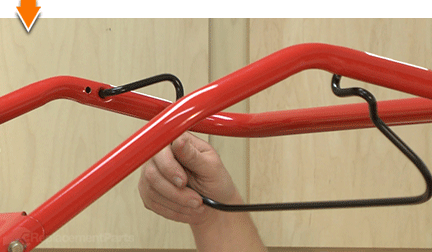
Place the Z-connector into the hole in the forward clutch bail (from the outside of the bail to the inside).
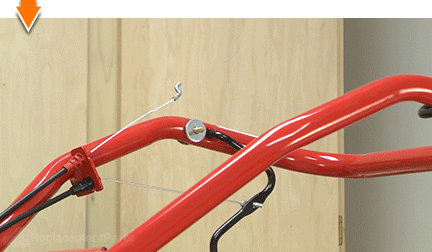
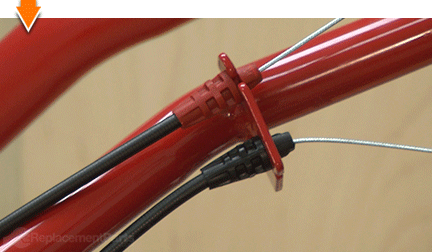
8. Secure the cables to the handle.
Install the forward drive cable onto the bracket on the upper handle.
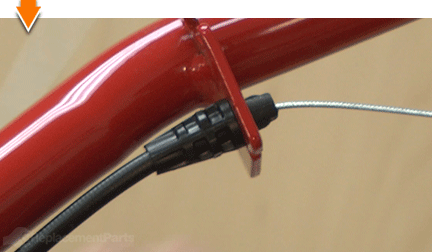
Install the reverse cable to the bracket on the upper handle.
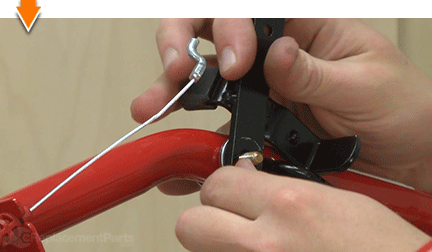
9. Reinstall the reverse handle assembly.
Thread the reverse handle mounting bolt through the upper handle (from the outside).
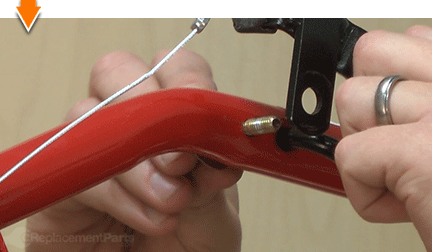
Install the washer.

Install the reverse handle onto the mounting bolt.
Secure the reverse handle to the upper handle with the nut.

Reconnect the reverse cable (Z-connector) to the reverse handle.

Do-it-yourself repairs like these are easier than you might think: From lawn machines to cordless drills, kitchen mixers to outdoor grills. Our "how-to" articles walk you through each repair from start to finish.
So, doing-it-yourself means never having to do it alone.
