


Why Read This Article?
Finish Nailer Repair - Replacing the Driver Guide (Ridgid Part # 79004001022)
Article Breakdown
Finish Nailer Repair - Replacing the Driver Guide (Ridgid Part # 79004001022)
Video

Tools & Materials

Filthy foam filter? It's time to face the fix. Whether you are a casual cultivator or a legendary landscaper, eReplacementParts.com provides the parts, procedures and facts you need to fearlessly fix what fails you.
Do you want your small engine to run trouble-free for years? Maintaining your air filter is a great start. The air filter should be cleaned or replaced at least once a year. It should be inspected often, and maintained as-needed.
The air filter stops dirt and debris before they can make their way into the engine. Dirt will quickly plug the tiny openings in the carburetor, stopping the flow of fuel. Even more harmful is the dirt that gets past the carburetor and into the cylinder.
Once inside the cylinder, the dirt acts like sandpaper; abrading away at the cylinder wall and the piston ring. It doesn't take much dirt (or time) to wear the cylinder and piston to the point that the engine is unable to maintain the compression it needs to operate (creating a very costly repair).
This article provides step-by-step instructions for removing and installing the foam air filter element on a Powermate cultivator.
Let's get started.
 REMOVING THE AIR FILTER [top]
1. Remove the air filter.
REMOVING THE AIR FILTER [top]
1. Remove the air filter.
Loosen the thumbscrew securing the air filter cover to the engine.
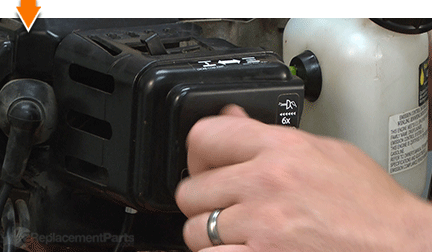
Remove the air filter cover assembly from the engine.
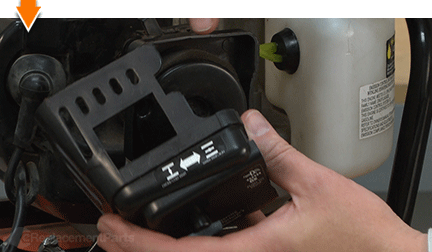
Inspect the pre-filter (and replace it as necessary).
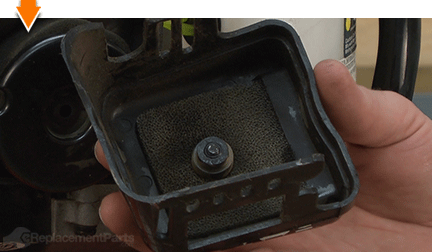
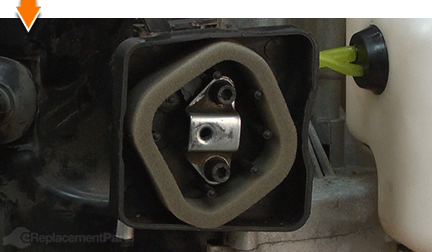
Remove the air filter mounting plate.
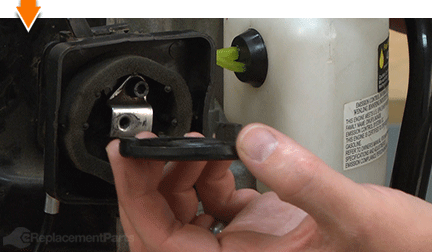
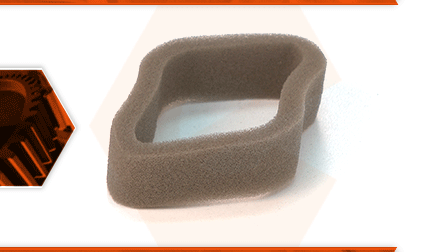
Remove the foam air filter.

INSTALLING THE NEW AIR FILTER [top] 2. Install the air filter.
Install the new foam air filter; ensuring alignment with the plastic guides on the air filter base.
Install the air filter mounting plate.
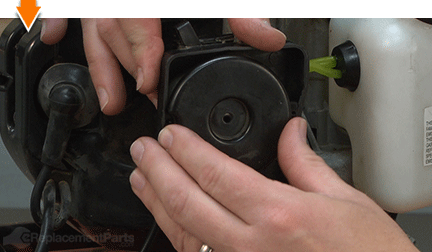
Install the air filter cover assembly.
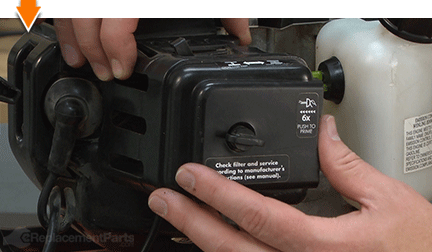
Tighten the thumbscrew to secure the air filter cover to the engine.

Do-it-yourself repairs like these are easier than you might think: From lawn machines to cordless drills, kitchen mixers to outdoor grills. Our "how-to" articles walk you through each repair from start to finish.
So, doing-it-yourself means never having to do it alone.
