


Why Read This Article?
Finish Nailer Repair - Replacing the Driver Guide (Ridgid Part # 79004001022)
Article Breakdown
Finish Nailer Repair - Replacing the Driver Guide (Ridgid Part # 79004001022)
Video

Tools & Materials


Cultivator not starting? It's time to face the fix. Whether you are a casual cultivator or a legendary landscaper, eReplacementParts.com provides the parts, procedures and facts you need to fearlessly fix what fails you.
The carburetor's job is to mix fuel and air in a perfect ratio for combustion. To supply the fuel for this mixture, there are many tiny passages inside the carburetor. Any one of these passages can become clogged, causing the engine to run poorly (or not at all).
Smaller, two-cycle carburetors also have several plastic and rubber components. Over time, these will become hardened and no longer operate like they should. You can tell that something is up with the carburetor if the engine runs poorly, surges, or flat-out won't run at all.
Of course, there are other things that can go wrong and cause these same symptoms, so you might need to do a little testing to determine that the carburetor is the problem.
In many areas of the country, gasoline has ethanol blended into it. The ethanol can cause havoc in your carburetor if old fuel is left sitting in it for a while (like over the winter). The ethanol attracts water. Together, they create an acid that corrodes metal and quickly hardens plastic and rubber.
This article provides step-by-step instructions for removing and installing the carburetor on a Powermate cultivator.
Let's get started.
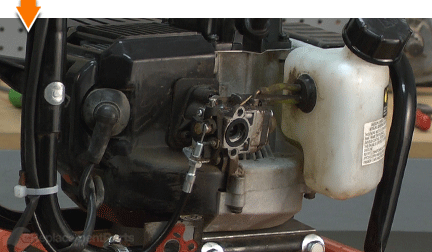
 REMOVING THE CARBURETOR [top]
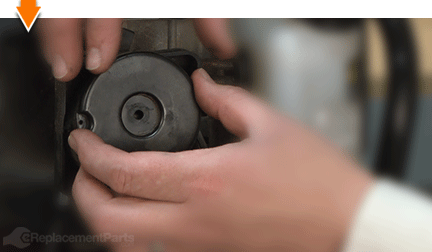
1. Remove the air filter.
REMOVING THE CARBURETOR [top]
1. Remove the air filter.
Loosen the thumbscrew securing the air filter cover.
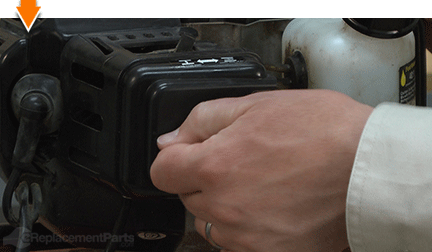
Remove the air filter cover assembly from the engine.
Remove the air filter mounting plate.
Remove the foam air filter.

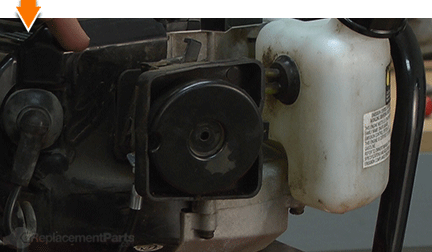
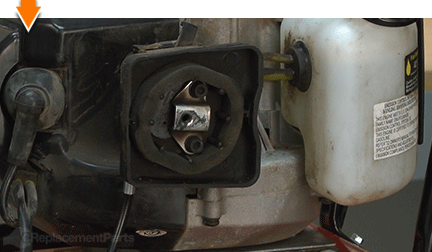
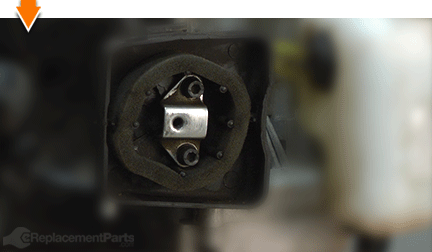
2. Remove the air filter housing.
Remove the (2) two screws securing the air filter housing (and the carburetor) to the engine.
Remove the air filter housing.
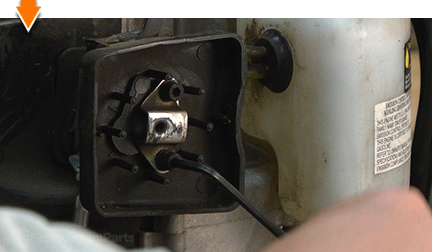
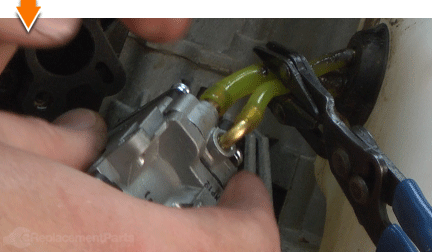
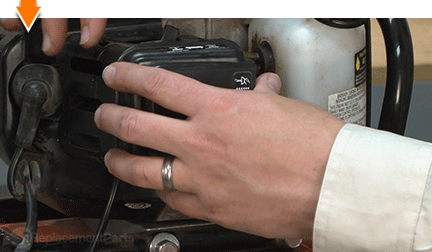
3. Disconnect the fuel lines.
Drain the excess fuel from the fuel tank (or apply fuel-line clamps to the fuel lines).
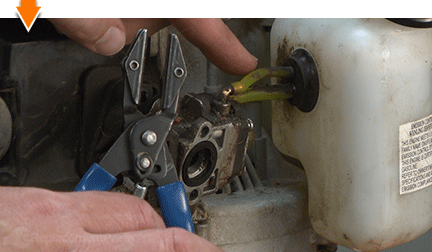
Use long-nosed pliers to disconnect each of the (2) fuel lines from the carburetor.
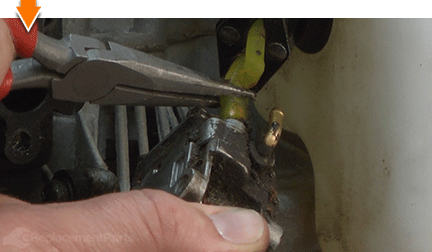
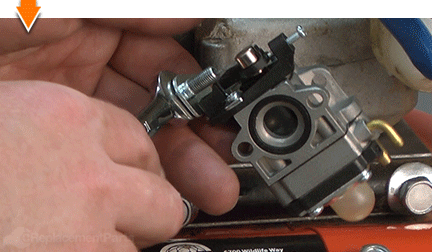
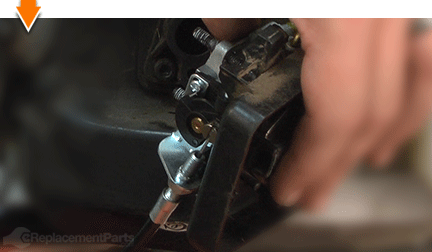
4. Remove the carburetor.
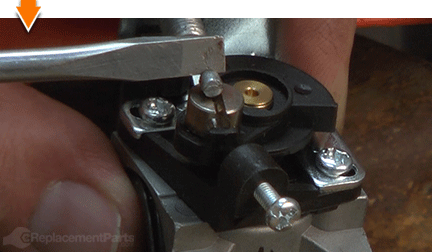
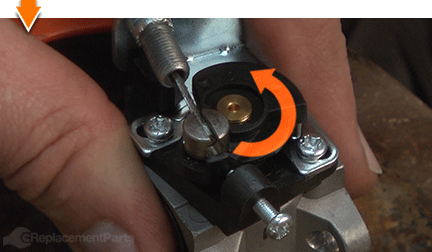
Rotate the throttle body assembly (on the carburetor) to relieve tension on the throttle cable.
Disconnect the throttle cable from the throttle body (on the carburetor).

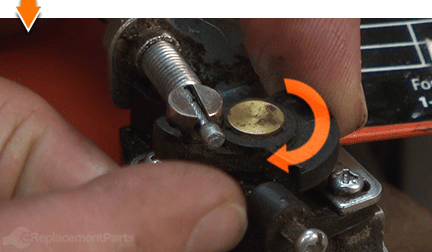
Loosen the nut securing the throttle cable assembly to the carburetor.
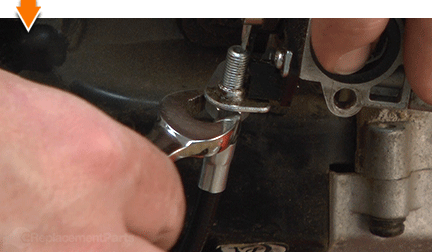
Unscrew and remove the carburetor assembly from the throttle cable.

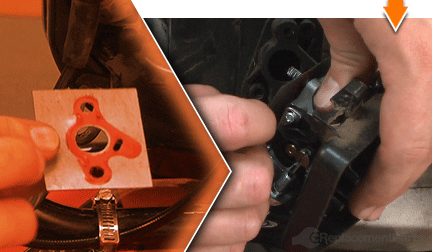
INSTALLING THE NEW CARBURETOR [top] 5. Install the carburetor.
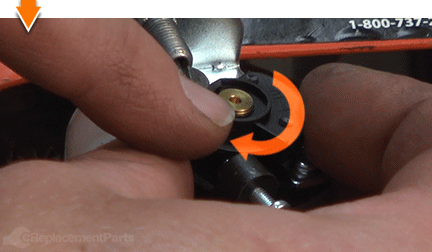
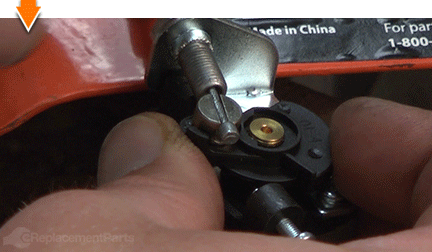
Thread the new carburetor assembly onto the threaded portion of the throttle cable linkage.
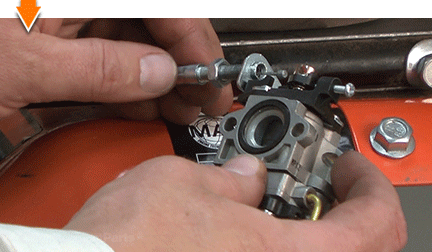
Rotate the carburetor assembly until approximately half of the threaded sleeve remains on either side of the bracket.
Tighten the adjustment nut to secure the carburetor to the throttle cable sleeve.
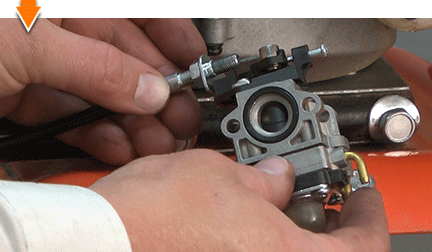
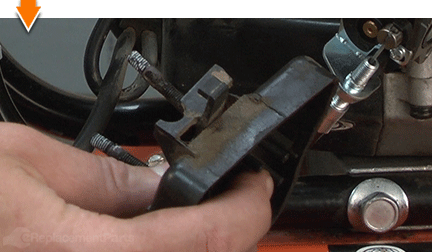
6. Connect the throttle cable.
Rotate the swivel on the carburetor assembly until (the slot) aligns with the throttle cable.
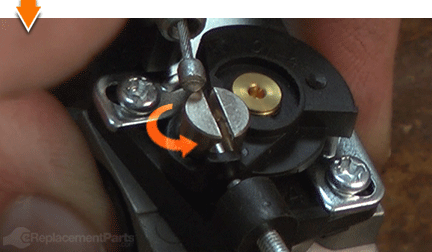
Verify that the larger opening (on the swivel) is facing away from the terminal on the throttle cable.
Rotate and hold the throttle body in the open position.
Install the throttle cable into the slot in the swivel.
Slowly rotate the throttle body back to the closed position; ensure that the terminal (on the cable) engages the slot on the swivel.
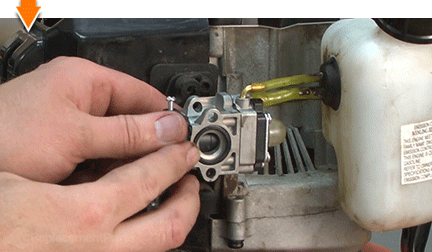
REASSEMBLING THE UNIT [top] 7. Reconnect the fuel lines.
Install the (2) fuel lines to the new carburetor.
Remove the fuel line clamps (if used).
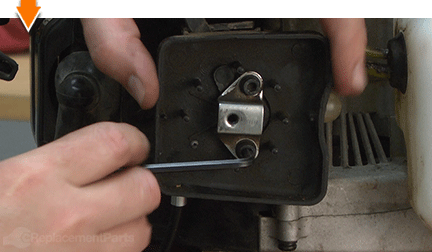
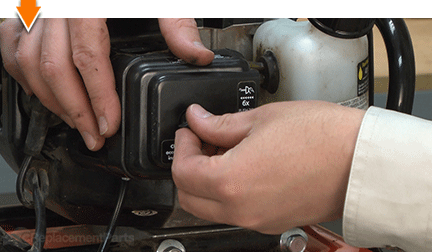
8. Reinstall the air filter housing.
Thread the bolts through the holes in the support bracket and through the plastic housing (the bracket should sit flush against the air filter housing, with the bolts extending several inches beyond the opposite side of the assembly).
Thread the carburetor onto the bolts and slide the two fixtures (the carburetor and the air filter housing) tightly together.
Install the carburetor gasket (over the bolts; flush against the carburetor).
Thread the bolts (containing the entire assembly) into the holes on the engine.
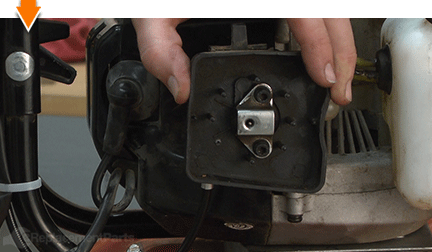
Tighten the (2) bolts to secure the air filter housing and the carburetor to the engine.
9. Reinstall the air filter.
Install the foam air filter; ensuring alignment with the plastic guides on the air filter housing.
Install the air filter mounting plate.
Install the air filter cover.
Tighten the thumbscrew to secure the air filter cover to the engine.

Do-it-yourself repairs like these are easier than you might think. From lawn machines to cordless drills - kitchen mixers - outdoor grills; our "how-to" articles and videos walk you through each repair from start to finish. So, doing-it-yourself means never having to do it alone.
