


Why Read This Article?
Finish Nailer Repair - Replacing the Driver Guide (Ridgid Part # 79004001022)
Article Breakdown
Finish Nailer Repair - Replacing the Driver Guide (Ridgid Part # 79004001022)
Video

Tools & Materials

String trimmer out of whack? It's time to face the fix. Whether you are a legendary landscaper or a weekend weed whacker, eReplacementParts.com provides the parts, procedures and facts you need to fearlessly fix what fails you.
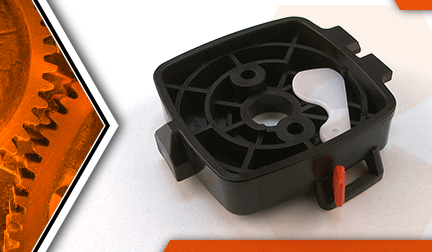
The air cleaner case (also known as the air filter base) provides structural support for the air filter, the mounting bracket and the air cleaner lid. It also contains the engine's choke assembly. If either the choke assembly or the case are damaged, the entire component should be replaced.
This article will show you how to remove and install the air cleaner case on an Echo trimmer model SRM-225.
Let's get started.
 REMOVING THE AIR CLEANER CASE [top]
1. Remove the air cleaner assembly.
REMOVING THE AIR CLEANER CASE [top]
1. Remove the air cleaner assembly.
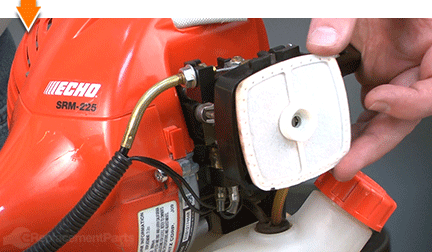
Loosen the thumb screw.
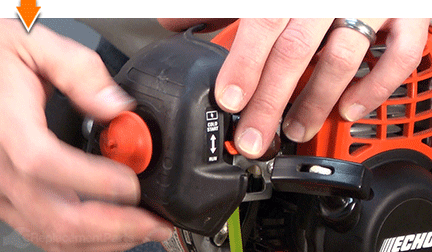
Remove the air cleaner lid.
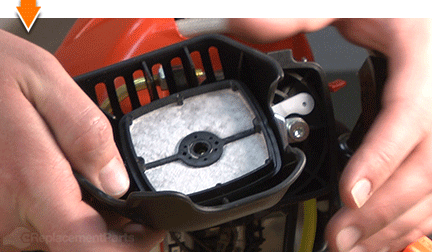
Remove the air filter.

2. Remove the air cleaner case.
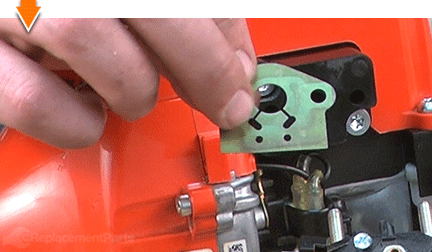
Loosen the (2) bracket retaining screws.
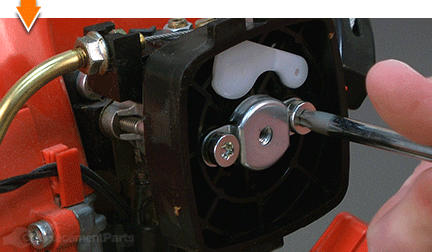
Remove the air cleaner case from the engine.
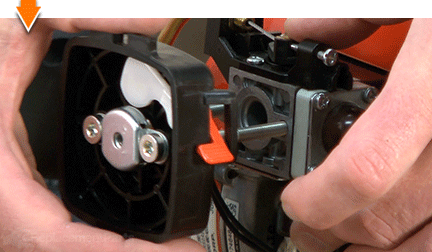
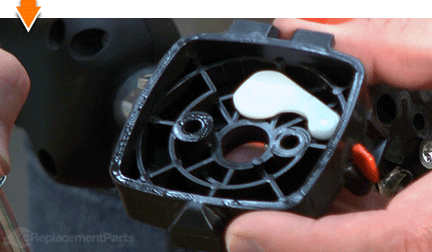
Remove the bracket and screws from the air cleaner case.
INSTALLING THE NEW AIR CLEANER CASE [top] 3. Install the air cleaner case.
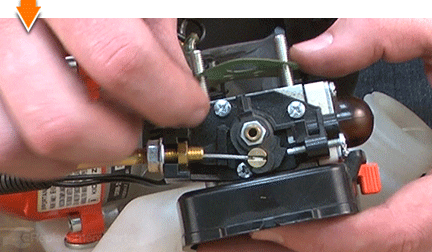
Thread the (2) mounting screws through the mounting holes on the bracket and the new air cleaner case. The bracket should be flush against the interior of the case (on the same side as the choke valve).
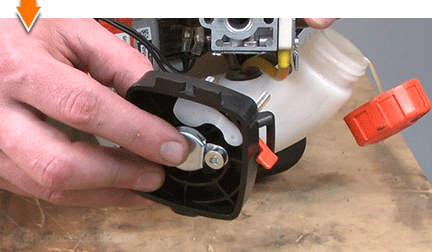
Thread the screws (protruding from the air cleaner case) through the holes on the carburetor assembly.
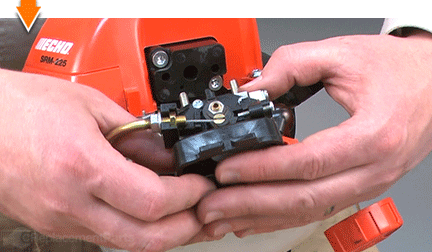
Note that there are two small holes on the intake gasket (besides the main intake opening and the two mounting holes). These small holes need to align with the small hole on the insulator block.
Thread the screws through the mounting holes on the intake gasket and slide the gasket flush against the carburetor.
Install the intake assembly (bracket, air cleaner case, carburetor and intake gasket) onto the intake insulator block.
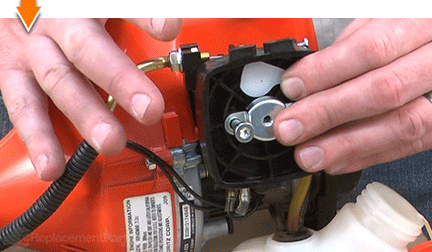
Secure the intake components (bracket, air cleaner case, carburetor and intake gasket) with the screws.
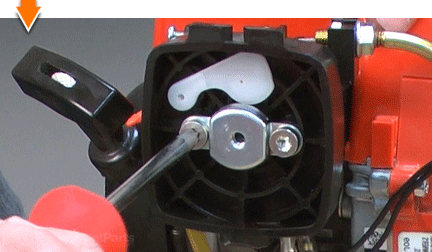
REASSEMBLING THE UNIT [top] 4. Reinstall the air filter.
Install the air filter into the air cleaner case.
5. Reinstall the air filter lid.
Install the air filter lid onto the air cleaner case.
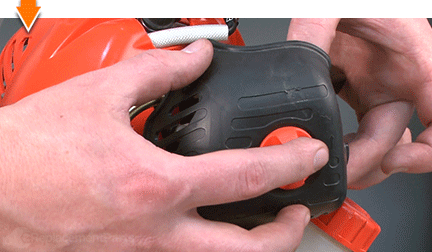
Secure the air filter lid with the thumbscrew.


You don't have to leverage your savings to level your lawns. As you just learned, repairing your own equipment is easy when you follow our step-by-step guides. Not only did you restore trimmer functionality at a fraction of the cost of replacement; you have taken the edge off of future repairs, wherever you may find them.
