


Why Read This Article?
Finish Nailer Repair - Replacing the Driver Guide (Ridgid Part # 79004001022)
Article Breakdown
Finish Nailer Repair - Replacing the Driver Guide (Ridgid Part # 79004001022)
Video

Tools & Materials
 THE FACTS | THE FIX | THE FINISH
If raised grains and elbow strains are sanding away your patience, it's time to face the fix. Whether you are a seasoned professional or a seasonal sander, eReplacementParts.com provides the parts, procedures and facts you need to fearlessly fix what fails you.
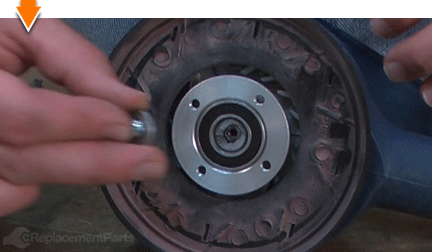
The bearing cap assembly is composed of an inner bearing and a metal flange. The flange, which contains four holes, serves as the primary point of attachment for the sanding pad. The bearing facilitates orbital rotation of the pad itself. A seized bearing will impair or prevent the sanding pad from rotating freely upon the spindle. A stripped or damaged flange can result in unstable, unsecure and unsafe installation of the sanding pad.
If a damaged sander has been grinding on your nerves, this article will show you how to quickly remove and install a new bearing cap assembly. THE FACTS | THE FIX | THE FINISH REMOVING THE BEARING CAP ASSEMBLY [top] 1. Remove the backing pad.
Remove the four screws from the backing pad.
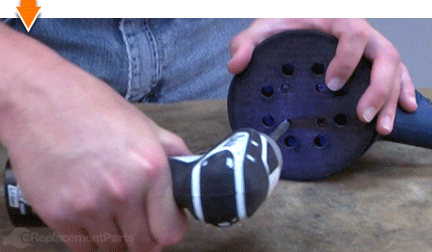
Remove the backing pad from the unit.
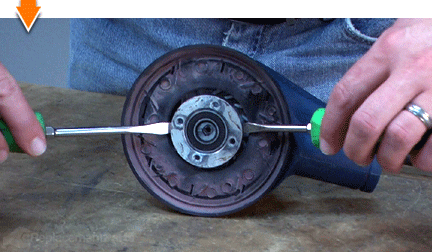
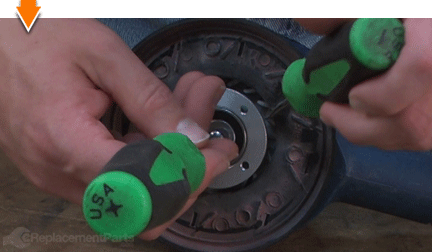
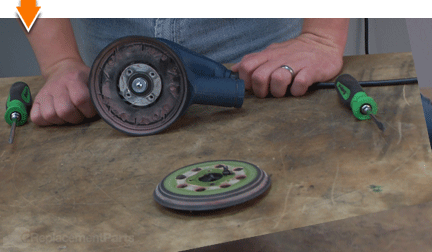 2. Remove the bearing cap assembly.
SPECIFIX: Use a standard screwdriver to bind the fan and prevent the spindle from rotating as you remove the screw.
Remove the retaining screw from the bearing cap.
Use two screwdrivers to apply even pressure (in a prying motion) to the back of the bearing assembly.
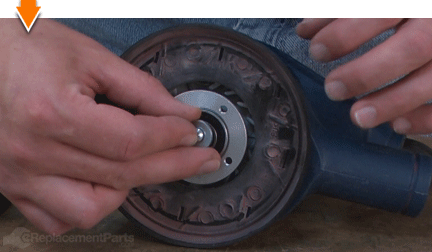
Remove the bearing cap assembly from the unit.
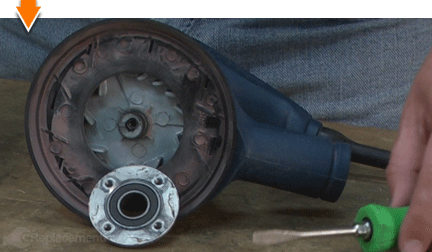
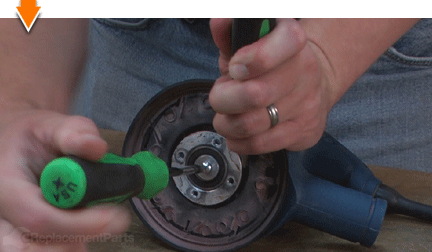
INSTALLING THE NEW BEARING CAP ASSEMBLY [top] 3. Install the new bearing cap assembly.
Install the new bearing cap on the spindle.
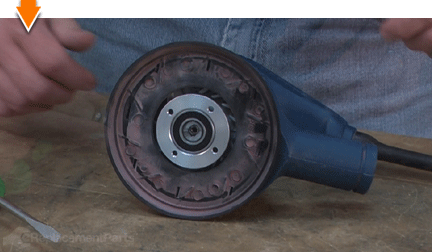
Bind the spindle with a second screwdriver.
Secure the bearing cap assembly with the screw.
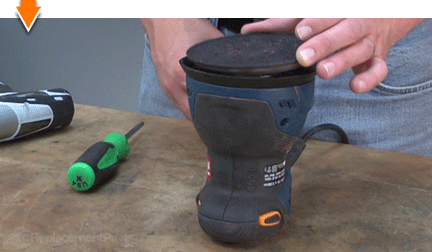
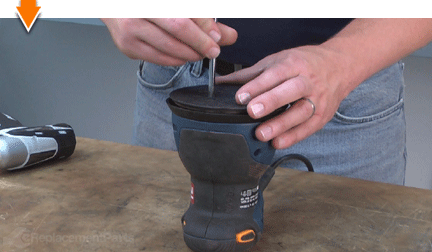
REASSEMBLING THE UNIT [top] 4. Reinstall the backing pad.
Install the backing pad.
Secure the backing pad with the four screws.
 THE FACTS | THE FIX | THE FINISH
Even with the best technology, sanding can be a demanding task. But you don't have to rough-up your accountant to smooth-out your countertops. As you just learned, repairing your own power tools is simple when you follow our step-by-step guides. Not only did you expand sander functionality at a fraction of the cost of replacement; you have taken the edge off future repairs regardless of their random nature. Find your next fix here. [top]
