Why Read This Article?
Finish Nailer Repair - Replacing the Driver Guide (Ridgid Part # 79004001022)
Article Breakdown
Finish Nailer Repair - Replacing the Driver Guide (Ridgid Part # 79004001022)
Tools & Materials
 THE FACTS | THE FIX | THE FINISH
If Murphy's laws and faulty saws have left you powerless to cut construction costs, it's time to face the fix. Whether you are a commercial contractor or an amateur artisan, eReplacementparts.com provides the parts, procedures and facts you need to cut out the middle-man and fearlessly fix what fails you.
As the armature rotates inside the motor housing, electrical current is transferred through carbon brushes, which are held in place by small springs. When functioning correctly, these springs apply just enough pressure on the brushes to ensure smooth and consistent contact with the armature. Too much pressure will cause the brushes to chatter, chip and vibrate against the spinning armature. Too little pressure (or excessively worn brushes) can result in visible arcing, decreased performance, power fluctuations or a total loss of power to the motor.
While contaminants within the housing can contribute to premature spring or brush failure, most brushes simply wear down with regular use. This article will guide you through the steps required to replace the brush ring assembly on your DeWalt DW718 miter saw.
THE FACTS | THE FIX | THE FINISH
REMOVING THE BRUSH RING ASSEMBLY [top]
1. Remove the carrying (top) handle.
THE FACTS | THE FIX | THE FINISH
If Murphy's laws and faulty saws have left you powerless to cut construction costs, it's time to face the fix. Whether you are a commercial contractor or an amateur artisan, eReplacementparts.com provides the parts, procedures and facts you need to cut out the middle-man and fearlessly fix what fails you.
As the armature rotates inside the motor housing, electrical current is transferred through carbon brushes, which are held in place by small springs. When functioning correctly, these springs apply just enough pressure on the brushes to ensure smooth and consistent contact with the armature. Too much pressure will cause the brushes to chatter, chip and vibrate against the spinning armature. Too little pressure (or excessively worn brushes) can result in visible arcing, decreased performance, power fluctuations or a total loss of power to the motor.
While contaminants within the housing can contribute to premature spring or brush failure, most brushes simply wear down with regular use. This article will guide you through the steps required to replace the brush ring assembly on your DeWalt DW718 miter saw.
THE FACTS | THE FIX | THE FINISH
REMOVING THE BRUSH RING ASSEMBLY [top]
1. Remove the carrying (top) handle.
Extract the screw from the top of the carrying handle.
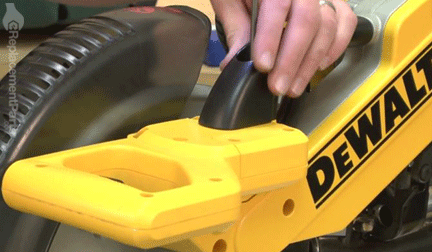
Remove the handle from the saw.
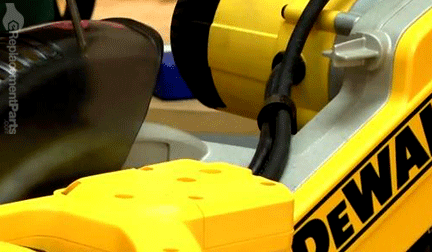 2. Remove the side cover from the switch handle.
Remove the screws from the side cover.
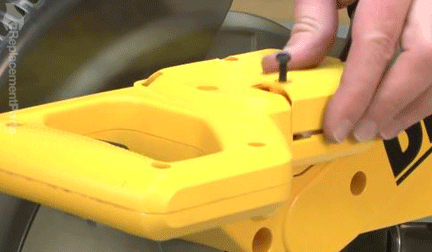
Remove the side cover from the switch handle.
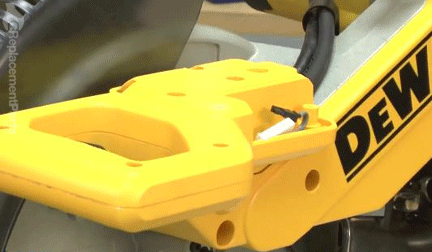 3. Remove the top half of the switch handle.
Remove the screws from the switch handle.
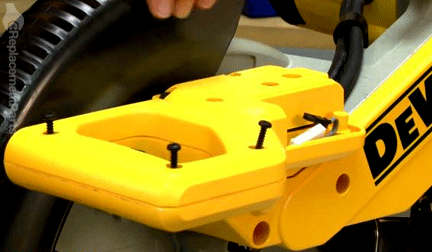
Remove the top half of the switch handle.
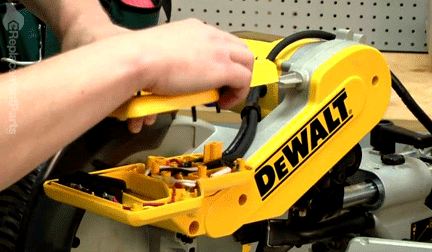 4. Remove the cable clamp.
Remove the screw from the cable clamp.
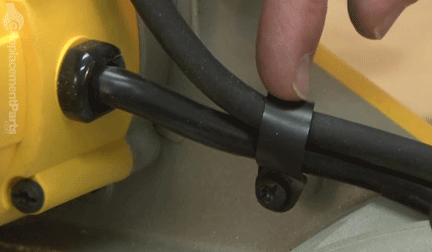
Remove the cable clamp from the saw.
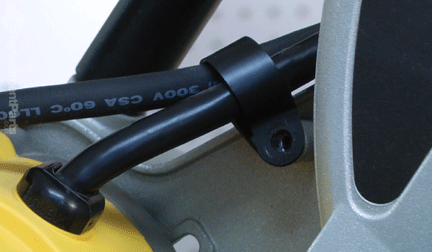 5. Remove the motor end cap.
Remove the screws from the motor end cap.
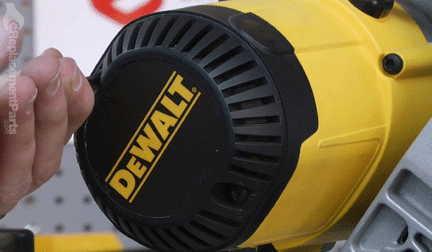
Remove the motor end cap from the field case.
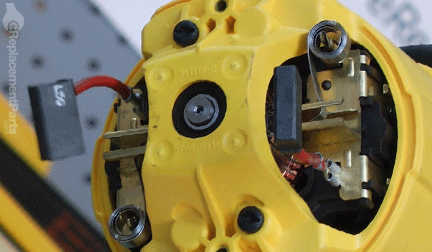
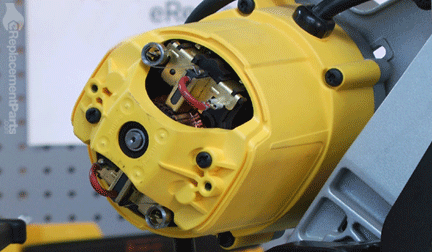 6. Disengage the brushes from the armature.
Retract the springs on the brush ring assembly.
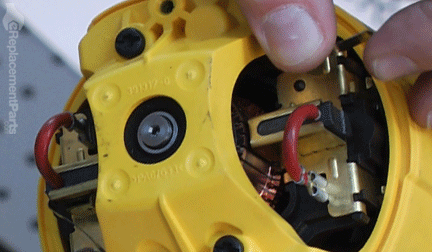
Slide the brushes out of the ring assembly to disengage them from the armature.
 7. Remove the field case (motor housing) from the saw.
Remove the 4 retaining screws from the field case.
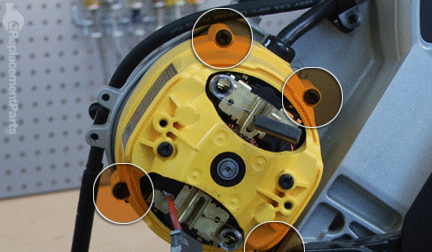
Remove the field case assembly from the saw.
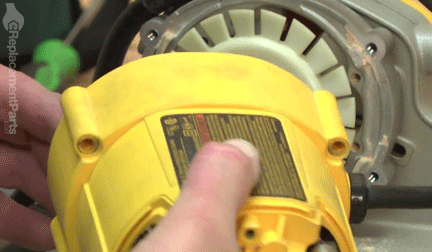 8. Remove protective plastic ring from the field case.
Slide the protective plastic ring out of the field case to expose the field wire connections.
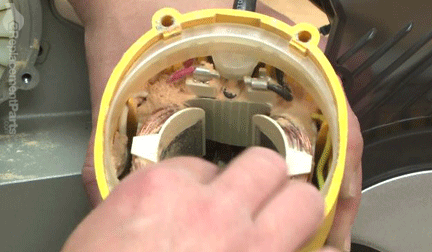 9. Remove the wires from the field.
FIXPIX: Before disconnecting the wires from the field, note the configuration of the existing connections for future reference. These wires must be reinstalled in the exact original positions. Taking a digital photo is a convenient and accurate way to document the existing wire configuration.
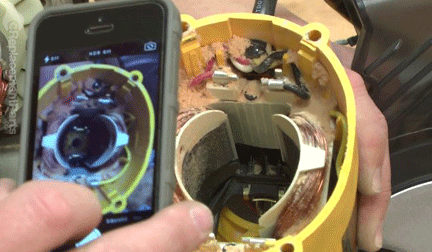
Use long-nosed pliers to remove the field wires from the connector terminals.
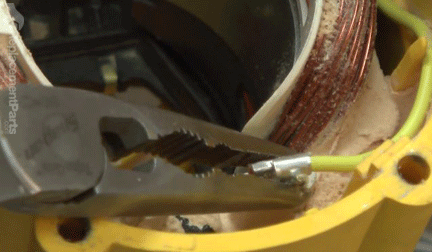
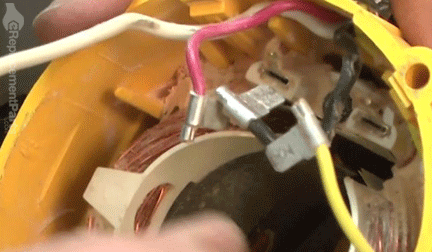 10. Remove the motor cord from the field case.
Use pliers to squeeze the sides of the strain-relief bushing (the point where the cord enters the case) and disengage it from the motor housing.
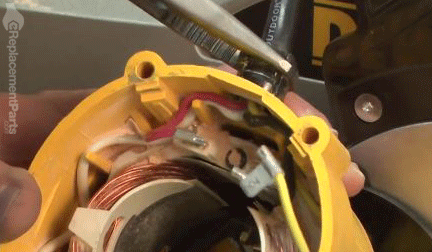
Remove the motor cord from the field case.
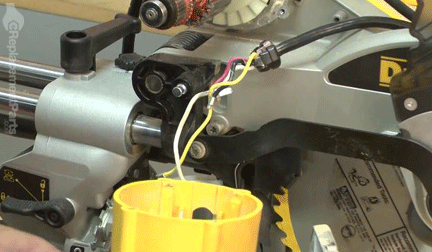 11. Remove the field from the field case.
Remove the two retaining screws from the field.
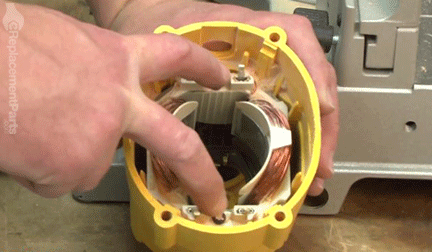
Insert a screwdriver through the hole in the top of the field case at an angle which allows the head of screwdriver to rest upon the metal edge of field. Gently tap the end of the screwdriver with a rubber mallet 2 or 3 times.
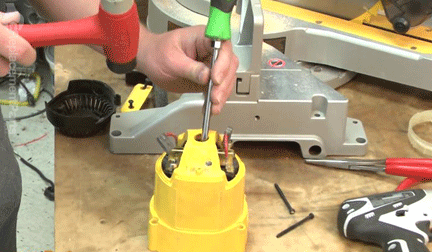
Reposition the screwdriver to rest upon the opposite edge of the field; gently tap the end of the screwdriver with a rubber mallet 2 or 3 times.
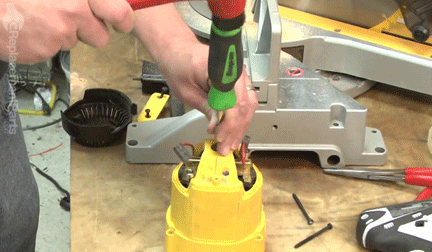
Alternate between the left and right sides of the field; tapping gently on each side until the field assembly slides freely from the field case.
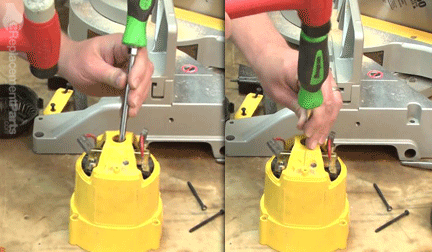
Remove the field from the field case.
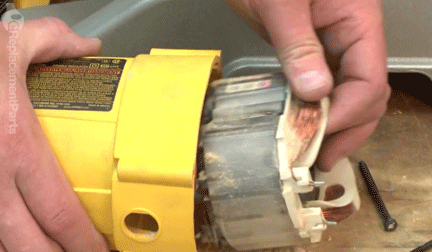 12. Remove the brush ring assembly from the field case.
Remove the brush ring retaining screws from the back of the field case.
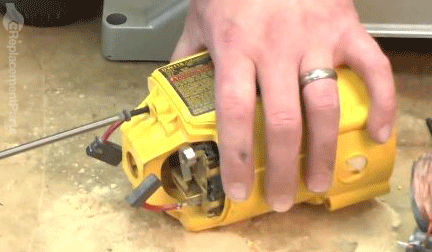
Remove the brush ring assembly from the field case.
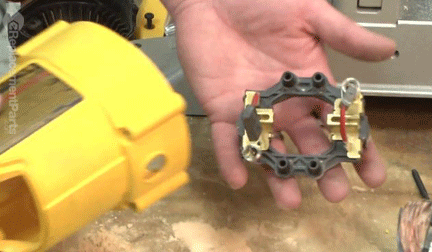 INSTALLING THE NEW BRUSH RING ASSEMBLY [top]
13. Install the new brush ring assembly.
Slide the new brush ring assembly into the motor housing and secure it with the two screws.
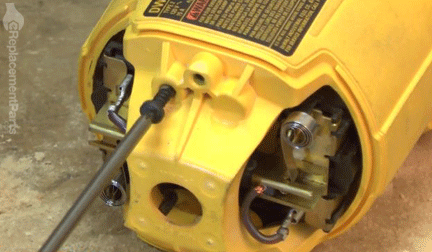 14. Remove the brushes from the assembly.
Retract the springs on the brush ring assembly.
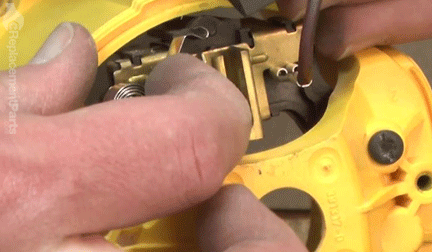
Slide the brushes out of the ring assembly.
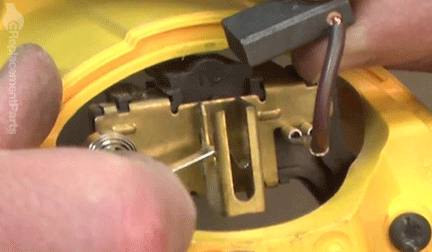 15. Reinstall the field into the field case.
Install the field into the field case.
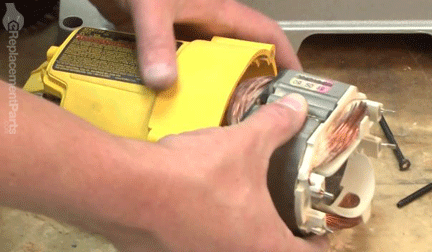
Secure the field to the field case with the two screws.
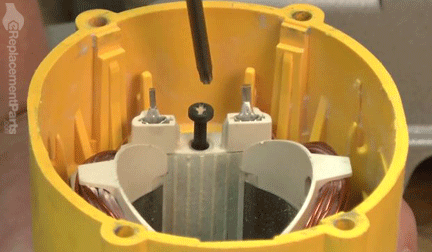 16. Reinstall the motor wires.
Slide the motor wires through the opening in the field case.
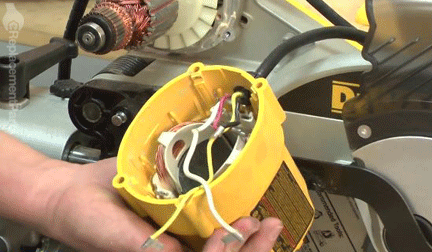
Use pliers to snap the strain-relief bushing back into position on the field case.
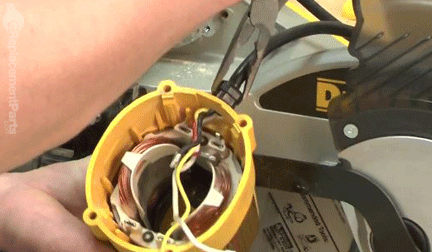
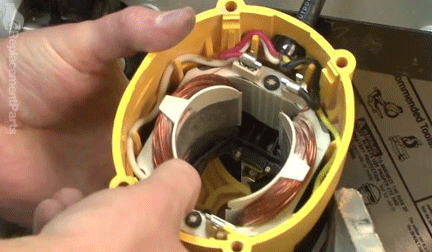
Reconnect the wires to the field assembly (using the photograph taken earlier to ensure proper configuration).
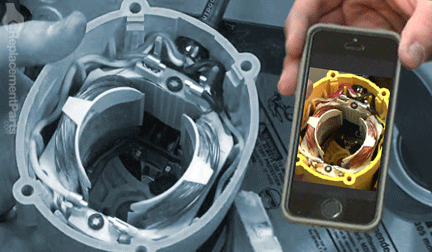
Tuck the wires into the retaining tabs along the inside of the field case. Make certain that the wires are properly seated and secured to prevent them from contacting the armature upon reassembly.
 REASSEMBLING THE UNIT [ top ]
17. Reinstall the plastic protective ring.
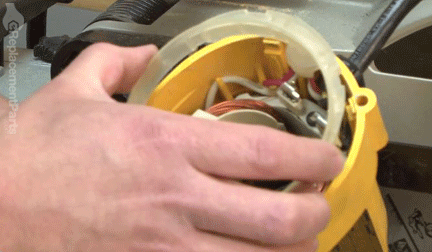
Slide the protective plastic ring back into position in the field case.
 18. Reinstall the field case assembly.
Slide the field case and field assembly over the armature assembly.
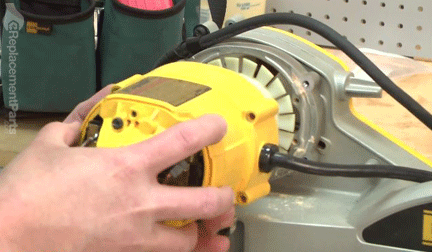
Secure the assembly to the saw with the screws.
 19. Reinstall the motor brushes.
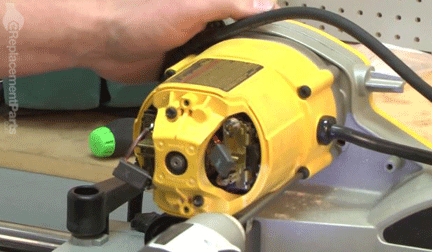
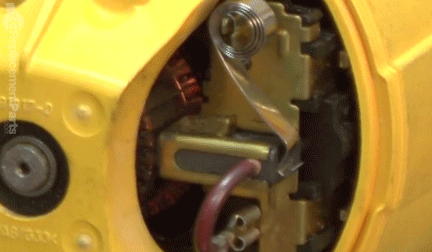
Retract the brush springs and insert the motor brushes into the brush ring assembly.
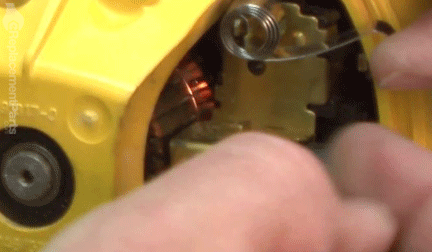
Release the brush springs to secure the brushes.
 20. Reinstall the motor cap.
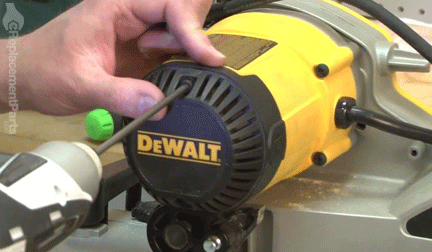
Reinstall the motor cap.
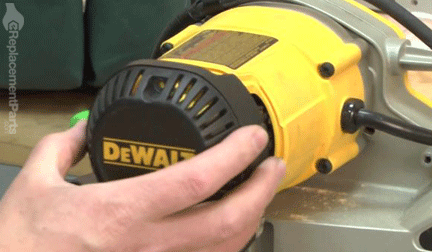
Secure the motor cap to the field case with the screws.
 21. Reinstall the cable clamp.
Collect the motor wires into the retaining strap.
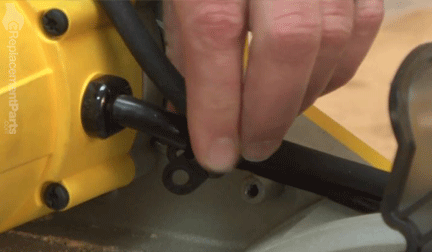
Secure the cable clamp to the saw.
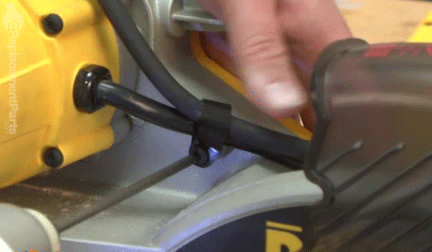 22. Reinstall the handle cover assembly.
Tuck the wires into the plastic recesses throughout the handle assembly.
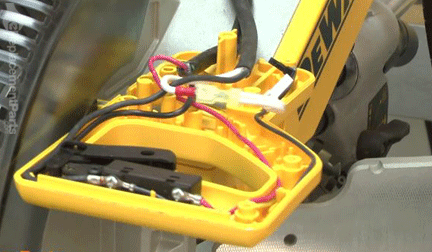
Reinstall the top half of the handle.
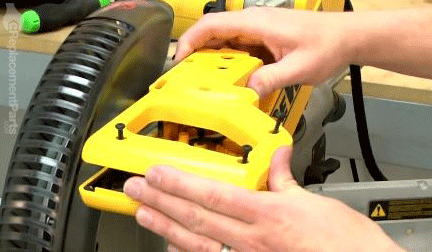
Secure the handle with the screws.
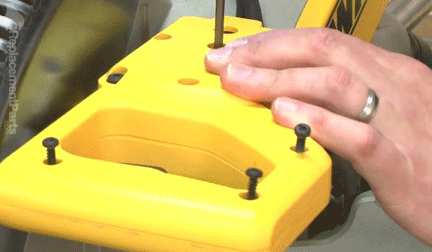 23. Replace the side cover.
Reinstall the side cover.
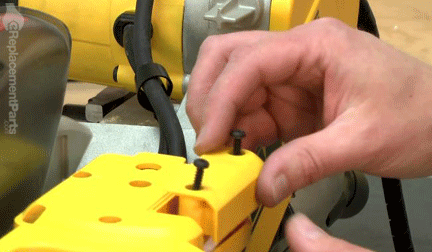
Secure the side cover to the handle with the screws.
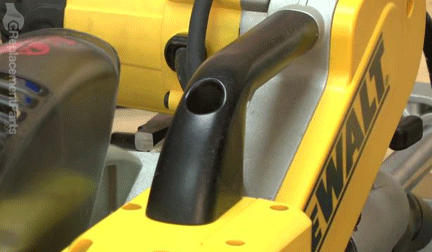
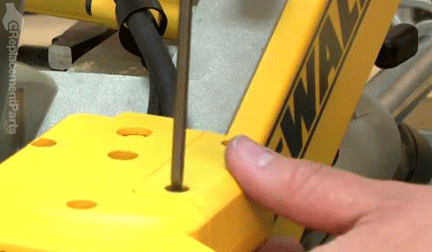 24. Reinstall the carrying handle.
Install the carrying handle and secure it to the saw with the screws.
 THE FACTS | THE FIX | THE FINISH
Successful finish carpenters know how to cut corners. They also know how to cut costs. But you don't have to be a skilled craftsman to cut out the middle-man. As you just learned, keeping the tools of your trade in razor-sharp condition allows you avoid costly offsite repairs and empowers you to face future fixes wherever you may find them. Save your saw. See more savings.
Find your next fix [here].
[ top ]


