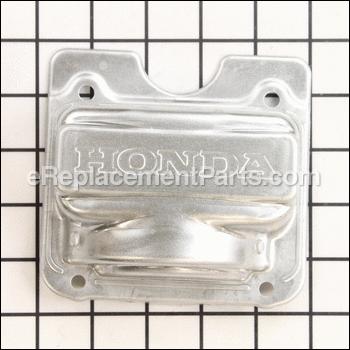
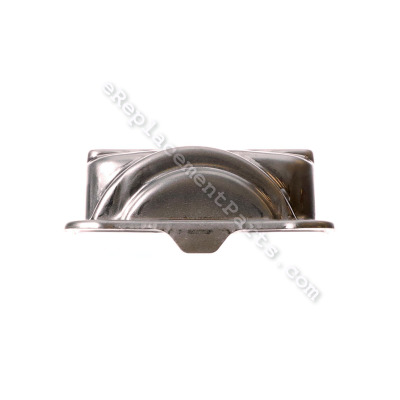
This genuine item is supplied directly from the original equipment manufacturer for use with Honda engines commonly installed on a variety of lawn and garden equipment. It is the main cover for the cylinder assembly. The part helps to protect the internal components from dust and other contaminants. If your cover is damaged or is missing, this will provide an identical replacement for the original component that was installed on a new unit. This high-quality head cover is made of durable metal and is sold individually. Note, the hardware to secure it is sold separately. You will need a wrench to perform this repair.
Head Cover 12310-Z8A-000
OEM part for: Honda, Briggs and Stratton, Toro
Part Number: 12310-Z8A-000
Jump To:
Frequently Purchased Together ?
Compatibility
This Head Cover will fit the following 305 machines. Confirm this part works with your model, and view the detailed model diagrams and repair help we have to offer.
Briggs and Stratton
Honda
Toro
Show More Compatible ModelsThis item works with the following types of products:
- Engine Parts
- Lawn Mower Parts
- Snowblower Parts
This part replaces obsolete part #: 12311-ZL8-D00 (Serial# (1000001-9999999)), 12310-Z0J-000 (Serial# (1212617-9999999)), 12311-ZL8-000 (Serial# (1000001-1468766)), 12310-Z8B-000, 12310-Z0J-000, 12311-ZL8-000, 12311-ZL8-D00
Customer Part Reviews ?
- 1
Questions & Answers ?
Our customer Service team is at the ready daily to answer your part and product questions.

Ask our Team
We have a dedicated staff with decades of collective experience in helping customers just like you purchase parts to repair their products.
Does this fit my product?Questions & Answers for Head Cover
Customer Repair Instructions ?
All our customer repair instructions are solicited directly from other customers just like you who have purchased and replaced this exact part.
Valve cover was leaking due to damage.
Tool Type
Engine
Difficulty
Easy
Time
15-30 minutes
Tools Used
Screwdriver, Pliers
Parts Used
2. Used pliers to pull valve cover off which damaged.
3. Cleaned off all sealant from head portion that valve cover mounts on.
4. Put grey sealant on the new valve cover which was recommended by others. (There was no gasket.)
5. Installed new valve cover and hand tightened screws per instructions.
Rings wore out
Tool Type
Lawn Mower
Difficulty
Medium
Time
1-2 hours
Tools Used
Screwdriver, Wrench Set, Nutdriver, Electrical screwdriver
2. Remove valve cover
3. Open crankcase
4. Remove flywheel with puller (try to mark locations on timing belt)
5. Remove crankshaft and piston (lose markings on timing belt)
6. Remove valve rockers and Springs then valves
7. Order new parts and wait for them to come
8. Install new valves and Springs and rockers (using online diagrams for exact part locations)
9. Install new rings on piston.
10. Install piston using recently purchased ring compressor
11. Install crankshaft
12. Refer to Internet for timing (quite simple)
13. Reinstall flywheel
14. Put rest if motor back together as best I can.
15. Try to figure why choke isn't working like should, no luck
16. Put in oil and gasoline and celebrate when it fires up and runs.
My cover had a puncture hole so I needed to replace it.
Tool Type
Lawn Mower
Difficulty
Easy
Time
30-60 minutes
Tools Used
Socket set
Parts Used
2. Removed the old cover.
3. Applied a gasket maker compound.
4. Placed my new cover on.
5. Hand tightened the bolts but not fully.
6. Allowed gasket compound to dry for a bit.
7. Came back and tightened all the way for a good seal.
Valve cover was leaking oil!
Tool Type
Lawn Mower
Difficulty
Easy
Time
15-30 minutes
Tools Used
Socket set, Wrench Set
Valve cover bent during removal. Honda recommends replacement on this OHC emgine.
Tool Type
Engine
Difficulty
Easy
Time
30-60 minutes
Tools Used
Screwdriver, Pliers, Socket set, putty knife to clean Silicone
Parts Used
I somehow punched a small hole in the aluminum valve cover. So it was releasing minute oil smoke
Tool Type
Lawn Mower
Difficulty
Medium
Time
15-30 minutes
Tools Used
Screwdriver, Socket set
Parts Used
Valve cover was bent preventing the valves from working
Tool Type
Lawn Mower
Difficulty
Easy
Time
15-30 minutes
Tools Used
Socket set, form a gasket
Parts Used
Timing belt kept jumping off the pulley.
Tool Type
Engine
Difficulty
Easy
Time
Less than 15 minutes
Tools Used
Nutdriver
Parts Used
Removed the rope starter assembly.
Move the flywheel to the magnets meet the magneto.
Move the cam sprocket so the timing marks line up.
Re-install the belt onto the cam sprocket.
Put the new rocker arm cover on. (Has a retainer to keep the belt from jumping.)
Re-install the rope starter assembly.
Log Splitter started on second pull.
OEM stands for Original Equipment Manufacturer and means the part you’re buying is sourced directly from the manufacturer who made your product. At eReplacementParts, we sell only genuine OEM parts, guaranteeing the part you’re purchasing is of better design and of higher quality than aftermarket parts.
Our product descriptions are a combination of data sourced directly from the manufacturers who made your product as well as content researched and curated by our content & customer service teams. This content is edited and reviewed internally before being made public to customers.
Our customer service team are at the ready daily to answer your part and product questions. We have a dedicated staff with decades of collective experience in helping customers just like you purchase parts to repair their products.
All our part reviews are solicited directly from other customers who have purchased this exact part. While we moderate these reviews for profanity, offensive language or personally identifiable information, these reviews are posted exactly as submitted and no alterations are made by our team.
All our customer repair instructions are solicited directly from other customers just like you who have purchased and replaced this exact part. While we moderate these reviews for profanity, offensive language or personally identifiable information, these reviews are posted exactly as submitted and no alterations are made by our team.
Based on data from past customer purchasing behaviors, these parts are most commonly purchased together along with the part you are viewing. These parts may be necessary or helpful to replace to complete your current repair.
All our installation videos are created and produced in collaboration with our in-house repair technician, Mark Sodja, who has helped millions of eReplacementParts customers over the last 13 years repair their products. Mark has years of experience in selling and repairing both commercial and residential products with a specialty in gas-powered equipment.
This data is collected from customers who submitted a repair instruction after replacing this exact part. Customers can rate how easy the repair was to complete and how long it took. We aggregate this data to provide a repair rating that allows customers to quickly determine the difficulty and time needed to perform their own repair.


