

Miter Saw: Saw Head Binds or Doesn't Operate Smoothly
Does your miter saw's head bind or not operate smoothly? Begin by inspect the bearings, arm assembly, ring, washer, bushings, and blade. Our guide is here to help you know what to look for, and ways you can fix the issue yourself.
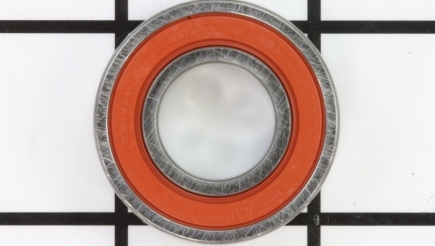
Bearings
Badly worn out bearings, that have not been replaced, can bind. Listen closely and pin point the binding bearing – it will be noticeable. A binding bearing is normally a bearing that has been going bad for some time and not fixed. Repair procedures will vary on all makes and models, though they will be similar.
To check and replace the armature bearings, start by removing the belt cover and then walk the belt off the pulleys. Some models will have screws holding a sliding bracket in place – loosen these screws. Loosen the belt tensioning screw at the back and remove the belt. Remove the end cap to the motor and slide the tension spring over. Remove the brushes. Some models will have brush caps on the side, which can be easily removed with a screwdriver. Remove the dust bag bracket and then the armature housing from the saw. Pull the armature housing free from the saw and tap the end of the armature light with a rubber mallet, or a brass hammer, to remove it from the housing. Spin the bearings on the armature shaft to determined which one is binding.
For the bearing beside the fan, remove the pulley screw. Heat the pulley up with a heat gun and remove it from the shaft with the keyway. Remove the retaining ring with a small screwdriver by walking it up the shaft. Do not damage the fan.
On some models, the fan is not sold separately so, if damaged, you will have to replace the entire armature. If there is no room between the bearing and the fan for a bearing puller to be used, you will have to score the bearing with a cut off wheel on opposite sides of the bearing. Insert the bearing into a vice and tighten until the outer race breaks off. Next, use needle-nose pliers to remove the cage and balls. Install the bearing separator under the inner bearing race and install the screw back into the armature shaft to avoid damage from the bearing puller. Install the bearing puller onto the separator and proceed to remove the inner race of the bearing. Clean the shaft and install the new bearing onto the shaft with a socket that only makes contact with the inner race of the bearing, to avoid damage. Tap the bearing in place with a hammer. Reinstall the retaining ring and heat the pulley back up for easier installation on the shaft, making sure to install the keyway with the pulley. Install the pulley screw.
To replace the lower bearing on the armature shaft, use a bearing puller to remove it and then install the new one onto the shaft with a socket that only makes contact with the inner race of the bearing to avoid damage. Tap the bearing in place with a hammer and then slide the armature back into the housing. Tap on the pulley screw to avoid damaging the armature shaft to seat the lower bearing into the armature housing. Reinstall the motor assembly to the miter saw and tighten the screws. Reinstall the brushes and the motor end cap. Reinstall the dust bag bracket, followed by the belt and the belt cover. If your model has an adjustable bracket for the belt, do not over tighten the belt as it can damage the new bearing.
A binding bearing in the gear box needs to be replaced right away. To replace the saw head bearing, remove the outer flange, blade and inner flange, plus any washers. Remove the spindle assembly. Once the spindle assembly has been removed, use a bearing separator to remove the bearing on the shaft and then tap a new one in place on the shaft with a socket that contact the inner race of the bearing to avoid damage.
For the bearing inside the bearing box, use a bearing puller to separate the bearing box (sleeve) from the spindle. Then, use a socket that makes contact with the outer race of the bearing and tap it free with a hammer. Install a new bearing with the same socket to avoid damaging the bearing and tap in place with a hammer. Some models will have needle bearings located inside the head assembly. Check these for bindings as well – they should spin freely, with no noise.
To replace these needle bearings, locate the cap on the outside of the saw head and tap them out. You may need to add a little heat to the head around the bearings. Install the new ones from the inside of the saw head by gently tapping them in place with a socket and hammer. Reinstall the spindle assembly into the saw. Reattach the inner flange, blade and outer flange. ... Read more
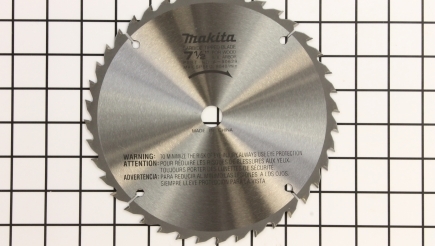
Blades
Blade binding occurs when the blade is dull. This can cause poor cuts in your workmanship as well cause the board to kick back on you, during cuts – which can be dangerous. Check that the teeth on your blade are shard and replace any that are dull.
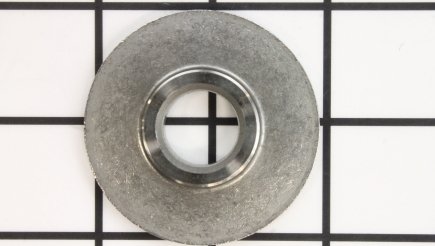
Washers
Some models will have a bolt and a washer securing a ring in place on the arm assembly that it pivots on. If this washer breaks, it can cause the arm assembly to bind as you manoeuvre it to make cuts. To replace the washer, remove the bolt at the back holding the assembly together to the saw. Remove and replace the washer and install the bolt.
Bushings
Some miter saws have a bushing on the shaft that the upper portion of the saw sits on and attaches to the base. The arm assembly rotates up and down on this shaft, allowing you to perform cuts. Over time, and with use, this bushing can wear out and cause the arm assembly to bind at this connection point. If the arm assembly is binding as you move it, it will need to be replaced. To replace the bushing, remove the stop screw at the back so you can move the saw all of the way back. Remove the set screws holding the shaft in. Tap the shaft out with a hammer and punch and pull the top of the saw away. Remove the bushing and inspect this bushing carefully for any signs of damage, or wear, indicating a problem. Clean the shafts and install a new one, if needed. Position the saw back into place and hammer the shaft back in. Reinstall the set screws and then lower the saw down and reinstall the stop screw, which prevents the saw from going back too far. ... Read more

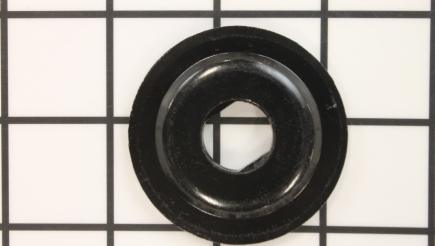
Rings
Some models have a metal ring located inside the link plate. The purpose of the ring is to distribute the pressure evenly as well as provide a tight seal for the arm assembly. This part can wear causing the arm assembly to bind or not operate smoothly. To replace the ring, remove the bolt and washer from the link plate at the back. Pop the ring out of the arm assembly and remove the old ring and then install a new one. Reinstall the washer and bolt.

Arms
The arm assembly may be worn and bound up not being able to turn or rotate. If this occurs you will have to replace the arm assembly. To do this you will need to remove everything from the arm assembly as well as the arm assembly from the unit. Remove the outer, flange, blade, inner flange and washers. Remove the blade guard assembly. Remove the gear box assembly. (If your model has needle bearings mounted in the arm assembly you can punch them out from the outside). Remove the belt cover and the belt. Remove the dust shield bracket. Remove the motor assembly. Remove the stop screw at the back and move the saw all the way back. Remove the set screws holding the shaft in. Tap the shaft out with a hammer and punch and pull the top of the saw away. Remove the bushing and install it into the new arm assembly. Position the saw head into place and hammer the shaft in. Reinstall the set screws then lower the saw down and reinstall the stop screw which prevents the saw from going to far back. Install the needle bearings with a socket by tapping them in place from the inside.
Install the gear box assembly into the new arm assembly. Install the dust shield bracket. Install the motor. Install the belt and the belt cover. Install the blade guard and install the washers, inner flange, blade and outer flange. ... Read more
Install the gear box assembly into the new arm assembly. Install the dust shield bracket. Install the motor. Install the belt and the belt cover. Install the blade guard and install the washers, inner flange, blade and outer flange. ... Read more