

Miter Saw: Motor Spins but Blades Don't
If the motor spins but the blades don't on your miter saw, inspect the belt, shafts, bearings, and gear for signs of wear and tear. Consider fixing your tool yourself by using our expert repair guide. Your miter saw will be back up and running in no time.
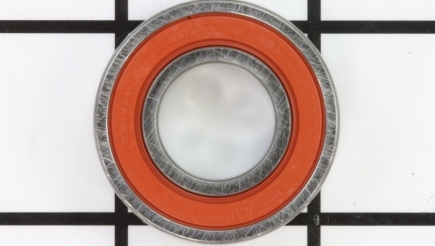
Bearings
Bearings support and guide components, which turn relative to one another. A seized bearing will prevent a shaft from rotating. To check the condition of the armature bearings, remove the belt cover and walk the belt off the pulleys. Some models will have screws securing a sliding bracket. Loosen the screws but do not remove. Loosen the belt tensioning screw at the back and remove the belt. Remove the motor end cap and slide the tension springs off of the carbon brushes, followed by the brushes. Remove the dust bag bracket. Remove the armature housing from the saw. Using a rubber mallet, or a brass hammer, tap the end of the armature shaft to free it from the housing. For this step, do not use a regular hammer as this can damage the armature shaft. Spin the bearings on the armature shaft to determine which one is seized.
To replace the bearing located beside the fan, remove the pulley screw. Heat the pulley up with a heat gun and remove it from the shaft. Remove the retaining ring with a small screwdriver by walking it up the shaft. Do not damage the fan. On some models the fan is not sold separately – if damaged, you will have to replace the armature. If there is no room between the bearing and the fan for a bearing puller, or separator, you will have to score the bearings outer race with a cut-off wheel on both sides of the bearing. Insert the bearing into a vice and tighten until the outer race breaks off. Once you have broken off the outer race, use needle-nose pliers to remove the cage and balls.
Next, install the bearing separator under the inner bearing race and then install the screw back into the armature shaft to avoid damage from the bearing puller. Install the bearing puller onto the separator and proceed to remove the inner race of the bearing. Clean the shaft and then install new bearings into the shaft. To avoid damaging the bearing, tap it in place with a socket placed on the inner bearing race only. Reinstall the retaining ring. Heat the pulley back up and reinstall it onto the armature shaft, making sure to install the keyway with the pulley. Install the pulley screw.
To replace the lower bearing on the armature shaft, use a bearing puller to remove it and then install the new one into the shaft with a socket that only makes contact with the inner race of the bearing, to avoid damage. Tap it in place using a hammer. Slide the armature back into the housing. Tap only on the pulley screw to avoid damaging the armature shaft when seating the lower bearing into the armature housing. Reinstall and secure the motor assembly to the miter saw. Reinstall the brushes and the motor end cap and then the dust bag bracket, the belt and the belt cover.
To inspect the saw bearings, remove the outer flange, blade and inner flange. Drop the blade guard down. Remove the spindle/transmission assembly and then spin the bearings to locate the seized bearing. Use a bearing separator, or bearing puller, to remove the seized bearing on the shaft.
Some models, you will have to score the bearing on both sides with a cut-off wheel and then break off the outer race by tightening the bearing in a bench vice. Use needle-nose pliers to remove the cage and balls and then use a bearing separator and puller to remove the inner race.
Clean the shaft and tap a new bearing in place on the shaft with a socket that contacts the inner race of the bearing to avoid damage to the bearing. For models where a bearing is located inside the bearing box, use a bearing puller to separate the bearing box (sleeve) from the spindle. Use a socket that makes contact with the outer race of the bearing and tap it out with a hammer. Tap the new bearing in place with the same socket – again, to avoid damage to the bearing. Some miter saws have roller bearings located inside the saw blade housing. Check to see if these bearings are free or seized. These roller bearings can be tapped out with a punch from the outside. These will look like a cap on the outside. You may need to apply a slight amount of heat on the housing around the bearing.
Install the new roller bearing using a socket and tap it in place from the inside. Apply grease to the gears and then install a new gasket. Reinstall the spindle/transmission assembly into the saw. Raise the blade guard and then reinstall any washers. Reattach the inner flange, blade and outer flange. ... Read more

Belts
The belt rides on pulleys that are mounted onto shafts and transfers power between the drive pulley and driven pulley. If the motor is spinning, but the blade is not, the first thing to check is the belt as they wear out and break. You can inspect the belt by removing the belt cover. If the belt is broken, remove it and install a new one. On some models, you will have to walk the belt onto the pulleys. Other models will have a tension release screw that you will have to back off, loosen the screws on the bracket and then slide it forward. Install the new belt and tighten it up with the tension screw and then tighten the bolts on the bracket to secure it in place. Reinstall the belt cover. ... Read more

Gears
Gears transfer power between shafts. Stripped gears will not be able to transfer power and will produce a grinding noise. To get a visual condition of the gears, remove the outer flange, blade and inner flange, along with any washers behind the inner flange. Drop the blade guard down and the remove the gear box assembly.
Clean out old grease and inspect the gears for stripped teeth. To replace a stripped gear, tap the shaft free from the assembly – you may need to heat it up for removal.
Gears may be mounted on the shaft different ways. Some gears will be held on by a retaining ring, which can be removed with retaining ring pliers.
Once removed, the gear will come off (or you may need to tap it off). Remove the keyway with the gear. When installing a new gear, make sure to install the keyway or the gear will not rotate. Reinstall the retaining ring on the shaft. Some gears are pressed on and will need to be removed with a hydraulic press and reinstall it as a unit.
Once you have made the repair, reinstall back into the housing by pressing them in with your hand. You might need to add a little pressure with a vice. Apply new grease. Install a new gasket and reassemble back into the saw. Raise the blade guard and install any washers on the shaft. Reinstall the inner flange, blade and outer flange and tight in place. ... Read more

Shafts
If the end of the armature shaft breaks off due to metal fatigue, it will prevent the blade from spinning. To check the armature shaft, remove the motor end cap and then remove the brushes. Remove the belt cover and walk the belt off the pulleys. Remove the armature housing from the miter saw. You will notice immediately if the end of the shaft has broken off. If it has broken off, tap the bottom of the armature shaft out of the housing. Remove the pulley screw and heat up the pulley to remove it. With the pulley still hot, install it onto the new armature shaft with the keyway and install the pulley screw. Install the new armature shaft into the housing and tap on the pulley screw lightly with a hammer to seat the lower bearing into the housing. Reattach the armature housing back to the miter saw. Install the belt by walking it back onto the pulleys and reinstall the belt cover. Install the carbon brushes and the motor end cap. ... Read more

Spindles
Remove the outer flange, blade and inner flange, including any washers behind the inner flange. Drop the blade guard down and then remove the spindle/transmission assembly. To replace a broken shaft here, remove any retaining rings holding the spindles in place. Tap it free with a hammer (you may need to add a little heat to the mounting plate. Shafts are sold with the gears already mounted by you will have to install a new bearing. This is because, in most cases, you will have to break the bearing off of the old shaft if it will not come off with a puller (due to tight clearances issues). Install the new bearing by tapping it in place with a socket and hammer. Make sure the socket is the same size as the bearings inner race. Do not tap on any other part of the bearing as this will cause damage. Reassembly the shaft back into the bearing housing by pressing it with your hand. You may need a vice for a little extra pressure. Install new great and a new gasket and then install back into the miter saw. Place the guard up and reinstall any washers, inner flange, blade and outer flange. ... Read more