

Miter Saw: Blade Brake Doesn't Work
If your blade brake doesn't work, our experts have nared down the most likely parts to be causing this issue to the carbon brushes, switch, and field. No need to spend money on hiring an outside service when you can do this repair yourself. Check out our tips on how to nar down the correct part to be replaced, and how you can fix your miter saw as quickly and efficiently as possible.
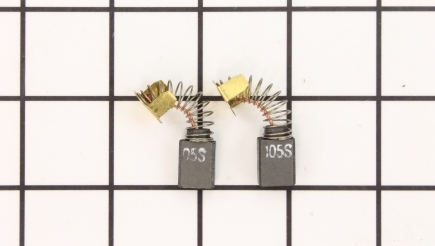
Carbon Brushes
The carbon brushes supply electricity to the armature by riding on the commutator. The flow of electricity reverses when the trigger is released. To check the condition of the carbon brushes, remove the end cap on the motor. Slide the brush springs to the side with pliers. Pull out the brushes. Brushes measuring 1/8 of an inch, or less, are worn. Replace brushes that are worn and always replace brushes in pairs.
Before installing new brushes, it is best to clean the commutator at this point of any dirt build-up. Reversing the flow of electricity for braking causes more wear on the brushes and dirt build-up on the commutator. Remove the motor housing from the saw. Using only 600-grit aluminum oxide sandpaper, move the sandpaper around the armature – in the direction of travel only – applying light pressure to clean the commutator. Next, use a plastic scribe to clean in between the commutator bars.
Once complete, clean only with electrical contact cleaner, wipe dry and reinstall. Install the new brushes and reapply the tension spring. Reattach the end cap of the motor housing.
Some miter saws have brush caps on the side of the motor housing, for easy access to the brushes for maintenance purposes. These can be removed with a screwdriver to access the brushes. The brushes will come right out. ... Read more

Fields
If the field is shorting out, it can impact the performance of the blade breaking system. You will have to access the field to determine its condition. Remove the belt cover and walk the belt off of the pulleys. Some models will have screws holding a sliding bracket in place – loosen these screws. Loosen the belt tensioning screw at the back and remove the belt. Remove the brushes from the miter saw by taking off the motor end cap and sliding the tension spring over to remove the brushes.<br> Other models will have brush caps on the side, which can be easily removed with a screwdriver to access the brushes. Remove the dust bag bracket, followed by the armature housing from the saw. Pull the armature housing free from the saw. Tap on the end of the armature with a hammer to free it from the housing.
It is a good idea to use a rubber mallet, or brass hammer, to avoid damaging the armature shaft. Clean the field with electrical contact cleaner and inspect the field for burn marks or anything else out of the ordinary. If there are burn marks, or melted insulation windings, replace the field.
Using a multimeter, you can check the field for continuity. Set the multimeter to an ohmmeter and place a lead on each end of the coil in the field. You will have to perform this test for each coil in the field. If the reading is infinity for one, or more, of the coils, then the field is bad and requires replacement. If there is a major variance between the coils, then the field needs to be replaced. Take a picture of the wiring set up for reassembly purposes.
Disconnect all wire terminals. If you have to cut any wires off, make sure to cut as close to the connector as possible, so you do not lose any wire length. Remove the screws securing the field into the housing and pull the field out. You may have to tap the housing on a table to free the field.
Install the new field and secure it with the screws. Reconnect the wires, referencing your photo. If you have to attach new ends to the wires, strip back ¼ of an inch of insulation and crimp the new connector on. Slide the armature back into the housing. Lightly tap on the pulley screw with a hammer (to avoid damaging the armature shaft) to seat the armature bearing into the motor housing. Reinstall the motor assembly to the miter saw and tighten the screws. Reinstall the brushes, motor end cap and the dust bag bracket. ... Read more

Switches
The switch controls the flow of electricity to the motor. It also reverses the flow of electricity when released, to stop the blade from rotating for safety reasons. Over time, the switch can wear out and become inoperable, requiring replacement. To replace the switch, remove the cover over the switch. You may also have to remove the handle on some models, if it is attached to the switch cover. Once all of the screws on the cover have been removed, you may have to raise the saw up, for clearance between the blade guard and the switch cover. Remove the switch and take a picture for reference of where all of the wires attach, for when you reassemble the new switch. Remove all the wires from the old switch and attach them to the new switch. Then, reassemble the switch back into the housing. Tuck all of the wires into their appropriate channels to avoid damage to them, when you reassemble the cover. Reinstall the cover and handle and make sure the saw it up to clear the blade guard. ... Read more