


Why Read This Article?
Finish Nailer Repair - Replacing the Driver Guide (Ridgid Part # 79004001022)
Article Breakdown
Finish Nailer Repair - Replacing the Driver Guide (Ridgid Part # 79004001022)
Video

Tools & Materials
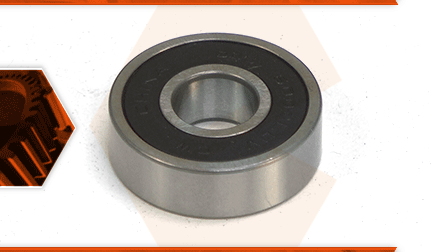
Power tools use many ball bearings to allow various components to rotate. Over time, a ball bearing will wear and begin to fail. A bearing that is failing will usually give warning; often with a squeaking or squealing sound.
Let's get started.
REMOVING THE BALL BEARING
1. Remove the motor cap.
2. Remove the top half of the trigger handle.
3. The power cord weaves through the top handle. Go ahead and pull it away from the handle.
4. Remove the red and the black motor wires.
5. Remove the two screws on this side of the lower handle that secure it to the motor housing, and one screw on the top (beneath the cord).
6. With the screws removed, now you can remove the lower handle and all the wiring from the saw.
7. Remove the four screws that secure the motor housing.
8. Remove the housing from the saw.
9. Remove the commutator-side bearing with a bearing puller.
INSTALLING THE NEW BALL BEARING
10. Place the bearing onto the armature shaft.
11. Use a socket that has a diameter about the same as the inner race on the bearing.
12. Use the socket to tap the bearing in place. You want to install the bearing until it is flush with the shaft.
13. Reinstall the motor housing.
14. Secure the motor housing with the screws.
15. Reinstall the lower handle.
16. Reinstall the motor wires.
17. Put the cord back through the top handle and then weave it through the rear of the handle.
18. Reinstall the upper half of the handle.
19. Finish up by reinstalling the motor cap.
