


Why Read This Article?
Finish Nailer Repair - Replacing the Driver Guide (Ridgid Part # 79004001022)
Article Breakdown
Finish Nailer Repair - Replacing the Driver Guide (Ridgid Part # 79004001022)
Video

Tools & Materials
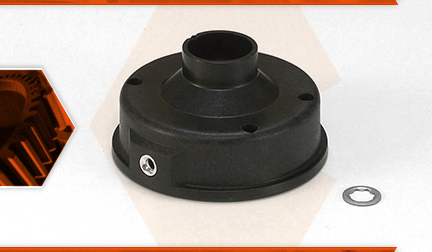
The outer spool assembly is the housing portion of the trimmer head. It is the part of the trimmer head that is attached to the gearbox. It accepts the line spool and contains the eyelets that the trimmer line passes through. Common problems with the outer spool assembly are wear in the area where the spool attaches to the gearbox, cracks in the housing, and worn or missing eyelets.
Let's get started.
REMOVING THE OUTER SPOOL 1. Remove the inner reel.
a. Unscrew and remove the bump knob from the spindle.
b. Remove the inner reel from the outer spool.
c. Secure the loose ends of trimmer line in the retaining notches on the top of the inner reel.
2. Remove the outer spool.
a. The outer spool is secured with a metal retainer. The retainer is not re-usable (the new spool comes with a new retainer).
b. Use a small screwdriver to pry the metal retainer away from the outer spool.
c. Use long-nosed pliers and/or wire cutters (as necessary) to remove the retainer from the spindle.
d. Remove the outer spool from the spindle.
INSTALLING THE NEW OUTER SPOOL
3. Install the outer spool.
a. Install the new outer spool onto the spindle.
b. Install the metal retainer onto the spindle.
c. Use a deep socket and a rubber mallet to secure the retainer on the spindle (against the outer spool).
REASSEMBLING THE UNIT
4. Reinstall the inner reel.
a. Thread the ends of the trimmer line through the eyelets on the new outer spool (one line through each eyelet).
b. Install the inner reel onto the spindle assembly (within the outer spool).
c. Pull the trimmer lines to disengage them from the retaining notches on the inner reel.
d. Secure the inner reel with the bump knob.
