


Why Read This Article?
Finish Nailer Repair - Replacing the Driver Guide (Ridgid Part # 79004001022)
Article Breakdown
Finish Nailer Repair - Replacing the Driver Guide (Ridgid Part # 79004001022)
Video

Tools & Materials
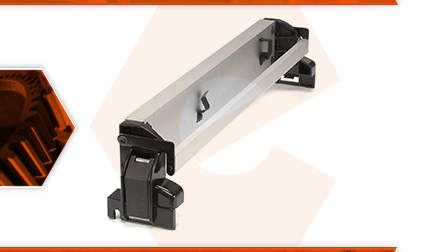
Did you lose your fence or is it damaged beyond repair? If so, you will need a new fence assembly. The fence assembly is a new, complete fence for your table saw. It comes completely assembled and is ready for use.
Let's get started.
REMOVING THE FENCE ASSEMBLY 1. Remove the fence assembly.
a. The fence is secured to the saw with a simple clamping mechanism on the front and the back.
b. Release the levers on both sides.
c. Lift the fence assembly away from the saw.
2. Transfer the push stick.
a. Remove the push stick from the side of the old fence assembly.
b. Install the push stick onto the new fence assembly.
INSTALLING THE NEW FENCE ASSEMBLY 3. Install the fence assembly.
a. Align the notches on both sides of the new fence assembly with the notches on the rail.
b. Tighten the clamps (both the front and the back).
REALIGNING THE CURSOR
4. Align the cursor.
a. When replacing the rip fence, it is usually necessary to realign the cursor. The cursor shows the correct distance between the blade and the fence.
b. Adjust the fence all the way toward the blade (until it makes contact).
c. Lock the fence with the lever.
d. Using a screwdriver, loosen the screws that hold the cursor plate.
e. Adjust the cursor until the red line (on the cursor) aligns with the "ZERO" indicator on the saw's ruler.
f. Secure the cursor with the screws.
