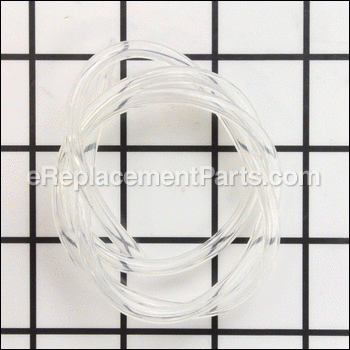
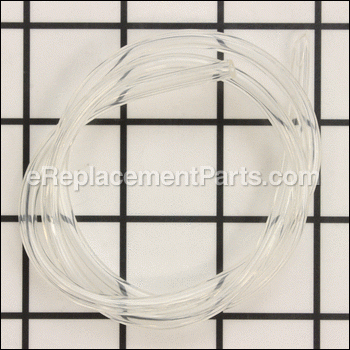
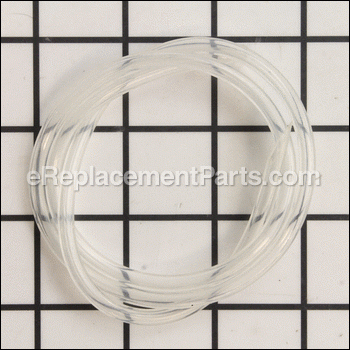
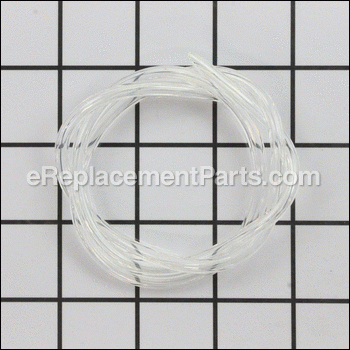
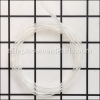
This is the Genuine Craftsman replacement part. It is made out of Flexible Rubber and is Sold Individually. The purpose of the 530069216 Tank Purge Line is to return the excess fuel that is in the carburetor after the primer bulb has been pushed. The excess fuel is forced through the purge line back into the fuel tank. Over time the Tank Purge Line will become brittle and crack and will need to be replaced.
Purge Line 530069216
OEM part for: Poulan, Paramount, Weed Eater, Husqvarna, Craftsman, Jonsered
Part Number: 530069216
Jump To:
Product Description ?
- OD 3/16
- Classification: Part
- Weight: 0.01 lbs.
- Also Known As: Fuel Line
- Shipping: Ships Worldwide
Frequently Purchased Together ?
Compatibility
This Purge Line will fit the following 1492 machines. Confirm this part works with your model, and view the detailed model diagrams and repair help we have to offer.
Paramount
Poulan
Weed Eater
Husqvarna
Craftsman
Jonsered
Show More Compatible ModelsThis item works with the following types of products:
- Hedge Trimmer Parts
- Trimmer Parts
- Chain Saw Parts
- Saw Parts
- Edger Parts
- Blower Parts
- Pruner Parts
This part replaces obsolete part #: 5300210-26, 5300211-32, 5300210-25, 530021132, , 530021014, 530021026, 530021035, 530021025, 530021028
Repair Videos ?
|
Fuel lines leaking? Learn to quickly remove and install the fuel tank purge line on your Poulan chainsaw. Step-by-step i...
November 01, 2016
|
Customer Part Reviews ?
- 1
- 2
- 3
Questions & Answers ?
Our customer Service team is at the ready daily to answer your part and product questions.

Ask our Team
We have a dedicated staff with decades of collective experience in helping customers just like you purchase parts to repair their products.
Does this fit my product?Questions & Answers for Purge Line
Customer Repair Instructions ?
All our customer repair instructions are solicited directly from other customers just like you who have purchased and replaced this exact part.
Old Primer Bulb was cracked and would not pump fuel into the carb
Tool Type
Chain Saw
Difficulty
Easy
Time
15-30 minutes
Tools Used
Screwdriver, Pliers
- Removed side cover where primer bulb is located
- Remove old snap in primer bulb (without disconnecting fuel lines)
- Cut and replace the 2 fuel lines one at a time (mine were hard and brittle from old fuel)
- The new bulb has 2 fuel ports, one is longer than the other which matched the old bulb.
- Installation instructions said to double check the direction of the fuel flow (the bulb sucks fuel through the carb, so the inlet side is connected to the carb and the outlet side goes back to the fuel tank).
- Snap the new bulb into place on the side panel
- Attach the side panel
- Attach the top panel
SST25 Line Trimmer: Would not start. Prior owner left old fuel in the entire fuel system for several years. Entire fuel system was gummed and would not start.
Tool Type
Trimmer
Difficulty
Easy
Time
15-30 minutes
Tools Used
Pliers, Allen Key Set, Needle Nose Pliers, Star Screwdriver Set
1. First I drained and disposed of all the old fuel.
2. Then I removed the fuel filter from the intake hose in the fuel tank with needle nose pliers. Once the fuel filter was removed then I remove the return line fuel assembly pickup (fancy name for little plastic insert) with needle nose pliers.
3. After both the fuel filter and fuel assembly pickup was remove then I removed the gas tank carefully, thus not to tear the fuel lines. The fuel tank is held on with two star screws so you would need the proper star screw driver or ratchet attachment.
4. Next I removed the hoses from the carburetor also careful not to tear the fuel lines. The reason for such care is because I used the old hoses to determine the size of the new hoses. Now for the carburetor.
5. I removed the air filter and air filter cover there are two Allen screws that hold on the carburetor. Using a the proper Allen key I remove both screws. Be careful not to tear any gaskets when removing. Also the throttle cable to attached to the carburetor it is easy to remove just angle the L properly and it slides right out.
Now that the carburetor is removed assess the situation. In my case I took the carburetor apart to see if I could clean it before I ordered a new carburetor but this was beyond cleaning. If you have never taken a carburetor apart proceed with caution and read a different repair guide.
Most of the parts where rusted and gummed and for 25 bucks I simple decided to order a new one. Also since I had the fuel take off I cleaned it and ordered new hoses, fuel filter, and a new fuel tank cap. I only ordered a new cap because the other one was cracked.
6. Once the parts arrived I began by cutting the new fuel hoses. I used the old hoses to determine the size. NOTE: Cut the new pieces a little longer than the old ones because the hardest part of the project is putting the new hoses into the fuel tank. And unless you are really good you will tare up the ends a bit and will need to be cut off. Plus you will need to cut the new ones at an angle so you will need to cut that flat as well.
7. After the cut is made, cut the end of the hoses at a sharp angle thus to be able to put the tip of the hose through the holes int he fuel tank. I recommend using a little lube on the outside of the hoses as well just so they slide easier. In my case I used a little 2-cycle oil because I knew it would not contaminate the line or the gas in the fuel tank. Once the hoses where just barely through the hole I grabbed the end of the hoses with needle nose pliers and pulled the desired length. On the intake hose I cut the end flush and attached the new fuel filter then put it back into the fuel tank. Also cut and attached the return line fuel assembly pickup to the return line then pulled it up to the top of the fuel tank.
8. Before I attached the tank I put the new carburetor on the same way I took it off making sure to attach the throttle cable as I went. When the screws where in line I tightened them down snug. Do not over tighten.
9. Now I attached fuel tank in same manner not to over tighten the screws.
10. Finally I attached the fuel lines to the carburetor filled the fuel tank with good 2 cycle and closes the fuel tank with my new fuel cap. Attached the air filter and air filter cover and we where good to go.
Primed the carburetor, put it full choke, cranked a could of times went into half choke. It fired right up, went to no choke and gave it full throttle and she purred like a kitten. Okay it is a line trimmer she roared like a lion but either way it is working great.
fuel lines inside gas tank corroded
Tool Type
Trimmer
Difficulty
Easy
Time
Less than 15 minutes
Tools Used
Screwdriver, Pliers
Parts Used
Take pictures before you start on which lines go where.
Unscrewed tank and was putting back on in 15 minutes.
Hardest part was getting new line back into tank.
Easy thing was line was already pre cut at angle.
Fuel line became brittle.
Tool Type
Chain Saw
Difficulty
Medium
Time
30-60 minutes
Tools Used
Screwdriver, Pliers, Socket set
Parts Used
I removed the existing fuel line.
I reran the fuel line from the tank to the carburetor.
I reassembled the saw.
The most difficult part was removing the old filter from the gas tank.
To remove the filter I made a hook out of some wire, and fished the line and filter out
I purposely took my time since I am not a mechanic
Unit started extremely hard and would not run full-throttle.
Tool Type
Trimmer
Difficulty
Easy
Time
15-30 minutes
Tools Used
Screwdriver, Pliers, Allen wrenches
A quick note about the Walbro rebuild kit and the original parts in the carburetor. The fuel pump, for these carbs, in the original was a piece of blue plastic/mylar(?) that was solid. The replacement fuel pump looked like a mesh screen. That had me confused, for a bit. I did not realize that the replacement parts would look so different from the originals. That said, I should laugh at myself because this unit was made in 1996 and this is the first time it's been rebuilt. Things have changed, a bit, since them, obviously. LOL.
This was a quick, and easy job. If you can use a screwdriver you can do this work.
Fuel line from gas tank to carb. On chainsaw separated into several pieces
Tool Type
Chain Saw
Difficulty
Easy
Time
15-30 minutes
Tools Used
Screwdriver
Two Poulan Pro power heads not running
Tool Type
Pruner
Difficulty
Medium
Time
1-2 hours
Tools Used
Screwdriver, Sharp knife, Allen wrench
Fuel lines deteriorated
Tool Type
Blower
Difficulty
Medium
Time
1-2 hours
Tools Used
Wrench Set
2 Insert lines into tank and attach filter
3 Reattach tank
4 Insert lines onto carburetor
5 Reattach carburetor.( not an easy task)
The smaller intake line has an undersized I.D. which required heated stretching in order to slip over the carburetor inlet pipe.
Fuel line and purge line deteriorated also bar chain oil leaking
Tool Type
Chain Saw
Difficulty
Medium
Time
30-60 minutes
Tools Used
Screwdriver, Pliers, Wrench Set, Nutdriver, Adjustable Wrench
My chain saw was in storage for over 8 years. The fuel line was destroyed everywhere I would touch it it would fall apart.
Tool Type
Chain Saw
Difficulty
Medium
Time
30-60 minutes
Tools Used
Screwdriver, Socket set
Parts Used
2. Removed handle and carburetor cover.
3. Disconnection what little line was left noting routing of the fuel line.
4. Connect new line to carburetor and route line along handle to the fuel tank. Make sure you leave enough fuel line to reach the bottom of the tank.
5. Install the tapered end of the line into the tank until you have enough line installed to reach the bottom.
6. Fill the tank with gas and oil mixture.
7. Prime the carburetor by pouring a small amount of gas into the carburetor. With the switch in run pull the rope until it fires. You may need to prom the saw several times to get the air out and enough gas into the line to keep it running.
8. Reinstall the bar chain and covers. Replace the air cleaner and clean or replace the spark plug if needed.
OEM stands for Original Equipment Manufacturer and means the part you’re buying is sourced directly from the manufacturer who made your product. At eReplacementParts, we sell only genuine OEM parts, guaranteeing the part you’re purchasing is of better design and of higher quality than aftermarket parts.
Our product descriptions are a combination of data sourced directly from the manufacturers who made your product as well as content researched and curated by our content & customer service teams. This content is edited and reviewed internally before being made public to customers.
Our customer service team are at the ready daily to answer your part and product questions. We have a dedicated staff with decades of collective experience in helping customers just like you purchase parts to repair their products.
All our part reviews are solicited directly from other customers who have purchased this exact part. While we moderate these reviews for profanity, offensive language or personally identifiable information, these reviews are posted exactly as submitted and no alterations are made by our team.
All our customer repair instructions are solicited directly from other customers just like you who have purchased and replaced this exact part. While we moderate these reviews for profanity, offensive language or personally identifiable information, these reviews are posted exactly as submitted and no alterations are made by our team.
Based on data from past customer purchasing behaviors, these parts are most commonly purchased together along with the part you are viewing. These parts may be necessary or helpful to replace to complete your current repair.
All our installation videos are created and produced in collaboration with our in-house repair technician, Mark Sodja, who has helped millions of eReplacementParts customers over the last 13 years repair their products. Mark has years of experience in selling and repairing both commercial and residential products with a specialty in gas-powered equipment.
This data is collected from customers who submitted a repair instruction after replacing this exact part. Customers can rate how easy the repair was to complete and how long it took. We aggregate this data to provide a repair rating that allows customers to quickly determine the difficulty and time needed to perform their own repair.

