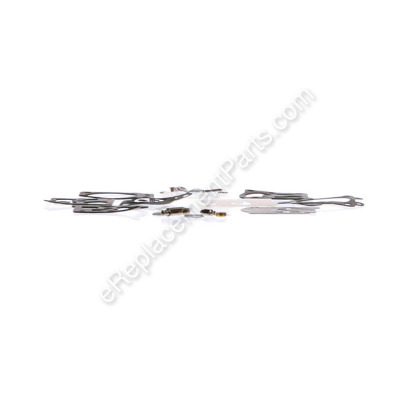
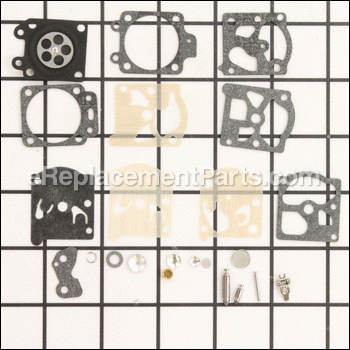
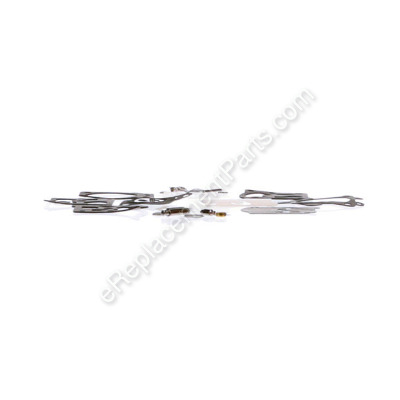
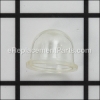
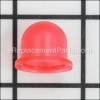
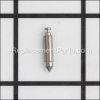
This genuine item is specially made for use with handheld lawn and garden equipment. Unfortunately, over time the material may wear out and even begin to crack eventually requiring a replacement. This high-quality kit is sold individually, keep in mind it includes all the necessary components to repair your carburetor. Please make sure to refer to the appropriate diagrams of your model for the correct location and application of these components.
NOTE: Here is the link to our article on How to Rebuild a Two-Cycle Engine Carburetor How to Rebuild a Two-Cycle Engine Carburetor " />
Repair Kit K20-WAT
OEM part for: Walbro, Weed Eater, Poulan, Husqvarna, Craftsman
Part Number: K20-WAT
Jump To:
Product Description ?
- Classification: Part
- Weight: 0.01 lbs.
- Shipping: Ships Worldwide
Frequently Purchased Together ?
Compatibility
This Repair Kit will fit the following 395 machines. Confirm this part works with your model, and view the detailed model diagrams and repair help we have to offer.
Weed Eater
Poulan
Husqvarna
Walbro
Craftsman
Show More Compatible ModelsThis item works with the following types of products:
- Trimmer Parts
This part replaces obsolete part #: 530069668
Customer Part Reviews ?
- 1
- 2
Questions & Answers ?
Our customer Service team is at the ready daily to answer your part and product questions.

Ask our Team
We have a dedicated staff with decades of collective experience in helping customers just like you purchase parts to repair their products.
Does this fit my product?Questions & Answers for Repair Kit
Customer Repair Instructions ?
All our customer repair instructions are solicited directly from other customers just like you who have purchased and replaced this exact part.
Unit started extremely hard and would not run full-throttle.
Tool Type
Trimmer
Difficulty
Easy
Time
15-30 minutes
Tools Used
Screwdriver, Pliers, Allen wrenches
A quick note about the Walbro rebuild kit and the original parts in the carburetor. The fuel pump, for these carbs, in the original was a piece of blue plastic/mylar(?) that was solid. The replacement fuel pump looked like a mesh screen. That had me confused, for a bit. I did not realize that the replacement parts would look so different from the originals. That said, I should laugh at myself because this unit was made in 1996 and this is the first time it's been rebuilt. Things have changed, a bit, since them, obviously. LOL.
This was a quick, and easy job. If you can use a screwdriver you can do this work.
The use of alcohol in the gasoline causes the rubber inthe diaphram to get hard. When this happens, the fuel pump will not work.
Tool Type
Trimmer
Difficulty
Easy
Time
15-30 minutes
Tools Used
Screwdriver
Parts Used
Remove the diaphragm cover (four screws).
Replace the fuel pump diaphragm and replace the cover.
Remove the fuel pressure regulator cover (four screws).
Replace the fuel pressure regulator diaphragm and the needle valve replace the cover.
Replace the fuel pressure regulator diaphragm and replace the cover.
Remount carb on motor, start the engine up and retune the engine using the Low and High speed air mixture screws.
Hint, set the high speed jet first. Once you have it about right, set the low speed jet.
Carb leak
Tool Type
Trimmer
Difficulty
Easy
Time
15-30 minutes
Tools Used
Screwdriver, None
Parts Used
Leaf blower wouldn't start
Tool Type
Trimmer
Difficulty
Easy
Time
15-30 minutes
Tools Used
Screwdriver
Parts Used
Here is the link to the video I watched, for those who need it.
http://www.ereplacementparts.com/article/6766/How_to_Rebuild_a_TwoCycle_Engine_Carburetor.html
Nothing, I rebuilt my RC airplane gasoline engine carburators regularly
Tool Type
Trimmer
Difficulty
Medium
Time
15-30 minutes
Tools Used
Screwdriver, Pliers, Wrench Set
Parts Used
2. Remove all gas lines and choke/throttle linkages.
3. Unbolt carb and remove old gaskets.
4. Disassemble carb.
5. Remove all parts, needle spring and screen.
6. Install all new rubber/paper gaskets and new needle/screen.
7. Reassemble all parts.
8. Re-attach to to engine.
9. Adust low/high needle's
10. Run engine and adjust carb as needed.
Older Chainsaw would not Start
Tool Type
Trimmer
Difficulty
Easy
Time
15-30 minutes
Tools Used
Screwdriver, Socket set, Nutdriver, Air compressor and Carb Cleaner Spray
Parts Used
Removed the old Carburetor and laid it on a clean work surface (old cookie sheet works good)
Disassembled the Carburetor being careful to lay out all parts to assure proper re-assembly
Slightly cleaned interior and exterior of carburetor body with carburetor cleaner spray and air
Reassembled the Carburetor with new parts
Reinstalled Carburetor on chainsaw
Primed it ... Saw started and ran like new with very little tweaking
It was an old saw, tough to find the carburetor, ordered the rebuild kit by the Carburetor number-
Cost 1/3 of a new carburetor....piece of cake...I'll continue to rebuild over buying new.
Carburetor was stopped up
Tool Type
Trimmer
Difficulty
Easy
Time
1-2 hours
Tools Used
Screwdriver, tweezers
Parts Used
took carburetor apart
cleaned all the passages
replaced the needle and seat
replaced carburetor filter
put in new gaskets and put it back together
float was dry rotted
Tool Type
Trimmer
Difficulty
Easy
Time
15-30 minutes
Tools Used
Screwdriver
Parts Used
Engine would not idle.
Tool Type
Trimmer
Difficulty
Easy
Time
15-30 minutes
Tools Used
Screwdriver, Wrench Set
Parts Used
My 22 Year old Stihl chain saw needed a carburetor rebuild.
Tool Type
Trimmer
Difficulty
Medium
Time
30-60 minutes
Tools Used
Screwdriver, Pliers, Socket set, Wrench Set, Adjustable Wrench, Camera (phone)
Parts Used
Below are my comments regarding my repair:
No Carburetor or rebuild kit from Stihl was available. My TrueValue Hardware store helped locate the actual carb mfgr. I was able to locate a rebuild kit from eReplacementParts - very reasonable price.
Steps for rebuild are below:
1) Find a YouTube Video on rebuild of your model (or similar) carb.
2) Take pictures along the way.
3) Remove Air Filter & nuts that hold the filter also hold the carb.
4) Remove the fuel line & priming bulb lines.
5) Remove the accelerator linkage.
6) Slide out the carb.
7) Rebuild per the YouTube Video & take pictures as needed.
8) Reassemble in reverse order.
Note: You might want to replace the fuel pick-up tube and fuel filter if it has been a while while you are at it. Also replace the Air Filter if needed.
Comments: I really didn't want to throw away a perfect good saw for something as simple as a carb that needed to be rebuilt. My saw now works as it did when new - has been a very good saw & didn't really want to buy a replacement. This rebuild was quite easy after viewing the videos. The parts supplied by eReplacementParts were right on and for about $10. + about 1/2 hour of time I couldn't be happier.
Thank you eReplacementParts,
Bob
OEM stands for Original Equipment Manufacturer and means the part you’re buying is sourced directly from the manufacturer who made your product. At eReplacementParts, we sell only genuine OEM parts, guaranteeing the part you’re purchasing is of better design and of higher quality than aftermarket parts.
Our product descriptions are a combination of data sourced directly from the manufacturers who made your product as well as content researched and curated by our content & customer service teams. This content is edited and reviewed internally before being made public to customers.
Our customer service team are at the ready daily to answer your part and product questions. We have a dedicated staff with decades of collective experience in helping customers just like you purchase parts to repair their products.
All our part reviews are solicited directly from other customers who have purchased this exact part. While we moderate these reviews for profanity, offensive language or personally identifiable information, these reviews are posted exactly as submitted and no alterations are made by our team.
All our customer repair instructions are solicited directly from other customers just like you who have purchased and replaced this exact part. While we moderate these reviews for profanity, offensive language or personally identifiable information, these reviews are posted exactly as submitted and no alterations are made by our team.
Based on data from past customer purchasing behaviors, these parts are most commonly purchased together along with the part you are viewing. These parts may be necessary or helpful to replace to complete your current repair.
All our installation videos are created and produced in collaboration with our in-house repair technician, Mark Sodja, who has helped millions of eReplacementParts customers over the last 13 years repair their products. Mark has years of experience in selling and repairing both commercial and residential products with a specialty in gas-powered equipment.
This data is collected from customers who submitted a repair instruction after replacing this exact part. Customers can rate how easy the repair was to complete and how long it took. We aggregate this data to provide a repair rating that allows customers to quickly determine the difficulty and time needed to perform their own repair.

