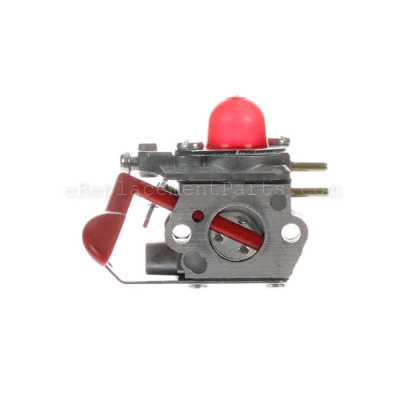
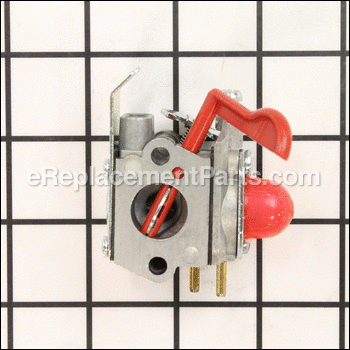
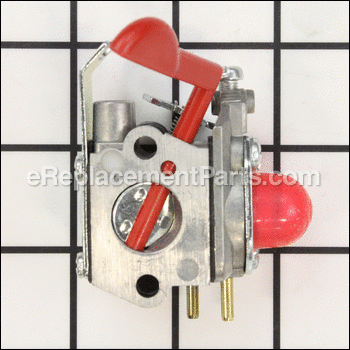
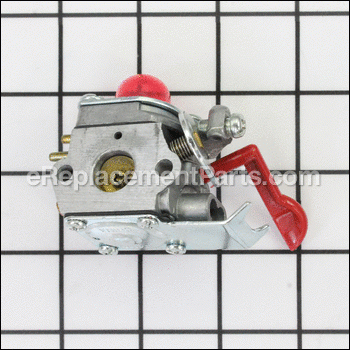
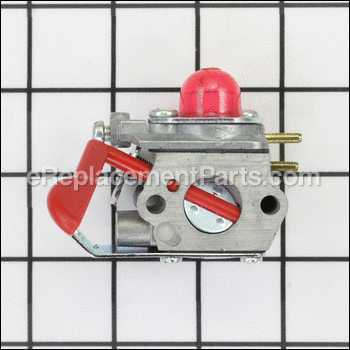
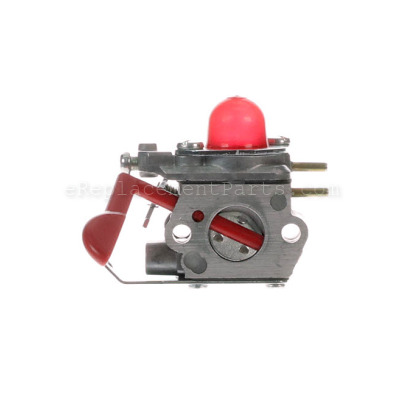
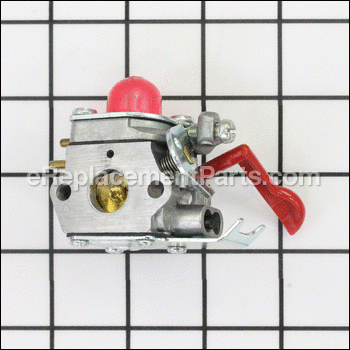
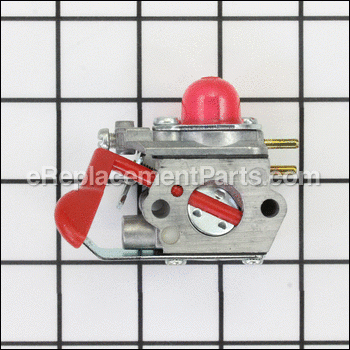
This is a manufacturer approved replacement part used on gas trimmers. The purpose of this part is to mix air and gas before the fuel mix goes to the engine.
If the engine won\\\'t start and the tank is full of fresh fuel, test the carburetor by removing the air filter and pouring about a teaspoon of fuel into the carburetor. Pull the starter rope. If the engine starts and then quickly dies, the carburetor is likely the problem.
This assembly includes a metal body carburetor, rubber o-ring and a plastic lever. When replacing carburetor it is advised that you also replace carburetor gaskets to ensure proper air tight seal for optimum performance. You will need a screwdriver to perform this repair.
Carburetor Assembly 530071822
OEM part for: Poulan, Weed Eater, Craftsman, Husqvarna
Part Number: 530071822
Jump To:
Product Description ?
- Classification: Part
- Weight: 0.23 lbs.
- Shipping: Ships Worldwide
Frequently Purchased Together ?
Compatibility
This part will fit the following 53 machines
Weed Eater
Craftsman
Husqvarna
Poulan
This item works with the following types of products:
- Trimmer Parts
This part replaces obsolete part #: 545081807 ((Note: Repair Kits Are Not Available for This Carburetor)), 545081808, 530071752
Customer Part Reviews ?
- 1
Questions & Answers ?
Our customer Service team is at the ready daily to answer your part and product questions.

Ask our Team
We have a dedicated staff with decades of collective experience in helping customers just like you purchase parts to repair their products.
Does this fit my product?Questions & Answers for Carburetor Assembly
Customer Repair Instructions ?
All our customer repair instructions are solicited directly from other customers just like you who have purchased and replaced this exact part.
SST25 Line Trimmer: Would not start. Prior owner left old fuel in the entire fuel system for several years. Entire fuel system was gummed and would not start.
Tool Type
Trimmer
Difficulty
Easy
Time
15-30 minutes
Tools Used
Pliers, Allen Key Set, Needle Nose Pliers, Star Screwdriver Set
1. First I drained and disposed of all the old fuel.
2. Then I removed the fuel filter from the intake hose in the fuel tank with needle nose pliers. Once the fuel filter was removed then I remove the return line fuel assembly pickup (fancy name for little plastic insert) with needle nose pliers.
3. After both the fuel filter and fuel assembly pickup was remove then I removed the gas tank carefully, thus not to tear the fuel lines. The fuel tank is held on with two star screws so you would need the proper star screw driver or ratchet attachment.
4. Next I removed the hoses from the carburetor also careful not to tear the fuel lines. The reason for such care is because I used the old hoses to determine the size of the new hoses. Now for the carburetor.
5. I removed the air filter and air filter cover there are two Allen screws that hold on the carburetor. Using a the proper Allen key I remove both screws. Be careful not to tear any gaskets when removing. Also the throttle cable to attached to the carburetor it is easy to remove just angle the L properly and it slides right out.
Now that the carburetor is removed assess the situation. In my case I took the carburetor apart to see if I could clean it before I ordered a new carburetor but this was beyond cleaning. If you have never taken a carburetor apart proceed with caution and read a different repair guide.
Most of the parts where rusted and gummed and for 25 bucks I simple decided to order a new one. Also since I had the fuel take off I cleaned it and ordered new hoses, fuel filter, and a new fuel tank cap. I only ordered a new cap because the other one was cracked.
6. Once the parts arrived I began by cutting the new fuel hoses. I used the old hoses to determine the size. NOTE: Cut the new pieces a little longer than the old ones because the hardest part of the project is putting the new hoses into the fuel tank. And unless you are really good you will tare up the ends a bit and will need to be cut off. Plus you will need to cut the new ones at an angle so you will need to cut that flat as well.
7. After the cut is made, cut the end of the hoses at a sharp angle thus to be able to put the tip of the hose through the holes int he fuel tank. I recommend using a little lube on the outside of the hoses as well just so they slide easier. In my case I used a little 2-cycle oil because I knew it would not contaminate the line or the gas in the fuel tank. Once the hoses where just barely through the hole I grabbed the end of the hoses with needle nose pliers and pulled the desired length. On the intake hose I cut the end flush and attached the new fuel filter then put it back into the fuel tank. Also cut and attached the return line fuel assembly pickup to the return line then pulled it up to the top of the fuel tank.
8. Before I attached the tank I put the new carburetor on the same way I took it off making sure to attach the throttle cable as I went. When the screws where in line I tightened them down snug. Do not over tighten.
9. Now I attached fuel tank in same manner not to over tighten the screws.
10. Finally I attached the fuel lines to the carburetor filled the fuel tank with good 2 cycle and closes the fuel tank with my new fuel cap. Attached the air filter and air filter cover and we where good to go.
Primed the carburetor, put it full choke, cranked a could of times went into half choke. It fired right up, went to no choke and gave it full throttle and she purred like a kitten. Okay it is a line trimmer she roared like a lion but either way it is working great.
Carburater wouldn't draw gasoline from the tank, I think that the diaphram had a pinhole, so the vacuum wouldn't open the valve for the gasoline
Tool Type
Trimmer
Difficulty
Easy
Time
Less than 15 minutes
Tools Used
Screwdriver, None
Parts Used
Replace carburetor
Tool Type
Trimmer
Difficulty
Easy
Time
30-60 minutes
Tools Used
Screwdriver
Parts Used
Wouldn't idle and starter spring broke.
Tool Type
Trimmer
Difficulty
Easy
Time
15-30 minutes
Tools Used
, Torx and Allen sockets
Running rough and would not idle down
Tool Type
Trimmer
Difficulty
Easy
Time
Less than 15 minutes
Tools Used
, Allen wrench
Parts Used
2. Replaced with "new" carburetor
3. Fired up trimmer, now runs like new
Trimmer would not run, bad carburetor
Tool Type
Trimmer
Difficulty
Easy
Time
Less than 15 minutes
Tools Used
, Torx head driver
Parts Used
Fouled carburetor
Tool Type
Trimmer
Difficulty
Easy
Time
15-30 minutes
Tools Used
, Allen wrench
Parts Used
Hard to start. Will not stay running.
Tool Type
Trimmer
Difficulty
Easy
Time
Less than 15 minutes
Tools Used
, Allen wrench
Parts Used
2. Remove air cleaner
3. Un bolt carb with allen wrench
4 Remove air cleaner housing
5. Put gasket on new carb using light coating of RTV or a new gasket
6. Bolt new carb with air cleaner housing onto trimmer
7. Replace air cleaner
8. Start trimmer
Engine starts, than stalls
Tool Type
Trimmer
Difficulty
Easy
Time
15-30 minutes
Tools Used
Screwdriver
Removed gas lines from carb and drained old gas from tank
Removed carb from studs, being careful to remove gaskets for reuse
Installed new carb being careful to install gaskets. Hoses and linkage as removed
Reinstalled air filter housing and new filter
Line trimmer would not start
Tool Type
Trimmer
Difficulty
Medium
Time
30-60 minutes
Tools Used
Screwdriver, Pliers, Wrench Set
Removed the carburetor
Installed the new carburetor.
OEM stands for Original Equipment Manufacturer and means the part you’re buying is sourced directly from the manufacturer who made your product. At eReplacementParts, we sell only genuine OEM parts, guaranteeing the part you’re purchasing is of better design and of higher quality than aftermarket parts.
Our product descriptions are a combination of data sourced directly from the manufacturers who made your product as well as content researched and curated by our content & customer service teams. This content is edited and reviewed internally before being made public to customers.
Our customer service team are at the ready daily to answer your part and product questions. We have a dedicated staff with decades of collective experience in helping customers just like you purchase parts to repair their products.
All our part reviews are solicited directly from other customers who have purchased this exact part. While we moderate these reviews for profanity, offensive language or personally identifiable information, these reviews are posted exactly as submitted and no alterations are made by our team.
All our customer repair instructions are solicited directly from other customers just like you who have purchased and replaced this exact part. While we moderate these reviews for profanity, offensive language or personally identifiable information, these reviews are posted exactly as submitted and no alterations are made by our team.
Based on data from past customer purchasing behaviors, these parts are most commonly purchased together along with the part you are viewing. These parts may be necessary or helpful to replace to complete your current repair.
All our installation videos are created and produced in collaboration with our in-house repair technician, Mark Sodja, who has helped millions of eReplacementParts customers over the last 13 years repair their products. Mark has years of experience in selling and repairing both commercial and residential products with a specialty in gas-powered equipment.
This data is collected from customers who submitted a repair instruction after replacing this exact part. Customers can rate how easy the repair was to complete and how long it took. We aggregate this data to provide a repair rating that allows customers to quickly determine the difficulty and time needed to perform their own repair.

