The Skinny on CrossFit
If you find going to a new gym nerve-wracking, joining a CrossFit gym might be downright terrifying. Walking into the warehouse-like gym and seeing people flipping tires while loud music pumps out of the stereo system and primal grunts and screams reverberate off the walls can be intimidating. Just take a deep breath, slip on your sneakers, grab your water bottle, and get ready to change your life completely.
Created by Gary Glassman, CrossFit is a high-intensity strength and conditioning program. It uses functional movements and varied workouts to help people lose weight, build muscle, and live healthier lives. While every CrossFit trainer is certified and able to adapt workouts to your needs, it is important that you consult your physician about any pre-existing conditions before beginning a new workout regime.
If you are nervous about going to your first CrossFit class, you can rest easy knowing it probably will not be very intense. Before you can participate in the daily workouts, you need to complete the Foundation Training. This is where you will learn the proper form and technique for the nine fundamental movements. Once you feel comfortable with these movements you can join the masses.
You first week at a Crossfit gym (typically called a “Box”) will be like your first week at a new school. There will be new friends to make, lots of questions to ask, and new skills to learn. You won’t be doing advanced moves in the beginning but you will still be working hard and will find yourself sore and tired by the end of the week.
Each class consists of a 15-minute warm-up, followed by 15 minutes of skill work. This is a great opportunity to improve on a move you are struggling with, or tackle an exercise you are nervous about in the Workout of the Day (WOD). After the skill work segment, you will move on to the WOD. The amount of time to complete a workout varies depending on the objective. Sometimes you will be racing against the clock, while other times you will be aiming for a timed personal best. A cool-down will round out your workout.
10 Components of CrossFit
Doing CrossFit is a full mind- and body-engaging experience. There are 10 specific elements of physical fitness you will practice during each workout. Your overall fitness level will be determined based on your competency in all these domains.

Building Blocks of CrossFit
There are nine foundational movements every new CrossFit member must understand and master to ensure they get the most out of their workout and avoid injury. The three basic movements are: Squats, Presses, and Lifts. These movements increase in difficulty from Level 1 to Level 3. Once an athlete is comfortable with the form and technique associated with an exercise, they can progress to the next level.
Squats
The first movement you will learn when you join a CrossFit gym is an air squat. This basic movement is the foundation for the next two levels of squats. Squats are excellent lower-body exercises that engage your hamstrings, glutes, and quadriceps. As you progress through the three levels of squats, you will also begin to engage your upper body and core, making the squat a full-body workout.
Level 1 – Air Squat:
Level 2 – Front Squat:
Level 3 – Overhead Squat:
Presses
Presses are fantastic for targeting and toning your upper body. They will engage your arms, shoulders, back, and, depending on what level you are on, your legs. As with squats, there are three levels of press.
Level 1 – Shoulder Press:
Level 2 – Push Press:
Level 3 – Push Jerk:

Lifts
The three progressive lifts in CrossFit engage your entire body. These full body movements allow you to make the most out of any workout. If you are short on time, incorporate these exercises into your routine to torch calories and burn muscle.
Level 1 – Deadlift:
Level 2 – Sumo Deadlift High Pull:
Level 3 – Medicine Ball Clean:
WOD are you Talking About?
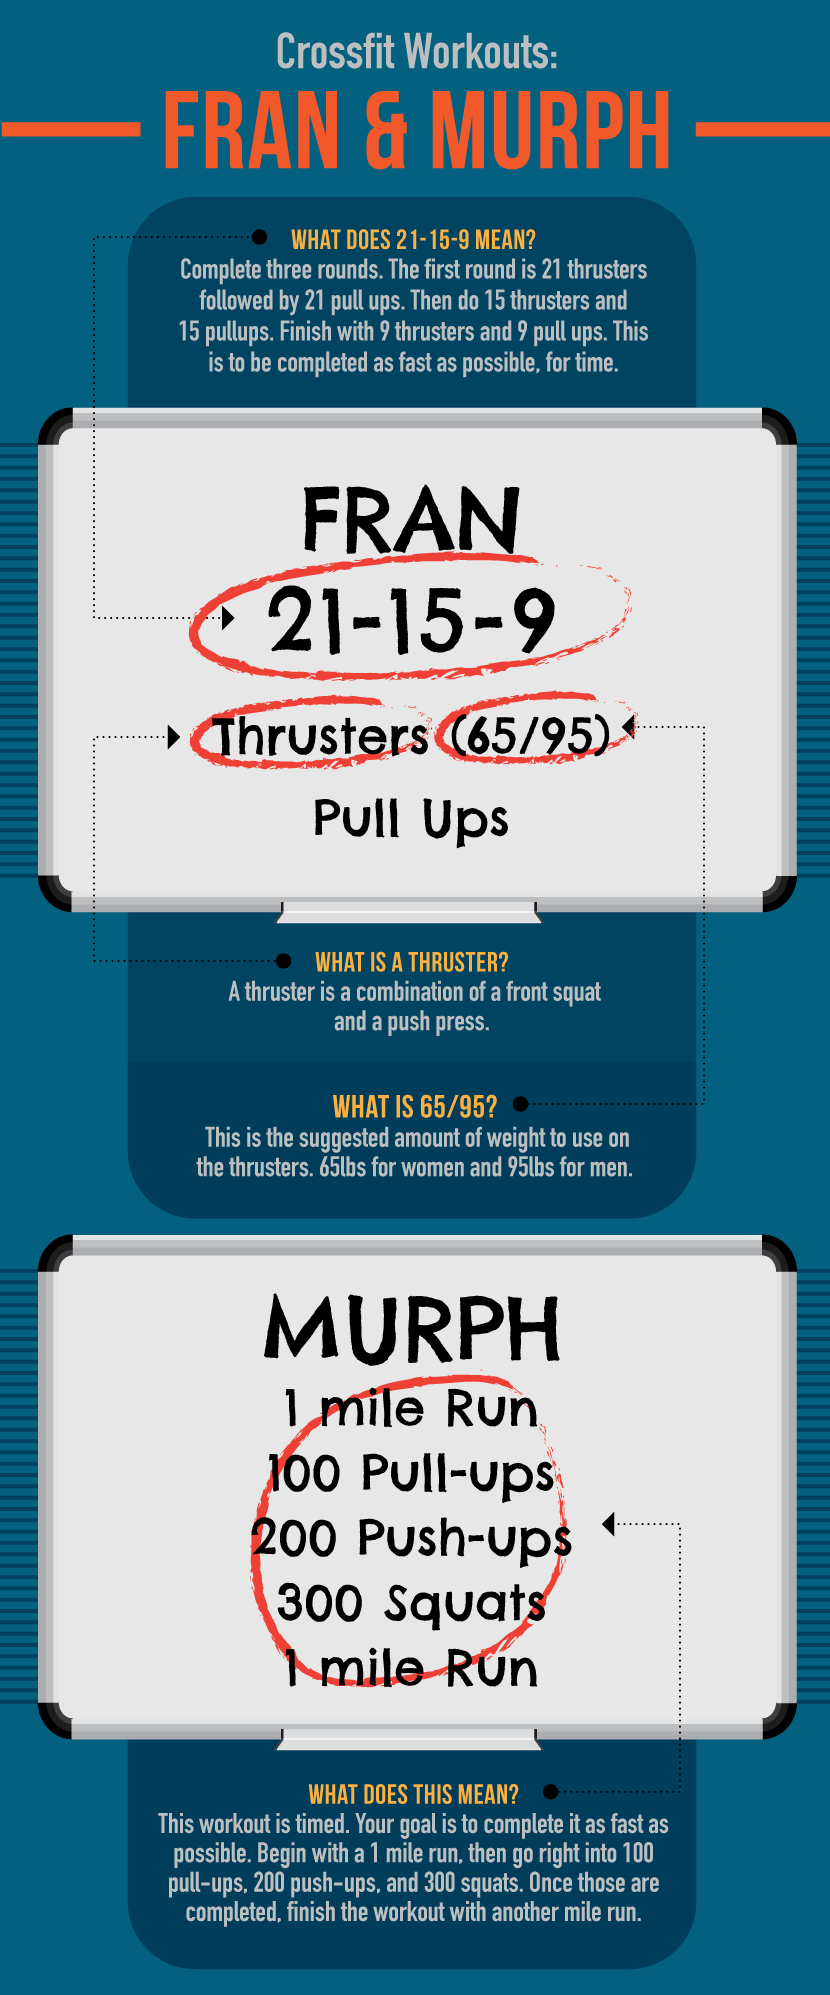
It’s no secret that CrossFit has a lingo of its own. If you’ve ever heard someone talking about CrossFit, you might wonder what language they are speaking and why they hate their friends Josh and Nancy so much. While they might be talking about a person, it is more likely your CrossFit friends are discussing a tough workout they just did. Each WOD is given a name. WODs are usually named after women (in the same way storms are, because they are so intense they leave you feeling like you were hit by a hurricane) or after fallen war heroes. Here are two notorious WODs that people love to trash.
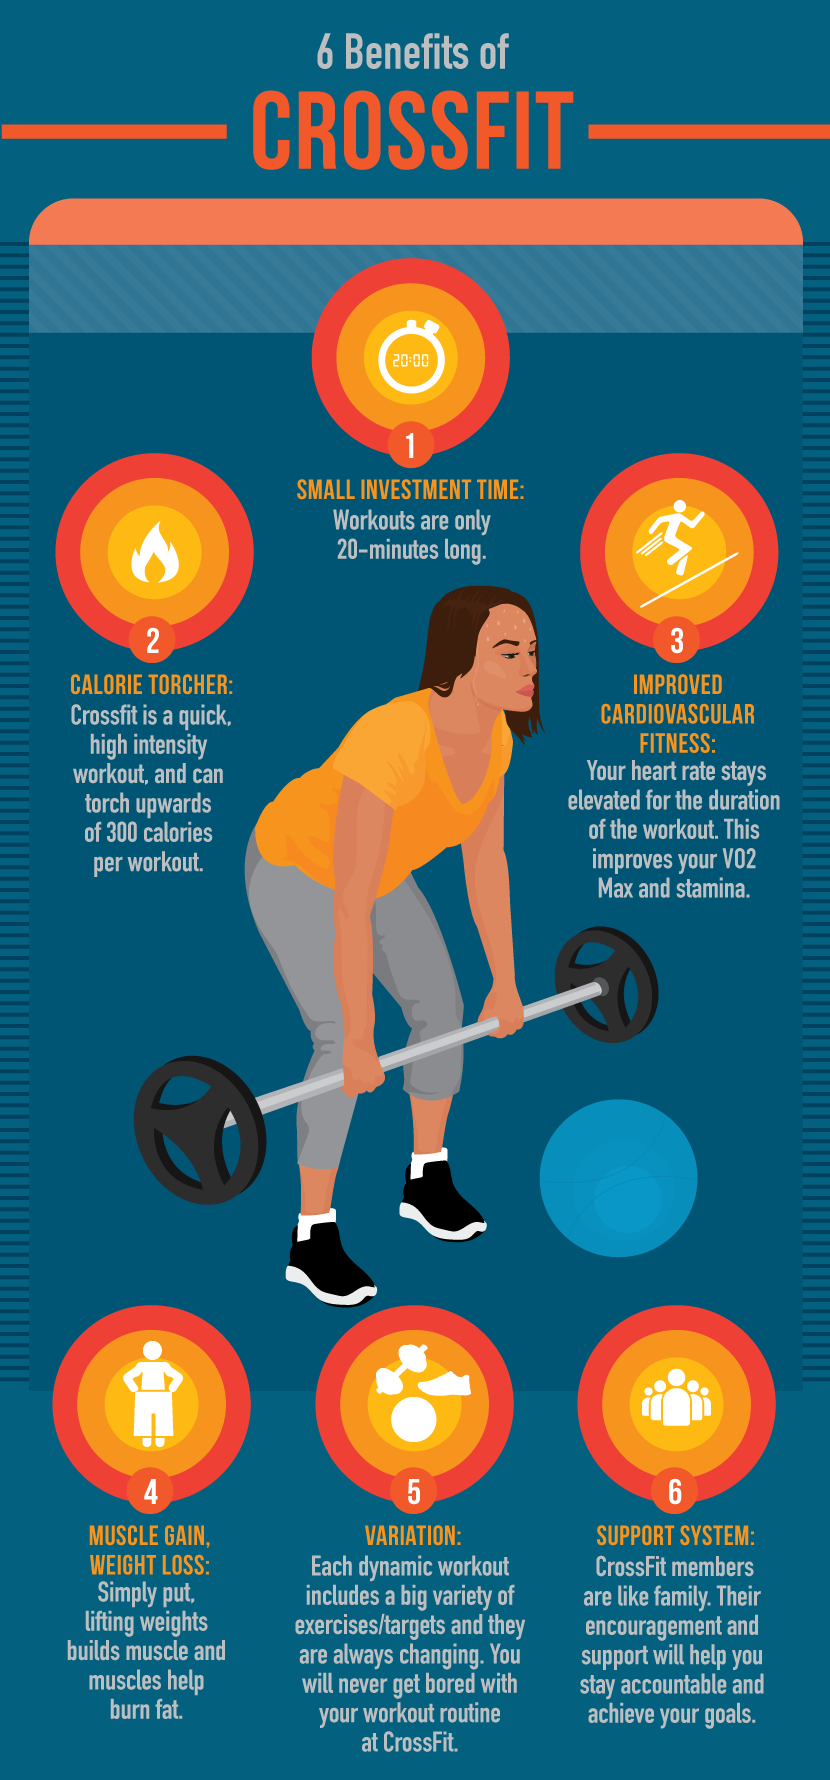
Six Benefits of CrossFit
CrossFit is a tough workout, you can’t deny that. But, if you are willing to take a shot and get your sweat on, you will reap the rewards. Here are just a few of the many benefits CrossFit will have on your health and life.

The best thing to do if you are considering joining a CrossFit gym is to stop by and check one out. They have certified coaches on site who will be more than willing to answer your questions and put your fears to rest. Who knows, you could be the next breakout star at the CrossFit games!
Embed the article on your site


