


Why Read This Article?
Finish Nailer Repair - Replacing the Driver Guide (Ridgid Part # 79004001022)
Article Breakdown
Finish Nailer Repair - Replacing the Driver Guide (Ridgid Part # 79004001022)
Video

Tools & Materials
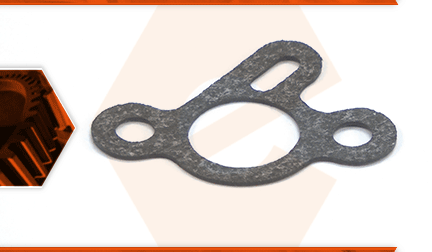
The carburetor gasket forms a seal between the carburetor and the isolator. Over time, gaskets can fail. A bad carburetor gasket can allow dirt into the engine, which will cause wear to the piston and cylinder (leading to a lack of compression). It will also allow extra air into the cylinder, causing a lean fuel mixture. This will also lead to piston and cylinder damage.
Let's get started.
REMOVING THE CARBURETOR GASKET 1. Remove the carburetor gasket.
a. Loosen the thumbscrew and remove the air filter cover.
b. Remove the air filter.
c. Loosen the two bolts securing the air cleaner base (and the carburetor) to the engine.
d. Pull the air cleaner base (and carburetor) away from the engine.
e. Remove the carburetor gasket from the carburetor assembly (or from the isolator).
INSTALLING THE NEW CARBURETOR GASKET
2. Install the new carburetor gasket.
a. Install the new carburetor gasket onto the carburetor (using the screws to hold the gasket in place).
b. Install the air cleaner assembly (including the air cleaner bracket, air cleaner base, carburetor, and new carburetor gasket) onto the engine (using the mounting screws to keep everything aligned).
c. Use a hex wrench to tighten the mounting screws and secure the air cleaner assembly and carburetor to the engine.
REASSEMBLING THE UNIT
3. Reinstall the air filter cover.
a. Install the air filter.
b. Install the air filter cover.
c. Tighten the thumbscrew to secure the air filter cover.
