


Why Read This Article?
Finish Nailer Repair - Replacing the Driver Guide (Ridgid Part # 79004001022)
Article Breakdown
Finish Nailer Repair - Replacing the Driver Guide (Ridgid Part # 79004001022)
Video

Tools & Materials
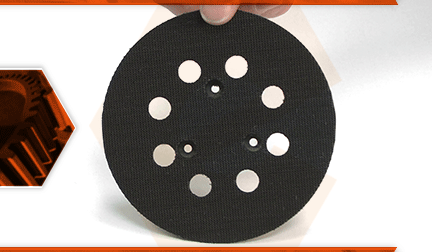
The sanding pad both holds the sandpaper and provides a flat surface for sanding. This pad uses hook and loop paper and has holes to work with dust collection. Over time, the pad will wear out. It will become nicked around the edge if it is struck against something while sanding. The hook and loop surface will wear away and no longer hold paper. The hook and loop will wear away much faster, if pressure is applied to the sander while it is used.
Let's get started.
REMOVING THE SANDING PAD 1. Remove the sanding pad.
a. Remove the three screws securing the sanding pad to the sander.
b. Remove the sanding pad from the sander.
c. Remove the bearing box cover from the sanding pad.
INSTALLING THE NEW SANDING PAD
2. Install the sanding pad.
a. Install the bearing box cover onto the new sanding pad.
b. Install the new sanding pad onto the sander.
c. Secure the sanding pad with the three screws.
