


Why Read This Article?
Finish Nailer Repair - Replacing the Driver Guide (Ridgid Part # 79004001022)
Article Breakdown
Finish Nailer Repair - Replacing the Driver Guide (Ridgid Part # 79004001022)
Video

Tools & Materials
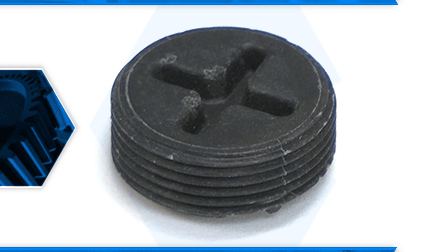
There are two brush caps that secure your saw's motor brushes. The plastic caps thread into the brush holders to hold the brushes in place. Most problems with the brush caps occur when they are being removed or installed. If a cap is overtightened, the slots for the screwdriver can be stripped or cracked. Overtightening can also cause the entire brush cap to crack in half. It is easy to cross-thread the brush cap and damage the threads.
Let's get started.
REMOVING THE BRUSH CAPS 1. Remove the brush caps.
a. Use a large screwdriver to remove the two brush caps (one on each side of the motor).
INSTALLING THE NEW BRUSH CAPS
2. Install the brush caps.
a. Compress the motor brush springs into the brush holders.
b. Align the posts on the back of the new brush caps with the dimples in the center of the brush plates.
c. Thread the brush caps into the brush holder and use a screwdriver to tighten the caps (be careful not to overtighten).
