Why Read This Article?
Finish Nailer Repair - Replacing the Driver Guide (Ridgid Part # 79004001022)
Article Breakdown
Finish Nailer Repair - Replacing the Driver Guide (Ridgid Part # 79004001022)
Tools & Materials

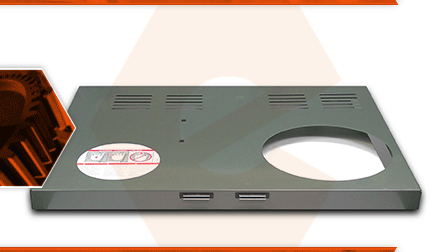
The bottom panel is the bottom shelf in your grill's cabinet. The propane cylinder sits in it and the door catches are attached to it. Most problems with the bottom panel are the result of accidental damage. The panel can also rust after many years in wet climates.
Let's get started.
REMOVING THE BOTTOM PANEL 1. Remove the back panel.
1. Remove the back panel.
a. Remove the (4) bolts securing the back panel.
b. Remove the back panel from the unit.
2. Remove the grease tray.
a. Open the cabinet doors.
b. Remove the aluminum catch pan.
c. Remove the grease tray.
3. Remove the tank blocker.
a. Remove the (2) screws securing the tank blocker to the bottom panel.
b. Remove the (1) screw securing the tank blocker to the side panel.
c. Remove the tank blocker from the unit.
4. Remove the bottom panel.
a. Remove the (4) bolts securing the bottom panel to the side panels. (There are two bolts on each side of the unit.)
b. Remove the bottom panel from the unit.
INSTALLING THE NEW BOTTOM PANEL
5. Install the hardware kit.
a. Install the (6) new retainer clips onto the new bottom panel. The nut on each retainer clip should face the inside of the new bottom panel. The clips themselves should align with the detents above each of the mounting holes.
b. Install the new plastic washers onto the new bolts.
6. Install the bottom panel.
a. Install the new bottom panel onto the frame. Verify that the magnetic door catches are facing the front of the grill.
b. Secure the bottom panel with four of the new bolts and washers (two per side).
REASSEMBLING THE UNIT
7. Reinstall the tank blocker.
a. Install the tank blocker into the cabinet.
b. Secure the tank blocker to the new bottom panel with the (2) screws.
c. Secure the tank blocker to the side panel with the (1) screw.
8. Reinstall the grease trays.
a. Install the grease tray.
b. Install the aluminum catch pan.
9. Reinstall the back panel.
a. Install the back panel.
b. Secure the back panel with the (4) bolts. (The lower bolts are included with the hardware kit).


