


Why Read This Article?
Finish Nailer Repair - Replacing the Driver Guide (Ridgid Part # 79004001022)
Article Breakdown
Finish Nailer Repair - Replacing the Driver Guide (Ridgid Part # 79004001022)
Video

Tools & Materials
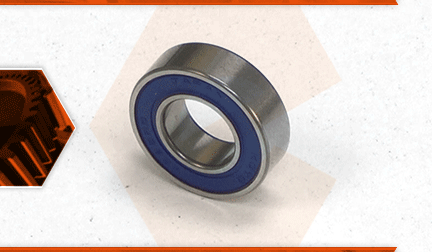
There are two ball bearings in your sander's front roller. Over time, the bearings can wear out. When this occurs, the roller can become difficult to rotate (or even seize). A bearing that is failing will usually give warning, either with a squealing or screeching sound.
Let's get started.
REMOVING THE BALL BEARINGS 1. Remove the abrasive belt.
a. Hold the sander in an upright position (with the roller pulley facing the ceiling).
b. Press the roller pulley toward the rear of the sander to retract the spring.
c. Slide the abrasive belt off the rear pulley.
d. Release tension on the roller pulley.
e. Remove the abrasive belt from the sander.
2. Remove the angle stay.
a. Loosen the wingnut securing the angle stay to the gear housing.
b. Unthread and remove the angle stay from the gear housing.
3. Remove the roller pulley.
a. Use a wrench to loosen (and remove) the nut securing the roller pulley (and the arm) to the angle stay.
b. Remove the (2) washers.
c. Remove the arm from the angle stay.
d. Remove the roller pulley from the angle stay.
e. Remove the roller pulley shaft from the roller pulley.
4. Remove the ball bearings.
a. Examine the (insides) of the roller pulley; identify the end of the pulley containing the brass shelf (the bearings should be pressed against it). The other side of the pulley does not have a shelf. BOTH bearings must be pressed out of the side without the shelf.
b. Position the roller pulley upon the (open) jaws of a bench vise. The jaws should be opened wide enough to allow the bearings to pass through them while still providing foundational support to the roller (for hammering). The brass shelf (inside the pulley) should face away from the vise jaws.
c. Locate a socket that is approximately the same size as the inner race on the bearings.
d. Position the socket against the inner race of the top bearing.
e. Use a hammer to tap the socket until both bearings (along with the spacer) are expelled from the pulley.
INSTALLING THE NEW BALL BEARINGS
5. Install the bearings.
a. Position the roller upon the closed jaws of a bench vise (or an anvil). The brass shelf (inside the roller) should face the vise.
b. Install the first new bearing into the roller.
c. Install the spacer into the roller and use a hammer to tap the spacer until it is flush with the pulley. d. Position the second new bearing on top of the spacer.
e. Locate a socket that is the same size as the OUTER race of the bearing. Hint: the spacer is exactly the right size for this application. For this reason, you may want to consider ordering a spacer specifically for this purpose.
f. Position the socket (or extra spacer) against the outer race of the bearing.
g. Tap the socket (or spacer) with a hammer until the three components the two new bearings and the spacer stop moving within the roller.
h. Remove the socket (or extra spacer) from the assembly.
REASSEMBLING THE UNIT
6. Reassemble the angle stay.
a. Install the roller pulley onto the pulley shaft. (The head of the shaft should be on side of the roller that has the shelf.)
b. Install the angle stay onto the pulley shaft.
c. Install the arm onto the pulley shaft.
d. Install the two washers.
e. Secure the assembly with the nut. (The washers should align with the shoulder of the nut.)
7. Reinstall the angle stay.
a. Install the angle stay assembly onto the gear housing.
b. Secure the angle stay with the wingnut.
8. Reinstall the abrasive belt.
a. Loop one end of the abrasive belt around the rear pulley.
b. Press the roller pulley toward the rear pulley to retract the spring.
c. Loop the other end of the abrasive belt around the roller pulley.
