Why Read This Article?
Finish Nailer Repair - Replacing the Driver Guide (Ridgid Part # 79004001022)
Article Breakdown
Finish Nailer Repair - Replacing the Driver Guide (Ridgid Part # 79004001022)
Tools & Materials

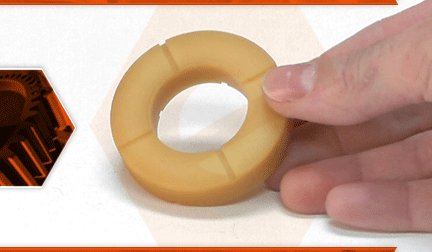
The bumper in your flooring stapler is a cushion that gives the piston something soft to stop against at the bottom of the cylinder. The bumper is made of a hard (but flexible) plastic. Over time, the bumper will weaken and begin to deteriorate and crumble. This will eventually lead to a reduced pushing effect and potential piston damage.
Let's get started.
REMOVING THE BUMPER 1. Remove the shoe.
a. Use a screwdriver to remove the four screws securing the shoe to the stapler.
b. Remove the shoe.
c. Remove the magazine and the nose-piece (as a single assembly).
2. Remove the bumper.
a. Use a pick to pry the bumper out of the housing.
INSTALLING THE NEW BUMPER
3. Install the bumper.
a. There are two different bumpers used on these staplers (depending on the age). The newer staplers use a thicker bumper, and the older staplers use a thinner bumper. The older stapler also has a metal spacer that installs with the bumper. Installation is the same for either bumper style.
b. Place the new bumper into the cylinder.
c. Use a rubber mullet to tap the new bumper into place until it is flush with the cylinder.
d. Note: for older staplers, install the metal spacer over the new bumper.
REASSEMBLING THE UNIT
4. Reassemble the external components.
a. Note: the "T" shape of the driver should fit into the "T" shape of the nose-piece. Rotate the driver around so it is at the front of the stapler. Attach the nose-piece to the stapler while aligning the "T" shapes.
b. Slide the shoe over the nose-piece and magazine assembly.
c. Apply thread sealant to the screws.
d. Secure the shoe assembly with the four screws.


