


Why Read This Article?
Finish Nailer Repair - Replacing the Driver Guide (Ridgid Part # 79004001022)
Article Breakdown
Finish Nailer Repair - Replacing the Driver Guide (Ridgid Part # 79004001022)
Video
Tools & Materials

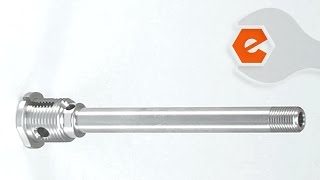
Are parts rattling around inside your flooring stapler? Does it fire, but the piston doesn't drive the staple? If so, you might need a new piston stem. The piston stem attaches the driver to the piston. It also connects to the poppet, which guides the piston stem. The most common issues with the piston stem are failure of the aluminum (around the pin that secures the driver), and failure of the threads that attach the piston stem to the piston.
Let's get started.
REMOVING THE PISTON STEM 1. Disassemble the external components.
a. Use a screwdriver to pry away the bumper from the top of the stapler.
b. Use a screwdriver to remove the four screws securing the top cap on the stapler.
c. Remove the top cap.
d. Use a screwdriver to remove the four screws securing the shoe to the stapler.
e. Remove the shoe.
f. Remove the magazine and the nose-piece (as a single assembly).
2. Disassemble the internal components.
a. Place a small screwdriver into one of the vent holes on the actuator. This will prevent it from turning while you remove the screws that secure the actuator.
b. Using a screwdriver, remove three screws that secure the actuator.
c. Pull the actuator from the top of the stapler.
d. Pull the driver and other components out of the bottom of the stapler.
e. There is a seal (that goes between the actuator and the poppet) that tends to stay inside the stapler when you remove everything else. Insert a screwdriver through the top of the housing and push the seal out through the bottom of the stapler.
3. Disassemble the driver and piston assembly.
a. Clamp the driver assembly in a vise.
b. Use a wrench to remove the cap.
c. Pull the poppet away from the piston stem.
d. Invert the assembly in the vise. (Clamp the piston on the piston skirts.)
e. Use a wrench to unscrew the piston stem assembly.
f. Remove the piston stem assembly.
4. Remove the piston stem.
a. Use a small screwdriver to extricate the pin securing the driver to the piston stem.
INSTALLING THE NEW PISTON STEM
5. Install the piston stem.
a. Slide the driver into the new piston stem.
b. Align the two holes.
c. Secure the components with the pin. (You may need to use a hammer and a punch to finish installing the pin. When installed completely, the pin should be below the bottoms of the threads on both sides.)
REASSEMBLING THE UNIT
6. Reassemble the driver and piston assembly.
a. Secure the piston (head) in the vise.
b. Screw the piston stem (and the driver assembly) into the piston.
c. Use an adjustable wrench to firmly tighten the assembly.
d. Invert the piston assembly in the vise.
e. Install the poppet over the piston stem.
f. Secure the poppet with the cap. (Use an adjustable wrench to firmly tighten the cap.)
7. Reassemble the internal components.
a. Slide the driver and piston assembly into the bottom of the stapler.
b. Attach the seal on top of the stapler (where the actuator connects).
c. Align the screw holes.
d. Install the actuator.
e. Secure the actuator with the three screws. (Place a small screwdriver into one of the vent holes to prevent the actuator from turning.)
8. Reassemble the external components.
a. Reinstall the top cap.
b. Apply thread sealant to the screws.
c. Secure the top cap with the four screws.
d. Set the bumper upside-down on the table.
e. Press the stapler onto the bumper to secure it.
f. Note: the "T" shape of the driver should fit into the "T" shape of the nose-piece. Rotate the driver around so it is at the front of the stapler. Attach the nose-piece to the stapler while aligning the "T" shapes.
g. Slide the shoe over the nose-piece and the magazine assembly.
h. Apply thread sealant to the screws.
i. Secure the shoe assembly with the four screws.
