Why Read This Article?
Finish Nailer Repair - Replacing the Driver Guide (Ridgid Part # 79004001022)
Article Breakdown
Finish Nailer Repair - Replacing the Driver Guide (Ridgid Part # 79004001022)
Tools & Materials

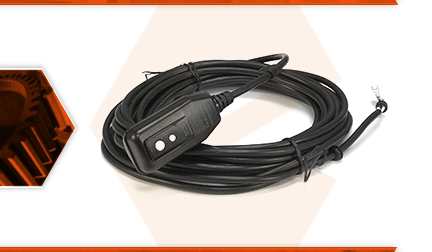
Pressure washer won't turn on? You may need to replace the electrical cord. The electrical cord assembly consists of a long wire cord with a GFCI-protected plug. The GFCI provides shock protection (because your pressure washer uses electricity and water together). The GFCI will shut off the power to your pressure washer (in a fraction of a second) if a short-circuit is detected. It is critical that you replace the cord on your pressure washer only with the correct GFCI-protected electrical cord. Common problems with the electrical cord are cracked or damaged insulation, which can lead to bare wires. Internal wire damage or failure of the GFCI protection device can also warrant replacing the cord.
Let's get started.
REMOVING THE ELECTRICAL CORD 1. Remove the soap tank.
a. Remove the soap dispensing hose from the pump.
b. Remove the nuts and bolts securing the soap tank to the frame.
c. Remove the soap tank from the frame.
2. Remove the top motor housing.
a. Remove the screws around the entire perimeter of the housing.
b. Lift the housing away from the unit.
3. Disconnect the electrical cord.
a. Remove the four screws securing the switch cover plate to the underside of the housing.
b. Lift the switch cover plate away from the housing.
c. Use long-nosed pliers to disconnect the BLACK wire from the bottom of the switch terminal.
d. Use long-nosed pliers to disconnect the WHITE wire from the bottom of switch terminal.
e. Remove the cord wires from the switch cover plate.
4. Remove the electrical cord
a. Remove the two screws securing the cord clamp.
b. Remove the cord clamp from the electrical cord
c. Pull the electrical cord through the rubber grommet and away from the housing.
d. Remove the rubber grommet from the housing.
INSTALLING THE NEW ELECTRICAL CORD
5. Install the electrical cord.
a. Remove the SWITCH PLATE grommet from the new cord assembly.
b. Using the old cord as a reference, position (slide) the lower HOUSING grommet (onto the new cord) the same distance (from the wire terminals) as the original.
c. Feed the new cord wires (terminal-ends first) through the opening in the housing.
d. Pull the cord wires into the housing until the rubber grommet reaches the outside of the housing.
e. Install the rubber grommet on the housing.
f. Install the cord clamp.
g. Secure the cord clamp with the two screws.
6. Connect the wires.
a. Install the switch plate grommet onto the cord wires and slide the grommet over the insulation.
b. Feed the cord wires through the opening on the switch plate.
c. Install the switch plate grommet.
d. Thread the cord wires through the switch plate gasket.
e. Connect the BLACK wire to the terminal beneath the black wire that is still connected to the on/off switch.
f. Connect the WHITE wire to the terminal beneath the white wire that is still connected to the on/off switch.
REASSEMBLING THE UNIT
7. Reinstall the switch cover plate.
a. Partially install the four screws into the switch cover plate (until the tips of the screws are accessible from the bottom of the plate).
b. Align the cover plate gasket with the exposed screws on the bottom of the plate. (Use the screw tips to keep the gasket aligned.)
c. Tuck the wires into the switch box. d. Install the cover plate.
e. Secure the cover plate with the screws.
8. Reinstall the top motor housing.
a. Install the top motor housing.
b. Secure the top motor housing with the screws.
9. Reinstall the soap tank.
a. Install the soap tank. (The tabs on the soap tank should sit beneath the metal frame rails.)
b. Secure the soap tank with the bolts, washers, and locknuts.
c. Connect the soap delivery hose to the pump.


