Why Read This Article?
Finish Nailer Repair - Replacing the Driver Guide (Ridgid Part # 79004001022)
Article Breakdown
Finish Nailer Repair - Replacing the Driver Guide (Ridgid Part # 79004001022)
Tools & Materials

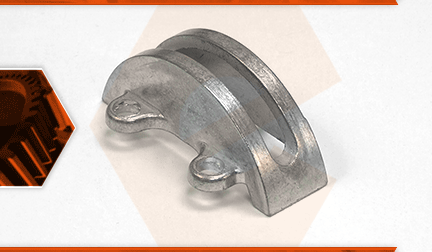
There are two trunnions attached to the underside of your band saw's table. The trunnions attach the table to the saw and allow the table to pivot to make bevel cuts. The trunnions are made of cast aluminum. They have holes (so that they can be mounted to the table), and a slot that attaches the trunnions to the trunnion bracket (allowing the table to pivot). Trunnions can become cracked from extensive use, accidental damage, or over-tightening the lock knobs. If damage occurs to a trunnion, it will need to be replaced.
Let's get started.
REMOVING THE TRUNNION(S) 1. Remove the table.
a. Remove the table alignment pin.
b. Remove the table insert.
c. Remove the lock nuts. (Be sure the table is supported.)
d. Lift the table away from the trunnion bracket (while guiding the blade through the slot in the table).
2. Remove the trunnion.
a. Remove the three bolts securing the trunnion to the table.
b. If you are replacing the front trunnion, note that the new trunnion does not include the bevel angle scale.
INSTALLING THE NEW TRUNNION(S)
3. Install the trunnion.
a. Insert the bolt and lock bracket through the slot in the center of the new trunnion.
b. Install the trunnion (and lock bracket) onto the table and align the mounting holes.
c. Secure the trunnion to the table with the three bolts.
REASSEMBLING THE UNIT
4. Reinstall the table.
a. Guide the blade through the slot in the table, and pivot the table so the trunnions align with the trunnion bracket.
b. Align the bolts on the trunnion with the trunnion bracket.
c. Secure the table with the lock knobs.
5. Align the table.
a. Loosen the table (lock knobs) slightly.
b. Use a square to align the table (to precisely 90-degrees to the blade).
c. Once the correct angle is met, secure the table by tightening the lock knobs.
d. Rotate the stop bolt until it touches the top of the table.
e. Tighten the lock nut.
f. Install the table insert.
g. Install the table adjustment pin.


