


Why Read This Article?
Finish Nailer Repair - Replacing the Driver Guide (Ridgid Part # 79004001022)
Article Breakdown
Finish Nailer Repair - Replacing the Driver Guide (Ridgid Part # 79004001022)
Video

Tools & Materials
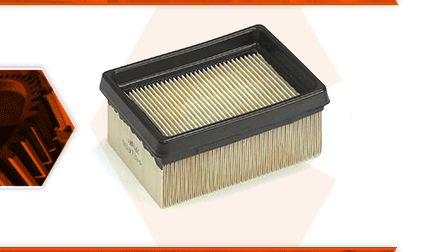
The air filter removes dirt, dust and debris before they can enter the engine through the air intake. Dirt and other contaminants can easily clog the carburetor's small fuel passages, causing poor engine performance. It can even prevent the engine from starting at all. If dirt gets into the engine, it can cause serious damage to the cylinder or piston, and can result in a loss of compression.
The air filter should be checked often, and replaced at least once a year (or more, depending on how much the saw is used). Replacing the air filter is a good way to keep the saw running well, and a way to prevent costly damage to the saw's engine.
Let's get started.
REMOVING THE AIR FILTER 1. Remove the top cover.
a. Loosen the thumbscrew on the top of the cover.
b. Remove the top cover (along with the pre-filter) from the saw.
2. Remove the filter cover.
a. Remove the screws securing the filter cover to the motor housing.
b. Lift the filter cover away from the saw.
3. Remove the air filter.
a. Remove the air filter (and the mesh inner filter) from the air cleaner assembly.
INSTALLING THE NEW AIR FILTER
4. Install the air filter.
a. Place the mesh inner-filter into the new air filter and install the assembly onto the air cleaner base. (Make sure the air filter assembly seals evenly along all sides.)
REASSEMBLING THE UNIT
5. Reinstall the filter cover.
a. Reinstall the filter cover.
b. Secure the filter cover with the screws.
6. Reinstall the top cover.
a. Install the top cover (along with the pre-filter).
b. Secure the top cover with the thumbscrew.
