


Why Read This Article?
Finish Nailer Repair - Replacing the Driver Guide (Ridgid Part # 79004001022)
Article Breakdown
Finish Nailer Repair - Replacing the Driver Guide (Ridgid Part # 79004001022)
Video

Tools & Materials

Running out of patience with a run-down router? It's time to face the fix. Whether you are a master carpenter or a weekend woodworker, eReplacementParts.com provides the parts, procedures and facts you need to fearlessly fix what fails you.
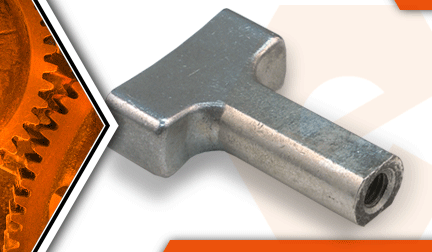
The clamp knob is a specialty wing nut designed to secure the base assembly on a Porter Cable router. It works in combination with the clamp screw and washer. Situations that might necessitate replacing the knob would be a broken bolt (that remains stuck inside the knob), or stripped threads within the knob itself.
You may also decide to replace a clamp knob that has lost its luster, as well as a knob that has been lost altogether. This article provides step-by-step instructions for removing and installing the clamp knob on a Porter Cable 690 series router.
Let's get started.
 REMOVING THE CLAMP KNOB [top]
1. Remove the clamp knob.
REMOVING THE CLAMP KNOB [top]
1. Remove the clamp knob.
Rotate the clamp knob in a counterclockwise direction to loosen the clamp.
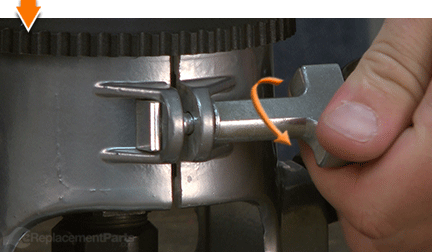
Continue rotating the clamp knob (counterclockwise) until it disengages the screw.
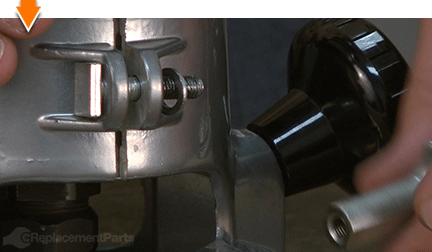
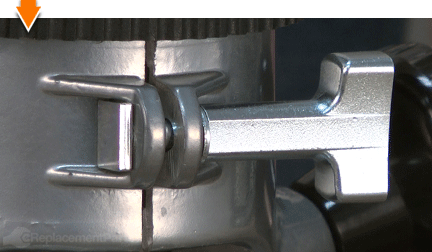
INSTALLING THE NEW CLAMP KNOB [top] 2. Install the new clamp knob.
Thread the new clamp knob onto the clamp screw.

Continue rotating the clamp knob (clockwise) to tighten the clamp and secure the base assembly.

Dovetails. Rabbets. Dados. Grooves: The possibilities are as priceless as machines that create them. But you don't have to be a carpenter to cut out the middle-man. Repairing your own powered equipment is easy and economical when you follow our step-by-step guides. Not only did you restore your router at a fraction of the cost of replacement; you built on your ability to face the next fix, whatever it may be.
