Power Cord 330072-98 - OEM DeWALT - eReplacementParts.com
eReplacementParts.com
877-346-4814
Black and Decker Parts

Power Cord 330072-98

OEM part for: DeWALT, Black and Decker, Porter Cable, Bostitch

Part Number: 330072-98


Install
Videos!
Grid squares measure 1x1 inch
Power Cord - 330072-98:DeWALTPower Cord - 330072-98:DeWALT
In Stock
Ships within 1 business day
Easy 15-30 minutes (80 rated repairs)?
OEM: Original Equipment Manufacturer ?
DeWALTBlack and DeckerPorter CableBostitch
Does this fit my product?

Product Description ?

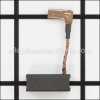
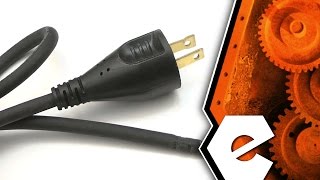
This cord is a genuine DeWalt replacement part. This cord is compatible with the list of models below. This part is made for double insulated tools It is a two wire cord with two prongs and does not need a ground wire. The cord is sold individually. Installation of this part requires the new cord wires to go correctly into wire terminals also routing the cord and wires in the right path can help avoid pinching when the tool case (Plate) is put back into place.

  • Length: 8'
  • Gauge: 18
  • Wires: 2
  • Type: Bare Wire
  • Classification: Part
  • Weight: 0.45 lbs.
  • Also Known As: AC Cord, Power Supply Cord, Cord Set, Electric Cord
  • Shipping: Ships Worldwide

Compatibility

This Power Cord will fit the following 543 machines. Confirm this part works with your model, and view the detailed model diagrams and repair help we have to offer.

Black and Decker

Porter Cable

DeWALT

Bostitch

Show More Compatible Models
Don't see yours? Try searching our site for :

This item works with the following types of products:

  • Drill Parts
  • Electric Drill Parts
  • Laminate Trimmer Parts
  • Plate Joiner Parts
  • Sander Parts
  • Grinder Parts
  • Hammer Drill Parts
  • Screwdriver Parts
  • Jig saw Parts
  • Saw Parts
  • Shear Parts
  • Router Parts
  • Jointer Parts
  • Reciprocating Saw Parts
  • Chop Saw Parts
  • Nibbler Parts
  • Polisher Parts

This part replaces obsolete part #: 325090-11, N133089

Repair Videos ?

Watch the Repair Video for Power Cord
Articles:
Power cord cracked? Learn to remove and install the power cord on your Porter Cable sander with these simple instruction...
October 06, 2015
Step-by-step instructions for removing and installing the power cord on your DeWALT shear....
April 09, 2018

Customer Part Reviews ?

4.8
Average Rating (out of 5):
71 Reviews
Click to filter by ratings:
5 stars
62
4 stars
5
3 stars
1
2 stars
2
1 stars
1
  • Highest Rating
  • Most Recent
< PREV
  • 1
  • 2
  • 3
NEXT >
  • Easy to order
    Easy to order, received the right parts on time, good follow-up. Will use them again when needed.
    Guest - 2 days ago Verified Purchase
    Easy repair
    The product came fast. The only thing that I had to supply was the splice connectors, which I had.
    Guest - March 1, 2024 Verified Purchase
    I recommed ordering from these folks.
    Received the part I need--correct part and in a reasonable amount of time at a descent part and nice service. Thank you
    Guest - December 2, 2023 Verified Purchase
    Just what I needed
    This item arrived very quickly so I was able to get my drill back into service. It is also very durable in it's appearance.
    Lee - September 28, 2023 Verified Purchase
    Power cord
    This was one of the best repairs yet. Very simple with the right parts! Thanks
    John - September 12, 2023 Verified Purchase
    Perfect - Parts
    Exactly what I needed. The website parts and diagram with part number list, perfect!
    David - September 2, 2023 Verified Purchase
    Cord replacement on Dewalt grinders.
    Appreciate the quick response time.
    Guest - August 23, 2023 Verified Purchase
    Exact replacement part
    My much used 4 1/2 inch DeWalt grinders needed new service cords. eReplacement parts had the exact cords at a great price and quickly available. Thanks again for super service.
    Steven - July 17, 2023 Verified Purchase
    Perfect fit and quality parts
    It’s just a power cord but it’s exactly what is needed as a replacement part. I’ve purchased mans parts from Ereplacement parts and I’m very happy with the availability plus fast shipping of parts I need to repair my equipment. Don’t throw away your worn out tools, repair them and save money.
    Robert - June 3, 2023 Verified Purchase
    Replacement was easy and tool worked as it should.
    New cord for a router. Easy replacement and happy
    Guest - June 1, 2023 Verified Purchase

    Questions & Answers ?

    Our customer Service team is at the ready daily to answer your part and product questions.

    photo of team member
    Ask our Team

    We have a dedicated staff with decades of collective experience in helping customers just like you purchase parts to repair their products.

    Does this fit my product?

    Questions & Answers for Power Cord


    Where do I get this replacement power cord for my jumpstart
    william for model number PPRH5B asked on 2023-03-28
    Hello William, Thank you for your inquiry. This part number is available on our website and if you need help placing an order, please do not hesitate to give us a call. We look forward to hearing from you.
    eReplacementParts Team March 28, 2023

    Customer Repair Instructions ?

    All our customer repair instructions are solicited directly from other customers just like you who have purchased and replaced this exact part.

    Easy 15-30 minutes (80 rated repairs)?

    Frayed cord

    Don - May 14, 2016
    👍 21 of 25 people found this instruction helpful
    Tool Type

    Electric Drill

    Difficulty

    Easy

    Time

    Less than 15 minutes

    Tools Used

    Screwdriver, wire stripper

    Remove one half of the housing. Disconnect the cord wires from the switch, slide the cord protector off of the old cord and slide it onto the new cord. Connect the new cord wires to the switch and assemble the housing..
    Did you find this story helpful?
    Thanks for voting and helping fellow customers!

    Cracked cord

    hoscar - January 10, 2016
    👍 8 of 9 people found this instruction helpful
    Tool Type

    Sander

    Difficulty

    Easy

    Time

    Less than 15 minutes

    Tools Used

    Screwdriver

    Remove the screws that hold the top cap on. Remove cap. Note where the cord leads are. Remove the cord leads from the tool. Slide off cord relief and place on the new cord. Trim the coed leads to the correct length. Attach the new cord leads. assemble sander.
    Did you find this story helpful?
    Thanks for voting and helping fellow customers!

    Bad power cord

    Byron - August 30, 2018
    👍 3 of 3 people found this instruction helpful
    Tool Type

    Grinder

    Difficulty

    Easy

    Time

    15-30 minutes

    Tools Used

    Screwdriver, Pliers

    Took a part grinder to cut wires to the connector. Pride open crimped connector to disconnect the wiring. Place new wire in then crimped and wrapped electrical tape. Slide the connector in place and assembled grinder. Nice new and longer cord, works and runs prefect.
    Did you find this story helpful?
    Thanks for voting and helping fellow customers!

    Power cord was cut

    Michael - September 25, 2016
    👍 4 of 5 people found this instruction helpful
    Tool Type

    Grinder

    Difficulty

    Easy

    Time

    15-30 minutes

    Tools Used

    Screwdriver, Wire strippers, crimper

    1. Remove housing on the grinder.
    2. Remove existing wire connectors and power cord.
    3. Install new connectors to new power cord. Cut wires on new cord to correct length.
    4. Expose about 3/8" in. of copper on each wire and crimp on new connectors.
    5. Install new power cord.
    6. Replace housing.
    Did you find this story helpful?
    Thanks for voting and helping fellow customers!

    Tool shut off when using.

    Mark - February 2, 2016
    👍 2 of 2 people found this instruction helpful
    Tool Type

    Grinder

    Difficulty

    Medium

    Time

    30-60 minutes

    Tools Used

    Screwdriver

    Removed one half of the housing. Removed the cord connections from the switch. Then removed the switch. Take a picture so you can see where all the parts inside are located. You will need to trim the cord wires to the correct length. And i should have ordered the cord terminals. Place the cord protector on the new cord and wire the cord to the new switch. Then assembly in reverse order.
    Did you find this story helpful?
    Thanks for voting and helping fellow customers!

    Power cord was cut

    Michael - October 9, 2018
    👍 2 of 3 people found this instruction helpful
    Tool Type

    Reciprocating Saw

    Difficulty

    Easy

    Time

    15-30 minutes

    Tools Used

    Screwdriver

    Took off the side cover, which exposes the power cord and trigger assembly . Then switch out cord and route the cord. Very easy to do.
    Did you find this story helpful?
    Thanks for voting and helping fellow customers!

    Power cord was cracked and disintegrating exposing wires

    Mark - September 8, 2018
    👍 1 of 1 people found this instruction helpful
    Tool Type

    Electric Drill

    Difficulty

    Easy

    Time

    Less than 15 minutes

    Tools Used

    Screwdriver, Wire stripper

    1. Took 7 screws to release the case
    2. Pressed the wire release on the trigger assembly releasing the wires
    3. Removed the old cord
    4. Stripped 1/2" off new power cord 2 wires
    5. Twisted the stranded wire and inserted back into assembly by pressing the release
    6. Rerouted the rest of the cord into proper position just as the old one was
    7. Snapped the case back together
    8. Screwed the case back together with 7 screws.
    9. Done
    Did you find this story helpful?
    Thanks for voting and helping fellow customers!

    Bad/damaged power cord

    Brian - June 25, 2018
    👍 1 of 1 people found this instruction helpful
    Tool Type

    Electric Drill

    Difficulty

    Easy

    Time

    15-30 minutes

    Tools Used

    Screwdriver, Pliers, Soldering gun

    1) Remove drill housing
    2) Remove old cord
    3) Reuse rubber cord protection and insert in base of drill handle once applied to new cord
    4) Solder new cord, braided wire ends, to stiffen them. (this is necessary to insert the wire into the trigger assembly)
    5) Close and secure drill housing
    Did you find this story helpful?
    Thanks for voting and helping fellow customers!

    Cord on electric drill was damaged

    Bruce - June 9, 2018
    👍 1 of 1 people found this instruction helpful
    Tool Type

    Electric Drill

    Difficulty

    Medium

    Time

    Less than 15 minutes

    Tools Used

    Screwdriver, Power Drill

    Opened up the drill, replaced the cord put the drill back together
    Did you find this story helpful?
    Thanks for voting and helping fellow customers!

    UV cracked cord.

    Ken - April 3, 2018
    👍 1 of 1 people found this instruction helpful
    Tool Type

    Sander

    Difficulty

    Medium

    Time

    15-30 minutes

    Tools Used

    , Torques, soldering iron

    1. Removed the top of the sander.
    2. Removed the old power cord.
    3. Removed the connectors from the old power cord.
    4. Soldered the old connectors to the new cord.
    5. Installed the new cord.
    6. Replaced the clamp.
    7. Replaced the top of the sander.
    Did you find this story helpful?
    Thanks for voting and helping fellow customers!

    OEM stands for Original Equipment Manufacturer and means the part you’re buying is sourced directly from the manufacturer who made your product. At eReplacementParts, we sell only genuine OEM parts, guaranteeing the part you’re purchasing is of better design and of higher quality than aftermarket parts.

    Our product descriptions are a combination of data sourced directly from the manufacturers who made your product as well as content researched and curated by our content & customer service teams. This content is edited and reviewed internally before being made public to customers.

    Our customer service team are at the ready daily to answer your part and product questions. We have a dedicated staff with decades of collective experience in helping customers just like you purchase parts to repair their products.

    All our part reviews are solicited directly from other customers who have purchased this exact part. While we moderate these reviews for profanity, offensive language or personally identifiable information, these reviews are posted exactly as submitted and no alterations are made by our team.

    All our customer repair instructions are solicited directly from other customers just like you who have purchased and replaced this exact part. While we moderate these reviews for profanity, offensive language or personally identifiable information, these reviews are posted exactly as submitted and no alterations are made by our team.

    Based on data from past customer purchasing behaviors, these parts are most commonly purchased together along with the part you are viewing. These parts may be necessary or helpful to replace to complete your current repair.

    All our installation videos are created and produced in collaboration with our in-house repair technician, Mark Sodja, who has helped millions of eReplacementParts customers over the last 13 years repair their products. Mark has years of experience in selling and repairing both commercial and residential products with a specialty in gas-powered equipment.

    This data is collected from customers who submitted a repair instruction after replacing this exact part. Customers can rate how easy the repair was to complete and how long it took. We aggregate this data to provide a repair rating that allows customers to quickly determine the difficulty and time needed to perform their own repair.

    eReplacementParts.com
    7174 South 400 West
    Suite 5
    Midvale, UT 84047
    visa mastercard discover american express PayPal