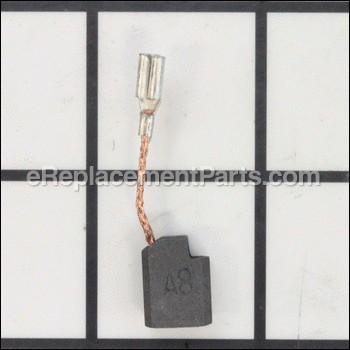
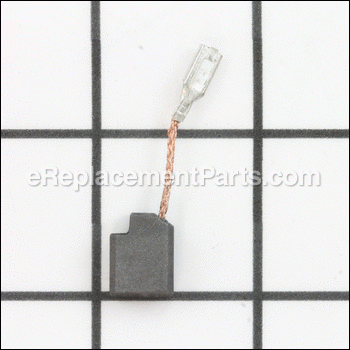
Genuine Dewalt replacement part.
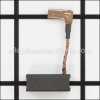
This brush is sold individually, 2 are needed for the tools shown below.
It is always best to replace both brushes, even if only one is worn. Worn brushes frequently are the cause behind a motor running poorly. Replacing brushes can fix a motor that’s operating intermittently. New brushes can restore a motor’s electric braking. Carbon brushes are one of the most commonly replaced power tool parts. This is because carbon brushes are wear items, meaning that through friction and use they will gradually wear away until they need replacing. Worn brushes are a common causes of intermittent motor function, reduced electric braking and reduced motor power. A worn-out brush will often be worn down near to the wire lead and can be cracked, pitted, or burned. When replacing carbon brushes, be sure to inspect your armature for burns, cracks, or other damage which can indicate larger motor problems. Sold individually.
Carbon Brush 650916-01
OEM part for: DeWALT
Part Number: 650916-01
Jump To:
Product Description ?
- Classification: Part
- Weight: 0.01 lbs.
- Also Known As: Motor Brush
- Shipping: Ships Worldwide
Frequently Purchased Together ?
Compatibility
This part will fit the following 30 machines
DeWALT
This item works with the following types of products:
- Grinder Parts
This part replaces obsolete part #: 636128-01
Repair Videos ?
|
This article outlines the steps needed to replace the brushes in a DeWalt grinder. ...
November 09, 2011
|
|
Step-by-step instructions show you how to quickly replace the carbon brushes in a DeWalt grinder....
February 19, 2015
|
Customer Part Reviews ?
- 1
- 2
- 3
Questions & Answers ?
Our customer Service team is at the ready daily to answer your part and product questions.

Ask our Team
We have a dedicated staff with decades of collective experience in helping customers just like you purchase parts to repair their products.
Does this fit my product?Questions & Answers for Carbon Brush
Customer Repair Instructions ?
All our customer repair instructions are solicited directly from other customers just like you who have purchased and replaced this exact part.
Worn brushes
Tool Type
Grinder
Difficulty
Easy
Time
Less than 15 minutes
Tools Used
Screwdriver
Parts Used
https://www.youtube.com/watch?v=kLSOOKZxpyI
DeWalt 4,1/2 inch angle grinder suddenly wouldn't start and was completly dead.
Tool Type
Grinder
Difficulty
Medium
Time
15-30 minutes
Tools Used
Screwdriver, Pliers
Parts Used
Grinder which didn't power up
Tool Type
Grinder
Difficulty
Easy
Time
Less than 15 minutes
Tools Used
Screwdriver
Parts Used
Remove (4) torx screws, disassemble cable holder which gives you access to brushes
Simply pull back spring that holds down brushes and pull off connector pin and reverse procedure
Brushes worn out.
Tool Type
Grinder
Difficulty
Easy
Time
Less than 15 minutes
Tools Used
Screwdriver
Parts Used
2. Removed the old brushes.
3. Installed the new brushes.
4. Put the grinder back together.
Brushes needed to be replaced in my grinder
Tool Type
Grinder
Difficulty
Easy
Time
15-30 minutes
Tools Used
Screwdriver, Pliers, None
Parts Used
Removed outer case. Located brushes. Used a needle noes pliers to unplug wires to brushes (2) brushes. Used small flat tip screw driver to pop the clip holding the plastic brush housing in place. Remove old worn brushes, and replaced with new ones.
Then reversed the procedure reassembling the grinder.
Brushes worn to the point of losing contact with armature
Tool Type
Grinder
Difficulty
Medium
Time
15-30 minutes
Tools Used
Screwdriver
Parts Used
Grinder stopped working
Tool Type
Grinder
Difficulty
Easy
Time
15-30 minutes
Tools Used
Screwdriver, Pliers, Allen wrench
Disassembled the armature assembly
Removed and replaced the brush spring, arm and carbon brush
Reassembled the armature
Reassembled the case
Inspected and tested the unit
Grinder made noise when operating and was weak power
Tool Type
Grinder
Difficulty
Easy
Time
15-30 minutes
Tools Used
Screwdriver, Pliers
Parts Used
Grinder would not turn on.
Tool Type
Grinder
Difficulty
Easy
Time
15-30 minutes
Tools Used
Screwdriver, Torx set
Parts Used
Worn out brushes.
Tool Type
Grinder
Difficulty
Medium
Time
Less than 15 minutes
Tools Used
Screwdriver
Parts Used
OEM stands for Original Equipment Manufacturer and means the part you’re buying is sourced directly from the manufacturer who made your product. At eReplacementParts, we sell only genuine OEM parts, guaranteeing the part you’re purchasing is of better design and of higher quality than aftermarket parts.
Our product descriptions are a combination of data sourced directly from the manufacturers who made your product as well as content researched and curated by our content & customer service teams. This content is edited and reviewed internally before being made public to customers.
Our customer service team are at the ready daily to answer your part and product questions. We have a dedicated staff with decades of collective experience in helping customers just like you purchase parts to repair their products.
All our part reviews are solicited directly from other customers who have purchased this exact part. While we moderate these reviews for profanity, offensive language or personally identifiable information, these reviews are posted exactly as submitted and no alterations are made by our team.
All our customer repair instructions are solicited directly from other customers just like you who have purchased and replaced this exact part. While we moderate these reviews for profanity, offensive language or personally identifiable information, these reviews are posted exactly as submitted and no alterations are made by our team.
Based on data from past customer purchasing behaviors, these parts are most commonly purchased together along with the part you are viewing. These parts may be necessary or helpful to replace to complete your current repair.
All our installation videos are created and produced in collaboration with our in-house repair technician, Mark Sodja, who has helped millions of eReplacementParts customers over the last 13 years repair their products. Mark has years of experience in selling and repairing both commercial and residential products with a specialty in gas-powered equipment.
This data is collected from customers who submitted a repair instruction after replacing this exact part. Customers can rate how easy the repair was to complete and how long it took. We aggregate this data to provide a repair rating that allows customers to quickly determine the difficulty and time needed to perform their own repair.

