
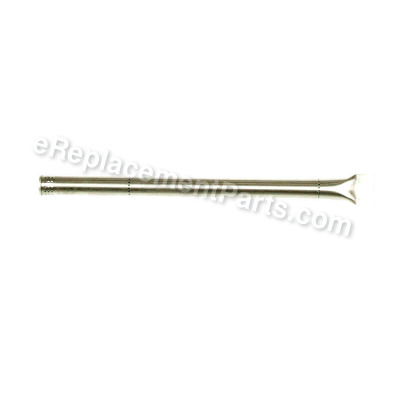
This replacement part is specially designed for use with Char-Broil grills. It is an authentic OEM item, not an aftermarket equivalent. This carryover tube is used to carry the flame from one burner to another as well as supporting for the burners themselves. Over time tubes tend to rust in combination of heat and moisture requiring replacement. Please note, this stainless steel tube is sold individually. This assembly includes two cotter pins to secure the carryover tube.
Flame Carryover Tube G524-0036-W1
OEM part for: Char-Broil
Part Number: G524-0036-W1
$6.21
In Stock
Jump To:
Frequently Purchased Together ?


Compatibility
This part will fit the following 35 machines
Char-Broil
463250811 4-Burner Infrared Grill View Diagrams & Manuals
463247311 4-Burner Infrared Grill View Diagrams & Manuals
463271311 Infrared 4-Burner W/Stovetop View Diagrams & Manuals
463271510 Quantum Stainless 4-Burner With Lights & Gauge View Diagrams & Manuals
463271310 Quantum Infrared 4-Burner Auto-Clean Grill View Diagrams & Manuals
463271309 Quantum Infrared 4-Burner W/Outdoor Stove View Diagrams & Manuals
463263110 Quantum Infrared 4-Burner Auto-Clean Grill View Diagrams & Manuals
463247209 Commercial Series 580 Four-Burner Infrared Grill View Diagrams & Manuals
463247512 Tru-Infrared Gas Grill View Diagrams & Manuals
463251012 Tru-Infrared 4-Burner Gourmet Gas Grill View Diagrams & Manuals
463241414 4-Burner Commercial T-47D View Diagrams & Manuals
463241413 4-Burner Commercial T-47D View Diagrams & Manuals
463271314 Performance Tru-Infrared 4-Burner Gas Grill View Diagrams & Manuals
463251914 Gas BBQ View Diagrams & Manuals
463251913 Gas BBQ View Diagrams & Manuals
466247209 Commercial Series Infrared Four-Burner Grill View Diagrams & Manuals
463247310 Commercial Series 580 Four-Burner Infrared View Diagrams & Manuals
466247310 Commercial Series Infrared Four-Burner Dual Fuel View Diagrams & Manuals
466247311 Commercial Series View Diagrams & Manuals
466271309 Quantum Infrared Four-Burner Dual Fuel Grill View Diagrams & Manuals
466271509 Quantum Infrared Four-Burner Grill View Diagrams & Manuals
466271310 Quantum Infrared Four-Burner Auto-Clean Grill View Diagrams & Manuals
463263111 Quantum Infrared Gas Grill with Auto-Clean View Diagrams & Manuals
463262811 4-Burner Quantum Infrared Dual Fuel Gas Grill View Diagrams & Manuals
466231711 Precisionflame Infrared 4=Rurner Gas Grill View Diagrams & Manuals
466271311 Magnum Quantum 580 Gas Grill View Diagrams & Manuals
463271313 Tru-Infrared Performance 4-Burner T-47D Gas Grill View Diagrams & Manuals
463273713 Performance T-47D Grill View Diagrams & Manuals
464224211 4-Burner Industrial Cart Gas Grill View Diagrams & Manuals
464224411 Concept Grill W/Steamer View Diagrams & Manuals
466224411 Bbq Grill W/Steamer View Diagrams & Manuals
466271312 Performance Bbq Grill View Diagrams & Manuals
466241414 Commercial Series Infrared Dual Fuel Outdoor Stove View Diagrams & Manuals
466242414 Commercial Series 4 Burner Tru-Infrared Grill View Diagrams & Manuals
466247512 Commercial Bbq View Diagrams & Manuals
Show More Compatible Models
This item works with the following types of products:
- Range Parts
This part replaces obsolete part #: G516-0006-W1, 80017662
Repair Videos ?

Articles:
|
Having trouble getting your grill to light up? A common cause of this issue is a defective ignition switch. We'll sho...
November 08, 2012
|

Customer Part Reviews ?
Average Rating (out of 5):
Click to filter by ratings:
5 stars
2
4 stars
0
3 stars
0
2 stars
0
1 stars
0
< PREV
- 1
Perfect replacements
All parts fitted the grill perfectly
Guest -
December 6, 2019
Verified Purchase
Easy part replacement
The replacement part fit perfectly and works just as well.
Guest -
May 24, 2019
Verified Purchase
t
t
t -
t days ago
Verified Purchase
eReplacementParts Team
t
Questions & Answers ?
Our customer Service team is at the ready daily to answer your part and product questions.

Ask our Team
We have a dedicated staff with decades of collective experience in helping customers just like you purchase parts to repair their products.
Does this fit my product?Questions & Answers for Flame Carryover Tube
No questions have been asked yet
Customer Repair Instructions ?
All our customer repair instructions are solicited directly from other customers just like you who have purchased and replaced this exact part.
Burner-carryover tube, and ignition module needed replacement.
Steve - May 1, 2017
👍 2 of 2 people found this instruction helpful
Tool Type
Outdoor Grill
Difficulty
Easy
Time
15-30 minutes
Tools Used
Screwdriver, Pliers, Adjustable Wrench
Installed new tubes and connected electrodes to new module. Very simple and just connected electrode wires to new module as they were connected to old module. $70.00 dollars in parts saved a $500.00 grill my wife wanted to throw out! Thanks eReplacementParts and will be ordering a few more parts in the future!
Regards
Steve Boldt
Regards
Steve Boldt
Did you find this story helpful?
Thanks for voting and helping fellow customers!
Internals rusted out
Brian - July 11, 2018
👍 1 of 1 people found this instruction helpful
Tool Type
Outdoor Grill
Difficulty
Medium
Time
30-60 minutes
Tools Used
Screwdriver, Pliers
Removed the grill grates and cleaned them
Removed the heat emitters and tossed them
Removed the flame tamers and cleaned them
Unplugged the burner electrodes and removed the rusted out burner tubes
Completely cleaned out the main box
Attached the new igniters to the new tubes and replaced the tubes
Ran the wires to the new ignition module and attached them
Attached the flame carryover tubes
Started the grill, testing each burner
Reset the flame tamers, heat emitters, and grill grates
Did you find this story helpful?
Thanks for voting and helping fellow customers!
Burner rusted and other parts
Eric - June 10, 2018
👍 1 of 1 people found this instruction helpful
Tool Type
Outdoor Grill
Difficulty
Easy
Time
15-30 minutes
Tools Used
Pliers
1) Removed rusted burner tubes and crossovers, disconnecting ignitors
2) Connected ignitors to new burner tubes and installed into grill
3) Installed pins to secure tubes
4) Connected new crossover tubes
5) Turned on gas and tested burners
6) Replaced flame tamers
2) Connected ignitors to new burner tubes and installed into grill
3) Installed pins to secure tubes
4) Connected new crossover tubes
5) Turned on gas and tested burners
6) Replaced flame tamers
Did you find this story helpful?
Thanks for voting and helping fellow customers!
Rusted grill parts
Lee - August 11, 2019
Tool Type
Outdoor Grill
Difficulty
Medium
Time
1-2 hours
Tools Used
Screwdriver, Pliers, Socket set, Wrench Set, Adjustable Wrench
Parts Used
100 percent
Did you find this story helpful?
Thanks for voting and helping fellow customers!
It was time to rebuild the Char broil grill
Steve - July 18, 2019
Tool Type
Outdoor Grill
Difficulty
Easy
Time
Less than 15 minutes
Tools Used
Pliers
Parts Used
I took out the old parts and put in the new ones
Did you find this story helpful?
Thanks for voting and helping fellow customers!
Broken burners , and carry over tubes were rusted/gone.
BRIAN - April 13, 2018
Tool Type
Outdoor Grill
Difficulty
Easy
Time
30-60 minutes
Tools Used
Screwdriver, Pliers
1. Removed all broken and rusted out parts.
2. Shop vac the fire box to get out all old part debris.
3. Install new parts.
4. Test grill.
2. Shop vac the fire box to get out all old part debris.
3. Install new parts.
4. Test grill.
Did you find this story helpful?
Thanks for voting and helping fellow customers!
Burners were rusted out with holes
Frank - March 27, 2018
Tool Type
Outdoor Grill
Difficulty
Easy
Time
1-2 hours
Tools Used
Screwdriver, Pliers
Replace all the old burners and Flame carryover tubes with new ones. Repair were quite simple.
Simply removed the old cotter pins, replaced old burners with new ones and replaced with new cotter pins provided with all new parts ordered.
Simply removed the old cotter pins, replaced old burners with new ones and replaced with new cotter pins provided with all new parts ordered.
Did you find this story helpful?
Thanks for voting and helping fellow customers!
Burners rotted out
Carl - March 22, 2018
Tool Type
Outdoor Grill
Difficulty
Easy
Time
30-60 minutes
Tools Used
Screwdriver, Pliers, Nutdriver, Hammer, shop-vac , wire brush, Awl
Remove old parts
Vacuum and glean inside of grill
Install new parts.
20 minutes to remove old parts
20 minutes to install new parts
10 minutes to clean up the mess..
Easy job. Grill like new
Vacuum and glean inside of grill
Install new parts.
20 minutes to remove old parts
20 minutes to install new parts
10 minutes to clean up the mess..
Easy job. Grill like new
Did you find this story helpful?
Thanks for voting and helping fellow customers!
Flame would not travel to other burners
David - March 8, 2018
Tool Type
Outdoor Grill
Difficulty
Easy
Time
Less than 15 minutes
Tools Used
Pliers
Parts Used
Installed the new flame carry over tubes and everything worked perfectly.
Did you find this story helpful?
Thanks for voting and helping fellow customers!
Multiple parts were rusted/corroded causing uneven heating.
Stephen - February 5, 2018
Tool Type
Outdoor Grill
Difficulty
Easy
Time
30-60 minutes
Tools Used
Pliers
I removed all burners, carryover tubes, flame tamers and emitter grates. They were held place with simple cotter pins. I cleaned out the fire box thoroughly. Then I installed all replacement parts. All the parts I ordered came with the necessary cotter pins. Some of the cotter pins were very rusty and broke when I tried to remove them. I was able to remove broken pieces with a punch and a small hammer. I actually had several left over. Now my grill works perfectly. It heats very evenly and and cooks like it is new. The process was easy. I was skeptical at first, but when I began to remove the old parts and realized how easily they came out I new I had done the right thing. I saved myself a lot of money repairing the grill instead of buying a new one. My wife was thrilled as well...
Did you find this story helpful?
Thanks for voting and helping fellow customers!
Load More Install Stories
OEM stands for Original Equipment Manufacturer and means the part you’re buying is sourced directly from the manufacturer who made your product. At eReplacementParts, we sell only genuine OEM parts, guaranteeing the part you’re purchasing is of better design and of higher quality than aftermarket parts.
Our product descriptions are a combination of data sourced directly from the manufacturers who made your product as well as content researched and curated by our content & customer service teams. This content is edited and reviewed internally before being made public to customers.
Our customer service team are at the ready daily to answer your part and product questions. We have a dedicated staff with decades of collective experience in helping customers just like you purchase parts to repair their products.
All our part reviews are solicited directly from other customers who have purchased this exact part. While we moderate these reviews for profanity, offensive language or personally identifiable information, these reviews are posted exactly as submitted and no alterations are made by our team.
All our customer repair instructions are solicited directly from other customers just like you who have purchased and replaced this exact part. While we moderate these reviews for profanity, offensive language or personally identifiable information, these reviews are posted exactly as submitted and no alterations are made by our team.
Based on data from past customer purchasing behaviors, these parts are most commonly purchased together along with the part you are viewing. These parts may be necessary or helpful to replace to complete your current repair.
All our installation videos are created and produced in collaboration with our in-house repair technician, Mark Sodja, who has helped millions of eReplacementParts customers over the last 13 years repair their products. Mark has years of experience in selling and repairing both commercial and residential products with a specialty in gas-powered equipment.
This data is collected from customers who submitted a repair instruction after replacing this exact part. Customers can rate how easy the repair was to complete and how long it took. We aggregate this data to provide a repair rating that allows customers to quickly determine the difficulty and time needed to perform their own repair.