


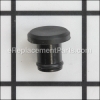
This is a genuine component which is specially designed for use with Hitachi compound miter saws. It is supplied directly from the original equipment manufacturer. This item provides a high-quality replacement for a missing or a faulty hardware that was installed on a new unit. The clip is a standard hardware which may have a few applications. Please make sure to refer to the appropriate diagrams of your model for the exact location and the correct application of this part. Keep in mind this high-quality clip is made of durable nylon material and is sold individually. Replacing it is a simple task that may require pliers to remove the old and secure the new.
Nylon Clip 948193
OEM part for: Metabo HPT (Hitachi)
Part Number: 948193
$4.99
In Stock
Jump To:
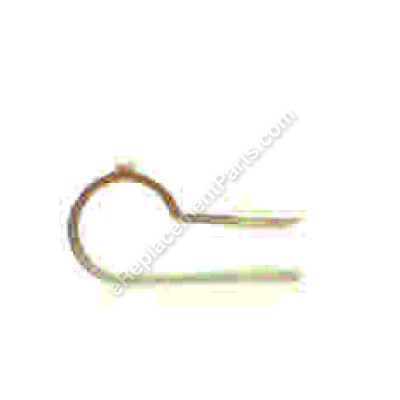
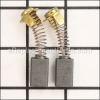
Frequently Purchased Together ?


Compatibility
This part will fit the following 25 machines
Metabo HPT (Hitachi)
C12LSH 12" Sliding Dual Compound Miter Saw View Diagrams & Manuals
C12RSH 12" Sliding Dual Compound Miter Saw View Diagrams & Manuals
C8FB2 8-1/2" Twin Rail Sliding Compound Miter Saw View Diagrams & Manuals
C12FSA 12" Sliding Dual Compound Miter Saw View Diagrams & Manuals
C10FS Slide Compound Saw View Diagrams & Manuals
C8FB Slide Compound Saw View Diagrams & Manuals
B-600A Band Saw View Diagrams & Manuals
UA-150 Finish Grinder View Diagrams & Manuals
C8FSE Slide Compound Saw View Diagrams & Manuals
C8FSHE Slide Compound Saw View Diagrams & Manuals
C10FSH Slide Compound Saw View Diagrams & Manuals
C10FSB Slide Compound Saw View Diagrams & Manuals
C10FSBSM 10-Inch Sliding, Dual Compound Miter Saw 12 Amp 3800 Rpm 5/8 Inch Arbor W/O Laser View Diagrams & Manuals
C10FSHSM 10-Inch Sliding, Dual Compound Miter Saw With Laser Marker W/Laser 12 Amp 3800 Rpm 5/8 Incharbor View Diagrams & Manuals
C12RSH2M 12 Inch Sliding Compound Miter Saw Wh Laser Marker,sliding Fences View Diagrams & Manuals
C8FSESM 8-1/2-Inch Sliding Compound Miter Saw View Diagrams & Manuals
C8FSHESM 8-1/2-Inch Sliding Compound Miter Saw With Laser And Light View Diagrams & Manuals
C10FSBE2 View Diagrams & Manuals
C10FSBP4 View Diagrams & Manuals
C10FSHE2 View Diagrams & Manuals
C10FSHPS View Diagrams & Manuals
C12LSHE2 View Diagrams & Manuals
C12RSH2 View Diagrams & Manuals
C12RSHE2 View Diagrams & Manuals
Show More Compatible Models
This item works with the following types of products:
- Miter Saw Parts
- Saw Parts
- Band Saw Parts
- Grinder Parts
Customer Part Reviews ?
Average Rating (out of 5):
Click to filter by ratings:
5 stars
2
4 stars
0
3 stars
0
2 stars
0
1 stars
0
< PREV
- 1
Exact replacement.
It does what is expected of it. It arrived in a timely manner.
Guest -
July 6, 2023
Verified Purchase
Perfect replacement
Arrived in perfect condition in the estimated time. Thank you
Guest -
May 6, 2020
Verified Purchase
t
t
t -
t days ago
Verified Purchase
eReplacementParts Team
t
Questions & Answers ?
Our customer Service team is at the ready daily to answer your part and product questions.

Ask our Team
We have a dedicated staff with decades of collective experience in helping customers just like you purchase parts to repair their products.
Does this fit my product?Questions & Answers for Nylon Clip
No questions have been asked yet
Customer Repair Instructions ?
All our customer repair instructions are solicited directly from other customers just like you who have purchased and replaced this exact part.
Broken indicators ,And table insert. I’m a little rough on my tools ,loading and unloading, Especially if it’s raining
fred - February 9, 2020
Tool Type
Miter Saw
Difficulty
Easy
Time
Less than 15 minutes
Tools Used
Screwdriver, Beer
I took out seven screws and replaced ,four parts. Oh yes ,I put the screws back IN.....also ....forgot about that part😉
Did you find this story helpful?
Thanks for voting and helping fellow customers!
I had bearing failure on the armature lg bearing & also in the gear spindle. I also replaced two broken pointers, a bad cord, & installed a new cord with clips that had broken.
Stephen - August 5, 2018
Tool Type
Miter Saw
Difficulty
Medium
Time
More than 2 hours
Tools Used
Screwdriver, Pliers, Bench Grinder, Hammer , Bearing Puller, Putty Knifes,Dsocket
1) Disassembled the saw & ordered the parts I needed to repair. When replacing bearings it's best to replace all of them due to their age.
2) I began the repair on the bearings on the armature the small one first. It came right off with the bearing puller I cleaned the tiny shaft & placed the new bearing in the shaft and tapped with the hammer once square pushed it in by using an 8 inch C-Clamp.
3) The larger bearing on the other end by the fan was really bad but the puller had to be modified so I could get behind the bearing to be able to pull it off. Once off the same procedure was used to install the larger one.
4) The Armature bearings have been replaced now to reinstall it into the handle portion, cleaned then installed the new bearing, installed the armature then installed the set of new brushes & reinstalled the handle section to the saw.
5) The gear spindle bearings I thought would be a challenge but the larger recessed bearing came right off easily by pulling the aluminum holder with the bearing once off push the bearing out if the aluminum holder with your fingers.
6) The smaller bearing on the end by the gear was so close I had to use 2 putty knifes to pry off enough to be able to get 2 larger screw drivers under it to finish prying off.
7) Once apart clean and reinstall both bearings being mindful to assemble the larger one first into the aluminum holder & making sure it starts square. For squeezing this on I used a deep well socket that fit over the shaft but making sure it was also touching the inner race as not to damage the bearing. I then squeezed it on by using the C-Clamp it will stop in the correct place on the shaft by itself. Now for the smaller bearing in the other end start square then squeeze on but this time you have to use a small washer that fits over the small shaft cause the bearing goes by the end if the shaft by .020 there bearings installed.
8) Grease and install into saw finish installing blade guards and new blade.
9) I then installed the new cord with clips and new pointers.
All parts now installed and the saw is like new again. I have had and use this saw so much I hated to buy a new one because of it' simplicity I am very pleased with the repair as well as ereplacement.com for making the parts available for purchase. Just take your time and pay attention to detail and you will have the same success.
Did you find this story helpful?
Thanks for voting and helping fellow customers!
OEM stands for Original Equipment Manufacturer and means the part you’re buying is sourced directly from the manufacturer who made your product. At eReplacementParts, we sell only genuine OEM parts, guaranteeing the part you’re purchasing is of better design and of higher quality than aftermarket parts.
Our product descriptions are a combination of data sourced directly from the manufacturers who made your product as well as content researched and curated by our content & customer service teams. This content is edited and reviewed internally before being made public to customers.
Our customer service team are at the ready daily to answer your part and product questions. We have a dedicated staff with decades of collective experience in helping customers just like you purchase parts to repair their products.
All our part reviews are solicited directly from other customers who have purchased this exact part. While we moderate these reviews for profanity, offensive language or personally identifiable information, these reviews are posted exactly as submitted and no alterations are made by our team.
All our customer repair instructions are solicited directly from other customers just like you who have purchased and replaced this exact part. While we moderate these reviews for profanity, offensive language or personally identifiable information, these reviews are posted exactly as submitted and no alterations are made by our team.
Based on data from past customer purchasing behaviors, these parts are most commonly purchased together along with the part you are viewing. These parts may be necessary or helpful to replace to complete your current repair.
All our installation videos are created and produced in collaboration with our in-house repair technician, Mark Sodja, who has helped millions of eReplacementParts customers over the last 13 years repair their products. Mark has years of experience in selling and repairing both commercial and residential products with a specialty in gas-powered equipment.
This data is collected from customers who submitted a repair instruction after replacing this exact part. Customers can rate how easy the repair was to complete and how long it took. We aggregate this data to provide a repair rating that allows customers to quickly determine the difficulty and time needed to perform their own repair.