


Genuine Manufacturer Approved replacement part used on a variety of Power Tools. This Ball Bearing has multiple applications depending on your tool. This part is made out of Metal and it is Sold Individually. Ball Bearings are used to reduce friction between rotating parts. The balls or rollers take the load and spin, distributing the weight evenly while the minimal contact area of the ball reduces friction. This reduces wear on the tool and allows it to run smoothly. Bearings experience constant wear when the tool is in operation from pressure, heat, vibration and friction. Because of this, many Bearings need periodic maintenance or replacement.
To replace this Bearing you would need a Screwdriver and a Set of Wrenches.
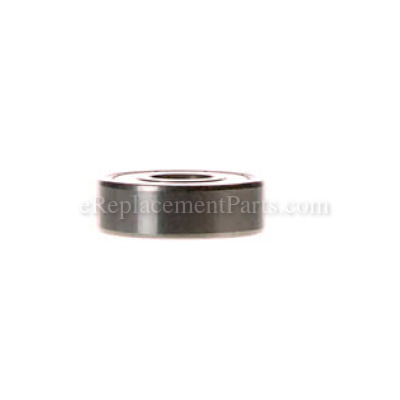
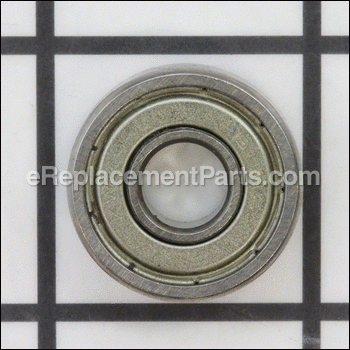
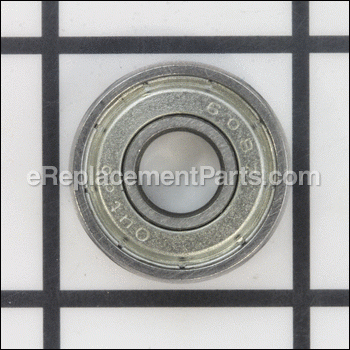
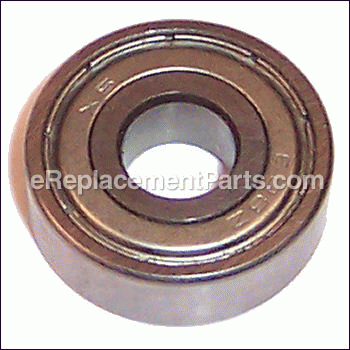
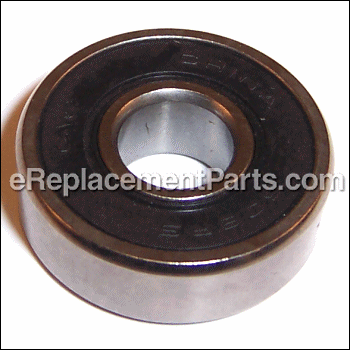
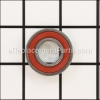
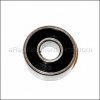
Bearing Ball 608zz 680141022
OEM part for: Ryobi, Ridgid, Craftsman, Ryobi -TTI
Part Number: 680141022
Jump To:
Product Description ?
- 608Z
- Classification: Part
- Weight: 0.01 lbs.
- Shipping: Ships Worldwide
Frequently Purchased Together ?


Compatibility
This Bearing Ball 608zz will fit the following 109 machines. Confirm this part works with your model, and view the detailed model diagrams and repair help we have to offer.
Ryobi
Ridgid
Craftsman
Ryobi -TTI
Show More Compatible ModelsThis item works with the following types of products:
- Planer Parts
- Circular Saw Parts
- Saw Parts
- Drill Parts
- Plate Joiner Parts
- Miter Saw Parts
- Sander Parts
- Router Parts
- Reciprocating Saw Parts
- Laminate Trimmer Parts
- Grinder Parts
- Hammer Drill Parts
- Table Saw Parts
- Jig saw Parts
- Impact Wrench Parts
- Electric Drill Parts
- Cultivator Parts
- Mixer Parts
- Tile Saw Parts
- Screwdriver Parts
- Polisher Parts
- Band Saw Parts
This part replaces obsolete part #: 680141013, 680141018 (4-23-19 (Rev:02)), 089030005003, 671419002, HPL50K-37, 680141020, 6814101, 990924001, 681100001, 050007000, 039143005024, 680141007, 681056001, 680141014, 680141018, A50060020056, 681141002, 039028001026, 6814104, 6710903, 671004001
Repair Videos ?

Customer Part Reviews ?
- 1
Questions & Answers ?
Our customer Service team is at the ready daily to answer your part and product questions.

Ask our Team
We have a dedicated staff with decades of collective experience in helping customers just like you purchase parts to repair their products.
Does this fit my product?Questions & Answers for Bearing Ball 608zz
Customer Repair Instructions ?
All our customer repair instructions are solicited directly from other customers just like you who have purchased and replaced this exact part.
Grinder armature bearing failure.
Tool Type
Grinder
Difficulty
Easy
Time
30-60 minutes
Tools Used
Screwdriver, Pliers
Ordered repair parts from e replacement parts
Received parts and installed.
Grinder works great.
Not bad for a 15.00 grinder
Both bearings on either side of the motors shaft were struggling to move and were going out fast on my Ryobi R160 Router!
Tool Type
Router
Difficulty
Medium
Time
15-30 minutes
Tools Used
Screwdriver
Removed fasteners holding in the motor.
Pressed the motor out.
Used bearing puller to remove both worn bearings.
Reinstalled everything.
Spindle lock block had broke and the bearings on the height adjustment had froze up.
Tool Type
Planer
Difficulty
Medium
Time
30-60 minutes
Tools Used
Screwdriver, Allen wrench
Bearings worn out
Tool Type
Sander
Difficulty
Medium
Time
1-2 hours
Tools Used
Screwdriver, Pliers, Adjustable Wrench
Parts Used
Air hosed the unit to glow out all dust
Pulled out ball bearings
Replaced ball bearings
Reassembled unit
Noisey power head bearings
Tool Type
Cultivator
Difficulty
Hard
Time
1-2 hours
Tools Used
Screwdriver, Socket set, Wrench Set, snap ring pliers, metric sockets, heat gun
Parts Used
OEM stands for Original Equipment Manufacturer and means the part you’re buying is sourced directly from the manufacturer who made your product. At eReplacementParts, we sell only genuine OEM parts, guaranteeing the part you’re purchasing is of better design and of higher quality than aftermarket parts.
Our product descriptions are a combination of data sourced directly from the manufacturers who made your product as well as content researched and curated by our content & customer service teams. This content is edited and reviewed internally before being made public to customers.
Our customer service team are at the ready daily to answer your part and product questions. We have a dedicated staff with decades of collective experience in helping customers just like you purchase parts to repair their products.
All our part reviews are solicited directly from other customers who have purchased this exact part. While we moderate these reviews for profanity, offensive language or personally identifiable information, these reviews are posted exactly as submitted and no alterations are made by our team.
All our customer repair instructions are solicited directly from other customers just like you who have purchased and replaced this exact part. While we moderate these reviews for profanity, offensive language or personally identifiable information, these reviews are posted exactly as submitted and no alterations are made by our team.
Based on data from past customer purchasing behaviors, these parts are most commonly purchased together along with the part you are viewing. These parts may be necessary or helpful to replace to complete your current repair.
All our installation videos are created and produced in collaboration with our in-house repair technician, Mark Sodja, who has helped millions of eReplacementParts customers over the last 13 years repair their products. Mark has years of experience in selling and repairing both commercial and residential products with a specialty in gas-powered equipment.
This data is collected from customers who submitted a repair instruction after replacing this exact part. Customers can rate how easy the repair was to complete and how long it took. We aggregate this data to provide a repair rating that allows customers to quickly determine the difficulty and time needed to perform their own repair.