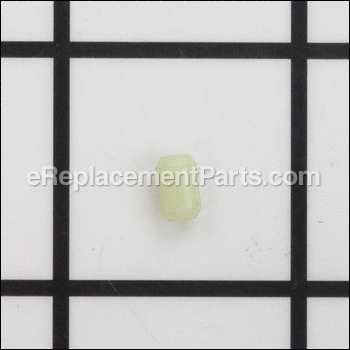

This manufacturer sourced replacement pin is made out rubber and it is sold individually. It acts as a cushion/spacer in a variety of Makita power tools. This is a standard piece of hardware and it has multiple applications based on your tool. Please refer to diagrams for correct application.
Rubber Pin 263002-9
OEM part for: Makita
Part Number: 263002-9
$4.99
Factory Backorder
Jump To:
Frequently Purchased Together ?


Compatibility
This Rubber Pin will fit the following 543 machines. Confirm this part works with your model, and view the detailed model diagrams and repair help we have to offer.
Makita
Show More Compatible ModelsThis item works with the following types of products:
- Plate Joiner Parts
- Drill Parts
- Planer Parts
- Saw Parts
- Trimmer Parts
- Blower Parts
- Circular Saw Parts
- Jig saw Parts
- Grinder Parts
- Chain Saw Parts
- Screwdriver Parts
- Impact Wrench Parts
- Table Saw Parts
- Miter Saw Parts
- Router Parts
- Sander Parts
- Demolition Hammer Parts
- Hammer Drill Parts
- Rotary Hammer Parts
- Nibbler Parts
- Reciprocating Saw Parts
- Shear Parts
- Band Saw Parts
- Impact Driver Parts
- Laminate Trimmer Parts
- Polisher Parts
- Electric Drill Parts
- Pole Saw Parts
- Chop Saw Parts
Repair Videos ?
Watch the Repair Video for
Rubber Pin

Questions & Answers ?
Our customer Service team is at the ready daily to answer your part and product questions.

Ask our Team
We have a dedicated staff with decades of collective experience in helping customers just like you purchase parts to repair their products.
Does this fit my product?Questions & Answers for Rubber Pin
No questions have been asked yet
Customer Repair Instructions ?
All our customer repair instructions are solicited directly from other customers just like you who have purchased and replaced this exact part.
Brushes and bearing pins
William - March 27, 2023
Tool Type
Sander
Difficulty
Medium
Time
1-2 hours
Tools Used
Screwdriver
Parts Used
I bought a new base with the felt pad included and brushes years ago from here and the feet.
At the time I needed the base because it was bent and the feet were shot.
This time I decided to replace the brushes and clean the entire sander out , it is a BO4510. It was full of sanding dust . All I needed was a screw driver .
I took the sander completely apart washed the 2 case half's in dish soap and brew them dry. I also brew all the sanding dust off the field and armature and cleaned the commutator because it was covered with carbon and cleaned the brush holders.
The bearings felt fine . Then I put it all back together , took photo's to know how it was so I could put it together as it should be.
I replaced the two rubber pins that keep the base bearing and lower bearing from spinning , they were flattened .
The only thing I would advise is when you install the base to the feet make sure the sandpaper clamps are even with the base edge , you will see if they are not . To do this loosen the 2 screws and take a small screw driver to move the feet which moves the paper clamps then tighten the screws then do the other side. If you don't the paper clamps will not hold the sandpaper well. I decided to look and noticed they were not lined up proper. You cannot simply slap the base on .
Did you find this story helpful?
Thanks for voting and helping fellow customers!
Charles - August 21, 2019
Tool Type
Sander
Difficulty
Easy
Time
15-30 minutes
Tools Used
Screwdriver, Hands
Parts Used
Took old parts off and installed new parts
Did you find this story helpful?
Thanks for voting and helping fellow customers!
stripped spiral gears
wes - December 7, 2018
Tool Type
Grinder
Difficulty
Easy
Time
15-30 minutes
Tools Used
Screwdriver, Pliers, Wrench Set, small clamshell bearing puller
1. removed angle drive cap (4 phillips #2)
2. removed drive gear (pliers and 10 mm)
3. removed snap ring
4.removed bearing
5. clean away old grease with metal grindings.
6. new grease and reassemble.
2. removed drive gear (pliers and 10 mm)
3. removed snap ring
4.removed bearing
5. clean away old grease with metal grindings.
6. new grease and reassemble.
Did you find this story helpful?
Thanks for voting and helping fellow customers!
OEM stands for Original Equipment Manufacturer and means the part you’re buying is sourced directly from the manufacturer who made your product. At eReplacementParts, we sell only genuine OEM parts, guaranteeing the part you’re purchasing is of better design and of higher quality than aftermarket parts.
Our product descriptions are a combination of data sourced directly from the manufacturers who made your product as well as content researched and curated by our content & customer service teams. This content is edited and reviewed internally before being made public to customers.
Our customer service team are at the ready daily to answer your part and product questions. We have a dedicated staff with decades of collective experience in helping customers just like you purchase parts to repair their products.
All our part reviews are solicited directly from other customers who have purchased this exact part. While we moderate these reviews for profanity, offensive language or personally identifiable information, these reviews are posted exactly as submitted and no alterations are made by our team.
All our customer repair instructions are solicited directly from other customers just like you who have purchased and replaced this exact part. While we moderate these reviews for profanity, offensive language or personally identifiable information, these reviews are posted exactly as submitted and no alterations are made by our team.
Based on data from past customer purchasing behaviors, these parts are most commonly purchased together along with the part you are viewing. These parts may be necessary or helpful to replace to complete your current repair.
All our installation videos are created and produced in collaboration with our in-house repair technician, Mark Sodja, who has helped millions of eReplacementParts customers over the last 13 years repair their products. Mark has years of experience in selling and repairing both commercial and residential products with a specialty in gas-powered equipment.
This data is collected from customers who submitted a repair instruction after replacing this exact part. Customers can rate how easy the repair was to complete and how long it took. We aggregate this data to provide a repair rating that allows customers to quickly determine the difficulty and time needed to perform their own repair.