Vent Tube V471001201 - OEM Echo - eReplacementParts.com
eReplacementParts.com
877-346-4814
Shindaiwa Parts

Vent Tube V471001201

OEM part for: Echo, Shindaiwa, Little Wonder

Part Number: V471001201


Install
Videos!
Grid squares measure 1x1 inch
In Stock
Ships within 1 business day
Easy 15-30 minutes (56 rated repairs)?
OEM: Original Equipment Manufacturer ?
EchoShindaiwaLittle Wonder
Does this fit my product?

Product Description ?

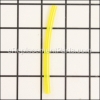
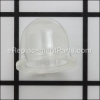
The purpose of the vent tube is to allow air in to the fuel tank so that a vacuum is not created when the fuel is being fed through the fuel line.
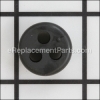
Most of the time the Vent line is connected to a fuel line grommet that is installed on the fuel tank.
The fuel return line and the fuel line are also connected to the fuel line grommet.

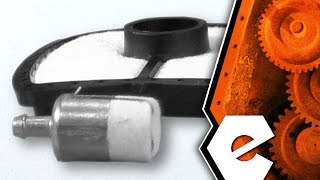
The other way a fuel tank is vented in other engines is by use of a fuel cap with a air vent built into it.

  • Classification: Part
  • Weight: 0.01 lbs.
  • Shipping: Ships Worldwide

Frequently Purchased Together ?

Compatibility

This Vent Tube will fit the following 568 machines. Confirm this part works with your model, and view the detailed model diagrams and repair help we have to offer.

Shindaiwa

Echo

Little Wonder

Show More Compatible Models
Don't see yours? Try searching our site for :

This item works with the following types of products:

  • Hedge Trimmer Parts
  • Trimmer Parts
  • Blower Parts
  • Edger Parts
  • Grass Trimmer Parts
  • Cultivator Parts
  • Pruner Parts
  • Reciprocating Saw Parts
  • Saw Parts
  • Pump Parts
  • Vacuum Parts
  • Chain Saw Parts

This part replaces obsolete part #: V471-001200, V471001200, 13131239130, 13131244330, 13271639130

Repair Videos ?

Articles:
Filthy Filters? This article will show you how to install a filter kit on an Echo SRM-225 trimmer....
May 27, 2015

Customer Part Reviews ?

5
Average Rating (out of 5):
7 Reviews
Click to filter by ratings:
5 stars
7
4 stars
0
3 stars
0
2 stars
0
1 stars
0
  • Highest Rating
  • Most Recent
< PREV
  • 1
NEXT >
  • I received my package, your tracking system works wonderful. I just haven't had time on my end to fix my weed whip. Thank you for the excellent service.
    I received my parts but I haven't had the time to fix my trimmer.
    Guest - July 30, 2021 Verified Purchase
    Service/Product
    Product was what I ordered, with another part, it fit and picture/description of part was accurate and good.
    Terry - July 1, 2019 Verified Purchase
    Fixed leaky tank
    Replaced the vent, fuel, and return lines, along with the tank grommet on my Echo blower. They arrived quickly, fit perfectly, and I was back in business in about 10 minutes.
    Guest - June 7, 2019 Verified Purchase
    Replacement parts
    Came quick and worked as it should
    Guest - June 5, 2019 Verified Purchase
    good results
    Exact item needed and an easy fix
    Guest - May 28, 2019 Verified Purchase
    Great!
    As described.....just what I wanted!
    Guest - May 27, 2019 Verified Purchase
    Wirira prende y se apaga
    Ala wirira le cambie todas las partes internas del carburador y volvió a trabajar normal muchas Gracias por su servicio bay
    Garcia - May 25, 2019 Verified Purchase

    Questions & Answers ?

    Our customer Service team is at the ready daily to answer your part and product questions.

    photo of team member
    Ask our Team

    We have a dedicated staff with decades of collective experience in helping customers just like you purchase parts to repair their products.

    Does this fit my product?

    Questions & Answers for Vent Tube


    No questions have been asked yet

    Customer Repair Instructions ?

    All our customer repair instructions are solicited directly from other customers just like you who have purchased and replaced this exact part.

    Easy 15-30 minutes (56 rated repairs)?

    Primer bulb was leaking, Trimmer was difficult to start and ran rough. Fuel lines and fuel line grommet were soft and sticky.

    Dennis - February 17, 2016
    👍 4 of 5 people found this instruction helpful
    Removed fuel lines from air purge body assembly. Removed the purge bulb retainer. Removed fuel line grommet from fuel tank by prying out with a screw drive. Inserted new fuel line, fuel vent line, and fuel return lines in new fuel line grommet. Inserted new grommet with lines into fuel tank by carefully using a screw driver to push grommet into the opening. Then inserted fuel tank vent into the vent line. As a precaution, I changed out the air purge body assembly. Attached the fuel line and the fuel return line to the air purge body assembly. I had taken a photo of the connections before dis-assembly to be sure I got the lines back in the right places. Installed the new purge bulb and reinstalled the purge bulb retainer. Hedger now runs great.
    Did you find this story helpful?
    Thanks for voting and helping fellow customers!

    2 hard to start trimmers

    KURT - September 28, 2016
    👍 2 of 2 people found this instruction helpful
    Tool Type

    Trimmer

    Difficulty

    Easy

    Time

    Less than 15 minutes

    Tools Used

    Screwdriver, Socket set

    The Echo trimmer needs a fuel line grommet, the old one was cracked. The trouble shooting list on ereplacement web site clearly indicated this problem and solution. The new grommet solved the problem. For shipping cost, also order and replace vent tube and fuel tank vent.
    The Toro trimmer had the same problem, but grommet is no longer available. Had to order a new fuel tank. I was happy that the new tank comes with fuel filter and fuel and vent tubing already installed permanently on the new tank. No grommet is needed in the new fuel tank. So the purchase price is a good value. Just plug the fuel and vent tubing to the engine, and it runs like new!
    Did you find this story helpful?
    Thanks for voting and helping fellow customers!

    Fuel lines had developed a leak

    Gurry - August 24, 2016
    👍 2 of 2 people found this instruction helpful
    Tool Type

    Blower

    Difficulty

    Medium

    Time

    30-60 minutes

    Tools Used

    Screwdriver, Nutdriver

    Removed the fuel tank, flushed and replaced fuel filter, fuel return and vent line.
    Did you find this story helpful?
    Thanks for voting and helping fellow customers!

    Gave my ECHO SRM-10 maintenance.

    John - February 29, 2016
    👍 2 of 2 people found this instruction helpful
    Tool Type

    Edger

    Difficulty

    Easy

    Time

    15-30 minutes

    Tools Used

    Screwdriver, Socket set, A piece of wire with hand formed hook

    This maintenance was pretty straight forward. Replacing air filter and spark plug was easy. Instructions come with spark plug gap number so that you can adjust the gap yourself. Replaced fuel vent, filter and primer tubes which are easy removed and replaced. Replaced fuel filter, as it's attached to the end of a tube inside of fuel tank. You use a 4" wire and form a hook on the end of it in order to pull out the tube from inside the fuel tank. It has the fuel filter attached to it. Simple replace. I replaced the rubber primer bulb. It's attached by 4 screws to carburetor and easy to access. Just remove the screws and plate, then remove old bulb and replace with new primer bulb and reattach screws. This all took about 30 minutes. Very easy. You just need screwdriver, spark plug socket and wire cutters to cut a piece of wire with. Use a coat hanger wire or any flexible wire that you can stick inside the fuel tank.
    Did you find this story helpful?
    Thanks for voting and helping fellow customers!

    fuel leaking (badly) from around fuel line grommet

    Randy - November 17, 2016
    👍 1 of 1 people found this instruction helpful
    1. Removed the old grommet and fuel lines
    2. Installed new fuel line, fuel return line, and vent tube into the new grommet
    3. Installed the new fuel filter on the fuel line in the tank
    4. Installed the grommet in the fuel tank
    5. Connected lines onto the carburetor
    6. Connected fuel tank vent

    New fuel lines fit very tightly into the new grommet and likewise the grommet in the fuel tank. Use a small amount of lubrication and it will go much easier.
    Did you find this story helpful?
    Thanks for voting and helping fellow customers!

    Primer bulb and fuel line grommet cracked & leaking

    Gerald - September 4, 2016
    👍 1 of 1 people found this instruction helpful
    1. Removed fuel tank.
    2. Replaced primer bulb & fuel line grommet plus all fuel lines, fuel filter
    3. Reinstalled fuel tank
    4. Replaced air filter.
    Did you find this story helpful?
    Thanks for voting and helping fellow customers!

    The grommet and fuel lines were old.

    Elton - July 28, 2016
    👍 1 of 1 people found this instruction helpful
    Removed the old grommet and the fuel lines and put new ones in.
    Did you find this story helpful?
    Thanks for voting and helping fellow customers!

    Old cracked and soft fuel lines and tank grommet

    Corey - August 14, 2016
    👍 1 of 1 people found this instruction helpful
    Tool Type

    Trimmer

    Difficulty

    Easy

    Time

    Less than 15 minutes

    Tools Used

    Screwdriver, Pliers

    Pulled out old tank grommet, removed old lines from the grommet. Replaced new lines in grommet and then replaced tank grommet in tank.
    Did you find this story helpful?
    Thanks for voting and helping fellow customers!

    Fuel leak

    Sarah - August 12, 2016
    👍 1 of 1 people found this instruction helpful
    Tool Type

    Trimmer

    Difficulty

    Medium

    Time

    30-60 minutes

    Tools Used

    Screwdriver, Pliers

    1. Simple repair.
    2. Removed old tubes and replaced.
    3. Instructions not really needed.

    Your website was very helpful. Good idea to list different problems and then see what parts are used to usually fix the problem. Well done!
    Did you find this story helpful?
    Thanks for voting and helping fellow customers!

    Gasoline leaking from grommet in fuel tank. Old tubes also well worn. Time to replace air filter and spark plug too.

    Paul - July 8, 2016
    👍 1 of 1 people found this instruction helpful
    1. Removed "foot" from the base of the motor.
    2. Removed pull starter.
    3. Removed fuel tank, all tubes, and grommet.
    4. Replaced grommet, tubes, and filters.
    5. Also replaced air filter and spark plug.
    No more leaks and unit runs well!
    Did you find this story helpful?
    Thanks for voting and helping fellow customers!

    OEM stands for Original Equipment Manufacturer and means the part you’re buying is sourced directly from the manufacturer who made your product. At eReplacementParts, we sell only genuine OEM parts, guaranteeing the part you’re purchasing is of better design and of higher quality than aftermarket parts.

    Our product descriptions are a combination of data sourced directly from the manufacturers who made your product as well as content researched and curated by our content & customer service teams. This content is edited and reviewed internally before being made public to customers.

    Our customer service team are at the ready daily to answer your part and product questions. We have a dedicated staff with decades of collective experience in helping customers just like you purchase parts to repair their products.

    All our part reviews are solicited directly from other customers who have purchased this exact part. While we moderate these reviews for profanity, offensive language or personally identifiable information, these reviews are posted exactly as submitted and no alterations are made by our team.

    All our customer repair instructions are solicited directly from other customers just like you who have purchased and replaced this exact part. While we moderate these reviews for profanity, offensive language or personally identifiable information, these reviews are posted exactly as submitted and no alterations are made by our team.

    Based on data from past customer purchasing behaviors, these parts are most commonly purchased together along with the part you are viewing. These parts may be necessary or helpful to replace to complete your current repair.

    All our installation videos are created and produced in collaboration with our in-house repair technician, Mark Sodja, who has helped millions of eReplacementParts customers over the last 13 years repair their products. Mark has years of experience in selling and repairing both commercial and residential products with a specialty in gas-powered equipment.

    This data is collected from customers who submitted a repair instruction after replacing this exact part. Customers can rate how easy the repair was to complete and how long it took. We aggregate this data to provide a repair rating that allows customers to quickly determine the difficulty and time needed to perform their own repair.

    eReplacementParts.com
    7174 South 400 West
    Suite 5
    Midvale, UT 84047
    visa mastercard discover american express PayPal