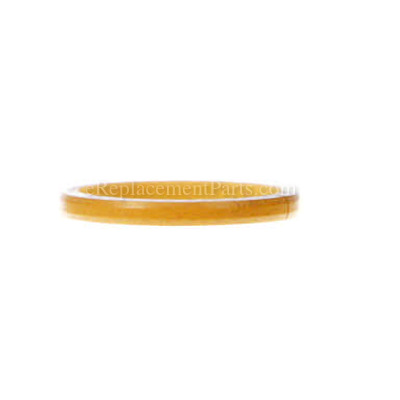
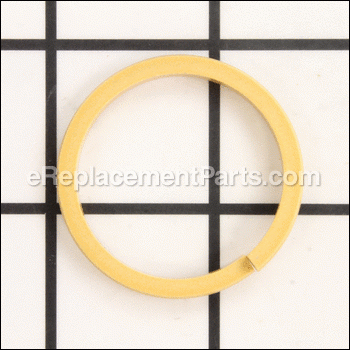


This is a Genuine OEM replacement part for use with Senco Nailers/Staplers. This item is made out of Rubber Material and it is Sold Individually. The purpose of this part is to create a seal so air does not leak from the gun. When replacing this Seal it is advised to inspect all of the other Seals and O-Rings for wear.
When replacing this item you would need an Allen Wrench Set and Pliers.
Seal LB5046
OEM part for: Senco
Part Number: LB5046
$7.07
In Stock
Jump To:
Product Description ?
- Classification: Part
- Weight: 0.01 lbs.
- Shipping: Ships Worldwide
Frequently Purchased Together ?


Compatibility
This part will fit the following 15 machines
Senco
SCN40DW Drywall Coil Nailer View Diagrams & Manuals
SCN40R Roofing Coil Nailer View Diagrams & Manuals
SFN30 15 Ga. Finish Nailer View Diagrams & Manuals
SKSXP Medium Wire Stapler View Diagrams & Manuals
SNS40 Rugged Duty Stapler View Diagrams & Manuals
SPS Stapler View Diagrams & Manuals
SFN1 Nailer View Diagrams & Manuals
SFN1+ Nailer View Diagrams & Manuals
SKS Stapler View Diagrams & Manuals
SCN40DWFRH (650003N) "drywall Coil Nailer, 1-1/2"" To 1-5/8"" (Scn40dw)" View Diagrams & Manuals
SCN40DWFRH (650004N) Scn40dw Drywall Coil Nailer View Diagrams & Manuals
SFN3015Ga (620002N) Sfn30 15 Gauge Finish Nailer View Diagrams & Manuals
SKS18 (300084N) "sks (N12-N17) Stapler, Contact Actuation" View Diagrams & Manuals
SNS42 (702001N) Stapler View Diagrams & Manuals
SNS43 (702002N) Stapler View Diagrams & Manuals
Show More Compatible Models
This item works with the following types of products:
- Nailer Parts
- Stapler Parts
Customer Part Reviews ?
Average Rating (out of 5):
Click to filter by ratings:
5 stars
3
4 stars
0
3 stars
0
2 stars
0
1 stars
0
< PREV
- 1
Extra instructions made an easy install
Ordered a seal for a Senco finish nailer. Perfect fit and a great instructional tip on installing it. (Soak in hot water and install like a tire)
Guest -
September 20, 2022
Verified Purchase
repair part for nail gun.
originally purchased the wrong part but was able to return with no hassel.
Guest -
November 16, 2021
Verified Purchase
part replacement
The part was an exact replacement and is working.
Guest -
May 9, 2020
Verified Purchase
t
t
t -
t days ago
Verified Purchase
eReplacementParts Team
t
Questions & Answers ?
Our customer Service team is at the ready daily to answer your part and product questions.

Ask our Team
We have a dedicated staff with decades of collective experience in helping customers just like you purchase parts to repair their products.
Does this fit my product?Questions & Answers for Seal
No questions have been asked yet
Customer Repair Instructions ?
All our customer repair instructions are solicited directly from other customers just like you who have purchased and replaced this exact part.
Plunger would not return .
James - February 1, 2018
👍 2 of 2 people found this instruction helpful
Tool Type
Stapler
Difficulty
Easy
Time
15-30 minutes
Tools Used
Screwdriver, Allen wrenches
Parts Used
Removed top end of gun clean and replace seals keeping parts in order as they came apart. Then I pulled the staple rail and head from gun and knocked the plunger cylinder out of the gun cleaned replace the two main seals and put plunger back in I then pulled apart railhead and replaced seal and put back together. I then continued to put the gun completely back together and then hook air to it and tested. It works like a new one.
Did you find this story helpful?
Thanks for voting and helping fellow customers!
tool would shoot one staple then would not pick up another stapkw
Loyd - March 10, 2022
Tool Type
Stapler
Difficulty
Easy
Time
Less than 15 minutes
Tools Used
, Allen wrench
Parts Used
Remove the exhaust cover from top of by staple gun
remove driver from cylinder sleeve.
Remove old seal from driver and install new one
Place driver back into cylinder sleeve and put exhaust cover back on tool
Repair complete .tool works good
remove driver from cylinder sleeve.
Remove old seal from driver and install new one
Place driver back into cylinder sleeve and put exhaust cover back on tool
Repair complete .tool works good
Did you find this story helpful?
Thanks for voting and helping fellow customers!
driver would not retract
RICHARD - January 9, 2022
Tool Type
Nailer
Difficulty
Easy
Time
Less than 15 minutes
Tools Used
, allen wrench
Parts Used
took top off of tool
replaced seal
replaced seal
Did you find this story helpful?
Thanks for voting and helping fellow customers!
Damaged cylinder seal And piston ring
James - January 7, 2021
Tool Type
Stapler
Difficulty
Easy
Time
Less than 15 minutes
Tools Used
Screwdriver, 6mm hex socket (3/8” drive)
Parts Used
1. Removed top cap (4 hex screws) and main staple holder/feed mechanism (1 machine nut & screw + 4 hex screws)
2. Removed Top interior cylinder guard
3. Removed piston and cylinder
4. Replaced large o-ring on new aluminum cylinder: replaced piston o-ring and seal
5. Coated internal parts and piston ring with dry powdered Teflon (don’t use oil!)
6. Installed new cylinder and piston
7. Replaced top cap/ tighten 4 hex screws
8. Replaced staple feed mechanism: 1 nut & screw plus 4 hex screws.
Did you find this story helpful?
Thanks for voting and helping fellow customers!
air leaks
Larry - April 23, 2020
Tool Type
Nailer
Difficulty
Medium
Time
30-60 minutes
Tools Used
, allen and starr tools
Disassembled nailer
Completely cleaned all parts
Reassemble nailer using new orings
Works like a new nailer gun
Completely cleaned all parts
Reassemble nailer using new orings
Works like a new nailer gun
Did you find this story helpful?
Thanks for voting and helping fellow customers!
driver would not go up far enough to pick up another nail
danny - March 16, 2020
Tool Type
Nailer
Difficulty
Easy
Time
15-30 minutes
Tools Used
, allen wrench
Parts Used
new driver
new seal
new seal
Did you find this story helpful?
Thanks for voting and helping fellow customers!
Broken driver blade
michael - October 4, 2018
Tool Type
Stapler
Difficulty
Easy
Time
15-30 minutes
Tools Used
, Allen wrench, pin punch, clean towel
1. Remove cylinder cap/muffler assembly
2. Remove piston/driver assembly
3. Remove both roll pins from piston/driver assembly
4. Install new driver with both new roll pins
5. Inspect cylinder for any debris from broken driver, remove any found pieces
6. Inspect for any damage to cylinder wall ie scratches/burrs
7. If none found reassemble using new seal on piston if existing is damaged
8. Tighten the 4 allen head screws on cap assembly evenly / being careful not to over tighten
Did you find this story helpful?
Thanks for voting and helping fellow customers!
Leaking air
David - May 12, 2017
Tool Type
Nailer
Difficulty
Easy
Time
15-30 minutes
Tools Used
, Allen wrench
Parts Used
Remove the four screws from the cap.
Remove the broken and worn seals
Cleaned out the gun
Installed the new parts and oil the gun
Replaced the cap with the for screws
Remove the broken and worn seals
Cleaned out the gun
Installed the new parts and oil the gun
Replaced the cap with the for screws
Did you find this story helpful?
Thanks for voting and helping fellow customers!
Replaced seals pins and retrofit kit
alfred - March 31, 2017
Tool Type
Nailer
Difficulty
Easy
Time
30-60 minutes
Tools Used
Nutdriver, Allen wrench
Removed the screws holding the cap on.
Removed the driver
Removed the old cylinder
Installed the seal and other parts listed
Cleaned the gun through out and oiled it
Put it back together
Replaced the cap
Shoots like a new nail gun
Removed the driver
Removed the old cylinder
Installed the seal and other parts listed
Cleaned the gun through out and oiled it
Put it back together
Replaced the cap
Shoots like a new nail gun
Did you find this story helpful?
Thanks for voting and helping fellow customers!
Driver broke piston wore out
James - March 8, 2017
Tool Type
Stapler
Difficulty
Easy
Time
Less than 15 minutes
Tools Used
Screwdriver, Pliers, Power Drill, Nutdriver
Pull head off 4screws
Push piston out
Put new piston in vice and assemble driver bang in rivets with hammer and back side of nail punch there are 2 rivets big one 1st then 2nd
Install new seals
Slide in driver put head back the way it was tighten 4 machine screws
Take a break
Go back to making money
Push piston out
Put new piston in vice and assemble driver bang in rivets with hammer and back side of nail punch there are 2 rivets big one 1st then 2nd
Install new seals
Slide in driver put head back the way it was tighten 4 machine screws
Take a break
Go back to making money
Did you find this story helpful?
Thanks for voting and helping fellow customers!
Load More Install Stories
OEM stands for Original Equipment Manufacturer and means the part you’re buying is sourced directly from the manufacturer who made your product. At eReplacementParts, we sell only genuine OEM parts, guaranteeing the part you’re purchasing is of better design and of higher quality than aftermarket parts.
Our product descriptions are a combination of data sourced directly from the manufacturers who made your product as well as content researched and curated by our content & customer service teams. This content is edited and reviewed internally before being made public to customers.
Our customer service team are at the ready daily to answer your part and product questions. We have a dedicated staff with decades of collective experience in helping customers just like you purchase parts to repair their products.
All our part reviews are solicited directly from other customers who have purchased this exact part. While we moderate these reviews for profanity, offensive language or personally identifiable information, these reviews are posted exactly as submitted and no alterations are made by our team.
All our customer repair instructions are solicited directly from other customers just like you who have purchased and replaced this exact part. While we moderate these reviews for profanity, offensive language or personally identifiable information, these reviews are posted exactly as submitted and no alterations are made by our team.
Based on data from past customer purchasing behaviors, these parts are most commonly purchased together along with the part you are viewing. These parts may be necessary or helpful to replace to complete your current repair.
All our installation videos are created and produced in collaboration with our in-house repair technician, Mark Sodja, who has helped millions of eReplacementParts customers over the last 13 years repair their products. Mark has years of experience in selling and repairing both commercial and residential products with a specialty in gas-powered equipment.
This data is collected from customers who submitted a repair instruction after replacing this exact part. Customers can rate how easy the repair was to complete and how long it took. We aggregate this data to provide a repair rating that allows customers to quickly determine the difficulty and time needed to perform their own repair.