
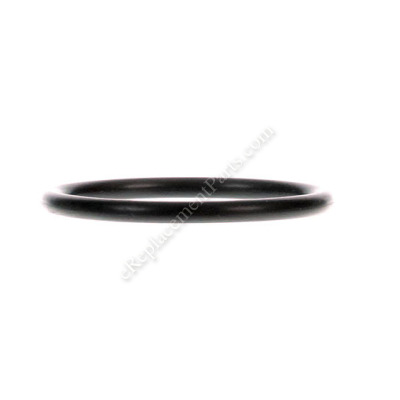


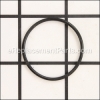
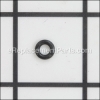
This item has been sourced from the original manufacturer to be used with pneumatic nailers and staplers. The seal is used to prevent air leaks and to secure the area between the cylinder and the body of the nailer. This item can be purchased as an individual replacement part.
Seal LB0777
OEM part for: Senco
Part Number: LB0777
$4.99
In Stock
Jump To:
Frequently Purchased Together ?


Compatibility
This Seal will fit the following 9 machines. Confirm this part works with your model, and view the detailed model diagrams and repair help we have to offer.
Senco
Show More Compatible ModelsThis item works with the following types of products:
- Nailer Parts
- Stapler Parts
Questions & Answers ?
Our customer Service team is at the ready daily to answer your part and product questions.

Ask our Team
We have a dedicated staff with decades of collective experience in helping customers just like you purchase parts to repair their products.
Does this fit my product?Questions & Answers for Seal
No questions have been asked yet
Customer Repair Instructions ?
All our customer repair instructions are solicited directly from other customers just like you who have purchased and replaced this exact part.
dried out rubber
Steven - July 10, 2016
👍 1 of 1 people found this instruction helpful
Tool Type
Stapler
Difficulty
Medium
Time
15-30 minutes
Tools Used
, Allen wrench
Senco SKS gun (mid 90'). Remove four alan screws at the top of the cylinder and everything pulls straight out without any other tools. The old plastic piston is no longer made and the seal is no longer available for it. Since that was the main problem with the gun, I bought the new style aluminum piston. It slides right in. Lube all the rubber with silicone o-ring lube. Good as new again.
Did you find this story helpful?
Thanks for voting and helping fellow customers!
The driver would not return to the fire position to drive another nail
Jack - January 6, 2022
Tool Type
Nailer
Difficulty
Medium
Time
Less than 15 minutes
Tools Used
, Allen wrenchs
Parts Used
Removed the cylinder from nail gun and replaced a couple seals that were in shards from Old Age with new ones and put nail gun back together and it works like it did in 1967 when I purchased it. If you go to the website ,all you do is punch in the model and whatever information in and it comes up with a schematic of your tool for parts and part numbers for all parts in the tool. Follow the pictures and you can rebuild almost any tool you might own. Their Staff is very Helpful and Courteous too !!! Great Company to do Business with and Parts are Shipped and Arrive when they Promise…. 10 Star Business
Did you find this story helpful?
Thanks for voting and helping fellow customers!
air leaks
Larry - April 23, 2020
Tool Type
Nailer
Difficulty
Medium
Time
30-60 minutes
Tools Used
, allen and starr tools
Disassembled nailer
Completely cleaned all parts
Reassemble nailer using new orings
Works like a new nailer gun
Completely cleaned all parts
Reassemble nailer using new orings
Works like a new nailer gun
Did you find this story helpful?
Thanks for voting and helping fellow customers!
Paul - March 7, 2019
Tool Type
Stapler
Difficulty
Easy
Time
15-30 minutes
Tools Used
Socket set, Allen wrench
Parts Used
Replaced cylinder..easy...
Did you find this story helpful?
Thanks for voting and helping fellow customers!
Driver would not return to top of cylinder
Ray - April 24, 2017
Tool Type
Stapler
Difficulty
Easy
Time
Less than 15 minutes
Tools Used
, 9/64 Allen wrench
Parts Used
1. Remove four cap screws.
2. Remove cap, muffler and valve assembly together and set aside as a unit.
3. Remove plastic cylinder (sleeve) support ring.
4. Turn gun body upside down and tap body on the work bench to dislodge sleeve and driver.
5. Use rubber pad or folded shop towels to protect gun body surface.
6. Remove driver from old sleeve if it didn't separate when removing the original sleeve. 7. Remove rubber bumper stop and large O-ring seal and reinstall on the new aluminum sleeve.
7. Install new sleeve.
8. ReInstall driver.
9. ReInstall plastic support collar.
10. Reinstall cap, muffler, and valve assembly unit.
11. Reinstall and tighten 4 cover screws. DONE!!
Such an easy fix. It actually took longer to write this procedure than to do the repair. Gun works like new.
Did you find this story helpful?
Thanks for voting and helping fellow customers!
Broken seals, retro fit sleeve kit
Jim - April 9, 2017
Tool Type
Nailer
Difficulty
Medium
Time
15-30 minutes
Tools Used
, Allen wrench
Disassembled unit. Removed front and rear covers, replaced damaged parts with new and reassembled.
Did you find this story helpful?
Thanks for voting and helping fellow customers!
Replaced seals pins and retrofit kit
alfred - March 31, 2017
Tool Type
Nailer
Difficulty
Easy
Time
30-60 minutes
Tools Used
Nutdriver, Allen wrench
Removed the screws holding the cap on.
Removed the driver
Removed the old cylinder
Installed the seal and other parts listed
Cleaned the gun through out and oiled it
Put it back together
Replaced the cap
Shoots like a new nail gun
Removed the driver
Removed the old cylinder
Installed the seal and other parts listed
Cleaned the gun through out and oiled it
Put it back together
Replaced the cap
Shoots like a new nail gun
Did you find this story helpful?
Thanks for voting and helping fellow customers!
Piston wouldn't return
Gary - February 22, 2017
Tool Type
Stapler
Difficulty
Medium
Time
15-30 minutes
Tools Used
, Allen wrench
Parts Used
Removed the top cover of the stapler and replace various seals and o-rings
Cleaned and oiled the internal parts
Replaced the top cover
Cleaned and oiled the internal parts
Replaced the top cover
Did you find this story helpful?
Thanks for voting and helping fellow customers!
Would not fire a staple
Fred - January 29, 2017
Tool Type
Stapler
Difficulty
Easy
Time
15-30 minutes
Tools Used
, Allen wrench
Replaced the worn o rings and the redesigned firing cilinder ,cleaned and lubed all parts and put back together . Works as good as new.
Very pleased with results .
Very pleased with results .
Did you find this story helpful?
Thanks for voting and helping fellow customers!
Plunger not retracting
Max - January 8, 2017
Tool Type
Stapler
Difficulty
Easy
Time
15-30 minutes
Tools Used
Screwdriver, Allen wrenches, mallet
Removed the top cap assembly
Removed the piston and driver
Tapped on the housing with a mallet, with the stapler upside down to release the cylinder.
Installed the new cylinder
Installed all of the other seals and o-rings
Place the top cap on.
Shoots like it's new
Removed the piston and driver
Tapped on the housing with a mallet, with the stapler upside down to release the cylinder.
Installed the new cylinder
Installed all of the other seals and o-rings
Place the top cap on.
Shoots like it's new
Did you find this story helpful?
Thanks for voting and helping fellow customers!
Load More Install Stories
OEM stands for Original Equipment Manufacturer and means the part you’re buying is sourced directly from the manufacturer who made your product. At eReplacementParts, we sell only genuine OEM parts, guaranteeing the part you’re purchasing is of better design and of higher quality than aftermarket parts.
Our product descriptions are a combination of data sourced directly from the manufacturers who made your product as well as content researched and curated by our content & customer service teams. This content is edited and reviewed internally before being made public to customers.
Our customer service team are at the ready daily to answer your part and product questions. We have a dedicated staff with decades of collective experience in helping customers just like you purchase parts to repair their products.
All our part reviews are solicited directly from other customers who have purchased this exact part. While we moderate these reviews for profanity, offensive language or personally identifiable information, these reviews are posted exactly as submitted and no alterations are made by our team.
All our customer repair instructions are solicited directly from other customers just like you who have purchased and replaced this exact part. While we moderate these reviews for profanity, offensive language or personally identifiable information, these reviews are posted exactly as submitted and no alterations are made by our team.
Based on data from past customer purchasing behaviors, these parts are most commonly purchased together along with the part you are viewing. These parts may be necessary or helpful to replace to complete your current repair.
All our installation videos are created and produced in collaboration with our in-house repair technician, Mark Sodja, who has helped millions of eReplacementParts customers over the last 13 years repair their products. Mark has years of experience in selling and repairing both commercial and residential products with a specialty in gas-powered equipment.
This data is collected from customers who submitted a repair instruction after replacing this exact part. Customers can rate how easy the repair was to complete and how long it took. We aggregate this data to provide a repair rating that allows customers to quickly determine the difficulty and time needed to perform their own repair.