


Genuine Dewalt replacement part, this item is sold individually.
This screw is used in various places in all of the tools listed below
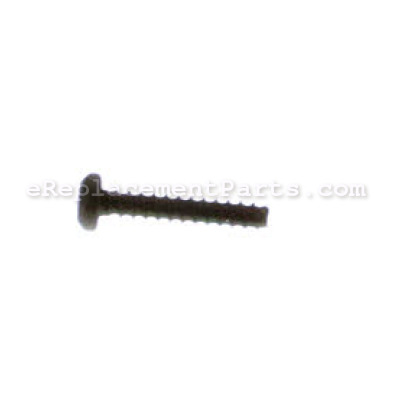
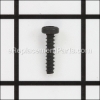
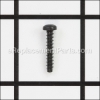
The most common use for this screw is to secure plastic housings together.
It has a Torx T-20 head.
Plastite Screw 330019-04
OEM part for: DeWALT, Black and Decker, Porter Cable, Bostitch, Stanley
Part Number: 330019-04
$4.99
In Stock
Jump To:
Product Description ?
- Classification: Part
- Weight: 0.01 lbs.
- Shipping: Ships Worldwide
Frequently Purchased Together ?


Compatibility
This Plastite Screw will fit the following 1323 machines. Confirm this part works with your model, and view the detailed model diagrams and repair help we have to offer.
DeWALT
Black and Decker
Porter Cable
Bostitch
Stanley
Show More Compatible ModelsThis item works with the following types of products:
- Cordless Drill Parts
- Drill Parts
- Hammer Drill Parts
- Impact Driver Parts
- Screwdriver Parts
- Rotary Hammer Parts
- Circular Saw Parts
- Saw Parts
- Reciprocating Saw Parts
- Trim Saw Parts
- Miter Saw Parts
- Shear Parts
- Sander Parts
- Impact Wrench Parts
- Grinder Parts
- Chop Saw Parts
- Grass Trimmer Parts
- Trimmer Parts
- Blower Parts
- Lawn Mower Parts
- Edger Parts
- Hedge Trimmer Parts
- Charger Parts
- Jig saw Parts
- Multi-Tool Parts
- Electric Drill Parts
- Oscillating Tool Parts
This part replaces obsolete part #: 330013-04
Customer Part Reviews ?
Average Rating (out of 5):
Click to filter by ratings:
5 stars
3
4 stars
0
3 stars
0
2 stars
0
1 stars
0
< PREV
- 1
easy repair
All parts ordered were received together on time and perfect condition. ereplacementparts.com made it very easy, I highly recommend them, and look forward to future business. Thanks for making it easy and painless !!
Roger -
January 30, 2023
Verified Purchase
Easy repair
Good condition
Guest -
July 5, 2022
Verified Purchase
Perfect replacement
It was the correct part and worked.
Guest -
June 18, 2019
Verified Purchase
Questions & Answers ?
Our customer Service team is at the ready daily to answer your part and product questions.

Ask our Team
We have a dedicated staff with decades of collective experience in helping customers just like you purchase parts to repair their products.
Does this fit my product?Questions & Answers for Plastite Screw
No questions have been asked yet
Customer Repair Instructions ?
All our customer repair instructions are solicited directly from other customers just like you who have purchased and replaced this exact part.
Replace hedge trimmer handle
John - March 30, 2016
👍 2 of 2 people found this instruction helpful
Tool Type
Hedge Trimmer
Difficulty
Easy
Time
Less than 15 minutes
Tools Used
Screwdriver
Parts Used
Very simple.
Line up handle with trimmer
Screw in the screws
3 minutes maximum
Line up handle with trimmer
Screw in the screws
3 minutes maximum
Did you find this story helpful?
Thanks for voting and helping fellow customers!
Handle was broken
Marie - February 12, 2024
👍 1 of 1 people found this instruction helpful
Tool Type
Hedge Trimmer
Difficulty
Easy
Time
Less than 15 minutes
Tools Used
Screwdriver
Parts Used
Removed the defective handle and replaced with the new one.
Did you find this story helpful?
Thanks for voting and helping fellow customers!
Nothing
Reginald - February 18, 2023
👍 1 of 1 people found this instruction helpful
Tool Type
Chop Saw
Difficulty
Easy
Time
30-60 minutes
Tools Used
Screwdriver
Took of broken parts
Replaced with new
Replaced with new
Did you find this story helpful?
Thanks for voting and helping fellow customers!
slight vibration
Roger - February 1, 2023
Tool Type
Hedge Trimmer
Difficulty
Easy
Time
30-60 minutes
Tools Used
Screwdriver, Pliers
removed cover exposing the motor, cleaned in and around motor, removed old brushes and installed new ones, cleaned and greased lower blade drive assembly, reassembled, and test run, proved smoother and quieter operation .
Did you find this story helpful?
Thanks for voting and helping fellow customers!
The two torx screws holding the plastic guard in place worked loose and fell out. I couldn't find them, so I had to order new ones.
William - May 12, 2022
Tool Type
Trimmer
Difficulty
Easy
Time
Less than 15 minutes
Tools Used
Screwdriver, Torx screwdriver
Parts Used
1. I put the plastic guard in place
2. Inserted the screws and tightened them down.
3. I will be checking them each time I use the trimmer now.
2. Inserted the screws and tightened them down.
3. I will be checking them each time I use the trimmer now.
Did you find this story helpful?
Thanks for voting and helping fellow customers!
The hedge trimmer motor quit working when attached to an electrical resource
James - April 11, 2019
Tool Type
Hedge Trimmer
Difficulty
Easy
Time
30-60 minutes
Tools Used
Screwdriver, Power Drill, None.
Parts Used
*Remove all the screws from the external casing.
*With a small screw driver pry the old switch off of the two plastic prongs that hold the old switch in place. This is a delicate process for you do not want to break of the plastic prongs.
*Detach the two electrical wires that connect to the old switch
*Reattach these two wires to the new switch.
Reinsert the new switch onto the plastic prongs
Re-insert all casing screws.
Task completed.
Did you find this story helpful?
Thanks for voting and helping fellow customers!
handle broken.
John - February 12, 2019
Tool Type
Reciprocating Saw
Difficulty
Easy
Time
Less than 15 minutes
Tools Used
Screwdriver
Replaced clam shell and (1) brush.
Simple remove all screws with a T10 Torx driver.
Reuse switch. Installed brush. ( Attached wire on brush was broken when handle failed.)
Replace with new parts. SIMPLE
Simple remove all screws with a T10 Torx driver.
Reuse switch. Installed brush. ( Attached wire on brush was broken when handle failed.)
Replace with new parts. SIMPLE
Did you find this story helpful?
Thanks for voting and helping fellow customers!
The blade had become badly worn and chewed up. Could not be sharpened any further
David - November 6, 2018
Tool Type
Hedge Trimmer
Difficulty
Easy
Time
15-30 minutes
Tools Used
Screwdriver, Torx #5 screwdriver
Very simple -
Removed the top handle and blade protector. Removed screws and slipped off.
Removed screws holding the casing, and exposed the blade.
Removed screws holding blade to motor and then removed the blade.
(The blade is one inclusive unit)
Reattach the blade being certain to align with the rotor that moves the scissors back and forth. Had to adjust the blades to line up just right.
Reattach housing, I bought new screws for this.
Reattach the blade protector.
Reattach the handle.
Ready to go.
Did you find this story helpful?
Thanks for voting and helping fellow customers!
Line blade fell off
John - June 25, 2018
Tool Type
Trimmer
Difficulty
Easy
Time
Less than 15 minutes
Tools Used
Screwdriver
Used screw to reattach lost blade on trimmer. Also replaced lost housing screw.
Did you find this story helpful?
Thanks for voting and helping fellow customers!
Bail handle would not stay in place.
Charley - March 16, 2018
Tool Type
Hedge Trimmer
Difficulty
Easy
Time
Less than 15 minutes
Tools Used
Screwdriver
Parts Used
1. Removed the old bail handle (had some wear).
2. Installed the new one.
2. Installed the new one.
Did you find this story helpful?
Thanks for voting and helping fellow customers!
Load More Install Stories
OEM stands for Original Equipment Manufacturer and means the part you’re buying is sourced directly from the manufacturer who made your product. At eReplacementParts, we sell only genuine OEM parts, guaranteeing the part you’re purchasing is of better design and of higher quality than aftermarket parts.
Our product descriptions are a combination of data sourced directly from the manufacturers who made your product as well as content researched and curated by our content & customer service teams. This content is edited and reviewed internally before being made public to customers.
Our customer service team are at the ready daily to answer your part and product questions. We have a dedicated staff with decades of collective experience in helping customers just like you purchase parts to repair their products.
All our part reviews are solicited directly from other customers who have purchased this exact part. While we moderate these reviews for profanity, offensive language or personally identifiable information, these reviews are posted exactly as submitted and no alterations are made by our team.
All our customer repair instructions are solicited directly from other customers just like you who have purchased and replaced this exact part. While we moderate these reviews for profanity, offensive language or personally identifiable information, these reviews are posted exactly as submitted and no alterations are made by our team.
Based on data from past customer purchasing behaviors, these parts are most commonly purchased together along with the part you are viewing. These parts may be necessary or helpful to replace to complete your current repair.
All our installation videos are created and produced in collaboration with our in-house repair technician, Mark Sodja, who has helped millions of eReplacementParts customers over the last 13 years repair their products. Mark has years of experience in selling and repairing both commercial and residential products with a specialty in gas-powered equipment.
This data is collected from customers who submitted a repair instruction after replacing this exact part. Customers can rate how easy the repair was to complete and how long it took. We aggregate this data to provide a repair rating that allows customers to quickly determine the difficulty and time needed to perform their own repair.