
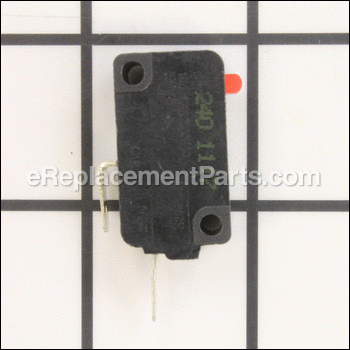
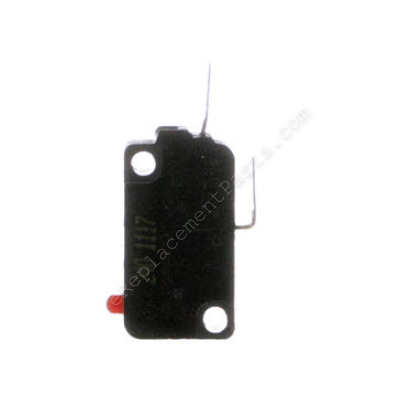


This authentic OEM sourced replacement switch is produced for use with Black and Decker and Dewalt hedge trimmers. Its function is to allow user to turn the equipment on and off. Because switches use mechanical internals, they will degrade and wear out eventually requiring replacement. Please note one durable plastic switch is included per order.
Switch 90541380
OEM part for: DeWALT, Black and Decker
Part Number: 90541380
$4.99
In Stock
Jump To:
Frequently Purchased Together ?

Compatibility
This part will fit the following 32 machines
Black and Decker
HH2450 Type 1 24" Hedge Hog Hedge Trimmer View Diagrams & Manuals
HH2450 Type 2 24" Hedge Hog Hedge Trimmer View Diagrams & Manuals
HS1010 Type 1 20" Hedge Hog Dual Action Hedge Trimmer View Diagrams & Manuals
HS1010 Type 2 20" Hedge Hog Dual Action Hedge Trimmer View Diagrams & Manuals
HT022 22" Electric Dual Action Hedge Trimmer View Diagrams & Manuals
TR1700 17" Hedge Trimmer View Diagrams & Manuals
TR1800 18" Hedge Trimmer View Diagrams & Manuals
HT2000 Type 1 20 Hedge Trimmer View Diagrams & Manuals
HT2000 Type 2 20 Hedge Trimmer View Diagrams & Manuals
HT22D Type 1 22 Hedge Trimmer View Diagrams & Manuals
HT2200 Type 1 22 Hedge Trimmer View Diagrams & Manuals
HT2200 Type 2 22 Hedge Trimmer View Diagrams & Manuals
TR1400 Type 1 14 Hedge Trimmer View Diagrams & Manuals
TR1600 Type 1 16 Hedge Trimmer View Diagrams & Manuals
79951 Type 1 18 Hedge Trimmer View Diagrams & Manuals
79955 Type 1 22 Hedge Trimmer View Diagrams & Manuals
79973 Type 1 18 Hedge Trimmer View Diagrams & Manuals
79974 Type 1 20 Hedge Trimmer View Diagrams & Manuals
79975 Type 1 22 Hedge Trimmer View Diagrams & Manuals
79952 Type 1 20 Hedge Trimmer View Diagrams & Manuals
HS1012 Type 1 22 Hedge Hog View Diagrams & Manuals
HS2400 Type 1 24 Hedge Trimmer View Diagrams & Manuals
HH2455 Type 1 24in Hedge Trimmer w/Rotating Handle View Diagrams & Manuals
HH2455 Type 2 24in Hedge Trimmer w/Rotating Handle View Diagrams & Manuals
HH2450 Type 3 Hedge Trimmer View Diagrams & Manuals
HH2400 24 In. Hedge Hog Hedge Trimmer View Diagrams & Manuals
HH2400 (Type 1) 24in Hedge Hog Power Tool View Diagrams & Manuals
HH2400 (Type 2) 24in Hedge Hog Power Tool View Diagrams & Manuals
HT022 (Type 1) 22 Hedge Trimmer Power Tool View Diagrams & Manuals
HT022 (Type 2) 22 Hedge Trimmer Power Tool View Diagrams & Manuals
TR1700 (Type 1) Rotary Mower Power Tool View Diagrams & Manuals
TR1800 (Type 1) Rotary Mower Power Tool View Diagrams & Manuals
Show More Compatible Models
This item works with the following types of products:
- Hedge Trimmer Parts
- Trimmer Parts
This part replaces obsolete part #: 394265-01
Customer Part Reviews ?
Average Rating (out of 5):
Click to filter by ratings:
5 stars
7
4 stars
1
3 stars
0
2 stars
0
1 stars
0
< PREV
- 1
Remove & Replace easy peezy!
The part was brand new. Easy to repair. 😀
Raymond -
September 13, 2022
Verified Purchase
Easy repair, was the exact part as shown
Was the exact part that I needed, it fit perfectly, and the hedge trimmer is up and running once again.
Guest -
August 20, 2021
Verified Purchase
The correct part, easy replacement and great experience
I was very please with the part I received as it was the correct part and was able to change it out and be back to working with my tool quickly with little ease!
Guest -
August 18, 2021
Verified Purchase
Easy Repair
The part arrived fast and we were back in business👍
Guest -
August 19, 2019
Verified Purchase
Great company, solid replacement part!
This Black and Decker Hedge Hog hedge trimmer replacement switch was actually a second time that I chose to replace it on my trimmer. I use my trimmer regularly, so this was a second time replacement in about 3 or so years, I believe?
As for eReplacement Parts....I've used this online company a lot and have always been pleased with their support. I haven't really checked their price points, but given the price of gasoline these days, ...and, the headaches of running around in traffic...I've found the cost of doing business with eReplacement Parts still a good deal.
Guest -
May 30, 2019
Verified Purchase
Great deal.
Exactly what I ordered and fixed my problem way cheaper than getting a new weed eater.
Guest -
May 4, 2019
Verified Purchase
B&D trimmer switch
Right price. Shipping delayed a day or two. Perfect fit.
Guest -
May 1, 2019
Verified Purchase
a little late
Arrived a few days late, but overall a good purchase
Bill -
October 30, 2023
Verified Purchase
t
t
t -
t days ago
Verified Purchase
eReplacementParts Team
t
Questions & Answers ?
Our customer Service team is at the ready daily to answer your part and product questions.

Ask our Team
We have a dedicated staff with decades of collective experience in helping customers just like you purchase parts to repair their products.
Does this fit my product?Questions & Answers for Switch
No questions have been asked yet
Customer Repair Instructions ?
All our customer repair instructions are solicited directly from other customers just like you who have purchased and replaced this exact part.
The switch stopped working
Scott - September 7, 2016
👍 5 of 5 people found this instruction helpful
Tool Type
Hedge Trimmer
Difficulty
Easy
Time
30-60 minutes
Tools Used
Screwdriver, TORX driver bits
Parts Used
1) Removed the screws to the handle, the guide, and the casing.
2) Slowly pulled apart
3) Compared new switch to old switch to make sure correct part and the direction it goes in.
4) Removed old switch and unplugged it one wire at a time and connected them to the new switch as I removed them (only two wires).
5) Put the new switch in place.
6) Put the casing back together, the guide, and the handle.
Did you find this story helpful?
Thanks for voting and helping fellow customers!
Switch was broken
James - March 21, 2016
👍 4 of 4 people found this instruction helpful
Tool Type
Hedge Trimmer
Difficulty
Easy
Time
15-30 minutes
Tools Used
Screwdriver, Pliers
Parts Used
Upon receiving the replacement switch I installed the new switch in just few seconds. It was easy to replace the switch, but took some time to put the case back together. The trimmer is working great and I did not have to throw it away and buy another. The part was a perfect fit.
Did you find this story helpful?
Thanks for voting and helping fellow customers!
Hedge trimmer was "dead"
John - January 25, 2016
👍 3 of 3 people found this instruction helpful
Tool Type
Hedge Trimmer
Difficulty
Medium
Time
1-2 hours
Tools Used
Screwdriver, Pliers, fine tipped tweezer
Parts Used
Following your guidelines to diagnose the problem, ordered the parts (brushes and switch).
Remove screws holding 2 halves of the body together. Separate the 2 plates, exposing the motor. Carefully pull out the end portion of the light springs holding the brushes in their channel with a fine tweezer. Remove the brushes utilizing gravity (tip motor and tap gently). Place new brushes into in their channels and reposition the holding springs onto the ends of each brush. Lift the switch off its plastic "pillars," remove wires connected to it. Attach wires, as before, to new switch and slip new switch back into place. Screw 2 halves of the plastic body back together.
Remove screws holding 2 halves of the body together. Separate the 2 plates, exposing the motor. Carefully pull out the end portion of the light springs holding the brushes in their channel with a fine tweezer. Remove the brushes utilizing gravity (tip motor and tap gently). Place new brushes into in their channels and reposition the holding springs onto the ends of each brush. Lift the switch off its plastic "pillars," remove wires connected to it. Attach wires, as before, to new switch and slip new switch back into place. Screw 2 halves of the plastic body back together.
Did you find this story helpful?
Thanks for voting and helping fellow customers!
Hedge trimmers would not shut off
david - July 15, 2018
👍 2 of 2 people found this instruction helpful
Tool Type
Hedge Trimmer
Difficulty
Easy
Time
Less than 15 minutes
Tools Used
Screwdriver
Parts Used
Removed side of trimmer & removed old switch & install the new one, reinstalled side.
Did you find this story helpful?
Thanks for voting and helping fellow customers!
BMD hedgehog would not start and run.
William - April 5, 2023
Tool Type
Hedge Trimmer
Difficulty
Easy
Time
Less than 15 minutes
Tools Used
Screwdriver
Parts Used
Made sure the hedgehog was unplugged. Removed the eight or 10 screws with a flat screwdriver. Took a picture of the components so I would know how they fit in case they shifted around. Removed the old switch and inserted the new switch. I was going to also replace the brushes, but it looked a little tedious so I reassembled and it started right up and ran beautifully. So I have two brushes in my inventory should I need them in the future. Received parts in five days and I am ready for summer trimming. 15 min job. Thank you!!!!
Did you find this story helpful?
Thanks for voting and helping fellow customers!
broken safety switch
Gerald - October 13, 2020
Tool Type
Hedge Trimmer
Difficulty
Easy
Time
30-60 minutes
Tools Used
Screwdriver, Nutdriver, soldering iron
Parts Used
disassembled hedger
removed broken switch
observed common wire from electric plug in detached
soldered common wire onto brush commutator
greased and cleaned hedger while disassembled
in ordering parts brushes (plural) ordered, seller delivered brush (singular) not a pair of brushes, so installed old brushes and did not use the 1 new brush delivered. in the future, if I do this repair again will cut out switch, solder wires together and fabricate replacement brushes from a piece of carbide
all in all repair easy but did not expect broken wire --- trimmer running perfect like new
Did you find this story helpful?
Thanks for voting and helping fellow customers!
Hedge Hog 24" trimmer was intermittent when running and stopped operating when shifted up and down.
Thomas - September 30, 2019
Tool Type
Hedge Trimmer
Difficulty
Medium
Time
15-30 minutes
Tools Used
Screwdriver, small wire nut, solder gun
Parts Used
I opened the plastic case with Phillips and Torx drivers;
I noted the two severely worn brushes and a broken wire from the switch to the armature -- resoldered it. I found that sometimes the switch worked properly and sometimes it didn't. I replaced both brushes (first raising the small brass retainer springs) and replaced the switch and then reassembled the case and had the same intermittent running problem as before when the unit was turned, shifted and extended during use.
I then opened the unit again and carefully studied the pig-tail power cord. I used my volt/ohmmeter to find an intermittent short in continuity due to a broken white wire in the cord. I removed the old power cord, inserted the new power cord, attached the black wire to the switch. I shortened and stripped the end of the original white wire to the armature winding wire and then used a small wire nut to connect the two ends of the white wires in the handle and reassembled the unit. It works perfectly now without any problems.
Thanks for your videos and informative website.
Tom S.
Did you find this story helpful?
Thanks for voting and helping fellow customers!
The hedge trimmer motor quit working when attached to an electrical resource
James - April 11, 2019
Tool Type
Hedge Trimmer
Difficulty
Easy
Time
30-60 minutes
Tools Used
Screwdriver, Power Drill, None.
Parts Used
*Remove all the screws from the external casing.
*With a small screw driver pry the old switch off of the two plastic prongs that hold the old switch in place. This is a delicate process for you do not want to break of the plastic prongs.
*Detach the two electrical wires that connect to the old switch
*Reattach these two wires to the new switch.
Reinsert the new switch onto the plastic prongs
Re-insert all casing screws.
Task completed.
Did you find this story helpful?
Thanks for voting and helping fellow customers!
On-off switch started failing and then stopped working.
Bob - June 27, 2018
Tool Type
Hedge Trimmer
Difficulty
Easy
Time
15-30 minutes
Tools Used
Screwdriver
Parts Used
1 Received new switch from Replacement Parts (wasn't sure that I could get one).
2. Removed about 12 screws holding the trimmer together.
3. Removed old switch and inserted new (electrical connections made it easy).
4. Put screws back in.
5. Tested trimmer and it worked great!
2. Removed about 12 screws holding the trimmer together.
3. Removed old switch and inserted new (electrical connections made it easy).
4. Put screws back in.
5. Tested trimmer and it worked great!
Did you find this story helpful?
Thanks for voting and helping fellow customers!
While cutting machine would stop
RICHARD - June 21, 2018
Tool Type
Hedge Trimmer
Difficulty
Easy
Time
15-30 minutes
Tools Used
Screwdriver, Torx wrench
Parts Used
Separated plastic housing with phillips screw driver and torx wrench. Removed switch and installed new item. Re-assembled casing.
Did you find this story helpful?
Thanks for voting and helping fellow customers!
Load More Install Stories
OEM stands for Original Equipment Manufacturer and means the part you’re buying is sourced directly from the manufacturer who made your product. At eReplacementParts, we sell only genuine OEM parts, guaranteeing the part you’re purchasing is of better design and of higher quality than aftermarket parts.
Our product descriptions are a combination of data sourced directly from the manufacturers who made your product as well as content researched and curated by our content & customer service teams. This content is edited and reviewed internally before being made public to customers.
Our customer service team are at the ready daily to answer your part and product questions. We have a dedicated staff with decades of collective experience in helping customers just like you purchase parts to repair their products.
All our part reviews are solicited directly from other customers who have purchased this exact part. While we moderate these reviews for profanity, offensive language or personally identifiable information, these reviews are posted exactly as submitted and no alterations are made by our team.
All our customer repair instructions are solicited directly from other customers just like you who have purchased and replaced this exact part. While we moderate these reviews for profanity, offensive language or personally identifiable information, these reviews are posted exactly as submitted and no alterations are made by our team.
Based on data from past customer purchasing behaviors, these parts are most commonly purchased together along with the part you are viewing. These parts may be necessary or helpful to replace to complete your current repair.
All our installation videos are created and produced in collaboration with our in-house repair technician, Mark Sodja, who has helped millions of eReplacementParts customers over the last 13 years repair their products. Mark has years of experience in selling and repairing both commercial and residential products with a specialty in gas-powered equipment.
This data is collected from customers who submitted a repair instruction after replacing this exact part. Customers can rate how easy the repair was to complete and how long it took. We aggregate this data to provide a repair rating that allows customers to quickly determine the difficulty and time needed to perform their own repair.