
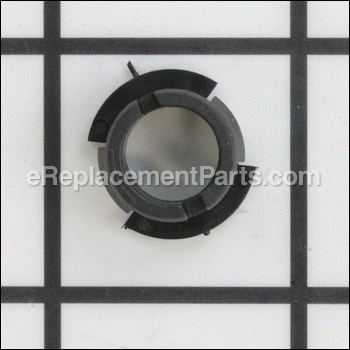
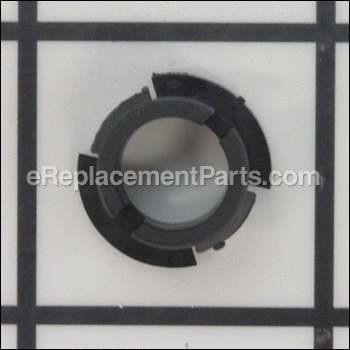
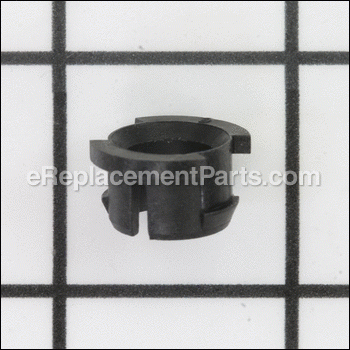


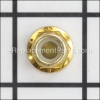
It is a genuine OEM item that is made for Craftsman lawn and garden equipment. This is a special component which helps to provide a tight fit between connected parts. It is an identical replacement for a damaged or a missing hardware that was installed on a new equipment. Make sure to check the appropriate diagrams for your model to ensure the proper repair procedure. It is made of durable plastic material and is sold as an individual item.
Bushing-.380 Id 941-0475
OEM part for: MTD, Ryobi, Yard Machines, Bolens, Yard Man, Craftsman, Troy-Bilt, Cub Cadet, Husky
Part Number: 941-0475
$4.99
In Stock
Jump To:
Product Description ?
- Dimension: .380 ID
- Classification: Part
- Weight: 0.01 lbs.
- Shipping: Ships Worldwide
Frequently Purchased Together ?


Compatibility
This part will fit the following 7174 machines
Ryobi
13AD678G034 Lawn Tractor View Diagrams & Manuals
13AN688G034 Lawn Tractor View Diagrams & Manuals
31AE162-013 Snow Thrower View Diagrams & Manuals
31AE162-034 Snow Thrower View Diagrams & Manuals
31AE660F013 Snow Thrower View Diagrams & Manuals
31AE660G034 Snow Thrower View Diagrams & Manuals
31AE6Q0F034 Snow Thrower View Diagrams & Manuals
13AN688G034 (2003) Lawn Tractor View Diagrams & Manuals
31AE660F013 (2001) Snowblower View Diagrams & Manuals
31AE162-013 (2002) Snowblower View Diagrams & Manuals
31AE162-034 (2003) Snowblower View Diagrams & Manuals
31AE660F013 (2002) Snowblower View Diagrams & Manuals
31AE660G034 (2003) Snowblower View Diagrams & Manuals
31AE6Q0F034 (2004) Snowblower View Diagrams & Manuals
Yard Machines
13AC762F000 (2008) Lawn Tractor View Diagrams & Manuals
13AL771H029 (2008) Lawn Tractor View Diagrams & Manuals
13AM772F000 (2008) Lawn Tractor View Diagrams & Manuals
13AN772G000 (2008) Lawn Tractor View Diagrams & Manuals
13AM772F700 (2007) Lawn Tractor View Diagrams & Manuals
13AN772G700 (2007) Lawn Tractor View Diagrams & Manuals
13A1762F700 (2006) Lawn Tractor View Diagrams & Manuals
13A3762F700 (2006) Lawn Tractor View Diagrams & Manuals
13A1760F700 (2005) Lawn Tractor View Diagrams & Manuals
13A3760F700 (2005) Lawn Tractor View Diagrams & Manuals
13A3761G700 (2005) Lawn Tractor View Diagrams & Manuals
13A3771G700 (2005) Lawn Tractor View Diagrams & Manuals
13A3791G700 (2005) Lawn Tractor View Diagrams & Manuals
13AC650F000 (2004) Lawn Tractor View Diagrams & Manuals
13AD685G000 (2004) Lawn Tractor View Diagrams & Manuals
13AD695G000 (2004) Lawn Tractor View Diagrams & Manuals
13AF685G700 (2004) Lawn Tractor View Diagrams & Manuals
13AF695G700 (2004) Lawn Tractor View Diagrams & Manuals
14AT808H129 (2003) Garden Tractor View Diagrams & Manuals
31AE6LFH718 (2005) Snowblower View Diagrams & Manuals
31AE600E161 (1999) Snowblower View Diagrams & Manuals
31AE600E161 (1998) Snowblower View Diagrams & Manuals
31AE640F000 (1998) Snowblower View Diagrams & Manuals
317E610E000 (1997) Snowblower View Diagrams & Manuals
316E610E000 (1996) Snowblower View Diagrams & Manuals
316E640F000 (1996) Snowblower View Diagrams & Manuals
13AC762F020 (2010) Ride On Lawn Mower View Diagrams & Manuals
13AC762F000 (2010) Ride on Lawn Mower View Diagrams & Manuals
31A-62BD700 (2010) Walk Behind Snowblower View Diagrams & Manuals
31A-62BD700 (2011) Walk Behind Snowblower View Diagrams & Manuals
31AH64EG700 (2011) Walk Behind Snowblower View Diagrams & Manuals
31AH65FH700 (2010) Walk Behind Snowblower View Diagrams & Manuals
31AH65FH700 (2011) Walk Behind Snowblower View Diagrams & Manuals
31AM63FE752 (2011) Walk Behind Snowblower View Diagrams & Manuals
31AS62EE700 (2010) Walk Behind Snowblower View Diagrams & Manuals
31AS62EE700 (2011) Walk Behind Snowblower View Diagrams & Manuals
31AS63EF700 (2010) Walk Behind Snowblower View Diagrams & Manuals
31AS63EF700 (2011) Walk Behind Snowblower View Diagrams & Manuals
31A-63BD700 (2012) Two-Stage Snowblower View Diagrams & Manuals
31AS63EE700 (2012) Two-Stage Snowblower View Diagrams & Manuals
31AH64FG700 (2012) Two-Stage Snowblower View Diagrams & Manuals
E665E Snowblower View Diagrams & Manuals
13A1762F729 Transmatic Lawn Tractor View Diagrams & Manuals
13A4662F129 (2002) Lawn Tractor View Diagrams & Manuals
31AE6A4E129 (2000) Snow Blower View Diagrams & Manuals
31AE6A4E129 (2001) Snow Blower View Diagrams & Manuals
31AE640F149 (1999) Snowblower View Diagrams & Manuals
31AE640F149 (2001) Snowblower View Diagrams & Manuals
31A-140-062 (1998) Snowblower View Diagrams & Manuals
31A-140-062 (1999) Snowblower View Diagrams & Manuals
31A-140-062 (2000) Snowblower View Diagrams & Manuals
31A-63BD700 (2014) Two Stage Snow Thrower View Diagrams & Manuals
31A-63BD700 (2013) Two Stage Snow Thrower View Diagrams & Manuals
31AH64EG700 (2012) Two Stage Snow Thrower View Diagrams & Manuals
31AH64EG700 (2013) Two Stage Snow Thrower View Diagrams & Manuals
31AH64EG700 (2014) Two Stage Snow Thrower View Diagrams & Manuals
31AH64EG700 (2009) Two Stage Snow Thrower View Diagrams & Manuals
31AH64FG700 (2014) Two Stage Snow Thrower View Diagrams & Manuals
31AH64FG700 (2013) Two Stage Snow Thrower View Diagrams & Manuals
31AH64FG795 (2013) Two Stage Snow Thrower View Diagrams & Manuals
31AH64FG795 (2012) Two Stage Snow Thrower View Diagrams & Manuals
31AH65FH700 (2013) Two Stage Snow Thrower View Diagrams & Manuals
31AH65FH700 (2014) Two Stage Snow Thrower View Diagrams & Manuals
31AH65FH700 (2012) Two Stage Snow Thrower View Diagrams & Manuals
31AS63EE700 (2014) Two Stage Snow Thrower View Diagrams & Manuals
31AS63EE700 (2013) Two Stage Snow Thrower View Diagrams & Manuals
31AS63EF700 (2013) Two Stage Snow Thrower View Diagrams & Manuals
31AS63EF700 (2014) Two Stage Snow Thrower View Diagrams & Manuals
31AS63EF700 (2012) Two Stage Snow Thrower View Diagrams & Manuals
31AS63EF729 (2013) Two Stage Snow Thrower View Diagrams & Manuals
31AS63EF729 (2014) Two Stage Snow Thrower View Diagrams & Manuals
31AS63EF729 (2012) Two Stage Snow Thrower View Diagrams & Manuals
31BM63LF704 (2013) Two Stage Snow Thrower View Diagrams & Manuals
31BM63LF704 (2012) Two Stage Snow Thrower View Diagrams & Manuals
13BK608G062 Automatic Lawn Tractor View Diagrams & Manuals
13AI607H019 (2000) Lawn Tractor View Diagrams & Manuals
13AI607H088 (TM03212002)(2000) Lawn Tractor View Diagrams & Manuals
13AI607H118 (2000) Lawn Tractor View Diagrams & Manuals
13AI608G129 (2000) Lawn Tractor View Diagrams & Manuals
13AI608H026 (2000) Lawn Tractor View Diagrams & Manuals
13AI608H062 (2000) Lawn Tractor View Diagrams & Manuals
13AK608G062 (2000) Lawn Tractor View Diagrams & Manuals
13AK608G129 (2000) Lawn Tractor View Diagrams & Manuals
13AN607H352 (2000) Lawn Tractor View Diagrams & Manuals
13AQ607H000 (2000) Lawn Tractor View Diagrams & Manuals
13AS607H352 (2000) Lawn Tractor View Diagrams & Manuals
13AI608H026 (2001) Lawn Tractor View Diagrams & Manuals
13AI608H062 (2001) Lawn Tractor View Diagrams & Manuals
13AI608H129 (2001) Lawn Tractor View Diagrams & Manuals
13AK608G009 (2001) Lawn Tractor View Diagrams & Manuals
13AN607H352 (2001) Lawn Tractor View Diagrams & Manuals
13BK608G129 (2001) Lawn Tractor View Diagrams & Manuals
13AF607G352 (2002) Lawn Tractor View Diagrams & Manuals
13AI608H352 (2002) Lawn Tractor View Diagrams & Manuals
13AN608G129 (2002) Lawn Tractor View Diagrams & Manuals
13AQ607H000 (2002) Lawn Tractor View Diagrams & Manuals
13BI608H129 (2002) Lawn Tractor View Diagrams & Manuals
13A1660F000 (2003) Lawn Tractor View Diagrams & Manuals
13A7668H352 (2003) Lawn Tractor View Diagrams & Manuals
13AC662F129 (2003) Lawn Tractor View Diagrams & Manuals
13AG619H022 (2003) Lawn Tractor View Diagrams & Manuals
13AH660F352 (2003) Lawn Tractor View Diagrams & Manuals
13AM660F000 (2003) Lawn Tractor View Diagrams & Manuals
13AM660F205 (2003) Lawn Tractor View Diagrams & Manuals
13AM685G000 (2003) Lawn Tractor View Diagrams & Manuals
13AN665G000 (2003) Lawn Tractor View Diagrams & Manuals
13AP608G129 (2003) Lawn Tractor View Diagrams & Manuals
13AQ608H129 (2003) Lawn Tractor View Diagrams & Manuals
13AR609G022 (2003) Lawn Tractor View Diagrams & Manuals
13AT604H452 (2003) Lawn Tractor View Diagrams & Manuals
13AZ614H452 (2003) Lawn Tractor View Diagrams & Manuals
13BN660G352 (2003) Lawn Tractor View Diagrams & Manuals
13BN682G129 (2003) Lawn Tractor View Diagrams & Manuals
13BQ607H000 (2003) Lawn Tractor View Diagrams & Manuals
13BR609G022 (2003) Lawn Tractor View Diagrams & Manuals
13BT604G452 (2003) Lawn Tractor View Diagrams & Manuals
13BT604H452 (2003) Lawn Tractor View Diagrams & Manuals
13CH660F000 (2003) Lawn Tractor View Diagrams & Manuals
13XQ698H000 (2003) Lawn Tractor View Diagrams & Manuals
13A7660G752 (2004) Lawn Tractor View Diagrams & Manuals
13AD618G726 (2004) Lawn Tractor View Diagrams & Manuals
13AH650F352 (2004) Lawn Tractor View Diagrams & Manuals
13AH650F752 (2004) Lawn Tractor View Diagrams & Manuals
13AJ690G752 (2004) Lawn Tractor View Diagrams & Manuals
13AJ693G755 (2004) Lawn Tractor View Diagrams & Manuals
13AM660F000 (2004) Lawn Tractor View Diagrams & Manuals
13AM660F352 (2004) Lawn Tractor View Diagrams & Manuals
13AM660F700 (2004) Lawn Tractor View Diagrams & Manuals
13AM660G000 (2004) Lawn Tractor View Diagrams & Manuals
13AM660G700 (2004) Lawn Tractor View Diagrams & Manuals
13AM660G752 (2004) Lawn Tractor View Diagrams & Manuals
13AN660G352 (2004) Lawn Tractor View Diagrams & Manuals
13AN660G752 (2004) Lawn Tractor View Diagrams & Manuals
13AN662G729 (2004) Lawn Tractor View Diagrams & Manuals
13AN682G729 (2004) Lawn Tractor View Diagrams & Manuals
13AQ608H729 (2004) Lawn Tractor View Diagrams & Manuals
13AT614H755 (2004) Lawn Tractor View Diagrams & Manuals
13AU614H755 (2004) Lawn Tractor View Diagrams & Manuals
13BM660F000 (2004) Lawn Tractor View Diagrams & Manuals
13AM762G752 (2005) Lawn Tractor View Diagrams & Manuals
13AN771G729 (2005) Lawn Tractor View Diagrams & Manuals
13AM762G752 (2006) Lawn Tractor View Diagrams & Manuals
13AN771H729 (2007) Lawn Tractor View Diagrams & Manuals
13R1762F729 (2007) Lawn Tractor View Diagrams & Manuals
13RN771H729 (2007) Lawn Tractor View Diagrams & Manuals
13RN772G729 (2007) Lawn Tractor View Diagrams & Manuals
13AM762F052 (2008) Lawn Tractor View Diagrams & Manuals
13RL771H029 (2008) Lawn Tractor View Diagrams & Manuals
13RL771H229 (2008) Lawn Tractor View Diagrams & Manuals
13RN772G029 (2008) Lawn Tractor View Diagrams & Manuals
13RN772G229 (2008) Lawn Tractor View Diagrams & Manuals
13AC762F052 (2009) Lawn Tractor View Diagrams & Manuals
13AH762F052 (2009) Lawn Tractor View Diagrams & Manuals
13RC762F052 (2009) Lawn Tractor View Diagrams & Manuals
14AJ825P352 (1997) Garden Tractor View Diagrams & Manuals
14AS825H000 (1997) Garden Tractor View Diagrams & Manuals
14AS825H118 (1997) Garden Tractor View Diagrams & Manuals
14AS825H302 (1997) Garden Tractor View Diagrams & Manuals
14AS825H700 (1997) Garden Tractor View Diagrams & Manuals
14AS82AH013 (1997) Garden Tractor View Diagrams & Manuals
14AS845H088 (TMO-3304602)(1997) Garden Tractor View Diagrams & Manuals
14AS845H372 (1997) Garden Tractor View Diagrams & Manuals
14AS845H788 (TMO-3304602)(1997) Garden Tractor View Diagrams & Manuals
14AS84AH062 (1997) Garden Tractor View Diagrams & Manuals
14AJ825H118 (1998) Garden Tractor View Diagrams & Manuals
14AJ825P000 (1998) Garden Tractor View Diagrams & Manuals
14AJ825P352 (1998) Garden Tractor View Diagrams & Manuals
14AJ84AH062 (1998) Garden Tractor View Diagrams & Manuals
14AS825H000 (1998) Garden Tractor View Diagrams & Manuals
14AS845H088 (TMO-3304602)(1998) Garden Tractor View Diagrams & Manuals
14AS845H372 (1998) Garden Tractor View Diagrams & Manuals
14BS843H352 (1998) Garden Tractor View Diagrams & Manuals
14BS845H088 (TMO-3304602)(1998) Garden Tractor View Diagrams & Manuals
14AI825P352 (1999) Garden Tractor View Diagrams & Manuals
14AI845H088 (1999) Garden Tractor View Diagrams & Manuals
14AI845H372 (1999) Garden Tractor View Diagrams & Manuals
14AJ84AH062 (1999) Garden Tractor View Diagrams & Manuals
14AS825H000 (1999) Garden Tractor View Diagrams & Manuals
14AU845H062 (1999) Garden Tractor View Diagrams & Manuals
14AU845H088 (1999) Garden Tractor View Diagrams & Manuals
14AI825P352 (2000) Garden Tractor View Diagrams & Manuals
14AJ845H062 (2000) Garden Tractor View Diagrams & Manuals
14AS825H000 (2000) Garden Tractor View Diagrams & Manuals
14AS825H013 (2000) Garden Tractor View Diagrams & Manuals
14AS848H022 (2000) Garden Tractor View Diagrams & Manuals
14AU807P352 (2000) Garden Tractor View Diagrams & Manuals
14AI825H352 (2001) Garden Tractor View Diagrams & Manuals
14AI845H129 (2001) Garden Tractor View Diagrams & Manuals
14AS825H000 (2001) Garden Tractor View Diagrams & Manuals
14AS825H062 (2001) Garden Tractor View Diagrams & Manuals
14AU807P352 (2002) Garden Tractor View Diagrams & Manuals
14BJ845H062 (2002) Garden Tractor View Diagrams & Manuals
14AQ808H129 (2003) Garden Tractor View Diagrams & Manuals
24BF51MX700 (2014) Log Splitter View Diagrams & Manuals
24BG55M1700 (2014) Log Splitter View Diagrams & Manuals
24BG57M1700 (2014) Log Splitter View Diagrams & Manuals
24BF51MX700 (2015) Log Splitter View Diagrams & Manuals
24BG55M1700 (2015) Log Splitter View Diagrams & Manuals
24BG57M1700 (2015) Log Splitter View Diagrams & Manuals
316-140-000 (1996) Snowblower View Diagrams & Manuals
316-140-700 (1996) Snowblower View Diagrams & Manuals
316-611D000 (1996) Snowblower View Diagrams & Manuals
316-611D700 (1996) Snowblower View Diagrams & Manuals
316-641E000 (1996) Snowblower View Diagrams & Manuals
316E150-000 (1996) Snowblower View Diagrams & Manuals
316E150-700 (1996) Snowblower View Diagrams & Manuals
316E610E700 (1996) Snowblower View Diagrams & Manuals
316E611D000 (1996) Snowblower View Diagrams & Manuals
316E640F700 (1996) Snowblower View Diagrams & Manuals
316E660G000 (1996) Snowblower View Diagrams & Manuals
316E660G700 (1996) Snowblower View Diagrams & Manuals
316E740F000 (1996) Snowblower View Diagrams & Manuals
316E740F700 (1996) Snowblower View Diagrams & Manuals
317-140-000 (1997) Snowblower View Diagrams & Manuals
317-140-088 (TMO-3525203)(1997) Snowblower View Diagrams & Manuals
317-140-302 (1997) Snowblower View Diagrams & Manuals
317-140-352 (1997) Snowblower View Diagrams & Manuals
317-140-372 (1997) Snowblower View Diagrams & Manuals
317-150-000 (1997) Snowblower View Diagrams & Manuals
317-150-118 (1997) Snowblower View Diagrams & Manuals
317-611D000 (1997) Snowblower View Diagrams & Manuals
317-611D097 (1997) Snowblower View Diagrams & Manuals
317-611D118 (1997) Snowblower View Diagrams & Manuals
317-611D302 (1997) Snowblower View Diagrams & Manuals
317-611D372 (1997) Snowblower View Diagrams & Manuals
317-611D700 (1997) Snowblower View Diagrams & Manuals
317E150-000 (1997) Snowblower View Diagrams & Manuals
317E150-013 (1997) Snowblower View Diagrams & Manuals
317E150-088 (TMO-3525708)(1997) Snowblower View Diagrams & Manuals
317E150-097 (1997) Snowblower View Diagrams & Manuals
317E150-129 (1997) Snowblower View Diagrams & Manuals
317E150-302 (1997) Snowblower View Diagrams & Manuals
317E150-372 (1997) Snowblower View Diagrams & Manuals
317E610E088 (TMO-3525302)(1997) Snowblower View Diagrams & Manuals
317E611D352 (1997) Snowblower View Diagrams & Manuals
317E640F000 (1997) Snowblower View Diagrams & Manuals
317E640F088 (TMO-3525401)(1997) Snowblower View Diagrams & Manuals
317E640F372 (1997) Snowblower View Diagrams & Manuals
317E640F700 (1997) Snowblower View Diagrams & Manuals
317E642E088 (TMO-3526600)(1997) Snowblower View Diagrams & Manuals
317E642E352 (1997) Snowblower View Diagrams & Manuals
317E644E000 (1997) Snowblower View Diagrams & Manuals
317E644E097 (1997) Snowblower View Diagrams & Manuals
317E644E129 (1997) Snowblower View Diagrams & Manuals
317E644E302 (1997) Snowblower View Diagrams & Manuals
317E660G000 (1997) Snowblower View Diagrams & Manuals
317E660G302 (1997) Snowblower View Diagrams & Manuals
317E660G352 (1997) Snowblower View Diagrams & Manuals
317E660G372 (1997) Snowblower View Diagrams & Manuals
317E661E118 (1997) Snowblower View Diagrams & Manuals
317E740F000 (1997) Snowblower View Diagrams & Manuals
317E742F352 (1997) Snowblower View Diagrams & Manuals
317E760F118 (1997) Snowblower View Diagrams & Manuals
31A-140-000 (1998) Snowblower View Diagrams & Manuals
31A-140-088 (1998) Snowblower View Diagrams & Manuals
31A-140-129 (1998) Snowblower View Diagrams & Manuals
31A-140-206 (1998) Snowblower View Diagrams & Manuals
31A-140-302 (1998) Snowblower View Diagrams & Manuals
31A-140-352 (1998) Snowblower View Diagrams & Manuals
31A-140-372 (1998) Snowblower View Diagrams & Manuals
31A-150-000 (1998) Snowblower View Diagrams & Manuals
31A-150-118 (1998) Snowblower View Diagrams & Manuals
31A-611D352 (1998) Snowblower View Diagrams & Manuals
31A-611D372 (1998) Snowblower View Diagrams & Manuals
31A-614E149 (1998) Snowblower View Diagrams & Manuals
31A-615D118 (1998) Snowblower View Diagrams & Manuals
31AE150-000 (1998) Snowblower View Diagrams & Manuals
31AE150-088 (1998) Snowblower View Diagrams & Manuals
31AE150-302 (1998) Snowblower View Diagrams & Manuals
31AE150-352 (1998) Snowblower View Diagrams & Manuals
31AE150-372 (1998) Snowblower View Diagrams & Manuals
31AE610E088 (1998) Snowblower View Diagrams & Manuals
31AE614E149 (1998) Snowblower View Diagrams & Manuals
31AE640F062 (1998) Snowblower View Diagrams & Manuals
31AE640F088 (1998) Snowblower View Diagrams & Manuals
31AE640F161 (1998) Snowblower View Diagrams & Manuals
31AE640F352 (1998) Snowblower View Diagrams & Manuals
31AE644E062 (1998) Snowblower View Diagrams & Manuals
31AE644E302 (1998) Snowblower View Diagrams & Manuals
31AE644E372 (1998) Snowblower View Diagrams & Manuals
31AE645E129 (1998) Snowblower View Diagrams & Manuals
31AE645E352 (1998) Snowblower View Diagrams & Manuals
31AE653F103 (1998) Snowblower View Diagrams & Manuals
31AE660F062 (1998) Snowblower View Diagrams & Manuals
31AE660G149 (1998) Snowblower View Diagrams & Manuals
31AE660G352 (1998) Snowblower View Diagrams & Manuals
31AE660H525 (1998) Snowblower View Diagrams & Manuals
31AE664F000 (1998) Snowblower View Diagrams & Manuals
31AE664F302 (1998) Snowblower View Diagrams & Manuals
31AE664F352 (1998) Snowblower View Diagrams & Manuals
31AE665E118 (1998) Snowblower View Diagrams & Manuals
31AE740F000 (1998) Snowblower View Diagrams & Manuals
31AE765F118 (1998) Snowblower View Diagrams & Manuals
31AE880H352 (1998) Snowblower View Diagrams & Manuals
31AE880I372 (1998) Snowblower View Diagrams & Manuals
31AE880I525 (1998) Snowblower View Diagrams & Manuals
31A-140-000 (1999) Snowblower View Diagrams & Manuals
31A-140-088 (1999) Snowblower View Diagrams & Manuals
31A-140-129 (1999) Snowblower View Diagrams & Manuals
31A-140-352 (1999) Snowblower View Diagrams & Manuals
31A-140-372 (1999) Snowblower View Diagrams & Manuals
31A-150-000 (1999) Snowblower View Diagrams & Manuals
31A-150-118 (1999) Snowblower View Diagrams & Manuals
31A-611D000 (1999) Snowblower View Diagrams & Manuals
31A-611D062 (1999) Snowblower View Diagrams & Manuals
31A-611D352 (1999) Snowblower View Diagrams & Manuals
31A-611D372 (1999) Snowblower View Diagrams & Manuals
31A-614E149 (1999) Snowblower View Diagrams & Manuals
31A-615D118 (1999) Snowblower View Diagrams & Manuals
31AE150-000 (1999) Snowblower View Diagrams & Manuals
31AE150-088 (1999) Snowblower View Diagrams & Manuals
31AE150-372 (1999) Snowblower View Diagrams & Manuals
31AE610E088 (1999) Snowblower View Diagrams & Manuals
31AE640F062 (1999) Snowblower View Diagrams & Manuals
31AE640F088 (1999) Snowblower View Diagrams & Manuals
31AE640F161 (1999) Snowblower View Diagrams & Manuals
31AE640F352 (1999) Snowblower View Diagrams & Manuals
31AE644E000 (1999) Snowblower View Diagrams & Manuals
31AE644E372 (1999) Snowblower View Diagrams & Manuals
31AE660F062 (1999) Snowblower View Diagrams & Manuals
31AE660G149 (1999) Snowblower View Diagrams & Manuals
31AE660G352 (1999) Snowblower View Diagrams & Manuals
31AE662H013 (1999) Snowblower View Diagrams & Manuals
31AE665E118 (1999) Snowblower View Diagrams & Manuals
31AE6A4E000 (1999) Snowblower View Diagrams & Manuals
31AE6A4E120 (1999) Snowblower View Diagrams & Manuals
31AE740F000 (1999) Snowblower View Diagrams & Manuals
31AE762F013 (1999) Snowblower View Diagrams & Manuals
31AE765F118 (1999) Snowblower View Diagrams & Manuals
31A-140-000 (2000) Snowblower View Diagrams & Manuals
31A-140-120 (2000) Snowblower View Diagrams & Manuals
31A-140-129 (2000) Snowblower View Diagrams & Manuals
31A-140-372 (2000) Snowblower View Diagrams & Manuals
31A-150-000 (2000) Snowblower View Diagrams & Manuals
31A-150-118 (2000) Snowblower View Diagrams & Manuals
31A-611D000 (2000) Snowblower View Diagrams & Manuals
31A-611D062 (2000) Snowblower View Diagrams & Manuals
31A-611D129 (2000) Snowblower View Diagrams & Manuals
31A-611D372 (2000) Snowblower View Diagrams & Manuals
31A-615D118 (2000) Snowblower View Diagrams & Manuals
31AE150-000 (2000) Snowblower View Diagrams & Manuals
31AE150-088 (2000) Snowblower View Diagrams & Manuals
31AE150-372 (2000) Snowblower View Diagrams & Manuals
31AE151-120 (2000) Snowblower View Diagrams & Manuals
31AE610E088 (2000) Snowblower View Diagrams & Manuals
31AE611D120 (2000) Snowblower View Diagrams & Manuals
31AE640F062 (2000) Snowblower View Diagrams & Manuals
31AE640F088 (2000) Snowblower View Diagrams & Manuals
31AE640F352 (2000) Snowblower View Diagrams & Manuals
31AE644E000 (2000) Snowblower View Diagrams & Manuals
31AE660F062 (2000) Snowblower View Diagrams & Manuals
31AE662H013 (2000) Snowblower View Diagrams & Manuals
31AE665E118 (2000) Snowblower View Diagrams & Manuals
31AE6A4E000 (2000) Snowblower View Diagrams & Manuals
31AE6A4E120 (2000) Snowblower View Diagrams & Manuals
31AE740F000 (2000) Snowblower View Diagrams & Manuals
31AE762F013 (2000) Snowblower View Diagrams & Manuals
31AE765F118 (2000) Snowblower View Diagrams & Manuals
31A-140-000 (2001) Snowblower View Diagrams & Manuals
31A-140-129 (2001) Snowblower View Diagrams & Manuals
31A-150-000 (2001) Snowblower View Diagrams & Manuals
31A-150-118 (2001) Snowblower View Diagrams & Manuals
31A-611D000 (2001) Snowblower View Diagrams & Manuals
31A-611D062 (2001) Snowblower View Diagrams & Manuals
31A-611D129 (2001) Snowblower View Diagrams & Manuals
31A-611D206 (2001) Snowblower View Diagrams & Manuals
31AE150-000 (2001) Snowblower View Diagrams & Manuals
31AE640F062 (2001) Snowblower View Diagrams & Manuals
31AE640F161 (2001) Snowblower View Diagrams & Manuals
31AE640F352 (2001) Snowblower View Diagrams & Manuals
31AE644E000 (2001) Snowblower View Diagrams & Manuals
31AE665E118 (2001) Snowblower View Diagrams & Manuals
31AE6A4E000 (2001) Snowblower View Diagrams & Manuals
31AE740F000 (2001) Snowblower View Diagrams & Manuals
31BE642F206 (2001) Snowblower View Diagrams & Manuals
31A-150-000 (2002) Snowblower View Diagrams & Manuals
31A-611D000 (2002) Snowblower View Diagrams & Manuals
31A-611D062 (2002) Snowblower View Diagrams & Manuals
31A-611D129 (2002) Snowblower View Diagrams & Manuals
31A-611D205 (2002) Snowblower View Diagrams & Manuals
31AE150-000 (2002) Snowblower View Diagrams & Manuals
31AE640F161 (2002) Snowblower View Diagrams & Manuals
31AE640F352 (2002) Snowblower View Diagrams & Manuals
31AE664G352 (2002) Snowblower View Diagrams & Manuals
31AE665E118 (2002) Snowblower View Diagrams & Manuals
31AS610E000 (2002) Snowblower View Diagrams & Manuals
31AS644E000 (2002) Snowblower View Diagrams & Manuals
31BE640F062 (2002) Snowblower View Diagrams & Manuals
31BE642F205 (2002) Snowblower View Diagrams & Manuals
31C-140-352 (2002) Snowblower View Diagrams & Manuals
31A-150-000 (2003) Snowblower View Diagrams & Manuals
31A-611D000 (2003) Snowblower View Diagrams & Manuals
31A-611D129 (2003) Snowblower View Diagrams & Manuals
31AE150-000 (2003) Snowblower View Diagrams & Manuals
31AS610E000 (2003) Snowblower View Diagrams & Manuals
31AS644E000 (2003) Snowblower View Diagrams & Manuals
31B-140-129 (2003) Snowblower View Diagrams & Manuals
31B-611D062 (2003) Snowblower View Diagrams & Manuals
31BE150-062 (2003) Snowblower View Diagrams & Manuals
31BE640F062 (2003) Snowblower View Diagrams & Manuals
31BE660F129 (2003) Snowblower View Diagrams & Manuals
31A-611D000 (2004) Snowblower View Diagrams & Manuals
31AE664G352 (2004) Snowblower View Diagrams & Manuals
31AS610E000 (2004) Snowblower View Diagrams & Manuals
31AS611D062 (2004) Snowblower View Diagrams & Manuals
31AS611E352 (2004) Snowblower View Diagrams & Manuals
31AS640F352 (2004) Snowblower View Diagrams & Manuals
31AS644E000 (2004) Snowblower View Diagrams & Manuals
31BS644E129 (2004) Snowblower View Diagrams & Manuals
31CE660F129 (2004) Snowblower View Diagrams & Manuals
31A-6ACE700 (2005-2) Snowblower View Diagrams & Manuals
31A-6BCD700 (2005) Snowblower View Diagrams & Manuals
31A-6BCD700 (2005-2) Snowblower View Diagrams & Manuals
31AE6BHE723 (2005) Snowblower View Diagrams & Manuals
31AE6FFF700 (2005) Snowblower View Diagrams & Manuals
31AE6FFF752 (2005) Snowblower View Diagrams & Manuals
31AE6FFF752 (2005-2) Snowblower View Diagrams & Manuals
31AE6LFG700 (2005) Snowblower View Diagrams & Manuals
31AS6BCE752 (2005) Snowblower View Diagrams & Manuals
31AS6BCE752 (2005-2) Snowblower View Diagrams & Manuals
31AS6BEE700 (2005) Snowblower View Diagrams & Manuals
31AS6BEE700 (2005-2) Snowblower View Diagrams & Manuals
31AS6FCE700 (2005) Snowblower View Diagrams & Manuals
31AS6FCE700 (2005-2) Snowblower View Diagrams & Manuals
31AS6FEF700 (2005) Snowblower View Diagrams & Manuals
31AS6FEF700 (2005-2) Snowblower View Diagrams & Manuals
31AS6LCE700 (2005) Snowblower View Diagrams & Manuals
31AS6LEG700 (2005-2) Snowblower View Diagrams & Manuals
31A-6ACE700 (2006) Snowblower View Diagrams & Manuals
31AE6FFF700 (2006) Snowblower View Diagrams & Manuals
31AE6FFF752 (2006) Snowblower View Diagrams & Manuals
31AS6BCE752 (2006) Snowblower View Diagrams & Manuals
31AS6BEE700 (2006) Snowblower View Diagrams & Manuals
31AS6FEF700 (2006) Snowblower View Diagrams & Manuals
31AS6LEG700 (2006) Snowblower View Diagrams & Manuals
31AE6FFF752 (2007) Snowblower View Diagrams & Manuals
31AH62EE000 (2007) Snowblower View Diagrams & Manuals
31AS6BCE752 (2007) Snowblower View Diagrams & Manuals
31AS6BEE700 (2007) Snowblower View Diagrams & Manuals
31AS6FEF700 (2007) Snowblower View Diagrams & Manuals
31AS6LEG700 (2007) Snowblower View Diagrams & Manuals
31A-62EE729 (2008) Snowblower View Diagrams & Manuals
31AH62EE000 (2008) Snowblower View Diagrams & Manuals
31AH6ZFH700 (2008) Snowblower View Diagrams & Manuals
31AH6ZFH729 (2008) Snowblower View Diagrams & Manuals
31AM62EE700 (2008) Snowblower View Diagrams & Manuals
31AM62EE752 (2008) Snowblower View Diagrams & Manuals
31AM63EF700 (2008) Snowblower View Diagrams & Manuals
31AM63FF752 (2008) Snowblower View Diagrams & Manuals
31AS6DEF700 (2008) Snowblower View Diagrams & Manuals
31AS6WEG700 (2008) Snowblower View Diagrams & Manuals
31AH6ZFH700 (2009) Snowblower View Diagrams & Manuals
31AM62EE700 (2009) Snowblower View Diagrams & Manuals
31AM62EE752 (2009) Snowblower View Diagrams & Manuals
31AM63EF700 (2009) Snowblower View Diagrams & Manuals
31AS6WEG700 (2009) Snowblower View Diagrams & Manuals
31AM63FF752 (2011) Snowblower View Diagrams & Manuals
31AM63FF752 (2012) Snowblower View Diagrams & Manuals
31AM63FF752 (2013) Snowblower View Diagrams & Manuals
31AM63FF752 (2014) Snowblower View Diagrams & Manuals
31AM63FF752 (2015) Snowblower View Diagrams & Manuals
31AS63EE752 (2015) Snowblower View Diagrams & Manuals
31AM63FF752 (2016) Snowblower View Diagrams & Manuals
31AM66EG700 (2016) Snowblower View Diagrams & Manuals
31AS63EE752 (2016) Snowblower View Diagrams & Manuals
31AM6CFG752 (2017) Snowblower View Diagrams & Manuals
31AS6BEE700 (2017) Snowblower View Diagrams & Manuals
31AS6BEE752 (2017) Snowblower View Diagrams & Manuals
31AS6BEF700 (2017) Snowblower View Diagrams & Manuals
31AH66FG783 (2014) Snow Thrower View Diagrams & Manuals
13A1762F029 (2008) Lawn Tractor View Diagrams & Manuals
13A1762F029 (2009) Lawn Tractor View Diagrams & Manuals
13A2775S000 (2015) Lawn Tractor View Diagrams & Manuals
13AM772F000 (2009) Lawn Tractor View Diagrams & Manuals
13AM772S000 (2012) Lawn Tractor View Diagrams & Manuals
13AM775S000 (2015) Lawn Tractor View Diagrams & Manuals
13AM775S000 (2016) Lawn Tractor View Diagrams & Manuals
13AM775S000 (2017) Lawn Tractor View Diagrams & Manuals
13AM775S000 (2018) Lawn Tractor View Diagrams & Manuals
13AN772G000 (2009) Lawn Tractor View Diagrams & Manuals
13BC762F000 (2015) Lawn Tractor View Diagrams & Manuals
13BC762F000 (2016) Lawn Tractor View Diagrams & Manuals
13BC762F000 (2017) Lawn Tractor View Diagrams & Manuals
31A-63BD700 (2015) Snow Thrower View Diagrams & Manuals
31AH64EG700 (2015) Snow Thrower View Diagrams & Manuals
31AH64FG700 (2015) Snow Thrower View Diagrams & Manuals
31AH65FH700 (2009) Snow Thrower View Diagrams & Manuals
31AH65FH700 (2015) Snow Thrower View Diagrams & Manuals
31AH65FH700 (2016) Snow Thrower View Diagrams & Manuals
31AM63EF729 (2009) Snow Thrower View Diagrams & Manuals
31AM63FE752 (2012) Snow Thrower View Diagrams & Manuals
31AM63FE752 (2013) Snow Thrower View Diagrams & Manuals
31AM6CFG752 (2018) Snow Thrower View Diagrams & Manuals
31AS62EE700 (2015) Snow Thrower View Diagrams & Manuals
31AS63EE700 (2015) Snow Thrower View Diagrams & Manuals
31AS63EE700 (2016) Snow Thrower View Diagrams & Manuals
31AS63EE700 (2017) Snow Thrower View Diagrams & Manuals
31AS6BEE700 (2018) Snow Thrower View Diagrams & Manuals
31AS6BEE752 (2018) Snow Thrower View Diagrams & Manuals
31AS6BEF700 (2018) Snow Thrower View Diagrams & Manuals
MTD
13AM772F000 (2008) Lawn Tractor View Diagrams & Manuals
13AN772G000 (2008) Lawn Tractor View Diagrams & Manuals
13AN772G200 (2008) Lawn Tractor View Diagrams & Manuals
13AM772F700 (2007) Lawn Tractor View Diagrams & Manuals
13AN772G700 (2007) Lawn Tractor View Diagrams & Manuals
13A1762F700 (2006) Lawn Tractor View Diagrams & Manuals
13A3762F700 (2006) Lawn Tractor View Diagrams & Manuals
13A1760F700 (2005) Lawn Tractor View Diagrams & Manuals
13A3760F700 (2005) Lawn Tractor View Diagrams & Manuals
13A3761G700 (2005) Lawn Tractor View Diagrams & Manuals
13A3771G700 (2005) Lawn Tractor View Diagrams & Manuals
13A3791G700 (2005) Lawn Tractor View Diagrams & Manuals
13AC650F000 (2004) Lawn Tractor View Diagrams & Manuals
13AC650F700 (2004) Lawn Tractor View Diagrams & Manuals
13AD685G000 (2004) Lawn Tractor View Diagrams & Manuals
13AD685G700 (2004) Lawn Tractor View Diagrams & Manuals
13AD688G722 (2004) Lawn Tractor View Diagrams & Manuals
13AD695G000 (2004) Lawn Tractor View Diagrams & Manuals
13AD695G700 (2004) Lawn Tractor View Diagrams & Manuals
13AD698G300 (2004) Lawn Tractor View Diagrams & Manuals
13AD698G722 (2004) Lawn Tractor View Diagrams & Manuals
13AF685G700 (2004) Lawn Tractor View Diagrams & Manuals
13AF688G722 (2004) Lawn Tractor View Diagrams & Manuals
13AF695G700 (2004) Lawn Tractor View Diagrams & Manuals
13AF698G722 (2004) Lawn Tractor View Diagrams & Manuals
13AG688H300 (2004) Lawn Tractor View Diagrams & Manuals
13AG688H722 (2004) Lawn Tractor View Diagrams & Manuals
13AJ698G300 (2004) Lawn Tractor View Diagrams & Manuals
13AJ698G722 (2004) Lawn Tractor View Diagrams & Manuals
13AT618H300 (2004) Lawn Tractor View Diagrams & Manuals
13AD608G300 (2003) Lawn Tractor View Diagrams & Manuals
31AO791G718 (2005) Pro Tractor View Diagrams & Manuals
31AT605H718 (2006) Pro Tractor View Diagrams & Manuals
319-180-092 (1989) Tiller View Diagrams & Manuals
319-550-092 (1989) Tiller View Diagrams & Manuals
212-340-000 (1992) Tiller View Diagrams & Manuals
212-340-009 (765244) (1992) Tiller View Diagrams & Manuals
212-340-023 (1992) Tiller View Diagrams & Manuals
212-340-027 (1992) Tiller View Diagrams & Manuals
212-340-031 (B063-089) (1992) Tiller View Diagrams & Manuals
212-340-032 (1992) Tiller View Diagrams & Manuals
212-340-034 (223-921-500) (1992) Tiller View Diagrams & Manuals
212-340-054 (481-4026) (1992) Tiller View Diagrams & Manuals
212-340-063 (1992) Tiller View Diagrams & Manuals
212-340-083 (1992) Tiller View Diagrams & Manuals
212-340-087 (1992) Tiller View Diagrams & Manuals
212-340-088 (TMO-3903102) (1992) Tiller View Diagrams & Manuals
212-340-102 (1992) Tiller View Diagrams & Manuals
212-340-129 (579-623) (1992) Tiller View Diagrams & Manuals
212-340-130 (1992) Tiller View Diagrams & Manuals
212-340-134 (1992) Tiller View Diagrams & Manuals
212-340-137 (1992) Tiller View Diagrams & Manuals
212-340-145 (1992) Tiller View Diagrams & Manuals
212-340-147 (1992) Tiller View Diagrams & Manuals
212-340-192 (1992) Tiller View Diagrams & Manuals
212-340-196 (1992) Tiller View Diagrams & Manuals
212-340-205 (1992) Tiller View Diagrams & Manuals
212-340-352 (1992) Tiller View Diagrams & Manuals
212-340-372 (06-982094) (1992) Tiller View Diagrams & Manuals
212-390-000 (1992) Tiller View Diagrams & Manuals
213-340-000 (1993) Tiller View Diagrams & Manuals
213-390-000 (1993) Tiller View Diagrams & Manuals
214-340-000 (1994) Tiller View Diagrams & Manuals
214-390-000 (1994) Tiller View Diagrams & Manuals
215-340-000 (1995) Tiller View Diagrams & Manuals
215-390-000 (1995) Tiller View Diagrams & Manuals
250-586-013 (93930) (1990) Edger View Diagrams & Manuals
250-586-019/823-101 (1990) Edger View Diagrams & Manuals
251-586-013 (93930) (1991) Edger View Diagrams & Manuals
251-586-019/823-101 (1991) Edger View Diagrams & Manuals
TMO-37960 (1991) Edger View Diagrams & Manuals
240-586-000 (1990) Edger View Diagrams & Manuals
586-046 (1990) Edger View Diagrams & Manuals
13611S (1985) Lawn Tractor View Diagrams & Manuals
13618S (1985) Lawn Tractor View Diagrams & Manuals
13619S (1985) Lawn Tractor View Diagrams & Manuals
251-586-000 (1991) Trimmer View Diagrams & Manuals
13AA625P004 (2009) Lawn Tractor View Diagrams & Manuals
13AJ771G004 (2009) Lawn Tractor View Diagrams & Manuals
13AJ795G004 (2009) Lawn Tractor View Diagrams & Manuals
13AL771H004 (2009) Lawn Tractor View Diagrams & Manuals
13AL795H004 (2009) Lawn Tractor View Diagrams & Manuals
13AA625P004 (2008) Lawn Tractor View Diagrams & Manuals
13AJ771G004 (2008) Lawn Tractor View Diagrams & Manuals
13AJ771G204 (2008) Lawn Tractor View Diagrams & Manuals
13AJ795G004 (2008) Lawn Tractor View Diagrams & Manuals
13AJ795G204 (2008) Lawn Tractor View Diagrams & Manuals
13AL771H004 (2008) Lawn Tractor View Diagrams & Manuals
13AL795H004 (2008) Lawn Tractor View Diagrams & Manuals
316E610E382 (1996) Snowblower View Diagrams & Manuals
316E640F382 (1996) Snowblower View Diagrams & Manuals
13AD688G300 (2004) Lawn Tractor Parts View Diagrams & Manuals
317E152-382 (1997) Snowblower View Diagrams & Manuals
317E610E382 (1997) Snowblower View Diagrams & Manuals
31AE152-382 (1998) Snowblower View Diagrams & Manuals
31AE600E382 (1998) Snowblower View Diagrams & Manuals
31AE640F382 (1998) Snowblower View Diagrams & Manuals
31AE172-382 (1999) Snowblower View Diagrams & Manuals
31AE600E382 (1999) Snowblower View Diagrams & Manuals
31AE6C0F382 (1999) Snowblower View Diagrams & Manuals
31AE600E300 (2003) Snowblower View Diagrams & Manuals
31AE660G300 (2003) Snowblower View Diagrams & Manuals
13AJ688G722 (2004) Lawn Tractor Parts View Diagrams & Manuals
13A7688G300 (2003) Lawn Tractor Parts View Diagrams & Manuals
13AD688G300 (2003) Lawn Tractor Parts View Diagrams & Manuals
13AD698G300 (2003) Lawn Tractor Parts View Diagrams & Manuals
13AT618H300 (2003) Lawn Tractor Parts View Diagrams & Manuals
13AL608G300 (2002) Lawn Tractor View Diagrams & Manuals
31AE6COF300 (2003) Snowblower View Diagrams & Manuals
31AE600E300 (2004) Snowblower View Diagrams & Manuals
31AE660G300 (2004) Snowblower View Diagrams & Manuals
31AE6C0F300 (2004) Snowblower View Diagrams & Manuals
31AH660G300 (2004) Snowblower View Diagrams & Manuals
31AE6AHE722 (2005) Snowblower View Diagrams & Manuals
31AE6BHE722 (2005) Snowblower View Diagrams & Manuals
31AH6LKH722 (2005) Snowblower View Diagrams & Manuals
14AA815K004 (2009) Garden Tractor View Diagrams & Manuals
14AA815K004 (2008) Garden Tractor View Diagrams & Manuals
14AG808H300 (2004) Garden Tractor View Diagrams & Manuals
14AT808H722 (2004) Garden Tractor View Diagrams & Manuals
14AT808H300 (2003) Garden Tractor View Diagrams & Manuals
752-023 (1988) Lawn Tractor View Diagrams & Manuals
13AN693G118 (2003) Lawn Tractor View Diagrams & Manuals
13AQ617H118 (2003) Lawn Tractor View Diagrams & Manuals
13AS608G033 (2000) Lawn Tractor View Diagrams & Manuals
13AK608G033 (2001) Lawn Tractor View Diagrams & Manuals
13AS608G033 (2001) Lawn Tractor View Diagrams & Manuals
13AQ609G033 (2003) Lawn Tractor View Diagrams & Manuals
14AK825H033 (1997) Garden Tractor View Diagrams & Manuals
14AS825H033 (1997) Garden Tractor View Diagrams & Manuals
317E640F033 (1997) Snowblower View Diagrams & Manuals
317E980I000 (1997) Snow Blower View Diagrams & Manuals
316-140-088 (TMO-3525203) (1996) Snow Blower View Diagrams & Manuals
316-150-118 (502549) (1996) Snow Blower View Diagrams & Manuals
316-610E147 (1996) Snow Blower View Diagrams & Manuals
316-611D118 (26274) (1996) Snow Blower View Diagrams & Manuals
316-641E118 (1996) Snow Blower View Diagrams & Manuals
316E150-088 (TMO-3525708) (1996) Snow Blower View Diagrams & Manuals
316E610E088 (TMO-3525302) (1996) Snow Blower View Diagrams & Manuals
316E641E205 (1996) Snow Blower View Diagrams & Manuals
316E660G352 (1619743) (1996) Snow Blower View Diagrams & Manuals
316E611D352 (1652656) (1996) Snow Blower View Diagrams & Manuals
316E640F013 (1996) Snow Blower View Diagrams & Manuals
316E661E118 (537980) (1996) Snow Blower View Diagrams & Manuals
316E740F352 (1652670) (1996) Snow Blower View Diagrams & Manuals
316E740F752 (1652670) (1996) Snow Blower View Diagrams & Manuals
315E140-000 (1995) Snow Blower View Diagrams & Manuals
315E150-000 (1995) Snow Blower View Diagrams & Manuals
315E610E000 (1995) Snow Blower View Diagrams & Manuals
315E640F000 (1995) Snow Blower View Diagrams & Manuals
316E760F118 (590678) (1996) Snow Blower View Diagrams & Manuals
315-140-000 (1995) Snow Blower View Diagrams & Manuals
315-150-000 (1995) Snow Blower View Diagrams & Manuals
315-162-000 (1995) Snow Blower View Diagrams & Manuals
315-611D000 (1995) Snow Blower View Diagrams & Manuals
315-641E000 (1995) Snow Blower View Diagrams & Manuals
315-661E118 (1995) Snow Blower View Diagrams & Manuals
315E641E000 (1995) Snow Blower View Diagrams & Manuals
314-180-000 (1994) Snowblower View Diagrams & Manuals
314-181-000 (1994) Snowblower View Diagrams & Manuals
314-191-000 (1994) Snowblower View Diagrams & Manuals
315E660G000 (1995) Snow Blower View Diagrams & Manuals
314-610E000 (1994) Snowblower View Diagrams & Manuals
315E740F000 (1995) Snow Blower View Diagrams & Manuals
314-612E000 (1994) Snowblower View Diagrams & Manuals
314-640F000 (1994) Snowblower View Diagrams & Manuals
313-191-000 (1993) Snowblower View Diagrams & Manuals
314-642F000 (1994) Snowblower View Diagrams & Manuals
313-610E000 (1993) Snowblower View Diagrams & Manuals
314-660G000 (1994) Snowblower View Diagrams & Manuals
313-612E000 (1993) Snowblower View Diagrams & Manuals
314-980I000 (1994) Snowblower View Diagrams & Manuals
313-640F000 (1993) Snowblower View Diagrams & Manuals
313-642F000 (1993) Snowblower View Diagrams & Manuals
313-180-000 (1993) Snowblower View Diagrams & Manuals
313-181-000 (1993) Snowblower View Diagrams & Manuals
313-660G000 (1993) Snowblower View Diagrams & Manuals
312-612E000 (1992) Snowblower View Diagrams & Manuals
313-980I000 (1993) Snowblower View Diagrams & Manuals
312-640F000 (1992) Snowblower View Diagrams & Manuals
312-642F000 (1992) Snowblower View Diagrams & Manuals
312-180-000 (1992) Snowblower View Diagrams & Manuals
312-181-000 (1992) Snowblower View Diagrams & Manuals
312-191-000 (1992) Snowblower View Diagrams & Manuals
312-660G000 (1992) Snowblower View Diagrams & Manuals
312-610E000 (1992) Snowblower View Diagrams & Manuals
312-980I000 (1992) Snowblower View Diagrams & Manuals
311-450-000 (1991) Snowblower View Diagrams & Manuals
311-550-000 (1991) Snowblower View Diagrams & Manuals
311-174-000 (1991) Snowblower View Diagrams & Manuals
311-180-000 (1991) Snowblower View Diagrams & Manuals
311-181-000 (1991) Snowblower View Diagrams & Manuals
311-191-000 (1991) Snowblower View Diagrams & Manuals
311-840-000 (1991) Snowblower View Diagrams & Manuals
311-440-000 (1991) Snowblower View Diagrams & Manuals
311-850-000 (1991) Snowblower View Diagrams & Manuals
311355 (1991) Snowblower View Diagrams & Manuals
311385 (1991) Snowblower View Diagrams & Manuals
311183 (1991) Snowblower View Diagrams & Manuals
311184 (1991) Snowblower View Diagrams & Manuals
311965 (1991) Snowblower View Diagrams & Manuals
311193 (1991) Snowblower View Diagrams & Manuals
311345 (1991) Snowblower View Diagrams & Manuals
311-181-118 SWC# 05372 (3/21) (1991) Snowblower View Diagrams & Manuals
TMO-35252 (1991) Snowblower Parts View Diagrams & Manuals
311-550-118 SWC# 26274 (5/24) (1991) Snowblower View Diagrams & Manuals
TMO-35253 (TMO-35253) (1991) Snowblower Parts View Diagrams & Manuals
311-840-118 SWC#01918 (1991) Snowblower View Diagrams & Manuals
TMO-35254 (311-586-088) (1991) Snowblower Parts View Diagrams & Manuals
TMO-35257 (311-191-088) (1991) Snowblower Parts View Diagrams & Manuals
240-550-000 (1990) Snowblower Parts View Diagrams & Manuals
311-180-054 (484-1078) (1991) Snowblower View Diagrams & Manuals
311-586-054 (484-1276) (1991) Snowblower View Diagrams & Manuals
310-180-000 (1990) Snowblower Parts View Diagrams & Manuals
310-440-000 (1990) Snowblower Parts View Diagrams & Manuals
310-181-000 (1990) Snowblower Parts View Diagrams & Manuals
310-450-000 (1990) Snowblower Parts View Diagrams & Manuals
310-552-000 (1990) Snowblower Parts View Diagrams & Manuals
310-588-000 (1990) Snowblower Parts View Diagrams & Manuals
310-840-000 (1990) Snowblower Parts View Diagrams & Manuals
310-850-000 (1990) Snowblower Parts View Diagrams & Manuals
310-960-000 (1990) Snowblower Parts View Diagrams & Manuals
310183 (21") (1990) Snowblower Parts View Diagrams & Manuals
310193 (1990) Snowblower Parts View Diagrams & Manuals
310345 (1990) Snowblower Parts View Diagrams & Manuals
310355 (1990) Snowblower Parts View Diagrams & Manuals
310385 (1990) Snowblower Parts View Diagrams & Manuals
310965 (1990) Snowblower Parts View Diagrams & Manuals
TMO-35253 (310-550-088) (1990) Snowblower Parts View Diagrams & Manuals
TMO-35254 (310-586-088) (1990) Snowblower Parts View Diagrams & Manuals
310-550-027 (414-367) (1990) Snowblower Parts View Diagrams & Manuals
310-586-027 (356-915) (1990) Snowblower Parts View Diagrams & Manuals
180-206 (1989) Snowblower Parts View Diagrams & Manuals
31183-9 (1989) Snowblower Parts View Diagrams & Manuals
31345-9 (1989) Snowblower Parts View Diagrams & Manuals
TMO-35253 (310-180-088) (1990) Snowblower Parts View Diagrams & Manuals
31355-9 (1989) Snowblower Parts View Diagrams & Manuals
319-440-000 (1989) Snowblower Parts View Diagrams & Manuals
31385-9 (1989) Snowblower Parts View Diagrams & Manuals
319-450-000 (1989) Snowblower Parts View Diagrams & Manuals
319-550-000 (1989) Snowblower Parts View Diagrams & Manuals
319-180-000 (1989) Snowblower Parts View Diagrams & Manuals
319-181-000 (1989) Snowblower Parts View Diagrams & Manuals
319-225-000 (1989) Snowblower Parts View Diagrams & Manuals
319-552-000 (1989) Snowblower Parts View Diagrams & Manuals
319-586-00 (1989) Snowblower Parts View Diagrams & Manuals
319-850-000 (1989) Snowblower Parts View Diagrams & Manuals
319-588-000 (1989) Snowblower Parts View Diagrams & Manuals
319-960-000 (1989) Snowblower Parts View Diagrams & Manuals
319-590-000 (1989) Snowblower Parts View Diagrams & Manuals
319-840-000 (1989) Snowblower Parts View Diagrams & Manuals
31965-9 (1989) Snowblower View Diagrams & Manuals
450-206 (1989) Snowblower View Diagrams & Manuals
450-327 (1989) Snowblower View Diagrams & Manuals
550-327 (1989) Snowblower View Diagrams & Manuals
550-206 (1989) Snowblower View Diagrams & Manuals
550-352 (1989) Snowblower View Diagrams & Manuals
552-206 (1989) Snowblower View Diagrams & Manuals
586-327 (1989) Snowblower View Diagrams & Manuals
586-206 (1989) Snowblower View Diagrams & Manuals
586-352 (1989) Snowblower View Diagrams & Manuals
840-206 (1989) Snowblower View Diagrams & Manuals
960-206 (1989) Snowblower View Diagrams & Manuals
850-327 (1989) Snowblower View Diagrams & Manuals
960-327 (1989) Snowblower View Diagrams & Manuals
149-852-023 Snowblower View Diagrams & Manuals
31340-8 (1988) Snowblower View Diagrams & Manuals
31353-8 (1988) Snowblower View Diagrams & Manuals
180-054 (1988) Snowblower View Diagrams & Manuals
31183-8 (1988) Snowblower View Diagrams & Manuals
31383-8 (1988) Snowblower View Diagrams & Manuals
318-180-000 (1988) Snowblower View Diagrams & Manuals
318-181-000 (1988) Snowblower View Diagrams & Manuals
318-225-000 (1988) Snowblower View Diagrams & Manuals
318-552-000 (1988) Snowblower View Diagrams & Manuals
318-440-000 (1988) Snowblower View Diagrams & Manuals
318-586-000 (1988) Snowblower View Diagrams & Manuals
318-450-000 (1988) Snowblower View Diagrams & Manuals
318-588-000 (1988) Snowblower View Diagrams & Manuals
318-550-000 (1988) Snowblower View Diagrams & Manuals
318-840-000 (1988) Snowblower View Diagrams & Manuals
318-850-000 (1988) Snowblower View Diagrams & Manuals
550-054 (1988) Snowblower View Diagrams & Manuals
550-098 (1988) Snowblower View Diagrams & Manuals
31960-8 (1988) Snowblower View Diagrams & Manuals
550-105 (1988) Snowblower View Diagrams & Manuals
550-118 (1988) Snowblower View Diagrams & Manuals
450-105 (1988) Snowblower View Diagrams & Manuals
552-054 (1988) Snowblower View Diagrams & Manuals
552-105 (1988) Snowblower View Diagrams & Manuals
586-054 (1988) Snowblower View Diagrams & Manuals
586-098 (1988) Snowblower View Diagrams & Manuals
850-054 (1988) Snowblower View Diagrams & Manuals
586-105 (1988) Snowblower View Diagrams & Manuals
850-105 (1988) Snowblower View Diagrams & Manuals
586-157 (1988) Snowblower View Diagrams & Manuals
180-027 (1987) Snowblower View Diagrams & Manuals
840-105 (1988) Snowblower View Diagrams & Manuals
31183-7 (1987) Snowblower View Diagrams & Manuals
31340-7 (1987) Snowblower View Diagrams & Manuals
317-180-000 (1987) Snowblower View Diagrams & Manuals
317-181-000 (1987) Snowblower View Diagrams & Manuals
317-190-000 (1987) Snowblower View Diagrams & Manuals
317-440-000 (1987) Snowblower View Diagrams & Manuals
317-552-000 (1987) Snowblower View Diagrams & Manuals
317-450-000 (1987) Snowblower View Diagrams & Manuals
317-586-000 (1987) Snowblower View Diagrams & Manuals
317-550-000 (1987) Snowblower View Diagrams & Manuals
317-840-000 (1987) Snowblower View Diagrams & Manuals
317-841-000 (1987) Snowblower View Diagrams & Manuals
317-850-000 (1987) Snowblower View Diagrams & Manuals
317-960-000 (1987) Snowblower View Diagrams & Manuals
31960-7 (1987) Snowblower View Diagrams & Manuals
840-027 (1987) Snowblower View Diagrams & Manuals
450-027 (1987) Snowblower View Diagrams & Manuals
31174C (1986) Snowblower View Diagrams & Manuals
31180C (1986) Snowblower View Diagrams & Manuals
31181C (1986) Snowblower View Diagrams & Manuals
316-151-000 (1986) Snowblower View Diagrams & Manuals
31190C (1986) Snowblower View Diagrams & Manuals
316-160-000 (1986) Snowblower View Diagrams & Manuals
31340C (1986) Snowblower View Diagrams & Manuals
316-174-000 (1986) Snowblower View Diagrams & Manuals
316-150-000 (1986) Snowblower View Diagrams & Manuals
316-550-000 (1986) Snowblower View Diagrams & Manuals
316-440-000 (1986) Snowblower View Diagrams & Manuals
316-580-000 (1986) Snowblower View Diagrams & Manuals
316-450-000 (1986) Snowblower View Diagrams & Manuals
31144S (1985) Snowblower View Diagrams & Manuals
31150S (1985) Snowblower View Diagrams & Manuals
31151S (1985) Snowblower View Diagrams & Manuals
31160S (1985) Snowblower View Diagrams & Manuals
316-800-000 (1986) Snowblower View Diagrams & Manuals
31245S (1985) Snowblower View Diagrams & Manuals
31250S (1985) Snowblower View Diagrams & Manuals
31960C (1986) Snowblower View Diagrams & Manuals
315-144-000 (1985) Snowblower View Diagrams & Manuals
315-150-000 (1985) Snowblower View Diagrams & Manuals
315-151-000 (1985) Snowblower View Diagrams & Manuals
315-160-000 (1985) Snowblower View Diagrams & Manuals
31550S (1985) Snowblower View Diagrams & Manuals
315-450-000 (1985) Snowblower View Diagrams & Manuals
31800S (1985) Snowblower View Diagrams & Manuals
315-800-000 (1985) Snowblower View Diagrams & Manuals
31960S (1985) Snowblower View Diagrams & Manuals
315-860-000 (1985) Snowblower View Diagrams & Manuals
315-960-000 (1985) Snowblower View Diagrams & Manuals
13AT605H718 (2006) 46" Pro Tractor View Diagrams & Manuals
14AI808H718 (2004) 46" Pro Tractor View Diagrams & Manuals
31AE6BHE718 (2005-2) Snow Thrower View Diagrams & Manuals
31AE6GFF795 (2007) Snow Thrower View Diagrams & Manuals
31AE6LFH718 (2005) Snow Thrower View Diagrams & Manuals
13AO791G718 (2005) 42" Lawn Tractor View Diagrams & Manuals
212-390-009 (1992) Tiller View Diagrams & Manuals
212-390-016 (1992) Tiller View Diagrams & Manuals
212-390-027 (1992) Tiller View Diagrams & Manuals
212-390-031 (1992) Tiller View Diagrams & Manuals
212-390-032 (1992) Tiller View Diagrams & Manuals
212-390-054 (1992) Tiller View Diagrams & Manuals
212-390-084 (1992) Tiller View Diagrams & Manuals
212-390-088 (1992) Tiller View Diagrams & Manuals
212-390-111 (1992) Tiller View Diagrams & Manuals
212-390-130 (1992) Tiller View Diagrams & Manuals
212-390-136 (1992) Tiller View Diagrams & Manuals
212-390-137 (1992) Tiller View Diagrams & Manuals
212-390-141 (1992) Tiller View Diagrams & Manuals
212-390-145 (1992) Tiller View Diagrams & Manuals
212-390-169 (1992) Tiller View Diagrams & Manuals
212-390-192 (1992) Tiller View Diagrams & Manuals
212-390-205 (1992) Tiller View Diagrams & Manuals
212-390-702 (1992) Tiller View Diagrams & Manuals
213-340-062 (1993) Tiller View Diagrams & Manuals
213-340-098 (1993) Tiller View Diagrams & Manuals
213-340-105 (1993) Tiller View Diagrams & Manuals
213-340-352 (1993) Tiller View Diagrams & Manuals
213-340-372 (1993) Tiller View Diagrams & Manuals
213-390-009 (1993) Tiller View Diagrams & Manuals
213-390-098 (1993) Tiller View Diagrams & Manuals
213-390-105 (1993) Tiller View Diagrams & Manuals
213-390-702 (1993) Tiller View Diagrams & Manuals
214-340-062 (1994) Tiller View Diagrams & Manuals
214-340-129 (1994) Tiller View Diagrams & Manuals
214-340-372 (1994) Tiller View Diagrams & Manuals
215-340-062 (1995) Tiller View Diagrams & Manuals
215-340-352 (1995) Tiller View Diagrams & Manuals
215-340-372 (1995) Tiller View Diagrams & Manuals
215-390-302 (1995) Tiller View Diagrams & Manuals
14AG808H722 (2004) Garden Tractor View Diagrams & Manuals
251-586-304 (1991) Trimmer View Diagrams & Manuals
251-586-372 (1991) Trimmer View Diagrams & Manuals
251-586-401 (1991) Trimmer View Diagrams & Manuals
251-586-720 (1991) Trimmer View Diagrams & Manuals
251-586-730 (1991) Trimmer View Diagrams & Manuals
251-586-301 (1991) Trimmer View Diagrams & Manuals
251-586-709 (1991) Trimmer View Diagrams & Manuals
251-586-371 (1991) Trimmer View Diagrams & Manuals
251-586-307 (1991) Trimmer View Diagrams & Manuals
251-586-513 (1991) Trimmer View Diagrams & Manuals
251-586-713 (1991) Trimmer View Diagrams & Manuals
251-586-382 (1991) Trimmer View Diagrams & Manuals
251-586-121 (1991) Trimmer View Diagrams & Manuals
251-586-205 (1991) Trimmer View Diagrams & Manuals
251-586-705 (1991) Trimmer View Diagrams & Manuals
251-586-706 (1991) Trimmer View Diagrams & Manuals
251-586-026 (1991) Trimmer View Diagrams & Manuals
251-586-726 (1991) Trimmer View Diagrams & Manuals
251-586-054 (1991) Trimmer View Diagrams & Manuals
251-586-745 (1991) Trimmer View Diagrams & Manuals
251-586-754 (1991) Trimmer View Diagrams & Manuals
251-586-704 (1991) Trimmer View Diagrams & Manuals
251-586-029 (1991) Trimmer View Diagrams & Manuals
251-586-229 (1991) Trimmer View Diagrams & Manuals
251-586-138 (1991) Trimmer View Diagrams & Manuals
251-586-729 (1991) Trimmer View Diagrams & Manuals
251-586-929 (1991) Trimmer View Diagrams & Manuals
251-586-129 (1991) Trimmer View Diagrams & Manuals
251-586-151 (1991) Trimmer View Diagrams & Manuals
251-586-206 (1991) Trimmer View Diagrams & Manuals
251-586-308 (1991) Trimmer View Diagrams & Manuals
251-586-033 (1991) Trimmer View Diagrams & Manuals
251-586-019 (1991) Trimmer View Diagrams & Manuals
251-586-057 (1991) Trimmer View Diagrams & Manuals
251-586-118 (1991) Trimmer View Diagrams & Manuals
251-586-131 (1991) Trimmer View Diagrams & Manuals
251-586-022 (1991) Trimmer View Diagrams & Manuals
251-586-722 (1991) Trimmer View Diagrams & Manuals
251-586-002 (1991) Trimmer View Diagrams & Manuals
251-586-715 (1991) Trimmer View Diagrams & Manuals
251-586-077 (1991) Trimmer View Diagrams & Manuals
251-586-977 (1991) Trimmer View Diagrams & Manuals
251-586-777 (1991) Trimmer View Diagrams & Manuals
251-586-724 (1991) Trimmer View Diagrams & Manuals
251-586-009 (1991) Trimmer View Diagrams & Manuals
251-586-016 (1991) Trimmer View Diagrams & Manuals
251-586-145 (1991) Trimmer View Diagrams & Manuals
251-586-196 (1991) Trimmer View Diagrams & Manuals
251-586-719 (1991) Trimmer View Diagrams & Manuals
251-586-098 (1991) Trimmer View Diagrams & Manuals
13AC762F304 (2008) Lawn Tractor View Diagrams & Manuals
13AC762F372 (2008) Lawn Tractor View Diagrams & Manuals
13AC762F401 (2008) Lawn Tractor View Diagrams & Manuals
13AC762F720 (2008) Lawn Tractor View Diagrams & Manuals
13AC762F730 (2008) Lawn Tractor View Diagrams & Manuals
13AC762F301 (2008) Lawn Tractor View Diagrams & Manuals
13AC762F709 (2008) Lawn Tractor View Diagrams & Manuals
13AC762F371 (2008) Lawn Tractor View Diagrams & Manuals
13AC762F307 (2008) Lawn Tractor View Diagrams & Manuals
13AC762F513 (2008) Lawn Tractor View Diagrams & Manuals
13AC762F713 (2008) Lawn Tractor View Diagrams & Manuals
13AC762F382 (2008) Lawn Tractor View Diagrams & Manuals
13AC762F121 (2008) Lawn Tractor View Diagrams & Manuals
13AC762F205 (2008) Lawn Tractor View Diagrams & Manuals
13AC762F705 (2008) Lawn Tractor View Diagrams & Manuals
13AC762F706 (2008) Lawn Tractor View Diagrams & Manuals
13AC762F026 (2008) Lawn Tractor View Diagrams & Manuals
13AC762F726 (2008) Lawn Tractor View Diagrams & Manuals
13AC762F054 (2008) Lawn Tractor View Diagrams & Manuals
13AC762F745 (2008) Lawn Tractor View Diagrams & Manuals
13AC762F754 (2008) Lawn Tractor View Diagrams & Manuals
13AC762F704 (2008) Lawn Tractor View Diagrams & Manuals
13AC762F029 (2008) Lawn Tractor View Diagrams & Manuals
13AC762F229 (2008) Lawn Tractor View Diagrams & Manuals
13AC762F134 (2008) Lawn Tractor View Diagrams & Manuals
13AC762F138 (2008) Lawn Tractor View Diagrams & Manuals
13AC762F729 (2008) Lawn Tractor View Diagrams & Manuals
13AC762F929 (2008) Lawn Tractor View Diagrams & Manuals
13AC762F129 (2008) Lawn Tractor View Diagrams & Manuals
13AC762F151 (2008) Lawn Tractor View Diagrams & Manuals
13AC762F206 (2008) Lawn Tractor View Diagrams & Manuals
13AC762F308 (2008) Lawn Tractor View Diagrams & Manuals
13AC762F033 (2008) Lawn Tractor View Diagrams & Manuals
13AC762F019 (2008) Lawn Tractor View Diagrams & Manuals
13AC762F057 (2008) Lawn Tractor View Diagrams & Manuals
13AC762F118 (2008) Lawn Tractor View Diagrams & Manuals
13AC762F131 (2008) Lawn Tractor View Diagrams & Manuals
13AC762F022 (2008) Lawn Tractor View Diagrams & Manuals
13AC762F722 (2008) Lawn Tractor View Diagrams & Manuals
13AC762F002 (2008) Lawn Tractor View Diagrams & Manuals
13AC762F715 (2008) Lawn Tractor View Diagrams & Manuals
13AC762F077 (2008) Lawn Tractor View Diagrams & Manuals
13AC762F977 (2008) Lawn Tractor View Diagrams & Manuals
13AC762F777 (2008) Lawn Tractor View Diagrams & Manuals
13AC762F724 (2008) Lawn Tractor View Diagrams & Manuals
13AC762F105 (2008) Lawn Tractor View Diagrams & Manuals
13AC762F009 (2008) Lawn Tractor View Diagrams & Manuals
13AC762F016 (2008) Lawn Tractor View Diagrams & Manuals
13AC762F145 (2008) Lawn Tractor View Diagrams & Manuals
13AC762F196 (2008) Lawn Tractor View Diagrams & Manuals
13AC762F719 (2008) Lawn Tractor View Diagrams & Manuals
13AC762F098 (2008) Lawn Tractor View Diagrams & Manuals
13AM772F304 (2008) Lawn Tractor View Diagrams & Manuals
13AM772F372 (2008) Lawn Tractor View Diagrams & Manuals
13AM772F401 (2008) Lawn Tractor View Diagrams & Manuals
13AM772F720 (2008) Lawn Tractor View Diagrams & Manuals
13AM772F730 (2008) Lawn Tractor View Diagrams & Manuals
13AM772F301 (2008) Lawn Tractor View Diagrams & Manuals
13AM772F709 (2008) Lawn Tractor View Diagrams & Manuals
13AM772F371 (2008) Lawn Tractor View Diagrams & Manuals
13AM772F307 (2008) Lawn Tractor View Diagrams & Manuals
13AM772F513 (2008) Lawn Tractor View Diagrams & Manuals
13AM772F713 (2008) Lawn Tractor View Diagrams & Manuals
13AM772F382 (2008) Lawn Tractor View Diagrams & Manuals
13AM772F121 (2008) Lawn Tractor View Diagrams & Manuals
13AM772F205 (2008) Lawn Tractor View Diagrams & Manuals
13AM772F705 (2008) Lawn Tractor View Diagrams & Manuals
13AM772F706 (2008) Lawn Tractor View Diagrams & Manuals
13AM772F026 (2008) Lawn Tractor View Diagrams & Manuals
13AM772F726 (2008) Lawn Tractor View Diagrams & Manuals
13AM772F054 (2008) Lawn Tractor View Diagrams & Manuals
13AM772F745 (2008) Lawn Tractor View Diagrams & Manuals
13AM772F754 (2008) Lawn Tractor View Diagrams & Manuals
13AM772F704 (2008) Lawn Tractor View Diagrams & Manuals
13AM772F029 (2008) Lawn Tractor View Diagrams & Manuals
13AM772F229 (2008) Lawn Tractor View Diagrams & Manuals
13AM772F134 (2008) Lawn Tractor View Diagrams & Manuals
13AM772F138 (2008) Lawn Tractor View Diagrams & Manuals
13AM772F729 (2008) Lawn Tractor View Diagrams & Manuals
13AM772F929 (2008) Lawn Tractor View Diagrams & Manuals
13AM772F129 (2008) Lawn Tractor View Diagrams & Manuals
13AM772F151 (2008) Lawn Tractor View Diagrams & Manuals
13AM772F206 (2008) Lawn Tractor View Diagrams & Manuals
13AM772F308 (2008) Lawn Tractor View Diagrams & Manuals
13AM772F033 (2008) Lawn Tractor View Diagrams & Manuals
13AM772F019 (2008) Lawn Tractor View Diagrams & Manuals
13AM772F057 (2008) Lawn Tractor View Diagrams & Manuals
13AM772F118 (2008) Lawn Tractor View Diagrams & Manuals
13AM772F131 (2008) Lawn Tractor View Diagrams & Manuals
13AM772F022 (2008) Lawn Tractor View Diagrams & Manuals
13AM772F722 (2008) Lawn Tractor View Diagrams & Manuals
13AM772F002 (2008) Lawn Tractor View Diagrams & Manuals
13AM772F715 (2008) Lawn Tractor View Diagrams & Manuals
13AM772F077 (2008) Lawn Tractor View Diagrams & Manuals
13AM772F977 (2008) Lawn Tractor View Diagrams & Manuals
13AM772F777 (2008) Lawn Tractor View Diagrams & Manuals
13AM772F724 (2008) Lawn Tractor View Diagrams & Manuals
13AM772F105 (2008) Lawn Tractor View Diagrams & Manuals
13AM772F009 (2008) Lawn Tractor View Diagrams & Manuals
13AM772F016 (2008) Lawn Tractor View Diagrams & Manuals
13AM772F145 (2008) Lawn Tractor View Diagrams & Manuals
13AM772F196 (2008) Lawn Tractor View Diagrams & Manuals
13AM772F719 (2008) Lawn Tractor View Diagrams & Manuals
13AM772F098 (2008) Lawn Tractor View Diagrams & Manuals
13AN772G304 (2008) Lawn Tractor View Diagrams & Manuals
13AN772G372 (2008) Lawn Tractor View Diagrams & Manuals
13AN772G401 (2008) Lawn Tractor View Diagrams & Manuals
13AN772G720 (2008) Lawn Tractor View Diagrams & Manuals
13AN772G730 (2008) Lawn Tractor View Diagrams & Manuals
13AN772G301 (2008) Lawn Tractor View Diagrams & Manuals
13AN772G709 (2008) Lawn Tractor View Diagrams & Manuals
13AN772G371 (2008) Lawn Tractor View Diagrams & Manuals
13AN772G307 (2008) Lawn Tractor View Diagrams & Manuals
13AN772G513 (2008) Lawn Tractor View Diagrams & Manuals
13AN772G713 (2008) Lawn Tractor View Diagrams & Manuals
13AN772G382 (2008) Lawn Tractor View Diagrams & Manuals
13AN772G121 (2008) Lawn Tractor View Diagrams & Manuals
13AN772G205 (2008) Lawn Tractor View Diagrams & Manuals
13AN772G705 (2008) Lawn Tractor View Diagrams & Manuals
13AN772G706 (2008) Lawn Tractor View Diagrams & Manuals
13AN772G026 (2008) Lawn Tractor View Diagrams & Manuals
13AN772G726 (2008) Lawn Tractor View Diagrams & Manuals
13AN772G054 (2008) Lawn Tractor View Diagrams & Manuals
13AN772G745 (2008) Lawn Tractor View Diagrams & Manuals
13AN772G754 (2008) Lawn Tractor View Diagrams & Manuals
13AN772G704 (2008) Lawn Tractor View Diagrams & Manuals
13AN772G029 (2008) Lawn Tractor View Diagrams & Manuals
13AN772G229 (2008) Lawn Tractor View Diagrams & Manuals
13AN772G134 (2008) Lawn Tractor View Diagrams & Manuals
13AN772G138 (2008) Lawn Tractor View Diagrams & Manuals
13AN772G729 (2008) Lawn Tractor View Diagrams & Manuals
13AN772G929 (2008) Lawn Tractor View Diagrams & Manuals
13AN772G129 (2008) Lawn Tractor View Diagrams & Manuals
13AN772G151 (2008) Lawn Tractor View Diagrams & Manuals
13AN772G206 (2008) Lawn Tractor View Diagrams & Manuals
13AN772G308 (2008) Lawn Tractor View Diagrams & Manuals
13AN772G033 (2008) Lawn Tractor View Diagrams & Manuals
13AN772G019 (2008) Lawn Tractor View Diagrams & Manuals
13AN772G057 (2008) Lawn Tractor View Diagrams & Manuals
13AN772G118 (2008) Lawn Tractor View Diagrams & Manuals
13AN772G131 (2008) Lawn Tractor View Diagrams & Manuals
13AN772G022 (2008) Lawn Tractor View Diagrams & Manuals
13AN772G722 (2008) Lawn Tractor View Diagrams & Manuals
13AN772G002 (2008) Lawn Tractor View Diagrams & Manuals
13AN772G715 (2008) Lawn Tractor View Diagrams & Manuals
13AN772G077 (2008) Lawn Tractor View Diagrams & Manuals
13AN772G977 (2008) Lawn Tractor View Diagrams & Manuals
13AN772G777 (2008) Lawn Tractor View Diagrams & Manuals
13AN772G724 (2008) Lawn Tractor View Diagrams & Manuals
13AN772G105 (2008) Lawn Tractor View Diagrams & Manuals
13AN772G009 (2008) Lawn Tractor View Diagrams & Manuals
13AN772G016 (2008) Lawn Tractor View Diagrams & Manuals
13AN772G145 (2008) Lawn Tractor View Diagrams & Manuals
13AN772G196 (2008) Lawn Tractor View Diagrams & Manuals
13AN772G719 (2008) Lawn Tractor View Diagrams & Manuals
13AN772G098 (2008) Lawn Tractor View Diagrams & Manuals
13A1762F304 (2006) Lawn Tractor View Diagrams & Manuals
13A1762F372 (2006) Lawn Tractor View Diagrams & Manuals
13A1762F401 (2006) Lawn Tractor View Diagrams & Manuals
13A1762F720 (2006) Lawn Tractor View Diagrams & Manuals
13A1762F730 (2006) Lawn Tractor View Diagrams & Manuals
13A1762F301 (2006) Lawn Tractor View Diagrams & Manuals
13A1762F709 (2006) Lawn Tractor View Diagrams & Manuals
13A1762F371 (2006) Lawn Tractor View Diagrams & Manuals
13A1762F307 (2006) Lawn Tractor View Diagrams & Manuals
13A1762F513 (2006) Lawn Tractor View Diagrams & Manuals
13A1762F713 (2006) Lawn Tractor View Diagrams & Manuals
13A1762F382 (2006) Lawn Tractor View Diagrams & Manuals
13A1762F000 (2006) Lawn Tractor View Diagrams & Manuals
13A1762F121 (2006) Lawn Tractor View Diagrams & Manuals
13A1762F205 (2006) Lawn Tractor View Diagrams & Manuals
13A1762F705 (2006) Lawn Tractor View Diagrams & Manuals
13A1762F706 (2006) Lawn Tractor View Diagrams & Manuals
13A1762F026 (2006) Lawn Tractor View Diagrams & Manuals
13A1762F726 (2006) Lawn Tractor View Diagrams & Manuals
13A1762F054 (2006) Lawn Tractor View Diagrams & Manuals
13A1762F745 (2006) Lawn Tractor View Diagrams & Manuals
13A1762F754 (2006) Lawn Tractor View Diagrams & Manuals
13A1762F704 (2006) Lawn Tractor View Diagrams & Manuals
13A1762F029 (2006) Lawn Tractor View Diagrams & Manuals
13A1762F229 (2006) Lawn Tractor View Diagrams & Manuals
13A1762F134 (2006) Lawn Tractor View Diagrams & Manuals
13A1762F138 (2006) Lawn Tractor View Diagrams & Manuals
13A1762F729 (2006) Lawn Tractor View Diagrams & Manuals
13A1762F929 (2006) Lawn Tractor View Diagrams & Manuals
13A1762F129 (2006) Lawn Tractor View Diagrams & Manuals
13A1762F151 (2006) Lawn Tractor View Diagrams & Manuals
13A1762F206 (2006) Lawn Tractor View Diagrams & Manuals
13A1762F308 (2006) Lawn Tractor View Diagrams & Manuals
13A1762F033 (2006) Lawn Tractor View Diagrams & Manuals
13A1762F019 (2006) Lawn Tractor View Diagrams & Manuals
13A1762F057 (2006) Lawn Tractor View Diagrams & Manuals
13A1762F118 (2006) Lawn Tractor View Diagrams & Manuals
13A1762F131 (2006) Lawn Tractor View Diagrams & Manuals
13A1762F022 (2006) Lawn Tractor View Diagrams & Manuals
13A1762F722 (2006) Lawn Tractor View Diagrams & Manuals
13A1762F002 (2006) Lawn Tractor View Diagrams & Manuals
13A1762F715 (2006) Lawn Tractor View Diagrams & Manuals
13A1762F077 (2006) Lawn Tractor View Diagrams & Manuals
13A1762F977 (2006) Lawn Tractor View Diagrams & Manuals
13A1762F777 (2006) Lawn Tractor View Diagrams & Manuals
13A1762F724 (2006) Lawn Tractor View Diagrams & Manuals
13A1762F105 (2006) Lawn Tractor View Diagrams & Manuals
13A1762F009 (2006) Lawn Tractor View Diagrams & Manuals
13A1762F016 (2006) Lawn Tractor View Diagrams & Manuals
13A1762F145 (2006) Lawn Tractor View Diagrams & Manuals
13A1762F196 (2006) Lawn Tractor View Diagrams & Manuals
13A1762F719 (2006) Lawn Tractor View Diagrams & Manuals
13A1762F098 (2006) Lawn Tractor View Diagrams & Manuals
13A3762F304 (2006) Lawn Tractor View Diagrams & Manuals
13A3762F372 (2006) Lawn Tractor View Diagrams & Manuals
13A3762F401 (2006) Lawn Tractor View Diagrams & Manuals
13A3762F720 (2006) Lawn Tractor View Diagrams & Manuals
13A3762F730 (2006) Lawn Tractor View Diagrams & Manuals
13A3762F301 (2006) Lawn Tractor View Diagrams & Manuals
13A3762F709 (2006) Lawn Tractor View Diagrams & Manuals
13A3762F371 (2006) Lawn Tractor View Diagrams & Manuals
13A3762F307 (2006) Lawn Tractor View Diagrams & Manuals
13A3762F513 (2006) Lawn Tractor View Diagrams & Manuals
13A3762F713 (2006) Lawn Tractor View Diagrams & Manuals
13A3762F382 (2006) Lawn Tractor View Diagrams & Manuals
13A3762F000 (2006) Lawn Tractor View Diagrams & Manuals
13A3762F121 (2006) Lawn Tractor View Diagrams & Manuals
13A3762F205 (2006) Lawn Tractor View Diagrams & Manuals
13A3762F705 (2006) Lawn Tractor View Diagrams & Manuals
13A3762F706 (2006) Lawn Tractor View Diagrams & Manuals
13A3762F026 (2006) Lawn Tractor View Diagrams & Manuals
13A3762F726 (2006) Lawn Tractor View Diagrams & Manuals
13A3762F054 (2006) Lawn Tractor View Diagrams & Manuals
13A3762F745 (2006) Lawn Tractor View Diagrams & Manuals
13A3762F754 (2006) Lawn Tractor View Diagrams & Manuals
13A3762F704 (2006) Lawn Tractor View Diagrams & Manuals
13A3762F029 (2006) Lawn Tractor View Diagrams & Manuals
13A3762F229 (2006) Lawn Tractor View Diagrams & Manuals
13A3762F134 (2006) Lawn Tractor View Diagrams & Manuals
13A3762F138 (2006) Lawn Tractor View Diagrams & Manuals
13A3762F729 (2006) Lawn Tractor View Diagrams & Manuals
13A3762F929 (2006) Lawn Tractor View Diagrams & Manuals
13A3762F129 (2006) Lawn Tractor View Diagrams & Manuals
13A3762F151 (2006) Lawn Tractor View Diagrams & Manuals
13A3762F206 (2006) Lawn Tractor View Diagrams & Manuals
13A3762F308 (2006) Lawn Tractor View Diagrams & Manuals
13A3762F033 (2006) Lawn Tractor View Diagrams & Manuals
13A3762F019 (2006) Lawn Tractor View Diagrams & Manuals
13A3762F057 (2006) Lawn Tractor View Diagrams & Manuals
13A3762F118 (2006) Lawn Tractor View Diagrams & Manuals
13A3762F131 (2006) Lawn Tractor View Diagrams & Manuals
13A3762F022 (2006) Lawn Tractor View Diagrams & Manuals
13A3762F722 (2006) Lawn Tractor View Diagrams & Manuals
13A3762F002 (2006) Lawn Tractor View Diagrams & Manuals
13A3762F715 (2006) Lawn Tractor View Diagrams & Manuals
13A3762F077 (2006) Lawn Tractor View Diagrams & Manuals
13A3762F977 (2006) Lawn Tractor View Diagrams & Manuals
13A3762F777 (2006) Lawn Tractor View Diagrams & Manuals
13A3762F724 (2006) Lawn Tractor View Diagrams & Manuals
13A3762F105 (2006) Lawn Tractor View Diagrams & Manuals
13A3762F009 (2006) Lawn Tractor View Diagrams & Manuals
13A3762F016 (2006) Lawn Tractor View Diagrams & Manuals
13A3762F145 (2006) Lawn Tractor View Diagrams & Manuals
13A3762F196 (2006) Lawn Tractor View Diagrams & Manuals
13A3762F719 (2006) Lawn Tractor View Diagrams & Manuals
13A3762F098 (2006) Lawn Tractor View Diagrams & Manuals
13A1760F304 (2005) Lawn Tractor View Diagrams & Manuals
13A1760F372 (2005) Lawn Tractor View Diagrams & Manuals
13A1760F401 (2005) Lawn Tractor View Diagrams & Manuals
13A1760F720 (2005) Lawn Tractor View Diagrams & Manuals
13A1760F730 (2005) Lawn Tractor View Diagrams & Manuals
13A1760F301 (2005) Lawn Tractor View Diagrams & Manuals
13A1760F709 (2005) Lawn Tractor View Diagrams & Manuals
13A1760F371 (2005) Lawn Tractor View Diagrams & Manuals
13A1760F307 (2005) Lawn Tractor View Diagrams & Manuals
13A1760F513 (2005) Lawn Tractor View Diagrams & Manuals
13A1760F713 (2005) Lawn Tractor View Diagrams & Manuals
13A1760F382 (2005) Lawn Tractor View Diagrams & Manuals
13A1760F000 (2005) Lawn Tractor View Diagrams & Manuals
13A1760F121 (2005) Lawn Tractor View Diagrams & Manuals
13A1760F205 (2005) Lawn Tractor View Diagrams & Manuals
13A1760F705 (2005) Lawn Tractor View Diagrams & Manuals
13A1760F706 (2005) Lawn Tractor View Diagrams & Manuals
13A1760F026 (2005) Lawn Tractor View Diagrams & Manuals
13A1760F726 (2005) Lawn Tractor View Diagrams & Manuals
13A1760F054 (2005) Lawn Tractor View Diagrams & Manuals
13A1760F745 (2005) Lawn Tractor View Diagrams & Manuals
13A1760F754 (2005) Lawn Tractor View Diagrams & Manuals
13A1760F704 (2005) Lawn Tractor View Diagrams & Manuals
13A1760F029 (2005) Lawn Tractor View Diagrams & Manuals
13A1760F229 (2005) Lawn Tractor View Diagrams & Manuals
13A1760F134 (2005) Lawn Tractor View Diagrams & Manuals
13A1760F138 (2005) Lawn Tractor View Diagrams & Manuals
13A1760F729 (2005) Lawn Tractor View Diagrams & Manuals
13A1760F929 (2005) Lawn Tractor View Diagrams & Manuals
13A1760F129 (2005) Lawn Tractor View Diagrams & Manuals
13A1760F151 (2005) Lawn Tractor View Diagrams & Manuals
13A1760F206 (2005) Lawn Tractor View Diagrams & Manuals
13A1760F308 (2005) Lawn Tractor View Diagrams & Manuals
13A1760F033 (2005) Lawn Tractor View Diagrams & Manuals
13A1760F019 (2005) Lawn Tractor View Diagrams & Manuals
13A1760F057 (2005) Lawn Tractor View Diagrams & Manuals
13A1760F118 (2005) Lawn Tractor View Diagrams & Manuals
13A1760F131 (2005) Lawn Tractor View Diagrams & Manuals
13A1760F022 (2005) Lawn Tractor View Diagrams & Manuals
13A1760F722 (2005) Lawn Tractor View Diagrams & Manuals
13A1760F002 (2005) Lawn Tractor View Diagrams & Manuals
13A1760F715 (2005) Lawn Tractor View Diagrams & Manuals
13A1760F077 (2005) Lawn Tractor View Diagrams & Manuals
13A1760F977 (2005) Lawn Tractor View Diagrams & Manuals
13A1760F777 (2005) Lawn Tractor View Diagrams & Manuals
13A1760F724 (2005) Lawn Tractor View Diagrams & Manuals
13A1760F105 (2005) Lawn Tractor View Diagrams & Manuals
13A1760F009 (2005) Lawn Tractor View Diagrams & Manuals
13A1760F016 (2005) Lawn Tractor View Diagrams & Manuals
13A1760F145 (2005) Lawn Tractor View Diagrams & Manuals
13A1760F196 (2005) Lawn Tractor View Diagrams & Manuals
13A1760F719 (2005) Lawn Tractor View Diagrams & Manuals
13A1760F098 (2005) Lawn Tractor View Diagrams & Manuals
13A3761G304 (2005) Lawn Tractor View Diagrams & Manuals
13A3761G372 (2005) Lawn Tractor View Diagrams & Manuals
13A3761G401 (2005) Lawn Tractor View Diagrams & Manuals
13A3761G720 (2005) Lawn Tractor View Diagrams & Manuals
13A3761G730 (2005) Lawn Tractor View Diagrams & Manuals
13A3761G301 (2005) Lawn Tractor View Diagrams & Manuals
13A3761G709 (2005) Lawn Tractor View Diagrams & Manuals
13A3761G371 (2005) Lawn Tractor View Diagrams & Manuals
13A3761G307 (2005) Lawn Tractor View Diagrams & Manuals
13A3761G513 (2005) Lawn Tractor View Diagrams & Manuals
13A3761G713 (2005) Lawn Tractor View Diagrams & Manuals
13A3761G382 (2005) Lawn Tractor View Diagrams & Manuals
13A3761G000 (2005) Lawn Tractor View Diagrams & Manuals
13A3761G121 (2005) Lawn Tractor View Diagrams & Manuals
13A3761G205 (2005) Lawn Tractor View Diagrams & Manuals
13A3761G705 (2005) Lawn Tractor View Diagrams & Manuals
13A3761G706 (2005) Lawn Tractor View Diagrams & Manuals
13A3761G026 (2005) Lawn Tractor View Diagrams & Manuals
13A3761G726 (2005) Lawn Tractor View Diagrams & Manuals
13A3761G054 (2005) Lawn Tractor View Diagrams & Manuals
13A3761G745 (2005) Lawn Tractor View Diagrams & Manuals
13A3761G754 (2005) Lawn Tractor View Diagrams & Manuals
13A3761G704 (2005) Lawn Tractor View Diagrams & Manuals
13A3761G029 (2005) Lawn Tractor View Diagrams & Manuals
13A3761G229 (2005) Lawn Tractor View Diagrams & Manuals
13A3761G134 (2005) Lawn Tractor View Diagrams & Manuals
13A3761G138 (2005) Lawn Tractor View Diagrams & Manuals
13A3761G729 (2005) Lawn Tractor View Diagrams & Manuals
13A3761G929 (2005) Lawn Tractor View Diagrams & Manuals
13A3761G129 (2005) Lawn Tractor View Diagrams & Manuals
13A3761G151 (2005) Lawn Tractor View Diagrams & Manuals
13A3761G206 (2005) Lawn Tractor View Diagrams & Manuals
13A3761G308 (2005) Lawn Tractor View Diagrams & Manuals
13A3761G033 (2005) Lawn Tractor View Diagrams & Manuals
13A3761G019 (2005) Lawn Tractor View Diagrams & Manuals
13A3761G057 (2005) Lawn Tractor View Diagrams & Manuals
13A3761G118 (2005) Lawn Tractor View Diagrams & Manuals
13A3761G131 (2005) Lawn Tractor View Diagrams & Manuals
13A3761G022 (2005) Lawn Tractor View Diagrams & Manuals
13A3761G722 (2005) Lawn Tractor View Diagrams & Manuals
13A3761G002 (2005) Lawn Tractor View Diagrams & Manuals
13A3761G715 (2005) Lawn Tractor View Diagrams & Manuals
13A3761G077 (2005) Lawn Tractor View Diagrams & Manuals
13A3761G977 (2005) Lawn Tractor View Diagrams & Manuals
13A3761G777 (2005) Lawn Tractor View Diagrams & Manuals
13A3761G724 (2005) Lawn Tractor View Diagrams & Manuals
13A3761G105 (2005) Lawn Tractor View Diagrams & Manuals
13A3761G009 (2005) Lawn Tractor View Diagrams & Manuals
13A3761G016 (2005) Lawn Tractor View Diagrams & Manuals
13A3761G145 (2005) Lawn Tractor View Diagrams & Manuals
13A3761G196 (2005) Lawn Tractor View Diagrams & Manuals
13A3761G719 (2005) Lawn Tractor View Diagrams & Manuals
13A3761G098 (2005) Lawn Tractor View Diagrams & Manuals
13A3771G304 (2005) Lawn Tractor View Diagrams & Manuals
13A3771G372 (2005) Lawn Tractor View Diagrams & Manuals
13A3771G401 (2005) Lawn Tractor View Diagrams & Manuals
13A3771G720 (2005) Lawn Tractor View Diagrams & Manuals
13A3771G730 (2005) Lawn Tractor View Diagrams & Manuals
13A3771G301 (2005) Lawn Tractor View Diagrams & Manuals
13A3771G709 (2005) Lawn Tractor View Diagrams & Manuals
13A3771G371 (2005) Lawn Tractor View Diagrams & Manuals
13A3771G307 (2005) Lawn Tractor View Diagrams & Manuals
13A3771G513 (2005) Lawn Tractor View Diagrams & Manuals
13A3771G713 (2005) Lawn Tractor View Diagrams & Manuals
13A3771G382 (2005) Lawn Tractor View Diagrams & Manuals
13A3771G000 (2005) Lawn Tractor View Diagrams & Manuals
13A3771G121 (2005) Lawn Tractor View Diagrams & Manuals
13A3771G205 (2005) Lawn Tractor View Diagrams & Manuals
13A3771G705 (2005) Lawn Tractor View Diagrams & Manuals
13A3771G706 (2005) Lawn Tractor View Diagrams & Manuals
13A3771G026 (2005) Lawn Tractor View Diagrams & Manuals
13A3771G726 (2005) Lawn Tractor View Diagrams & Manuals
13A3771G054 (2005) Lawn Tractor View Diagrams & Manuals
13A3771G745 (2005) Lawn Tractor View Diagrams & Manuals
13A3771G754 (2005) Lawn Tractor View Diagrams & Manuals
13A3771G704 (2005) Lawn Tractor View Diagrams & Manuals
13A3771G029 (2005) Lawn Tractor View Diagrams & Manuals
13A3771G229 (2005) Lawn Tractor View Diagrams & Manuals
13A3771G134 (2005) Lawn Tractor View Diagrams & Manuals
13A3771G138 (2005) Lawn Tractor View Diagrams & Manuals
13A3771G729 (2005) Lawn Tractor View Diagrams & Manuals
13A3771G929 (2005) Lawn Tractor View Diagrams & Manuals
13A3771G129 (2005) Lawn Tractor View Diagrams & Manuals
13A3771G151 (2005) Lawn Tractor View Diagrams & Manuals
13A3771G206 (2005) Lawn Tractor View Diagrams & Manuals
13A3771G308 (2005) Lawn Tractor View Diagrams & Manuals
13A3771G033 (2005) Lawn Tractor View Diagrams & Manuals
13A3771G019 (2005) Lawn Tractor View Diagrams & Manuals
13A3771G057 (2005) Lawn Tractor View Diagrams & Manuals
13A3771G118 (2005) Lawn Tractor View Diagrams & Manuals
13A3771G131 (2005) Lawn Tractor View Diagrams & Manuals
13A3771G022 (2005) Lawn Tractor View Diagrams & Manuals
13A3771G722 (2005) Lawn Tractor View Diagrams & Manuals
13A3771G002 (2005) Lawn Tractor View Diagrams & Manuals
13A3771G715 (2005) Lawn Tractor View Diagrams & Manuals
13A3771G077 (2005) Lawn Tractor View Diagrams & Manuals
13A3771G977 (2005) Lawn Tractor View Diagrams & Manuals
13A3771G777 (2005) Lawn Tractor View Diagrams & Manuals
13A3771G724 (2005) Lawn Tractor View Diagrams & Manuals
13A3771G105 (2005) Lawn Tractor View Diagrams & Manuals
13A3771G009 (2005) Lawn Tractor View Diagrams & Manuals
13A3771G016 (2005) Lawn Tractor View Diagrams & Manuals
13A3771G145 (2005) Lawn Tractor View Diagrams & Manuals
13A3771G196 (2005) Lawn Tractor View Diagrams & Manuals
13A3771G719 (2005) Lawn Tractor View Diagrams & Manuals
13A3771G098 (2005) Lawn Tractor View Diagrams & Manuals
13A3791G304 (2005) Lawn Tractor View Diagrams & Manuals
13A3791G372 (2005) Lawn Tractor View Diagrams & Manuals
13A3791G401 (2005) Lawn Tractor View Diagrams & Manuals
13A3791G720 (2005) Lawn Tractor View Diagrams & Manuals
13A3791G730 (2005) Lawn Tractor View Diagrams & Manuals
13A3791G301 (2005) Lawn Tractor View Diagrams & Manuals
13A3791G709 (2005) Lawn Tractor View Diagrams & Manuals
13A3791G371 (2005) Lawn Tractor View Diagrams & Manuals
13A3791G307 (2005) Lawn Tractor View Diagrams & Manuals
13A3791G513 (2005) Lawn Tractor View Diagrams & Manuals
13A3791G713 (2005) Lawn Tractor View Diagrams & Manuals
13A3791G382 (2005) Lawn Tractor View Diagrams & Manuals
13A3791G000 (2005) Lawn Tractor View Diagrams & Manuals
13A3791G121 (2005) Lawn Tractor View Diagrams & Manuals
13A3791G205 (2005) Lawn Tractor View Diagrams & Manuals
13A3791G705 (2005) Lawn Tractor View Diagrams & Manuals
13A3791G706 (2005) Lawn Tractor View Diagrams & Manuals
13A3791G026 (2005) Lawn Tractor View Diagrams & Manuals
13A3791G726 (2005) Lawn Tractor View Diagrams & Manuals
13A3791G054 (2005) Lawn Tractor View Diagrams & Manuals
13A3791G745 (2005) Lawn Tractor View Diagrams & Manuals
13A3791G754 (2005) Lawn Tractor View Diagrams & Manuals
13A3791G704 (2005) Lawn Tractor View Diagrams & Manuals
13A3791G029 (2005) Lawn Tractor View Diagrams & Manuals
13A3791G229 (2005) Lawn Tractor View Diagrams & Manuals
13A3791G134 (2005) Lawn Tractor View Diagrams & Manuals
13A3791G138 (2005) Lawn Tractor View Diagrams & Manuals
13A3791G729 (2005) Lawn Tractor View Diagrams & Manuals
13A3791G929 (2005) Lawn Tractor View Diagrams & Manuals
13A3791G129 (2005) Lawn Tractor View Diagrams & Manuals
13A3791G151 (2005) Lawn Tractor View Diagrams & Manuals
13A3791G206 (2005) Lawn Tractor View Diagrams & Manuals
13A3791G308 (2005) Lawn Tractor View Diagrams & Manuals
13A3791G033 (2005) Lawn Tractor View Diagrams & Manuals
13A3791G019 (2005) Lawn Tractor View Diagrams & Manuals
13A3791G057 (2005) Lawn Tractor View Diagrams & Manuals
13A3791G118 (2005) Lawn Tractor View Diagrams & Manuals
13A3791G131 (2005) Lawn Tractor View Diagrams & Manuals
13A3791G022 (2005) Lawn Tractor View Diagrams & Manuals
13A3791G722 (2005) Lawn Tractor View Diagrams & Manuals
13A3791G002 (2005) Lawn Tractor View Diagrams & Manuals
13A3791G715 (2005) Lawn Tractor View Diagrams & Manuals
13A3791G077 (2005) Lawn Tractor View Diagrams & Manuals
13A3791G977 (2005) Lawn Tractor View Diagrams & Manuals
13A3791G777 (2005) Lawn Tractor View Diagrams & Manuals
13A3791G724 (2005) Lawn Tractor View Diagrams & Manuals
13A3791G105 (2005) Lawn Tractor View Diagrams & Manuals
13A3791G009 (2005) Lawn Tractor View Diagrams & Manuals
13A3791G016 (2005) Lawn Tractor View Diagrams & Manuals
13A3791G145 (2005) Lawn Tractor View Diagrams & Manuals
13A3791G196 (2005) Lawn Tractor View Diagrams & Manuals
13A3791G719 (2005) Lawn Tractor View Diagrams & Manuals
13A3791G098 (2005) Lawn Tractor View Diagrams & Manuals
13AC650F304 (2004) Lawn Tractor View Diagrams & Manuals
13AC650F372 (2004) Lawn Tractor View Diagrams & Manuals
13AC650F401 (2004) Lawn Tractor View Diagrams & Manuals
13AC650F720 (2004) Lawn Tractor View Diagrams & Manuals
13AC650F730 (2004) Lawn Tractor View Diagrams & Manuals
13AC650F301 (2004) Lawn Tractor View Diagrams & Manuals
13AC650F709 (2004) Lawn Tractor View Diagrams & Manuals
13AC650F371 (2004) Lawn Tractor View Diagrams & Manuals
13AC650F307 (2004) Lawn Tractor View Diagrams & Manuals
13AC650F513 (2004) Lawn Tractor View Diagrams & Manuals
13AC650F713 (2004) Lawn Tractor View Diagrams & Manuals
13AC650F382 (2004) Lawn Tractor View Diagrams & Manuals
13AC650F121 (2004) Lawn Tractor View Diagrams & Manuals
13AC650F205 (2004) Lawn Tractor View Diagrams & Manuals
13AC650F705 (2004) Lawn Tractor View Diagrams & Manuals
13AC650F706 (2004) Lawn Tractor View Diagrams & Manuals
13AC650F026 (2004) Lawn Tractor View Diagrams & Manuals
13AC650F726 (2004) Lawn Tractor View Diagrams & Manuals
13AC650F054 (2004) Lawn Tractor View Diagrams & Manuals
13AC650F745 (2004) Lawn Tractor View Diagrams & Manuals
13AC650F754 (2004) Lawn Tractor View Diagrams & Manuals
13AC650F704 (2004) Lawn Tractor View Diagrams & Manuals
13AC650F029 (2004) Lawn Tractor View Diagrams & Manuals
13AC650F229 (2004) Lawn Tractor View Diagrams & Manuals
13AC650F134 (2004) Lawn Tractor View Diagrams & Manuals
13AC650F138 (2004) Lawn Tractor View Diagrams & Manuals
13AC650F729 (2004) Lawn Tractor View Diagrams & Manuals
13AC650F929 (2004) Lawn Tractor View Diagrams & Manuals
13AC650F129 (2004) Lawn Tractor View Diagrams & Manuals
13AC650F151 (2004) Lawn Tractor View Diagrams & Manuals
13AC650F206 (2004) Lawn Tractor View Diagrams & Manuals
13AC650F308 (2004) Lawn Tractor View Diagrams & Manuals
13AC650F033 (2004) Lawn Tractor View Diagrams & Manuals
13AC650F019 (2004) Lawn Tractor View Diagrams & Manuals
13AC650F057 (2004) Lawn Tractor View Diagrams & Manuals
13AC650F118 (2004) Lawn Tractor View Diagrams & Manuals
13AC650F131 (2004) Lawn Tractor View Diagrams & Manuals
13AC650F022 (2004) Lawn Tractor View Diagrams & Manuals
13AC650F722 (2004) Lawn Tractor View Diagrams & Manuals
13AC650F002 (2004) Lawn Tractor View Diagrams & Manuals
13AC650F715 (2004) Lawn Tractor View Diagrams & Manuals
13AC650F077 (2004) Lawn Tractor View Diagrams & Manuals
13AC650F977 (2004) Lawn Tractor View Diagrams & Manuals
13AC650F777 (2004) Lawn Tractor View Diagrams & Manuals
13AC650F724 (2004) Lawn Tractor View Diagrams & Manuals
13AC650F105 (2004) Lawn Tractor View Diagrams & Manuals
13AC650F009 (2004) Lawn Tractor View Diagrams & Manuals
13AC650F016 (2004) Lawn Tractor View Diagrams & Manuals
13AC650F145 (2004) Lawn Tractor View Diagrams & Manuals
13AC650F196 (2004) Lawn Tractor View Diagrams & Manuals
13AC650F719 (2004) Lawn Tractor View Diagrams & Manuals
13AC650F098 (2004) Lawn Tractor View Diagrams & Manuals
13AD685G304 (2004) Lawn Tractor View Diagrams & Manuals
13AD685G372 (2004) Lawn Tractor View Diagrams & Manuals
13AD685G401 (2004) Lawn Tractor View Diagrams & Manuals
13AD685G720 (2004) Lawn Tractor View Diagrams & Manuals
13AD685G730 (2004) Lawn Tractor View Diagrams & Manuals
13AD685G301 (2004) Lawn Tractor View Diagrams & Manuals
13AD685G709 (2004) Lawn Tractor View Diagrams & Manuals
13AD685G371 (2004) Lawn Tractor View Diagrams & Manuals
13AD685G307 (2004) Lawn Tractor View Diagrams & Manuals
13AD685G513 (2004) Lawn Tractor View Diagrams & Manuals
13AD685G713 (2004) Lawn Tractor View Diagrams & Manuals
13AD685G382 (2004) Lawn Tractor View Diagrams & Manuals
13AD685G121 (2004) Lawn Tractor View Diagrams & Manuals
13AD685G205 (2004) Lawn Tractor View Diagrams & Manuals
13AD685G705 (2004) Lawn Tractor View Diagrams & Manuals
13AD685G706 (2004) Lawn Tractor View Diagrams & Manuals
13AD685G026 (2004) Lawn Tractor View Diagrams & Manuals
13AD685G726 (2004) Lawn Tractor View Diagrams & Manuals
13AD685G054 (2004) Lawn Tractor View Diagrams & Manuals
13AD685G745 (2004) Lawn Tractor View Diagrams & Manuals
13AD685G754 (2004) Lawn Tractor View Diagrams & Manuals
13AD685G704 (2004) Lawn Tractor View Diagrams & Manuals
13AD685G029 (2004) Lawn Tractor View Diagrams & Manuals
13AD685G229 (2004) Lawn Tractor View Diagrams & Manuals
13AD685G134 (2004) Lawn Tractor View Diagrams & Manuals
13AD685G138 (2004) Lawn Tractor View Diagrams & Manuals
13AD685G729 (2004) Lawn Tractor View Diagrams & Manuals
13AD685G929 (2004) Lawn Tractor View Diagrams & Manuals
13AD685G129 (2004) Lawn Tractor View Diagrams & Manuals
13AD685G151 (2004) Lawn Tractor View Diagrams & Manuals
13AD685G206 (2004) Lawn Tractor View Diagrams & Manuals
13AD685G308 (2004) Lawn Tractor View Diagrams & Manuals
13AD685G033 (2004) Lawn Tractor View Diagrams & Manuals
13AD685G019 (2004) Lawn Tractor View Diagrams & Manuals
13AD685G057 (2004) Lawn Tractor View Diagrams & Manuals
13AD685G118 (2004) Lawn Tractor View Diagrams & Manuals
13AD685G131 (2004) Lawn Tractor View Diagrams & Manuals
13AD685G022 (2004) Lawn Tractor View Diagrams & Manuals
13AD685G722 (2004) Lawn Tractor View Diagrams & Manuals
13AD685G002 (2004) Lawn Tractor View Diagrams & Manuals
13AD685G715 (2004) Lawn Tractor View Diagrams & Manuals
13AD685G077 (2004) Lawn Tractor View Diagrams & Manuals
13AD685G977 (2004) Lawn Tractor View Diagrams & Manuals
13AD685G777 (2004) Lawn Tractor View Diagrams & Manuals
13AD685G724 (2004) Lawn Tractor View Diagrams & Manuals
13AD685G105 (2004) Lawn Tractor View Diagrams & Manuals
13AD685G009 (2004) Lawn Tractor View Diagrams & Manuals
13AD685G016 (2004) Lawn Tractor View Diagrams & Manuals
13AD685G145 (2004) Lawn Tractor View Diagrams & Manuals
13AD685G196 (2004) Lawn Tractor View Diagrams & Manuals
13AD685G719 (2004) Lawn Tractor View Diagrams & Manuals
13AD685G098 (2004) Lawn Tractor View Diagrams & Manuals
13AD688G304 (2004) Lawn Tractor View Diagrams & Manuals
13AD688G372 (2004) Lawn Tractor View Diagrams & Manuals
13AD688G401 (2004) Lawn Tractor View Diagrams & Manuals
13AD688G720 (2004) Lawn Tractor View Diagrams & Manuals
13AD688G730 (2004) Lawn Tractor View Diagrams & Manuals
13AD688G301 (2004) Lawn Tractor View Diagrams & Manuals
13AD688G709 (2004) Lawn Tractor View Diagrams & Manuals
13AD688G371 (2004) Lawn Tractor View Diagrams & Manuals
13AD688G307 (2004) Lawn Tractor View Diagrams & Manuals
13AD688G513 (2004) Lawn Tractor View Diagrams & Manuals
13AD688G713 (2004) Lawn Tractor View Diagrams & Manuals
13AD688G382 (2004) Lawn Tractor View Diagrams & Manuals
13AD688G000 (2004) Lawn Tractor View Diagrams & Manuals
13AD688G121 (2004) Lawn Tractor View Diagrams & Manuals
13AD688G205 (2004) Lawn Tractor View Diagrams & Manuals
13AD688G705 (2004) Lawn Tractor View Diagrams & Manuals
13AD688G706 (2004) Lawn Tractor View Diagrams & Manuals
13AD688G026 (2004) Lawn Tractor View Diagrams & Manuals
13AD688G726 (2004) Lawn Tractor View Diagrams & Manuals
13AD688G054 (2004) Lawn Tractor View Diagrams & Manuals
13AD688G745 (2004) Lawn Tractor View Diagrams & Manuals
13AD688G754 (2004) Lawn Tractor View Diagrams & Manuals
13AD688G704 (2004) Lawn Tractor View Diagrams & Manuals
13AD688G029 (2004) Lawn Tractor View Diagrams & Manuals
13AD688G229 (2004) Lawn Tractor View Diagrams & Manuals
13AD688G134 (2004) Lawn Tractor View Diagrams & Manuals
13AD688G138 (2004) Lawn Tractor View Diagrams & Manuals
13AD688G729 (2004) Lawn Tractor View Diagrams & Manuals
13AD688G929 (2004) Lawn Tractor View Diagrams & Manuals
13AD688G129 (2004) Lawn Tractor View Diagrams & Manuals
13AD688G151 (2004) Lawn Tractor View Diagrams & Manuals
13AD688G206 (2004) Lawn Tractor View Diagrams & Manuals
13AD688G308 (2004) Lawn Tractor View Diagrams & Manuals
13AD688G033 (2004) Lawn Tractor View Diagrams & Manuals
13AD688G019 (2004) Lawn Tractor View Diagrams & Manuals
13AD688G057 (2004) Lawn Tractor View Diagrams & Manuals
13AD688G118 (2004) Lawn Tractor View Diagrams & Manuals
13AD688G131 (2004) Lawn Tractor View Diagrams & Manuals
13AD688G022 (2004) Lawn Tractor View Diagrams & Manuals
13AD688G002 (2004) Lawn Tractor View Diagrams & Manuals
13AD688G715 (2004) Lawn Tractor View Diagrams & Manuals
13AD688G077 (2004) Lawn Tractor View Diagrams & Manuals
13AD688G977 (2004) Lawn Tractor View Diagrams & Manuals
13AD688G777 (2004) Lawn Tractor View Diagrams & Manuals
13AD688G724 (2004) Lawn Tractor View Diagrams & Manuals
13AD688G105 (2004) Lawn Tractor View Diagrams & Manuals
13AD688G009 (2004) Lawn Tractor View Diagrams & Manuals
13AD688G016 (2004) Lawn Tractor View Diagrams & Manuals
13AD688G145 (2004) Lawn Tractor View Diagrams & Manuals
13AD688G196 (2004) Lawn Tractor View Diagrams & Manuals
13AD688G719 (2004) Lawn Tractor View Diagrams & Manuals
13AD688G098 (2004) Lawn Tractor View Diagrams & Manuals
13AD695G304 (2004) Lawn Tractor View Diagrams & Manuals
13AD695G372 (2004) Lawn Tractor View Diagrams & Manuals
13AD695G401 (2004) Lawn Tractor View Diagrams & Manuals
13AD695G720 (2004) Lawn Tractor View Diagrams & Manuals
13AD695G730 (2004) Lawn Tractor View Diagrams & Manuals
13AD695G301 (2004) Lawn Tractor View Diagrams & Manuals
13AD695G709 (2004) Lawn Tractor View Diagrams & Manuals
13AD695G371 (2004) Lawn Tractor View Diagrams & Manuals
13AD695G307 (2004) Lawn Tractor View Diagrams & Manuals
13AD695G513 (2004) Lawn Tractor View Diagrams & Manuals
13AD695G713 (2004) Lawn Tractor View Diagrams & Manuals
13AD695G382 (2004) Lawn Tractor View Diagrams & Manuals
13AD695G121 (2004) Lawn Tractor View Diagrams & Manuals
13AD695G205 (2004) Lawn Tractor View Diagrams & Manuals
13AD695G705 (2004) Lawn Tractor View Diagrams & Manuals
13AD695G706 (2004) Lawn Tractor View Diagrams & Manuals
13AD695G026 (2004) Lawn Tractor View Diagrams & Manuals
13AD695G726 (2004) Lawn Tractor View Diagrams & Manuals
13AD695G054 (2004) Lawn Tractor View Diagrams & Manuals
13AD695G745 (2004) Lawn Tractor View Diagrams & Manuals
13AD695G754 (2004) Lawn Tractor View Diagrams & Manuals
13AD695G704 (2004) Lawn Tractor View Diagrams & Manuals
13AD695G029 (2004) Lawn Tractor View Diagrams & Manuals
13AD695G229 (2004) Lawn Tractor View Diagrams & Manuals
13AD695G134 (2004) Lawn Tractor View Diagrams & Manuals
13AD695G138 (2004) Lawn Tractor View Diagrams & Manuals
13AD695G729 (2004) Lawn Tractor View Diagrams & Manuals
13AD695G929 (2004) Lawn Tractor View Diagrams & Manuals
13AD695G129 (2004) Lawn Tractor View Diagrams & Manuals
13AD695G151 (2004) Lawn Tractor View Diagrams & Manuals
13AD695G206 (2004) Lawn Tractor View Diagrams & Manuals
13AD695G308 (2004) Lawn Tractor View Diagrams & Manuals
13AD695G033 (2004) Lawn Tractor View Diagrams & Manuals
13AD695G019 (2004) Lawn Tractor View Diagrams & Manuals
13AD695G057 (2004) Lawn Tractor View Diagrams & Manuals
13AD695G118 (2004) Lawn Tractor View Diagrams & Manuals
13AD695G131 (2004) Lawn Tractor View Diagrams & Manuals
13AD695G022 (2004) Lawn Tractor View Diagrams & Manuals
13AD695G722 (2004) Lawn Tractor View Diagrams & Manuals
13AD695G002 (2004) Lawn Tractor View Diagrams & Manuals
13AD695G715 (2004) Lawn Tractor View Diagrams & Manuals
13AD695G077 (2004) Lawn Tractor View Diagrams & Manuals
13AD695G977 (2004) Lawn Tractor View Diagrams & Manuals
13AD695G777 (2004) Lawn Tractor View Diagrams & Manuals
13AD695G724 (2004) Lawn Tractor View Diagrams & Manuals
13AD695G105 (2004) Lawn Tractor View Diagrams & Manuals
13AD695G009 (2004) Lawn Tractor View Diagrams & Manuals
13AD695G016 (2004) Lawn Tractor View Diagrams & Manuals
13AD695G145 (2004) Lawn Tractor View Diagrams & Manuals
13AD695G196 (2004) Lawn Tractor View Diagrams & Manuals
13AD695G719 (2004) Lawn Tractor View Diagrams & Manuals
13AD695G098 (2004) Lawn Tractor View Diagrams & Manuals
13AD698G304 (2004) Lawn Tractor View Diagrams & Manuals
13AD698G372 (2004) Lawn Tractor View Diagrams & Manuals
13AD698G401 (2004) Lawn Tractor View Diagrams & Manuals
13AD698G720 (2004) Lawn Tractor View Diagrams & Manuals
13AD698G730 (2004) Lawn Tractor View Diagrams & Manuals
13AD698G301 (2004) Lawn Tractor View Diagrams & Manuals
13AD698G709 (2004) Lawn Tractor View Diagrams & Manuals
13AD698G371 (2004) Lawn Tractor View Diagrams & Manuals
13AD698G307 (2004) Lawn Tractor View Diagrams & Manuals
13AD698G513 (2004) Lawn Tractor View Diagrams & Manuals
13AD698G713 (2004) Lawn Tractor View Diagrams & Manuals
13AD698G382 (2004) Lawn Tractor View Diagrams & Manuals
13AD698G000 (2004) Lawn Tractor View Diagrams & Manuals
13AD698G121 (2004) Lawn Tractor View Diagrams & Manuals
13AD698G205 (2004) Lawn Tractor View Diagrams & Manuals
13AD698G705 (2004) Lawn Tractor View Diagrams & Manuals
13AD698G706 (2004) Lawn Tractor View Diagrams & Manuals
13AD698G026 (2004) Lawn Tractor View Diagrams & Manuals
13AD698G726 (2004) Lawn Tractor View Diagrams & Manuals
13AD698G054 (2004) Lawn Tractor View Diagrams & Manuals
13AD698G745 (2004) Lawn Tractor View Diagrams & Manuals
13AD698G754 (2004) Lawn Tractor View Diagrams & Manuals
13AD698G704 (2004) Lawn Tractor View Diagrams & Manuals
13AD698G029 (2004) Lawn Tractor View Diagrams & Manuals
13AD698G229 (2004) Lawn Tractor View Diagrams & Manuals
13AD698G134 (2004) Lawn Tractor View Diagrams & Manuals
13AD698G138 (2004) Lawn Tractor View Diagrams & Manuals
13AD698G729 (2004) Lawn Tractor View Diagrams & Manuals
13AD698G929 (2004) Lawn Tractor View Diagrams & Manuals
13AD698G129 (2004) Lawn Tractor View Diagrams & Manuals
13AD698G151 (2004) Lawn Tractor View Diagrams & Manuals
13AD698G206 (2004) Lawn Tractor View Diagrams & Manuals
13AD698G308 (2004) Lawn Tractor View Diagrams & Manuals
13AD698G033 (2004) Lawn Tractor View Diagrams & Manuals
13AD698G019 (2004) Lawn Tractor View Diagrams & Manuals
13AD698G057 (2004) Lawn Tractor View Diagrams & Manuals
13AD698G118 (2004) Lawn Tractor View Diagrams & Manuals
13AD698G131 (2004) Lawn Tractor View Diagrams & Manuals
13AD698G022 (2004) Lawn Tractor View Diagrams & Manuals
13AD698G002 (2004) Lawn Tractor View Diagrams & Manuals
13AD698G715 (2004) Lawn Tractor View Diagrams & Manuals
13AD698G077 (2004) Lawn Tractor View Diagrams & Manuals
13AD698G977 (2004) Lawn Tractor View Diagrams & Manuals
13AD698G777 (2004) Lawn Tractor View Diagrams & Manuals
13AD698G724 (2004) Lawn Tractor View Diagrams & Manuals
13AD698G105 (2004) Lawn Tractor View Diagrams & Manuals
13AD698G009 (2004) Lawn Tractor View Diagrams & Manuals
13AD698G016 (2004) Lawn Tractor View Diagrams & Manuals
13AD698G145 (2004) Lawn Tractor View Diagrams & Manuals
13AD698G196 (2004) Lawn Tractor View Diagrams & Manuals
13AD698G719 (2004) Lawn Tractor View Diagrams & Manuals
13AD698G098 (2004) Lawn Tractor View Diagrams & Manuals
13AF685G304 (2004) Lawn Tractor View Diagrams & Manuals
13AF685G372 (2004) Lawn Tractor View Diagrams & Manuals
13AF685G401 (2004) Lawn Tractor View Diagrams & Manuals
13AF685G720 (2004) Lawn Tractor View Diagrams & Manuals
13AF685G730 (2004) Lawn Tractor View Diagrams & Manuals
13AF685G301 (2004) Lawn Tractor View Diagrams & Manuals
13AF685G709 (2004) Lawn Tractor View Diagrams & Manuals
13AF685G371 (2004) Lawn Tractor View Diagrams & Manuals
13AF685G307 (2004) Lawn Tractor View Diagrams & Manuals
13AF685G513 (2004) Lawn Tractor View Diagrams & Manuals
13AF685G713 (2004) Lawn Tractor View Diagrams & Manuals
13AF685G382 (2004) Lawn Tractor View Diagrams & Manuals
13AF685G000 (2004) Lawn Tractor View Diagrams & Manuals
13AF685G121 (2004) Lawn Tractor View Diagrams & Manuals
13AF685G205 (2004) Lawn Tractor View Diagrams & Manuals
13AF685G705 (2004) Lawn Tractor View Diagrams & Manuals
13AF685G706 (2004) Lawn Tractor View Diagrams & Manuals
13AF685G026 (2004) Lawn Tractor View Diagrams & Manuals
13AF685G726 (2004) Lawn Tractor View Diagrams & Manuals
13AF685G054 (2004) Lawn Tractor View Diagrams & Manuals
13AF685G745 (2004) Lawn Tractor View Diagrams & Manuals
13AF685G754 (2004) Lawn Tractor View Diagrams & Manuals
13AF685G704 (2004) Lawn Tractor View Diagrams & Manuals
13AF685G029 (2004) Lawn Tractor View Diagrams & Manuals
13AF685G229 (2004) Lawn Tractor View Diagrams & Manuals
13AF685G134 (2004) Lawn Tractor View Diagrams & Manuals
13AF685G138 (2004) Lawn Tractor View Diagrams & Manuals
13AF685G729 (2004) Lawn Tractor View Diagrams & Manuals
13AF685G929 (2004) Lawn Tractor View Diagrams & Manuals
13AF685G129 (2004) Lawn Tractor View Diagrams & Manuals
13AF685G151 (2004) Lawn Tractor View Diagrams & Manuals
13AF685G206 (2004) Lawn Tractor View Diagrams & Manuals
13AF685G308 (2004) Lawn Tractor View Diagrams & Manuals
13AF685G033 (2004) Lawn Tractor View Diagrams & Manuals
13AF685G019 (2004) Lawn Tractor View Diagrams & Manuals
13AF685G057 (2004) Lawn Tractor View Diagrams & Manuals
13AF685G118 (2004) Lawn Tractor View Diagrams & Manuals
13AF685G131 (2004) Lawn Tractor View Diagrams & Manuals
13AF685G022 (2004) Lawn Tractor View Diagrams & Manuals
13AF685G722 (2004) Lawn Tractor View Diagrams & Manuals
13AF685G002 (2004) Lawn Tractor View Diagrams & Manuals
13AF685G715 (2004) Lawn Tractor View Diagrams & Manuals
13AF685G077 (2004) Lawn Tractor View Diagrams & Manuals
13AF685G977 (2004) Lawn Tractor View Diagrams & Manuals
13AF685G777 (2004) Lawn Tractor View Diagrams & Manuals
13AF685G724 (2004) Lawn Tractor View Diagrams & Manuals
13AF685G105 (2004) Lawn Tractor View Diagrams & Manuals
13AF685G009 (2004) Lawn Tractor View Diagrams & Manuals
13AF685G016 (2004) Lawn Tractor View Diagrams & Manuals
13AF685G145 (2004) Lawn Tractor View Diagrams & Manuals
13AF685G196 (2004) Lawn Tractor View Diagrams & Manuals
13AF685G719 (2004) Lawn Tractor View Diagrams & Manuals
13AF685G098 (2004) Lawn Tractor View Diagrams & Manuals
13AF688G304 (2004) Lawn Tractor View Diagrams & Manuals
13AF688G372 (2004) Lawn Tractor View Diagrams & Manuals
13AF688G401 (2004) Lawn Tractor View Diagrams & Manuals
13AF688G720 (2004) Lawn Tractor View Diagrams & Manuals
13AF688G730 (2004) Lawn Tractor View Diagrams & Manuals
13AF688G301 (2004) Lawn Tractor View Diagrams & Manuals
13AF688G709 (2004) Lawn Tractor View Diagrams & Manuals
13AF688G371 (2004) Lawn Tractor View Diagrams & Manuals
13AF688G307 (2004) Lawn Tractor View Diagrams & Manuals
13AF688G513 (2004) Lawn Tractor View Diagrams & Manuals
13AF688G713 (2004) Lawn Tractor View Diagrams & Manuals
13AF688G382 (2004) Lawn Tractor View Diagrams & Manuals
13AF688G000 (2004) Lawn Tractor View Diagrams & Manuals
13AF688G121 (2004) Lawn Tractor View Diagrams & Manuals
13AF688G205 (2004) Lawn Tractor View Diagrams & Manuals
13AF688G705 (2004) Lawn Tractor View Diagrams & Manuals
13AF688G706 (2004) Lawn Tractor View Diagrams & Manuals
13AF688G026 (2004) Lawn Tractor View Diagrams & Manuals
13AF688G726 (2004) Lawn Tractor View Diagrams & Manuals
13AF688G054 (2004) Lawn Tractor View Diagrams & Manuals
13AF688G745 (2004) Lawn Tractor View Diagrams & Manuals
13AF688G754 (2004) Lawn Tractor View Diagrams & Manuals
13AF688G704 (2004) Lawn Tractor View Diagrams & Manuals
13AF688G029 (2004) Lawn Tractor View Diagrams & Manuals
13AF688G229 (2004) Lawn Tractor View Diagrams & Manuals
13AF688G134 (2004) Lawn Tractor View Diagrams & Manuals
13AF688G138 (2004) Lawn Tractor View Diagrams & Manuals
13AF688G729 (2004) Lawn Tractor View Diagrams & Manuals
13AF688G929 (2004) Lawn Tractor View Diagrams & Manuals
13AF688G129 (2004) Lawn Tractor View Diagrams & Manuals
13AF688G151 (2004) Lawn Tractor View Diagrams & Manuals
13AF688G206 (2004) Lawn Tractor View Diagrams & Manuals
13AF688G308 (2004) Lawn Tractor View Diagrams & Manuals
13AF688G033 (2004) Lawn Tractor View Diagrams & Manuals
13AF688G019 (2004) Lawn Tractor View Diagrams & Manuals
13AF688G057 (2004) Lawn Tractor View Diagrams & Manuals
13AF688G118 (2004) Lawn Tractor View Diagrams & Manuals
13AF688G131 (2004) Lawn Tractor View Diagrams & Manuals
13AF688G022 (2004) Lawn Tractor View Diagrams & Manuals
13AF688G002 (2004) Lawn Tractor View Diagrams & Manuals
13AF688G715 (2004) Lawn Tractor View Diagrams & Manuals
13AF688G077 (2004) Lawn Tractor View Diagrams & Manuals
13AF688G977 (2004) Lawn Tractor View Diagrams & Manuals
13AF688G777 (2004) Lawn Tractor View Diagrams & Manuals
13AF688G724 (2004) Lawn Tractor View Diagrams & Manuals
13AF688G105 (2004) Lawn Tractor View Diagrams & Manuals
13AF688G009 (2004) Lawn Tractor View Diagrams & Manuals
13AF688G016 (2004) Lawn Tractor View Diagrams & Manuals
13AF688G145 (2004) Lawn Tractor View Diagrams & Manuals
13AF688G196 (2004) Lawn Tractor View Diagrams & Manuals
13AF688G719 (2004) Lawn Tractor View Diagrams & Manuals
13AF688G098 (2004) Lawn Tractor View Diagrams & Manuals
13AF695G304 (2004) Lawn Tractor View Diagrams & Manuals
13AF695G372 (2004) Lawn Tractor View Diagrams & Manuals
13AF695G401 (2004) Lawn Tractor View Diagrams & Manuals
13AF695G720 (2004) Lawn Tractor View Diagrams & Manuals
13AF695G730 (2004) Lawn Tractor View Diagrams & Manuals
13AF695G301 (2004) Lawn Tractor View Diagrams & Manuals
13AF695G709 (2004) Lawn Tractor View Diagrams & Manuals
13AF695G371 (2004) Lawn Tractor View Diagrams & Manuals
13AF695G307 (2004) Lawn Tractor View Diagrams & Manuals
13AF695G513 (2004) Lawn Tractor View Diagrams & Manuals
13AF695G713 (2004) Lawn Tractor View Diagrams & Manuals
13AF695G382 (2004) Lawn Tractor View Diagrams & Manuals
13AF695G000 (2004) Lawn Tractor View Diagrams & Manuals
13AF695G121 (2004) Lawn Tractor View Diagrams & Manuals
13AF695G205 (2004) Lawn Tractor View Diagrams & Manuals
13AF695G705 (2004) Lawn Tractor View Diagrams & Manuals
13AF695G706 (2004) Lawn Tractor View Diagrams & Manuals
13AF695G026 (2004) Lawn Tractor View Diagrams & Manuals
13AF695G726 (2004) Lawn Tractor View Diagrams & Manuals
13AF695G054 (2004) Lawn Tractor View Diagrams & Manuals
13AF695G745 (2004) Lawn Tractor View Diagrams & Manuals
13AF695G754 (2004) Lawn Tractor View Diagrams & Manuals
13AF695G704 (2004) Lawn Tractor View Diagrams & Manuals
13AF695G029 (2004) Lawn Tractor View Diagrams & Manuals
13AF695G229 (2004) Lawn Tractor View Diagrams & Manuals
13AF695G134 (2004) Lawn Tractor View Diagrams & Manuals
13AF695G138 (2004) Lawn Tractor View Diagrams & Manuals
13AF695G729 (2004) Lawn Tractor View Diagrams & Manuals
13AF695G929 (2004) Lawn Tractor View Diagrams & Manuals
13AF695G129 (2004) Lawn Tractor View Diagrams & Manuals
13AF695G151 (2004) Lawn Tractor View Diagrams & Manuals
13AF695G206 (2004) Lawn Tractor View Diagrams & Manuals
13AF695G308 (2004) Lawn Tractor View Diagrams & Manuals
13AF695G033 (2004) Lawn Tractor View Diagrams & Manuals
13AF695G019 (2004) Lawn Tractor View Diagrams & Manuals
13AF695G057 (2004) Lawn Tractor View Diagrams & Manuals
13AF695G118 (2004) Lawn Tractor View Diagrams & Manuals
13AF695G131 (2004) Lawn Tractor View Diagrams & Manuals
13AF695G022 (2004) Lawn Tractor View Diagrams & Manuals
13AF695G722 (2004) Lawn Tractor View Diagrams & Manuals
13AF695G002 (2004) Lawn Tractor View Diagrams & Manuals
13AF695G715 (2004) Lawn Tractor View Diagrams & Manuals
13AF695G077 (2004) Lawn Tractor View Diagrams & Manuals
13AF695G977 (2004) Lawn Tractor View Diagrams & Manuals
13AF695G777 (2004) Lawn Tractor View Diagrams & Manuals
13AF695G724 (2004) Lawn Tractor View Diagrams & Manuals
13AF695G105 (2004) Lawn Tractor View Diagrams & Manuals
13AF695G009 (2004) Lawn Tractor View Diagrams & Manuals
13AF695G016 (2004) Lawn Tractor View Diagrams & Manuals
13AF695G145 (2004) Lawn Tractor View Diagrams & Manuals
13AF695G196 (2004) Lawn Tractor View Diagrams & Manuals
13AF695G719 (2004) Lawn Tractor View Diagrams & Manuals
13AF695G098 (2004) Lawn Tractor View Diagrams & Manuals
13AF698G304 (2004) Lawn Tractor View Diagrams & Manuals
13AF698G372 (2004) Lawn Tractor View Diagrams & Manuals
13AF698G401 (2004) Lawn Tractor View Diagrams & Manuals
13AF698G720 (2004) Lawn Tractor View Diagrams & Manuals
13AF698G730 (2004) Lawn Tractor View Diagrams & Manuals
13AF698G301 (2004) Lawn Tractor View Diagrams & Manuals
13AF698G709 (2004) Lawn Tractor View Diagrams & Manuals
13AF698G371 (2004) Lawn Tractor View Diagrams & Manuals
13AF698G307 (2004) Lawn Tractor View Diagrams & Manuals
13AF698G513 (2004) Lawn Tractor View Diagrams & Manuals
13AF698G713 (2004) Lawn Tractor View Diagrams & Manuals
13AF698G382 (2004) Lawn Tractor View Diagrams & Manuals
13AF698G000 (2004) Lawn Tractor View Diagrams & Manuals
13AF698G121 (2004) Lawn Tractor View Diagrams & Manuals
13AF698G205 (2004) Lawn Tractor View Diagrams & Manuals
13AF698G705 (2004) Lawn Tractor View Diagrams & Manuals
13AF698G706 (2004) Lawn Tractor View Diagrams & Manuals
13AF698G026 (2004) Lawn Tractor View Diagrams & Manuals
13AF698G726 (2004) Lawn Tractor View Diagrams & Manuals
13AF698G054 (2004) Lawn Tractor View Diagrams & Manuals
13AF698G745 (2004) Lawn Tractor View Diagrams & Manuals
13AF698G754 (2004) Lawn Tractor View Diagrams & Manuals
13AF698G704 (2004) Lawn Tractor View Diagrams & Manuals
13AF698G029 (2004) Lawn Tractor View Diagrams & Manuals
13AF698G229 (2004) Lawn Tractor View Diagrams & Manuals
13AF698G134 (2004) Lawn Tractor View Diagrams & Manuals
13AF698G138 (2004) Lawn Tractor View Diagrams & Manuals
13AF698G729 (2004) Lawn Tractor View Diagrams & Manuals
13AF698G929 (2004) Lawn Tractor View Diagrams & Manuals
13AF698G129 (2004) Lawn Tractor View Diagrams & Manuals
13AF698G151 (2004) Lawn Tractor View Diagrams & Manuals
13AF698G206 (2004) Lawn Tractor View Diagrams & Manuals
13AF698G308 (2004) Lawn Tractor View Diagrams & Manuals
13AF698G033 (2004) Lawn Tractor View Diagrams & Manuals
13AF698G019 (2004) Lawn Tractor View Diagrams & Manuals
13AF698G057 (2004) Lawn Tractor View Diagrams & Manuals
13AF698G118 (2004) Lawn Tractor View Diagrams & Manuals
13AF698G131 (2004) Lawn Tractor View Diagrams & Manuals
13AF698G022 (2004) Lawn Tractor View Diagrams & Manuals
13AF698G002 (2004) Lawn Tractor View Diagrams & Manuals
13AF698G715 (2004) Lawn Tractor View Diagrams & Manuals
13AF698G077 (2004) Lawn Tractor View Diagrams & Manuals
13AF698G977 (2004) Lawn Tractor View Diagrams & Manuals
13AF698G777 (2004) Lawn Tractor View Diagrams & Manuals
13AF698G724 (2004) Lawn Tractor View Diagrams & Manuals
13AF698G105 (2004) Lawn Tractor View Diagrams & Manuals
13AF698G009 (2004) Lawn Tractor View Diagrams & Manuals
13AF698G016 (2004) Lawn Tractor View Diagrams & Manuals
13AF698G145 (2004) Lawn Tractor View Diagrams & Manuals
13AF698G196 (2004) Lawn Tractor View Diagrams & Manuals
13AF698G719 (2004) Lawn Tractor View Diagrams & Manuals
13AF698G098 (2004) Lawn Tractor View Diagrams & Manuals
13AG688H304 (2004) Lawn Tractor View Diagrams & Manuals
13AG688H372 (2004) Lawn Tractor View Diagrams & Manuals
13AG688H401 (2004) Lawn Tractor View Diagrams & Manuals
13AG688H720 (2004) Lawn Tractor View Diagrams & Manuals
13AG688H730 (2004) Lawn Tractor View Diagrams & Manuals
13AG688H301 (2004) Lawn Tractor View Diagrams & Manuals
13AG688H709 (2004) Lawn Tractor View Diagrams & Manuals
13AG688H371 (2004) Lawn Tractor View Diagrams & Manuals
13AG688H307 (2004) Lawn Tractor View Diagrams & Manuals
13AG688H513 (2004) Lawn Tractor View Diagrams & Manuals
13AG688H713 (2004) Lawn Tractor View Diagrams & Manuals
13AG688H382 (2004) Lawn Tractor View Diagrams & Manuals
13AG688H000 (2004) Lawn Tractor View Diagrams & Manuals
13AG688H121 (2004) Lawn Tractor View Diagrams & Manuals
13AG688H205 (2004) Lawn Tractor View Diagrams & Manuals
13AG688H705 (2004) Lawn Tractor View Diagrams & Manuals
13AG688H706 (2004) Lawn Tractor View Diagrams & Manuals
13AG688H026 (2004) Lawn Tractor View Diagrams & Manuals
13AG688H726 (2004) Lawn Tractor View Diagrams & Manuals
13AG688H054 (2004) Lawn Tractor View Diagrams & Manuals
13AG688H745 (2004) Lawn Tractor View Diagrams & Manuals
13AG688H754 (2004) Lawn Tractor View Diagrams & Manuals
13AG688H704 (2004) Lawn Tractor View Diagrams & Manuals
13AG688H029 (2004) Lawn Tractor View Diagrams & Manuals
13AG688H229 (2004) Lawn Tractor View Diagrams & Manuals
13AG688H134 (2004) Lawn Tractor View Diagrams & Manuals
13AG688H138 (2004) Lawn Tractor View Diagrams & Manuals
13AG688H729 (2004) Lawn Tractor View Diagrams & Manuals
13AG688H929 (2004) Lawn Tractor View Diagrams & Manuals
13AG688H129 (2004) Lawn Tractor View Diagrams & Manuals
13AG688H151 (2004) Lawn Tractor View Diagrams & Manuals
13AG688H206 (2004) Lawn Tractor View Diagrams & Manuals
13AG688H308 (2004) Lawn Tractor View Diagrams & Manuals
13AG688H033 (2004) Lawn Tractor View Diagrams & Manuals
13AG688H019 (2004) Lawn Tractor View Diagrams & Manuals
13AG688H057 (2004) Lawn Tractor View Diagrams & Manuals
13AG688H118 (2004) Lawn Tractor View Diagrams & Manuals
13AG688H131 (2004) Lawn Tractor View Diagrams & Manuals
13AG688H022 (2004) Lawn Tractor View Diagrams & Manuals
13AG688H002 (2004) Lawn Tractor View Diagrams & Manuals
13AG688H715 (2004) Lawn Tractor View Diagrams & Manuals
13AG688H077 (2004) Lawn Tractor View Diagrams & Manuals
13AG688H977 (2004) Lawn Tractor View Diagrams & Manuals
13AG688H777 (2004) Lawn Tractor View Diagrams & Manuals
13AG688H724 (2004) Lawn Tractor View Diagrams & Manuals
13AG688H105 (2004) Lawn Tractor View Diagrams & Manuals
13AG688H009 (2004) Lawn Tractor View Diagrams & Manuals
13AG688H016 (2004) Lawn Tractor View Diagrams & Manuals
13AG688H145 (2004) Lawn Tractor View Diagrams & Manuals
13AG688H196 (2004) Lawn Tractor View Diagrams & Manuals
13AG688H719 (2004) Lawn Tractor View Diagrams & Manuals
13AG688H098 (2004) Lawn Tractor View Diagrams & Manuals
13AJ688G304 (2004) Lawn Tractor Parts View Diagrams & Manuals
13AJ688G372 (2004) Lawn Tractor Parts View Diagrams & Manuals
13AJ688G401 (2004) Lawn Tractor Parts View Diagrams & Manuals
13AJ688G720 (2004) Lawn Tractor Parts View Diagrams & Manuals
13AJ688G730 (2004) Lawn Tractor Parts View Diagrams & Manuals
13AJ688G301 (2004) Lawn Tractor Parts View Diagrams & Manuals
13AJ688G709 (2004) Lawn Tractor Parts View Diagrams & Manuals
13AJ688G371 (2004) Lawn Tractor Parts View Diagrams & Manuals
13AJ688G307 (2004) Lawn Tractor Parts View Diagrams & Manuals
13AJ688G513 (2004) Lawn Tractor Parts View Diagrams & Manuals
13AJ688G713 (2004) Lawn Tractor Parts View Diagrams & Manuals
13AJ688G382 (2004) Lawn Tractor Parts View Diagrams & Manuals
13AJ688G000 (2004) Lawn Tractor Parts View Diagrams & Manuals
13AJ688G121 (2004) Lawn Tractor Parts View Diagrams & Manuals
13AJ688G205 (2004) Lawn Tractor Parts View Diagrams & Manuals
13AJ688G705 (2004) Lawn Tractor Parts View Diagrams & Manuals
13AJ688G706 (2004) Lawn Tractor Parts View Diagrams & Manuals
13AJ688G026 (2004) Lawn Tractor Parts View Diagrams & Manuals
13AJ688G726 (2004) Lawn Tractor Parts View Diagrams & Manuals
13AJ688G054 (2004) Lawn Tractor Parts View Diagrams & Manuals
13AJ688G745 (2004) Lawn Tractor Parts View Diagrams & Manuals
13AJ688G754 (2004) Lawn Tractor Parts View Diagrams & Manuals
13AJ688G704 (2004) Lawn Tractor Parts View Diagrams & Manuals
13AJ688G029 (2004) Lawn Tractor Parts View Diagrams & Manuals
13AJ688G229 (2004) Lawn Tractor Parts View Diagrams & Manuals
13AJ688G134 (2004) Lawn Tractor Parts View Diagrams & Manuals
13AJ688G138 (2004) Lawn Tractor Parts View Diagrams & Manuals
13AJ688G729 (2004) Lawn Tractor Parts View Diagrams & Manuals
13AJ688G929 (2004) Lawn Tractor Parts View Diagrams & Manuals
13AJ688G129 (2004) Lawn Tractor Parts View Diagrams & Manuals
13AJ688G151 (2004) Lawn Tractor Parts View Diagrams & Manuals
13AJ688G206 (2004) Lawn Tractor Parts View Diagrams & Manuals
13AJ688G308 (2004) Lawn Tractor Parts View Diagrams & Manuals
13AJ688G033 (2004) Lawn Tractor Parts View Diagrams & Manuals
13AJ688G019 (2004) Lawn Tractor Parts View Diagrams & Manuals
13AJ688G057 (2004) Lawn Tractor Parts View Diagrams & Manuals
13AJ688G118 (2004) Lawn Tractor Parts View Diagrams & Manuals
13AJ688G131 (2004) Lawn Tractor Parts View Diagrams & Manuals
13AJ688G022 (2004) Lawn Tractor Parts View Diagrams & Manuals
13AJ688G002 (2004) Lawn Tractor Parts View Diagrams & Manuals
13AJ688G715 (2004) Lawn Tractor Parts View Diagrams & Manuals
13AJ688G077 (2004) Lawn Tractor Parts View Diagrams & Manuals
13AJ688G977 (2004) Lawn Tractor Parts View Diagrams & Manuals
13AJ688G777 (2004) Lawn Tractor Parts View Diagrams & Manuals
13AJ688G724 (2004) Lawn Tractor Parts View Diagrams & Manuals
13AJ688G105 (2004) Lawn Tractor Parts View Diagrams & Manuals
13AJ688G009 (2004) Lawn Tractor Parts View Diagrams & Manuals
13AJ688G016 (2004) Lawn Tractor Parts View Diagrams & Manuals
13AJ688G145 (2004) Lawn Tractor Parts View Diagrams & Manuals
13AJ688G196 (2004) Lawn Tractor Parts View Diagrams & Manuals
13AJ688G719 (2004) Lawn Tractor Parts View Diagrams & Manuals
13AJ688G098 (2004) Lawn Tractor Parts View Diagrams & Manuals
13AT618H304 (2004) Lawn Tractor View Diagrams & Manuals
13AT618H372 (2004) Lawn Tractor View Diagrams & Manuals
13AT618H401 (2004) Lawn Tractor View Diagrams & Manuals
13AT618H720 (2004) Lawn Tractor View Diagrams & Manuals
13AT618H730 (2004) Lawn Tractor View Diagrams & Manuals
13AT618H301 (2004) Lawn Tractor View Diagrams & Manuals
13AT618H709 (2004) Lawn Tractor View Diagrams & Manuals
13AT618H371 (2004) Lawn Tractor View Diagrams & Manuals
13AT618H307 (2004) Lawn Tractor View Diagrams & Manuals
13AT618H513 (2004) Lawn Tractor View Diagrams & Manuals
13AT618H713 (2004) Lawn Tractor View Diagrams & Manuals
13AT618H382 (2004) Lawn Tractor View Diagrams & Manuals
13AT618H000 (2004) Lawn Tractor View Diagrams & Manuals
13AT618H121 (2004) Lawn Tractor View Diagrams & Manuals
13AT618H205 (2004) Lawn Tractor View Diagrams & Manuals
13AT618H705 (2004) Lawn Tractor View Diagrams & Manuals
13AT618H706 (2004) Lawn Tractor View Diagrams & Manuals
13AT618H026 (2004) Lawn Tractor View Diagrams & Manuals
13AT618H726 (2004) Lawn Tractor View Diagrams & Manuals
13AT618H054 (2004) Lawn Tractor View Diagrams & Manuals
13AT618H745 (2004) Lawn Tractor View Diagrams & Manuals
13AT618H754 (2004) Lawn Tractor View Diagrams & Manuals
13AT618H704 (2004) Lawn Tractor View Diagrams & Manuals
13AT618H029 (2004) Lawn Tractor View Diagrams & Manuals
13AT618H229 (2004) Lawn Tractor View Diagrams & Manuals
13AT618H134 (2004) Lawn Tractor View Diagrams & Manuals
13AT618H138 (2004) Lawn Tractor View Diagrams & Manuals
13AT618H729 (2004) Lawn Tractor View Diagrams & Manuals
13AT618H929 (2004) Lawn Tractor View Diagrams & Manuals
13AT618H129 (2004) Lawn Tractor View Diagrams & Manuals
13AT618H151 (2004) Lawn Tractor View Diagrams & Manuals
13AT618H206 (2004) Lawn Tractor View Diagrams & Manuals
13AT618H308 (2004) Lawn Tractor View Diagrams & Manuals
13AT618H033 (2004) Lawn Tractor View Diagrams & Manuals
13AT618H019 (2004) Lawn Tractor View Diagrams & Manuals
13AT618H057 (2004) Lawn Tractor View Diagrams & Manuals
13AT618H118 (2004) Lawn Tractor View Diagrams & Manuals
13AT618H131 (2004) Lawn Tractor View Diagrams & Manuals
13AT618H022 (2004) Lawn Tractor View Diagrams & Manuals
13AT618H722 (2004) Lawn Tractor View Diagrams & Manuals
13AT618H002 (2004) Lawn Tractor View Diagrams & Manuals
13AT618H715 (2004) Lawn Tractor View Diagrams & Manuals
13AT618H077 (2004) Lawn Tractor View Diagrams & Manuals
13AT618H977 (2004) Lawn Tractor View Diagrams & Manuals
13AT618H777 (2004) Lawn Tractor View Diagrams & Manuals
13AT618H724 (2004) Lawn Tractor View Diagrams & Manuals
13AT618H105 (2004) Lawn Tractor View Diagrams & Manuals
13AT618H009 (2004) Lawn Tractor View Diagrams & Manuals
13AT618H016 (2004) Lawn Tractor View Diagrams & Manuals
13AT618H145 (2004) Lawn Tractor View Diagrams & Manuals
13AT618H196 (2004) Lawn Tractor View Diagrams & Manuals
13AT618H719 (2004) Lawn Tractor View Diagrams & Manuals
13AT618H098 (2004) Lawn Tractor View Diagrams & Manuals
13A7688G304 (2003) Lawn Tractor Parts View Diagrams & Manuals
13A7688G372 (2003) Lawn Tractor Parts View Diagrams & Manuals
13A7688G401 (2003) Lawn Tractor Parts View Diagrams & Manuals
13A7688G720 (2003) Lawn Tractor Parts View Diagrams & Manuals
13A7688G730 (2003) Lawn Tractor Parts View Diagrams & Manuals
13A7688G301 (2003) Lawn Tractor Parts View Diagrams & Manuals
13A7688G709 (2003) Lawn Tractor Parts View Diagrams & Manuals
13A7688G371 (2003) Lawn Tractor Parts View Diagrams & Manuals
13A7688G307 (2003) Lawn Tractor Parts View Diagrams & Manuals
13A7688G513 (2003) Lawn Tractor Parts View Diagrams & Manuals
13A7688G713 (2003) Lawn Tractor Parts View Diagrams & Manuals
13A7688G382 (2003) Lawn Tractor Parts View Diagrams & Manuals
13A7688G000 (2003) Lawn Tractor Parts View Diagrams & Manuals
13A7688G121 (2003) Lawn Tractor Parts View Diagrams & Manuals
13A7688G205 (2003) Lawn Tractor Parts View Diagrams & Manuals
13A7688G705 (2003) Lawn Tractor Parts View Diagrams & Manuals
13A7688G706 (2003) Lawn Tractor Parts View Diagrams & Manuals
13A7688G026 (2003) Lawn Tractor Parts View Diagrams & Manuals
13A7688G726 (2003) Lawn Tractor Parts View Diagrams & Manuals
13A7688G054 (2003) Lawn Tractor Parts View Diagrams & Manuals
13A7688G745 (2003) Lawn Tractor Parts View Diagrams & Manuals
13A7688G754 (2003) Lawn Tractor Parts View Diagrams & Manuals
13A7688G704 (2003) Lawn Tractor Parts View Diagrams & Manuals
13A7688G029 (2003) Lawn Tractor Parts View Diagrams & Manuals
13A7688G229 (2003) Lawn Tractor Parts View Diagrams & Manuals
13A7688G134 (2003) Lawn Tractor Parts View Diagrams & Manuals
13A7688G138 (2003) Lawn Tractor Parts View Diagrams & Manuals
13A7688G729 (2003) Lawn Tractor Parts View Diagrams & Manuals
13A7688G929 (2003) Lawn Tractor Parts View Diagrams & Manuals
13A7688G129 (2003) Lawn Tractor Parts View Diagrams & Manuals
13A7688G151 (2003) Lawn Tractor Parts View Diagrams & Manuals
13A7688G206 (2003) Lawn Tractor Parts View Diagrams & Manuals
13A7688G308 (2003) Lawn Tractor Parts View Diagrams & Manuals
13A7688G033 (2003) Lawn Tractor Parts View Diagrams & Manuals
13A7688G019 (2003) Lawn Tractor Parts View Diagrams & Manuals
13A7688G057 (2003) Lawn Tractor Parts View Diagrams & Manuals
13A7688G118 (2003) Lawn Tractor Parts View Diagrams & Manuals
13A7688G131 (2003) Lawn Tractor Parts View Diagrams & Manuals
13A7688G022 (2003) Lawn Tractor Parts View Diagrams & Manuals
13A7688G722 (2003) Lawn Tractor Parts View Diagrams & Manuals
13A7688G002 (2003) Lawn Tractor Parts View Diagrams & Manuals
13A7688G715 (2003) Lawn Tractor Parts View Diagrams & Manuals
13A7688G077 (2003) Lawn Tractor Parts View Diagrams & Manuals
13A7688G977 (2003) Lawn Tractor Parts View Diagrams & Manuals
13A7688G777 (2003) Lawn Tractor Parts View Diagrams & Manuals
13A7688G724 (2003) Lawn Tractor Parts View Diagrams & Manuals
13A7688G105 (2003) Lawn Tractor Parts View Diagrams & Manuals
13A7688G009 (2003) Lawn Tractor Parts View Diagrams & Manuals
13A7688G016 (2003) Lawn Tractor Parts View Diagrams & Manuals
13A7688G145 (2003) Lawn Tractor Parts View Diagrams & Manuals
13A7688G196 (2003) Lawn Tractor Parts View Diagrams & Manuals
13A7688G719 (2003) Lawn Tractor Parts View Diagrams & Manuals
13A7688G098 (2003) Lawn Tractor Parts View Diagrams & Manuals
13AD608G304 (2003) Lawn Tractor View Diagrams & Manuals
13AD608G372 (2003) Lawn Tractor View Diagrams & Manuals
13AD608G401 (2003) Lawn Tractor View Diagrams & Manuals
13AD608G720 (2003) Lawn Tractor View Diagrams & Manuals
13AD608G730 (2003) Lawn Tractor View Diagrams & Manuals
13AD608G301 (2003) Lawn Tractor View Diagrams & Manuals
13AD608G709 (2003) Lawn Tractor View Diagrams & Manuals
13AD608G371 (2003) Lawn Tractor View Diagrams & Manuals
13AD608G307 (2003) Lawn Tractor View Diagrams & Manuals
13AD608G513 (2003) Lawn Tractor View Diagrams & Manuals
13AD608G713 (2003) Lawn Tractor View Diagrams & Manuals
13AD608G382 (2003) Lawn Tractor View Diagrams & Manuals
13AD608G000 (2003) Lawn Tractor View Diagrams & Manuals
13AD608G121 (2003) Lawn Tractor View Diagrams & Manuals
13AD608G205 (2003) Lawn Tractor View Diagrams & Manuals
13AD608G705 (2003) Lawn Tractor View Diagrams & Manuals
13AD608G706 (2003) Lawn Tractor View Diagrams & Manuals
13AD608G026 (2003) Lawn Tractor View Diagrams & Manuals
13AD608G726 (2003) Lawn Tractor View Diagrams & Manuals
13AD608G054 (2003) Lawn Tractor View Diagrams & Manuals
13AD608G745 (2003) Lawn Tractor View Diagrams & Manuals
13AD608G754 (2003) Lawn Tractor View Diagrams & Manuals
13AD608G704 (2003) Lawn Tractor View Diagrams & Manuals
13AD608G029 (2003) Lawn Tractor View Diagrams & Manuals
13AD608G229 (2003) Lawn Tractor View Diagrams & Manuals
13AD608G134 (2003) Lawn Tractor View Diagrams & Manuals
13AD608G138 (2003) Lawn Tractor View Diagrams & Manuals
13AD608G729 (2003) Lawn Tractor View Diagrams & Manuals
13AD608G929 (2003) Lawn Tractor View Diagrams & Manuals
13AD608G129 (2003) Lawn Tractor View Diagrams & Manuals
13AD608G151 (2003) Lawn Tractor View Diagrams & Manuals
13AD608G206 (2003) Lawn Tractor View Diagrams & Manuals
13AD608G308 (2003) Lawn Tractor View Diagrams & Manuals
13AD608G033 (2003) Lawn Tractor View Diagrams & Manuals
13AD608G019 (2003) Lawn Tractor View Diagrams & Manuals
13AD608G057 (2003) Lawn Tractor View Diagrams & Manuals
13AD608G118 (2003) Lawn Tractor View Diagrams & Manuals
13AD608G131 (2003) Lawn Tractor View Diagrams & Manuals
13AD608G022 (2003) Lawn Tractor View Diagrams & Manuals
13AD608G722 (2003) Lawn Tractor View Diagrams & Manuals
13AD608G002 (2003) Lawn Tractor View Diagrams & Manuals
13AD608G715 (2003) Lawn Tractor View Diagrams & Manuals
13AD608G077 (2003) Lawn Tractor View Diagrams & Manuals
13AD608G977 (2003) Lawn Tractor View Diagrams & Manuals
13AD608G777 (2003) Lawn Tractor View Diagrams & Manuals
13AD608G724 (2003) Lawn Tractor View Diagrams & Manuals
13AD608G105 (2003) Lawn Tractor View Diagrams & Manuals
13AD608G009 (2003) Lawn Tractor View Diagrams & Manuals
13AD608G016 (2003) Lawn Tractor View Diagrams & Manuals
13AD608G145 (2003) Lawn Tractor View Diagrams & Manuals
13AD608G196 (2003) Lawn Tractor View Diagrams & Manuals
13AD608G719 (2003) Lawn Tractor View Diagrams & Manuals
13AD608G098 (2003) Lawn Tractor View Diagrams & Manuals
13AO791G304 (2005) 42" Lawn Tractor View Diagrams & Manuals
13AO791G372 (2005) 42" Lawn Tractor View Diagrams & Manuals
13AO791G401 (2005) 42" Lawn Tractor View Diagrams & Manuals
13AO791G720 (2005) 42" Lawn Tractor View Diagrams & Manuals
13AO791G730 (2005) 42" Lawn Tractor View Diagrams & Manuals
13AO791G301 (2005) 42" Lawn Tractor View Diagrams & Manuals
13AO791G709 (2005) 42" Lawn Tractor View Diagrams & Manuals
13AO791G371 (2005) 42" Lawn Tractor View Diagrams & Manuals
13AO791G307 (2005) 42" Lawn Tractor View Diagrams & Manuals
13AO791G513 (2005) 42" Lawn Tractor View Diagrams & Manuals
13AO791G713 (2005) 42" Lawn Tractor View Diagrams & Manuals
13AO791G382 (2005) 42" Lawn Tractor View Diagrams & Manuals
13AO791G000 (2005) 42" Lawn Tractor View Diagrams & Manuals
13AO791G121 (2005) 42" Lawn Tractor View Diagrams & Manuals
13AO791G205 (2005) 42" Lawn Tractor View Diagrams & Manuals
13AO791G705 (2005) 42" Lawn Tractor View Diagrams & Manuals
13AO791G706 (2005) 42" Lawn Tractor View Diagrams & Manuals
13AO791G026 (2005) 42" Lawn Tractor View Diagrams & Manuals
13AO791G726 (2005) 42" Lawn Tractor View Diagrams & Manuals
13AO791G054 (2005) 42" Lawn Tractor View Diagrams & Manuals
13AO791G745 (2005) 42" Lawn Tractor View Diagrams & Manuals
13AO791G754 (2005) 42" Lawn Tractor View Diagrams & Manuals
13AO791G704 (2005) 42" Lawn Tractor View Diagrams & Manuals
13AO791G029 (2005) 42" Lawn Tractor View Diagrams & Manuals
13AO791G229 (2005) 42" Lawn Tractor View Diagrams & Manuals
13AO791G134 (2005) 42" Lawn Tractor View Diagrams & Manuals
13AO791G138 (2005) 42" Lawn Tractor View Diagrams & Manuals
13AO791G729 (2005) 42" Lawn Tractor View Diagrams & Manuals
13AO791G929 (2005) 42" Lawn Tractor View Diagrams & Manuals
13AO791G129 (2005) 42" Lawn Tractor View Diagrams & Manuals
13AO791G151 (2005) 42" Lawn Tractor View Diagrams & Manuals
13AO791G206 (2005) 42" Lawn Tractor View Diagrams & Manuals
13AO791G308 (2005) 42" Lawn Tractor View Diagrams & Manuals
13AO791G033 (2005) 42" Lawn Tractor View Diagrams & Manuals
13AO791G019 (2005) 42" Lawn Tractor View Diagrams & Manuals
13AO791G057 (2005) 42" Lawn Tractor View Diagrams & Manuals
13AO791G118 (2005) 42" Lawn Tractor View Diagrams & Manuals
13AO791G131 (2005) 42" Lawn Tractor View Diagrams & Manuals
13AO791G022 (2005) 42" Lawn Tractor View Diagrams & Manuals
13AO791G722 (2005) 42" Lawn Tractor View Diagrams & Manuals
13AO791G002 (2005) 42" Lawn Tractor View Diagrams & Manuals
13AO791G715 (2005) 42" Lawn Tractor View Diagrams & Manuals
13AO791G077 (2005) 42" Lawn Tractor View Diagrams & Manuals
13AO791G977 (2005) 42" Lawn Tractor View Diagrams & Manuals
13AO791G777 (2005) 42" Lawn Tractor View Diagrams & Manuals
13AO791G724 (2005) 42" Lawn Tractor View Diagrams & Manuals
13AO791G105 (2005) 42" Lawn Tractor View Diagrams & Manuals
13AO791G009 (2005) 42" Lawn Tractor View Diagrams & Manuals
13AO791G016 (2005) 42" Lawn Tractor View Diagrams & Manuals
13AO791G145 (2005) 42" Lawn Tractor View Diagrams & Manuals
13AO791G196 (2005) 42" Lawn Tractor View Diagrams & Manuals
13AO791G719 (2005) 42" Lawn Tractor View Diagrams & Manuals
13AO791G098 (2005) 42" Lawn Tractor View Diagrams & Manuals
13AT605H304 (2006) 46" Pro Tractor View Diagrams & Manuals
13AT605H372 (2006) 46" Pro Tractor View Diagrams & Manuals
13AT605H401 (2006) 46" Pro Tractor View Diagrams & Manuals
13AT605H720 (2006) 46" Pro Tractor View Diagrams & Manuals
13AT605H730 (2006) 46" Pro Tractor View Diagrams & Manuals
13AT605H301 (2006) 46" Pro Tractor View Diagrams & Manuals
13AT605H709 (2006) 46" Pro Tractor View Diagrams & Manuals
13AT605H371 (2006) 46" Pro Tractor View Diagrams & Manuals
13AT605H307 (2006) 46" Pro Tractor View Diagrams & Manuals
13AT605H513 (2006) 46" Pro Tractor View Diagrams & Manuals
13AT605H713 (2006) 46" Pro Tractor View Diagrams & Manuals
13AT605H382 (2006) 46" Pro Tractor View Diagrams & Manuals
13AT605H000 (2006) 46" Pro Tractor View Diagrams & Manuals
13AT605H121 (2006) 46" Pro Tractor View Diagrams & Manuals
13AT605H205 (2006) 46" Pro Tractor View Diagrams & Manuals
13AT605H705 (2006) 46" Pro Tractor View Diagrams & Manuals
13AT605H706 (2006) 46" Pro Tractor View Diagrams & Manuals
13AT605H026 (2006) 46" Pro Tractor View Diagrams & Manuals
13AT605H726 (2006) 46" Pro Tractor View Diagrams & Manuals
13AT605H054 (2006) 46" Pro Tractor View Diagrams & Manuals
13AT605H745 (2006) 46" Pro Tractor View Diagrams & Manuals
13AT605H754 (2006) 46" Pro Tractor View Diagrams & Manuals
13AT605H704 (2006) 46" Pro Tractor View Diagrams & Manuals
13AT605H029 (2006) 46" Pro Tractor View Diagrams & Manuals
13AT605H229 (2006) 46" Pro Tractor View Diagrams & Manuals
13AT605H134 (2006) 46" Pro Tractor View Diagrams & Manuals
13AT605H138 (2006) 46" Pro Tractor View Diagrams & Manuals
13AT605H729 (2006) 46" Pro Tractor View Diagrams & Manuals
13AT605H929 (2006) 46" Pro Tractor View Diagrams & Manuals
13AT605H129 (2006) 46" Pro Tractor View Diagrams & Manuals
13AT605H151 (2006) 46" Pro Tractor View Diagrams & Manuals
13AT605H206 (2006) 46" Pro Tractor View Diagrams & Manuals
13AT605H308 (2006) 46" Pro Tractor View Diagrams & Manuals
13AT605H033 (2006) 46" Pro Tractor View Diagrams & Manuals
13AT605H019 (2006) 46" Pro Tractor View Diagrams & Manuals
13AT605H057 (2006) 46" Pro Tractor View Diagrams & Manuals
13AT605H118 (2006) 46" Pro Tractor View Diagrams & Manuals
13AT605H131 (2006) 46" Pro Tractor View Diagrams & Manuals
13AT605H022 (2006) 46" Pro Tractor View Diagrams & Manuals
13AT605H722 (2006) 46" Pro Tractor View Diagrams & Manuals
13AT605H002 (2006) 46" Pro Tractor View Diagrams & Manuals
13AT605H715 (2006) 46" Pro Tractor View Diagrams & Manuals
13AT605H077 (2006) 46" Pro Tractor View Diagrams & Manuals
13AT605H977 (2006) 46" Pro Tractor View Diagrams & Manuals
13AT605H777 (2006) 46" Pro Tractor View Diagrams & Manuals
13AT605H724 (2006) 46" Pro Tractor View Diagrams & Manuals
13AT605H105 (2006) 46" Pro Tractor View Diagrams & Manuals
13AT605H009 (2006) 46" Pro Tractor View Diagrams & Manuals
13AT605H016 (2006) 46" Pro Tractor View Diagrams & Manuals
13AT605H145 (2006) 46" Pro Tractor View Diagrams & Manuals
13AT605H196 (2006) 46" Pro Tractor View Diagrams & Manuals
13AT605H719 (2006) 46" Pro Tractor View Diagrams & Manuals
13AT605H098 (2006) 46" Pro Tractor View Diagrams & Manuals
14AI808H304 (2004) 46" Pro Tractor View Diagrams & Manuals
14AI808H372 (2004) 46" Pro Tractor View Diagrams & Manuals
14AI808H401 (2004) 46" Pro Tractor View Diagrams & Manuals
14AI808H720 (2004) 46" Pro Tractor View Diagrams & Manuals
14AI808H730 (2004) 46" Pro Tractor View Diagrams & Manuals
14AI808H301 (2004) 46" Pro Tractor View Diagrams & Manuals
14AI808H709 (2004) 46" Pro Tractor View Diagrams & Manuals
14AI808H371 (2004) 46" Pro Tractor View Diagrams & Manuals
14AI808H307 (2004) 46" Pro Tractor View Diagrams & Manuals
14AI808H513 (2004) 46" Pro Tractor View Diagrams & Manuals
14AI808H713 (2004) 46" Pro Tractor View Diagrams & Manuals
14AI808H382 (2004) 46" Pro Tractor View Diagrams & Manuals
14AI808H000 (2004) 46" Pro Tractor View Diagrams & Manuals
14AI808H121 (2004) 46" Pro Tractor View Diagrams & Manuals
14AI808H205 (2004) 46" Pro Tractor View Diagrams & Manuals
14AI808H705 (2004) 46" Pro Tractor View Diagrams & Manuals
14AI808H706 (2004) 46" Pro Tractor View Diagrams & Manuals
14AI808H026 (2004) 46" Pro Tractor View Diagrams & Manuals
14AI808H726 (2004) 46" Pro Tractor View Diagrams & Manuals
14AI808H054 (2004) 46" Pro Tractor View Diagrams & Manuals
14AI808H745 (2004) 46" Pro Tractor View Diagrams & Manuals
14AI808H754 (2004) 46" Pro Tractor View Diagrams & Manuals
14AI808H704 (2004) 46" Pro Tractor View Diagrams & Manuals
14AI808H029 (2004) 46" Pro Tractor View Diagrams & Manuals
14AI808H229 (2004) 46" Pro Tractor View Diagrams & Manuals
14AI808H134 (2004) 46" Pro Tractor View Diagrams & Manuals
14AI808H138 (2004) 46" Pro Tractor View Diagrams & Manuals
14AI808H729 (2004) 46" Pro Tractor View Diagrams & Manuals
14AI808H929 (2004) 46" Pro Tractor View Diagrams & Manuals
14AI808H129 (2004) 46" Pro Tractor View Diagrams & Manuals
14AI808H151 (2004) 46" Pro Tractor View Diagrams & Manuals
14AI808H206 (2004) 46" Pro Tractor View Diagrams & Manuals
14AI808H308 (2004) 46" Pro Tractor View Diagrams & Manuals
14AI808H033 (2004) 46" Pro Tractor View Diagrams & Manuals
14AI808H019 (2004) 46" Pro Tractor View Diagrams & Manuals
14AI808H057 (2004) 46" Pro Tractor View Diagrams & Manuals
14AI808H118 (2004) 46" Pro Tractor View Diagrams & Manuals
14AI808H131 (2004) 46" Pro Tractor View Diagrams & Manuals
14AI808H022 (2004) 46" Pro Tractor View Diagrams & Manuals
14AI808H722 (2004) 46" Pro Tractor View Diagrams & Manuals
14AI808H002 (2004) 46" Pro Tractor View Diagrams & Manuals
14AI808H715 (2004) 46" Pro Tractor View Diagrams & Manuals
14AI808H077 (2004) 46" Pro Tractor View Diagrams & Manuals
14AI808H977 (2004) 46" Pro Tractor View Diagrams & Manuals
14AI808H777 (2004) 46" Pro Tractor View Diagrams & Manuals
14AI808H724 (2004) 46" Pro Tractor View Diagrams & Manuals
14AI808H105 (2004) 46" Pro Tractor View Diagrams & Manuals
14AI808H009 (2004) 46" Pro Tractor View Diagrams & Manuals
14AI808H016 (2004) 46" Pro Tractor View Diagrams & Manuals
14AI808H145 (2004) 46" Pro Tractor View Diagrams & Manuals
14AI808H196 (2004) 46" Pro Tractor View Diagrams & Manuals
14AI808H719 (2004) 46" Pro Tractor View Diagrams & Manuals
14AI808H098 (2004) 46" Pro Tractor View Diagrams & Manuals
31AE6BHE304 (2005-2) Snow Thrower View Diagrams & Manuals
31AE6BHE372 (2005-2) Snow Thrower View Diagrams & Manuals
31AE6BHE401 (2005-2) Snow Thrower View Diagrams & Manuals
31AE6BHE720 (2005-2) Snow Thrower View Diagrams & Manuals
31AE6BHE730 (2005-2) Snow Thrower View Diagrams & Manuals
31AE6BHE301 (2005-2) Snow Thrower View Diagrams & Manuals
31AE6BHE709 (2005-2) Snow Thrower View Diagrams & Manuals
31AE6BHE371 (2005-2) Snow Thrower View Diagrams & Manuals
31AE6BHE307 (2005-2) Snow Thrower View Diagrams & Manuals
31AE6BHE513 (2005-2) Snow Thrower View Diagrams & Manuals
31AE6BHE713 (2005-2) Snow Thrower View Diagrams & Manuals
31AE6BHE382 (2005-2) Snow Thrower View Diagrams & Manuals
31AE6BHE000 (2005-2) Snow Thrower View Diagrams & Manuals
31AE6BHE121 (2005-2) Snow Thrower View Diagrams & Manuals
31AE6BHE205 (2005-2) Snow Thrower View Diagrams & Manuals
31AE6BHE705 (2005-2) Snow Thrower View Diagrams & Manuals
31AE6BHE706 (2005-2) Snow Thrower View Diagrams & Manuals
31AE6BHE026 (2005-2) Snow Thrower View Diagrams & Manuals
31AE6BHE726 (2005-2) Snow Thrower View Diagrams & Manuals
31AE6BHE054 (2005-2) Snow Thrower View Diagrams & Manuals
31AE6BHE745 (2005-2) Snow Thrower View Diagrams & Manuals
31AE6BHE754 (2005-2) Snow Thrower View Diagrams & Manuals
31AE6BHE704 (2005-2) Snow Thrower View Diagrams & Manuals
31AE6BHE029 (2005-2) Snow Thrower View Diagrams & Manuals
31AE6BHE229 (2005-2) Snow Thrower View Diagrams & Manuals
31AE6BHE134 (2005-2) Snow Thrower View Diagrams & Manuals
31AE6BHE138 (2005-2) Snow Thrower View Diagrams & Manuals
31AE6BHE729 (2005-2) Snow Thrower View Diagrams & Manuals
31AE6BHE929 (2005-2) Snow Thrower View Diagrams & Manuals
31AE6BHE129 (2005-2) Snow Thrower View Diagrams & Manuals
31AE6BHE151 (2005-2) Snow Thrower View Diagrams & Manuals
31AE6BHE206 (2005-2) Snow Thrower View Diagrams & Manuals
31AE6BHE308 (2005-2) Snow Thrower View Diagrams & Manuals
31AE6BHE033 (2005-2) Snow Thrower View Diagrams & Manuals
31AE6BHE019 (2005-2) Snow Thrower View Diagrams & Manuals
31AE6BHE057 (2005-2) Snow Thrower View Diagrams & Manuals
31AE6BHE118 (2005-2) Snow Thrower View Diagrams & Manuals
31AE6BHE131 (2005-2) Snow Thrower View Diagrams & Manuals
31AE6BHE022 (2005-2) Snow Thrower View Diagrams & Manuals
31AE6BHE002 (2005-2) Snow Thrower View Diagrams & Manuals
31AE6BHE715 (2005-2) Snow Thrower View Diagrams & Manuals
31AE6BHE077 (2005-2) Snow Thrower View Diagrams & Manuals
31AE6BHE977 (2005-2) Snow Thrower View Diagrams & Manuals
31AE6BHE777 (2005-2) Snow Thrower View Diagrams & Manuals
31AE6BHE724 (2005-2) Snow Thrower View Diagrams & Manuals
31AE6BHE105 (2005-2) Snow Thrower View Diagrams & Manuals
31AE6BHE009 (2005-2) Snow Thrower View Diagrams & Manuals
31AE6BHE016 (2005-2) Snow Thrower View Diagrams & Manuals
31AE6BHE145 (2005-2) Snow Thrower View Diagrams & Manuals
31AE6BHE196 (2005-2) Snow Thrower View Diagrams & Manuals
31AE6BHE719 (2005-2) Snow Thrower View Diagrams & Manuals
31AE6BHE098 (2005-2) Snow Thrower View Diagrams & Manuals
31AE6GFF304 (2007) Snow Thrower View Diagrams & Manuals
31AE6GFF372 (2007) Snow Thrower View Diagrams & Manuals
31AE6GFF401 (2007) Snow Thrower View Diagrams & Manuals
31AE6GFF720 (2007) Snow Thrower View Diagrams & Manuals
31AE6GFF730 (2007) Snow Thrower View Diagrams & Manuals
31AE6GFF301 (2007) Snow Thrower View Diagrams & Manuals
31AE6GFF709 (2007) Snow Thrower View Diagrams & Manuals
31AE6GFF371 (2007) Snow Thrower View Diagrams & Manuals
31AE6GFF307 (2007) Snow Thrower View Diagrams & Manuals
31AE6GFF513 (2007) Snow Thrower View Diagrams & Manuals
31AE6GFF713 (2007) Snow Thrower View Diagrams & Manuals
31AE6GFF382 (2007) Snow Thrower View Diagrams & Manuals
31AE6GFF000 (2007) Snow Thrower View Diagrams & Manuals
31AE6GFF121 (2007) Snow Thrower View Diagrams & Manuals
31AE6GFF205 (2007) Snow Thrower View Diagrams & Manuals
31AE6GFF705 (2007) Snow Thrower View Diagrams & Manuals
31AE6GFF706 (2007) Snow Thrower View Diagrams & Manuals
31AE6GFF026 (2007) Snow Thrower View Diagrams & Manuals
31AE6GFF726 (2007) Snow Thrower View Diagrams & Manuals
31AE6GFF054 (2007) Snow Thrower View Diagrams & Manuals
31AE6GFF745 (2007) Snow Thrower View Diagrams & Manuals
31AE6GFF754 (2007) Snow Thrower View Diagrams & Manuals
31AE6GFF704 (2007) Snow Thrower View Diagrams & Manuals
31AE6GFF029 (2007) Snow Thrower View Diagrams & Manuals
31AE6GFF229 (2007) Snow Thrower View Diagrams & Manuals
31AE6GFF134 (2007) Snow Thrower View Diagrams & Manuals
31AE6GFF138 (2007) Snow Thrower View Diagrams & Manuals
31AE6GFF729 (2007) Snow Thrower View Diagrams & Manuals
31AE6GFF929 (2007) Snow Thrower View Diagrams & Manuals
31AE6GFF129 (2007) Snow Thrower View Diagrams & Manuals
31AE6GFF151 (2007) Snow Thrower View Diagrams & Manuals
31AE6GFF206 (2007) Snow Thrower View Diagrams & Manuals
31AE6GFF308 (2007) Snow Thrower View Diagrams & Manuals
31AE6GFF033 (2007) Snow Thrower View Diagrams & Manuals
31AE6GFF019 (2007) Snow Thrower View Diagrams & Manuals
31AE6GFF057 (2007) Snow Thrower View Diagrams & Manuals
31AE6GFF118 (2007) Snow Thrower View Diagrams & Manuals
31AE6GFF131 (2007) Snow Thrower View Diagrams & Manuals
31AE6GFF022 (2007) Snow Thrower View Diagrams & Manuals
31AE6GFF722 (2007) Snow Thrower View Diagrams & Manuals
31AE6GFF002 (2007) Snow Thrower View Diagrams & Manuals
31AE6GFF715 (2007) Snow Thrower View Diagrams & Manuals
31AE6GFF077 (2007) Snow Thrower View Diagrams & Manuals
31AE6GFF977 (2007) Snow Thrower View Diagrams & Manuals
31AE6GFF777 (2007) Snow Thrower View Diagrams & Manuals
31AE6GFF724 (2007) Snow Thrower View Diagrams & Manuals
31AE6GFF105 (2007) Snow Thrower View Diagrams & Manuals
31AE6GFF009 (2007) Snow Thrower View Diagrams & Manuals
31AE6GFF016 (2007) Snow Thrower View Diagrams & Manuals
31AE6GFF145 (2007) Snow Thrower View Diagrams & Manuals
31AE6GFF196 (2007) Snow Thrower View Diagrams & Manuals
31AE6GFF719 (2007) Snow Thrower View Diagrams & Manuals
31AE6GFF098 (2007) Snow Thrower View Diagrams & Manuals
31AE6LFH304 (2005) Snow Thrower View Diagrams & Manuals
31AE6LFH372 (2005) Snow Thrower View Diagrams & Manuals
31AE6LFH401 (2005) Snow Thrower View Diagrams & Manuals
31AE6LFH720 (2005) Snow Thrower View Diagrams & Manuals
31AE6LFH730 (2005) Snow Thrower View Diagrams & Manuals
31AE6LFH301 (2005) Snow Thrower View Diagrams & Manuals
31AE6LFH709 (2005) Snow Thrower View Diagrams & Manuals
31AE6LFH371 (2005) Snow Thrower View Diagrams & Manuals
31AE6LFH307 (2005) Snow Thrower View Diagrams & Manuals
31AE6LFH513 (2005) Snow Thrower View Diagrams & Manuals
31AE6LFH713 (2005) Snow Thrower View Diagrams & Manuals
31AE6LFH382 (2005) Snow Thrower View Diagrams & Manuals
31AE6LFH000 (2005) Snow Thrower View Diagrams & Manuals
31AE6LFH121 (2005) Snow Thrower View Diagrams & Manuals
31AE6LFH205 (2005) Snow Thrower View Diagrams & Manuals
31AE6LFH705 (2005) Snow Thrower View Diagrams & Manuals
31AE6LFH706 (2005) Snow Thrower View Diagrams & Manuals
31AE6LFH026 (2005) Snow Thrower View Diagrams & Manuals
31AE6LFH726 (2005) Snow Thrower View Diagrams & Manuals
31AE6LFH054 (2005) Snow Thrower View Diagrams & Manuals
31AE6LFH745 (2005) Snow Thrower View Diagrams & Manuals
31AE6LFH754 (2005) Snow Thrower View Diagrams & Manuals
31AE6LFH704 (2005) Snow Thrower View Diagrams & Manuals
31AE6LFH029 (2005) Snow Thrower View Diagrams & Manuals
31AE6LFH229 (2005) Snow Thrower View Diagrams & Manuals
31AE6LFH134 (2005) Snow Thrower View Diagrams & Manuals
31AE6LFH138 (2005) Snow Thrower View Diagrams & Manuals
31AE6LFH729 (2005) Snow Thrower View Diagrams & Manuals
31AE6LFH929 (2005) Snow Thrower View Diagrams & Manuals
31AE6LFH129 (2005) Snow Thrower View Diagrams & Manuals
31AE6LFH151 (2005) Snow Thrower View Diagrams & Manuals
31AE6LFH206 (2005) Snow Thrower View Diagrams & Manuals
31AE6LFH308 (2005) Snow Thrower View Diagrams & Manuals
31AE6LFH033 (2005) Snow Thrower View Diagrams & Manuals
31AE6LFH019 (2005) Snow Thrower View Diagrams & Manuals
31AE6LFH057 (2005) Snow Thrower View Diagrams & Manuals
31AE6LFH118 (2005) Snow Thrower View Diagrams & Manuals
31AE6LFH131 (2005) Snow Thrower View Diagrams & Manuals
31AE6LFH022 (2005) Snow Thrower View Diagrams & Manuals
31AE6LFH722 (2005) Snow Thrower View Diagrams & Manuals
31AE6LFH002 (2005) Snow Thrower View Diagrams & Manuals
31AE6LFH715 (2005) Snow Thrower View Diagrams & Manuals
31AE6LFH077 (2005) Snow Thrower View Diagrams & Manuals
31AE6LFH977 (2005) Snow Thrower View Diagrams & Manuals
31AE6LFH777 (2005) Snow Thrower View Diagrams & Manuals
31AE6LFH724 (2005) Snow Thrower View Diagrams & Manuals
31AE6LFH105 (2005) Snow Thrower View Diagrams & Manuals
31AE6LFH009 (2005) Snow Thrower View Diagrams & Manuals
31AE6LFH016 (2005) Snow Thrower View Diagrams & Manuals
31AE6LFH145 (2005) Snow Thrower View Diagrams & Manuals
31AE6LFH196 (2005) Snow Thrower View Diagrams & Manuals
31AE6LFH719 (2005) Snow Thrower View Diagrams & Manuals
31AE6LFH098 (2005) Snow Thrower View Diagrams & Manuals
31AO791G304 (2005) Pro Tractor View Diagrams & Manuals
31AO791G372 (2005) Pro Tractor View Diagrams & Manuals
31AO791G401 (2005) Pro Tractor View Diagrams & Manuals
31AO791G720 (2005) Pro Tractor View Diagrams & Manuals
31AO791G730 (2005) Pro Tractor View Diagrams & Manuals
31AO791G301 (2005) Pro Tractor View Diagrams & Manuals
31AO791G709 (2005) Pro Tractor View Diagrams & Manuals
31AO791G371 (2005) Pro Tractor View Diagrams & Manuals
31AO791G307 (2005) Pro Tractor View Diagrams & Manuals
31AO791G513 (2005) Pro Tractor View Diagrams & Manuals
31AO791G713 (2005) Pro Tractor View Diagrams & Manuals
31AO791G382 (2005) Pro Tractor View Diagrams & Manuals
31AO791G000 (2005) Pro Tractor View Diagrams & Manuals
31AO791G121 (2005) Pro Tractor View Diagrams & Manuals
31AO791G205 (2005) Pro Tractor View Diagrams & Manuals
31AO791G705 (2005) Pro Tractor View Diagrams & Manuals
31AO791G706 (2005) Pro Tractor View Diagrams & Manuals
31AO791G026 (2005) Pro Tractor View Diagrams & Manuals
31AO791G726 (2005) Pro Tractor View Diagrams & Manuals
31AO791G054 (2005) Pro Tractor View Diagrams & Manuals
31AO791G745 (2005) Pro Tractor View Diagrams & Manuals
31AO791G754 (2005) Pro Tractor View Diagrams & Manuals
31AO791G704 (2005) Pro Tractor View Diagrams & Manuals
31AO791G029 (2005) Pro Tractor View Diagrams & Manuals
31AO791G229 (2005) Pro Tractor View Diagrams & Manuals
31AO791G134 (2005) Pro Tractor View Diagrams & Manuals
31AO791G138 (2005) Pro Tractor View Diagrams & Manuals
31AO791G729 (2005) Pro Tractor View Diagrams & Manuals
31AO791G929 (2005) Pro Tractor View Diagrams & Manuals
31AO791G129 (2005) Pro Tractor View Diagrams & Manuals
31AO791G151 (2005) Pro Tractor View Diagrams & Manuals
31AO791G206 (2005) Pro Tractor View Diagrams & Manuals
31AO791G308 (2005) Pro Tractor View Diagrams & Manuals
31AO791G033 (2005) Pro Tractor View Diagrams & Manuals
31AO791G019 (2005) Pro Tractor View Diagrams & Manuals
31AO791G057 (2005) Pro Tractor View Diagrams & Manuals
31AO791G118 (2005) Pro Tractor View Diagrams & Manuals
31AO791G131 (2005) Pro Tractor View Diagrams & Manuals
31AO791G022 (2005) Pro Tractor View Diagrams & Manuals
31AO791G722 (2005) Pro Tractor View Diagrams & Manuals
31AO791G002 (2005) Pro Tractor View Diagrams & Manuals
31AO791G715 (2005) Pro Tractor View Diagrams & Manuals
31AO791G077 (2005) Pro Tractor View Diagrams & Manuals
31AO791G977 (2005) Pro Tractor View Diagrams & Manuals
31AO791G777 (2005) Pro Tractor View Diagrams & Manuals
31AO791G724 (2005) Pro Tractor View Diagrams & Manuals
31AO791G105 (2005) Pro Tractor View Diagrams & Manuals
31AO791G009 (2005) Pro Tractor View Diagrams & Manuals
31AO791G016 (2005) Pro Tractor View Diagrams & Manuals
31AO791G145 (2005) Pro Tractor View Diagrams & Manuals
31AO791G196 (2005) Pro Tractor View Diagrams & Manuals
31AO791G719 (2005) Pro Tractor View Diagrams & Manuals
31AO791G098 (2005) Pro Tractor View Diagrams & Manuals
31AT605H304 (2006) Pro Tractor View Diagrams & Manuals
31AT605H372 (2006) Pro Tractor View Diagrams & Manuals
31AT605H401 (2006) Pro Tractor View Diagrams & Manuals
31AT605H720 (2006) Pro Tractor View Diagrams & Manuals
31AT605H730 (2006) Pro Tractor View Diagrams & Manuals
31AT605H301 (2006) Pro Tractor View Diagrams & Manuals
31AT605H709 (2006) Pro Tractor View Diagrams & Manuals
31AT605H371 (2006) Pro Tractor View Diagrams & Manuals
31AT605H307 (2006) Pro Tractor View Diagrams & Manuals
31AT605H513 (2006) Pro Tractor View Diagrams & Manuals
31AT605H713 (2006) Pro Tractor View Diagrams & Manuals
31AT605H382 (2006) Pro Tractor View Diagrams & Manuals
31AT605H000 (2006) Pro Tractor View Diagrams & Manuals
31AT605H121 (2006) Pro Tractor View Diagrams & Manuals
31AT605H205 (2006) Pro Tractor View Diagrams & Manuals
31AT605H705 (2006) Pro Tractor View Diagrams & Manuals
31AT605H706 (2006) Pro Tractor View Diagrams & Manuals
31AT605H026 (2006) Pro Tractor View Diagrams & Manuals
31AT605H726 (2006) Pro Tractor View Diagrams & Manuals
31AT605H054 (2006) Pro Tractor View Diagrams & Manuals
31AT605H745 (2006) Pro Tractor View Diagrams & Manuals
31AT605H754 (2006) Pro Tractor View Diagrams & Manuals
31AT605H704 (2006) Pro Tractor View Diagrams & Manuals
31AT605H029 (2006) Pro Tractor View Diagrams & Manuals
31AT605H229 (2006) Pro Tractor View Diagrams & Manuals
31AT605H134 (2006) Pro Tractor View Diagrams & Manuals
31AT605H138 (2006) Pro Tractor View Diagrams & Manuals
31AT605H729 (2006) Pro Tractor View Diagrams & Manuals
31AT605H929 (2006) Pro Tractor View Diagrams & Manuals
31AT605H129 (2006) Pro Tractor View Diagrams & Manuals
31AT605H151 (2006) Pro Tractor View Diagrams & Manuals
31AT605H206 (2006) Pro Tractor View Diagrams & Manuals
31AT605H308 (2006) Pro Tractor View Diagrams & Manuals
31AT605H033 (2006) Pro Tractor View Diagrams & Manuals
31AT605H019 (2006) Pro Tractor View Diagrams & Manuals
31AT605H057 (2006) Pro Tractor View Diagrams & Manuals
31AT605H118 (2006) Pro Tractor View Diagrams & Manuals
31AT605H131 (2006) Pro Tractor View Diagrams & Manuals
31AT605H022 (2006) Pro Tractor View Diagrams & Manuals
31AT605H722 (2006) Pro Tractor View Diagrams & Manuals
31AT605H002 (2006) Pro Tractor View Diagrams & Manuals
31AT605H715 (2006) Pro Tractor View Diagrams & Manuals
31AT605H077 (2006) Pro Tractor View Diagrams & Manuals
31AT605H977 (2006) Pro Tractor View Diagrams & Manuals
31AT605H777 (2006) Pro Tractor View Diagrams & Manuals
31AT605H724 (2006) Pro Tractor View Diagrams & Manuals
31AT605H105 (2006) Pro Tractor View Diagrams & Manuals
31AT605H009 (2006) Pro Tractor View Diagrams & Manuals
31AT605H016 (2006) Pro Tractor View Diagrams & Manuals
31AT605H145 (2006) Pro Tractor View Diagrams & Manuals
31AT605H196 (2006) Pro Tractor View Diagrams & Manuals
31AT605H719 (2006) Pro Tractor View Diagrams & Manuals
31AT605H098 (2006) Pro Tractor View Diagrams & Manuals
319-180-304 (1989) Tiller View Diagrams & Manuals
319-180-372 (1989) Tiller View Diagrams & Manuals
319-180-401 (1989) Tiller View Diagrams & Manuals
319-180-720 (1989) Tiller View Diagrams & Manuals
319-180-730 (1989) Tiller View Diagrams & Manuals
319-180-301 (1989) Tiller View Diagrams & Manuals
319-180-709 (1989) Tiller View Diagrams & Manuals
319-180-371 (1989) Tiller View Diagrams & Manuals
319-180-307 (1989) Tiller View Diagrams & Manuals
319-180-513 (1989) Tiller View Diagrams & Manuals
319-180-713 (1989) Tiller View Diagrams & Manuals
319-180-382 (1989) Tiller View Diagrams & Manuals
319-180-121 (1989) Tiller View Diagrams & Manuals
319-180-205 (1989) Tiller View Diagrams & Manuals
319-180-705 (1989) Tiller View Diagrams & Manuals
319-180-706 (1989) Tiller View Diagrams & Manuals
319-180-026 (1989) Tiller View Diagrams & Manuals
319-180-726 (1989) Tiller View Diagrams & Manuals
319-180-054 (1989) Tiller View Diagrams & Manuals
319-180-745 (1989) Tiller View Diagrams & Manuals
319-180-754 (1989) Tiller View Diagrams & Manuals
319-180-704 (1989) Tiller View Diagrams & Manuals
319-180-029 (1989) Tiller View Diagrams & Manuals
319-180-229 (1989) Tiller View Diagrams & Manuals
319-180-134 (1989) Tiller View Diagrams & Manuals
319-180-138 (1989) Tiller View Diagrams & Manuals
319-180-729 (1989) Tiller View Diagrams & Manuals
319-180-929 (1989) Tiller View Diagrams & Manuals
319-180-129 (1989) Tiller View Diagrams & Manuals
319-180-151 (1989) Tiller View Diagrams & Manuals
319-180-206 (1989) Tiller View Diagrams & Manuals
319-180-308 (1989) Tiller View Diagrams & Manuals
319-180-033 (1989) Tiller View Diagrams & Manuals
319-180-019 (1989) Tiller View Diagrams & Manuals
319-180-057 (1989) Tiller View Diagrams & Manuals
319-180-118 (1989) Tiller View Diagrams & Manuals
319-180-131 (1989) Tiller View Diagrams & Manuals
319-180-022 (1989) Tiller View Diagrams & Manuals
319-180-722 (1989) Tiller View Diagrams & Manuals
319-180-002 (1989) Tiller View Diagrams & Manuals
319-180-715 (1989) Tiller View Diagrams & Manuals
319-180-077 (1989) Tiller View Diagrams & Manuals
319-180-977 (1989) Tiller View Diagrams & Manuals
319-180-777 (1989) Tiller View Diagrams & Manuals
319-180-724 (1989) Tiller View Diagrams & Manuals
319-180-105 (1989) Tiller View Diagrams & Manuals
319-180-009 (1989) Tiller View Diagrams & Manuals
319-180-016 (1989) Tiller View Diagrams & Manuals
319-180-145 (1989) Tiller View Diagrams & Manuals
319-180-196 (1989) Tiller View Diagrams & Manuals
319-180-719 (1989) Tiller View Diagrams & Manuals
319-180-098 (1989) Tiller View Diagrams & Manuals
319-550-304 (1989) Tiller View Diagrams & Manuals
319-550-372 (1989) Tiller View Diagrams & Manuals
319-550-401 (1989) Tiller View Diagrams & Manuals
319-550-720 (1989) Tiller View Diagrams & Manuals
319-550-730 (1989) Tiller View Diagrams & Manuals
319-550-301 (1989) Tiller View Diagrams & Manuals
319-550-709 (1989) Tiller View Diagrams & Manuals
319-550-371 (1989) Tiller View Diagrams & Manuals
319-550-307 (1989) Tiller View Diagrams & Manuals
319-550-513 (1989) Tiller View Diagrams & Manuals
319-550-713 (1989) Tiller View Diagrams & Manuals
319-550-382 (1989) Tiller View Diagrams & Manuals
319-550-121 (1989) Tiller View Diagrams & Manuals
319-550-205 (1989) Tiller View Diagrams & Manuals
319-550-705 (1989) Tiller View Diagrams & Manuals
319-550-706 (1989) Tiller View Diagrams & Manuals
319-550-026 (1989) Tiller View Diagrams & Manuals
319-550-726 (1989) Tiller View Diagrams & Manuals
319-550-054 (1989) Tiller View Diagrams & Manuals
319-550-745 (1989) Tiller View Diagrams & Manuals
319-550-754 (1989) Tiller View Diagrams & Manuals
319-550-704 (1989) Tiller View Diagrams & Manuals
319-550-029 (1989) Tiller View Diagrams & Manuals
319-550-229 (1989) Tiller View Diagrams & Manuals
319-550-134 (1989) Tiller View Diagrams & Manuals
319-550-138 (1989) Tiller View Diagrams & Manuals
319-550-729 (1989) Tiller View Diagrams & Manuals
319-550-929 (1989) Tiller View Diagrams & Manuals
319-550-129 (1989) Tiller View Diagrams & Manuals
319-550-151 (1989) Tiller View Diagrams & Manuals
319-550-206 (1989) Tiller View Diagrams & Manuals
319-550-308 (1989) Tiller View Diagrams & Manuals
319-550-033 (1989) Tiller View Diagrams & Manuals
319-550-019 (1989) Tiller View Diagrams & Manuals
319-550-057 (1989) Tiller View Diagrams & Manuals
319-550-118 (1989) Tiller View Diagrams & Manuals
319-550-131 (1989) Tiller View Diagrams & Manuals
319-550-022 (1989) Tiller View Diagrams & Manuals
319-550-722 (1989) Tiller View Diagrams & Manuals
319-550-002 (1989) Tiller View Diagrams & Manuals
319-550-715 (1989) Tiller View Diagrams & Manuals
319-550-077 (1989) Tiller View Diagrams & Manuals
319-550-977 (1989) Tiller View Diagrams & Manuals
319-550-777 (1989) Tiller View Diagrams & Manuals
319-550-724 (1989) Tiller View Diagrams & Manuals
319-550-105 (1989) Tiller View Diagrams & Manuals
319-550-009 (1989) Tiller View Diagrams & Manuals
319-550-016 (1989) Tiller View Diagrams & Manuals
319-550-145 (1989) Tiller View Diagrams & Manuals
319-550-196 (1989) Tiller View Diagrams & Manuals
319-550-719 (1989) Tiller View Diagrams & Manuals
319-550-098 (1989) Tiller View Diagrams & Manuals
212-340-304 (1992) Tiller View Diagrams & Manuals
212-340-401 (1992) Tiller View Diagrams & Manuals
212-340-720 (1992) Tiller View Diagrams & Manuals
212-340-730 (1992) Tiller View Diagrams & Manuals
212-340-301 (1992) Tiller View Diagrams & Manuals
212-340-709 (1992) Tiller View Diagrams & Manuals
212-340-371 (1992) Tiller View Diagrams & Manuals
212-340-307 (1992) Tiller View Diagrams & Manuals
212-340-513 (1992) Tiller View Diagrams & Manuals
212-340-713 (1992) Tiller View Diagrams & Manuals
212-340-382 (1992) Tiller View Diagrams & Manuals
212-340-121 (1992) Tiller View Diagrams & Manuals
212-340-705 (1992) Tiller View Diagrams & Manuals
212-340-706 (1992) Tiller View Diagrams & Manuals
212-340-026 (1992) Tiller View Diagrams & Manuals
212-340-726 (1992) Tiller View Diagrams & Manuals
212-340-745 (1992) Tiller View Diagrams & Manuals
212-340-754 (1992) Tiller View Diagrams & Manuals
212-340-704 (1992) Tiller View Diagrams & Manuals
212-340-029 (1992) Tiller View Diagrams & Manuals
212-340-229 (1992) Tiller View Diagrams & Manuals
212-340-138 (1992) Tiller View Diagrams & Manuals
212-340-729 (1992) Tiller View Diagrams & Manuals
212-340-929 (1992) Tiller View Diagrams & Manuals
212-340-151 (1992) Tiller View Diagrams & Manuals
212-340-206 (1992) Tiller View Diagrams & Manuals
212-340-308 (1992) Tiller View Diagrams & Manuals
212-340-033 (1992) Tiller View Diagrams & Manuals
212-340-019 (1992) Tiller View Diagrams & Manuals
212-340-057 (1992) Tiller View Diagrams & Manuals
212-340-118 (1992) Tiller View Diagrams & Manuals
212-340-131 (1992) Tiller View Diagrams & Manuals
212-340-022 (1992) Tiller View Diagrams & Manuals
212-340-722 (1992) Tiller View Diagrams & Manuals
212-340-002 (1992) Tiller View Diagrams & Manuals
212-340-715 (1992) Tiller View Diagrams & Manuals
212-340-077 (1992) Tiller View Diagrams & Manuals
212-340-977 (1992) Tiller View Diagrams & Manuals
212-340-777 (1992) Tiller View Diagrams & Manuals
212-340-724 (1992) Tiller View Diagrams & Manuals
212-340-105 (1992) Tiller View Diagrams & Manuals
212-340-016 (1992) Tiller View Diagrams & Manuals
212-340-719 (1992) Tiller View Diagrams & Manuals
212-340-098 (1992) Tiller View Diagrams & Manuals
212-390-304 (1992) Tiller View Diagrams & Manuals
212-390-372 (1992) Tiller View Diagrams & Manuals
212-390-401 (1992) Tiller View Diagrams & Manuals
212-390-720 (1992) Tiller View Diagrams & Manuals
212-390-730 (1992) Tiller View Diagrams & Manuals
212-390-301 (1992) Tiller View Diagrams & Manuals
212-390-709 (1992) Tiller View Diagrams & Manuals
212-390-371 (1992) Tiller View Diagrams & Manuals
212-390-307 (1992) Tiller View Diagrams & Manuals
212-390-513 (1992) Tiller View Diagrams & Manuals
212-390-713 (1992) Tiller View Diagrams & Manuals
212-390-382 (1992) Tiller View Diagrams & Manuals
212-390-121 (1992) Tiller View Diagrams & Manuals
212-390-705 (1992) Tiller View Diagrams & Manuals
212-390-706 (1992) Tiller View Diagrams & Manuals
212-390-026 (1992) Tiller View Diagrams & Manuals
212-390-726 (1992) Tiller View Diagrams & Manuals
212-390-745 (1992) Tiller View Diagrams & Manuals
212-390-754 (1992) Tiller View Diagrams & Manuals
212-390-704 (1992) Tiller View Diagrams & Manuals
212-390-029 (1992) Tiller View Diagrams & Manuals
212-390-229 (1992) Tiller View Diagrams & Manuals
212-390-134 (1992) Tiller View Diagrams & Manuals
212-390-138 (1992) Tiller View Diagrams & Manuals
212-390-729 (1992) Tiller View Diagrams & Manuals
212-390-929 (1992) Tiller View Diagrams & Manuals
212-390-129 (1992) Tiller View Diagrams & Manuals
212-390-151 (1992) Tiller View Diagrams & Manuals
212-390-206 (1992) Tiller View Diagrams & Manuals
212-390-308 (1992) Tiller View Diagrams & Manuals
212-390-033 (1992) Tiller View Diagrams & Manuals
212-390-019 (1992) Tiller View Diagrams & Manuals
212-390-057 (1992) Tiller View Diagrams & Manuals
212-390-118 (1992) Tiller View Diagrams & Manuals
212-390-131 (1992) Tiller View Diagrams & Manuals
212-390-022 (1992) Tiller View Diagrams & Manuals
212-390-722 (1992) Tiller View Diagrams & Manuals
212-390-002 (1992) Tiller View Diagrams & Manuals
212-390-715 (1992) Tiller View Diagrams & Manuals
212-390-077 (1992) Tiller View Diagrams & Manuals
212-390-977 (1992) Tiller View Diagrams & Manuals
212-390-777 (1992) Tiller View Diagrams & Manuals
212-390-724 (1992) Tiller View Diagrams & Manuals
212-390-105 (1992) Tiller View Diagrams & Manuals
212-390-196 (1992) Tiller View Diagrams & Manuals
212-390-719 (1992) Tiller View Diagrams & Manuals
212-390-098 (1992) Tiller View Diagrams & Manuals
213-340-304 (1993) Tiller View Diagrams & Manuals
213-340-401 (1993) Tiller View Diagrams & Manuals
213-340-720 (1993) Tiller View Diagrams & Manuals
213-340-730 (1993) Tiller View Diagrams & Manuals
213-340-301 (1993) Tiller View Diagrams & Manuals
213-340-709 (1993) Tiller View Diagrams & Manuals
213-340-371 (1993) Tiller View Diagrams & Manuals
213-340-307 (1993) Tiller View Diagrams & Manuals
213-340-513 (1993) Tiller View Diagrams & Manuals
213-340-713 (1993) Tiller View Diagrams & Manuals
213-340-382 (1993) Tiller View Diagrams & Manuals
213-340-121 (1993) Tiller View Diagrams & Manuals
213-340-205 (1993) Tiller View Diagrams & Manuals
213-340-705 (1993) Tiller View Diagrams & Manuals
213-340-706 (1993) Tiller View Diagrams & Manuals
213-340-026 (1993) Tiller View Diagrams & Manuals
213-340-726 (1993) Tiller View Diagrams & Manuals
213-340-054 (1993) Tiller View Diagrams & Manuals
213-340-745 (1993) Tiller View Diagrams & Manuals
213-340-754 (1993) Tiller View Diagrams & Manuals
213-340-704 (1993) Tiller View Diagrams & Manuals
213-340-029 (1993) Tiller View Diagrams & Manuals
213-340-229 (1993) Tiller View Diagrams & Manuals
213-340-134 (1993) Tiller View Diagrams & Manuals
213-340-138 (1993) Tiller View Diagrams & Manuals
213-340-729 (1993) Tiller View Diagrams & Manuals
213-340-929 (1993) Tiller View Diagrams & Manuals
213-340-129 (1993) Tiller View Diagrams & Manuals
213-340-151 (1993) Tiller View Diagrams & Manuals
213-340-206 (1993) Tiller View Diagrams & Manuals
213-340-308 (1993) Tiller View Diagrams & Manuals
213-340-033 (1993) Tiller View Diagrams & Manuals
213-340-019 (1993) Tiller View Diagrams & Manuals
213-340-057 (1993) Tiller View Diagrams & Manuals
213-340-118 (1993) Tiller View Diagrams & Manuals
213-340-131 (1993) Tiller View Diagrams & Manuals
213-340-022 (1993) Tiller View Diagrams & Manuals
213-340-722 (1993) Tiller View Diagrams & Manuals
213-340-002 (1993) Tiller View Diagrams & Manuals
213-340-715 (1993) Tiller View Diagrams & Manuals
213-340-077 (1993) Tiller View Diagrams & Manuals
213-340-977 (1993) Tiller View Diagrams & Manuals
213-340-777 (1993) Tiller View Diagrams & Manuals
213-340-724 (1993) Tiller View Diagrams & Manuals
213-340-009 (1993) Tiller View Diagrams & Manuals
213-340-016 (1993) Tiller View Diagrams & Manuals
213-340-145 (1993) Tiller View Diagrams & Manuals
213-340-196 (1993) Tiller View Diagrams & Manuals
213-340-719 (1993) Tiller View Diagrams & Manuals
213-390-304 (1993) Tiller View Diagrams & Manuals
213-390-372 (1993) Tiller View Diagrams & Manuals
213-390-401 (1993) Tiller View Diagrams & Manuals
213-390-720 (1993) Tiller View Diagrams & Manuals
213-390-730 (1993) Tiller View Diagrams & Manuals
213-390-301 (1993) Tiller View Diagrams & Manuals
213-390-709 (1993) Tiller View Diagrams & Manuals
213-390-371 (1993) Tiller View Diagrams & Manuals
213-390-307 (1993) Tiller View Diagrams & Manuals
213-390-513 (1993) Tiller View Diagrams & Manuals
213-390-713 (1993) Tiller View Diagrams & Manuals
213-390-382 (1993) Tiller View Diagrams & Manuals
213-390-121 (1993) Tiller View Diagrams & Manuals
213-390-205 (1993) Tiller View Diagrams & Manuals
213-390-705 (1993) Tiller View Diagrams & Manuals
213-390-706 (1993) Tiller View Diagrams & Manuals
213-390-026 (1993) Tiller View Diagrams & Manuals
213-390-726 (1993) Tiller View Diagrams & Manuals
213-390-054 (1993) Tiller View Diagrams & Manuals
213-390-745 (1993) Tiller View Diagrams & Manuals
213-390-754 (1993) Tiller View Diagrams & Manuals
213-390-704 (1993) Tiller View Diagrams & Manuals
213-390-029 (1993) Tiller View Diagrams & Manuals
213-390-229 (1993) Tiller View Diagrams & Manuals
213-390-134 (1993) Tiller View Diagrams & Manuals
213-390-138 (1993) Tiller View Diagrams & Manuals
213-390-729 (1993) Tiller View Diagrams & Manuals
213-390-929 (1993) Tiller View Diagrams & Manuals
213-390-129 (1993) Tiller View Diagrams & Manuals
213-390-151 (1993) Tiller View Diagrams & Manuals
213-390-206 (1993) Tiller View Diagrams & Manuals
213-390-308 (1993) Tiller View Diagrams & Manuals
213-390-033 (1993) Tiller View Diagrams & Manuals
213-390-019 (1993) Tiller View Diagrams & Manuals
213-390-057 (1993) Tiller View Diagrams & Manuals
213-390-118 (1993) Tiller View Diagrams & Manuals
213-390-131 (1993) Tiller View Diagrams & Manuals
213-390-022 (1993) Tiller View Diagrams & Manuals
213-390-722 (1993) Tiller View Diagrams & Manuals
213-390-002 (1993) Tiller View Diagrams & Manuals
213-390-715 (1993) Tiller View Diagrams & Manuals
213-390-077 (1993) Tiller View Diagrams & Manuals
213-390-977 (1993) Tiller View Diagrams & Manuals
213-390-777 (1993) Tiller View Diagrams & Manuals
213-390-724 (1993) Tiller View Diagrams & Manuals
213-390-016 (1993) Tiller View Diagrams & Manuals
213-390-145 (1993) Tiller View Diagrams & Manuals
213-390-196 (1993) Tiller View Diagrams & Manuals
213-390-719 (1993) Tiller View Diagrams & Manuals
214-340-304 (1994) Tiller View Diagrams & Manuals
214-340-401 (1994) Tiller View Diagrams & Manuals
214-340-720 (1994) Tiller View Diagrams & Manuals
214-340-730 (1994) Tiller View Diagrams & Manuals
214-340-301 (1994) Tiller View Diagrams & Manuals
214-340-709 (1994) Tiller View Diagrams & Manuals
214-340-371 (1994) Tiller View Diagrams & Manuals
214-340-307 (1994) Tiller View Diagrams & Manuals
214-340-513 (1994) Tiller View Diagrams & Manuals
214-340-713 (1994) Tiller View Diagrams & Manuals
214-340-382 (1994) Tiller View Diagrams & Manuals
214-340-121 (1994) Tiller View Diagrams & Manuals
214-340-205 (1994) Tiller View Diagrams & Manuals
214-340-705 (1994) Tiller View Diagrams & Manuals
214-340-706 (1994) Tiller View Diagrams & Manuals
214-340-026 (1994) Tiller View Diagrams & Manuals
214-340-726 (1994) Tiller View Diagrams & Manuals
214-340-054 (1994) Tiller View Diagrams & Manuals
214-340-745 (1994) Tiller View Diagrams & Manuals
214-340-754 (1994) Tiller View Diagrams & Manuals
214-340-704 (1994) Tiller View Diagrams & Manuals
214-340-029 (1994) Tiller View Diagrams & Manuals
214-340-229 (1994) Tiller View Diagrams & Manuals
214-340-134 (1994) Tiller View Diagrams & Manuals
214-340-138 (1994) Tiller View Diagrams & Manuals
214-340-729 (1994) Tiller View Diagrams & Manuals
214-340-929 (1994) Tiller View Diagrams & Manuals
214-340-151 (1994) Tiller View Diagrams & Manuals
214-340-206 (1994) Tiller View Diagrams & Manuals
214-340-308 (1994) Tiller View Diagrams & Manuals
214-340-033 (1994) Tiller View Diagrams & Manuals
214-340-019 (1994) Tiller View Diagrams & Manuals
214-340-057 (1994) Tiller View Diagrams & Manuals
214-340-118 (1994) Tiller View Diagrams & Manuals
214-340-131 (1994) Tiller View Diagrams & Manuals
214-340-022 (1994) Tiller View Diagrams & Manuals
214-340-722 (1994) Tiller View Diagrams & Manuals
214-340-002 (1994) Tiller View Diagrams & Manuals
214-340-715 (1994) Tiller View Diagrams & Manuals
214-340-077 (1994) Tiller View Diagrams & Manuals
214-340-977 (1994) Tiller View Diagrams & Manuals
214-340-777 (1994) Tiller View Diagrams & Manuals
214-340-724 (1994) Tiller View Diagrams & Manuals
214-340-105 (1994) Tiller View Diagrams & Manuals
214-340-009 (1994) Tiller View Diagrams & Manuals
214-340-016 (1994) Tiller View Diagrams & Manuals
214-340-145 (1994) Tiller View Diagrams & Manuals
214-340-196 (1994) Tiller View Diagrams & Manuals
214-340-719 (1994) Tiller View Diagrams & Manuals
214-340-098 (1994) Tiller View Diagrams & Manuals
214-390-304 (1994) Tiller View Diagrams & Manuals
214-390-372 (1994) Tiller View Diagrams & Manuals
214-390-401 (1994) Tiller View Diagrams & Manuals
214-390-720 (1994) Tiller View Diagrams & Manuals
214-390-730 (1994) Tiller View Diagrams & Manuals
214-390-301 (1994) Tiller View Diagrams & Manuals
214-390-709 (1994) Tiller View Diagrams & Manuals
214-390-371 (1994) Tiller View Diagrams & Manuals
214-390-307 (1994) Tiller View Diagrams & Manuals
214-390-513 (1994) Tiller View Diagrams & Manuals
214-390-713 (1994) Tiller View Diagrams & Manuals
214-390-382 (1994) Tiller View Diagrams & Manuals
214-390-121 (1994) Tiller View Diagrams & Manuals
214-390-205 (1994) Tiller View Diagrams & Manuals
214-390-705 (1994) Tiller View Diagrams & Manuals
214-390-706 (1994) Tiller View Diagrams & Manuals
214-390-026 (1994) Tiller View Diagrams & Manuals
214-390-726 (1994) Tiller View Diagrams & Manuals
214-390-054 (1994) Tiller View Diagrams & Manuals
214-390-745 (1994) Tiller View Diagrams & Manuals
214-390-754 (1994) Tiller View Diagrams & Manuals
214-390-704 (1994) Tiller View Diagrams & Manuals
214-390-029 (1994) Tiller View Diagrams & Manuals
214-390-229 (1994) Tiller View Diagrams & Manuals
214-390-134 (1994) Tiller View Diagrams & Manuals
214-390-138 (1994) Tiller View Diagrams & Manuals
214-390-729 (1994) Tiller View Diagrams & Manuals
214-390-929 (1994) Tiller View Diagrams & Manuals
214-390-129 (1994) Tiller View Diagrams & Manuals
214-390-151 (1994) Tiller View Diagrams & Manuals
214-390-206 (1994) Tiller View Diagrams & Manuals
214-390-308 (1994) Tiller View Diagrams & Manuals
214-390-033 (1994) Tiller View Diagrams & Manuals
214-390-019 (1994) Tiller View Diagrams & Manuals
214-390-057 (1994) Tiller View Diagrams & Manuals
214-390-118 (1994) Tiller View Diagrams & Manuals
214-390-131 (1994) Tiller View Diagrams & Manuals
214-390-022 (1994) Tiller View Diagrams & Manuals
214-390-722 (1994) Tiller View Diagrams & Manuals
214-390-002 (1994) Tiller View Diagrams & Manuals
214-390-715 (1994) Tiller View Diagrams & Manuals
214-390-077 (1994) Tiller View Diagrams & Manuals
214-390-977 (1994) Tiller View Diagrams & Manuals
214-390-777 (1994) Tiller View Diagrams & Manuals
214-390-724 (1994) Tiller View Diagrams & Manuals
214-390-105 (1994) Tiller View Diagrams & Manuals
214-390-009 (1994) Tiller View Diagrams & Manuals
214-390-016 (1994) Tiller View Diagrams & Manuals
214-390-145 (1994) Tiller View Diagrams & Manuals
214-390-196 (1994) Tiller View Diagrams & Manuals
214-390-719 (1994) Tiller View Diagrams & Manuals
214-390-098 (1994) Tiller View Diagrams & Manuals
215-340-304 (1995) Tiller View Diagrams & Manuals
215-340-401 (1995) Tiller View Diagrams & Manuals
215-340-720 (1995) Tiller View Diagrams & Manuals
215-340-730 (1995) Tiller View Diagrams & Manuals
215-340-301 (1995) Tiller View Diagrams & Manuals
215-340-709 (1995) Tiller View Diagrams & Manuals
215-340-371 (1995) Tiller View Diagrams & Manuals
215-340-307 (1995) Tiller View Diagrams & Manuals
215-340-513 (1995) Tiller View Diagrams & Manuals
215-340-713 (1995) Tiller View Diagrams & Manuals
215-340-382 (1995) Tiller View Diagrams & Manuals
215-340-121 (1995) Tiller View Diagrams & Manuals
215-340-205 (1995) Tiller View Diagrams & Manuals
215-340-705 (1995) Tiller View Diagrams & Manuals
215-340-706 (1995) Tiller View Diagrams & Manuals
215-340-026 (1995) Tiller View Diagrams & Manuals
215-340-726 (1995) Tiller View Diagrams & Manuals
215-340-054 (1995) Tiller View Diagrams & Manuals
215-340-745 (1995) Tiller View Diagrams & Manuals
215-340-754 (1995) Tiller View Diagrams & Manuals
215-340-704 (1995) Tiller View Diagrams & Manuals
215-340-029 (1995) Tiller View Diagrams & Manuals
215-340-229 (1995) Tiller View Diagrams & Manuals
215-340-134 (1995) Tiller View Diagrams & Manuals
215-340-138 (1995) Tiller View Diagrams & Manuals
215-340-729 (1995) Tiller View Diagrams & Manuals
215-340-929 (1995) Tiller View Diagrams & Manuals
215-340-129 (1995) Tiller View Diagrams & Manuals
215-340-151 (1995) Tiller View Diagrams & Manuals
215-340-206 (1995) Tiller View Diagrams & Manuals
215-340-308 (1995) Tiller View Diagrams & Manuals
215-340-033 (1995) Tiller View Diagrams & Manuals
215-340-019 (1995) Tiller View Diagrams & Manuals
215-340-057 (1995) Tiller View Diagrams & Manuals
215-340-118 (1995) Tiller View Diagrams & Manuals
215-340-131 (1995) Tiller View Diagrams & Manuals
215-340-022 (1995) Tiller View Diagrams & Manuals
215-340-722 (1995) Tiller View Diagrams & Manuals
215-340-002 (1995) Tiller View Diagrams & Manuals
215-340-715 (1995) Tiller View Diagrams & Manuals
215-340-077 (1995) Tiller View Diagrams & Manuals
215-340-977 (1995) Tiller View Diagrams & Manuals
215-340-777 (1995) Tiller View Diagrams & Manuals
215-340-724 (1995) Tiller View Diagrams & Manuals
215-340-105 (1995) Tiller View Diagrams & Manuals
215-340-009 (1995) Tiller View Diagrams & Manuals
215-340-016 (1995) Tiller View Diagrams & Manuals
215-340-145 (1995) Tiller View Diagrams & Manuals
215-340-196 (1995) Tiller View Diagrams & Manuals
215-340-719 (1995) Tiller View Diagrams & Manuals
215-340-098 (1995) Tiller View Diagrams & Manuals
215-390-304 (1995) Tiller View Diagrams & Manuals
215-390-372 (1995) Tiller View Diagrams & Manuals
215-390-401 (1995) Tiller View Diagrams & Manuals
215-390-720 (1995) Tiller View Diagrams & Manuals
215-390-730 (1995) Tiller View Diagrams & Manuals
215-390-301 (1995) Tiller View Diagrams & Manuals
215-390-709 (1995) Tiller View Diagrams & Manuals
215-390-371 (1995) Tiller View Diagrams & Manuals
215-390-307 (1995) Tiller View Diagrams & Manuals
215-390-513 (1995) Tiller View Diagrams & Manuals
215-390-713 (1995) Tiller View Diagrams & Manuals
215-390-382 (1995) Tiller View Diagrams & Manuals
215-390-121 (1995) Tiller View Diagrams & Manuals
215-390-205 (1995) Tiller View Diagrams & Manuals
215-390-705 (1995) Tiller View Diagrams & Manuals
215-390-706 (1995) Tiller View Diagrams & Manuals
215-390-026 (1995) Tiller View Diagrams & Manuals
215-390-726 (1995) Tiller View Diagrams & Manuals
215-390-054 (1995) Tiller View Diagrams & Manuals
215-390-745 (1995) Tiller View Diagrams & Manuals
215-390-754 (1995) Tiller View Diagrams & Manuals
215-390-704 (1995) Tiller View Diagrams & Manuals
215-390-029 (1995) Tiller View Diagrams & Manuals
215-390-229 (1995) Tiller View Diagrams & Manuals
215-390-134 (1995) Tiller View Diagrams & Manuals
215-390-138 (1995) Tiller View Diagrams & Manuals
215-390-729 (1995) Tiller View Diagrams & Manuals
215-390-929 (1995) Tiller View Diagrams & Manuals
215-390-129 (1995) Tiller View Diagrams & Manuals
215-390-151 (1995) Tiller View Diagrams & Manuals
215-390-206 (1995) Tiller View Diagrams & Manuals
215-390-308 (1995) Tiller View Diagrams & Manuals
215-390-033 (1995) Tiller View Diagrams & Manuals
215-390-019 (1995) Tiller View Diagrams & Manuals
215-390-057 (1995) Tiller View Diagrams & Manuals
215-390-118 (1995) Tiller View Diagrams & Manuals
215-390-131 (1995) Tiller View Diagrams & Manuals
215-390-022 (1995) Tiller View Diagrams & Manuals
215-390-722 (1995) Tiller View Diagrams & Manuals
215-390-002 (1995) Tiller View Diagrams & Manuals
215-390-715 (1995) Tiller View Diagrams & Manuals
215-390-077 (1995) Tiller View Diagrams & Manuals
215-390-977 (1995) Tiller View Diagrams & Manuals
215-390-777 (1995) Tiller View Diagrams & Manuals
215-390-724 (1995) Tiller View Diagrams & Manuals
215-390-105 (1995) Tiller View Diagrams & Manuals
215-390-009 (1995) Tiller View Diagrams & Manuals
215-390-016 (1995) Tiller View Diagrams & Manuals
215-390-145 (1995) Tiller View Diagrams & Manuals
215-390-196 (1995) Tiller View Diagrams & Manuals
215-390-719 (1995) Tiller View Diagrams & Manuals
215-390-098 (1995) Tiller View Diagrams & Manuals
250-586-304 (93930) (1990) Edger View Diagrams & Manuals
250-586-372 (93930) (1990) Edger View Diagrams & Manuals
250-586-401 (93930) (1990) Edger View Diagrams & Manuals
250-586-720 (93930) (1990) Edger View Diagrams & Manuals
250-586-730 (93930) (1990) Edger View Diagrams & Manuals
250-586-301 (93930) (1990) Edger View Diagrams & Manuals
250-586-709 (93930) (1990) Edger View Diagrams & Manuals
250-586-371 (93930) (1990) Edger View Diagrams & Manuals
250-586-307 (93930) (1990) Edger View Diagrams & Manuals
250-586-513 (93930) (1990) Edger View Diagrams & Manuals
250-586-713 (93930) (1990) Edger View Diagrams & Manuals
250-586-382 (93930) (1990) Edger View Diagrams & Manuals
250-586-000 (93930) (1990) Edger View Diagrams & Manuals
250-586-121 (93930) (1990) Edger View Diagrams & Manuals
250-586-205 (93930) (1990) Edger View Diagrams & Manuals
250-586-705 (93930) (1990) Edger View Diagrams & Manuals
250-586-706 (93930) (1990) Edger View Diagrams & Manuals
250-586-026 (93930) (1990) Edger View Diagrams & Manuals
250-586-726 (93930) (1990) Edger View Diagrams & Manuals
250-586-054 (93930) (1990) Edger View Diagrams & Manuals
250-586-745 (93930) (1990) Edger View Diagrams & Manuals
250-586-754 (93930) (1990) Edger View Diagrams & Manuals
250-586-704 (93930) (1990) Edger View Diagrams & Manuals
250-586-029 (93930) (1990) Edger View Diagrams & Manuals
250-586-229 (93930) (1990) Edger View Diagrams & Manuals
250-586-134 (93930) (1990) Edger View Diagrams & Manuals
250-586-729 (93930) (1990) Edger View Diagrams & Manuals
250-586-929 (93930) (1990) Edger View Diagrams & Manuals
250-586-129 (93930) (1990) Edger View Diagrams & Manuals
250-586-151 (93930) (1990) Edger View Diagrams & Manuals
250-586-308 (93930) (1990) Edger View Diagrams & Manuals
250-586-033 (93930) (1990) Edger View Diagrams & Manuals
250-586-019 (93930) (1990) Edger View Diagrams & Manuals
250-586-057 (93930) (1990) Edger View Diagrams & Manuals
250-586-118 (93930) (1990) Edger View Diagrams & Manuals
250-586-131 (93930) (1990) Edger View Diagrams & Manuals
250-586-022 (93930) (1990) Edger View Diagrams & Manuals
250-586-722 (93930) (1990) Edger View Diagrams & Manuals
250-586-002 (93930) (1990) Edger View Diagrams & Manuals
250-586-715 (93930) (1990) Edger View Diagrams & Manuals
250-586-077 (93930) (1990) Edger View Diagrams & Manuals
250-586-977 (93930) (1990) Edger View Diagrams & Manuals
250-586-777 (93930) (1990) Edger View Diagrams & Manuals
250-586-724 (93930) (1990) Edger View Diagrams & Manuals
250-586-009 (93930) (1990) Edger View Diagrams & Manuals
250-586-016 (93930) (1990) Edger View Diagrams & Manuals
250-586-145 (93930) (1990) Edger View Diagrams & Manuals
250-586-196 (93930) (1990) Edger View Diagrams & Manuals
250-586-719 (93930) (1990) Edger View Diagrams & Manuals
250-586-098 (93930) (1990) Edger View Diagrams & Manuals
240-586-304 (1990) Edger View Diagrams & Manuals
240-586-372 (1990) Edger View Diagrams & Manuals
240-586-401 (1990) Edger View Diagrams & Manuals
240-586-720 (1990) Edger View Diagrams & Manuals
240-586-730 (1990) Edger View Diagrams & Manuals
240-586-301 (1990) Edger View Diagrams & Manuals
240-586-709 (1990) Edger View Diagrams & Manuals
240-586-371 (1990) Edger View Diagrams & Manuals
240-586-307 (1990) Edger View Diagrams & Manuals
240-586-513 (1990) Edger View Diagrams & Manuals
240-586-713 (1990) Edger View Diagrams & Manuals
240-586-382 (1990) Edger View Diagrams & Manuals
240-586-121 (1990) Edger View Diagrams & Manuals
240-586-205 (1990) Edger View Diagrams & Manuals
240-586-705 (1990) Edger View Diagrams & Manuals
240-586-706 (1990) Edger View Diagrams & Manuals
240-586-026 (1990) Edger View Diagrams & Manuals
240-586-726 (1990) Edger View Diagrams & Manuals
240-586-054 (1990) Edger View Diagrams & Manuals
240-586-745 (1990) Edger View Diagrams & Manuals
240-586-754 (1990) Edger View Diagrams & Manuals
240-586-704 (1990) Edger View Diagrams & Manuals
240-586-029 (1990) Edger View Diagrams & Manuals
240-586-229 (1990) Edger View Diagrams & Manuals
240-586-134 (1990) Edger View Diagrams & Manuals
240-586-138 (1990) Edger View Diagrams & Manuals
240-586-729 (1990) Edger View Diagrams & Manuals
240-586-929 (1990) Edger View Diagrams & Manuals
240-586-129 (1990) Edger View Diagrams & Manuals
240-586-151 (1990) Edger View Diagrams & Manuals
240-586-206 (1990) Edger View Diagrams & Manuals
240-586-308 (1990) Edger View Diagrams & Manuals
240-586-019 (1990) Edger View Diagrams & Manuals
240-586-057 (1990) Edger View Diagrams & Manuals
240-586-118 (1990) Edger View Diagrams & Manuals
240-586-131 (1990) Edger View Diagrams & Manuals
240-586-022 (1990) Edger View Diagrams & Manuals
240-586-722 (1990) Edger View Diagrams & Manuals
240-586-002 (1990) Edger View Diagrams & Manuals
240-586-715 (1990) Edger View Diagrams & Manuals
240-586-077 (1990) Edger View Diagrams & Manuals
240-586-977 (1990) Edger View Diagrams & Manuals
240-586-777 (1990) Edger View Diagrams & Manuals
240-586-724 (1990) Edger View Diagrams & Manuals
240-586-105 (1990) Edger View Diagrams & Manuals
240-586-009 (1990) Edger View Diagrams & Manuals
240-586-016 (1990) Edger View Diagrams & Manuals
240-586-145 (1990) Edger View Diagrams & Manuals
240-586-196 (1990) Edger View Diagrams & Manuals
240-586-719 (1990) Edger View Diagrams & Manuals
13AA625P304 (2009) Lawn Tractor View Diagrams & Manuals
13AA625P372 (2009) Lawn Tractor View Diagrams & Manuals
13AA625P401 (2009) Lawn Tractor View Diagrams & Manuals
13AA625P720 (2009) Lawn Tractor View Diagrams & Manuals
13AA625P730 (2009) Lawn Tractor View Diagrams & Manuals
13AA625P301 (2009) Lawn Tractor View Diagrams & Manuals
13AA625P709 (2009) Lawn Tractor View Diagrams & Manuals
13AA625P371 (2009) Lawn Tractor View Diagrams & Manuals
13AA625P307 (2009) Lawn Tractor View Diagrams & Manuals
13AA625P513 (2009) Lawn Tractor View Diagrams & Manuals
13AA625P713 (2009) Lawn Tractor View Diagrams & Manuals
13AA625P382 (2009) Lawn Tractor View Diagrams & Manuals
13AA625P000 (2009) Lawn Tractor View Diagrams & Manuals
13AA625P121 (2009) Lawn Tractor View Diagrams & Manuals
13AA625P205 (2009) Lawn Tractor View Diagrams & Manuals
13AA625P705 (2009) Lawn Tractor View Diagrams & Manuals
13AA625P706 (2009) Lawn Tractor View Diagrams & Manuals
13AA625P026 (2009) Lawn Tractor View Diagrams & Manuals
13AA625P726 (2009) Lawn Tractor View Diagrams & Manuals
13AA625P054 (2009) Lawn Tractor View Diagrams & Manuals
13AA625P745 (2009) Lawn Tractor View Diagrams & Manuals
13AA625P754 (2009) Lawn Tractor View Diagrams & Manuals
13AA625P704 (2009) Lawn Tractor View Diagrams & Manuals
13AA625P029 (2009) Lawn Tractor View Diagrams & Manuals
13AA625P229 (2009) Lawn Tractor View Diagrams & Manuals
13AA625P134 (2009) Lawn Tractor View Diagrams & Manuals
13AA625P138 (2009) Lawn Tractor View Diagrams & Manuals
13AA625P729 (2009) Lawn Tractor View Diagrams & Manuals
13AA625P929 (2009) Lawn Tractor View Diagrams & Manuals
13AA625P129 (2009) Lawn Tractor View Diagrams & Manuals
13AA625P151 (2009) Lawn Tractor View Diagrams & Manuals
13AA625P206 (2009) Lawn Tractor View Diagrams & Manuals
13AA625P308 (2009) Lawn Tractor View Diagrams & Manuals
13AA625P033 (2009) Lawn Tractor View Diagrams & Manuals
13AA625P019 (2009) Lawn Tractor View Diagrams & Manuals
13AA625P057 (2009) Lawn Tractor View Diagrams & Manuals
13AA625P118 (2009) Lawn Tractor View Diagrams & Manuals
13AA625P131 (2009) Lawn Tractor View Diagrams & Manuals
13AA625P022 (2009) Lawn Tractor View Diagrams & Manuals
13AA625P722 (2009) Lawn Tractor View Diagrams & Manuals
13AA625P002 (2009) Lawn Tractor View Diagrams & Manuals
13AA625P715 (2009) Lawn Tractor View Diagrams & Manuals
13AA625P077 (2009) Lawn Tractor View Diagrams & Manuals
13AA625P977 (2009) Lawn Tractor View Diagrams & Manuals
13AA625P777 (2009) Lawn Tractor View Diagrams & Manuals
13AA625P724 (2009) Lawn Tractor View Diagrams & Manuals
13AA625P105 (2009) Lawn Tractor View Diagrams & Manuals
13AA625P009 (2009) Lawn Tractor View Diagrams & Manuals
13AA625P016 (2009) Lawn Tractor View Diagrams & Manuals
13AA625P145 (2009) Lawn Tractor View Diagrams & Manuals
13AA625P196 (2009) Lawn Tractor View Diagrams & Manuals
13AA625P719 (2009) Lawn Tractor View Diagrams & Manuals
13AA625P098 (2009) Lawn Tractor View Diagrams & Manuals
13AJ771G304 (2009) Lawn Tractor View Diagrams & Manuals
13AJ771G372 (2009) Lawn Tractor View Diagrams & Manuals
13AJ771G401 (2009) Lawn Tractor View Diagrams & Manuals
13AJ771G720 (2009) Lawn Tractor View Diagrams & Manuals
13AJ771G730 (2009) Lawn Tractor View Diagrams & Manuals
13AJ771G301 (2009) Lawn Tractor View Diagrams & Manuals
13AJ771G709 (2009) Lawn Tractor View Diagrams & Manuals
13AJ771G371 (2009) Lawn Tractor View Diagrams & Manuals
13AJ771G307 (2009) Lawn Tractor View Diagrams & Manuals
13AJ771G513 (2009) Lawn Tractor View Diagrams & Manuals
13AJ771G713 (2009) Lawn Tractor View Diagrams & Manuals
13AJ771G382 (2009) Lawn Tractor View Diagrams & Manuals
13AJ771G000 (2009) Lawn Tractor View Diagrams & Manuals
13AJ771G121 (2009) Lawn Tractor View Diagrams & Manuals
13AJ771G205 (2009) Lawn Tractor View Diagrams & Manuals
13AJ771G705 (2009) Lawn Tractor View Diagrams & Manuals
13AJ771G706 (2009) Lawn Tractor View Diagrams & Manuals
13AJ771G026 (2009) Lawn Tractor View Diagrams & Manuals
13AJ771G726 (2009) Lawn Tractor View Diagrams & Manuals
13AJ771G054 (2009) Lawn Tractor View Diagrams & Manuals
13AJ771G745 (2009) Lawn Tractor View Diagrams & Manuals
13AJ771G754 (2009) Lawn Tractor View Diagrams & Manuals
13AJ771G704 (2009) Lawn Tractor View Diagrams & Manuals
13AJ771G029 (2009) Lawn Tractor View Diagrams & Manuals
13AJ771G229 (2009) Lawn Tractor View Diagrams & Manuals
13AJ771G134 (2009) Lawn Tractor View Diagrams & Manuals
13AJ771G138 (2009) Lawn Tractor View Diagrams & Manuals
13AJ771G729 (2009) Lawn Tractor View Diagrams & Manuals
13AJ771G929 (2009) Lawn Tractor View Diagrams & Manuals
13AJ771G129 (2009) Lawn Tractor View Diagrams & Manuals
13AJ771G151 (2009) Lawn Tractor View Diagrams & Manuals
13AJ771G206 (2009) Lawn Tractor View Diagrams & Manuals
13AJ771G308 (2009) Lawn Tractor View Diagrams & Manuals
13AJ771G033 (2009) Lawn Tractor View Diagrams & Manuals
13AJ771G019 (2009) Lawn Tractor View Diagrams & Manuals
13AJ771G057 (2009) Lawn Tractor View Diagrams & Manuals
13AJ771G118 (2009) Lawn Tractor View Diagrams & Manuals
13AJ771G131 (2009) Lawn Tractor View Diagrams & Manuals
13AJ771G022 (2009) Lawn Tractor View Diagrams & Manuals
13AJ771G722 (2009) Lawn Tractor View Diagrams & Manuals
13AJ771G002 (2009) Lawn Tractor View Diagrams & Manuals
13AJ771G715 (2009) Lawn Tractor View Diagrams & Manuals
13AJ771G077 (2009) Lawn Tractor View Diagrams & Manuals
13AJ771G977 (2009) Lawn Tractor View Diagrams & Manuals
13AJ771G777 (2009) Lawn Tractor View Diagrams & Manuals
13AJ771G724 (2009) Lawn Tractor View Diagrams & Manuals
13AJ771G105 (2009) Lawn Tractor View Diagrams & Manuals
13AJ771G009 (2009) Lawn Tractor View Diagrams & Manuals
13AJ771G016 (2009) Lawn Tractor View Diagrams & Manuals
13AJ771G145 (2009) Lawn Tractor View Diagrams & Manuals
13AJ771G196 (2009) Lawn Tractor View Diagrams & Manuals
13AJ771G719 (2009) Lawn Tractor View Diagrams & Manuals
13AJ771G098 (2009) Lawn Tractor View Diagrams & Manuals
13AJ795G304 (2009) Lawn Tractor View Diagrams & Manuals
13AJ795G372 (2009) Lawn Tractor View Diagrams & Manuals
13AJ795G401 (2009) Lawn Tractor View Diagrams & Manuals
13AJ795G720 (2009) Lawn Tractor View Diagrams & Manuals
13AJ795G730 (2009) Lawn Tractor View Diagrams & Manuals
13AJ795G301 (2009) Lawn Tractor View Diagrams & Manuals
13AJ795G709 (2009) Lawn Tractor View Diagrams & Manuals
13AJ795G371 (2009) Lawn Tractor View Diagrams & Manuals
13AJ795G307 (2009) Lawn Tractor View Diagrams & Manuals
13AJ795G513 (2009) Lawn Tractor View Diagrams & Manuals
13AJ795G713 (2009) Lawn Tractor View Diagrams & Manuals
13AJ795G382 (2009) Lawn Tractor View Diagrams & Manuals
13AJ795G000 (2009) Lawn Tractor View Diagrams & Manuals
13AJ795G121 (2009) Lawn Tractor View Diagrams & Manuals
13AJ795G205 (2009) Lawn Tractor View Diagrams & Manuals
13AJ795G705 (2009) Lawn Tractor View Diagrams & Manuals
13AJ795G706 (2009) Lawn Tractor View Diagrams & Manuals
13AJ795G026 (2009) Lawn Tractor View Diagrams & Manuals
13AJ795G726 (2009) Lawn Tractor View Diagrams & Manuals
13AJ795G054 (2009) Lawn Tractor View Diagrams & Manuals
13AJ795G745 (2009) Lawn Tractor View Diagrams & Manuals
13AJ795G754 (2009) Lawn Tractor View Diagrams & Manuals
13AJ795G704 (2009) Lawn Tractor View Diagrams & Manuals
13AJ795G029 (2009) Lawn Tractor View Diagrams & Manuals
13AJ795G229 (2009) Lawn Tractor View Diagrams & Manuals
13AJ795G134 (2009) Lawn Tractor View Diagrams & Manuals
13AJ795G138 (2009) Lawn Tractor View Diagrams & Manuals
13AJ795G729 (2009) Lawn Tractor View Diagrams & Manuals
13AJ795G929 (2009) Lawn Tractor View Diagrams & Manuals
13AJ795G129 (2009) Lawn Tractor View Diagrams & Manuals
13AJ795G151 (2009) Lawn Tractor View Diagrams & Manuals
13AJ795G206 (2009) Lawn Tractor View Diagrams & Manuals
13AJ795G308 (2009) Lawn Tractor View Diagrams & Manuals
13AJ795G033 (2009) Lawn Tractor View Diagrams & Manuals
13AJ795G019 (2009) Lawn Tractor View Diagrams & Manuals
13AJ795G057 (2009) Lawn Tractor View Diagrams & Manuals
13AJ795G118 (2009) Lawn Tractor View Diagrams & Manuals
13AJ795G131 (2009) Lawn Tractor View Diagrams & Manuals
13AJ795G022 (2009) Lawn Tractor View Diagrams & Manuals
13AJ795G722 (2009) Lawn Tractor View Diagrams & Manuals
13AJ795G002 (2009) Lawn Tractor View Diagrams & Manuals
13AJ795G715 (2009) Lawn Tractor View Diagrams & Manuals
13AJ795G077 (2009) Lawn Tractor View Diagrams & Manuals
13AJ795G977 (2009) Lawn Tractor View Diagrams & Manuals
13AJ795G777 (2009) Lawn Tractor View Diagrams & Manuals
13AJ795G724 (2009) Lawn Tractor View Diagrams & Manuals
13AJ795G105 (2009) Lawn Tractor View Diagrams & Manuals
13AJ795G009 (2009) Lawn Tractor View Diagrams & Manuals
13AJ795G016 (2009) Lawn Tractor View Diagrams & Manuals
13AJ795G145 (2009) Lawn Tractor View Diagrams & Manuals
13AJ795G196 (2009) Lawn Tractor View Diagrams & Manuals
13AJ795G719 (2009) Lawn Tractor View Diagrams & Manuals
13AJ795G098 (2009) Lawn Tractor View Diagrams & Manuals
13AL771H304 (2009) Lawn Tractor View Diagrams & Manuals
13AL771H372 (2009) Lawn Tractor View Diagrams & Manuals
13AL771H401 (2009) Lawn Tractor View Diagrams & Manuals
13AL771H720 (2009) Lawn Tractor View Diagrams & Manuals
13AL771H730 (2009) Lawn Tractor View Diagrams & Manuals
13AL771H301 (2009) Lawn Tractor View Diagrams & Manuals
13AL771H709 (2009) Lawn Tractor View Diagrams & Manuals
13AL771H371 (2009) Lawn Tractor View Diagrams & Manuals
13AL771H307 (2009) Lawn Tractor View Diagrams & Manuals
13AL771H513 (2009) Lawn Tractor View Diagrams & Manuals
13AL771H713 (2009) Lawn Tractor View Diagrams & Manuals
13AL771H382 (2009) Lawn Tractor View Diagrams & Manuals
13AL771H000 (2009) Lawn Tractor View Diagrams & Manuals
13AL771H121 (2009) Lawn Tractor View Diagrams & Manuals
13AL771H205 (2009) Lawn Tractor View Diagrams & Manuals
13AL771H705 (2009) Lawn Tractor View Diagrams & Manuals
13AL771H706 (2009) Lawn Tractor View Diagrams & Manuals
13AL771H026 (2009) Lawn Tractor View Diagrams & Manuals
13AL771H726 (2009) Lawn Tractor View Diagrams & Manuals
13AL771H054 (2009) Lawn Tractor View Diagrams & Manuals
13AL771H745 (2009) Lawn Tractor View Diagrams & Manuals
13AL771H754 (2009) Lawn Tractor View Diagrams & Manuals
13AL771H704 (2009) Lawn Tractor View Diagrams & Manuals
13AL771H029 (2009) Lawn Tractor View Diagrams & Manuals
13AL771H229 (2009) Lawn Tractor View Diagrams & Manuals
13AL771H134 (2009) Lawn Tractor View Diagrams & Manuals
13AL771H138 (2009) Lawn Tractor View Diagrams & Manuals
13AL771H729 (2009) Lawn Tractor View Diagrams & Manuals
13AL771H929 (2009) Lawn Tractor View Diagrams & Manuals
13AL771H129 (2009) Lawn Tractor View Diagrams & Manuals
13AL771H151 (2009) Lawn Tractor View Diagrams & Manuals
13AL771H206 (2009) Lawn Tractor View Diagrams & Manuals
13AL771H308 (2009) Lawn Tractor View Diagrams & Manuals
13AL771H033 (2009) Lawn Tractor View Diagrams & Manuals
13AL771H019 (2009) Lawn Tractor View Diagrams & Manuals
13AL771H057 (2009) Lawn Tractor View Diagrams & Manuals
13AL771H118 (2009) Lawn Tractor View Diagrams & Manuals
13AL771H131 (2009) Lawn Tractor View Diagrams & Manuals
13AL771H022 (2009) Lawn Tractor View Diagrams & Manuals
13AL771H722 (2009) Lawn Tractor View Diagrams & Manuals
13AL771H002 (2009) Lawn Tractor View Diagrams & Manuals
13AL771H715 (2009) Lawn Tractor View Diagrams & Manuals
13AL771H077 (2009) Lawn Tractor View Diagrams & Manuals
13AL771H977 (2009) Lawn Tractor View Diagrams & Manuals
13AL771H777 (2009) Lawn Tractor View Diagrams & Manuals
13AL771H724 (2009) Lawn Tractor View Diagrams & Manuals
13AL771H105 (2009) Lawn Tractor View Diagrams & Manuals
13AL771H009 (2009) Lawn Tractor View Diagrams & Manuals
13AL771H016 (2009) Lawn Tractor View Diagrams & Manuals
13AL771H145 (2009) Lawn Tractor View Diagrams & Manuals
13AL771H196 (2009) Lawn Tractor View Diagrams & Manuals
13AL771H719 (2009) Lawn Tractor View Diagrams & Manuals
13AL771H098 (2009) Lawn Tractor View Diagrams & Manuals
13AL795H304 (2009) Lawn Tractor View Diagrams & Manuals
13AL795H372 (2009) Lawn Tractor View Diagrams & Manuals
13AL795H401 (2009) Lawn Tractor View Diagrams & Manuals
13AL795H720 (2009) Lawn Tractor View Diagrams & Manuals
13AL795H730 (2009) Lawn Tractor View Diagrams & Manuals
13AL795H301 (2009) Lawn Tractor View Diagrams & Manuals
13AL795H709 (2009) Lawn Tractor View Diagrams & Manuals
13AL795H371 (2009) Lawn Tractor View Diagrams & Manuals
13AL795H307 (2009) Lawn Tractor View Diagrams & Manuals
13AL795H513 (2009) Lawn Tractor View Diagrams & Manuals
13AL795H713 (2009) Lawn Tractor View Diagrams & Manuals
13AL795H382 (2009) Lawn Tractor View Diagrams & Manuals
13AL795H000 (2009) Lawn Tractor View Diagrams & Manuals
13AL795H121 (2009) Lawn Tractor View Diagrams & Manuals
13AL795H205 (2009) Lawn Tractor View Diagrams & Manuals
13AL795H705 (2009) Lawn Tractor View Diagrams & Manuals
13AL795H706 (2009) Lawn Tractor View Diagrams & Manuals
13AL795H026 (2009) Lawn Tractor View Diagrams & Manuals
13AL795H726 (2009) Lawn Tractor View Diagrams & Manuals
13AL795H054 (2009) Lawn Tractor View Diagrams & Manuals
13AL795H745 (2009) Lawn Tractor View Diagrams & Manuals
13AL795H754 (2009) Lawn Tractor View Diagrams & Manuals
13AL795H704 (2009) Lawn Tractor View Diagrams & Manuals
13AL795H029 (2009) Lawn Tractor View Diagrams & Manuals
13AL795H229 (2009) Lawn Tractor View Diagrams & Manuals
13AL795H134 (2009) Lawn Tractor View Diagrams & Manuals
13AL795H138 (2009) Lawn Tractor View Diagrams & Manuals
13AL795H729 (2009) Lawn Tractor View Diagrams & Manuals
13AL795H929 (2009) Lawn Tractor View Diagrams & Manuals
13AL795H129 (2009) Lawn Tractor View Diagrams & Manuals
13AL795H151 (2009) Lawn Tractor View Diagrams & Manuals
13AL795H206 (2009) Lawn Tractor View Diagrams & Manuals
13AL795H308 (2009) Lawn Tractor View Diagrams & Manuals
13AL795H033 (2009) Lawn Tractor View Diagrams & Manuals
13AL795H019 (2009) Lawn Tractor View Diagrams & Manuals
13AL795H057 (2009) Lawn Tractor View Diagrams & Manuals
13AL795H118 (2009) Lawn Tractor View Diagrams & Manuals
13AL795H131 (2009) Lawn Tractor View Diagrams & Manuals
13AL795H022 (2009) Lawn Tractor View Diagrams & Manuals
13AL795H722 (2009) Lawn Tractor View Diagrams & Manuals
13AL795H002 (2009) Lawn Tractor View Diagrams & Manuals
13AL795H715 (2009) Lawn Tractor View Diagrams & Manuals
13AL795H077 (2009) Lawn Tractor View Diagrams & Manuals
13AL795H977 (2009) Lawn Tractor View Diagrams & Manuals
13AL795H777 (2009) Lawn Tractor View Diagrams & Manuals
13AL795H724 (2009) Lawn Tractor View Diagrams & Manuals
13AL795H105 (2009) Lawn Tractor View Diagrams & Manuals
13AL795H009 (2009) Lawn Tractor View Diagrams & Manuals
13AL795H016 (2009) Lawn Tractor View Diagrams & Manuals
13AL795H145 (2009) Lawn Tractor View Diagrams & Manuals
13AL795H196 (2009) Lawn Tractor View Diagrams & Manuals
13AL795H719 (2009) Lawn Tractor View Diagrams & Manuals
13AL795H098 (2009) Lawn Tractor View Diagrams & Manuals
316E610E304 (1996) Snowblower View Diagrams & Manuals
316E610E372 (1996) Snowblower View Diagrams & Manuals
316E610E401 (1996) Snowblower View Diagrams & Manuals
316E610E720 (1996) Snowblower View Diagrams & Manuals
316E610E730 (1996) Snowblower View Diagrams & Manuals
316E610E301 (1996) Snowblower View Diagrams & Manuals
316E610E709 (1996) Snowblower View Diagrams & Manuals
316E610E371 (1996) Snowblower View Diagrams & Manuals
316E610E307 (1996) Snowblower View Diagrams & Manuals
316E610E513 (1996) Snowblower View Diagrams & Manuals
316E610E713 (1996) Snowblower View Diagrams & Manuals
316E610E000 (1996) Snowblower View Diagrams & Manuals
316E610E121 (1996) Snowblower View Diagrams & Manuals
316E610E205 (1996) Snowblower View Diagrams & Manuals
316E610E705 (1996) Snowblower View Diagrams & Manuals
316E610E706 (1996) Snowblower View Diagrams & Manuals
316E610E026 (1996) Snowblower View Diagrams & Manuals
316E610E726 (1996) Snowblower View Diagrams & Manuals
316E610E054 (1996) Snowblower View Diagrams & Manuals
316E610E745 (1996) Snowblower View Diagrams & Manuals
316E610E754 (1996) Snowblower View Diagrams & Manuals
316E610E704 (1996) Snowblower View Diagrams & Manuals
316E610E029 (1996) Snowblower View Diagrams & Manuals
316E610E229 (1996) Snowblower View Diagrams & Manuals
316E610E134 (1996) Snowblower View Diagrams & Manuals
316E610E138 (1996) Snowblower View Diagrams & Manuals
316E610E729 (1996) Snowblower View Diagrams & Manuals
316E610E929 (1996) Snowblower View Diagrams & Manuals
316E610E129 (1996) Snowblower View Diagrams & Manuals
316E610E151 (1996) Snowblower View Diagrams & Manuals
316E610E206 (1996) Snowblower View Diagrams & Manuals
316E610E308 (1996) Snowblower View Diagrams & Manuals
316E610E033 (1996) Snowblower View Diagrams & Manuals
316E610E019 (1996) Snowblower View Diagrams & Manuals
316E610E057 (1996) Snowblower View Diagrams & Manuals
316E610E118 (1996) Snowblower View Diagrams & Manuals
316E610E131 (1996) Snowblower View Diagrams & Manuals
316E610E022 (1996) Snowblower View Diagrams & Manuals
316E610E722 (1996) Snowblower View Diagrams & Manuals
316E610E002 (1996) Snowblower View Diagrams & Manuals
316E610E715 (1996) Snowblower View Diagrams & Manuals
316E610E077 (1996) Snowblower View Diagrams & Manuals
316E610E977 (1996) Snowblower View Diagrams & Manuals
316E610E777 (1996) Snowblower View Diagrams & Manuals
316E610E724 (1996) Snowblower View Diagrams & Manuals
316E610E105 (1996) Snowblower View Diagrams & Manuals
316E610E009 (1996) Snowblower View Diagrams & Manuals
316E610E016 (1996) Snowblower View Diagrams & Manuals
316E610E145 (1996) Snowblower View Diagrams & Manuals
316E610E196 (1996) Snowblower View Diagrams & Manuals
316E610E719 (1996) Snowblower View Diagrams & Manuals
316E610E098 (1996) Snowblower View Diagrams & Manuals
316E640F304 (1996) Snowblower View Diagrams & Manuals
316E640F372 (1996) Snowblower View Diagrams & Manuals
316E640F401 (1996) Snowblower View Diagrams & Manuals
316E640F720 (1996) Snowblower View Diagrams & Manuals
316E640F730 (1996) Snowblower View Diagrams & Manuals
316E640F301 (1996) Snowblower View Diagrams & Manuals
316E640F709 (1996) Snowblower View Diagrams & Manuals
316E640F371 (1996) Snowblower View Diagrams & Manuals
316E640F307 (1996) Snowblower View Diagrams & Manuals
316E640F513 (1996) Snowblower View Diagrams & Manuals
316E640F713 (1996) Snowblower View Diagrams & Manuals
316E640F000 (1996) Snowblower View Diagrams & Manuals
316E640F121 (1996) Snowblower View Diagrams & Manuals
316E640F205 (1996) Snowblower View Diagrams & Manuals
316E640F705 (1996) Snowblower View Diagrams & Manuals
316E640F706 (1996) Snowblower View Diagrams & Manuals
316E640F026 (1996) Snowblower View Diagrams & Manuals
316E640F726 (1996) Snowblower View Diagrams & Manuals
316E640F054 (1996) Snowblower View Diagrams & Manuals
316E640F745 (1996) Snowblower View Diagrams & Manuals
316E640F754 (1996) Snowblower View Diagrams & Manuals
316E640F704 (1996) Snowblower View Diagrams & Manuals
316E640F029 (1996) Snowblower View Diagrams & Manuals
316E640F229 (1996) Snowblower View Diagrams & Manuals
316E640F134 (1996) Snowblower View Diagrams & Manuals
316E640F138 (1996) Snowblower View Diagrams & Manuals
316E640F729 (1996) Snowblower View Diagrams & Manuals
316E640F929 (1996) Snowblower View Diagrams & Manuals
316E640F129 (1996) Snowblower View Diagrams & Manuals
316E640F151 (1996) Snowblower View Diagrams & Manuals
316E640F206 (1996) Snowblower View Diagrams & Manuals
316E640F308 (1996) Snowblower View Diagrams & Manuals
316E640F033 (1996) Snowblower View Diagrams & Manuals
316E640F019 (1996) Snowblower View Diagrams & Manuals
316E640F057 (1996) Snowblower View Diagrams & Manuals
316E640F118 (1996) Snowblower View Diagrams & Manuals
316E640F131 (1996) Snowblower View Diagrams & Manuals
316E640F022 (1996) Snowblower View Diagrams & Manuals
316E640F722 (1996) Snowblower View Diagrams & Manuals
316E640F002 (1996) Snowblower View Diagrams & Manuals
316E640F715 (1996) Snowblower View Diagrams & Manuals
316E640F077 (1996) Snowblower View Diagrams & Manuals
316E640F977 (1996) Snowblower View Diagrams & Manuals
316E640F777 (1996) Snowblower View Diagrams & Manuals
316E640F724 (1996) Snowblower View Diagrams & Manuals
316E640F105 (1996) Snowblower View Diagrams & Manuals
316E640F009 (1996) Snowblower View Diagrams & Manuals
316E640F016 (1996) Snowblower View Diagrams & Manuals
316E640F145 (1996) Snowblower View Diagrams & Manuals
316E640F196 (1996) Snowblower View Diagrams & Manuals
316E640F719 (1996) Snowblower View Diagrams & Manuals
316E640F098 (1996) Snowblower View Diagrams & Manuals
317E152-304 (1997) Snowblower View Diagrams & Manuals
317E152-372 (1997) Snowblower View Diagrams & Manuals
317E152-401 (1997) Snowblower View Diagrams & Manuals
317E152-720 (1997) Snowblower View Diagrams & Manuals
317E152-730 (1997) Snowblower View Diagrams & Manuals
317E152-301 (1997) Snowblower View Diagrams & Manuals
317E152-709 (1997) Snowblower View Diagrams & Manuals
317E152-371 (1997) Snowblower View Diagrams & Manuals
317E152-307 (1997) Snowblower View Diagrams & Manuals
317E152-513 (1997) Snowblower View Diagrams & Manuals
317E152-713 (1997) Snowblower View Diagrams & Manuals
317E152-000 (1997) Snowblower View Diagrams & Manuals
317E152-121 (1997) Snowblower View Diagrams & Manuals
317E152-205 (1997) Snowblower View Diagrams & Manuals
317E152-705 (1997) Snowblower View Diagrams & Manuals
317E152-706 (1997) Snowblower View Diagrams & Manuals
317E152-026 (1997) Snowblower View Diagrams & Manuals
317E152-726 (1997) Snowblower View Diagrams & Manuals
317E152-054 (1997) Snowblower View Diagrams & Manuals
317E152-745 (1997) Snowblower View Diagrams & Manuals
317E152-754 (1997) Snowblower View Diagrams & Manuals
317E152-704 (1997) Snowblower View Diagrams & Manuals
317E152-029 (1997) Snowblower View Diagrams & Manuals
317E152-229 (1997) Snowblower View Diagrams & Manuals
317E152-134 (1997) Snowblower View Diagrams & Manuals
317E152-138 (1997) Snowblower View Diagrams & Manuals
317E152-729 (1997) Snowblower View Diagrams & Manuals
317E152-929 (1997) Snowblower View Diagrams & Manuals
317E152-129 (1997) Snowblower View Diagrams & Manuals
317E152-151 (1997) Snowblower View Diagrams & Manuals
317E152-206 (1997) Snowblower View Diagrams & Manuals
317E152-308 (1997) Snowblower View Diagrams & Manuals
317E152-033 (1997) Snowblower View Diagrams & Manuals
317E152-019 (1997) Snowblower View Diagrams & Manuals
317E152-057 (1997) Snowblower View Diagrams & Manuals
317E152-118 (1997) Snowblower View Diagrams & Manuals
317E152-131 (1997) Snowblower View Diagrams & Manuals
317E152-022 (1997) Snowblower View Diagrams & Manuals
317E152-722 (1997) Snowblower View Diagrams & Manuals
317E152-002 (1997) Snowblower View Diagrams & Manuals
317E152-715 (1997) Snowblower View Diagrams & Manuals
317E152-077 (1997) Snowblower View Diagrams & Manuals
317E152-977 (1997) Snowblower View Diagrams & Manuals
317E152-777 (1997) Snowblower View Diagrams & Manuals
317E152-724 (1997) Snowblower View Diagrams & Manuals
317E152-105 (1997) Snowblower View Diagrams & Manuals
317E152-009 (1997) Snowblower View Diagrams & Manuals
317E152-016 (1997) Snowblower View Diagrams & Manuals
317E152-145 (1997) Snowblower View Diagrams & Manuals
317E152-196 (1997) Snowblower View Diagrams & Manuals
317E152-719 (1997) Snowblower View Diagrams & Manuals
317E152-098 (1997) Snowblower View Diagrams & Manuals
317E610E304 (1997) Snowblower View Diagrams & Manuals
317E610E372 (1997) Snowblower View Diagrams & Manuals
317E610E401 (1997) Snowblower View Diagrams & Manuals
317E610E720 (1997) Snowblower View Diagrams & Manuals
317E610E730 (1997) Snowblower View Diagrams & Manuals
317E610E301 (1997) Snowblower View Diagrams & Manuals
317E610E709 (1997) Snowblower View Diagrams & Manuals
317E610E371 (1997) Snowblower View Diagrams & Manuals
317E610E307 (1997) Snowblower View Diagrams & Manuals
317E610E513 (1997) Snowblower View Diagrams & Manuals
317E610E713 (1997) Snowblower View Diagrams & Manuals
317E610E000 (1997) Snowblower View Diagrams & Manuals
317E610E121 (1997) Snowblower View Diagrams & Manuals
317E610E205 (1997) Snowblower View Diagrams & Manuals
317E610E705 (1997) Snowblower View Diagrams & Manuals
317E610E706 (1997) Snowblower View Diagrams & Manuals
317E610E026 (1997) Snowblower View Diagrams & Manuals
317E610E726 (1997) Snowblower View Diagrams & Manuals
317E610E054 (1997) Snowblower View Diagrams & Manuals
317E610E745 (1997) Snowblower View Diagrams & Manuals
317E610E754 (1997) Snowblower View Diagrams & Manuals
317E610E704 (1997) Snowblower View Diagrams & Manuals
317E610E029 (1997) Snowblower View Diagrams & Manuals
317E610E229 (1997) Snowblower View Diagrams & Manuals
317E610E134 (1997) Snowblower View Diagrams & Manuals
317E610E138 (1997) Snowblower View Diagrams & Manuals
317E610E729 (1997) Snowblower View Diagrams & Manuals
317E610E929 (1997) Snowblower View Diagrams & Manuals
317E610E129 (1997) Snowblower View Diagrams & Manuals
317E610E151 (1997) Snowblower View Diagrams & Manuals
317E610E206 (1997) Snowblower View Diagrams & Manuals
317E610E308 (1997) Snowblower View Diagrams & Manuals
317E610E033 (1997) Snowblower View Diagrams & Manuals
317E610E019 (1997) Snowblower View Diagrams & Manuals
317E610E057 (1997) Snowblower View Diagrams & Manuals
317E610E118 (1997) Snowblower View Diagrams & Manuals
317E610E131 (1997) Snowblower View Diagrams & Manuals
317E610E022 (1997) Snowblower View Diagrams & Manuals
317E610E722 (1997) Snowblower View Diagrams & Manuals
317E610E002 (1997) Snowblower View Diagrams & Manuals
317E610E715 (1997) Snowblower View Diagrams & Manuals
317E610E077 (1997) Snowblower View Diagrams & Manuals
317E610E977 (1997) Snowblower View Diagrams & Manuals
317E610E777 (1997) Snowblower View Diagrams & Manuals
317E610E724 (1997) Snowblower View Diagrams & Manuals
317E610E105 (1997) Snowblower View Diagrams & Manuals
317E610E009 (1997) Snowblower View Diagrams & Manuals
317E610E016 (1997) Snowblower View Diagrams & Manuals
317E610E145 (1997) Snowblower View Diagrams & Manuals
317E610E196 (1997) Snowblower View Diagrams & Manuals
317E610E719 (1997) Snowblower View Diagrams & Manuals
317E610E098 (1997) Snowblower View Diagrams & Manuals
31AE152-304 (1998) Snowblower View Diagrams & Manuals
31AE152-372 (1998) Snowblower View Diagrams & Manuals
31AE152-401 (1998) Snowblower View Diagrams & Manuals
31AE152-720 (1998) Snowblower View Diagrams & Manuals
31AE152-730 (1998) Snowblower View Diagrams & Manuals
31AE152-301 (1998) Snowblower View Diagrams & Manuals
31AE152-709 (1998) Snowblower View Diagrams & Manuals
31AE152-371 (1998) Snowblower View Diagrams & Manuals
31AE152-307 (1998) Snowblower View Diagrams & Manuals
31AE152-513 (1998) Snowblower View Diagrams & Manuals
31AE152-713 (1998) Snowblower View Diagrams & Manuals
31AE152-000 (1998) Snowblower View Diagrams & Manuals
31AE152-121 (1998) Snowblower View Diagrams & Manuals
31AE152-205 (1998) Snowblower View Diagrams & Manuals
31AE152-705 (1998) Snowblower View Diagrams & Manuals
31AE152-706 (1998) Snowblower View Diagrams & Manuals
31AE152-026 (1998) Snowblower View Diagrams & Manuals
31AE152-726 (1998) Snowblower View Diagrams & Manuals
31AE152-054 (1998) Snowblower View Diagrams & Manuals
31AE152-745 (1998) Snowblower View Diagrams & Manuals
31AE152-754 (1998) Snowblower View Diagrams & Manuals
31AE152-704 (1998) Snowblower View Diagrams & Manuals
31AE152-029 (1998) Snowblower View Diagrams & Manuals
31AE152-229 (1998) Snowblower View Diagrams & Manuals
31AE152-134 (1998) Snowblower View Diagrams & Manuals
31AE152-138 (1998) Snowblower View Diagrams & Manuals
31AE152-729 (1998) Snowblower View Diagrams & Manuals
31AE152-929 (1998) Snowblower View Diagrams & Manuals
31AE152-129 (1998) Snowblower View Diagrams & Manuals
31AE152-151 (1998) Snowblower View Diagrams & Manuals
31AE152-206 (1998) Snowblower View Diagrams & Manuals
31AE152-308 (1998) Snowblower View Diagrams & Manuals
31AE152-033 (1998) Snowblower View Diagrams & Manuals
31AE152-019 (1998) Snowblower View Diagrams & Manuals
31AE152-057 (1998) Snowblower View Diagrams & Manuals
31AE152-118 (1998) Snowblower View Diagrams & Manuals
31AE152-131 (1998) Snowblower View Diagrams & Manuals
31AE152-022 (1998) Snowblower View Diagrams & Manuals
31AE152-722 (1998) Snowblower View Diagrams & Manuals
31AE152-002 (1998) Snowblower View Diagrams & Manuals
31AE152-715 (1998) Snowblower View Diagrams & Manuals
31AE152-077 (1998) Snowblower View Diagrams & Manuals
31AE152-977 (1998) Snowblower View Diagrams & Manuals
31AE152-777 (1998) Snowblower View Diagrams & Manuals
31AE152-724 (1998) Snowblower View Diagrams & Manuals
31AE152-105 (1998) Snowblower View Diagrams & Manuals
31AE152-009 (1998) Snowblower View Diagrams & Manuals
31AE152-016 (1998) Snowblower View Diagrams & Manuals
31AE152-145 (1998) Snowblower View Diagrams & Manuals
31AE152-196 (1998) Snowblower View Diagrams & Manuals
31AE152-719 (1998) Snowblower View Diagrams & Manuals
31AE152-098 (1998) Snowblower View Diagrams & Manuals
31AE600E304 (1998) Snowblower View Diagrams & Manuals
31AE600E372 (1998) Snowblower View Diagrams & Manuals
31AE600E401 (1998) Snowblower View Diagrams & Manuals
31AE600E720 (1998) Snowblower View Diagrams & Manuals
31AE600E730 (1998) Snowblower View Diagrams & Manuals
31AE600E301 (1998) Snowblower View Diagrams & Manuals
31AE600E709 (1998) Snowblower View Diagrams & Manuals
31AE600E371 (1998) Snowblower View Diagrams & Manuals
31AE600E307 (1998) Snowblower View Diagrams & Manuals
31AE600E513 (1998) Snowblower View Diagrams & Manuals
31AE600E713 (1998) Snowblower View Diagrams & Manuals
31AE600E000 (1998) Snowblower View Diagrams & Manuals
31AE600E121 (1998) Snowblower View Diagrams & Manuals
31AE600E205 (1998) Snowblower View Diagrams & Manuals
31AE600E705 (1998) Snowblower View Diagrams & Manuals
31AE600E706 (1998) Snowblower View Diagrams & Manuals
31AE600E026 (1998) Snowblower View Diagrams & Manuals
31AE600E726 (1998) Snowblower View Diagrams & Manuals
31AE600E054 (1998) Snowblower View Diagrams & Manuals
31AE600E745 (1998) Snowblower View Diagrams & Manuals
31AE600E754 (1998) Snowblower View Diagrams & Manuals
31AE600E704 (1998) Snowblower View Diagrams & Manuals
31AE600E029 (1998) Snowblower View Diagrams & Manuals
31AE600E229 (1998) Snowblower View Diagrams & Manuals
31AE600E134 (1998) Snowblower View Diagrams & Manuals
31AE600E138 (1998) Snowblower View Diagrams & Manuals
31AE600E729 (1998) Snowblower View Diagrams & Manuals
31AE600E929 (1998) Snowblower View Diagrams & Manuals
31AE600E129 (1998) Snowblower View Diagrams & Manuals
31AE600E151 (1998) Snowblower View Diagrams & Manuals
31AE600E206 (1998) Snowblower View Diagrams & Manuals
31AE600E308 (1998) Snowblower View Diagrams & Manuals
31AE600E033 (1998) Snowblower View Diagrams & Manuals
31AE600E019 (1998) Snowblower View Diagrams & Manuals
31AE600E057 (1998) Snowblower View Diagrams & Manuals
31AE600E118 (1998) Snowblower View Diagrams & Manuals
31AE600E131 (1998) Snowblower View Diagrams & Manuals
31AE600E022 (1998) Snowblower View Diagrams & Manuals
31AE600E722 (1998) Snowblower View Diagrams & Manuals
31AE600E002 (1998) Snowblower View Diagrams & Manuals
31AE600E715 (1998) Snowblower View Diagrams & Manuals
31AE600E077 (1998) Snowblower View Diagrams & Manuals
31AE600E977 (1998) Snowblower View Diagrams & Manuals
31AE600E777 (1998) Snowblower View Diagrams & Manuals
31AE600E724 (1998) Snowblower View Diagrams & Manuals
31AE600E105 (1998) Snowblower View Diagrams & Manuals
31AE600E009 (1998) Snowblower View Diagrams & Manuals
31AE600E016 (1998) Snowblower View Diagrams & Manuals
31AE600E145 (1998) Snowblower View Diagrams & Manuals
31AE600E196 (1998) Snowblower View Diagrams & Manuals
31AE600E719 (1998) Snowblower View Diagrams & Manuals
31AE600E098 (1998) Snowblower View Diagrams & Manuals
31AE640F304 (1998) Snowblower View Diagrams & Manuals
31AE640F372 (1998) Snowblower View Diagrams & Manuals
31AE640F401 (1998) Snowblower View Diagrams & Manuals
31AE640F720 (1998) Snowblower View Diagrams & Manuals
31AE640F730 (1998) Snowblower View Diagrams & Manuals
31AE640F301 (1998) Snowblower View Diagrams & Manuals
31AE640F709 (1998) Snowblower View Diagrams & Manuals
31AE640F371 (1998) Snowblower View Diagrams & Manuals
31AE640F307 (1998) Snowblower View Diagrams & Manuals
31AE640F513 (1998) Snowblower View Diagrams & Manuals
31AE640F713 (1998) Snowblower View Diagrams & Manuals
31AE640F000 (1998) Snowblower View Diagrams & Manuals
31AE640F121 (1998) Snowblower View Diagrams & Manuals
31AE640F205 (1998) Snowblower View Diagrams & Manuals
31AE640F705 (1998) Snowblower View Diagrams & Manuals
31AE640F706 (1998) Snowblower View Diagrams & Manuals
31AE640F026 (1998) Snowblower View Diagrams & Manuals
31AE640F726 (1998) Snowblower View Diagrams & Manuals
31AE640F054 (1998) Snowblower View Diagrams & Manuals
31AE640F745 (1998) Snowblower View Diagrams & Manuals
31AE640F754 (1998) Snowblower View Diagrams & Manuals
31AE640F704 (1998) Snowblower View Diagrams & Manuals
31AE640F029 (1998) Snowblower View Diagrams & Manuals
31AE640F229 (1998) Snowblower View Diagrams & Manuals
31AE640F134 (1998) Snowblower View Diagrams & Manuals
31AE640F138 (1998) Snowblower View Diagrams & Manuals
31AE640F729 (1998) Snowblower View Diagrams & Manuals
31AE640F929 (1998) Snowblower View Diagrams & Manuals
31AE640F129 (1998) Snowblower View Diagrams & Manuals
31AE640F151 (1998) Snowblower View Diagrams & Manuals
31AE640F206 (1998) Snowblower View Diagrams & Manuals
31AE640F308 (1998) Snowblower View Diagrams & Manuals
31AE640F033 (1998) Snowblower View Diagrams & Manuals
31AE640F019 (1998) Snowblower View Diagrams & Manuals
31AE640F057 (1998) Snowblower View Diagrams & Manuals
31AE640F118 (1998) Snowblower View Diagrams & Manuals
31AE640F131 (1998) Snowblower View Diagrams & Manuals
31AE640F022 (1998) Snowblower View Diagrams & Manuals
31AE640F722 (1998) Snowblower View Diagrams & Manuals
31AE640F002 (1998) Snowblower View Diagrams & Manuals
31AE640F715 (1998) Snowblower View Diagrams & Manuals
31AE640F077 (1998) Snowblower View Diagrams & Manuals
31AE640F977 (1998) Snowblower View Diagrams & Manuals
31AE640F777 (1998) Snowblower View Diagrams & Manuals
31AE640F724 (1998) Snowblower View Diagrams & Manuals
31AE640F105 (1998) Snowblower View Diagrams & Manuals
31AE640F009 (1998) Snowblower View Diagrams & Manuals
31AE640F016 (1998) Snowblower View Diagrams & Manuals
31AE640F145 (1998) Snowblower View Diagrams & Manuals
31AE640F196 (1998) Snowblower View Diagrams & Manuals
31AE640F719 (1998) Snowblower View Diagrams & Manuals
31AE640F098 (1998) Snowblower View Diagrams & Manuals
31AE172-304 (1999) Snowblower View Diagrams & Manuals
31AE172-372 (1999) Snowblower View Diagrams & Manuals
31AE172-401 (1999) Snowblower View Diagrams & Manuals
31AE172-720 (1999) Snowblower View Diagrams & Manuals
31AE172-730 (1999) Snowblower View Diagrams & Manuals
31AE172-301 (1999) Snowblower View Diagrams & Manuals
31AE172-709 (1999) Snowblower View Diagrams & Manuals
31AE172-371 (1999) Snowblower View Diagrams & Manuals
31AE172-307 (1999) Snowblower View Diagrams & Manuals
31AE172-513 (1999) Snowblower View Diagrams & Manuals
31AE172-713 (1999) Snowblower View Diagrams & Manuals
31AE172-000 (1999) Snowblower View Diagrams & Manuals
31AE172-121 (1999) Snowblower View Diagrams & Manuals
31AE172-205 (1999) Snowblower View Diagrams & Manuals
31AE172-705 (1999) Snowblower View Diagrams & Manuals
31AE172-706 (1999) Snowblower View Diagrams & Manuals
31AE172-026 (1999) Snowblower View Diagrams & Manuals
31AE172-726 (1999) Snowblower View Diagrams & Manuals
31AE172-054 (1999) Snowblower View Diagrams & Manuals
31AE172-745 (1999) Snowblower View Diagrams & Manuals
31AE172-754 (1999) Snowblower View Diagrams & Manuals
31AE172-704 (1999) Snowblower View Diagrams & Manuals
31AE172-029 (1999) Snowblower View Diagrams & Manuals
31AE172-229 (1999) Snowblower View Diagrams & Manuals
31AE172-134 (1999) Snowblower View Diagrams & Manuals
31AE172-138 (1999) Snowblower View Diagrams & Manuals
31AE172-729 (1999) Snowblower View Diagrams & Manuals
31AE172-929 (1999) Snowblower View Diagrams & Manuals
31AE172-129 (1999) Snowblower View Diagrams & Manuals
31AE172-151 (1999) Snowblower View Diagrams & Manuals
31AE172-206 (1999) Snowblower View Diagrams & Manuals
31AE172-308 (1999) Snowblower View Diagrams & Manuals
31AE172-019 (1999) Snowblower View Diagrams & Manuals
31AE172-057 (1999) Snowblower View Diagrams & Manuals
31AE172-118 (1999) Snowblower View Diagrams & Manuals
31AE172-131 (1999) Snowblower View Diagrams & Manuals
31AE172-022 (1999) Snowblower View Diagrams & Manuals
31AE172-722 (1999) Snowblower View Diagrams & Manuals
31AE172-002 (1999) Snowblower View Diagrams & Manuals
31AE172-715 (1999) Snowblower View Diagrams & Manuals
31AE172-077 (1999) Snowblower View Diagrams & Manuals
31AE172-977 (1999) Snowblower View Diagrams & Manuals
31AE172-777 (1999) Snowblower View Diagrams & Manuals
31AE172-724 (1999) Snowblower View Diagrams & Manuals
31AE172-105 (1999) Snowblower View Diagrams & Manuals
31AE172-009 (1999) Snowblower View Diagrams & Manuals
31AE172-016 (1999) Snowblower View Diagrams & Manuals
31AE172-145 (1999) Snowblower View Diagrams & Manuals
31AE172-196 (1999) Snowblower View Diagrams & Manuals
31AE172-719 (1999) Snowblower View Diagrams & Manuals
31AE172-098 (1999) Snowblower View Diagrams & Manuals
31AE6C0F304 (1999) Snowblower View Diagrams & Manuals
31AE6C0F372 (1999) Snowblower View Diagrams & Manuals
31AE6C0F401 (1999) Snowblower View Diagrams & Manuals
31AE6C0F720 (1999) Snowblower View Diagrams & Manuals
31AE6C0F730 (1999) Snowblower View Diagrams & Manuals
31AE6C0F301 (1999) Snowblower View Diagrams & Manuals
31AE6C0F709 (1999) Snowblower View Diagrams & Manuals
31AE6C0F371 (1999) Snowblower View Diagrams & Manuals
31AE6C0F307 (1999) Snowblower View Diagrams & Manuals
31AE6C0F513 (1999) Snowblower View Diagrams & Manuals
31AE6C0F713 (1999) Snowblower View Diagrams & Manuals
31AE6C0F000 (1999) Snowblower View Diagrams & Manuals
31AE6C0F121 (1999) Snowblower View Diagrams & Manuals
31AE6C0F205 (1999) Snowblower View Diagrams & Manuals
31AE6C0F705 (1999) Snowblower View Diagrams & Manuals
31AE6C0F706 (1999) Snowblower View Diagrams & Manuals
31AE6C0F026 (1999) Snowblower View Diagrams & Manuals
31AE6C0F726 (1999) Snowblower View Diagrams & Manuals
31AE6C0F054 (1999) Snowblower View Diagrams & Manuals
31AE6C0F745 (1999) Snowblower View Diagrams & Manuals
31AE6C0F754 (1999) Snowblower View Diagrams & Manuals
31AE6C0F704 (1999) Snowblower View Diagrams & Manuals
31AE6C0F029 (1999) Snowblower View Diagrams & Manuals
31AE6C0F229 (1999) Snowblower View Diagrams & Manuals
31AE6C0F134 (1999) Snowblower View Diagrams & Manuals
31AE6C0F138 (1999) Snowblower View Diagrams & Manuals
31AE6C0F729 (1999) Snowblower View Diagrams & Manuals
31AE6C0F929 (1999) Snowblower View Diagrams & Manuals
31AE6C0F129 (1999) Snowblower View Diagrams & Manuals
31AE6C0F151 (1999) Snowblower View Diagrams & Manuals
31AE6C0F206 (1999) Snowblower View Diagrams & Manuals
31AE6C0F308 (1999) Snowblower View Diagrams & Manuals
31AE6C0F033 (1999) Snowblower View Diagrams & Manuals
31AE6C0F019 (1999) Snowblower View Diagrams & Manuals
31AE6C0F057 (1999) Snowblower View Diagrams & Manuals
31AE6C0F118 (1999) Snowblower View Diagrams & Manuals
31AE6C0F131 (1999) Snowblower View Diagrams & Manuals
31AE6C0F022 (1999) Snowblower View Diagrams & Manuals
31AE6C0F722 (1999) Snowblower View Diagrams & Manuals
31AE6C0F002 (1999) Snowblower View Diagrams & Manuals
31AE6C0F715 (1999) Snowblower View Diagrams & Manuals
31AE6C0F077 (1999) Snowblower View Diagrams & Manuals
31AE6C0F977 (1999) Snowblower View Diagrams & Manuals
31AE6C0F777 (1999) Snowblower View Diagrams & Manuals
31AE6C0F724 (1999) Snowblower View Diagrams & Manuals
31AE6C0F105 (1999) Snowblower View Diagrams & Manuals
31AE6C0F009 (1999) Snowblower View Diagrams & Manuals
31AE6C0F016 (1999) Snowblower View Diagrams & Manuals
31AE6C0F145 (1999) Snowblower View Diagrams & Manuals
31AE6C0F196 (1999) Snowblower View Diagrams & Manuals
31AE6C0F719 (1999) Snowblower View Diagrams & Manuals
31AE6C0F098 (1999) Snowblower View Diagrams & Manuals
31AE660G304 (2003) Snowblower View Diagrams & Manuals
31AE660G372 (2003) Snowblower View Diagrams & Manuals
31AE660G401 (2003) Snowblower View Diagrams & Manuals
31AE660G720 (2003) Snowblower View Diagrams & Manuals
31AE660G730 (2003) Snowblower View Diagrams & Manuals
31AE660G301 (2003) Snowblower View Diagrams & Manuals
31AE660G709 (2003) Snowblower View Diagrams & Manuals
31AE660G371 (2003) Snowblower View Diagrams & Manuals
31AE660G307 (2003) Snowblower View Diagrams & Manuals
31AE660G513 (2003) Snowblower View Diagrams & Manuals
31AE660G713 (2003) Snowblower View Diagrams & Manuals
31AE660G382 (2003) Snowblower View Diagrams & Manuals
31AE660G000 (2003) Snowblower View Diagrams & Manuals
31AE660G121 (2003) Snowblower View Diagrams & Manuals
31AE660G205 (2003) Snowblower View Diagrams & Manuals
31AE660G705 (2003) Snowblower View Diagrams & Manuals
31AE660G706 (2003) Snowblower View Diagrams & Manuals
31AE660G026 (2003) Snowblower View Diagrams & Manuals
31AE660G726 (2003) Snowblower View Diagrams & Manuals
31AE660G054 (2003) Snowblower View Diagrams & Manuals
31AE660G745 (2003) Snowblower View Diagrams & Manuals
31AE660G754 (2003) Snowblower View Diagrams & Manuals
31AE660G704 (2003) Snowblower View Diagrams & Manuals
31AE660G029 (2003) Snowblower View Diagrams & Manuals
31AE660G229 (2003) Snowblower View Diagrams & Manuals
31AE660G134 (2003) Snowblower View Diagrams & Manuals
31AE660G138 (2003) Snowblower View Diagrams & Manuals
31AE660G729 (2003) Snowblower View Diagrams & Manuals
31AE660G929 (2003) Snowblower View Diagrams & Manuals
31AE660G129 (2003) Snowblower View Diagrams & Manuals
31AE660G151 (2003) Snowblower View Diagrams & Manuals
31AE660G206 (2003) Snowblower View Diagrams & Manuals
31AE660G308 (2003) Snowblower View Diagrams & Manuals
31AE660G033 (2003) Snowblower View Diagrams & Manuals
31AE660G019 (2003) Snowblower View Diagrams & Manuals
31AE660G057 (2003) Snowblower View Diagrams & Manuals
31AE660G118 (2003) Snowblower View Diagrams & Manuals
31AE660G131 (2003) Snowblower View Diagrams & Manuals
31AE660G022 (2003) Snowblower View Diagrams & Manuals
31AE660G722 (2003) Snowblower View Diagrams & Manuals
31AE660G002 (2003) Snowblower View Diagrams & Manuals
31AE660G715 (2003) Snowblower View Diagrams & Manuals
31AE660G077 (2003) Snowblower View Diagrams & Manuals
31AE660G977 (2003) Snowblower View Diagrams & Manuals
31AE660G777 (2003) Snowblower View Diagrams & Manuals
31AE660G724 (2003) Snowblower View Diagrams & Manuals
31AE660G105 (2003) Snowblower View Diagrams & Manuals
31AE660G009 (2003) Snowblower View Diagrams & Manuals
31AE660G016 (2003) Snowblower View Diagrams & Manuals
31AE660G145 (2003) Snowblower View Diagrams & Manuals
31AE660G196 (2003) Snowblower View Diagrams & Manuals
31AE660G719 (2003) Snowblower View Diagrams & Manuals
31AE660G098 (2003) Snowblower View Diagrams & Manuals
13AL608G304 (2002) Lawn Tractor View Diagrams & Manuals
13AL608G372 (2002) Lawn Tractor View Diagrams & Manuals
13AL608G401 (2002) Lawn Tractor View Diagrams & Manuals
13AL608G720 (2002) Lawn Tractor View Diagrams & Manuals
13AL608G730 (2002) Lawn Tractor View Diagrams & Manuals
13AL608G301 (2002) Lawn Tractor View Diagrams & Manuals
13AL608G709 (2002) Lawn Tractor View Diagrams & Manuals
13AL608G371 (2002) Lawn Tractor View Diagrams & Manuals
13AL608G307 (2002) Lawn Tractor View Diagrams & Manuals
13AL608G513 (2002) Lawn Tractor View Diagrams & Manuals
13AL608G713 (2002) Lawn Tractor View Diagrams & Manuals
13AL608G382 (2002) Lawn Tractor View Diagrams & Manuals
13AL608G000 (2002) Lawn Tractor View Diagrams & Manuals
13AL608G121 (2002) Lawn Tractor View Diagrams & Manuals
13AL608G205 (2002) Lawn Tractor View Diagrams & Manuals
13AL608G705 (2002) Lawn Tractor View Diagrams & Manuals
13AL608G706 (2002) Lawn Tractor View Diagrams & Manuals
13AL608G026 (2002) Lawn Tractor View Diagrams & Manuals
13AL608G726 (2002) Lawn Tractor View Diagrams & Manuals
13AL608G054 (2002) Lawn Tractor View Diagrams & Manuals
13AL608G745 (2002) Lawn Tractor View Diagrams & Manuals
13AL608G754 (2002) Lawn Tractor View Diagrams & Manuals
13AL608G704 (2002) Lawn Tractor View Diagrams & Manuals
13AL608G029 (2002) Lawn Tractor View Diagrams & Manuals
13AL608G229 (2002) Lawn Tractor View Diagrams & Manuals
13AL608G134 (2002) Lawn Tractor View Diagrams & Manuals
13AL608G138 (2002) Lawn Tractor View Diagrams & Manuals
13AL608G729 (2002) Lawn Tractor View Diagrams & Manuals
13AL608G929 (2002) Lawn Tractor View Diagrams & Manuals
13AL608G129 (2002) Lawn Tractor View Diagrams & Manuals
13AL608G151 (2002) Lawn Tractor View Diagrams & Manuals
13AL608G206 (2002) Lawn Tractor View Diagrams & Manuals
13AL608G308 (2002) Lawn Tractor View Diagrams & Manuals
13AL608G033 (2002) Lawn Tractor View Diagrams & Manuals
13AL608G019 (2002) Lawn Tractor View Diagrams & Manuals
13AL608G057 (2002) Lawn Tractor View Diagrams & Manuals
13AL608G118 (2002) Lawn Tractor View Diagrams & Manuals
13AL608G131 (2002) Lawn Tractor View Diagrams & Manuals
13AL608G022 (2002) Lawn Tractor View Diagrams & Manuals
13AL608G722 (2002) Lawn Tractor View Diagrams & Manuals
13AL608G002 (2002) Lawn Tractor View Diagrams & Manuals
13AL608G715 (2002) Lawn Tractor View Diagrams & Manuals
13AL608G077 (2002) Lawn Tractor View Diagrams & Manuals
13AL608G977 (2002) Lawn Tractor View Diagrams & Manuals
13AL608G777 (2002) Lawn Tractor View Diagrams & Manuals
13AL608G724 (2002) Lawn Tractor View Diagrams & Manuals
13AL608G105 (2002) Lawn Tractor View Diagrams & Manuals
13AL608G009 (2002) Lawn Tractor View Diagrams & Manuals
13AL608G016 (2002) Lawn Tractor View Diagrams & Manuals
13AL608G145 (2002) Lawn Tractor View Diagrams & Manuals
13AL608G196 (2002) Lawn Tractor View Diagrams & Manuals
13AL608G719 (2002) Lawn Tractor View Diagrams & Manuals
13AL608G098 (2002) Lawn Tractor View Diagrams & Manuals
31AE6COF304 (2003) Snowblower View Diagrams & Manuals
31AE6COF372 (2003) Snowblower View Diagrams & Manuals
31AE6COF401 (2003) Snowblower View Diagrams & Manuals
31AE6COF720 (2003) Snowblower View Diagrams & Manuals
31AE6COF730 (2003) Snowblower View Diagrams & Manuals
31AE6COF301 (2003) Snowblower View Diagrams & Manuals
31AE6COF709 (2003) Snowblower View Diagrams & Manuals
31AE6COF371 (2003) Snowblower View Diagrams & Manuals
31AE6COF307 (2003) Snowblower View Diagrams & Manuals
31AE6COF513 (2003) Snowblower View Diagrams & Manuals
31AE6COF713 (2003) Snowblower View Diagrams & Manuals
31AE6COF382 (2003) Snowblower View Diagrams & Manuals
31AE6COF000 (2003) Snowblower View Diagrams & Manuals
31AE6COF121 (2003) Snowblower View Diagrams & Manuals
31AE6COF205 (2003) Snowblower View Diagrams & Manuals
31AE6COF705 (2003) Snowblower View Diagrams & Manuals
31AE6COF706 (2003) Snowblower View Diagrams & Manuals
31AE6COF026 (2003) Snowblower View Diagrams & Manuals
31AE6COF726 (2003) Snowblower View Diagrams & Manuals
31AE6COF054 (2003) Snowblower View Diagrams & Manuals
31AE6COF745 (2003) Snowblower View Diagrams & Manuals
31AE6COF754 (2003) Snowblower View Diagrams & Manuals
31AE6COF704 (2003) Snowblower View Diagrams & Manuals
31AE6COF029 (2003) Snowblower View Diagrams & Manuals
31AE6COF229 (2003) Snowblower View Diagrams & Manuals
31AE6COF134 (2003) Snowblower View Diagrams & Manuals
31AE6COF138 (2003) Snowblower View Diagrams & Manuals
31AE6COF729 (2003) Snowblower View Diagrams & Manuals
31AE6COF929 (2003) Snowblower View Diagrams & Manuals
31AE6COF129 (2003) Snowblower View Diagrams & Manuals
31AE6COF151 (2003) Snowblower View Diagrams & Manuals
31AE6COF206 (2003) Snowblower View Diagrams & Manuals
31AE6COF308 (2003) Snowblower View Diagrams & Manuals
31AE6COF033 (2003) Snowblower View Diagrams & Manuals
31AE6COF019 (2003) Snowblower View Diagrams & Manuals
31AE6COF057 (2003) Snowblower View Diagrams & Manuals
31AE6COF118 (2003) Snowblower View Diagrams & Manuals
31AE6COF131 (2003) Snowblower View Diagrams & Manuals
31AE6COF022 (2003) Snowblower View Diagrams & Manuals
31AE6COF722 (2003) Snowblower View Diagrams & Manuals
31AE6COF002 (2003) Snowblower View Diagrams & Manuals
31AE6COF715 (2003) Snowblower View Diagrams & Manuals
31AE6COF077 (2003) Snowblower View Diagrams & Manuals
31AE6COF977 (2003) Snowblower View Diagrams & Manuals
31AE6COF777 (2003) Snowblower View Diagrams & Manuals
31AE6COF724 (2003) Snowblower View Diagrams & Manuals
31AE6COF105 (2003) Snowblower View Diagrams & Manuals
31AE6COF009 (2003) Snowblower View Diagrams & Manuals
31AE6COF016 (2003) Snowblower View Diagrams & Manuals
31AE6COF145 (2003) Snowblower View Diagrams & Manuals
31AE6COF196 (2003) Snowblower View Diagrams & Manuals
31AE6COF719 (2003) Snowblower View Diagrams & Manuals
31AE6COF098 (2003) Snowblower View Diagrams & Manuals
31AH660G304 (2004) Snowblower View Diagrams & Manuals
31AH660G372 (2004) Snowblower View Diagrams & Manuals
31AH660G401 (2004) Snowblower View Diagrams & Manuals
31AH660G720 (2004) Snowblower View Diagrams & Manuals
31AH660G730 (2004) Snowblower View Diagrams & Manuals
31AH660G301 (2004) Snowblower View Diagrams & Manuals
31AH660G709 (2004) Snowblower View Diagrams & Manuals
31AH660G371 (2004) Snowblower View Diagrams & Manuals
31AH660G307 (2004) Snowblower View Diagrams & Manuals
31AH660G513 (2004) Snowblower View Diagrams & Manuals
31AH660G713 (2004) Snowblower View Diagrams & Manuals
31AH660G382 (2004) Snowblower View Diagrams & Manuals
31AH660G000 (2004) Snowblower View Diagrams & Manuals
31AH660G121 (2004) Snowblower View Diagrams & Manuals
31AH660G205 (2004) Snowblower View Diagrams & Manuals
31AH660G705 (2004) Snowblower View Diagrams & Manuals
31AH660G706 (2004) Snowblower View Diagrams & Manuals
31AH660G026 (2004) Snowblower View Diagrams & Manuals
31AH660G726 (2004) Snowblower View Diagrams & Manuals
31AH660G054 (2004) Snowblower View Diagrams & Manuals
31AH660G745 (2004) Snowblower View Diagrams & Manuals
31AH660G754 (2004) Snowblower View Diagrams & Manuals
31AH660G704 (2004) Snowblower View Diagrams & Manuals
31AH660G029 (2004) Snowblower View Diagrams & Manuals
31AH660G229 (2004) Snowblower View Diagrams & Manuals
31AH660G134 (2004) Snowblower View Diagrams & Manuals
31AH660G138 (2004) Snowblower View Diagrams & Manuals
31AH660G729 (2004) Snowblower View Diagrams & Manuals
31AH660G929 (2004) Snowblower View Diagrams & Manuals
31AH660G129 (2004) Snowblower View Diagrams & Manuals
31AH660G151 (2004) Snowblower View Diagrams & Manuals
31AH660G206 (2004) Snowblower View Diagrams & Manuals
31AH660G308 (2004) Snowblower View Diagrams & Manuals
31AH660G033 (2004) Snowblower View Diagrams & Manuals
31AH660G019 (2004) Snowblower View Diagrams & Manuals
31AH660G057 (2004) Snowblower View Diagrams & Manuals
31AH660G118 (2004) Snowblower View Diagrams & Manuals
31AH660G131 (2004) Snowblower View Diagrams & Manuals
31AH660G022 (2004) Snowblower View Diagrams & Manuals
31AH660G722 (2004) Snowblower View Diagrams & Manuals
31AH660G002 (2004) Snowblower View Diagrams & Manuals
31AH660G715 (2004) Snowblower View Diagrams & Manuals
31AH660G077 (2004) Snowblower View Diagrams & Manuals
31AH660G977 (2004) Snowblower View Diagrams & Manuals
31AH660G777 (2004) Snowblower View Diagrams & Manuals
31AH660G724 (2004) Snowblower View Diagrams & Manuals
31AH660G105 (2004) Snowblower View Diagrams & Manuals
31AH660G009 (2004) Snowblower View Diagrams & Manuals
31AH660G016 (2004) Snowblower View Diagrams & Manuals
31AH660G145 (2004) Snowblower View Diagrams & Manuals
31AH660G196 (2004) Snowblower View Diagrams & Manuals
31AH660G719 (2004) Snowblower View Diagrams & Manuals
31AH660G098 (2004) Snowblower View Diagrams & Manuals
31AE6AHE304 (2005) Snowblower View Diagrams & Manuals
31AE6AHE372 (2005) Snowblower View Diagrams & Manuals
31AE6AHE401 (2005) Snowblower View Diagrams & Manuals
31AE6AHE720 (2005) Snowblower View Diagrams & Manuals
31AE6AHE730 (2005) Snowblower View Diagrams & Manuals
31AE6AHE301 (2005) Snowblower View Diagrams & Manuals
31AE6AHE709 (2005) Snowblower View Diagrams & Manuals
31AE6AHE371 (2005) Snowblower View Diagrams & Manuals
31AE6AHE307 (2005) Snowblower View Diagrams & Manuals
31AE6AHE513 (2005) Snowblower View Diagrams & Manuals
31AE6AHE713 (2005) Snowblower View Diagrams & Manuals
31AE6AHE382 (2005) Snowblower View Diagrams & Manuals
31AE6AHE000 (2005) Snowblower View Diagrams & Manuals
31AE6AHE121 (2005) Snowblower View Diagrams & Manuals
31AE6AHE205 (2005) Snowblower View Diagrams & Manuals
31AE6AHE705 (2005) Snowblower View Diagrams & Manuals
31AE6AHE706 (2005) Snowblower View Diagrams & Manuals
31AE6AHE026 (2005) Snowblower View Diagrams & Manuals
31AE6AHE726 (2005) Snowblower View Diagrams & Manuals
31AE6AHE054 (2005) Snowblower View Diagrams & Manuals
31AE6AHE745 (2005) Snowblower View Diagrams & Manuals
31AE6AHE754 (2005) Snowblower View Diagrams & Manuals
31AE6AHE704 (2005) Snowblower View Diagrams & Manuals
31AE6AHE029 (2005) Snowblower View Diagrams & Manuals
31AE6AHE229 (2005) Snowblower View Diagrams & Manuals
31AE6AHE134 (2005) Snowblower View Diagrams & Manuals
31AE6AHE138 (2005) Snowblower View Diagrams & Manuals
31AE6AHE729 (2005) Snowblower View Diagrams & Manuals
31AE6AHE929 (2005) Snowblower View Diagrams & Manuals
31AE6AHE129 (2005) Snowblower View Diagrams & Manuals
31AE6AHE151 (2005) Snowblower View Diagrams & Manuals
31AE6AHE206 (2005) Snowblower View Diagrams & Manuals
31AE6AHE308 (2005) Snowblower View Diagrams & Manuals
31AE6AHE033 (2005) Snowblower View Diagrams & Manuals
31AE6AHE019 (2005) Snowblower View Diagrams & Manuals
31AE6AHE057 (2005) Snowblower View Diagrams & Manuals
31AE6AHE118 (2005) Snowblower View Diagrams & Manuals
31AE6AHE131 (2005) Snowblower View Diagrams & Manuals
31AE6AHE022 (2005) Snowblower View Diagrams & Manuals
31AE6AHE002 (2005) Snowblower View Diagrams & Manuals
31AE6AHE715 (2005) Snowblower View Diagrams & Manuals
31AE6AHE077 (2005) Snowblower View Diagrams & Manuals
31AE6AHE977 (2005) Snowblower View Diagrams & Manuals
31AE6AHE777 (2005) Snowblower View Diagrams & Manuals
31AE6AHE724 (2005) Snowblower View Diagrams & Manuals
31AE6AHE105 (2005) Snowblower View Diagrams & Manuals
31AE6AHE009 (2005) Snowblower View Diagrams & Manuals
31AE6AHE016 (2005) Snowblower View Diagrams & Manuals
31AE6AHE145 (2005) Snowblower View Diagrams & Manuals
31AE6AHE196 (2005) Snowblower View Diagrams & Manuals
31AE6AHE719 (2005) Snowblower View Diagrams & Manuals
31AE6AHE098 (2005) Snowblower View Diagrams & Manuals
31AH6LKH304 (2005) Snowblower View Diagrams & Manuals
31AH6LKH372 (2005) Snowblower View Diagrams & Manuals
31AH6LKH401 (2005) Snowblower View Diagrams & Manuals
31AH6LKH720 (2005) Snowblower View Diagrams & Manuals
31AH6LKH730 (2005) Snowblower View Diagrams & Manuals
31AH6LKH301 (2005) Snowblower View Diagrams & Manuals
31AH6LKH709 (2005) Snowblower View Diagrams & Manuals
31AH6LKH371 (2005) Snowblower View Diagrams & Manuals
31AH6LKH307 (2005) Snowblower View Diagrams & Manuals
31AH6LKH513 (2005) Snowblower View Diagrams & Manuals
31AH6LKH713 (2005) Snowblower View Diagrams & Manuals
31AH6LKH382 (2005) Snowblower View Diagrams & Manuals
31AH6LKH000 (2005) Snowblower View Diagrams & Manuals
31AH6LKH121 (2005) Snowblower View Diagrams & Manuals
31AH6LKH205 (2005) Snowblower View Diagrams & Manuals
31AH6LKH705 (2005) Snowblower View Diagrams & Manuals
31AH6LKH706 (2005) Snowblower View Diagrams & Manuals
31AH6LKH026 (2005) Snowblower View Diagrams & Manuals
31AH6LKH726 (2005) Snowblower View Diagrams & Manuals
31AH6LKH054 (2005) Snowblower View Diagrams & Manuals
31AH6LKH745 (2005) Snowblower View Diagrams & Manuals
31AH6LKH754 (2005) Snowblower View Diagrams & Manuals
31AH6LKH704 (2005) Snowblower View Diagrams & Manuals
31AH6LKH029 (2005) Snowblower View Diagrams & Manuals
31AH6LKH229 (2005) Snowblower View Diagrams & Manuals
31AH6LKH134 (2005) Snowblower View Diagrams & Manuals
31AH6LKH138 (2005) Snowblower View Diagrams & Manuals
31AH6LKH729 (2005) Snowblower View Diagrams & Manuals
31AH6LKH929 (2005) Snowblower View Diagrams & Manuals
31AH6LKH129 (2005) Snowblower View Diagrams & Manuals
31AH6LKH151 (2005) Snowblower View Diagrams & Manuals
31AH6LKH206 (2005) Snowblower View Diagrams & Manuals
31AH6LKH308 (2005) Snowblower View Diagrams & Manuals
31AH6LKH033 (2005) Snowblower View Diagrams & Manuals
31AH6LKH019 (2005) Snowblower View Diagrams & Manuals
31AH6LKH057 (2005) Snowblower View Diagrams & Manuals
31AH6LKH118 (2005) Snowblower View Diagrams & Manuals
31AH6LKH131 (2005) Snowblower View Diagrams & Manuals
31AH6LKH022 (2005) Snowblower View Diagrams & Manuals
31AH6LKH002 (2005) Snowblower View Diagrams & Manuals
31AH6LKH715 (2005) Snowblower View Diagrams & Manuals
31AH6LKH077 (2005) Snowblower View Diagrams & Manuals
31AH6LKH977 (2005) Snowblower View Diagrams & Manuals
31AH6LKH777 (2005) Snowblower View Diagrams & Manuals
31AH6LKH724 (2005) Snowblower View Diagrams & Manuals
31AH6LKH105 (2005) Snowblower View Diagrams & Manuals
31AH6LKH009 (2005) Snowblower View Diagrams & Manuals
31AH6LKH016 (2005) Snowblower View Diagrams & Manuals
31AH6LKH145 (2005) Snowblower View Diagrams & Manuals
31AH6LKH196 (2005) Snowblower View Diagrams & Manuals
31AH6LKH719 (2005) Snowblower View Diagrams & Manuals
31AH6LKH098 (2005) Snowblower View Diagrams & Manuals
14AA815K304 (2009) Garden Tractor View Diagrams & Manuals
14AA815K372 (2009) Garden Tractor View Diagrams & Manuals
14AA815K401 (2009) Garden Tractor View Diagrams & Manuals
14AA815K720 (2009) Garden Tractor View Diagrams & Manuals
14AA815K730 (2009) Garden Tractor View Diagrams & Manuals
14AA815K301 (2009) Garden Tractor View Diagrams & Manuals
14AA815K709 (2009) Garden Tractor View Diagrams & Manuals
14AA815K371 (2009) Garden Tractor View Diagrams & Manuals
14AA815K307 (2009) Garden Tractor View Diagrams & Manuals
14AA815K513 (2009) Garden Tractor View Diagrams & Manuals
14AA815K713 (2009) Garden Tractor View Diagrams & Manuals
14AA815K382 (2009) Garden Tractor View Diagrams & Manuals
14AA815K000 (2009) Garden Tractor View Diagrams & Manuals
14AA815K121 (2009) Garden Tractor View Diagrams & Manuals
14AA815K205 (2009) Garden Tractor View Diagrams & Manuals
14AA815K705 (2009) Garden Tractor View Diagrams & Manuals
14AA815K706 (2009) Garden Tractor View Diagrams & Manuals
14AA815K026 (2009) Garden Tractor View Diagrams & Manuals
14AA815K726 (2009) Garden Tractor View Diagrams & Manuals
14AA815K054 (2009) Garden Tractor View Diagrams & Manuals
14AA815K745 (2009) Garden Tractor View Diagrams & Manuals
14AA815K754 (2009) Garden Tractor View Diagrams & Manuals
14AA815K704 (2009) Garden Tractor View Diagrams & Manuals
14AA815K029 (2009) Garden Tractor View Diagrams & Manuals
14AA815K229 (2009) Garden Tractor View Diagrams & Manuals
14AA815K134 (2009) Garden Tractor View Diagrams & Manuals
14AA815K138 (2009) Garden Tractor View Diagrams & Manuals
14AA815K729 (2009) Garden Tractor View Diagrams & Manuals
14AA815K929 (2009) Garden Tractor View Diagrams & Manuals
14AA815K129 (2009) Garden Tractor View Diagrams & Manuals
14AA815K151 (2009) Garden Tractor View Diagrams & Manuals
14AA815K206 (2009) Garden Tractor View Diagrams & Manuals
14AA815K308 (2009) Garden Tractor View Diagrams & Manuals
14AA815K033 (2009) Garden Tractor View Diagrams & Manuals
14AA815K019 (2009) Garden Tractor View Diagrams & Manuals
14AA815K057 (2009) Garden Tractor View Diagrams & Manuals
14AA815K118 (2009) Garden Tractor View Diagrams & Manuals
14AA815K131 (2009) Garden Tractor View Diagrams & Manuals
14AA815K022 (2009) Garden Tractor View Diagrams & Manuals
14AA815K722 (2009) Garden Tractor View Diagrams & Manuals
14AA815K002 (2009) Garden Tractor View Diagrams & Manuals
14AA815K715 (2009) Garden Tractor View Diagrams & Manuals
14AA815K077 (2009) Garden Tractor View Diagrams & Manuals
14AA815K977 (2009) Garden Tractor View Diagrams & Manuals
14AA815K777 (2009) Garden Tractor View Diagrams & Manuals
14AA815K724 (2009) Garden Tractor View Diagrams & Manuals
14AA815K105 (2009) Garden Tractor View Diagrams & Manuals
14AA815K009 (2009) Garden Tractor View Diagrams & Manuals
14AA815K016 (2009) Garden Tractor View Diagrams & Manuals
14AA815K145 (2009) Garden Tractor View Diagrams & Manuals
14AA815K196 (2009) Garden Tractor View Diagrams & Manuals
14AA815K719 (2009) Garden Tractor View Diagrams & Manuals
14AA815K098 (2009) Garden Tractor View Diagrams & Manuals
14AG808H304 (2004) Garden Tractor View Diagrams & Manuals
14AG808H372 (2004) Garden Tractor View Diagrams & Manuals
14AG808H401 (2004) Garden Tractor View Diagrams & Manuals
14AG808H720 (2004) Garden Tractor View Diagrams & Manuals
14AG808H730 (2004) Garden Tractor View Diagrams & Manuals
14AG808H301 (2004) Garden Tractor View Diagrams & Manuals
14AG808H709 (2004) Garden Tractor View Diagrams & Manuals
14AG808H371 (2004) Garden Tractor View Diagrams & Manuals
14AG808H307 (2004) Garden Tractor View Diagrams & Manuals
14AG808H513 (2004) Garden Tractor View Diagrams & Manuals
14AG808H713 (2004) Garden Tractor View Diagrams & Manuals
14AG808H382 (2004) Garden Tractor View Diagrams & Manuals
14AG808H000 (2004) Garden Tractor View Diagrams & Manuals
14AG808H121 (2004) Garden Tractor View Diagrams & Manuals
14AG808H205 (2004) Garden Tractor View Diagrams & Manuals
14AG808H705 (2004) Garden Tractor View Diagrams & Manuals
14AG808H706 (2004) Garden Tractor View Diagrams & Manuals
14AG808H026 (2004) Garden Tractor View Diagrams & Manuals
14AG808H726 (2004) Garden Tractor View Diagrams & Manuals
14AG808H054 (2004) Garden Tractor View Diagrams & Manuals
14AG808H745 (2004) Garden Tractor View Diagrams & Manuals
14AG808H754 (2004) Garden Tractor View Diagrams & Manuals
14AG808H704 (2004) Garden Tractor View Diagrams & Manuals
14AG808H029 (2004) Garden Tractor View Diagrams & Manuals
14AG808H229 (2004) Garden Tractor View Diagrams & Manuals
14AG808H134 (2004) Garden Tractor View Diagrams & Manuals
14AG808H138 (2004) Garden Tractor View Diagrams & Manuals
14AG808H729 (2004) Garden Tractor View Diagrams & Manuals
14AG808H929 (2004) Garden Tractor View Diagrams & Manuals
14AG808H129 (2004) Garden Tractor View Diagrams & Manuals
14AG808H151 (2004) Garden Tractor View Diagrams & Manuals
14AG808H206 (2004) Garden Tractor View Diagrams & Manuals
14AG808H308 (2004) Garden Tractor View Diagrams & Manuals
14AG808H033 (2004) Garden Tractor View Diagrams & Manuals
14AG808H019 (2004) Garden Tractor View Diagrams & Manuals
14AG808H057 (2004) Garden Tractor View Diagrams & Manuals
14AG808H118 (2004) Garden Tractor View Diagrams & Manuals
14AG808H131 (2004) Garden Tractor View Diagrams & Manuals
14AG808H022 (2004) Garden Tractor View Diagrams & Manuals
14AG808H002 (2004) Garden Tractor View Diagrams & Manuals
14AG808H715 (2004) Garden Tractor View Diagrams & Manuals
14AG808H077 (2004) Garden Tractor View Diagrams & Manuals
14AG808H977 (2004) Garden Tractor View Diagrams & Manuals
14AG808H777 (2004) Garden Tractor View Diagrams & Manuals
14AG808H724 (2004) Garden Tractor View Diagrams & Manuals
14AG808H105 (2004) Garden Tractor View Diagrams & Manuals
14AG808H009 (2004) Garden Tractor View Diagrams & Manuals
14AG808H016 (2004) Garden Tractor View Diagrams & Manuals
14AG808H145 (2004) Garden Tractor View Diagrams & Manuals
14AG808H196 (2004) Garden Tractor View Diagrams & Manuals
14AG808H719 (2004) Garden Tractor View Diagrams & Manuals
14AG808H098 (2004) Garden Tractor View Diagrams & Manuals
14AT808H304 (2004) Garden Tractor View Diagrams & Manuals
14AT808H372 (2004) Garden Tractor View Diagrams & Manuals
14AT808H401 (2004) Garden Tractor View Diagrams & Manuals
14AT808H720 (2004) Garden Tractor View Diagrams & Manuals
14AT808H730 (2004) Garden Tractor View Diagrams & Manuals
14AT808H301 (2004) Garden Tractor View Diagrams & Manuals
14AT808H709 (2004) Garden Tractor View Diagrams & Manuals
14AT808H371 (2004) Garden Tractor View Diagrams & Manuals
14AT808H307 (2004) Garden Tractor View Diagrams & Manuals
14AT808H513 (2004) Garden Tractor View Diagrams & Manuals
14AT808H713 (2004) Garden Tractor View Diagrams & Manuals
14AT808H382 (2004) Garden Tractor View Diagrams & Manuals
14AT808H000 (2004) Garden Tractor View Diagrams & Manuals
14AT808H121 (2004) Garden Tractor View Diagrams & Manuals
14AT808H205 (2004) Garden Tractor View Diagrams & Manuals
14AT808H705 (2004) Garden Tractor View Diagrams & Manuals
14AT808H706 (2004) Garden Tractor View Diagrams & Manuals
14AT808H026 (2004) Garden Tractor View Diagrams & Manuals
14AT808H726 (2004) Garden Tractor View Diagrams & Manuals
14AT808H054 (2004) Garden Tractor View Diagrams & Manuals
14AT808H745 (2004) Garden Tractor View Diagrams & Manuals
14AT808H754 (2004) Garden Tractor View Diagrams & Manuals
14AT808H704 (2004) Garden Tractor View Diagrams & Manuals
14AT808H029 (2004) Garden Tractor View Diagrams & Manuals
14AT808H229 (2004) Garden Tractor View Diagrams & Manuals
14AT808H134 (2004) Garden Tractor View Diagrams & Manuals
14AT808H138 (2004) Garden Tractor View Diagrams & Manuals
14AT808H729 (2004) Garden Tractor View Diagrams & Manuals
14AT808H929 (2004) Garden Tractor View Diagrams & Manuals
14AT808H129 (2004) Garden Tractor View Diagrams & Manuals
14AT808H151 (2004) Garden Tractor View Diagrams & Manuals
14AT808H206 (2004) Garden Tractor View Diagrams & Manuals
14AT808H308 (2004) Garden Tractor View Diagrams & Manuals
14AT808H033 (2004) Garden Tractor View Diagrams & Manuals
14AT808H019 (2004) Garden Tractor View Diagrams & Manuals
14AT808H057 (2004) Garden Tractor View Diagrams & Manuals
14AT808H118 (2004) Garden Tractor View Diagrams & Manuals
14AT808H131 (2004) Garden Tractor View Diagrams & Manuals
14AT808H022 (2004) Garden Tractor View Diagrams & Manuals
14AT808H002 (2004) Garden Tractor View Diagrams & Manuals
14AT808H715 (2004) Garden Tractor View Diagrams & Manuals
14AT808H077 (2004) Garden Tractor View Diagrams & Manuals
14AT808H977 (2004) Garden Tractor View Diagrams & Manuals
14AT808H777 (2004) Garden Tractor View Diagrams & Manuals
14AT808H724 (2004) Garden Tractor View Diagrams & Manuals
14AT808H105 (2004) Garden Tractor View Diagrams & Manuals
14AT808H009 (2004) Garden Tractor View Diagrams & Manuals
14AT808H016 (2004) Garden Tractor View Diagrams & Manuals
14AT808H145 (2004) Garden Tractor View Diagrams & Manuals
14AT808H196 (2004) Garden Tractor View Diagrams & Manuals
14AT808H719 (2004) Garden Tractor View Diagrams & Manuals
14AT808H098 (2004) Garden Tractor View Diagrams & Manuals
316-140-302 (TMO-3525203) (1996) Snow Blower View Diagrams & Manuals
316-140-352 (TMO-3525203) (1996) Snow Blower View Diagrams & Manuals
316-140-372 (TMO-3525203) (1996) Snow Blower View Diagrams & Manuals
316-140-752 (TMO-3525203) (1996) Snow Blower View Diagrams & Manuals
316-611D302 (26274) (1996) Snow Blower View Diagrams & Manuals
316-611D352 (26274) (1996) Snow Blower View Diagrams & Manuals
316-611D372 (26274) (1996) Snow Blower View Diagrams & Manuals
316-E150129 (TMO-3525708) (1996) Snow Blower View Diagrams & Manuals
316E150-302 (TMO-3525708) (1996) Snow Blower View Diagrams & Manuals
316E150-372 (TMO-3525708) (1996) Snow Blower View Diagrams & Manuals
316E611D752 (1652656) (1996) Snow Blower View Diagrams & Manuals
316E640F088 (1996) Snow Blower View Diagrams & Manuals
316E640F302 (1996) Snow Blower View Diagrams & Manuals
316E640F352 (1996) Snow Blower View Diagrams & Manuals
316E640F752 (1996) Snow Blower View Diagrams & Manuals
31AE644E129 (1998) Snowblower View Diagrams & Manuals
31AE150-129 (1998) Snowblower View Diagrams & Manuals
240-586-098 (1990) Edger View Diagrams & Manuals
240-586-033 (1990) Edger View Diagrams & Manuals
13AN779G766 (2005) Lawn Tractor View Diagrams & Manuals
31BE665E118 (2003) Snowblower View Diagrams & Manuals
13AC762F065 (2010) Ride on Lawn Mower View Diagrams & Manuals
13WC762F265 (2010) Ride on Lawn Mower View Diagrams & Manuals
13AC762F200 (2010) Ride on Lawn Mower View Diagrams & Manuals
13AN772S000 (2010) Ride on Lawn Mower View Diagrams & Manuals
24BF552B729 (2011) 25 Ton Splitter View Diagrams & Manuals
31AM62FE752 (2010) Walk Behind Snowblower View Diagrams & Manuals
31AS63EF729 (2011) Walk Behind Snowblower View Diagrams & Manuals
31AE150-129 (1999) Snowblower View Diagrams & Manuals
31AE150-129 (2003) Snowblower View Diagrams & Manuals
31AE150-129 (2000) Snowblower View Diagrams & Manuals
31AE150-129 (2001) Snowblower View Diagrams & Manuals
31AE150-129 (2002) Snowblower View Diagrams & Manuals
13AX771S004 (2011) 42" Lawn Tractor View Diagrams & Manuals
31AH64FG795 (2011) 28" Two-Stage Snowblower View Diagrams & Manuals
31AH65FH795 (2010) 30" Two-Stage Snowblower View Diagrams & Manuals
31AH65FH795 (2011) 30" Two-Stage Snowblower View Diagrams & Manuals
31AH65LG704 (2010) 28" Two-Stage Snowblower View Diagrams & Manuals
31AH65LG704 (2011) 28" Two-Stage Snowblower View Diagrams & Manuals
31AM63FF706 (2011) 26" Two-Stage Snowblower View Diagrams & Manuals
31AM63KE704 (2011) 24" Two-Stage Snowblower View Diagrams & Manuals
31AS63EE706 (2011) 24" Two-Stage Snowblower View Diagrams & Manuals
31BM63LF704 (2010) 26" Two-Stage Snowblower View Diagrams & Manuals
31BM63LF704 (2011) 26" Two-Stage Snowblower View Diagrams & Manuals
24BF51MM004 (2010) Log Splitter View Diagrams & Manuals
24BF51MM004 (2012) Log Splitter View Diagrams & Manuals
31AH65LG704 (2009) 28" Two-Stage Snowblower View Diagrams & Manuals
31BM63LF704 (2009) 26" Two-Stage Snowblower View Diagrams & Manuals
13AB652F729 (2004) Lawn Mower View Diagrams & Manuals
13AJ795G059 (2009) Lawn Tractor View Diagrams & Manuals
13AG601H729 (2005) Lawn Tractor View Diagrams & Manuals
31B-611D352 (2002) Snowblower View Diagrams & Manuals
31AM63EF729 (2008) Snowblower View Diagrams & Manuals
13DF675G062 Lawn Tractor View Diagrams & Manuals
31AE640F000 (2000) Snowblower View Diagrams & Manuals
31AS644E129 (2002) Snowblower View Diagrams & Manuals
13AT604G755 (2004) 42" Riding Lawn Mower View Diagrams & Manuals
13AT604H755 (2004) Lawn Tractor View Diagrams & Manuals
31AE660F129 Snow Thrower View Diagrams & Manuals
31B-140-352 (2000) Snowblower View Diagrams & Manuals
31B-140-352 (2001) Snowblower View Diagrams & Manuals
31AE6A4E372 (1999) Snowblower View Diagrams & Manuals
31AS611D129 Snow Blower View Diagrams & Manuals
13A1762F500 Lawn Tractor View Diagrams & Manuals
13AN682G129 (2003) Lawn Tractor View Diagrams & Manuals
14AS820H352 (1997) Lawn Mower View Diagrams & Manuals
14AS820H352 (1998) Lawn Mower View Diagrams & Manuals
14AS820H352 (1999) Lawn Mower View Diagrams & Manuals
14AS820H352 (2000) Lawn Mower View Diagrams & Manuals
13AN795H790 (2007) Lawn Mower View Diagrams & Manuals
13BN771G729 (2006) Lawn Tractor View Diagrams & Manuals
13A2606G190 (2003) Mower View Diagrams & Manuals
13AF608G062 (2002) Lawn Tractor View Diagrams & Manuals
13AN601H729 (2006) Lawn Tractor View Diagrams & Manuals
13AL605H057 (2009) Lawn Mower View Diagrams & Manuals
13AM660F062 Lawn Tractor View Diagrams & Manuals
31AS6LEG752 (2005) Snow Blower View Diagrams & Manuals
31350C (1986) Snowblower View Diagrams & Manuals
31AE610E000 (1998) Snow Thrower View Diagrams & Manuals
31AE610E000 (1999) Snow Thrower View Diagrams & Manuals
31AE610E000 (2000) Snow Thrower View Diagrams & Manuals
31AE610E000 (2001) Snow Thrower View Diagrams & Manuals
315E740F352 (1995) Snowblower View Diagrams & Manuals
31AE150-062 (1998) Snowblower View Diagrams & Manuals
31AE150-062 (1999) Snowblower View Diagrams & Manuals
31AE150-062 (2000) Snowblower View Diagrams & Manuals
31AE150-062 (2001) Snowblower View Diagrams & Manuals
31AS6FEE729 (2005) Snowblower View Diagrams & Manuals
31B-140-000 (2002) Snowblower View Diagrams & Manuals
31B-140-000 (2003) Snowblower View Diagrams & Manuals
31B-140-000 (140-2004) Snowblower View Diagrams & Manuals
14AS843H131 (1997) Lawn Mower View Diagrams & Manuals
317E640F352 (1997) Snow Thrower View Diagrams & Manuals
31AE662E088 (1998) Snow Thrower View Diagrams & Manuals
13AL771T004 (2010) Lawn Tractor View Diagrams & Manuals
180-031 (1987) Snowblower View Diagrams & Manuals
180-050 (1987) Snowblower View Diagrams & Manuals
180-087 (1987) Snowblower View Diagrams & Manuals
180-092 (1988) Snowblower View Diagrams & Manuals
180-095 (1987) Snowblower View Diagrams & Manuals
180-098 (1988) Snowblower View Diagrams & Manuals
180-120 (1987) Snowblower View Diagrams & Manuals
180-205 (1987) Snowblower View Diagrams & Manuals
180-327 (1989) Snowblower View Diagrams & Manuals
180-352 (1989) Snowblower View Diagrams & Manuals
181-027 (1987) Snowblower View Diagrams & Manuals
181-031 (1987) Snowblower View Diagrams & Manuals
181-122 (1988) Snowblower View Diagrams & Manuals
181-205 (1987) Snowblower View Diagrams & Manuals
181-206 (1989) Snowblower View Diagrams & Manuals
181-327 (1989) Snowblower View Diagrams & Manuals
24BG55M3006 (2011) Lawn Mower View Diagrams & Manuals
24BG57M1704 (2013) Log Splitter View Diagrams & Manuals
250-586-034 Snowblower View Diagrams & Manuals
250-586-059 Snowblower View Diagrams & Manuals
250-586-083 Snowblower View Diagrams & Manuals
250-586-084 Snowblower View Diagrams & Manuals
250-586-087 Snowblower View Diagrams & Manuals
250-586-092 Snowblower View Diagrams & Manuals
250-586-105 Snowblower View Diagrams & Manuals
250-586-138 Mtd Mdl 250-586-138 View Diagrams & Manuals
250-586-146 Snowblower View Diagrams & Manuals
250-586-170 Snowblower View Diagrams & Manuals
250-586-206 Snowblower View Diagrams & Manuals
251-586-031 Snowblower View Diagrams & Manuals
251-586-034 Snowblower View Diagrams & Manuals
251-586-045 Snowblower View Diagrams & Manuals
251-586-046 Snowblower View Diagrams & Manuals
24BF51MN704 (2012) Log Spillter View Diagrams & Manuals
24BF51MX704 (2013) Log Spillter View Diagrams & Manuals
24BG55M1706 (2013) Log Spillter View Diagrams & Manuals
13AD678G300 (2002) Lawn Tractor View Diagrams & Manuals
13AF698G300 (2002) Lawn Tractor View Diagrams & Manuals
13AJ771S004 (2010) Lawn Tractor View Diagrams & Manuals
13AK608G013 (2001) Lawn Tractor View Diagrams & Manuals
147-842-000 (1987) Lawn Tractor View Diagrams & Manuals
147-843-000 (1987) Lawn Tractor View Diagrams & Manuals
147-847-000 (1987) Lawn Tractor View Diagrams & Manuals
147-852-000 (1987) Lawn Tractor View Diagrams & Manuals
147-853-000 (1987) Lawn Tractor View Diagrams & Manuals
147-857-000 (1987) Lawn Tractor View Diagrams & Manuals
147-862-000 (1987) Lawn Tractor View Diagrams & Manuals
147-862-135 Lawn Tractor View Diagrams & Manuals
147-863-000 (1987) Lawn Tractor View Diagrams & Manuals
147-867-000 (1987) Lawn Tractor View Diagrams & Manuals
148-842-000 (1988) Lawn Tractor View Diagrams & Manuals
148-847-000 (1988) Lawn Tractor View Diagrams & Manuals
148-852-000 (1988) Lawn Tractor View Diagrams & Manuals
148-853-000 (1988) Lawn Tractor View Diagrams & Manuals
148-857-000 (1988) Lawn Tractor View Diagrams & Manuals
148-862-000 (1988) Lawn Tractor View Diagrams & Manuals
148-862-135 Lawn Tractor View Diagrams & Manuals
148-863-000 (1988) Lawn Tractor View Diagrams & Manuals
148-867-000 (1988) Lawn Tractor View Diagrams & Manuals
251-586-059 Edger/Snowthrower View Diagrams & Manuals
251-586-062 (91952) Edger/Snowthrower View Diagrams & Manuals
251-586-084 (569541) Edger/Snowthrower View Diagrams & Manuals
251-586-092 Edger/Snowthrower View Diagrams & Manuals
251-586-102 (780315) Edger/Snowthrower View Diagrams & Manuals
251-586-105 (26636) Edger/Snowthrower View Diagrams & Manuals
251-586-105 (26722) Edger/Snowthrower View Diagrams & Manuals
251-586-111 Edger/Snowthrower View Diagrams & Manuals
251-586-134 Edger/Snowthrower View Diagrams & Manuals
251-586-141 Edger/Snowthrower View Diagrams & Manuals
251-586-192 Edger/Snowthrower View Diagrams & Manuals
251-586-331 (57058-3) Edger/Snowthrower View Diagrams & Manuals
251-586-701 (469) Edger/Snowthrower View Diagrams & Manuals
251-586-701 (555) Edger/Snowthrower View Diagrams & Manuals
311-840-118 (01918) Snowblower View Diagrams & Manuals
310-180-027 (411-082) Snowblower View Diagrams & Manuals
310-180-031 (B075059) Snowblower View Diagrams & Manuals
310-180-050 Snowblower View Diagrams & Manuals
310-180-054 (484-1078) Snowblower View Diagrams & Manuals
310-180-134 (322-970) Snowblower View Diagrams & Manuals
310-180-327 Snowblower View Diagrams & Manuals
310-180-352 Snowblower View Diagrams & Manuals
310-181-118 (05372) Snowblower View Diagrams & Manuals
310-181-122 (0021845) Snowblower View Diagrams & Manuals
310-181-327 Snowblower View Diagrams & Manuals
310-181-352 Snowblower View Diagrams & Manuals
310-181-372 (06-434039) Snowblower View Diagrams & Manuals
310-450-134 (322-997) Snowblower View Diagrams & Manuals
310-450-327 Snowblower View Diagrams & Manuals
310-450-352 Snowblower View Diagrams & Manuals
310-550-031 (B075-109) Snowblower View Diagrams & Manuals
310-550-050 Snowblower View Diagrams & Manuals
310-550-054 (484-1227) Snowblower View Diagrams & Manuals
310-550-098 Snowblower View Diagrams & Manuals
310-550-118 (26274) Snowblower View Diagrams & Manuals
310-550-327 Snowblower View Diagrams & Manuals
310-550-352 Snowblower View Diagrams & Manuals
310-552-027 (576-777) Snowblower View Diagrams & Manuals
310-552-031 (B075-174) Snowblower View Diagrams & Manuals
310-552-054 (484-1234) Snowblower View Diagrams & Manuals
310-552-098 Snowblower View Diagrams & Manuals
310-552-372 (06-433957) Snowblower View Diagrams & Manuals
310-586-031 (B075-133) Snowblower View Diagrams & Manuals
310-586-054 Snowblower View Diagrams & Manuals
310-586-098 Snowblower View Diagrams & Manuals
310-586-327 Snowblower View Diagrams & Manuals
310-586-352 Snowblower View Diagrams & Manuals
310-588-031 (2828-556) Snowblower View Diagrams & Manuals
310-840-031 (2824-985) Snowblower View Diagrams & Manuals
310-840-050 Snowblower View Diagrams & Manuals
310-840-118 (01918) Snowblower View Diagrams & Manuals
310-840-352 Snowblower View Diagrams & Manuals
310-850-054 (045-1708) Snowblower View Diagrams & Manuals
310-850-327 Snowblower View Diagrams & Manuals
310-960-027 (391-995) Snowblower View Diagrams & Manuals
310-960-031 (2833-762) Snowblower View Diagrams & Manuals
310-960-050 Snowblower View Diagrams & Manuals
310-960-327 Snowblower View Diagrams & Manuals
310-960-352 Snowblower View Diagrams & Manuals
311-180-134 Snowblower View Diagrams & Manuals
311-180-352 Snowblower View Diagrams & Manuals
311-181-102 Snowblower View Diagrams & Manuals
311-181-122 Snowblower View Diagrams & Manuals
311-181-352 Snowblower View Diagrams & Manuals
311-181-372 (06-434039) Snowblower View Diagrams & Manuals
311-450-102 Snowblower View Diagrams & Manuals
311-450-134 Snowblower View Diagrams & Manuals
311-550-054 (484-1227) Snowblower View Diagrams & Manuals
311-550-122 Snowblower View Diagrams & Manuals
311-550-352 Snowblower View Diagrams & Manuals
311-586-352 Snowblower View Diagrams & Manuals
31184-7 (1987) Snowblower View Diagrams & Manuals
31184-8 (1988) Snowblower View Diagrams & Manuals
31184-9 (1989) Snowblower View Diagrams & Manuals
31193-7 (1987) Snowblower View Diagrams & Manuals
31193-8 (1988) Snowblower View Diagrams & Manuals
31193-9 (1989) Snowblower View Diagrams & Manuals
312-180-009 (1992) Snowblower View Diagrams & Manuals
312-180-032 (1992) Snowblower View Diagrams & Manuals
312-180-054 (1992) Snowblower 484-1078 View Diagrams & Manuals
312-180-088 (1992) Snowblower TMO-3525203 View Diagrams & Manuals
312-180-098 (1992) Snowblower View Diagrams & Manuals
312-180-102 (1992) Snowblower View Diagrams & Manuals
312-180-134 (1992) Snowblower 322-970 View Diagrams & Manuals
312-180-192 (1992) Snowblower View Diagrams & Manuals
312-180-352 (1992) Snowblower View Diagrams & Manuals
312-181-118 (1992) Snowblower View Diagrams & Manuals
312-181-122 (1992) Snowblower 0021845 View Diagrams & Manuals
312-181-192 (1992) Snowblower View Diagrams & Manuals
312-181-352 (1992) Snowblower View Diagrams & Manuals
312-181-372 (1992) Snowblower 06-434039 View Diagrams & Manuals
312-191-032 (1992) Snowblower View Diagrams & Manuals
312-191-054 (1992) Snowblower 484-1102 View Diagrams & Manuals
312-610E032 (1992) Snowblower View Diagrams & Manuals
312-610E054 (1992) Snowblower View Diagrams & Manuals
312-610E088 (1992) Snowblower TMO-3525302 View Diagrams & Manuals
312-610E098 (1992) Snowblower View Diagrams & Manuals
312-610E102 (1992) Snowblower View Diagrams & Manuals
312-610E118 (1992) Snowblower View Diagrams & Manuals
312-610E134 (1992) 312-610E134 1992 View Diagrams & Manuals
312-610E192 (1992) Snowblower View Diagrams & Manuals
312-610E352 (1992) Snowblower View Diagrams & Manuals
312-612E054 (1992) Snowblower View Diagrams & Manuals
312-612E098 (1992) Snowblower View Diagrams & Manuals
312-640F032 (1992) Snowblower View Diagrams & Manuals
312-640F054 (1992) Snowblower 484-2522 View Diagrams & Manuals
312-640F088 (1992) Snowblower TMO-3525401 View Diagrams & Manuals
312-640F098 (1992) Snowblower View Diagrams & Manuals
312-640F134 (1992) Snowblower View Diagrams & Manuals
312-640F192 (1992) Snowblower View Diagrams & Manuals
312-640F352 (1992) Snowblower View Diagrams & Manuals
312-642F054 (1992) Snowblower View Diagrams & Manuals
312-642F102 (1992) Snowblower View Diagrams & Manuals
312-980I054 (1992) Snowblower View Diagrams & Manuals
313-180-027 (1993) Snowblower View Diagrams & Manuals
313-180-031 (1993) Snowblower View Diagrams & Manuals
313-180-032 (1993) Snowblower View Diagrams & Manuals
313-180-054 (1993) Snowblower View Diagrams & Manuals
313-180-088 (1993) Snowblower TMO-35252 View Diagrams & Manuals
313-180-095 (1993) Snowblower View Diagrams & Manuals
313-180-098 (1993) Snowblower View Diagrams & Manuals
313-180-102 (1993) Snowblower View Diagrams & Manuals
313-180-120 (1993) Snowblower View Diagrams & Manuals
313-180-134 (1993) Snowblower View Diagrams & Manuals
313-180-205 (1993) Snowblower View Diagrams & Manuals
313-180-352 (1993) Snowblower View Diagrams & Manuals
313-181-032 (1993) Snowblower View Diagrams & Manuals
313-181-118 (1993) Snowblower View Diagrams & Manuals
313-181-122 (1993) Snowblower View Diagrams & Manuals
313-181-149 (1993) Snowblower View Diagrams & Manuals
313-181-205 (1993) Snowblower View Diagrams & Manuals
313-181-352 (1993) Snowblower View Diagrams & Manuals
313-191-031 (1993) Snowblower View Diagrams & Manuals
313-191-032 (1993) Snowblower View Diagrams & Manuals
313-191-054 (1993) Snowblower View Diagrams & Manuals
313-191-088 (1993) Snowblower TMO-35257 View Diagrams & Manuals
313-191-095 (1993) Snowblower View Diagrams & Manuals
313-191-205 (1993) Snowblower View Diagrams & Manuals
313-610E027 (1993) Snowblower View Diagrams & Manuals
313-610E031 (1993) Snowblower View Diagrams & Manuals
313-610E032 (1993) Snowblower View Diagrams & Manuals
313-610E054 (1993) Snowblower View Diagrams & Manuals
313-610E088 (1993) Snowblower TMO-3525302 View Diagrams & Manuals
313-610E095 (1993) Snowblower View Diagrams & Manuals
313-610E098 (1993) Snowblower View Diagrams & Manuals
313-610E102 (1993) Snowblower View Diagrams & Manuals
313-610E118 (1993) Snowblower View Diagrams & Manuals
313-610E120 (1993) Snowblower View Diagrams & Manuals
313-610E134 (1993) Snowblower View Diagrams & Manuals
313-610E161 (1993) Snowblower View Diagrams & Manuals
313-610E205 (1993) Snowblower View Diagrams & Manuals
313-610E352 (1993) Snowblower View Diagrams & Manuals
313-612E027 (1993) Snowblower View Diagrams & Manuals
313-612E054 (1993) Snowblower 481-1409 View Diagrams & Manuals
313-612E095 (1993) Snowblower View Diagrams & Manuals
313-612E098 (1993) Snowblower View Diagrams & Manuals
313-612E161 (1993) Snowblower View Diagrams & Manuals
313-612E205 (1993) Snowblower View Diagrams & Manuals
313-640F027 (1993) Snowblower View Diagrams & Manuals
313-640F031 (1993) Snowblower View Diagrams & Manuals
313-640F032 (1993) Snowblower View Diagrams & Manuals
313-640F054 (1993) Snowblower View Diagrams & Manuals
313-640F088 (1993) Snowblower TMO-3525401 View Diagrams & Manuals
313-640F095 (1993) Snowblower View Diagrams & Manuals
313-640F098 (1993) Snowblower View Diagrams & Manuals
313-640F118 (1993) Snowblower View Diagrams & Manuals
313-640F120 (1993) Snowblower View Diagrams & Manuals
313-640F149 (1993) Snowblower View Diagrams & Manuals
313-640F161 (1993) Snowblower View Diagrams & Manuals
313-640F205 (1993) Snowblower View Diagrams & Manuals
313-640F352 (1993) Snowblower View Diagrams & Manuals
313-642F027 (1993) Snowblower View Diagrams & Manuals
313-642F095 (1993) Snowblower View Diagrams & Manuals
313-642F102 (1993) Snowblower View Diagrams & Manuals
313-642F161 (1993) Snowblower View Diagrams & Manuals
313-642F205 (1993) Snowblower View Diagrams & Manuals
313-660G054 (1993) Snowblower View Diagrams & Manuals
313-660G149 (1993) Snowblower View Diagrams & Manuals
313-660G161 (1993) Snowblower View Diagrams & Manuals
313-660G205 (1993) Snowblower View Diagrams & Manuals
313-980I031 (1993) Snowblower View Diagrams & Manuals
313-980I054 (1993) Snowblower View Diagrams & Manuals
313-980I095 (1993) Snowblower View Diagrams & Manuals
313-980I205 (1993) Snowblower View Diagrams & Manuals
313-980I352 (1993) Snowblower View Diagrams & Manuals
31353-7 (1987) Snowblower View Diagrams & Manuals
31380C (1986) Snowblower View Diagrams & Manuals
31383-7 (1987) Snowblower View Diagrams & Manuals
314-180-088 (1994) Snowblower TMO-3525203 View Diagrams & Manuals
314-191-088 (1994) Snowblower TMO-3525708 View Diagrams & Manuals
314-610E013 (1994) Snowblower View Diagrams & Manuals
314-610E088 (1994) Snowblower TMO-3525302 View Diagrams & Manuals
315-140-120 (1995) Snowblower View Diagrams & Manuals
315-140-352 (1995) Snowblower View Diagrams & Manuals
315-150-118 (1995) Snowblower View Diagrams & Manuals
315-550-000 (1985) Snowblower View Diagrams & Manuals
315-580-000 (1985) Snowblower View Diagrams & Manuals
315-611D118 (1995) Snowblower View Diagrams & Manuals
315-611D352 (1995) Snowblower View Diagrams & Manuals
315-641E118 (1995) Snowblower View Diagrams & Manuals
315E640F013 (1995) Snowblower View Diagrams & Manuals
315E640F352 (1995) Snowblower View Diagrams & Manuals
315E641E205 (1995) Snowblower View Diagrams & Manuals
316E150-129 (1996) Snowblower View Diagrams & Manuals
317-180-054 (481-1078) Snowblower View Diagrams & Manuals
317-181-054 (481-0842) Snowblower View Diagrams & Manuals
317-450-054 (481-0838) Snowblower View Diagrams & Manuals
317-550-054 (481-1227) Snowblower View Diagrams & Manuals
317-552-054 (481-1243) Snowblower View Diagrams & Manuals
317-586-054 (481-1276) Snowblower View Diagrams & Manuals
317-588-000 (1987) Snowblower View Diagrams & Manuals
317-840-054 Snowblower View Diagrams & Manuals
317-850-054 (045-1708) Snowblower View Diagrams & Manuals
317-850-105 Snowblower View Diagrams & Manuals
317-850-327 Snowblower View Diagrams & Manuals
317-960-054 Snowblower View Diagrams & Manuals
318-180-027 (411-082) Snowblower View Diagrams & Manuals
318-180-031 (B075-059) Snowblower View Diagrams & Manuals
318-180-095 (0573853) Snowblower View Diagrams & Manuals
318-180-135 (9Z289) Snowblower View Diagrams & Manuals
318-180-205 Snowblower View Diagrams & Manuals
318-180-352 Snowblower View Diagrams & Manuals
318-181-135 (3Z395) Snowblower View Diagrams & Manuals
318-181-205 Snowblower View Diagrams & Manuals
318-181-327 Snowblower View Diagrams & Manuals
318-181-352 Snowblower View Diagrams & Manuals
318-450-135 (9Z290) Snowblower View Diagrams & Manuals
318-450-205 Snowblower View Diagrams & Manuals
318-450-327 Snowblower View Diagrams & Manuals
318-550-027 (411-367) Snowblower View Diagrams & Manuals
318-550-031 (B075-109) Snowblower View Diagrams & Manuals
318-550-095 (0573896) Snowblower View Diagrams & Manuals
318-550-135 (9Z306) Snowblower View Diagrams & Manuals
318-550-205 Snowblower View Diagrams & Manuals
318-550-327 Snowblower View Diagrams & Manuals
318-550-352 Snowblower View Diagrams & Manuals
318-552-027 (576-777) Snowblower View Diagrams & Manuals
318-552-031 (2828-366) Snowblower View Diagrams & Manuals
318-552-095 (0573917) Snowblower View Diagrams & Manuals
318-552-352 Snowblower View Diagrams & Manuals
318-586-027 Snowblower View Diagrams & Manuals
318-586-031 (B075-133) Snowblower View Diagrams & Manuals
318-586-135 (9Z291) Snowblower View Diagrams & Manuals
318-586-205 Snowblower View Diagrams & Manuals
318-586-327 Snowblower View Diagrams & Manuals
318-586-352 Snowblower View Diagrams & Manuals
318-588-352 Snowblower View Diagrams & Manuals
318-840-031-2824-985 Snowblower View Diagrams & Manuals
318-840-095 (0573909) Snowblower View Diagrams & Manuals
318-840-135 (9Z396) Snowblower View Diagrams & Manuals
318-840-205 Snowblower View Diagrams & Manuals
318-850-031 (2824-993) Snowblower View Diagrams & Manuals
318-850-135 (4Z307) Snowblower View Diagrams & Manuals
318-850-327 Snowblower View Diagrams & Manuals
319-180-031 Snowblower View Diagrams & Manuals
319-180-102 (504167) Snowblower View Diagrams & Manuals
319-181-122 Snowblower View Diagrams & Manuals
319-450-372 (06-270425) Snowblower View Diagrams & Manuals
319-550-031 Snowblower View Diagrams & Manuals
319-550-050 Snowblower View Diagrams & Manuals
319-552-031 Snowblower View Diagrams & Manuals
319-552-054 Snowblower View Diagrams & Manuals
319-552-098 (95-7520-0F) Snowblower View Diagrams & Manuals
319-586-000 (1989) Snowblower View Diagrams & Manuals
319-586-031 Snowblower View Diagrams & Manuals
319-586-054 (484-1276) Snowblower View Diagrams & Manuals
319-586-098 (95-7508-5F) Snowblower View Diagrams & Manuals
319-586-118 Snowblower View Diagrams & Manuals
319-588-031 Snowblower View Diagrams & Manuals
319-840-031 Snowblower View Diagrams & Manuals
319-840-050 Snowblower View Diagrams & Manuals
319-840-102 (504175) Snowblower View Diagrams & Manuals
319-840-372 (06-328447) Snowblower View Diagrams & Manuals
319-850-031 Snowblower View Diagrams & Manuals
319-850-054 (045-1708) Snowblower View Diagrams & Manuals
319-960-050 Snowblower View Diagrams & Manuals
31AE150-013 (2001) Snowblower View Diagrams & Manuals
31AH64EG795 (2010) Snowblower View Diagrams & Manuals
31AM62EE706 (2009) Snowblower View Diagrams & Manuals
31AM63EF706 (2010) Snowblower View Diagrams & Manuals
31AS62EE706 (2010) Snowblower View Diagrams & Manuals
31BM62KE704 (2009) Snowblower View Diagrams & Manuals
31CM62KE704 (2010) Snowblower View Diagrams & Manuals
450-031 (1987) Snowblower View Diagrams & Manuals
450-205 (1987) Snowblower View Diagrams & Manuals
550-027 (1987) Snowblower View Diagrams & Manuals
550-031 (1987) Snowblower View Diagrams & Manuals
550-050 (1987) Snowblower View Diagrams & Manuals
550-087 (1987) Snowblower View Diagrams & Manuals
550-095 (1987) Snowblower View Diagrams & Manuals
550-120 (1987) Snowblower View Diagrams & Manuals
550-205 (1987) Snowblower View Diagrams & Manuals
552-027 (1987) Snowblower View Diagrams & Manuals
552-095 (1987) Snowblower View Diagrams & Manuals
586-027 (1987) Snowblower View Diagrams & Manuals
586-031 (1987) Snowblower View Diagrams & Manuals
586-120 (1987) Snowblower View Diagrams & Manuals
586-205 (1987) Snowblower View Diagrams & Manuals
588-105 (1987) Snowblower View Diagrams & Manuals
588-205 (1987) Snowblower View Diagrams & Manuals
148-842-101 (1031B 811-5081 1988) Lawn Tractor View Diagrams & Manuals
840-031 (1987) Snowblower View Diagrams & Manuals
840-050 (1987) Snowblower View Diagrams & Manuals
840-095 (1987) Snowblower View Diagrams & Manuals
840-205 (1987) Snowblower View Diagrams & Manuals
840-327 (1987) Snowblower View Diagrams & Manuals
850-031 (1987) Snowblower View Diagrams & Manuals
850-205 (1987) 850-205 1987 View Diagrams & Manuals
852-031 (1987) Lawn Tractor View Diagrams & Manuals
852-095 (1987) Lawn Tractor View Diagrams & Manuals
852-192 (1987) Lawn Tractor View Diagrams & Manuals
852-205 (1987) Lawn Tractor View Diagrams & Manuals
314-640F088 (TMO-3525401 1994) Snowblower View Diagrams & Manuals
31AE640E206 (2004) Snowblower View Diagrams & Manuals
13AN690G352 (2002) Lawn Tractor View Diagrams & Manuals
13AN690G352 (2003) Lawn Tractor View Diagrams & Manuals
24BF51MM004 (2011) Log Splitter View Diagrams & Manuals
24BG55M1706 (2012) 25 Ton Log Splitter View Diagrams & Manuals
24BG57M3004 (2011) 27 Ton Log Splitter View Diagrams & Manuals
31AH65FH795 (2013) Two Stage Snow Thrower View Diagrams & Manuals
31AH65FH795 (2012) Two Stage Snow Thrower View Diagrams & Manuals
31AH65LG704 (2013) Two Stage Snow Thrower View Diagrams & Manuals
31AH65LG704 (2012) Two Stage Snow Thrower View Diagrams & Manuals
31AM63FF706 (2013) Two Stage Snow Thrower View Diagrams & Manuals
31AM63FF706 (2012) Two Stage Snow Thrower View Diagrams & Manuals
31AM63KE704 (2013) Two Stage Snow Thrower View Diagrams & Manuals
31AM63KE704 (2012) Two Stage Snow Thrower View Diagrams & Manuals
31AS63EE706 (2013) Two Stage Snow Thrower View Diagrams & Manuals
31AS63EE706 (2012) Two Stage Snow Thrower View Diagrams & Manuals
31AH64FG795 (2014) MP28 Two Stage Snow Thrower View Diagrams & Manuals
31AH65FH795 (2014) MP30 Two Stage Snow Thrower View Diagrams & Manuals
31AS6AEE700 Two Stage Snow Thrower View Diagrams & Manuals
13AF618G726 Hydrostatic Lawn Tractor View Diagrams & Manuals
13AN678G016 (2002) Statesman Lawn Tractor View Diagrams & Manuals
13AP62TK090 (2008) Riding Lawn Tractor View Diagrams & Manuals
13AM663F352 (2002) Transmatic Lawn Tractor View Diagrams & Manuals
1031B811-5081 (148-842-101)(1988) Garden Tractor View Diagrams & Manuals
240-596-372 06-010706 Edger View Diagrams & Manuals
3 (1960-7, 1987) 1960-7 Snow Thrower View Diagrams & Manuals
3 (1960-8, 1988) 1960-8 Snow Thrower View Diagrams & Manuals
3 (1965-9, 1989) 1965-9 Snow Thrower View Diagrams & Manuals
14AS84AH019 (1997) Garden Tractor View Diagrams & Manuals
450-122 (1987) Snowblower View Diagrams & Manuals
13AT618G205 (2003) Lawn Tractor View Diagrams & Manuals
13AG618G706 (2004) Lawn Tractor View Diagrams & Manuals
13AT618G706 (2004) Lawn Tractor View Diagrams & Manuals
13AG611G706 (2005) Lawn Tractor View Diagrams & Manuals
14AZ818H706 (2004) Garden Tractor View Diagrams & Manuals
31AE6FHE706 (2005) Snowblower View Diagrams & Manuals
150 (1985) Snowblower View Diagrams & Manuals
151 (1985) Snowblower View Diagrams & Manuals
180 (1987) Snowblower View Diagrams & Manuals
181 (1987) Snowblower View Diagrams & Manuals
13AI617H118 (2002) Lawn Tractor View Diagrams & Manuals
31AE665E118 (2003) Snowblower View Diagrams & Manuals
31AE665F118 (2004) Snowblower View Diagrams & Manuals
1031A811-5081 (1987) Garden Tractor View Diagrams & Manuals
250-586-101870-1260 (1990) Edger View Diagrams & Manuals
870-12608887 (1991) Edger View Diagrams & Manuals
1052B811-5107 (1989) Snowblower View Diagrams & Manuals
319-180-027 (1989) Snowblower View Diagrams & Manuals
319-550-027 (1989) Snowblower View Diagrams & Manuals
319-552-027 (1989) Snowblower View Diagrams & Manuals
319-586-027 (1989) Snowblower View Diagrams & Manuals
319-960-027 (1989) Snowblower View Diagrams & Manuals
212-340-101 (850-6230/8918)(1992) Tiller View Diagrams & Manuals
212-390-101 (850-5802/8916)(1992) Tiller View Diagrams & Manuals
0349 (1986) Snowblower View Diagrams & Manuals
13AR608G022 (1999) Lawn Tractor View Diagrams & Manuals
13AG619H022 (2000) Lawn Tractor View Diagrams & Manuals
13BR609G022 (2000) Lawn Tractor View Diagrams & Manuals
13AG619H022 (2001) Lawn Tractor View Diagrams & Manuals
13AQ609G022 (2001) Lawn Tractor View Diagrams & Manuals
13AG619H022 (2002) Lawn Tractor View Diagrams & Manuals
13BR609G022 (2002) Lawn Tractor View Diagrams & Manuals
316-140-022 (1996) Snowblower View Diagrams & Manuals
316-150-022 (1996) Snowblower View Diagrams & Manuals
316E140-022 (1996) Snowblower View Diagrams & Manuals
316E150-022 (1996) Snowblower View Diagrams & Manuals
317-140-022 (1997) Snowblower View Diagrams & Manuals
31A-140-022 (2001) Snowblower View Diagrams & Manuals
31A-150-022 (2001) Snowblower View Diagrams & Manuals
14AS845H147 (1997) Lawn Tractor View Diagrams & Manuals
31A-140-515 (1998) Snowblower View Diagrams & Manuals
31AE642E515 (1998) Snowblower View Diagrams & Manuals
31AE643F515 (1998) Snowblower View Diagrams & Manuals
31AE662G515 (1998) Snowblower View Diagrams & Manuals
31AE662H515 (1998) Snowblower View Diagrams & Manuals
31AE663H515 (1998) Snowblower View Diagrams & Manuals
31AE983H515 (1998) Snowblower View Diagrams & Manuals
31AE983I515 (1998) Snowblower View Diagrams & Manuals
315E640F088 (TMO-3525401)(1995) Snowblower View Diagrams & Manuals
14AS840H120 (1997) Garden Tractor View Diagrams & Manuals
14AS840H720 (1997) Garden Tractor View Diagrams & Manuals
317-140-120 (1997) Snowblower View Diagrams & Manuals
317E611D120 (1997) Snowblower View Diagrams & Manuals
317E642E120 (1997) Snowblower View Diagrams & Manuals
317E662G120 (1997) Snowblower View Diagrams & Manuals
31A-140-120 (1998) Snowblower View Diagrams & Manuals
31A-611E120 (1998) Snowblower View Diagrams & Manuals
31AE150-120 (1998) Snowblower View Diagrams & Manuals
31AE151-120 (1998) Snowblower View Diagrams & Manuals
31AE640E120 (1998) Snowblower View Diagrams & Manuals
31AE640F120 (1998) Snowblower View Diagrams & Manuals
31AE740F120 (1998) Snowblower View Diagrams & Manuals
31A-140-120 (1999) Snowblower View Diagrams & Manuals
31A-611E120 (1999) Snowblower View Diagrams & Manuals
31AE151-120 (1999) Snowblower View Diagrams & Manuals
31AE611D120 (1999) Snowblower View Diagrams & Manuals
31AE640E120 (1999) Snowblower View Diagrams & Manuals
31A-611E120 (2000) Snowblower View Diagrams & Manuals
13AI618H205 (2000) Lawn Tractor View Diagrams & Manuals
13AI618H205 (2001) Lawn Tractor View Diagrams & Manuals
13BI618H205 (2002) Lawn Tractor View Diagrams & Manuals
13A3660F205 (2003) Lawn Tractor View Diagrams & Manuals
13AN668G205 (2003) Lawn Tractor View Diagrams & Manuals
13AD618G705 (2004) Lawn Tractor View Diagrams & Manuals
13AD668G705 (2004) Lawn Tractor View Diagrams & Manuals
13AF618G705 (2004) Lawn Tractor View Diagrams & Manuals
13AG618G705 (2004) Lawn Tractor View Diagrams & Manuals
13AT618G705 (2004) Lawn Tractor View Diagrams & Manuals
13AU618H705 (2004) Lawn Tractor View Diagrams & Manuals
13AZ618H705 (2004) Lawn Tractor View Diagrams & Manuals
13AQ611H705 (2005) Lawn Tractor View Diagrams & Manuals
13AX611G705 (2005) Lawn Tractor View Diagrams & Manuals
13AX611H705 (2005) Lawn Tractor View Diagrams & Manuals
14A9843H206 (1997) Garden Tractor View Diagrams & Manuals
14AQ825H206 (1997) Garden Tractor View Diagrams & Manuals
14AS825H205 (1998) Garden Tractor View Diagrams & Manuals
14B9843H206 (1998) Garden Tractor View Diagrams & Manuals
14AS825H206 (1999) Garden Tractor View Diagrams & Manuals
14AS825H205 (2000) Garden Tractor View Diagrams & Manuals
14AI828H205 (2001) Garden Tractor View Diagrams & Manuals
14AV818P205 (2001) Garden Tractor View Diagrams & Manuals
14AV818P205 (2002) Garden Tractor View Diagrams & Manuals
14AT818H205 (2003) Garden Tractor View Diagrams & Manuals
14AV818P205 (2003) Garden Tractor View Diagrams & Manuals
14AZ818H705 (2004) Garden Tractor View Diagrams & Manuals
14AK811P705 (2005) Garden Tractor View Diagrams & Manuals
31A-614E205 (1998) Snowblower View Diagrams & Manuals
31AE150-205 (1998) Snowblower View Diagrams & Manuals
31AE644F205 (1998) Snowblower View Diagrams & Manuals
31A-614E205 (1999) Snowblower View Diagrams & Manuals
31AE150-205 (1999) Snowblower View Diagrams & Manuals
31BE640F206 (1999) Snowblower View Diagrams & Manuals
31A-614E205 (2000) Snowblower View Diagrams & Manuals
31AE150-205 (2000) Snowblower View Diagrams & Manuals
31AE642F206 (2000) Snowblower View Diagrams & Manuals
31A-614E205 (2001) Snowblower View Diagrams & Manuals
31AE150-149 (2001) Snowblower View Diagrams & Manuals
31A-614E205 (2002) Snowblower View Diagrams & Manuals
31A-614E205 (2003) Snowblower View Diagrams & Manuals
31A-614E205 (2004) Snowblower View Diagrams & Manuals
31A-6BCE705 (2005) Snowblower View Diagrams & Manuals
31AE6FHG705 (2005) Snowblower View Diagrams & Manuals
31AE6FHG705 (2005-2) Snowblower View Diagrams & Manuals
31AE6LHG705 (2005) Snowblower View Diagrams & Manuals
317E662G013 (1997) Snowblower View Diagrams & Manuals
317E762F013 (1997) Snowblower View Diagrams & Manuals
31AE660H513 (1998) Snowblower View Diagrams & Manuals
31AE662H013 (1998) Snowblower View Diagrams & Manuals
319-450-002 (UP604/8451)(1989) Lawn Mower View Diagrams & Manuals
319-552-002 (UP606/8481)(1989) Lawn Mower View Diagrams & Manuals
319-586-002 (UP607/8551)(1989) Lawn Mower View Diagrams & Manuals
318-450-002 (8451)(1988) Snowblower View Diagrams & Manuals
318-550-002 (8461)(1988) Snowblower View Diagrams & Manuals
318-586-002 (8481)(1988) Snowblower View Diagrams & Manuals
UP6108462 (1989) Snowblower View Diagrams & Manuals
UP6128552 (1989) Snowblower View Diagrams & Manuals
310-181-169PJ 6038441 (1990) Snowblower View Diagrams & Manuals
310-550-169PJ 6058461 (1990) Snowblower View Diagrams & Manuals
6028431 (1990) Snowblower View Diagrams & Manuals
6058461 (1990) Snowblower View Diagrams & Manuals
6068481 (1990) Snowblower View Diagrams & Manuals
311-180-120 (1991) Snowblower View Diagrams & Manuals
311-550-120 (1991) Snowblower View Diagrams & Manuals
311-586-120 (1991) Snowblower View Diagrams & Manuals
4049-101 (812-1337)(1987) Snowblower View Diagrams & Manuals
4048812-1329 (1987) Snowblower View Diagrams & Manuals
4050812-1295 (1987) Snowblower View Diagrams & Manuals
4051850-0795 (317-851-101)(1987) Snowblower View Diagrams & Manuals
4050A812-1295 (318-440-101)(1988) Snowblower View Diagrams & Manuals
4048A812-1329 (318-841-101)(1988) Snowblower View Diagrams & Manuals
319-440-101 (4050A/812-1295)(1989) Snowblower View Diagrams & Manuals
4049812-1337 (1989) Snowblower View Diagrams & Manuals
4048A812-1329 (319-841-101)(1989) Snowblower View Diagrams & Manuals
4049-101 (812-1337)(1990) Snowblower View Diagrams & Manuals
315-150-049 (1985) Snowblower View Diagrams & Manuals
315-150-120 (1985) Snowblower View Diagrams & Manuals
315-550-049 (1985) Snowblower View Diagrams & Manuals
315-550-120 (1985) Snowblower View Diagrams & Manuals
315-580-120 (1985) Snowblower View Diagrams & Manuals
550 (1985) Snowblower View Diagrams & Manuals
316-150-120 (1986) Snowblower View Diagrams & Manuals
316-440-101 (1986) Snowblower View Diagrams & Manuals
316-550-120 (1986) Snowblower View Diagrams & Manuals
316-580-120 (1986) Snowblower View Diagrams & Manuals
316-580-205 (1986) Snowblower View Diagrams & Manuals
316-800-205 (1986) Snowblower View Diagrams & Manuals
13AU608H016 (2000) Lawn Tractor View Diagrams & Manuals
13AT608H016 (2001) Lawn Tractor View Diagrams & Manuals
13AU618H016 (2001) Lawn Tractor View Diagrams & Manuals
13AU608H016 (2002) Lawn Tractor View Diagrams & Manuals
13AZ618H016 (2002) Lawn Tractor View Diagrams & Manuals
147-853-016 (4185-71)(1987) Garden Tractor View Diagrams & Manuals
14AI849H016 (2000) Garden Tractor View Diagrams & Manuals
14AV808P016 (2000) Garden Tractor View Diagrams & Manuals
14AI849H016 (2001) Garden Tractor View Diagrams & Manuals
14AV808P016 (2001) Garden Tractor View Diagrams & Manuals
212-340-062 (95208)(1992) Tiller View Diagrams & Manuals
212-340-119 (1992) Tiller View Diagrams & Manuals
212-390-119 (1992) Tiller View Diagrams & Manuals
212-340-095 (1992) Tiller View Diagrams & Manuals
212-390-095 (1992) Tiller View Diagrams & Manuals
14AS849H009 (1997) Garden Tractor View Diagrams & Manuals
13AI607H098 (2000) Lawn Tractor View Diagrams & Manuals
13AT618G098 (2000) Lawn Tractor View Diagrams & Manuals
13AU618H098 (2000) Lawn Tractor View Diagrams & Manuals
13AT618G098 (2001) Lawn Tractor View Diagrams & Manuals
13AG683G163 (2003) Lawn Tractor View Diagrams & Manuals
13AG683H163 (2003) Lawn Tractor View Diagrams & Manuals
13AM662F163 (2003) Lawn Tractor View Diagrams & Manuals
13AN683G163 (2003) Lawn Tractor View Diagrams & Manuals
13AO683G163 (2003) Lawn Tractor View Diagrams & Manuals
13AC650F765 (2004) Lawn Tractor View Diagrams & Manuals
13AM662F765 (2004) Lawn Tractor View Diagrams & Manuals
13AM662G765 (2004) Lawn Tractor View Diagrams & Manuals
13AM762F765 (2005) Lawn Tractor View Diagrams & Manuals
13AM762F765 (2006) Lawn Tractor View Diagrams & Manuals
13AM762F765 (2007) Lawn Tractor View Diagrams & Manuals
13AM762F065 (2008) Lawn Tractor View Diagrams & Manuals
13AM762F265 (2008) Lawn Tractor View Diagrams & Manuals
13AM761F065 (2009) Lawn Tractor View Diagrams & Manuals
13AM761F265 (2009) Lawn Tractor View Diagrams & Manuals
13WC762F065 (2010) Lawn Tractor View Diagrams & Manuals
14AG808H163 (2003) Garden Tractor View Diagrams & Manuals
31AS611D163 (2004) Snow Thrower View Diagrams & Manuals
13AP616G597 (2008) Lawn Tractor View Diagrams & Manuals
13AP616H597 (2008) Lawn Tractor View Diagrams & Manuals
13AQ626P597 (2008) Lawn Tractor View Diagrams & Manuals
13AV606G597 (2008) Lawn Tractor View Diagrams & Manuals
13AV616G597 (2008) Lawn Tractor View Diagrams & Manuals
13AV761F597 (2008) Lawn Tractor View Diagrams & Manuals
13AP61GG897 (2009) Lawn Tractor View Diagrams & Manuals
13AP61GH897 (2009) Lawn Tractor View Diagrams & Manuals
13AQ62GP897 (2009) Lawn Tractor View Diagrams & Manuals
13AV60GG897 (2009) Lawn Tractor View Diagrams & Manuals
13AV61GG897 (2009) Lawn Tractor View Diagrams & Manuals
13AV76GF897 (2009) Lawn Tractor View Diagrams & Manuals
CR30H (13A721JD897)(2017) Lawn Tractor View Diagrams & Manuals
14AQ816H597 (2008) Garden Tractor View Diagrams & Manuals
14AQ816K597 (2008) Garden Tractor View Diagrams & Manuals
14AQ81GH897 (2009) Garden Tractor View Diagrams & Manuals
14AQ81GK897 (2009) Garden Tractor View Diagrams & Manuals
CLS27T (24BF572B897)(2015) Log Splitter View Diagrams & Manuals
CLS33T (24BL59M5897)(2016) Log Splitter View Diagrams & Manuals
CLS27T (24BF572B897)(2017) Log Splitter View Diagrams & Manuals
31AH5ZK5597 (10530CA)(2008) Snowblower View Diagrams & Manuals
31AH6WK3597 (85026PC)(2008) Snowblower View Diagrams & Manuals
31AH6ZK4597 (10528PC)(2008) Snowblower View Diagrams & Manuals
31AH9J75597 (11030GC)(2008) Snowblower View Diagrams & Manuals
31AH9J76597 (12033GC)(2008) Snowblower View Diagrams & Manuals
31AH9J77597 (13045GC)(2008) Snowblower View Diagrams & Manuals
31AH9Z74597 (10528GC)(2008) Snowblower View Diagrams & Manuals
31AM63K2597 (65024PC)(2008) Snowblower View Diagrams & Manuals
31AH54K3897 (90026PC)(2009) Snowblower View Diagrams & Manuals
31AH55K4897 (10528PC)(2009) Snowblower View Diagrams & Manuals
31AH55K5897 (11530PC)(2009) Snowblower View Diagrams & Manuals
31AH9574897 (10528GC)(2009) Snowblower View Diagrams & Manuals
31AH9575897 (11530GC)(2009) Snowblower View Diagrams & Manuals
31AH9576897 (12533GC)(2009) Snowblower View Diagrams & Manuals
31AM53K2897 (71024PC)(2009) Snowblower View Diagrams & Manuals
31AH9574897 (10528GC)(2010) Snowblower View Diagrams & Manuals
31AH9575897 (11530GC)(2010) Snowblower View Diagrams & Manuals
31AH9576897 (12533GC)(2010) Snowblower View Diagrams & Manuals
31AH9574897 (10528GC)(2011) Snowblower View Diagrams & Manuals
31AH9575897 (11530GC)(2011) Snowblower View Diagrams & Manuals
31AH9576897 (12533GC)(2011) Snowblower View Diagrams & Manuals
10528GC (31AH9774897)(2012) Snowblower View Diagrams & Manuals
10528PC (31AH55K4897)(2012) Snowblower View Diagrams & Manuals
11530GC (31AH9775897)(2012) Snowblower View Diagrams & Manuals
11530PC (31AH55K5897)(2012) Snowblower View Diagrams & Manuals
12533GC (31AH9776897)(2012) Snowblower View Diagrams & Manuals
31AM63K2897 (2012) Snowblower View Diagrams & Manuals
71024PC (31AM53K2897)(2012) Snowblower View Diagrams & Manuals
90026PC (31AH54K3897)(2012) Snowblower View Diagrams & Manuals
10528GC (31AH9774897)(2013) Snowblower View Diagrams & Manuals
10528PC (31AH55K4897)(2013) Snowblower View Diagrams & Manuals
11530GC (31AH9775897)(2013) Snowblower View Diagrams & Manuals
11530PC (31AH55K5897)(2013) Snowblower View Diagrams & Manuals
12533GC (31AH9776897)(2013) Snowblower View Diagrams & Manuals
90026PC (31AH54K3897)(2013) Snowblower View Diagrams & Manuals
10528GC (31AH9774897)(2014) Snowblower View Diagrams & Manuals
10528PC (31AH55K4897)(2014) Snowblower View Diagrams & Manuals
11530GC (31AH9775897)(2014) Snowblower View Diagrams & Manuals
12533GC (31AH9776897)(2014) Snowblower View Diagrams & Manuals
60024PC (31AM63K2897)(2014) Snowblower View Diagrams & Manuals
60026PC (31AH64K3897)(2014) Snowblower View Diagrams & Manuals
C224 (31AM53K2897)(2014) Snowblower View Diagrams & Manuals
CA324 (31AH54K6897)(2014) Snowblower View Diagrams & Manuals
CA326 (31AH55K7897)(2014) Snowblower View Diagrams & Manuals
CA328 (31AH57K8897)(2014) Snowblower View Diagrams & Manuals
CA330 (31AH57K9897)(2014) Snowblower View Diagrams & Manuals
10528PC (31AH55K4897)(2015) Snowblower View Diagrams & Manuals
21XPL (31AM2T6D897)(2015) Snowblower View Diagrams & Manuals
60024PC (31AM63K2897)(2015) Snowblower View Diagrams & Manuals
C224 (31AM53K2897)(2015) Snowblower View Diagrams & Manuals
CA324 (31AH54K6897)(2015) Snowblower View Diagrams & Manuals
CA328 (31AH55K8897)(2015) Snowblower View Diagrams & Manuals
CA330 (31AH57K9897)(2015) Snowblower View Diagrams & Manuals
10528PC (31AH55K4897)(2016) Snowblower View Diagrams & Manuals
60024PC (31AM6BK2897)(2016) Snowblower View Diagrams & Manuals
60026PC (31AH64K3897)(2016) Snowblower View Diagrams & Manuals
C224 (31AM53K2897)(2016) Snowblower View Diagrams & Manuals
C224 (31AM5BK2897)(2016) Snowblower View Diagrams & Manuals
CA230 (PRO 31AH8EKS897)(2016) Snowblower View Diagrams & Manuals
CA234 (PRO 31AH8EKT897)(2016) Snowblower View Diagrams & Manuals
CA324HD (31AH5DK4897)(2016) Snowblower View Diagrams & Manuals
CA324HD (31AH5DKK897)(2016) Snowblower View Diagrams & Manuals
CA328HDT (31AH7EKY897)(2016) Snowblower View Diagrams & Manuals
21XPL (31AM2T6D897)(2017) Snowblower View Diagrams & Manuals
CA230 (PRO 31AH8EKS897)(2017) Snowblower View Diagrams & Manuals
CA326 (31AH5DK7897)(2017) Snowblower View Diagrams & Manuals
CA326HD (31AH54KM897)(2017) Snowblower View Diagrams & Manuals
CA328HD (31AH5EKY897)(2017) Snowblower View Diagrams & Manuals
CA328HDT (31AH7EKY897)(2017) Snowblower View Diagrams & Manuals
CA330HD (31AH5EKZ897)(2017) Snowblower View Diagrams & Manuals
13AU604H099 (247.27432)(1999) Lawn Tractor View Diagrams & Manuals
13AX604G099 (247.27402)(1999) Lawn Tractor View Diagrams & Manuals
24BF570F299 (247.776411)(2011) Log Splitter View Diagrams & Manuals
247.88670 (1989) Snowblower View Diagrams & Manuals
247.884320 (310-181-099)(1990) Snowblower View Diagrams & Manuals
247.884321 (310-181-099)(1990) Snowblower View Diagrams & Manuals
099 (247.882901)(1991) Snowblower View Diagrams & Manuals
199 (247.882901)(1991) Snowblower View Diagrams & Manuals
247.884240 (311-180A099)(1991) Snowblower View Diagrams & Manuals
312-174-099 (247.882902)(1992) Snowblower View Diagrams & Manuals
315-718E099 (247.885550)(1995) Snowblower View Diagrams & Manuals
315E748F099 (247.885680)(1995) Snowblower View Diagrams & Manuals
317E738E099 (247.885570)(1997) Snowblower View Diagrams & Manuals
317E758F099 (247.885690)(1997) Snowblower View Diagrams & Manuals
31AE7C8F099 (247.888500)(1998) Snowblower View Diagrams & Manuals
31AE558F099 (247.888520)(1999) Snowblower View Diagrams & Manuals
31AE558G099 (247.888530)(1999) Snowblower View Diagrams & Manuals
31AE758F099 (247.888510)(1999) Snowblower View Diagrams & Manuals
31AE458G099 (247.888540)(2000) Snowblower View Diagrams & Manuals
31AE558G099 (247.888540)(2000) Snowblower View Diagrams & Manuals
31AE558G099 (247.888540)(2001) Snowblower View Diagrams & Manuals
31AE558G099 (247.888530)(2002) Snowblower View Diagrams & Manuals
31AS615E099 (247.888640)(2002) Snowblower View Diagrams & Manuals
31AE558G099 (247.888530)(2003) Snowblower View Diagrams & Manuals
31AE5D8E099 (247.888160)(2003) Snowblower View Diagrams & Manuals
31AS615E099 (247.888640)(2003) Snowblower View Diagrams & Manuals
31AE558G099 (247.888531)(2004) Snowblower View Diagrams & Manuals
31AS615E099 (247.886640)(2004) Snowblower View Diagrams & Manuals
31AE7H8G799 (247.88890)(2005) Snowblower View Diagrams & Manuals
31AS6BCE799 (247.88355)(2005-2) Snowblower View Diagrams & Manuals
31AS6HEG799 (247.88190)(2005-2) Snowblower View Diagrams & Manuals
31AS6BCE799 (247.88355)(2006) Snowblower View Diagrams & Manuals
31AS6HEG799 (247.88190)(2006) Snowblower View Diagrams & Manuals
31AE9O6I799 (247.88033)(2007) Snowblower View Diagrams & Manuals
31AE9P6J799 (247.88045)(2007) Snowblower View Diagrams & Manuals
31AS6BCE799 (247.88355)(2007) Snowblower View Diagrams & Manuals
31AS6HEG799 (247.881900)(2007) Snowblower View Diagrams & Manuals
31AH9J6I799 (247.88833)(2008) Snowblower View Diagrams & Manuals
31AH9J6J799 (247.88845)(2008) Snowblower View Diagrams & Manuals
31AM62EE799 (247.88955)(2008) Snowblower View Diagrams & Manuals
31AS6WEG799 (247.88690)(2008) Snowblower View Diagrams & Manuals
31AH95SI799 (247.88833)(2009) Snowblower View Diagrams & Manuals
31AH976J799 (247.88846)(2009) Snowblower View Diagrams & Manuals
31BM62EE799 (247.88957)(2009) Snowblower View Diagrams & Manuals
31AH95SI799 (247.88835)(2010) Snowblower View Diagrams & Manuals
31AH97SJ799 (247.88848)(2010) Snowblower View Diagrams & Manuals
31AS62EE799 (247.889571)(2010) Snowblower View Diagrams & Manuals
31A-62BD799 (247.88787)(2011) Snowblower View Diagrams & Manuals
31AH95SI799 (247.88835)(2011) Snowblower View Diagrams & Manuals
31AH97SJ799 (247.88848)(2011) Snowblower View Diagrams & Manuals
31AM2T6D799 (247.88782)(2011) Snowblower View Diagrams & Manuals
31AS62EE799 (247.889571)(2011) Snowblower View Diagrams & Manuals
31AM2T6D799 (247.887820)(2012) Snowblower View Diagrams & Manuals
31AS63EE793 (247.985360)(2012) Snowblower View Diagrams & Manuals
31AS63EE799 (247.881730)(2012) Snowblower View Diagrams & Manuals
31BH95SI799 (247.883970)(2012) Snowblower View Diagrams & Manuals
31BH97SJ799 (247.883980)(2012) Snowblower View Diagrams & Manuals
31BS62EE799 (247.881720)(2012) Snowblower View Diagrams & Manuals
31AM2T6D799 (247.887821)(2013) Snowblower View Diagrams & Manuals
31AS63EE793 (247.985360)(2013) Snowblower View Diagrams & Manuals
31AS63EE799 (247.881731)(2013) Snowblower View Diagrams & Manuals
31BH95SI799 (247.883971)(2013) Snowblower View Diagrams & Manuals
31BH97SJ799 (247.883981)(2013) Snowblower View Diagrams & Manuals
31BS62EE799 (247.881720)(2013) Snowblower View Diagrams & Manuals
31AS63EE799 (247.881731)(2014) Snowblower View Diagrams & Manuals
31BH95SI799 (247.883971)(2014) Snowblower View Diagrams & Manuals
31BH97SJ799 (247.883981)(2014) Snowblower View Diagrams & Manuals
31BS62EE799 (247.881721)(2014) Snowblower View Diagrams & Manuals
31AS63EE799 (247.881731)(2015) Snowblower View Diagrams & Manuals
31AS6AEE799 (247.881722)(2015) Snowblower View Diagrams & Manuals
31AS6BEE799 (247.881732)(2015) Snowblower View Diagrams & Manuals
31BS62EE799 (247.881721)(2015) Snowblower View Diagrams & Manuals
31CH95SI799 (247.888760)(2015) Snowblower View Diagrams & Manuals
31CH97SJ799 (247.888780)(2015) Snowblower View Diagrams & Manuals
31AH8DSH799 (247.889760)(2016) Snowblower View Diagrams & Manuals
31AH8ESJ799 (247.889780)(2016) Snowblower View Diagrams & Manuals
31AM2T6D799 (247.887822)(2016) Snowblower View Diagrams & Manuals
31AS6AEE799 (247.881723)(2016) Snowblower View Diagrams & Manuals
31AS6BEE799 (247.881733)(2016) Snowblower View Diagrams & Manuals
31AH8DSH799 (247.889760)(2017) Snowblower View Diagrams & Manuals
31AH8ESJ799 (247.889780)(2017) Snowblower View Diagrams & Manuals
31AS5BHE799 (247.886400)(2017) Snowblower View Diagrams & Manuals
31AS62ED799 (247.884330)(2017) Snowblower View Diagrams & Manuals
31AS68EE799 (247.887890)(2017) Snowblower View Diagrams & Manuals
31AS6AED799 (247.884331)(2017) Snowblower View Diagrams & Manuals
31AS6AEE799 (247.881723)(2017) Snowblower View Diagrams & Manuals
31AS6BEE799 (247.881733)(2017) Snowblower View Diagrams & Manuals
13AJ775G059 (2008) Lawn Tractor View Diagrams & Manuals
13AJ775G059 (2009) Lawn Tractor View Diagrams & Manuals
13AJ775S059 (2010) Lawn Tractor View Diagrams & Manuals
212-340-701 (1992) Tiller View Diagrams & Manuals
212-340-740 (1992) Tiller View Diagrams & Manuals
251-586-010 (586)(1991) Edger View Diagrams & Manuals
251-586-120 (1991) Edger View Diagrams & Manuals
251-586-736586 (1991) Edger View Diagrams & Manuals
31A-63BD706 (2014) Snowblower View Diagrams & Manuals
31A-63BD706 (2015) Snowblower View Diagrams & Manuals
31A-63BD706 (2016) Snowblower View Diagrams & Manuals
MP28 (31AH64FG795) (2014) 31AH64FG795 Snow Thrower View Diagrams & Manuals
MP30 (31AH65FH795) (2014) 31AH65FH795 Snow Thrower View Diagrams & Manuals
31AM66FG795 (2015) Snowblower View Diagrams & Manuals
195-930-000 (1985) Attachment View Diagrams & Manuals
195-990-000 (1985) Attachment View Diagrams & Manuals
19930S (1985) Attachment View Diagrams & Manuals
19990S (1985) Attachment View Diagrams & Manuals
19491C (1986) Attachment View Diagrams & Manuals
19830C (1986) Attachment View Diagrams & Manuals
19930C (1986) Attachment View Diagrams & Manuals
19990C (1986) Attachment View Diagrams & Manuals
190-491-000 (1987) Attachment View Diagrams & Manuals
190-830-000 (1987) Attachment View Diagrams & Manuals
190-930-000 (1987) Attachment View Diagrams & Manuals
190-990-000 (1987) Attachment View Diagrams & Manuals
19491-7 (1987) Attachment View Diagrams & Manuals
19830-7 (1987) Attachment View Diagrams & Manuals
19930-7 (1987) Attachment View Diagrams & Manuals
190-491-000 (1988) Attachment View Diagrams & Manuals
190-930-000 (1988) Attachment View Diagrams & Manuals
190-990-000 (1988) Attachment View Diagrams & Manuals
19491-8 (1988) Attachment View Diagrams & Manuals
19930-8 (1988) Attachment View Diagrams & Manuals
190-491-000 (1989) Attachment View Diagrams & Manuals
190-930-000 (1989) Attachment View Diagrams & Manuals
19491-9 (1989) Attachment View Diagrams & Manuals
19930-9 (1989) Attachment View Diagrams & Manuals
190-491-000 (1990) Attachment View Diagrams & Manuals
190-832-000 (1990) Attachment View Diagrams & Manuals
190-990-000 (1990) Attachment View Diagrams & Manuals
190491 (1990) Attachment View Diagrams & Manuals
190832 (1990) Attachment View Diagrams & Manuals
190-491-000 (1991) Attachment View Diagrams & Manuals
190-832-000 (1991) Attachment View Diagrams & Manuals
190-990-000 (1991) Attachment View Diagrams & Manuals
190491 (1991) Attachment View Diagrams & Manuals
190832 (1991) Attachment View Diagrams & Manuals
190-491-000 (1992) Attachment View Diagrams & Manuals
190-831-000 (1992) Attachment View Diagrams & Manuals
190-832-000 (1992) Attachment View Diagrams & Manuals
190-990-000 (1992) Attachment View Diagrams & Manuals
190-491-000 (1993) Attachment View Diagrams & Manuals
190-831-000 (1993) Attachment View Diagrams & Manuals
190-832-000 (1993) Attachment View Diagrams & Manuals
190-990-000 (1993) Attachment View Diagrams & Manuals
190-491-000 (1994) Attachment View Diagrams & Manuals
190-831-000 (1994) Attachment View Diagrams & Manuals
190-832-000 (1994) Attachment View Diagrams & Manuals
190-990-000 (1994) Attachment View Diagrams & Manuals
190-491-000 (1995) Attachment View Diagrams & Manuals
190-831-000 (1995) Attachment View Diagrams & Manuals
190-832-000 (1995) Attachment View Diagrams & Manuals
190-990-000 (1995) Attachment View Diagrams & Manuals
190-491-000 (1996) Attachment View Diagrams & Manuals
190-621-000 (1996) Attachment View Diagrams & Manuals
190-831-000 (1996) Attachment View Diagrams & Manuals
190-832-000 (1996) Attachment View Diagrams & Manuals
190-990-000 (1996) Attachment View Diagrams & Manuals
190-491-000 (1997) Attachment View Diagrams & Manuals
190-621-000 (1997) Attachment View Diagrams & Manuals
190-623-000 (1997) Attachment View Diagrams & Manuals
190-624-000 (1997) Attachment View Diagrams & Manuals
190-831-000 (1997) Attachment View Diagrams & Manuals
190-832-000 (1997) Attachment View Diagrams & Manuals
190-990-000 (1997) Attachment View Diagrams & Manuals
190-491-000 (1998) Attachment View Diagrams & Manuals
190-621-000 (1998) Attachment View Diagrams & Manuals
190-623-000 (1998) Attachment View Diagrams & Manuals
190-624-000 (1998) Attachment View Diagrams & Manuals
190-831-000 (1998) Attachment View Diagrams & Manuals
190-832-000 (1998) Attachment View Diagrams & Manuals
190-990-000 (1998) Attachment View Diagrams & Manuals
190-823-000 (2000) Attachment View Diagrams & Manuals
OEM-190-627 (2001) Attachment View Diagrams & Manuals
OEM-190-823 (2001) Attachment View Diagrams & Manuals
OEM-190-627 (2002) Attachment View Diagrams & Manuals
OEM-190-823 (2002) Attachment View Diagrams & Manuals
OEM-190-823 (2003) Attachment View Diagrams & Manuals
OEM-190-823 (2004) Attachment View Diagrams & Manuals
OEM-190-032 (2005) Attachment View Diagrams & Manuals
OEM-190-823 (2005) Attachment View Diagrams & Manuals
OEM-190-032 (2006) Attachment View Diagrams & Manuals
OEM-190-032 (2007) Snow Thrower View Diagrams & Manuals
OEM-190-032 (2008) Attachment View Diagrams & Manuals
19A70009OEM (2009) Attachment View Diagrams & Manuals
OEM-190-032 (2009) Attachment View Diagrams & Manuals
OEM-190-032 (2010) Snow Thrower View Diagrams & Manuals
OEM-190-032 (190-032)(190-032-101)(2011) Attachment View Diagrams & Manuals
OEM-190-032 (190-032)(190-032-101)(2012) Attachment View Diagrams & Manuals
OEM-190-032 (190-032)(190-032-101)(2013) Attachment View Diagrams & Manuals
OEM-190-032 (190-032)(190-032-101)(2014) Attachment View Diagrams & Manuals
19A40024OEM (2015) Attachment View Diagrams & Manuals
OEM-190-032 (190-032)(190-032-101)(2015) Attachment View Diagrams & Manuals
24BF50MX783 (2014) Log Splitter View Diagrams & Manuals
24BF53MX783 (2015) Log Splitter View Diagrams & Manuals
24BG57M1783 (2015) Log Splitter View Diagrams & Manuals
24CF50MX783 (2015) Log Splitter View Diagrams & Manuals
24BG57M1783 (2016) Log Splitter View Diagrams & Manuals
24CF50MX783 (2016) Log Splitter View Diagrams & Manuals
24BF53MX783 (RM23)(2017) Log Splitter View Diagrams & Manuals
RM2410 (31AS63EE783)(2014) Snowblower View Diagrams & Manuals
RM2610 (31AM63FF783)(2014) Snowblower View Diagrams & Manuals
RM2860 (31AH66FG783)(2014) Snowblower View Diagrams & Manuals
RM3060 (31AH65FH783)(2014) Snowblower View Diagrams & Manuals
RM2410 (31AS63EE783)(2015) Snowblower View Diagrams & Manuals
RM2460 (31AM63FE783)(2015) Snowblower View Diagrams & Manuals
RM2610 (31AM63FF783)(2015) Snowblower View Diagrams & Manuals
RM2860 (31AM66FG783)(2015) Snowblower View Diagrams & Manuals
RM3060 (31AH65FH783)(2015) Snowblower View Diagrams & Manuals
RM2410 (31AS6BEE783)(2017) Snowblower View Diagrams & Manuals
RM2660 (31AM6BFF783)(2017) Snowblower View Diagrams & Manuals
315-151-190 (1985) Snowblower View Diagrams & Manuals
315-550-190 (1985) Snowblower View Diagrams & Manuals
315-800-190 (1985) Snowblower View Diagrams & Manuals
196-491-000 (1986) 36-In Snow Thrower View Diagrams & Manuals
196-830-000 (1986) Attachment View Diagrams & Manuals
196-930-000 (1986) 40-In Snow Thrower View Diagrams & Manuals
196-990-000 (1986) Attachment View Diagrams & Manuals
316-550-190 (1986) Snowblower View Diagrams & Manuals
316-800-190 (1986) Snowblower View Diagrams & Manuals
190-491-190 (1987) Attachment View Diagrams & Manuals
190-830-190 (1987) Attachment View Diagrams & Manuals
190-930-190 (1987) Attachment View Diagrams & Manuals
190-990-190 (1987) Attachment View Diagrams & Manuals
317-181-190 (1987) Snowblower View Diagrams & Manuals
317-440-190 (1987) Snowblower View Diagrams & Manuals
317-552-190 (1987) Snowblower View Diagrams & Manuals
317-840-190 (1987) Snowblower View Diagrams & Manuals
190-491-190 (1988) Attachment View Diagrams & Manuals
190-930-190 (1988) Attachment View Diagrams & Manuals
190-990-190 (1988) Attachment View Diagrams & Manuals
318-181-190 (1988) Snowblower View Diagrams & Manuals
318-440-190 (1988) Snowblower View Diagrams & Manuals
318-550-190 (1988) Snowblower View Diagrams & Manuals
318-552-190 (1988) Snowblower View Diagrams & Manuals
318-840-190 (1988) Snowblower View Diagrams & Manuals
190-491-190 (1989) Attachment View Diagrams & Manuals
190-930-190 (1989) Attachment View Diagrams & Manuals
319-181-190 (1989) Snowblower View Diagrams & Manuals
319-440-190 (1989) Snowblower View Diagrams & Manuals
319-550-190 (1989) Snowblower View Diagrams & Manuals
319-552-190 (1989) Snowblower View Diagrams & Manuals
319-586-190 (1989) Snowblower View Diagrams & Manuals
319-850-190 (1989) Snowblower View Diagrams & Manuals
190-491-190 (1990) Attachment View Diagrams & Manuals
190-832-190 (1990) Attachment View Diagrams & Manuals
310-180-190 (1990) Snowblower View Diagrams & Manuals
310-181-190 (1990) Snowblower View Diagrams & Manuals
310-192-190 (1990) Snowblower View Diagrams & Manuals
310-440-190 (1990) Snowblower View Diagrams & Manuals
310-550-190 (1990) Snowblower View Diagrams & Manuals
310-552-190 (1990) Snowblower View Diagrams & Manuals
310-586-190 (1990) Snowblower View Diagrams & Manuals
310-850-190 (1990) Snowblower View Diagrams & Manuals
190-491-190 (1991) Attachment View Diagrams & Manuals
190-832-190 (1991) Attachment View Diagrams & Manuals
311-180-190 (1991) Snowblower View Diagrams & Manuals
311-181-190 (1991) Snowblower View Diagrams & Manuals
311-192-190 (1991) Snowblower View Diagrams & Manuals
311-550-190 (1991) Snowblower View Diagrams & Manuals
311-552-190 (1991) Snowblower View Diagrams & Manuals
311-586-190 (1991) Snowblower View Diagrams & Manuals
311-850-190 (1991) Snowblower View Diagrams & Manuals
190-491-190 (1992) Attachment View Diagrams & Manuals
190-831-190 (1992) Attachment View Diagrams & Manuals
190-832-190 (1992) Attachment View Diagrams & Manuals
190-985-190 (1992) Attachment View Diagrams & Manuals
252-586-190 (1992) Misc Tool View Diagrams & Manuals
312-180-190 (1992) Snowblower View Diagrams & Manuals
312-181-190 (1992) Snowblower View Diagrams & Manuals
312-192-190 (1992) Snowblower View Diagrams & Manuals
312-440-190 (1992) Snowblower View Diagrams & Manuals
312-550-190 (1992) Snowblower View Diagrams & Manuals
312-552-190 (1992) Snowblower View Diagrams & Manuals
212-390-190 (1992) Tiller View Diagrams & Manuals
190-491-190 (1993) Attachment View Diagrams & Manuals
190-831-190 (1993) Attachment View Diagrams & Manuals
190-832-190 (1993) Attachment View Diagrams & Manuals
190-990-190 (1993) Attachment View Diagrams & Manuals
313-182-190 (1993) Snowblower View Diagrams & Manuals
313-183-190 (1993) Snowblower View Diagrams & Manuals
313-192-190 (1993) Snowblower View Diagrams & Manuals
313-616E190 (1993) Snowblower View Diagrams & Manuals
313-646F190 (1993) Snowblower View Diagrams & Manuals
313-648F190 (1993) Snowblower View Diagrams & Manuals
213-340-190 (1993) Tiller View Diagrams & Manuals
190-491-190 (1994) Attachment View Diagrams & Manuals
190-831-190 (1994) Attachment View Diagrams & Manuals
190-832-190 (1994) Attachment View Diagrams & Manuals
190-990-190 (1994) Attachment View Diagrams & Manuals
314-182-190 (1994) Snowblower View Diagrams & Manuals
314-183-190 (1994) Snowblower View Diagrams & Manuals
314-192-190 (1994) Snowblower View Diagrams & Manuals
314-193-190 (1994) Snowblower View Diagrams & Manuals
314-616E190 (1994) Snowblower View Diagrams & Manuals
314-646F190 (1994) Snowblower View Diagrams & Manuals
314-648F190 (1994) Snowblower View Diagrams & Manuals
314-666G190 (1994) Snowblower View Diagrams & Manuals
214-340-190 (1994) Tiller View Diagrams & Manuals
190-491-190 (1995) Attachment View Diagrams & Manuals
190-831-190 (1995) Attachment View Diagrams & Manuals
190-832-190 (1995) Attachment View Diagrams & Manuals
190-990-190 (1995) Attachment View Diagrams & Manuals
315-142-190 (1995) Snowblower View Diagrams & Manuals
315-152-190 (1995) Snowblower View Diagrams & Manuals
315-616E190 (1995) Snowblower View Diagrams & Manuals
315-746E190 (1995) Snowblower View Diagrams & Manuals
315E142-190 (1995) Snowblower View Diagrams & Manuals
315E162-190 (1995) Snowblower View Diagrams & Manuals
315E646F190 (1995) Snowblower View Diagrams & Manuals
315E666H190 (1995) Snowblower View Diagrams & Manuals
315E756G190 (1995) Snowblower View Diagrams & Manuals
215-340-190 (1995) Tiller View Diagrams & Manuals
190-491-190 (1996) Attachment View Diagrams & Manuals
190-621-190 (1996) Attachment View Diagrams & Manuals
190-831-190 (1996) Attachment View Diagrams & Manuals
190-832-190 (1996) Attachment View Diagrams & Manuals
190-990-190 (1996) Attachment View Diagrams & Manuals
316-142-190 (1996) Snowblower View Diagrams & Manuals
316-152-190 (1996) Snowblower View Diagrams & Manuals
316-616E190 (1996) Snowblower View Diagrams & Manuals
316-746E190 (1996) Snowblower View Diagrams & Manuals
316E142-190 (1996) Snowblower View Diagrams & Manuals
316E162-190 (1996) Snowblower View Diagrams & Manuals
316E646-190 (1996) Snowblower View Diagrams & Manuals
316E666H190 (1996) Snowblower View Diagrams & Manuals
316E756G190 (1996) Snowblower View Diagrams & Manuals
190-491-000 (White)(1997) Attachment View Diagrams & Manuals
190-621-000 (White)(1997) Attachment View Diagrams & Manuals
190-623-000 (White)(1997) Attachment View Diagrams & Manuals
190-624-000 (White)(1997) Attachment View Diagrams & Manuals
190-831-000 (White)(1997) Attachment View Diagrams & Manuals
190-832-000 (White)(1997) Attachment View Diagrams & Manuals
190-990-000 (White)(1997) Attachment View Diagrams & Manuals
317E623D190 (1997) Snowblower View Diagrams & Manuals
317E633E190 (1997) Snowblower View Diagrams & Manuals
317E653F190 (1997) Snowblower View Diagrams & Manuals
317E663H190 (1997) Snowblower View Diagrams & Manuals
317E733E190 (1997) Snowblower View Diagrams & Manuals
317E753F190 (1997) Snowblower View Diagrams & Manuals
190-621-000 (White)(1998) Attachment View Diagrams & Manuals
190-623-000 (White)(1998) Attachment View Diagrams & Manuals
190-624-000 (White)(1998) Attachment View Diagrams & Manuals
31A-142-190 (1998) Snowblower View Diagrams & Manuals
31A6C0F382 (1998) Snowblower View Diagrams & Manuals
31AE623D190 (1998) Snowblower View Diagrams & Manuals
31AE633E190 (1998) Snowblower View Diagrams & Manuals
31AE653F190 (1998) Snowblower View Diagrams & Manuals
31AE663H190 (1998) Snowblower View Diagrams & Manuals
31AE733E190 (1998) Snowblower View Diagrams & Manuals
31AE753F190 (1998) Snowblower View Diagrams & Manuals
31AE983I190 (1998) Snowblower View Diagrams & Manuals
31A-142-190 (1999) Snowblower View Diagrams & Manuals
31AE573H190 (1999) Snowblower View Diagrams & Manuals
31AE5E3F190 (1999) Snowblower View Diagrams & Manuals
31AE623D190 (1999) Snowblower View Diagrams & Manuals
31AE633E190 (1999) Snowblower View Diagrams & Manuals
31AE733E190 (1999) Snowblower View Diagrams & Manuals
31AE7E3F190 (1999) Snowblower View Diagrams & Manuals
31AE993I190 (1999) Snowblower View Diagrams & Manuals
190-621-000 (190-621-190)(2000) Attachment View Diagrams & Manuals
823 (190-823-101)(2000) Attachment View Diagrams & Manuals
14AJ816H190 (GT-2150)(2000) Garden Tractor View Diagrams & Manuals
14AZ816P190 (GT-2550)(2000) Garden Tractor View Diagrams & Manuals
13AJ616H190 (LT-2150)(2000) Lawn Tractor View Diagrams & Manuals
13AO616G190 (LT-1650)(2000) Lawn Tractor View Diagrams & Manuals
13AT606H190 (LT-1800)(2000) Lawn Tractor View Diagrams & Manuals
13AT616H190 (LT-1850)(2000) Lawn Tractor View Diagrams & Manuals
31A-152-190 (SB45)(2000) Snowblower View Diagrams & Manuals
31AE162-190 (SB55)(2000) Snowblower View Diagrams & Manuals
31AE993I190 (SB1350W)(2000) Snowblower View Diagrams & Manuals
31AE993J190 (2000) Snowblower View Diagrams & Manuals
31AH623D190 (SB550)(2000) Snowblower View Diagrams & Manuals
31AH633E190 (SB750)(2000) Snowblower View Diagrams & Manuals
190-627-000 (2001) Attachment View Diagrams & Manuals
190-823-101 (2001) Attachment View Diagrams & Manuals
14BJ816H190 (GT-2150)(2001) Misc Tool View Diagrams & Manuals
14BZ816P190 (GT-2550)(2001) Misc Tool View Diagrams & Manuals
13AJ616H190 (LT-2150)(2001) Misc Tool View Diagrams & Manuals
13AP606G190 (LT-1500)(2001) Misc Tool View Diagrams & Manuals
13BO616G190 (LT-1650)(2001) Misc Tool View Diagrams & Manuals
13BT616H190 (LT-1850)(2001) Misc Tool View Diagrams & Manuals
13CO616G190 (LT-1650)(2001) Misc Tool View Diagrams & Manuals
31A-140-000 (2001) Snow Thrower 140 View Diagrams & Manuals
31A-152-190 (2001) Snowblower View Diagrams & Manuals
31AD6J3D190 (2001) Snowblower View Diagrams & Manuals
31AD6K3E190 (2001) Snowblower View Diagrams & Manuals
31AD7K3E190 (2001) Snowblower View Diagrams & Manuals
31AE162-190 (2001) Snowblower View Diagrams & Manuals
31AE993I190 (2001) Snowblower View Diagrams & Manuals
31AE993J190 (2001) Snowblower View Diagrams & Manuals
190-627-000 (2002) Attachment View Diagrams & Manuals
190-823-101 (2002) Attachment View Diagrams & Manuals
14AZ816K190 (GT-2550)(2002) Misc Tool View Diagrams & Manuals
14BJ816H190 (GT-2150)(2002) Misc Tool View Diagrams & Manuals
13AA662F190 (LT-13)(2002) Misc Tool View Diagrams & Manuals
13AA692G190 (LT-135)(2002) Misc Tool View Diagrams & Manuals
13AP606G190 (LT-1500)(2002) Misc Tool View Diagrams & Manuals
13BT616H190 (LT-1850)(2002) Misc Tool View Diagrams & Manuals
13CO616G190 (LT-1650)(2002) Misc Tool View Diagrams & Manuals
31A-152-190 (2002) Snowblower View Diagrams & Manuals
31AE295-190 (2002) Snowblower View Diagrams & Manuals
31AE633E190 (2002) Snowblower View Diagrams & Manuals
31AE993I190 (2002) Snowblower View Diagrams & Manuals
190-627-000 (2003) Attachment View Diagrams & Manuals
190-823-101 (2003) Attachment View Diagrams & Manuals
14A6816H190 (GT-2150)(2003) Misc Tool View Diagrams & Manuals
14A9816K190 (GT-2550)(2003) Misc Tool View Diagrams & Manuals
13A2682F190 (LT-15)(2003) Misc Tool View Diagrams & Manuals
13A2693G190 (LT-165)(2003) Misc Tool View Diagrams & Manuals
13A4616G190 (LT-1650)(2003) Misc Tool View Diagrams & Manuals
13A6616H190 (LT-1850)(2003) Misc Tool View Diagrams & Manuals
13B4516N190 (RD-1750)(2003) Misc Tool View Diagrams & Manuals
190-823-101 (2004) Attachment View Diagrams & Manuals
14A9816K790 (GT-2550H)(2004) Misc Tool View Diagrams & Manuals
13A2606G790 (LT-1800)(2004) Misc Tool View Diagrams & Manuals
13A2683G790 (LT-175)(2004) Misc Tool View Diagrams & Manuals
13A6606H790 (LT-2200)(2004) Misc Tool View Diagrams & Manuals
13AJ606G790 (LT-1855)(2004) Misc Tool View Diagrams & Manuals
13AJ616G790 (LT-1855H)(2004) Misc Tool View Diagrams & Manuals
13AY616G790 (LT-1855H)(2004) Misc Tool View Diagrams & Manuals
13B4516N190 (RD-1750)(2004) Misc Tool View Diagrams & Manuals
190-823-101 (2005) Attachment View Diagrams & Manuals
14A9816P790 (GT-950H)(2005) Misc Tool View Diagrams & Manuals
13A2771G790 (LT-542G)(2005) Misc Tool View Diagrams & Manuals
13A2791G790 (LT-542H)(2005) Misc Tool View Diagrams & Manuals
13A4616G790 (LT-942H)(2005) Misc Tool View Diagrams & Manuals
13A4616H790 (LT-946H)(2005) Misc Tool View Diagrams & Manuals
31AE6BHE790 (SB-624)(2005-2) Snowblower View Diagrams & Manuals
31AE6BHE791 (SB-624)(2005-2) Snowblower View Diagrams & Manuals
31AE9M6G590 (SB-928)(2005-2) Snowblower View Diagrams & Manuals
31AE9P6I590 (SB-933)(2005-2) Snowblower View Diagrams & Manuals
31AE9P6J590 (SB-945)(2005-2) Snowblower View Diagrams & Manuals
190-032-101 (2006) Attachment View Diagrams & Manuals
190-823-101 (2006) Attachment View Diagrams & Manuals
14AQ816K790 (GT-954H)(2006) Misc Tool View Diagrams & Manuals
13A2771G790 (LT-542G)(2006) Misc Tool View Diagrams & Manuals
13A2791G790 (LT-542H)(2006) Misc Tool View Diagrams & Manuals
13AP606H790 (LT-946G)(2006) Misc Tool View Diagrams & Manuals
13AP616P790 (LT-950H)(2006) Misc Tool View Diagrams & Manuals
13AX605G790 (LT-942G)(2006) Misc Tool View Diagrams & Manuals
31AE9M6G590 (SB-928)(2006) Snowblower View Diagrams & Manuals
31AE9O6I590 (SB-933)(2006) Snowblower View Diagrams & Manuals
31AE9P6J590 (SB-945)(2006) Snowblower View Diagrams & Manuals
31AH5MLH590 (SB-630)(2006) Snowblower View Diagrams & Manuals
31AH6BHE790 (SB624)(2006) Snowblower View Diagrams & Manuals
190-032-101 (2007) Attachment View Diagrams & Manuals
14AA815K790 (GT-954)(2007) Misc Tool View Diagrams & Manuals
13AJ775G790 (LT-542G)(2007) Misc Tool View Diagrams & Manuals
13AN775H790 (LT-546G)(2007) Misc Tool View Diagrams & Manuals
13AN795G790 (LT-542H)(2007) Misc Tool View Diagrams & Manuals
31AE9M6G590 (SB-928)(2007) Snowblower View Diagrams & Manuals
31AE9O6I590 (SB-933)(2007) Snowblower View Diagrams & Manuals
31AE9P6J590 (SB-945)(2007) Snowblower View Diagrams & Manuals
31AH5MLH590 (SB-630)(2007) Snowblower View Diagrams & Manuals
31AH6BHE790 (SB624)(2007) Snowblower View Diagrams & Manuals
190-032-101 (2008) Attachment View Diagrams & Manuals
13AP60TP090 (LT-5000)(2008) Misc Tool View Diagrams & Manuals
13AP60TP290 (LT-5000)(2008) Misc Tool View Diagrams & Manuals
13AX79TH090 (LT-4600H)(2008) Misc Tool View Diagrams & Manuals
31AH6WFG790 (SB628)(2008) Snowblower View Diagrams & Manuals
190-032-101 (2009) Attachment View Diagrams & Manuals
190-032-101 (2010) Attachment View Diagrams & Manuals
13AV77TF090 (13AV77TF090 LT-1700)(2010) Misc Tool View Diagrams & Manuals
13AX78TS090 (13AX78TS090 LT-2000)(2010) Misc Tool View Diagrams & Manuals
13AX78TT090 (13AX78TT090 LT-2200)(2010) Misc Tool View Diagrams & Manuals
13WV77TF090 (13WV77TF090 LT-1700)(2010) Misc Tool View Diagrams & Manuals
13WX78TS090 (13WX78TS090 LT-2000)(2010) Misc Tool View Diagrams & Manuals
13WX78TT090 (13WX78TT090 LT2200)(2010) Misc Tool View Diagrams & Manuals
190-032-101 (2011) Attachment View Diagrams & Manuals
13A3665G000 (2003) Lawn Tractor View Diagrams & Manuals
13AH762F752 (2005) Lawn Tractor View Diagrams & Manuals
13AH762F752 (2006) Lawn Tractor View Diagrams & Manuals
31AS6FEF729 (2005-2) Snow Thrower View Diagrams & Manuals
13AD604G401 (1999) Lawn Tractor View Diagrams & Manuals
13AT604G401 (1999) Lawn Tractor View Diagrams & Manuals
13AU604H401 (1999) Lawn Tractor View Diagrams & Manuals
13AU604H402 (1999) Lawn Tractor View Diagrams & Manuals
13AX604G401 (1999) Lawn Tractor View Diagrams & Manuals
13AX604G402 (1999) Lawn Tractor View Diagrams & Manuals
13AD604G401 (2000) Lawn Tractor View Diagrams & Manuals
13AK604G401 (2000) Lawn Tractor View Diagrams & Manuals
13AU604H401 (2000) Lawn Tractor View Diagrams & Manuals
13AX604H401 (2000) Lawn Tractor View Diagrams & Manuals
13AU604H401 (2001) Lawn Tractor View Diagrams & Manuals
13AX604G401 (2001) Lawn Tractor View Diagrams & Manuals
13BD604G401 (2001) Lawn Tractor View Diagrams & Manuals
13BX604G401 (2001) Lawn Tractor View Diagrams & Manuals
13AA604F401 (2002) Lawn Tractor View Diagrams & Manuals
13AU604H401 (2002) Lawn Tractor View Diagrams & Manuals
13AY614G401 (2002) Lawn Tractor View Diagrams & Manuals
13BD604G401 (2002) Lawn Tractor View Diagrams & Manuals
13AT604H401 (2003) Lawn Tractor View Diagrams & Manuals
13AT614H401 (2003) Lawn Tractor View Diagrams & Manuals
13AZ614H401 (2003) Lawn Tractor View Diagrams & Manuals
13BT604G401 (2003) Lawn Tractor View Diagrams & Manuals
13BT604H401 (2003) Lawn Tractor View Diagrams & Manuals
13CX614G401 (2003) Lawn Tractor View Diagrams & Manuals
13AD683G713 (2004) Lawn Tractor View Diagrams & Manuals
13AT604G701 (2004) Lawn Tractor View Diagrams & Manuals
13AT604H701 (2004) Lawn Tractor View Diagrams & Manuals
13AT614H401 (2004) Lawn Tractor View Diagrams & Manuals
13AT614H701 (2004) Lawn Tractor View Diagrams & Manuals
13AX614G701 (2004) Lawn Tractor View Diagrams & Manuals
13AZ614H401 (2004) Lawn Tractor View Diagrams & Manuals
13AZ614H701 (2004) Lawn Tractor View Diagrams & Manuals
13BT604G401 (2004) Lawn Tractor View Diagrams & Manuals
13BT604H401 (2004) Lawn Tractor View Diagrams & Manuals
13CX614G401 (2004) Lawn Tractor View Diagrams & Manuals
13AN791G755 (2005) Lawn Tractor View Diagrams & Manuals
13AP615P755 (2005) Lawn Tractor View Diagrams & Manuals
13AT605G755 (2005) Lawn Tractor View Diagrams & Manuals
13AT605H755 (2005) Lawn Tractor View Diagrams & Manuals
13AU615P755 (2005) Lawn Tractor View Diagrams & Manuals
13BT604H755 (2005) Lawn Tractor View Diagrams & Manuals
13AN771G755 (2006) Lawn Tractor View Diagrams & Manuals
13AP605H755 (2006) Lawn Tractor View Diagrams & Manuals
13AX605G755 (2006) Lawn Tractor View Diagrams & Manuals
13AC762F755 (2007) Lawn Tractor View Diagrams & Manuals
13AM772G755 (2007) Lawn Tractor View Diagrams & Manuals
13AO772H755 (2007) Lawn Tractor View Diagrams & Manuals
13BP605H755 (2007) Lawn Tractor View Diagrams & Manuals
13BX605G755 (2007) Lawn Tractor View Diagrams & Manuals
13AO771H055 (2008) Lawn Tractor View Diagrams & Manuals
13AO772G055 (2008) Lawn Tractor View Diagrams & Manuals
13AX615G055 (2008) Lawn Tractor View Diagrams & Manuals
13AN772G055 (2009) Lawn Tractor View Diagrams & Manuals
13AO771H055 (2009) Lawn Tractor View Diagrams & Manuals
13RN772G055 (2009) Lawn Tractor View Diagrams & Manuals
13AC76LF055 (2010) Lawn Tractor View Diagrams & Manuals
14AU844H401 (1998) Garden Tractor View Diagrams & Manuals
14AU844H401 (1999) Garden Tractor View Diagrams & Manuals
315E162-401 (1995) Snow Thrower View Diagrams & Manuals
315E633E401 (1995) Snow Thrower View Diagrams & Manuals
315E733E401 (1995) Snow Thrower View Diagrams & Manuals
315E753F401 (1995) Snow Thrower View Diagrams & Manuals
316E162-401 (1996) Snow Thrower View Diagrams & Manuals
316E613D401 (1996) Snow Thrower View Diagrams & Manuals
316E633E401 (1996) Snow Thrower View Diagrams & Manuals
316E633E701 (1996) Snow Thrower View Diagrams & Manuals
316E733E401 (1996) Snow Thrower View Diagrams & Manuals
316E733E701 (1996) Snow Thrower View Diagrams & Manuals
316E753F401 (1996) Snow Thrower View Diagrams & Manuals
316E753F701 (1996) Snow Thrower View Diagrams & Manuals
317E623D401 (1997) Snow Thrower View Diagrams & Manuals
317E633E401 (1997) Snow Thrower View Diagrams & Manuals
317E663H401 (1997) Snow Thrower View Diagrams & Manuals
317E733E401 (1997) Snow Thrower View Diagrams & Manuals
317E753F401 (1997) Snow Thrower View Diagrams & Manuals
31AE623D401 (1998) Snow Thrower View Diagrams & Manuals
31AE633E401 (1998) Snow Thrower View Diagrams & Manuals
31AE653F401 (1998) Snow Thrower View Diagrams & Manuals
31AE663H401 (1998) Snow Thrower View Diagrams & Manuals
31AE6B3H401 (1998) Snow Thrower View Diagrams & Manuals
31AE753F401 (1998) Snow Thrower View Diagrams & Manuals
31AE983H401 (1998) Snow Thrower View Diagrams & Manuals
31AE993I401 (1998) Snow Thrower View Diagrams & Manuals
31AE162-401 (1999) Snow Thrower View Diagrams & Manuals
31AE553F401 (1999) Snow Thrower View Diagrams & Manuals
31AE573H401 (1999) Snow Thrower View Diagrams & Manuals
31AE633E401 (1999) Snow Thrower View Diagrams & Manuals
31AE663H401 (1999) Snow Thrower View Diagrams & Manuals
31AE6B3H401 (1999) Snow Thrower View Diagrams & Manuals
31AE753F401 (1999) Snow Thrower View Diagrams & Manuals
31AE993I401 (1999) Snow Thrower View Diagrams & Manuals
31AE663H401 (2000) Snow Thrower View Diagrams & Manuals
31AE993I401 (2000) Snow Thrower View Diagrams & Manuals
31AE633E401 (2001) Snow Thrower View Diagrams & Manuals
31AE663H401 (2001) Snow Thrower View Diagrams & Manuals
31AE993I401 (2001) Snow Thrower View Diagrams & Manuals
31AE285-401 (2002) Snow Thrower View Diagrams & Manuals
31AE295-401 (2002) Snow Thrower View Diagrams & Manuals
31AE663H401 (2002) Snow Thrower View Diagrams & Manuals
31AE993I401 (2002) Snow Thrower View Diagrams & Manuals
31AE993J401 (2002) Snow Thrower View Diagrams & Manuals
31AE285-401 (2003) Snow Thrower View Diagrams & Manuals
31AE295-401 (2003) Snow Thrower View Diagrams & Manuals
31AE663H401 (2003) Snow Thrower View Diagrams & Manuals
31AE993I401 (2003) Snow Thrower View Diagrams & Manuals
31AE993J401 (2003) Snow Thrower View Diagrams & Manuals
31BH5C3F401 (2003) Snow Thrower View Diagrams & Manuals
31BH5Q3G401 (2003) Snow Thrower View Diagrams & Manuals
31BH763G401 (2003) Snow Thrower View Diagrams & Manuals
31AE643E401 (2004) Snow Thrower View Diagrams & Manuals
31AE663H401 (2004) Snow Thrower View Diagrams & Manuals
31AE993J401 (2004) Snow Thrower View Diagrams & Manuals
31BH5C3F401 (2004) Snow Thrower View Diagrams & Manuals
31BH5Q3G401 (2004) Snow Thrower View Diagrams & Manuals
31BH763G401 (2004) Snow Thrower View Diagrams & Manuals
31AE5KLF801 (2005-2) Snow Thrower View Diagrams & Manuals
31AE6GLF801 (2005-2) Snow Thrower View Diagrams & Manuals
31AE9P3I801 (2005) Snow Thrower View Diagrams & Manuals
31AE9P3I801 (2005-2) Snow Thrower View Diagrams & Manuals
31AE9P3J801 (2005) Snow Thrower View Diagrams & Manuals
31AE9P3J801 (2005-2) Snow Thrower View Diagrams & Manuals
31AH6LLH801 (2005-2) Snow Thrower View Diagrams & Manuals
31AH7L3G701 (2005) Snow Thrower View Diagrams & Manuals
31AH7S3G701 (2005-2) Snow Thrower View Diagrams & Manuals
31AE5KLF801 (2006) Snow Thrower View Diagrams & Manuals
31AE5KLG801 (2007) Snow Thrower View Diagrams & Manuals
31AH65LG701 (2010) Snow Thrower View Diagrams & Manuals
31AM63LF701 (2010) Snow Thrower View Diagrams & Manuals
31AH65LG701 (2011) Snow Thrower View Diagrams & Manuals
31AM63KE701 (2011) Snow Thrower View Diagrams & Manuals
31AM63LF701 (2011) Snow Thrower View Diagrams & Manuals
31AH65LG701 (2012) Snow Thrower View Diagrams & Manuals
31AM63KE701 (2012) Snow Thrower View Diagrams & Manuals
31AM63LF701 (2012) Snow Thrower View Diagrams & Manuals
31AS63EE701 (2012) Snow Thrower View Diagrams & Manuals
31AH65LG701 (2013) Snow Thrower View Diagrams & Manuals
31AM63KE701 (2013) Snow Thrower View Diagrams & Manuals
31AM63LF701 (2013) Snow Thrower View Diagrams & Manuals
138-752-023 (1988) ) Lawn Tractor View Diagrams & Manuals
147-852-095 (1987) ) Garden Tractor View Diagrams & Manuals
147-852-192 (1987) ) Garden Tractor View Diagrams & Manuals
5Z028-1 (148-862-135)(1988) ) Garden Tractor View Diagrams & Manuals
5Z028 (147-862-135)(1987) ) Garden Tractor View Diagrams & Manuals
190-032 (2013) Snow Thrower Attachment View Diagrams & Manuals
190-032 (2014) Snow Thrower Attachment View Diagrams & Manuals
0021845 (310-181-122)(1990) ) Snow Thrower View Diagrams & Manuals
0021845 (312-181-122)(1992) ) Snow Thrower View Diagrams & Manuals
01918 (310-840-118)(1990) ) Snow Thrower View Diagrams & Manuals
032 (2006) 42 Inch 2-Stage Snow Thrower View Diagrams & Manuals
032 (2008) 42 Inch 2-Stage Snow Thrower View Diagrams & Manuals
05372 (310-181-118)(1990) ) Snow Thrower View Diagrams & Manuals
0573853 (318-180-095)(1988) ) Snow Thrower View Diagrams & Manuals
0573896 (318-550-095)(1988) ) Snow Thrower View Diagrams & Manuals
0573909 (318-840-095)(1988) ) Snow Thrower View Diagrams & Manuals
0573917 (318-552-095)(1988) ) Snow Thrower View Diagrams & Manuals
1619743 (316E660G352)(1996) ) Snow Thrower View Diagrams & Manuals
1652649 (316-140-352)(1996) ) Snow Thrower View Diagrams & Manuals
1652649 (316-140-752)(1996) ) Snow Thrower View Diagrams & Manuals
1652656 (316E611D352)(1996) ) Snow Thrower View Diagrams & Manuals
1652656 (316E611D752)(1996) ) Snow Thrower View Diagrams & Manuals
1652670 (316E740F352)(1996) ) Snow Thrower View Diagrams & Manuals
1652670 (316E740F752)(1996) ) Snow Thrower View Diagrams & Manuals
1683580 (316E640F352)(1996) ) Snow Thrower View Diagrams & Manuals
1683580 (316E640F752)(1996) ) Snow Thrower View Diagrams & Manuals
26274 (310-550-118)(1990) ) Snow Thrower View Diagrams & Manuals
26274 (316-611D118)(1996) ) Snow Thrower View Diagrams & Manuals
2824-985 (310-840-031)(1990) ) Snow Thrower View Diagrams & Manuals
2824-985 (318-840-031)(1988) ) Snow Thrower View Diagrams & Manuals
2824-993 (318-850-031)(1988) ) Snow Thrower View Diagrams & Manuals
2828-366 (318-552-031)(1988) ) Snow Thrower View Diagrams & Manuals
2828-556 (310-588-031)(1990) ) Snow Thrower View Diagrams & Manuals
2833-762 (310-960-031)(1990) ) Snow Thrower View Diagrams & Manuals
310-586-046 (1990) ) Snow Thrower View Diagrams & Manuals
311-181-118 (1991) ) Snow Thrower View Diagrams & Manuals
311-550-118 (1991) ) Snow Thrower View Diagrams & Manuals
315-150-331 (1985) ) Snow Thrower View Diagrams & Manuals
317-180-027 (1987) ) Snow Thrower View Diagrams & Manuals
317-180-031 (1987) ) Snow Thrower View Diagrams & Manuals
317-180-050 (1987) ) Snow Thrower View Diagrams & Manuals
317-180-087 (1987) ) Snow Thrower View Diagrams & Manuals
317-180-095 (1987) ) Snow Thrower View Diagrams & Manuals
317-180-098 (1987) ) Snow Thrower View Diagrams & Manuals
317-180-120 (1987) ) Snow Thrower View Diagrams & Manuals
317-180-205 (1987) ) Snow Thrower View Diagrams & Manuals
317-180-327 (1987) ) Snow Thrower View Diagrams & Manuals
317-180-331 (1987) ) Snow Thrower View Diagrams & Manuals
317-181-027 (1987) ) Snow Thrower View Diagrams & Manuals
317-181-031 (1987) ) Snow Thrower View Diagrams & Manuals
317-181-122 (1987) ) Snow Thrower View Diagrams & Manuals
317-181-205 (1987) ) Snow Thrower View Diagrams & Manuals
317-450-027 (1987) ) Snow Thrower View Diagrams & Manuals
317-450-031 (1987) ) Snow Thrower View Diagrams & Manuals
317-450-105 (1987) ) Snow Thrower View Diagrams & Manuals
317-450-122 (1987) ) Snow Thrower View Diagrams & Manuals
317-450-205 (1987) ) Snow Thrower View Diagrams & Manuals
317-550-027 (1987) ) Snow Thrower View Diagrams & Manuals
317-550-031 (1987) ) Snow Thrower View Diagrams & Manuals
317-550-050 (1987) ) Snow Thrower View Diagrams & Manuals
317-550-087 (1987) ) Snow Thrower View Diagrams & Manuals
317-550-095 (1987) ) Snow Thrower View Diagrams & Manuals
317-550-098 (1987) ) Snow Thrower View Diagrams & Manuals
317-550-105 (1987) ) Snow Thrower View Diagrams & Manuals
317-550-120 (1987) ) Snow Thrower View Diagrams & Manuals
317-550-205 (1987) ) Snow Thrower View Diagrams & Manuals
317-550-327 (1987) ) Snow Thrower View Diagrams & Manuals
317-552-027 (1987) ) Snow Thrower View Diagrams & Manuals
317-552-095 (1987) ) Snow Thrower View Diagrams & Manuals
317-552-105 (1987) ) Snow Thrower View Diagrams & Manuals
317-586-027 (1987) ) Snow Thrower View Diagrams & Manuals
317-586-031 (1987) ) Snow Thrower View Diagrams & Manuals
317-586-098 (1987) ) Snow Thrower View Diagrams & Manuals
317-586-105 (1987) ) Snow Thrower View Diagrams & Manuals
317-586-120 (1987) ) Snow Thrower View Diagrams & Manuals
317-586-205 (1987) ) Snow Thrower View Diagrams & Manuals
317-586-327 (1987) ) Snow Thrower View Diagrams & Manuals
317-588-105 (1987) ) Snow Thrower View Diagrams & Manuals
317-588-205 (1987) ) Snow Thrower View Diagrams & Manuals
317-840-027 (1987) ) Snow Thrower View Diagrams & Manuals
317-840-031 (1987) ) Snow Thrower View Diagrams & Manuals
317-840-050 (1987) ) Snow Thrower View Diagrams & Manuals
317-840-095 (1987) ) Snow Thrower View Diagrams & Manuals
317-840-105 (1987) ) Snow Thrower View Diagrams & Manuals
317-840-205 (1987) ) Snow Thrower View Diagrams & Manuals
317-840-327 (1987) ) Snow Thrower View Diagrams & Manuals
317-850-031 (1987) ) Snow Thrower View Diagrams & Manuals
317-850-205 (1987) ) Snow Thrower View Diagrams & Manuals
318-180-092 (1988) ) Snow Thrower View Diagrams & Manuals
318-180-098 (1988) ) Snow Thrower View Diagrams & Manuals
318-181-122 (1988) ) Snow Thrower View Diagrams & Manuals
318-450-105 (1988) ) Snow Thrower View Diagrams & Manuals
318-550-098 (1988) ) Snow Thrower View Diagrams & Manuals
318-550-105 (1988) ) Snow Thrower View Diagrams & Manuals
318-550-118 (1988) ) Snow Thrower View Diagrams & Manuals
318-552-105 (1988) ) Snow Thrower View Diagrams & Manuals
318-586-098 (1988) ) Snow Thrower View Diagrams & Manuals
318-586-105 (1988) ) Snow Thrower View Diagrams & Manuals
318-586-157 (1988) ) Snow Thrower View Diagrams & Manuals
318-840-105 (1988) ) Snow Thrower View Diagrams & Manuals
318-850-105 (1988) ) Snow Thrower View Diagrams & Manuals
319-180-327 (1989) ) Snow Thrower View Diagrams & Manuals
319-180-352 (1989) ) Snow Thrower View Diagrams & Manuals
319-181-206 (1989) ) Snow Thrower View Diagrams & Manuals
319-181-327 (1989) ) Snow Thrower View Diagrams & Manuals
319-450-206 (1989) ) Snow Thrower View Diagrams & Manuals
319-450-327 (1989) ) Snow Thrower View Diagrams & Manuals
319-550-327 (1989) ) Snow Thrower View Diagrams & Manuals
319-550-352 (1989) ) Snow Thrower View Diagrams & Manuals
319-552-206 (1989) ) Snow Thrower View Diagrams & Manuals
319-586-206 (1989) ) Snow Thrower View Diagrams & Manuals
319-586-327 (1989) ) Snow Thrower View Diagrams & Manuals
319-586-352 (1989) ) Snow Thrower View Diagrams & Manuals
319-840-206 (1989) ) Snow Thrower View Diagrams & Manuals
319-850-327 (1989) ) Snow Thrower View Diagrams & Manuals
319-960-206 (1989) ) Snow Thrower View Diagrams & Manuals
319-960-327 (1989) ) Snow Thrower View Diagrams & Manuals
356-915 (310-586-027)(1990) ) Snow Thrower View Diagrams & Manuals
356-915 (318-586-027)(1988) ) Snow Thrower View Diagrams & Manuals
391-995 (310-960-027)(1990) ) Snow Thrower View Diagrams & Manuals
411-082 (310-180-027)(1990) ) Snow Thrower View Diagrams & Manuals
411-082 (318-180-027)(1988) ) Snow Thrower View Diagrams & Manuals
411-367 (318-550-027)(1988) ) Snow Thrower View Diagrams & Manuals
414-367 (310-550-027)(1990) ) Snow Thrower View Diagrams & Manuals
4Z307 (318-850-135)(1988) ) Snow Thrower View Diagrams & Manuals
502549 (316-150-118)(1996) ) Snow Thrower View Diagrams & Manuals
504167 (319-180-102)(1989) ) Snow Thrower View Diagrams & Manuals
504175 (319-840-102)(1989) ) Snow Thrower View Diagrams & Manuals
537980 (316E661E118)(1996) ) Snow Thrower View Diagrams & Manuals
576-777 (310-552-027)(1990) ) Snow Thrower View Diagrams & Manuals
576-777 (318-552-027)(1988) ) Snow Thrower View Diagrams & Manuals
590678 (316E760F118)(1996) ) Snow Thrower View Diagrams & Manuals
7025612 (316E610E033)(1996) ) Snow Thrower View Diagrams & Manuals
75903 (316E640F033)(1996) ) Snow Thrower View Diagrams & Manuals
75903 (317E640F033)(1997) ) Snow Thrower View Diagrams & Manuals
95-7504-4F (319-180-098)(1989) ) Snow Thrower View Diagrams & Manuals
95-7506-9F (319-550-098)(1989) ) Snow Thrower View Diagrams & Manuals
95-7508-5F (319-586-098)(1989) ) Snow Thrower View Diagrams & Manuals
95-7520-0F (319-552-098)(1989) ) Snow Thrower View Diagrams & Manuals
9Z289 (318-180-135)(1988) ) Snow Thrower View Diagrams & Manuals
9Z290 (318-450-135)(1988) ) Snow Thrower View Diagrams & Manuals
9Z291 (318-586-135)(1988) ) Snow Thrower View Diagrams & Manuals
9Z306 (318-550-135)(1988) ) Snow Thrower View Diagrams & Manuals
9Z396 (318-840-135)(1988) ) Snow Thrower View Diagrams & Manuals
223-9014-00 (250-586-034)(1990) ) Edger View Diagrams & Manuals
223-9113-00 (251-586-034)(1991) ) Edger View Diagrams & Manuals
32922 (250-586-170)(1990) ) Edger View Diagrams & Manuals
569541 (250-586-084)(1990) ) Edger View Diagrams & Manuals
569541 (251-586-084)(1991) ) Edger View Diagrams & Manuals
72774 (250-586-033)(1990) ) Edger View Diagrams & Manuals
750315 (251-586-102)(1991) ) Edger View Diagrams & Manuals
91592 (251-586-062)(1991) ) Edger View Diagrams & Manuals
93930 (251-586-013)(1991) ) Edger View Diagrams & Manuals
B033-256 (251-586-031)(1991) ) Edger View Diagrams & Manuals
2202A39 (213-340-098)(1993) ) Tiller View Diagrams & Manuals
223-921-500 (212-340-034)(1992) ) Tiller View Diagrams & Manuals
40585 (213-390-105)(1993) ) Tiller View Diagrams & Manuals
41292 (213-340-105)(1993) ) Tiller View Diagrams & Manuals
5055-21 (212-390-016)(1992) ) Tiller View Diagrams & Manuals
50668 (212-340-382)(1992) ) Tiller View Diagrams & Manuals
579-623 (212-340-129)(1992) ) Tiller View Diagrams & Manuals
579661 (212-390-111)(1992) ) Tiller View Diagrams & Manuals
70578 (212-390-033)(1992) ) Tiller View Diagrams & Manuals
70578 (213-390-033)(1993) ) Tiller View Diagrams & Manuals
765244 (212-340-009)(1992) ) Tiller View Diagrams & Manuals
765244 (213-390-009)(1993) ) Tiller View Diagrams & Manuals
765252 (212-390-009)(1992) ) Tiller View Diagrams & Manuals
8918 (212-340-101)(1992) ) Tiller View Diagrams & Manuals
95208 (213-340-062)(1993) ) Tiller View Diagrams & Manuals
Bolens
13AM761F065 (2009) Lawn Tractor View Diagrams & Manuals
13AM761F265 (2009) Lawn Tractor View Diagrams & Manuals
13AM762F065 (2008) Lawn Tractor View Diagrams & Manuals
13AM762F765 (2006) Lawn Tractor View Diagrams & Manuals
13AM762F265 (2008) Lawn Tractor View Diagrams & Manuals
13AM762F765 (2005) Lawn Tractor View Diagrams & Manuals
13AM762F765 (2007) Lawn Tractor View Diagrams & Manuals
13AC650F765 (2004) Lawn Tractor View Diagrams & Manuals
13AM662F765 (2004) Lawn Tractor View Diagrams & Manuals
13AG683H163 (2003) Lawn Tractor View Diagrams & Manuals
13AM662F163 (2003) Lawn Tractor View Diagrams & Manuals
13AM662G765 (2004) Lawn Tractor View Diagrams & Manuals
13AN683G163 (2003) Lawn Tractor View Diagrams & Manuals
13AG683G163 (2003) Lawn Tractor View Diagrams & Manuals
13AO683G163 (2003) Lawn Tractor View Diagrams & Manuals
14AG808H163 (2003) Garden Tractor View Diagrams & Manuals
31AS611D163 (2004) Snowblower View Diagrams & Manuals
13WC762F065 (2010) Ride on Lawn Mower View Diagrams & Manuals
Yard Man
213-390-401 (1993) Tiller View Diagrams & Manuals
315E753F401 (1995) Snowblower View Diagrams & Manuals
13AC762F755 (2007) Lawn Tractor View Diagrams & Manuals
315E162-401 (1995) Snowblower View Diagrams & Manuals
316E162-401 (1996) Snowblower View Diagrams & Manuals
315E633E401 (1995) Snowblower View Diagrams & Manuals
316E613D401 (1996) Snowblower View Diagrams & Manuals
13AM772G755 (2007) Lawn Tractor View Diagrams & Manuals
316E633E401 (1996) Snowblower View Diagrams & Manuals
315E733E401 (1995) Snowblower View Diagrams & Manuals
13AO772H755 (2007) Lawn Tractor View Diagrams & Manuals
316E633E701 (1996) Snowblower View Diagrams & Manuals
316E733E401 (1996) Snowblower View Diagrams & Manuals
13BP605H755 (2007) Lawn Tractor View Diagrams & Manuals
316E733E701 (1996) Snowblower View Diagrams & Manuals
316E753F401 (1996) Snowblower View Diagrams & Manuals
316E753F701 (1996) Snowblower View Diagrams & Manuals
317E623D401 (1997) Snowblower View Diagrams & Manuals
317E633E401 (1997) Snowblower View Diagrams & Manuals
317E753F401 (1997) Snowblower View Diagrams & Manuals
31AE623D401 (1998) Snowblower View Diagrams & Manuals
317E663H401 (1997) Snowblower View Diagrams & Manuals
31AE633E401 (1998) Snowblower View Diagrams & Manuals
317E733E401 (1997) Snowblower View Diagrams & Manuals
31AE653F401 (1998) Snowblower View Diagrams & Manuals
31AE663H401 (1998) Snowblower View Diagrams & Manuals
31AE162-401 (1999) Snowblower View Diagrams & Manuals
31AE6B3H401 (1998) Snowblower View Diagrams & Manuals
31AE753F401 (1998) Snowblower View Diagrams & Manuals
31AE983H401 (1998) Snowblower View Diagrams & Manuals
31AE993I401 (1998) Snowblower View Diagrams & Manuals
31AE6B3H401 (1999) Snowblower View Diagrams & Manuals
31AE753F401 (1999) Snowblower View Diagrams & Manuals
31AE993I401 (1999) Snowblower View Diagrams & Manuals
31AE663H401 (2000) Snowblower View Diagrams & Manuals
31AE993I401 (2000) Snowblower View Diagrams & Manuals
31AE553F401 (1999) Snowblower View Diagrams & Manuals
31AE573H401 (1999) Snowblower View Diagrams & Manuals
31AE633E401 (1999) Snowblower View Diagrams & Manuals
31AE663H401 (1999) Snowblower View Diagrams & Manuals
31AE285-401 (2002) Snowblower View Diagrams & Manuals
31AE295-401 (2002) Snowblower View Diagrams & Manuals
31AE663H401 (2002) Snowblower View Diagrams & Manuals
31AE663H401 (2003) Snowblower View Diagrams & Manuals
31AE993I401 (2003) Snowblower View Diagrams & Manuals
31AE633E401 (2001) Snowblower View Diagrams & Manuals
31AE993J401 (2003) Snowblower View Diagrams & Manuals
31AE663H401 (2001) Snowblower View Diagrams & Manuals
31BH5C3F401 (2003) Snowblower View Diagrams & Manuals
31AE993I401 (2001) Snowblower View Diagrams & Manuals
31BH5Q3G401 (2003) Snowblower View Diagrams & Manuals
31AE993I401 (2002) Snowblower View Diagrams & Manuals
31BH763G401 (2003) Snowblower View Diagrams & Manuals
31AE993J401 (2002) Snowblower View Diagrams & Manuals
31AE993J401 (2004) Snowblower View Diagrams & Manuals
31BH5C3F401 (2004) Snowblower View Diagrams & Manuals
31BH5Q3G401 (2004) Snowblower View Diagrams & Manuals
31BH763G401 (2004) Snowblower View Diagrams & Manuals
31AE285-401 (2003) Snowblower View Diagrams & Manuals
31AE295-401 (2003) Snowblower View Diagrams & Manuals
31AE643E401 (2004) Snowblower View Diagrams & Manuals
31AE663H401 (2004) Snowblower View Diagrams & Manuals
31AE993I400 (2004) Snowblower View Diagrams & Manuals
31AE5KLF801 (2005-2) Snowblower View Diagrams & Manuals
31AE6GLF801 (2005-2) Snowblower View Diagrams & Manuals
31AE9P3J801 (2005-2) Snowblower View Diagrams & Manuals
31AH6LLH801 (2005-2) Snowblower View Diagrams & Manuals
31AH7L3G701 (2005) Snowblower View Diagrams & Manuals
31AH7S3G701 (2005-2) Snowblower View Diagrams & Manuals
31AE9P3I801 (2005) Snowblower View Diagrams & Manuals
31AE9P3I801 (2005-2) Snowblower View Diagrams & Manuals
31AE9P3J801 (2005) Snowblower View Diagrams & Manuals
31AE5KLF801 (2006) Snowblower View Diagrams & Manuals
31AE5KLG801 (2007) Snowblower View Diagrams & Manuals
13AN772G055 (2009) Lawn Tractor View Diagrams & Manuals
13AO771H055 (2009) Lawn Tractor View Diagrams & Manuals
13AO772G055 (2008) Lawn Tractor View Diagrams & Manuals
13AX615G055 (2008) Lawn Tractor View Diagrams & Manuals
13BX605G755 (2007) Lawn Tractor View Diagrams & Manuals
13AX605G755 (2006) Lawn Tractor View Diagrams & Manuals
OEM-190-032 (2007) Snow Thrower View Diagrams & Manuals
13AJ771G713 (2005) Lawn Tractor View Diagrams & Manuals
13AN771G755 (2006) Lawn Tractor View Diagrams & Manuals
13RN772G055 (2009) Lawn Tractor View Diagrams & Manuals
13AN791G755 (2005) Lawn Tractor View Diagrams & Manuals
13AP605H755 (2006) Lawn Tractor View Diagrams & Manuals
13AO771H055 (2008) Lawn Tractor View Diagrams & Manuals
13BT604H401 (2003) Lawn Tractor View Diagrams & Manuals
13AP615P755 (2005) Lawn Tractor View Diagrams & Manuals
13AU615P755 (2005) Lawn Tractor View Diagrams & Manuals
13CX614G401 (2003) Lawn Tractor View Diagrams & Manuals
13AT605G755 (2005) Lawn Tractor View Diagrams & Manuals
13BT604H755 (2005) Lawn Tractor View Diagrams & Manuals
13AT614H401 (2003) Lawn Tractor View Diagrams & Manuals
13AT605H755 (2005) Lawn Tractor View Diagrams & Manuals
13AZ614H401 (2003) Lawn Tractor View Diagrams & Manuals
13AY614G401 (2002) Lawn Tractor View Diagrams & Manuals
13BT604G401 (2003) Lawn Tractor View Diagrams & Manuals
13AD683G713 (2004) Lawn Tractor View Diagrams & Manuals
13AT614H401 (2004) Lawn Tractor View Diagrams & Manuals
13AT604G701 (2004) Lawn Tractor View Diagrams & Manuals
13AT614H701 (2004) Lawn Tractor View Diagrams & Manuals
13BD604G401 (2002) Lawn Tractor View Diagrams & Manuals
13AT604H701 (2004) Lawn Tractor View Diagrams & Manuals
13AX614G701 (2004) Lawn Tractor View Diagrams & Manuals
13AZ614H701 (2004) Lawn Tractor View Diagrams & Manuals
13AZ614H401 (2004) Lawn Tractor View Diagrams & Manuals
13AA604F401 (2002) Lawn Tractor View Diagrams & Manuals
13BT604G401 (2004) Lawn Tractor View Diagrams & Manuals
13AX604G401 (2001) Lawn Tractor View Diagrams & Manuals
13BT604H401 (2004) Lawn Tractor View Diagrams & Manuals
13AU604H401 (2002) Lawn Tractor View Diagrams & Manuals
13CX614G401 (2004) Lawn Tractor View Diagrams & Manuals
13AT604H401 (2003) Lawn Tractor View Diagrams & Manuals
13AD604G401 (2000) Lawn Tractor View Diagrams & Manuals
13AX604H401 (2000) Lawn Tractor View Diagrams & Manuals
13AD604G401 (1999) Lawn Tractor View Diagrams & Manuals
13AU604H401 (2001) Lawn Tractor View Diagrams & Manuals
13AK604G401 (2000) Lawn Tractor View Diagrams & Manuals
13BD604G401 (2001) Lawn Tractor View Diagrams & Manuals
13AU604H401 (2000) Lawn Tractor View Diagrams & Manuals
13BX604G401 (2001) Lawn Tractor View Diagrams & Manuals
13AT604G401 (1999) Lawn Tractor View Diagrams & Manuals
13AU604H402 (1999) Lawn Tractor View Diagrams & Manuals
13AX604G401 (1999) Lawn Tractor View Diagrams & Manuals
13AU604H401 (1999) Lawn Tractor View Diagrams & Manuals
13AX604G402 (1999) Lawn Tractor View Diagrams & Manuals
13AC76LF055 (2010) Ride on Lawn Mower View Diagrams & Manuals
31AS63EE701 (2012) Two-Stage Snowblower View Diagrams & Manuals
31AM63KE701 (2011) Two-Stage Snowblower View Diagrams & Manuals
31AM63KE701 (2012) Two-Stage Snowblower View Diagrams & Manuals
31AM63LF701 (2010) Two-Stage Snowblower View Diagrams & Manuals
31AM63LF701 (2011) Two-Stage Snowblower View Diagrams & Manuals
31AM63LF701 (2012) Two-Stage Snowblower View Diagrams & Manuals
31AH65LG701 (2010) Two-Stage Snowblower View Diagrams & Manuals
31AH65LG701 (2011) Two-Stage Snowblower View Diagrams & Manuals
31AH65LG701 (2012) Two-Stage Snowblower View Diagrams & Manuals
31AE640F062 Snow Thrower View Diagrams & Manuals
13BN771G729 Tractor View Diagrams & Manuals
13AN771H729 Lawn Tractor View Diagrams & Manuals
14AU844H401 (1998) Lawn Tractor View Diagrams & Manuals
14AU844H401 (1999) Lawn Tractor View Diagrams & Manuals
31AS6FEF729 (2005-2) Snow Thrower View Diagrams & Manuals
13BT604G452 Lawn Mower View Diagrams & Manuals
13AJ693G755 Riding Mower 2004 View Diagrams & Manuals
31AH65LG701 (2013) Two Stage Snow Thrower View Diagrams & Manuals
31AM63KE701 (2013) Two Stage Snow Thrower View Diagrams & Manuals
31AM63LF701 (2013) Two-Stage Snow Thrower View Diagrams & Manuals
13RC76LF055 (2010) Lawn Tractor View Diagrams & Manuals
13RM772S055 (2010) Lawn Tractor View Diagrams & Manuals
14AJ844H401 (1997) Garden Tractor View Diagrams & Manuals
14AW844H401 (1997) Garden Tractor View Diagrams & Manuals
14AY844P401 (1997) Garden Tractor View Diagrams & Manuals
14AU804H401 (1999) Garden Tractor View Diagrams & Manuals
14AV804P401 (1999) Garden Tractor View Diagrams & Manuals
14AZ804P401 (1999) Garden Tractor View Diagrams & Manuals
14AU804H401 (2000) Garden Tractor View Diagrams & Manuals
14AW804H401 (2000) Garden Tractor View Diagrams & Manuals
14AZ804P401 (2000) Garden Tractor View Diagrams & Manuals
14AU804H401 (2001) Garden Tractor View Diagrams & Manuals
14AV804P401 (2001) Garden Tractor View Diagrams & Manuals
14AW804H401 (2001) Garden Tractor View Diagrams & Manuals
14AW804P401 (2001) Garden Tractor View Diagrams & Manuals
14AZ804P401 (2001) Garden Tractor View Diagrams & Manuals
14AR814K401 (2002) Garden Tractor View Diagrams & Manuals
14AU804H401 (2002) Garden Tractor View Diagrams & Manuals
14AW814H401 (2002) Garden Tractor View Diagrams & Manuals
14BU804H401 (2002) Garden Tractor View Diagrams & Manuals
14AZ814K401 (2003) Garden Tractor View Diagrams & Manuals
14CU804H401 (2003) Garden Tractor View Diagrams & Manuals
14AZ814K401 (2004) Garden Tractor View Diagrams & Manuals
14AZ814K701 (2004) Garden Tractor View Diagrams & Manuals
14CU804H401 (2004) Garden Tractor View Diagrams & Manuals
31AM62KE701 (2010) Snowblower View Diagrams & Manuals
31AS63EE701 (2013) Snow Thrower View Diagrams & Manuals
13AM772S055 (2010) Lawn Tractor View Diagrams & Manuals
Craftsman
24788787 Snowblower View Diagrams & Manuals
24788782 Snowblower View Diagrams & Manuals
24710568 Snowblower View Diagrams & Manuals
24788771 Snowblower View Diagrams & Manuals
24788846 Snowblower View Diagrams & Manuals
24788957 Snowblower View Diagrams & Manuals
24788835 33" Snowblower View Diagrams & Manuals
247885500 Snowblower View Diagrams & Manuals
24788955 Snowblower View Diagrams & Manuals
24788690 28" Snowblower View Diagrams & Manuals
24788833 Snowblower View Diagrams & Manuals
24788845 Snowblower View Diagrams & Manuals
247881900 Snowblower View Diagrams & Manuals
24788033 Snowblower View Diagrams & Manuals
24788045 45" Snowblower View Diagrams & Manuals
247883550 Snowblower View Diagrams & Manuals
24788190 Snowblower View Diagrams & Manuals
24788890 Snowblower View Diagrams & Manuals
247888900 Snowblower View Diagrams & Manuals
247884311 20" Snowblower View Diagrams & Manuals
247882901 21" Snowblower View Diagrams & Manuals
247884220 20" Snowblower View Diagrams & Manuals
247884310 20" Snowblower View Diagrams & Manuals
247884221 20" Snowblower View Diagrams & Manuals
247885680 Snowblower View Diagrams & Manuals
247886700 26" Snowblower View Diagrams & Manuals
247882900 21" Electric Snowblower View Diagrams & Manuals
247882902 Snowblower View Diagrams & Manuals
24788347 Snowblower View Diagrams & Manuals
24788848 Snowblower View Diagrams & Manuals
247889571 24" Snowblower View Diagrams & Manuals
247885570 Snowblower* View Diagrams & Manuals
247886640 Snowblower View Diagrams & Manuals
247888500 Snowblower View Diagrams & Manuals
247888520 Snowblower View Diagrams & Manuals
247888510 Snowblower View Diagrams & Manuals
247886510 Snowblower View Diagrams & Manuals
24788345 Single Stage Snowblower View Diagrams & Manuals
24742513 Snowblower View Diagrams & Manuals
486248531 Snow Thrower View Diagrams & Manuals
247888530 Snow Thorwer View Diagrams & Manuals
486248462 46In. Snow Thrower View Diagrams & Manuals
247885550 (1994) Track Drive Snow Thrower View Diagrams & Manuals
247274020 Lawn Tractor View Diagrams & Manuals
24727432 Lawn Tractor View Diagrams & Manuals
247274320 Lawn Tractor View Diagrams & Manuals
247286040 Lawn Tractor View Diagrams & Manuals
316286040 Lawn Tractor View Diagrams & Manuals
247881720 Snowblower View Diagrams & Manuals
247881721 Snowblower View Diagrams & Manuals
24788173 Snowblower View Diagrams & Manuals
247881730 Snowblower View Diagrams & Manuals
247881731 Snowblower View Diagrams & Manuals
247882690 Snowblower View Diagrams & Manuals
24788346 Snowblower View Diagrams & Manuals
247883970 Snowblower View Diagrams & Manuals
247883971 Snowblower View Diagrams & Manuals
247883980 Snowblower View Diagrams & Manuals
247884210 Snowblower View Diagrams & Manuals
247885690 Snowblower View Diagrams & Manuals
247887820 Snowblower View Diagrams & Manuals
247887821 Snowblower View Diagrams & Manuals
247888540 Snowblower View Diagrams & Manuals
247888550 Snowblower View Diagrams & Manuals
247985360 Snowblower View Diagrams & Manuals
247776411 Log Splitter View Diagrams & Manuals
247881722 Snow Thrower View Diagrams & Manuals
247881723 Snow Thrower View Diagrams & Manuals
247881732 Snow Thrower View Diagrams & Manuals
247881733 Snow Thrower View Diagrams & Manuals
247883981 Snowthrower View Diagrams & Manuals
247887822 Snow Thrower View Diagrams & Manuals
247888760 Snow Thrower View Diagrams & Manuals
247888780 Snow Thrower View Diagrams & Manuals
247889570 Snow Thrower View Diagrams & Manuals
247889760 Snow Thrower View Diagrams & Manuals
247889780 Snow Thrower View Diagrams & Manuals
247887940 Snow Thrower View Diagrams & Manuals
247884330 Snow Thrower View Diagrams & Manuals
247888450 Snow Thrower View Diagrams & Manuals
247888480 Snow Thrower View Diagrams & Manuals
247529180 Snow Thrower View Diagrams & Manuals
247887810 Snow Thrower View Diagrams & Manuals
247886400 Snow Thrower View Diagrams & Manuals
247888350 Snow Thrower View Diagrams & Manuals
247884331 Snow Thrower View Diagrams & Manuals
247888460 Snow Thrower View Diagrams & Manuals
247888330 Snow Thrower View Diagrams & Manuals
247887890 Snow Thrower View Diagrams & Manuals
CMXGLAM1143200 (24BG57M1793)(2018) Log Splitter View Diagrams & Manuals
247.887870 (31A-62BD799)(2011) ) Snow Thrower View Diagrams & Manuals
CMGSB24208 (31AS68EE791)(2018) Snow Throwers View Diagrams & Manuals
CMXGBAM1054541 (31AS6BEE793)(2018) Snow Thrower View Diagrams & Manuals
CMXGBAM1054542 (31AM6BHF793)(2018) Snow Thrower View Diagrams & Manuals
CMXGBAM1054543 (31AM6CSG793)(2018) Snow Thrower View Diagrams & Manuals
CMXGRAM1130040 (13AC21JD093)(2019) R140 Rear-Engine Riding Mower View Diagrams & Manuals
Troy-Bilt
31AH63N2711 (2007) Storm 24" Self-Propelled View Diagrams & Manuals
31BM63P3711 (2011) Storm 2620 View Diagrams & Manuals
31BM63P3766 (2011) Storm 2620 View Diagrams & Manuals
31BM63P3 (2009) Storm 2620 26" Self-Propelled View Diagrams & Manuals
31BM63P3 (2010) Storm 2620 26" Self-Propelled View Diagrams & Manuals
10030 (2003) Storm 10HP 30" Self-Propelled View Diagrams & Manuals
10530 (2003) Polar Blast 10.5HP 30" Self-Propelled View Diagrams & Manuals
13045 (2003) Polar Blast 13HP 45" Self-Propelled View Diagrams & Manuals
521 (2003) Squall 5HP 21" Walk-Behind View Diagrams & Manuals
721 (2003) Squall 7HP 21" Walk-Behind View Diagrams & Manuals
7524 (2003) Storm 7.5HP 24" Self-Propelled View Diagrams & Manuals
8526 (2003) Storm 8.5HP 26" Self-Propelled View Diagrams & Manuals
31AH7T74063 (2003) Storm Tracker 9.5HP 28" Track Drive View Diagrams & Manuals
10030 (2004) Storm 10HP 30" Self-Propelled View Diagrams & Manuals
10530 (2004) Polar Blast 10.5HP 30" Self-Propelled View Diagrams & Manuals
13045 (2004) Polar Blast 13HP 45" Self-Propelled View Diagrams & Manuals
7524 (2004) Storm 7.5HP 24" Self-Propelled View Diagrams & Manuals
8524 (2004) Storm 8.5HP 26" Self-Propelled View Diagrams & Manuals
31AH7T74063 (2004) Storm Tracker 9.5HP 28" Track Drive View Diagrams & Manuals
1028 (2005) Storm Tracker 10HP 28" Track Drive View Diagrams & Manuals
10530 (2005) Polar Blast 10.5HP 30" Self-Propelled View Diagrams & Manuals
1130 (2005) Storm Tracker 11HP 30" Track Drive View Diagrams & Manuals
13045 (2005) Polar Blast 13HP 45" Self-Propelled View Diagrams & Manuals
5524 (2005) Storm 5.5HP 24" Self-Propelled View Diagrams & Manuals
5024 (2005-2) Storm 5.5HP 24" Self-Propelled View Diagrams & Manuals
8026 (2005-2) Storm 8.5HP 26" Self-Propelled View Diagrams & Manuals
8526 (2005-2) Storm 8.5HP 26" Self-Propelled View Diagrams & Manuals
31AH7L74766 (2005-2) Storm Tracker 10HP 28" Track Drive View Diagrams & Manuals
31AE6LO4766 (2006) Storm 10HP 28" Self-Propelled View Diagrams & Manuals
31AH9Q77766 (2006) Storm 13HP 45" Self-Propelled View Diagrams & Manuals
31AS6BN2711 (2006) Storm 5.5HP 24" Self-Propelled View Diagrams & Manuals
31AS6BN2766 (2006) Storm 5.5HP 24" Self-Propelled View Diagrams & Manuals
31AS6GN3711 (2006) Storm 8.5HP 26" Self-Propelled View Diagrams & Manuals
31AS6GN3766 (2006) Storm 8.5HP 26" Self-Propelled View Diagrams & Manuals
31AE6LO4766 (2007) Storm 10HP 28" Self-Propelled View Diagrams & Manuals
31AH9P77766 (2007) Polar Blast 13HP 45" Self-Propelled View Diagrams & Manuals
31AS6BN2711 (2007) Storm 5.5HP 24" Self-Propelled View Diagrams & Manuals
31AS6BN2766 (2007) Storm 5.5HP 24" Self-Propelled View Diagrams & Manuals
31AS6GN3711 (2007) Storm 8.5HP 26" Self-Propelled View Diagrams & Manuals
31AS6GN3766 (2007) Storm 8.5HP 26" Self-Propelled View Diagrams & Manuals
31AH63N2011 (2008) Storm 24" Self-Propelled View Diagrams & Manuals
31AH9J77766 (2008) Polar Blast 4510 45" Self-Propelled View Diagrams & Manuals
31AM62N2 (2008) Storm 2410 24" Self-Propelled View Diagrams & Manuals
31AH64Q4 (2009) Storm 2840 28" Self-Propelled View Diagrams & Manuals
31AH9777766 (2009) Polar Blast 4510 45" Self-Propelled View Diagrams & Manuals
31AM62N2 (2009) Storm 2410 24" Self-Propelled View Diagrams & Manuals
31AH64Q4 (2010) Storm 2840 28" Self-Propelled View Diagrams & Manuals
31AH97P7 (2010) Polar Blast 4510 45" Self-Propelled View Diagrams & Manuals
31AS62N2 (2010) Storm 2410 24" Self-Propelled View Diagrams & Manuals
31AH64Q4711 (2011) Storm 2840 View Diagrams & Manuals
31AH64Q4766 (2011) Storm 2840 View Diagrams & Manuals
31AH95P6711 (2011) Polar Blast 3310 View Diagrams & Manuals
31AH95P6766 (2011) Polar Blast 3310 View Diagrams & Manuals
31AH97P7711 (2011) Polar Blast 4510 45" Self-Propelled View Diagrams & Manuals
31AH97P7766 (2011) Polar Blast 4510 45" Self-Propelled View Diagrams & Manuals
31AS62N2766 (2011) Storm 2410 View Diagrams & Manuals
31AS63N2711 (2011) Storm 2410 View Diagrams & Manuals
31AS62N2711 (2011) Storm 2410 View Diagrams & Manuals
13AN77KS011 (Pony) (2010) Lawn Tractor View Diagrams & Manuals
13AN77KS066 (Pony) (2010) Lawn Tractor View Diagrams & Manuals
13AV77KF066 (Tuffy) (2010) Lawn Tractor View Diagrams & Manuals
13AX78KS011 (Bronco) (2010) Lawn Tractor View Diagrams & Manuals
13AX78KS066 (Bronco) (2010) Lawn Tractor View Diagrams & Manuals
13AX78KT066 (Thouroghbred) (2010) Lawn Tractor View Diagrams & Manuals
13WN77KS011 (Pony) (2010) Lawn Tractor View Diagrams & Manuals
13WN77KS211 (Pony) (2010) Lawn Tractor View Diagrams & Manuals
13WV77KF066 (Tuffy) (2010) Lawn Tractor View Diagrams & Manuals
13WX78KS011 (Bronco) (2010) Lawn Tractor View Diagrams & Manuals
13WX78KS066 (Bronco) (2010) Lawn Tractor View Diagrams & Manuals
13WX78KS211 (Bronco) (2010) Lawn Tractor View Diagrams & Manuals
13WX78KT066 (Thouroghbred) (2010) Lawn Tractor View Diagrams & Manuals
OEM-190-032 (2010) 42" 2-Stage Snow Thrower View Diagrams & Manuals
14AV809H063 (1999) Garden Tractor View Diagrams & Manuals
14AW809H063 (1999) Garden Tractor View Diagrams & Manuals
14AY809P063 (2000) Garden Tractor View Diagrams & Manuals
14BV809H063 (2000) Garden Tractor View Diagrams & Manuals
14AY809P063 (2001) Garden Tractor View Diagrams & Manuals
14BV809H063 (2001) Garden Tractor View Diagrams & Manuals
14AB809H063 (2002) 22HP Garden Tractor View Diagrams & Manuals
14AR809K063 (2002) 25HP Garden Tractor View Diagrams & Manuals
GTX2446 (14AZ809H063) (2003) Garden Tractor View Diagrams & Manuals
GTX2654 (14AZ809K063) (2003) Garden Tractor View Diagrams & Manuals
14AT809H766 (Horse) (2004) Garden Tractor View Diagrams & Manuals
14AZ809K766 (Big Red) (2004) Garden Tractor View Diagrams & Manuals
14AP80TP766 (GT50) (2006) Big Red Garden Tractor View Diagrams & Manuals
14AQ81TK766 (GT54) (2006) Big Red Garden Tractor View Diagrams & Manuals
14AA80TP711 (Big Red Horse) (2007) Garden Tractor View Diagrams & Manuals
14AA80TP766 (Big Red Horse) (2007) Garden Tractor View Diagrams & Manuals
OEM-190-823 42" 2-Stage Snow Thrower View Diagrams & Manuals
13AN77KG011 (Pony) (2008) Lawn Tractor View Diagrams & Manuals
13AN77KG011 (Pony) (2009) Lawn Tractor View Diagrams & Manuals
13AO77TG766 (2006) Bronco Lawn Tractor View Diagrams & Manuals
13AN77TG766 (2006) Pony Lawn Tractor View Diagrams & Manuals
13AU604H063 (1999) Riding Lawn Mower View Diagrams & Manuals
31AH64Q4711 (2012) Storm 2840 Snowblower View Diagrams & Manuals
31AH64Q4766 (2012) Storm 2840 Snowblower View Diagrams & Manuals
31AH95P6711 (2012) Polar Blast 3310 Snowblower View Diagrams & Manuals
31AH97P7711 (2012) Polar Blast 4510 45" Self Propelled Snowblower View Diagrams & Manuals
31AH97P7766 (2012) Polar Blast 4510 45" Self Propelled Snowblower View Diagrams & Manuals
31AS62N2711 (2012) Storm 2410 Snowblower View Diagrams & Manuals
31AS63N2766 (2012) Storm 2410 Snowblower View Diagrams & Manuals
31BM63P3711 (2012) Storm 2620 Snowblower View Diagrams & Manuals
31BM63P3766 (2012) Storm 2620 Snowblower View Diagrams & Manuals
13AJ609G766 Lawn Tractor View Diagrams & Manuals
31AM62N2711 (600 Series ) Snow Thrower View Diagrams & Manuals
31AH95P6563 Snowblower View Diagrams & Manuals
13BX60TG766 (2007) Super Bronco View Diagrams & Manuals
13AP609G063 LTX1842 (2003) Lawn Tractor View Diagrams & Manuals
13BU609H063 (2000) Riding Mower View Diagrams & Manuals
31AH9M75766 (2005) Polar Blast 10.5HP 30" Self-Propelled View Diagrams & Manuals
13AG609G063 (2001) Lawn Tractor View Diagrams & Manuals
13AP60TP766 Lawn Tractor View Diagrams & Manuals
13AH762F752 (2005) Lawn Tractor View Diagrams & Manuals
13AH762F752 (2006) Lawn Tractor View Diagrams & Manuals
24BL59M5711 (2012) Log Splitter View Diagrams & Manuals
13AY609H063 Lawn Tractor View Diagrams & Manuals
13AX60TG766 Automatic Lawn Tractor Super Bronco Model 60TG View Diagrams & Manuals
13AV60KG011 (2008) Bronco View Diagrams & Manuals
13AV60KG011 (2009) Bronco View Diagrams & Manuals
13AT609H063 (LTX2146) Lawn Mower 2003 View Diagrams & Manuals
13AF693G118 (2002) Lawn Tractor View Diagrams & Manuals
TB27LS (2012)(24CF572B711) Log Splitter View Diagrams & Manuals
31AE6GO3711 8.5Hp 26In. Self-Propelled Snow Blower View Diagrams & Manuals
13AN689G766 Lawn Tractor Tuffy Model View Diagrams & Manuals
13AT609G766 Super Bronco View Diagrams & Manuals
13AX60KH011 Automatic Lawn Tractor Series 600 View Diagrams & Manuals
13BX60KH011 Automatic Lawn Tractor View Diagrams & Manuals
13AD609G063 Pedal Drive Lawn Tractor View Diagrams & Manuals
13CU609H063 (2002) 20 Hp Lawn Tractor View Diagrams & Manuals
13AJ609G766 (2005) 42" Variable Speed Lawn Tractor View Diagrams & Manuals
13CX609G063 (2002) 18Hp Lawn Tractor View Diagrams & Manuals
13AX609G063 (2001) Riding Lawn Tractor View Diagrams & Manuals
13AJ609H063 (2001) Lawn Tractor View Diagrams & Manuals
13AV609H063 (2001) Lawn Tractor View Diagrams & Manuals
13AY609H063 (2001) Lawn Tractor View Diagrams & Manuals
13CD609G063 (2001) Lawn Tractor View Diagrams & Manuals
13AN77KG066 (2009) Pony View Diagrams & Manuals
13AN77KG211 (2009) Pony View Diagrams & Manuals
13AP61KP011 (2009) Horse View Diagrams & Manuals
13AV60KG066 (2009) Bronco View Diagrams & Manuals
13AV60KG211 (2009) Bronco View Diagrams & Manuals
13AX60KH011 (2009) Super Bronco View Diagrams & Manuals
13AD604G063 (1999) Lawn Tractor View Diagrams & Manuals
13AU609H063 (1999) Lawn Tractor View Diagrams & Manuals
13AX604G063 (1999) Lawn Tractor View Diagrams & Manuals
13AZ604H063 (1999) Lawn Tractor View Diagrams & Manuals
13AD609G063 (2000) Lawn Tractor View Diagrams & Manuals
13AQ609G063 (2000) Lawn Tractor View Diagrams & Manuals
13BD609G063 (2000) Lawn Tractor View Diagrams & Manuals
13BX609G063 (2000) Lawn Tractor View Diagrams & Manuals
13BZ609H063 (2000) Lawn Tractor View Diagrams & Manuals
13AX60KH066 (2009) Super Bronco View Diagrams & Manuals
TB30R (13AC21JD011)(2016) Hydro Tractor View Diagrams & Manuals
13AX60KH211 (2009) Super Bronco View Diagrams & Manuals
13AX61KG011 (2009) Range Rider View Diagrams & Manuals
13CD609G063 (LT-1742)(2002) 17.5hp Lawn Tractor View Diagrams & Manuals
13AP609G063 (2003) Ltx1842 View Diagrams & Manuals
13AC21JD011 (TB30R)(2017) Hydro View Diagrams & Manuals
13BX60KH011 (2009) Super Bronco View Diagrams & Manuals
13BX60KH211 (2009) Super Bronco View Diagrams & Manuals
13AT609H063 (2003) Ltx2146 View Diagrams & Manuals
13AJ609G766 (2004) Bronco View Diagrams & Manuals
13AN77KS011 (2010) Pony View Diagrams & Manuals
13AN77KS066 (2010) Pony View Diagrams & Manuals
13AJ689G766 (2004) Tuffy View Diagrams & Manuals
13AV77KF066 (2010) Tuffy View Diagrams & Manuals
13AX78KS011 (2010) Bronco View Diagrams & Manuals
131Z27JD711 (TB30E)(2018) Lawn Tractor View Diagrams & Manuals
13A721JD066 (TB30R)(2018) Hydro View Diagrams & Manuals
13AX78KS066 (2010) Bronco View Diagrams & Manuals
13AX78KT066 (2010) Thouroghbred View Diagrams & Manuals
13AN689G766 (2004) Pony View Diagrams & Manuals
13AC21JD011 (TB30R)(2018) Hydro View Diagrams & Manuals
13AT609G766 (2004) Super Bronco View Diagrams & Manuals
13AY609G766 (2004) Bronco View Diagrams & Manuals
13AN779G766 (2005) Pony View Diagrams & Manuals
13WN77KS011 (2010) Pony View Diagrams & Manuals
13WV77KF066 (2010) Tuffy View Diagrams & Manuals
13WX78KS011 (2010) Bronco View Diagrams & Manuals
13WX78KS066 (2010) Bronco View Diagrams & Manuals
13AT609G766 (2005) Super Bronco View Diagrams & Manuals
13AP60TP766 (2006) Horse View Diagrams & Manuals
13AX60TG766 (2006) Super Bronco View Diagrams & Manuals
13WX78KS211 (2010) Bronco View Diagrams & Manuals
13WX78KT066 (2010) Thouroghbred View Diagrams & Manuals
13AN77TG711 (2007) Pony View Diagrams & Manuals
13AN77TG766 (2007) Pony View Diagrams & Manuals
13AX60TH711 (2007) Range Rider View Diagrams & Manuals
13BX60TG711 (2007) Super Bronco View Diagrams & Manuals
13AN77KG011 (2008) Pony View Diagrams & Manuals
13AN77KG066 (2008) Pony View Diagrams & Manuals
13AN77KG211 (2008) Pony View Diagrams & Manuals
13AP61KP011 (2008) Horse View Diagrams & Manuals
13AV60KG066 (2008) Bronco View Diagrams & Manuals
13AV60KG211 (2008) Bronco View Diagrams & Manuals
13AX60KH011 (2008) Super Bronco View Diagrams & Manuals
13AX60KH066 (2008) Super Bronco View Diagrams & Manuals
13AX60KH211 (2008) Super Bronco View Diagrams & Manuals
13AX61KG011 (2008) Range Rider View Diagrams & Manuals
13AN77KG011 (2009) Pony View Diagrams & Manuals
13A721JD066 (TB30R)(2019) Hydro View Diagrams & Manuals
14AT809H766 (2004) Horse View Diagrams & Manuals
14AZ809K766 (2004) Big Red View Diagrams & Manuals
14AP80TP766 (2006) Big Red Gt50 View Diagrams & Manuals
14AQ81TK766 (2006) Big Red Gt54 View Diagrams & Manuals
14AA80TP711 (2007) Big Red Horse View Diagrams & Manuals
14AA80TP766 (2007) Big Red Horse View Diagrams & Manuals
31AH74P4766 (2016) Storm Tracker 2890 View Diagrams & Manuals
31AM59P4766 (2017) Storm 2890 View Diagrams & Manuals
31AM5CP3766 (2017) Storm 2690 View Diagrams & Manuals
31AM63P2766 (2015) Storm 2420 View Diagrams & Manuals
31AH95P6766 (2015) Polar Blast 3310 View Diagrams & Manuals
31AH97P7711 (2015) Polar Blast 4510 View Diagrams & Manuals
24BG57M1766 (TB 27 LS)(2017) Log Splitter View Diagrams & Manuals
24CF572B711 (TB 27 LS)(2017) Log Splitter View Diagrams & Manuals
24BG57M1766 (TB27LS)(2019) Log Splitter View Diagrams & Manuals
31AH74P4766 (2015) Storm Tracker 2890 View Diagrams & Manuals
31AM66P3766 (2015) Storm 2625 View Diagrams & Manuals
31AM66P3766 (2014) Storm 2625 View Diagrams & Manuals
31AH97P7766 (2015) Polar Blast 4510 View Diagrams & Manuals
31AS62N2711 (2014) Storm 2410 View Diagrams & Manuals
31BM63P3711 (2014) Storm 2620 View Diagrams & Manuals
31BM63P3766 (2014) Storm 2620 View Diagrams & Manuals
31AM63P2766 (2014) Storm 2420 View Diagrams & Manuals
OEM-190-627 (190-627) 42-Inch 2-Stage Snow Thrower View Diagrams & Manuals
31AM6BO2766 (2017) Storm 2460 View Diagrams & Manuals
31AM6BO3711 (2017) Storm 2660 View Diagrams & Manuals
31AM6CP4711 (2017) Storm 2860 View Diagrams & Manuals
OEM-190-032 (2006) 42-Inch 2-Stage Snow Thrower View Diagrams & Manuals
31AM2T6F711 (2016) Squall 2100 View Diagrams & Manuals
31AM56P3766 (2016) Storm 2690 View Diagrams & Manuals
31AM59P4766 (2016) Storm 2890 View Diagrams & Manuals
31BS6BN2711 (2017) Storm 2410 View Diagrams & Manuals
31AM6BO2766 (2016) Storm 2460 View Diagrams & Manuals
31AH5DP5766 (2018) Storm 3090 View Diagrams & Manuals
31AH7T74063 (31AH7T74063)(2003) Storm Tracker 9. 28-Inch Track Drive View Diagrams & Manuals
31AH7FP4766 (2018) Storm Tracker 2890 View Diagrams & Manuals
31AH7T74063 (31AH7T74101)(31AH7T74063)(2004) Storm Tracker 9. 28-Inch Track Drive View Diagrams & Manuals
31AH7L74766 (31AH7L74766)(2005-2) Storm Tracker 28-Inch Track Drive View Diagrams & Manuals
OEM-190-032 (190-032)(190-032-101)(2007) 42-Inch 2-Stage Snow Thrower View Diagrams & Manuals
31AM59P4766 (2018) Storm 2890 View Diagrams & Manuals
OEM-190-032 (190-032)(190-032-101)(2008) 42-Inch 2-Stage Snow Thrower View Diagrams & Manuals
31AM6BO2766 (2018) Storm 2460 View Diagrams & Manuals
31AM6CP3723 (2018) Storm 2665 View Diagrams & Manuals
31AM6CP4766 (2018) Storm 2860 View Diagrams & Manuals
31AH64Q4711 (2013) Storm 2840 View Diagrams & Manuals
31AH64Q4766 (2013) Storm 2840 View Diagrams & Manuals
31AM6BO3711 (2016) Storm 2660 View Diagrams & Manuals
31AH64Q4711 (2014) Storm 2840 View Diagrams & Manuals
31AH95P6711 (2013) Polar Blast 3310xp View Diagrams & Manuals
31AH64Q4766 (2014) Storm 2840 View Diagrams & Manuals
OEM-190-032 (190-032)(190-032-101)(2009) 42-Inch 2-Stage Snow Thrower View Diagrams & Manuals
31AH74P4766 (2014) Storm Tracker 2890 View Diagrams & Manuals
OEM-190-032 (190-032)(190-032-101)(2011) 42-Inch 2-Stage Snow Thrower View Diagrams & Manuals
31AS6BN2723 (2018) Storm 2410 View Diagrams & Manuals
31AH95P6766 (2013) Polar Blast 3310xp View Diagrams & Manuals
31AM6CP4711 (2016) Storm 2860 View Diagrams & Manuals
OEM-190-032 (190-032)(190-032-101)(2012) 42-Inch 2-Stage Snow Thrower View Diagrams & Manuals
OEM-190-032 (190-032)(190-032-101)(2013) 42-Inch 2-Stage Snow Thrower View Diagrams & Manuals
31AH5DP5766 (2019) Storm 3090 View Diagrams & Manuals
31BS6BN2711 (2016) Storm 2410 View Diagrams & Manuals
31AH7FP4766 (2019) Storm Tracker 2890 View Diagrams & Manuals
31AH54P4766 (2015) Storm 2890 View Diagrams & Manuals
31AH5DP5766 (2017) Storm 3090 View Diagrams & Manuals
31AM66Q4711 (2015) Storm 2840 View Diagrams & Manuals
31AS62N2711 (2013) Storm 2410 View Diagrams & Manuals
31AS63N2711 (2013) Storm 2410 View Diagrams & Manuals
31AS63N2766 (2013) Storm 2410 View Diagrams & Manuals
OEM-190-032 (190-032)(190-032-101)(2014) 42-Inch 2-Stage Snow Thrower View Diagrams & Manuals
31AM59P4766 (2019) Storm 2890 View Diagrams & Manuals
31AH55P5766 (2015) Storm 3090 View Diagrams & Manuals
31AM6BO2766 (2019) Storm 2460 View Diagrams & Manuals
31AM6CP3723 (2019) Storm 2665 View Diagrams & Manuals
31BM63P3711 (2013) Storm 2620 View Diagrams & Manuals
31AH97P7711 (2013) Polar Blast 4510 View Diagrams & Manuals
19A40024OEM (2015) 42-Inch 3x Snow Thrower View Diagrams & Manuals
OEM-190-032 (190-032)(190-032-101)(2015) 42-Inch 2-Stage Snow Thrower View Diagrams & Manuals
19A40045OEM (2018) 42-Inch 3x Snow Thrower View Diagrams & Manuals
31BM63P3766 (2013) Storm 2620 View Diagrams & Manuals
31AH97P7766 (2013) Polar Blast 4510 View Diagrams & Manuals
31AH95P6766 (2014) Polar Blast 3310xp View Diagrams & Manuals
31AH97P7711 (2014) Polar Blast 4510 View Diagrams & Manuals
31AS62N2711 (2015) Storm 2410 View Diagrams & Manuals
31BM63P3711 (2015) Storm 2620 View Diagrams & Manuals
31AH97P7766 (2014) Polar Blast 4510 View Diagrams & Manuals
31AH54P4766 (2014) Storm 2890 View Diagrams & Manuals
31AH55P5766 (2014) Storm 3090 View Diagrams & Manuals
31AH74P4766 (2017) Storm Tracker 2890 View Diagrams & Manuals
31AM6CP4766 (2019) Storm 2860 View Diagrams & Manuals
31AS6BN2723 (2019) Storm 2410 View Diagrams & Manuals
TB27LS (24DF572B766)(2015) Log Splitter View Diagrams & Manuals
TB33LS (24BL59M5711)(2015) Log Splitter View Diagrams & Manuals
TB33LS (24BL59M5766)(2015) Log Splitter View Diagrams & Manuals
TB27LS (24BG57M1766)(2016) Log Splitter View Diagrams & Manuals
31AH55P5766 (2016) Storm 3090 View Diagrams & Manuals
31BS6BN2766 (2019) Storm 2410 View Diagrams & Manuals
TB27LS (24CF572B711)(2016) Log Splitter View Diagrams & Manuals
TB33LS (24BL59M5711)(2016) Log Splitter View Diagrams & Manuals
24BC7FM1766 (TB 25 LS)(2017) Log Splitter View Diagrams & Manuals
24BF572B711 (LS27)(1H240H40027-UP)(2010) Log Splitter View Diagrams & Manuals
24BG57M3066 (LS27)(2010) Log Splitter View Diagrams & Manuals
24BF572B711 (LS27)(2011) Log Splitter View Diagrams & Manuals
24BG57M3066 (LS27)(2011) Log Splitter View Diagrams & Manuals
24BL597D711 (LS33)(2011) Log Splitter View Diagrams & Manuals
24BL59M4066 (LS33)(2011) Log Splitter View Diagrams & Manuals
24BL59M5766 (LS33)(2011) Log Splitter View Diagrams & Manuals
TB27LS (24BF572B766)(2012) Log Splitter View Diagrams & Manuals
TB27LS (24BG57M1766)(2012) Log Splitter View Diagrams & Manuals
TB33LS (24BL59M5711)(2012) Log Splitter View Diagrams & Manuals
TB33LS (24BL59M5766)(2012) Log Splitter View Diagrams & Manuals
TB27LS (24BF572B711)(2013) Log Splitter View Diagrams & Manuals
TB27LS (24BF572B766)(2013) Log Splitter View Diagrams & Manuals
TB27LS (24BG57M1711)(2013) Log Splitter View Diagrams & Manuals
TB27LS (24BG57M1766)(2013) Log Splitter View Diagrams & Manuals
TB27LS (24CF572B711)(2013) Log Splitter View Diagrams & Manuals
TB27LS (24CF572B766)(2013) Log Splitter View Diagrams & Manuals
TB33LS (24BL59M5711)(2013) Log Splitter View Diagrams & Manuals
TB33LS (24BL59M5766)(2013) Log Splitter View Diagrams & Manuals
TB27LS (24BG57M1766)(2014) Log Splitter View Diagrams & Manuals
TB27LS (24CF572B711)(2014) Log Splitter View Diagrams & Manuals
TB33LS (24BL59M5711)(2014) Log Splitter View Diagrams & Manuals
TB33LS (24BL59M5766)(2014) Log Splitter View Diagrams & Manuals
24BF582B766 (2015) Log Splitter View Diagrams & Manuals
TB27LS (24CF572B711)(2015) Log Splitter View Diagrams & Manuals
TB27LS (24CF572B766)(2015) Log Splitter View Diagrams & Manuals
TB27LS (24CG57M1766)(2015) Log Splitter View Diagrams & Manuals
24BF552B766 (TBLS25)(2021) Tb Ls 25 Log Splitter View Diagrams & Manuals
24BF572B711 (TB27LS)(2013) Log Splitter View Diagrams & Manuals
24BF572B766 (TB27LS)(2012) Log Splitter View Diagrams & Manuals
24BF572B766 (TB27LS)(2013) Log Splitter View Diagrams & Manuals
24BG57M1711 (TB27LS)(2013) Log Splitter View Diagrams & Manuals
24BG57M1766 (TB27LS)(2012) Log Splitter View Diagrams & Manuals
24BG57M1766 (TB27LS)(2013) Log Splitter View Diagrams & Manuals
24BG57M1766 (TB27LS)(2014) Log Splitter View Diagrams & Manuals
24BG57M1766 (TB27LS)(2016) Log Splitter View Diagrams & Manuals
24BG57M1766 (TB27LS)(2020) Log Splitter View Diagrams & Manuals
24BL59M5711 (TB33LS)(2013) Log Splitter View Diagrams & Manuals
24BL59M5711 (TB33LS)(2014) Log Splitter View Diagrams & Manuals
24BL59M5711 (TB33LS)(2015) Log Splitter View Diagrams & Manuals
24BL59M5711 (TB33LS)(2016) Log Splitter View Diagrams & Manuals
24BL59M5766 (TB33LS)(2012) Log Splitter View Diagrams & Manuals
24BL59M5766 (TB33LS)(2013) Log Splitter View Diagrams & Manuals
24BL59M5766 (TB33LS)(2014) Log Splitter View Diagrams & Manuals
24BL59M5766 (TB33LS)(2015) Log Splitter View Diagrams & Manuals
24BL59M6766 (TB33LS)(2020) Tb 33 Ls Log Splitter View Diagrams & Manuals
24BL59M6766 (TB33LS)(2021) Log Splitter View Diagrams & Manuals
24CF572B711 (TB27LS)(2012) Log Splitter View Diagrams & Manuals
24CF572B711 (TB27LS)(2013) Log Splitter View Diagrams & Manuals
24CF572B711 (TB27LS)(2014) Log Splitter View Diagrams & Manuals
24CF572B711 (TB27LS)(2015) Log Splitter View Diagrams & Manuals
24CF572B711 (TB27LS)(2016) Log Splitter View Diagrams & Manuals
24CF572B766 (TB27LS)(2013) Log Splitter View Diagrams & Manuals
24CF572B766 (TB27LS)(2015) Log Splitter View Diagrams & Manuals
24CG57M1766 (TB27LS)(2015) Log Splitter View Diagrams & Manuals
24DF572B766 (TB27LS)(2015) Log Splitter View Diagrams & Manuals
31AH5DP5766 (2020) Storm 3090 Snow Blower View Diagrams & Manuals
31AH5DP5766 (2021) Storm 3090 Snow Blower View Diagrams & Manuals
31AH5DP7B66 (2021) Vortex 2610 Snow Blower View Diagrams & Manuals
31AH5EP8B66 (2021) Vortex 2895 Xp Snow Blower View Diagrams & Manuals
31AH7FP4766 (2020) Storm Tracker 2890 Snow Blower View Diagrams & Manuals
31AM59P4766 (2020) Storm 2890 Snow Blower View Diagrams & Manuals
31AM59P4766 (2021) Storm 2890 Snow Blower View Diagrams & Manuals
31AM5CP3766 (2020) Storm 2665 Xp Snow Blower View Diagrams & Manuals
31AM5CP3766 (2021) Storm 2665 Xp Snow Blower View Diagrams & Manuals
31AM6BO2766 (2020) Storm 2460 Snow Blower View Diagrams & Manuals
31AM6CM3B66 (2021) Storm 2610 Snow Blower View Diagrams & Manuals
31AM6CP3723 (2020) Storm 2665 Snow Blower View Diagrams & Manuals
31AM6CP4766 (2020) Storm 2860 Snow Blower View Diagrams & Manuals
31AS62N2766 (2013) Storm 2410 Snow Blower View Diagrams & Manuals
31AS6BM2B66 (2021) Storm 2440 Snow Blower View Diagrams & Manuals
31AS6BN2723 (2021) Storm 2410 Snow Blower View Diagrams & Manuals
31AS6KM2B66 (2021) Storm 2425 Snow Blower View Diagrams & Manuals
31AS6KM3B23 (2021) Storm 2600 Snow Blower View Diagrams & Manuals
31AS6KN2B23 (2021) Storm 2420 Snow Blower View Diagrams & Manuals
31BS6BN2766 (2021) Storm 2410 Snow Blower View Diagrams & Manuals
31BS6KN2766 (2020) Storm 2410 Snow Blower View Diagrams & Manuals
31CM6CP3B66 (2021) Storm 2620 Snow Blower View Diagrams & Manuals
31CS6KN2B66 (2021) Storm 2420 Snow Blower View Diagrams & Manuals
Cub Cadet
032 (190-032-101, OEM-190-032) 42 Inch Snow Thrower View Diagrams & Manuals
19A126 (19A-126-100) (2009 & After) 42 Inch Two Stage Snow Thrower View Diagrams & Manuals
19A40023 (19A40023100) 42-Inch 3X Snow Thrower View Diagrams & Manuals
19A40024 (19A40024100) 42-Inch 3X Snow Thrower View Diagrams & Manuals
SB45 (59A40051727) Snowblower View Diagrams & Manuals
190-364-100 45-In Snow Thrower Cub Cadet View Diagrams & Manuals
930SWE (31AH95SU710) (2009) Snow Thrower View Diagrams & Manuals
933SWE (31AH95SV710) (2009) Snow Thrower View Diagrams & Manuals
945SWE (31AH973W710) (2009) Snow Thrower View Diagrams & Manuals
LS27CC (24BG5HM4010) (2010) 24BG5HM4 Log Splitter View Diagrams & Manuals
221LHP (31AM2T6D710) (2010) Snow Thrower View Diagrams & Manuals
930SWE (31AH95SU710) (2010) Snow Thrower View Diagrams & Manuals
933SWE (31AH95SV710) (2010) Snow Thrower View Diagrams & Manuals
945SWE (31AH97SW710) (2010) Snow Thrower View Diagrams & Manuals
SW10528L (31AH957T596) (2010) Snow Thrower View Diagrams & Manuals
LS27CC (24BG5HM4010) (2011) 24BG5HM4 Log Splitter View Diagrams & Manuals
LS27CC (24BG5HM5710) (2011) 24BG5HM5 Log Splitter View Diagrams & Manuals
221LHP (31AM2T6D710, 31AM2T6D709, 31AM2T6D756) (2011) Snow Thrower View Diagrams & Manuals
930SWE (31AH95SU710) (2011) Snow Thrower View Diagrams & Manuals
933SWE (31AH95SV710) (2011) Snow Thrower View Diagrams & Manuals
945SWE (31AH97SW710) (2011) Snow Thrower View Diagrams & Manuals
LS25CC (24BF552B710, 24BF552B756) (2012) 24BF552B Log Splitter View Diagrams & Manuals
LS27CC (24BG5HM5710) (2012) 24BG5HM5 Log Splitter View Diagrams & Manuals
221LHP (31AM2T6D710, 31AM2T6D756) (2012) Snow Thrower View Diagrams & Manuals
930SWE (31BH95SU710, 31AH95SU756) (2012) Snow Thrower View Diagrams & Manuals
933SWE (31BH95SV710, 31AH95SV756) (2012) Snow Thrower View Diagrams & Manuals
945SWE (31BH97SW710, 31AH97SW756) (2012) Snow Thrower View Diagrams & Manuals
LS25CC (24BF552B710, 24BF552B756) (2013) 24BF552B Log Splitter View Diagrams & Manuals
LS27CC (24BG5HM5710) (2013) 24BG5HM5 Log Splitter View Diagrams & Manuals
1X (31AM2T6D710, 31AM2T6D756, 221LHP) (2013) 221LHP Snow Thrower View Diagrams & Manuals
2X (31BH95SU710, 31AH95SU756, 930SWE) (2013) 930SWE Snow Thrower View Diagrams & Manuals
2X (31BH95SV710, 31AH95SV756, 933SWE) (2013) 933SWE Snow Thrower View Diagrams & Manuals
2X (31BH97SW710, 31AH97SW756, 945SWE) (2013) 945SWE Snow Thrower View Diagrams & Manuals
3X (31AH55SX710) (2013) 26-Inch Hd 31AH55SX Snow Thrower View Diagrams & Manuals
3X (31AH57SZ710) (2013) 30-Inch Hd 31AH57SZ Snow Thrower View Diagrams & Manuals
LS25CC (24BF552B710, 24BF552B756) (2014) 24BF552B Log Splitter View Diagrams & Manuals
LS27CC (24BG5HM5710) (2014) 24BG5HM5 Log Splitter View Diagrams & Manuals
1X (31AM2T6D710, 31AM2T6D709, 31AM2T6D713, 31AM2T) (2014) 221LHP Snow Thrower View Diagrams & Manuals
2X (31AM63SR710, 31AM63SR756, 31AM63SR713) (2014) 524WE Snow Thrower View Diagrams & Manuals
2X (31BH95SV710, 31AH95SV756) (2014) 933SWE Snow Thrower View Diagrams & Manuals
2X (31BH97SW710, 31AH97SW756) (2014) 945SWE Snow Thrower View Diagrams & Manuals
3X (31AH54SK710) (2014) 24-Inch Hd 31AH54SK Snow Thrower View Diagrams & Manuals
3X (31AH55SX710) (2014) 26-Inch Hd 31AH55SX Snow Thrower View Diagrams & Manuals
3X (31AH55SY710) (2014) 28-Inch Hd 31AH55SY Snow Thrower View Diagrams & Manuals
3X (31AH57SZ710) (2014) 30-Inch Hd 31AH57SZ Snow Thrower View Diagrams & Manuals
3x (31AH77SZ710) (2014) 30-Inch Trac 31AH77SZ View Diagrams & Manuals
LS25CC (24BF552B756) (2015) 24BF552B Log Splitter View Diagrams & Manuals
LS25CC (24BG55M1710) (2015) 24BG55M1 Log Splitter View Diagrams & Manuals
LS27CC (24BG5HM5710) (2015) 24BG5HM5 Log Splitter View Diagrams & Manuals
LS33CC (24BL59M5710) (2015) 24BL59M5 Log Splitter View Diagrams & Manuals
1X (31AM2T6D710, 31AM2T6D709, 31AM2T6D756, 31AM2T) (2015) 221LHP Snow Thrower View Diagrams & Manuals
2X (31AM53SR710, 31AM53SR756) (2015) 24HP Snow Thrower View Diagrams & Manuals
2X (31AM56SS710, 31AM56SS756) (2015) 26HP Snow Thrower View Diagrams & Manuals
2X (31AM63SR710, 31AM63SR756, 31AM63SR713) (2015) 524WE Snow Thrower View Diagrams & Manuals
2X (31BH95SV710, 31BH95SV756) (2015) 933SWE Snow Thrower View Diagrams & Manuals
2X (31AH97SW756, 31BH97SW710, 31BH97SW756) (2015) 945SWE Snow Thrower View Diagrams & Manuals
3X (31AH54SK710) (2015) 24-Inch Hd 31AH54SK Snow Thrower View Diagrams & Manuals
3X (31AH55SX710) (2015) 26-Inch Hd 31AH55SX Snow Thrower View Diagrams & Manuals
3x (31AH75SX710) (2015) 26-Inch Trac 31AH75SX View Diagrams & Manuals
3X (31AH55SY710) (2015) 28-Inch Hd 31AH55SY Snow Thrower View Diagrams & Manuals
3X (31AH57SW710) (2015) 30-Inch Hd 31AH57SW Snow Thrower View Diagrams & Manuals
3X (31AH57SZ710) (2015) 30-Inch Hd 31AH57SZ Snow Thrower View Diagrams & Manuals
3x (31AH77SZ710) (2015) 30-Inch Trac 31AH77SZ View Diagrams & Manuals
CC30 (13A221JD210) (2016) H Mini Rider View Diagrams & Manuals
CC30 (13A221JD010) (2016) H Mini Rider View Diagrams & Manuals
CC30 (13B221JD010) (2016) H Mini Rider View Diagrams & Manuals
CB2900 (24AE687F710) (2016) Blower View Diagrams & Manuals
LS25CC (24BF552B710) (2016) Log Splitter View Diagrams & Manuals
LS25CC (24BF552B756) (2016) Log Splitter View Diagrams & Manuals
1X (31AM2T6C710) (2016) 21-Inch Lhp Snow Thrower View Diagrams & Manuals
2X (31AM5BSR710) (2016) 24-Inch Hp Snow Thrower View Diagrams & Manuals
2X (31AM5CSS710) (2016) 26HP Snow Thrower View Diagrams & Manuals
2X (31AH54ST710) (2016) 28-Inch Hp Snow Thrower View Diagrams & Manuals
2X (31AH5DSY710) (2016) 28-Inch Hp Snow Thrower View Diagrams & Manuals
2X (31AM6BSR713) (2016) 524WE Snow Thrower View Diagrams & Manuals
3X (31AH54SC710) (2016) 24-Inch Snow Thrower View Diagrams & Manuals
3X (31BH54SK710) (2016) 24-Inch Hd Snow Thrower View Diagrams & Manuals
3X (31AH5DSA710) (2016) 26-Inch Snow Thrower View Diagrams & Manuals
3X (31AH5DSA756) (2016) 26-Inch Snow Thrower View Diagrams & Manuals
3X (31AH5DSX710) (2016) 26-Inch Hd Snow Thrower View Diagrams & Manuals
3X (31AH7DSX710) (2016) 26-Inch Trac View Diagrams & Manuals
3X (31AH5DSB709) (2016) 28-Inch Snow Thrower View Diagrams & Manuals
3X (31AH5DSB710) (2016) 28-Inch Snow Thrower View Diagrams & Manuals
3X (31AH5DSY710) (2016) 28-Inch Hp Snow Thrower View Diagrams & Manuals
3X (31AH5ESW710) (2016) 30-Inch Hd Snow Thrower View Diagrams & Manuals
3X (31AH8ESU710) (2016) 30-Inch Pro Snow Thrower View Diagrams & Manuals
3X (31AH8E2U710) (2016) 30-Inch Pro H View Diagrams & Manuals
3X (31AH7ESZ710) (2016) 30-Inch Trac View Diagrams & Manuals
3X (31AH8ESV710) (2016) 34-Inch Pro Snow Thrower View Diagrams & Manuals
3X (31AH8E2V710) (2016) 34-Inch Pro H View Diagrams & Manuals
CC30 (13A721JD010) (2017) Hydro Mini Rider View Diagrams & Manuals
CC30 (13A721JD056) (2017) Hydro Mini Rider View Diagrams & Manuals
GT1554 (14AK13CK, 14AK13CK010) Tractor Courage Engine View Diagrams & Manuals
GT1554VT (14VR13CK010, 14VR13CK009) Tractor View Diagrams & Manuals
GT2542 (14A-2D2G010) (2009 & After) Tractor View Diagrams & Manuals
GT2544 (14A-2E7L010) (2009 & After) Tractor View Diagrams & Manuals
GT2550 (14A-2E7P010) (2009 & After) Tractor View Diagrams & Manuals
GT2554 (14A-2A7K010) (2009 & After) Tractor View Diagrams & Manuals
L48KH (53AN2RTB050, 53RN2RTB050) (2014) Tank View Diagrams & Manuals
L54KW (53AI2RTC050, 53RI2RTC050) (2014) Tank View Diagrams & Manuals
L60 (53YI2RTD050) (2016) Tank Kw View Diagrams & Manuals
L60KH (53AN2RTD050, 53AN2RTD009, 53RN2RTD050) (2014) Tank View Diagrams & Manuals
L60KW (53AI2RTD050, 53RI2RTD050) (2014) Tank View Diagrams & Manuals
L60KW (53YI2RTD050) (2015) Tank View Diagrams & Manuals
LZ-48 (53AM2PTB050, 53AM2PTB250) (2012) Tank View Diagrams & Manuals
LZ-48 (53AM2PTB050) (2013) Tank View Diagrams & Manuals
LZ-54 (53AH2PTC050) (2012) Tank View Diagrams & Manuals
LZ-54 (53AH2PTC050) (2013) Tank View Diagrams & Manuals
LZ-54KW (53AI2PTC050, 53RI2PTC050) (2014) Tank View Diagrams & Manuals
LZ-54KW (53YI2PTC050) (2015) Tank View Diagrams & Manuals
LZ-54KW (53YI2PTC050) (2016) Tank View Diagrams & Manuals
LZ-60 (53YI2PTD050) (2016) Tank Kw View Diagrams & Manuals
LZ-60KH (53AH2PTD050) (2012) Tank View Diagrams & Manuals
LZ-60KH (53AH2PTD050) (2013) Tank View Diagrams & Manuals
LZ-60KW (53AI2PTD050) (2012) Tank View Diagrams & Manuals
LZ-60KW (53AI2PTD050) (2013) Tank View Diagrams & Manuals
LZ-60KW (53BI2PTD050, 53RI2PTD050) (2014) Tank View Diagrams & Manuals
LZ-60KW (53YI2PTD050) (2015) Tank View Diagrams & Manuals
S-60KH (53RN2RUD050) (2015) Tank View Diagrams & Manuals
S-60KH (53RN2RUD050) (2016) Tank View Diagrams & Manuals
SZ-48 (53AH2PUB050, 53AH2PUB250) (2012) Tank View Diagrams & Manuals
SZ-48 (53AH2PUB050) (2013) Tank View Diagrams & Manuals
SZ-54KH (53AN2PUC050, 53RN2PUC050) (2014) Tank View Diagrams & Manuals
SZ-54KW (53AI2PUC050, 53RI2PUC050) (2014) Tank View Diagrams & Manuals
SZ-54KW (53YI2PUC050) (2015) Tank View Diagrams & Manuals
SZ-54KW (53YI2PUC050) (2016) Tank View Diagrams & Manuals
SZ-60 (53AI2PUD050) (2012) Tank View Diagrams & Manuals
SZ-60 (53AI2PUD050) (2013) Tank View Diagrams & Manuals
SZ-60 (53BI2PUD050, 53RI2PUD050) (2014) Tank View Diagrams & Manuals
SZ-60KH (53RE2PUD050) (2015) Tank Efi View Diagrams & Manuals
SZ-60KH (53RE2PUD050) (2016) Tank Efi View Diagrams & Manuals
SZ-60KW (53YI2PUD050) (2015) Tank View Diagrams & Manuals
SZ-60KW (53YI2PUD050) (2016) Tank View Diagrams & Manuals
190-032-101 032 42 Inch Oem-190-032 Snow Thrower View Diagrams & Manuals
195-350-100 (196-350-100)(1986 and Before) 350 40-Inch Single Stage (1986 And Prior) Snow Thrower View Diagrams & Manuals
19A40023100 42-Inch 3x Snow Thrower View Diagrams & Manuals
19A40024100 (2015 and Before) 42-Inch 3x Snow Thrower View Diagrams & Manuals
19A40024100 (2016 and After) 42-Inch 3x Snow Thrower View Diagrams & Manuals
1X (31AM2T6C710)(2017) 21-Inch Lhp Snow Thrower View Diagrams & Manuals
1X (31PM2T6C710)(2017) 21-Inch Lhp Snow Thrower View Diagrams & Manuals
221LHP (31AM2T6D710)(31AM2T6D756)(2013) 1x 31am2t6d710 31am2t6d756 Snow Thrower View Diagrams & Manuals
2X (31AM5CVS710)(2017) 26-Inch Hp Snow Thrower View Diagrams & Manuals
2X (31AM5CVS756)(2017) 26-Inch Hp Snow Thrower View Diagrams & Manuals
31AH54SK (31AH54SK710)(2015) 3x 24-Inch Hd Snow Thrower View Diagrams & Manuals
31AH54VT709 (2017) 2x 28-Inch Hp Snow Thrower View Diagrams & Manuals
31AH54VT709 (2018) 2x 28 Hp Snow Blower View Diagrams & Manuals
31AH54VT710 (2017) 2x 28-Inch Hp Snow Thrower View Diagrams & Manuals
31AH55SX (31AH55SX710)(2014) 3x 26-Inch Hd Snow Thrower View Diagrams & Manuals
31AH55SX (31AH55SX710)(2015) 3x 26-Inch Hd Snow Thrower View Diagrams & Manuals
31AH55SY (31AH55SY710)(2015) 3x 28-Inch Hd Snow Thrower View Diagrams & Manuals
31AH57SW (31AH57SW710)(2015) 3x 30-Inch Hd Snow Thrower View Diagrams & Manuals
31AH57SZ (31AH57SZ710)(2014) 3x 30-Inch Hd Snow Thrower View Diagrams & Manuals
31AH57SZ (31AH57SZ710)(2015) 3x 30-Inch Hd Snow Thrower View Diagrams & Manuals
31AH5DVA710 (2018) 3x 26 Snow Blower View Diagrams & Manuals
31AH5DVA710 (2019) 3x 26 Snow Blower View Diagrams & Manuals
31AH5DVA710 (2020) 3x 26 Snow Blower View Diagrams & Manuals
31AH5DVA710 (2021) 3x 26 Snow Blower View Diagrams & Manuals
31AH5DVA756 (2018) 3x 26 Snow Blower View Diagrams & Manuals
31AH5DVA756 (2019) 3x 26 Snow Blower View Diagrams & Manuals
31AH5DVA756 (2020) 3x 26 Snow Blower View Diagrams & Manuals
31AH5DVA756 (2021) 3x 26 Snow Blower View Diagrams & Manuals
31AH5DVB709 (2018) 3x 28 Hp Snow Blower View Diagrams & Manuals
31AH5DVB709 (2020) 3x 28 Snow Blower View Diagrams & Manuals
31AH5DVB709 (2021) 3x 28 Snow Blower View Diagrams & Manuals
31AH5DVB710 (2018) 3x 28 Snow Blower View Diagrams & Manuals
31AH5DVB710 (2019) 3x 28 Snow Blower View Diagrams & Manuals
31AH5DVB710 (2020) 3x 28 Snow Blower View Diagrams & Manuals
31AH5DVB710 (2021) 3x 28 Snow Blower View Diagrams & Manuals
31AH5DVU710 (2018) 2x 30 Hp Snow Blower View Diagrams & Manuals
31AH5DVU710 (2019) 2x 30 Hp Snow Blower View Diagrams & Manuals
31AH5DVU710 (2020) 2x 30 Hp Snow Blower View Diagrams & Manuals
31AH5DVU710 (2021) 2x 30 Hp Snow Blower View Diagrams & Manuals
31AH5DVU756 (2020) 2x 30 Hp Snow Blower View Diagrams & Manuals
31AH5DVU756 (2021) 2x 30 Hp Snow Blower View Diagrams & Manuals
31AH5DVX710 (2018) 3x 26 Hd Snow Blower View Diagrams & Manuals
31AH5DVY710 (2018) 3x 28 Hd Snow Blower View Diagrams & Manuals
31AH5EVW710 (2018) 3x 30 Hd Snow Blower View Diagrams & Manuals
31AH5EVW710 (2019) 3x 30 Hd Snow Blower View Diagrams & Manuals
31AH5EVW710 (2020) 3x 30 Hd Snow Blower View Diagrams & Manuals
31AH5EVW710 (2021) 3x 30 Hd Snow Blower View Diagrams & Manuals
31AH5FVT709 (2019) 2x 28 Hp Snow Blower View Diagrams & Manuals
31AH5FVT710 (2018) 2x 28 Hp Snow Blower View Diagrams & Manuals
31AH5FVT710 (2019) 2x 28 Hp Snow Blower View Diagrams & Manuals
31AH5GVO710 (2019) 2x 30 Efi Snow Blower View Diagrams & Manuals
31AH5GVO710 (2021) 2x 30 Efi Snow Blower View Diagrams & Manuals
31AH75SX (31AH75SX710)(2015) 3x 26-Inch Trac Snow Thrower View Diagrams & Manuals
31AH77SZ (31AH77SZ710)(2015) 3x 30-Inch Trac Snow Thrower View Diagrams & Manuals
31AH7DVO710 (2020) 2x 30 Trac Snow Blower View Diagrams & Manuals
31AH7DVX710 (2018) 3x 26 Trac Snow Blower View Diagrams & Manuals
31AH7DVX710 (2019) 3x 26 Trac Snow Blower View Diagrams & Manuals
31AH7DVX710 (2020) 3x 26 Trac Snow Blower View Diagrams & Manuals
31AH7EVZ710 (2018) 3x 30 Trac Snow Blower View Diagrams & Manuals
31AH7EVZ710 (2019) 3x 30 Trac Snow Blower View Diagrams & Manuals
31AH7EVZ710 (2020) 3x 30 Trac Snow Blower View Diagrams & Manuals
31AH7FVM710 (2020) 2x 26 Trac Snow Blower View Diagrams & Manuals
31AH8DVS710 (2020) 2x 30 Max Snow Blower View Diagrams & Manuals
31AH8E4U710 (2018) 3x 30 Pro H Snow Blower View Diagrams & Manuals
31AH8E4U710 (2019) 3x 30 Pro H Snow Blower View Diagrams & Manuals
31AH8E4V710 (2018) 3x 34 Pro H Snow Blower View Diagrams & Manuals
31AH8E4V710 (2019) 3x 34 Pro H Snow Blower View Diagrams & Manuals
31AH8E4V710 (2020) 3x 34 Max H Snow Blower View Diagrams & Manuals
31AH8EVS710 (2019) 2x 30 Pro Snow Blower View Diagrams & Manuals
31AH8EVU710 (2018) 3x 30 Pro Snow Blower View Diagrams & Manuals
31AH8EVU710 (2019) 3x 30 Pro Snow Blower View Diagrams & Manuals
31AH8EVU710 (2020) 3x 30 Max Snow Blower View Diagrams & Manuals
31AM2T6D709 (31AM2T6D710)(31AM2T6D713)(31AM2T6D756)(2015) Home Maintenance 31-S Snow Thrower View Diagrams & Manuals
31AM53SR710 (31AM53SR756)(2015) 2x 24hp Snow Thrower View Diagrams & Manuals
31AM56SS710 (31AM56SS756)(2015) 2x 26hp Snow Thrower View Diagrams & Manuals
31AM5CVR709 (2019) 2x 24 Snow Blower View Diagrams & Manuals
31AM5CVR709 (2020) 2x 24 Snow Blower View Diagrams & Manuals
31AM5CVR709 (2021) 2x 24 Snow Blower View Diagrams & Manuals
31AM5CVR710 (2019) 2x 24 Snow Blower View Diagrams & Manuals
31AM5CVR710 (2020) 2x 24 Snow Blower View Diagrams & Manuals
31AM5CVR710 (2021) 2x 24 Snow Blower View Diagrams & Manuals
31AM5CVS710 (2018) 2x 26 Hp Snow Blower View Diagrams & Manuals
31AM5CVS710 (2019) 2x 26 Hp Snow Blower View Diagrams & Manuals
31AM5CVS710 (2020) 2x 26 Hp Snow Blower View Diagrams & Manuals
31AM5CVS710 (2021) 2x 26 Hp Snow Blower View Diagrams & Manuals
31AM5CVS756 (2018) 2x 26 Hp Snow Blower View Diagrams & Manuals
31AM5CVS756 (2019) 2x 26 Hp Snow Blower View Diagrams & Manuals
31AM5CVS756 (2020) 2x 26 Hp Snow Blower View Diagrams & Manuals
31AM5CVS756 (2021) 2x 26 Hp Snow Blower View Diagrams & Manuals
31PM2T6C710 (2019) 1x 21 Lhp Snow Blower View Diagrams & Manuals
31PM2T6C710 (2020) 1x 21 Lhp Snow Blower View Diagrams & Manuals
31PM2T6C710 (2021) 1x 21 Lhp Snow Blower View Diagrams & Manuals
3X (31AH54VC710)(2017) 24-Inch Snow Thrower View Diagrams & Manuals
3X (31AH54VK710)(2017) 24-Inch Hd Snow Thrower View Diagrams & Manuals
3X (31AH5DVA710)(2017) 26-Inch Snow Thrower View Diagrams & Manuals
3X (31AH5DVA756)(2017) 26-Inch Snow Thrower View Diagrams & Manuals
3X (31AH5DVB709)(2017) 28-Inch Snow Thrower View Diagrams & Manuals
3X (31AH5DVB710)(2017) 28-Inch Snow Thrower View Diagrams & Manuals
3X (31AH5DVX710)(2017) 26-Inch Hd Snow Thrower View Diagrams & Manuals
3X (31AH5DVY710)(2017) 28-Inch Hd Snow Thrower View Diagrams & Manuals
3X (31AH5EVW710)(2017) 30-Inch Hd Snow Thrower View Diagrams & Manuals
3X (31AH7DVX710)(2017) 26-Inch Trac Snow Thrower View Diagrams & Manuals
3X (31AH7EVZ710)(2017) 30-Inch Trac Snow Thrower View Diagrams & Manuals
3X (31AH8E2U710)(2017) 30-Inch Pro H Snow Thrower View Diagrams & Manuals
3X (31AH8E2V710)(2017) 34-Inch Pro H Snow Thrower View Diagrams & Manuals
3X (31AH8ESU710)(2017) 30-Inch Pro Snow Thrower View Diagrams & Manuals
3X (31AH8ESV710)(2017) 34-Inch Pro Snow Thrower View Diagrams & Manuals
524WE (31AM63SR710)(31AM63SR713)(31AM63SR756)(2015) Snow Thrower View Diagrams & Manuals
930SWE (31AH95SU756)(31BH95SU710)(2013) 2x 31ah95su756 31bh95su710 Snow Thrower View Diagrams & Manuals
933SWE (31AH95SV756)(31BH95SV710)(2013) 2x 31ah95sv756 31bh95sv710 Snow Thrower View Diagrams & Manuals
933SWE (31AH95SV756)(31BH95SV710)(2014) 2x 31ah95sv756 31bh95sv710 Snow Thrower View Diagrams & Manuals
933SWE (31BH95SV710)(31BH95SV756)(2015) 2x 31bh95sv710 31bh95sv756 Snow Thrower View Diagrams & Manuals
945SWE (31AH97SW756)(31BH97SW710)(2013) 2x 31ah97sw756 31bh97sw710 Snow Thrower View Diagrams & Manuals
945SWE (31AH97SW756)(31BH97SW710)(2014) 2x 31ah97sw756 31bh97sw710 Snow Thrower View Diagrams & Manuals
945SWE (31AH97SW756)(31BH97SW710)(31BH97SW756)(2015) Snow Thrower View Diagrams & Manuals
1G202Z-1G313Z (37BC465D010) 465 4x4 Utility Vehicle View Diagrams & Manuals
1G202Z-1G313Z (37BC466D010) 466 4x4 Utility Vehicle View Diagrams & Manuals
1G202Z-1G313Z (37BC467D010) 467 4x4 (Camo) Utility Vehicle View Diagrams & Manuals
1G202Z-1G313Z (37BC46GD010) 46g 4x4 Utility Vehicle View Diagrams & Manuals
1G202Z-1G313Z (37BK465D010)(37BK465D710) 465 Diesel 4x4 Utility Vehicle View Diagrams & Manuals
1G202Z-1G313Z (37BK466D010) 466 Diesel 4x4 Utility Vehicle View Diagrams & Manuals
1G202Z-1G313Z (37BK467D010)(37BK467D710) 467 Diesel 4x4 (Camo) Utility Vehicle View Diagrams & Manuals
1G202Z-1G313Z (37BK46GD010)(37BK46GD710) 46g Diesel 4x4 Utility Vehicle View Diagrams & Manuals
1G202Z-1G313Z (37BM465D710) 465 4x4 Efi Utility Vehicle View Diagrams & Manuals
1G202Z-1G313Z (37BM466D710) 466 4x4 Efi Utility Vehicle View Diagrams & Manuals
1G202Z-1G313Z (37BM467D710) 467 4x4 (Camo) Efi Utility Vehicle View Diagrams & Manuals
1G202Z-1G313Z (37BM46GD710) 46g 4x4 Efi Utility Vehicle View Diagrams & Manuals
1H013H-1H294H (37BC465D010) 465 4x4 Utility Vehicle View Diagrams & Manuals
1H013H-1H294H (37BC466D010) 466 4x4 Utility Vehicle View Diagrams & Manuals
1H013H-1H294H (37BC467D010) 467 4x4 (Camo) Utility Vehicle View Diagrams & Manuals
1H013H-1H294H (37BC46GD010) 46g 4x4 Utility Vehicle View Diagrams & Manuals
1H013H-1H294H (37BK465D010) 465 Diesel 4x4 Utility Vehicle View Diagrams & Manuals
1H013H-1H294H (37BK466D010) 466 Diesel 4x4 Utility Vehicle View Diagrams & Manuals
1H013H-1H294H (37BK467D010) 467 Diesel 4x4 Utility Vehicle View Diagrams & Manuals
1H013H-1H294H (37BK46GD010) 46g Diesel 4x4 Utility Vehicle View Diagrams & Manuals
1H013H-1H294H (37BM465D710) 465 4x4 Efi Utility Vehicle View Diagrams & Manuals
1H013H-1H294H (37BM466D710) 466 4x4 Efi Utility Vehicle View Diagrams & Manuals
1H013H-1H294H (37BM467D710) 467 4x4 (Camo) Efi Utility Vehicle View Diagrams & Manuals
1H013H-1H294H (37BM46GD710) 46g 4x4 Efi Utility Vehicle View Diagrams & Manuals
1H030Z-1G192Z (37BC465D010) 465 4x4 Utility Vehicle View Diagrams & Manuals
1H030Z-1G192Z (37BC466D010) 466 4x4 Utility Vehicle View Diagrams & Manuals
1H030Z-1G192Z (37BK465D710) 465 Diesel 4x4 Utility Vehicle View Diagrams & Manuals
1H030Z-1G192Z (37BK466D710) 466 Diesel 4x4 Utility Vehicle View Diagrams & Manuals
1H030Z-1G192Z (37BK46GD710) 46g Diesel 4x4 Utility Vehicle View Diagrams & Manuals
1H030Z-1G192Z (37BM465D710) 465 4x4 Efi Utility Vehicle View Diagrams & Manuals
1H030Z-1G192Z (37BM466D710) 466 4x4 Efi Utility Vehicle View Diagrams & Manuals
1H030Z-1G192Z (37BM46GD710) 46g 4x4 Efi Utility Vehicle View Diagrams & Manuals
1I018G-1I019G (37AC466D010)(37AC466D210) 466 4x4 Utility Vehicle View Diagrams & Manuals
1I018G-1I019G (37AC46FH010) 46f 4x4 Utility Vehicle View Diagrams & Manuals
1I018G-1I019G (37AK466D710) 466 Diesel 4x4 Utility Vehicle View Diagrams & Manuals
1I018G-1I019G (37AM46FH710) 46f 4x4 Efi Utility Vehicle View Diagrams & Manuals
1I019G (37AK46GD710) 46g Diesel 4x4 Utility Vehicle View Diagrams & Manuals
1I019G (37AM46GD710) 46g 4x4 Efi Utility Vehicle View Diagrams & Manuals
1I029Z-1H020Z (37BC465D710) 465 4x4 (Tracker) Utility Vehicle View Diagrams & Manuals
1I029Z-1H020Z (37BC466D710) 466 4x4 Utility Vehicle View Diagrams & Manuals
1I029Z-1H020Z (37BK465D710) 465 Diesel 4x4 Utility Vehicle View Diagrams & Manuals
1I029Z-1H020Z (37BK466D710) 466 Diesel 4x4 Utility Vehicle View Diagrams & Manuals
1I029Z-1H020Z (37BK46GD710) 46g Diesel 4x4 Utility Vehicle View Diagrams & Manuals
1I029Z-1H020Z (37BM465D710) 465 4x4 Efi Utility Vehicle View Diagrams & Manuals
1I029Z-1H020Z (37BM466D710) 466 4x4 Efi Utility Vehicle View Diagrams & Manuals
1I029Z-1H020Z (37BM46GD710) 46g 4x4 Efi Utility Vehicle View Diagrams & Manuals
400 (37BV3BHK010)(2018) Challenger 4x4 Yellow Utility Vehicle View Diagrams & Manuals
400 (37BV3BHK010)(2019) Challenger 4x4 Yellow Utility Vehicle View Diagrams & Manuals
400 (37BV3BHK210)(2018) Challenger 4x4 Yellow Utility Vehicle View Diagrams & Manuals
400 (37BV3BHK210)(2019) Challenger 4x4 Yellow Utility Vehicle View Diagrams & Manuals
400 (37CV3BHK010)(2020) Challenger 4x4 Yellow Utility Vehicle View Diagrams & Manuals
465 (1I018G-1I019G) 4x4 (Tracker) Utility Vehicle View Diagrams & Manuals
465 (1I019G & Before) Diesel 4x4 Utility Vehicle View Diagrams & Manuals
466 (1I019G & Before) 4x4 Efi Utility Vehicle View Diagrams & Manuals
467 (1H030Z-1G192Z) 4x4 (Camo) Efi Utility Vehicle View Diagrams & Manuals
467 (1I018G-1I019G) 4x4 (Camo) Efi Utility Vehicle View Diagrams & Manuals
467 (1I029Z-1H020Z) 4x4 (Camo) Efi Utility Vehicle View Diagrams & Manuals
46E (1I018G-1I019G) 4x4 Efi Utility Vehicle View Diagrams & Manuals
46F (37AK46FH710) Diesel 4x4 Volunteer Utility Vehicle View Diagrams & Manuals
475 (1G202Z-1G313Z) 4x2 Fis Utility Vehicle View Diagrams & Manuals
475 (1H013H-1H294H) 4x2 Fis Utility Vehicle View Diagrams & Manuals
475 (1H030Z-1G192Z) 4x2 Fis Utility Vehicle View Diagrams & Manuals
475 (1I018G-1I019G) 4x2 Fis Utility Vehicle View Diagrams & Manuals
475 (1I029Z-1H020Z) 4x2 Fis Utility Vehicle View Diagrams & Manuals
476 (1G202Z-1G313Z) 4x2 Fis Utility Vehicle View Diagrams & Manuals
476 (1H013H-1H294H) 4x2 Fis Utility Vehicle View Diagrams & Manuals
477 (1G202Z-1G313Z) 4x2 Fis (Camo) Utility Vehicle View Diagrams & Manuals
477 (1H013H-1H294H) 4x2 Fis (Camo) Utility Vehicle View Diagrams & Manuals
47G (1G202Z-1G313Z) 4x2 Fis Utility Vehicle View Diagrams & Manuals
47G (1H013H-1H294H) 4x2 Fis Utility Vehicle View Diagrams & Manuals
485 (37AM485D010)(2015) 4x4 (Green) Efi (Volunteer) Utility Vehicle View Diagrams & Manuals
486 (37AM486D010)(2015) 4x4 (Yellow) Efi (Volunteer) Utility Vehicle View Diagrams & Manuals
487 (37AM487D010)(2015) 4x4 (Camo) Efi (Volunteer) Utility Vehicle View Diagrams & Manuals
48G (37AM48GD010)(2015) 4x4 (Red) Efi (Volunteer) Utility Vehicle View Diagrams & Manuals
500 (53RIHJTK050)(2018) Pro Z Kw 548-L Zero Turn Rider View Diagrams & Manuals
500 (53TIHJTN050)(2018) Pro Z Kw 554-L Zero Turn Rider View Diagrams & Manuals
500 (53TIHJTN050)(2019) Pro Z Kw 554-L Zero Turn Rider View Diagrams & Manuals
500 (53TIHJTN050)(2020) Pro Z Kw 554-L Zero Turn Rider View Diagrams & Manuals
500 (53TIHJTN050)(2021) Pro Z Kw 554-L Zero Turn Rider View Diagrams & Manuals
500 (53TIHJTV050)(2018) Pro Z Kw 560-L Zero Turn Rider View Diagrams & Manuals
500 (53TIHJTV050)(2019) Pro Z Kw 560-L Zero Turn Rider View Diagrams & Manuals
500 (53TIHJTV050)(2020) Pro Z Kw 560-L Zero Turn Rider View Diagrams & Manuals
500 (53TIHJTV050)(2021) Pro Z Kw 560-L Zero Turn Rider View Diagrams & Manuals
500 (53TIHJUN050)(2018) Pro Z Kw 554-S Zero Turn Rider View Diagrams & Manuals
500 (53TIHJUN050)(2019) Pro Z Kw 554-S Zero Turn Rider View Diagrams & Manuals
500 (53TIHJUN050)(2020) Pro Z Kw 554-S Zero Turn Rider View Diagrams & Manuals
500 (53TIHJUN050)(2021) Pro Z Kw 554-S Zero Turn Rider View Diagrams & Manuals
500 (53TIHJUV050)(2018) Pro Z Kw 560-S Zero Turn Rider View Diagrams & Manuals
500 (53TIHJUV050)(2019) Pro Z Kw 560-S Zero Turn Rider View Diagrams & Manuals
500 (53TIHJUV050)(2020) Pro Z Kw 560-S Zero Turn Rider View Diagrams & Manuals
500 (53TIHJUV050)(2021) Pro Z Kw 560-S Zero Turn Rider View Diagrams & Manuals
59A50006150 (2018) Wide-Area Mower Discharge Restrictor Kit View Diagrams & Manuals
59A50011150 (2020) 48-Inch Side Discharge Blocker Kit View Diagrams & Manuals
59A50012150 (2020) 54-Inch And 60-Inch Side Discharge Blocker Kit (2020) View Diagrams & Manuals
700 (53RIHKTV050)(2016) Pro Z Kw 760-L Zero Turn Rider View Diagrams & Manuals
700 (53RIHKTY050)(2016) Pro Z Kw 772-L Zero Turn Rider View Diagrams & Manuals
700 (53RIHKUV050)(2016) Pro Z Kw 760-S Zero Turn Rider View Diagrams & Manuals
700 (53RIHKUY050)(2016) Pro Z Kw 772-S Zero Turn Rider View Diagrams & Manuals
700 (53RLHKTV050)(2018) Pro Z Kw Efi 760-L Zero Turn Rider View Diagrams & Manuals
700 (53TIHKTV050)(2018) Pro Z Kw 760-L Zero Turn Rider View Diagrams & Manuals
700 (53TIHKTV050)(2019) Pro Z Kw 760-L Zero Turn Rider View Diagrams & Manuals
700 (53TIHKTV050)(2020) Pro Z Kw 760-L Zero Turn Rider View Diagrams & Manuals
700 (53TIHKTV050)(2021) Pro Z Kw 760-L Zero Turn Rider View Diagrams & Manuals
700 (53TIHKTY050)(2018) Pro Z Kw 772-L Zero Turn Rider View Diagrams & Manuals
700 (53TIHKTY050)(2019) Pro Z Kw 772-L Zero Turn Rider View Diagrams & Manuals
700 (53TIHKTY050)(2020) Pro Z Kw 772-L Zero Turn Rider View Diagrams & Manuals
700 (53TIHKTY050)(2021) Pro Z Kw 772-L Zero Turn Rider View Diagrams & Manuals
700 (53TIHKUV050)(2018) Pro Z Kw 760-S Zero Turn Rider View Diagrams & Manuals
700 (53TIHKUV050)(2019) Pro Z Kw 760-S Zero Turn Rider View Diagrams & Manuals
700 (53TIHKUV050)(2020) Pro Z Kw 760-S Zero Turn Rider View Diagrams & Manuals
700 (53TIHKUV050)(2021) Pro Z Kw 760-S Zero Turn Rider View Diagrams & Manuals
747 (37AM485D010)(2016) Volunteer Efi 4x4 Green Utility Vehicle(4x4) View Diagrams & Manuals
747 (37AM485D010)(2017) Volunteer Efi 4x4 Green Utility Vehicle(4x4) View Diagrams & Manuals
747 (37AM485D010)(2018) Volunteer Efi 4x4 Green Utility Vehicle(4x4) View Diagrams & Manuals
747 (37AM486D010)(2016) Volunteer Efi 4x4 Yellow Utility Vehicle(4x4) View Diagrams & Manuals
747 (37AM486D010)(2017) Volunteer Efi 4x4 Yellow Utility Vehicle(4x4) View Diagrams & Manuals
747 (37AM486D010)(2018) Volunteer Efi 4x4 Yellow Utility Vehicle(4x4) View Diagrams & Manuals
747 (37AM486M010)(2016) Volunteer Wt Efi Utility Vehicle(4x4) View Diagrams & Manuals
747 (37AM486M010)(2017) Volunteer Wt Efi Utility Vehicle(4x4) View Diagrams & Manuals
747 (37AM486M010)(2018) Volunteer Wt Efi Utility Vehicle(4x4) View Diagrams & Manuals
747 (37AM487D010)(2016) Volunteer Efi 4x4 Camo Utility Vehicle(4x4) View Diagrams & Manuals
747 (37AM487D010)(2017) Volunteer Efi 4x4 Camo Utility Vehicle(4x4) View Diagrams & Manuals
747 (37AM487D010)(2018) Volunteer Efi 4x4 Camo Utility Vehicle(4x4) View Diagrams & Manuals
747 (37AM48FM010)(2016) Volunteer Wt Cab Efi Utility Vehicle(4x4) View Diagrams & Manuals
747 (37AM48FM010)(2017) Volunteer Wt Cab Efi Utility Vehicle(4x4) View Diagrams & Manuals
747 (37AM48GD010)(2016) Volunteer Efi 4x4 Red Utility Vehicle(4x4) View Diagrams & Manuals
747 (37AM48GD010)(2017) Volunteer Efi 4x4 Red Utility Vehicle(4x4) View Diagrams & Manuals
747 (37AM48GD010)(2018) Volunteer Efi 4x4 Red Utility Vehicle(4x4) View Diagrams & Manuals
747 (37BM485D010)(2019) Volunteer Efi 4x4 Green Utility Vehicle(4x4) View Diagrams & Manuals
747 (37BM486D010)(2019) Volunteer Efi 4x4 Yellow Utility Vehicle(4x4) View Diagrams & Manuals
747 (37BM487D010)(2019) Volunteer Efi 4x4 Camo Utility Vehicle(4x4) View Diagrams & Manuals
747 (37BM48GD010)(2019) Volunteer Efi 4x4 Red Utility Vehicle(4x4) View Diagrams & Manuals
900 (53FIHMUY050)(2018) Pro Z Kw 972-S Zero Turn Rider View Diagrams & Manuals
900 (53FIHMUY050)(2019) Pro Z Kw 972-S Zero Turn Rider View Diagrams & Manuals
900 (53FIHMUY050)(2020) Pro Z Kw 972-S Zero Turn Rider View Diagrams & Manuals
900 (53FIHMUY050)(2021) Pro Z Kw 972-S Zero Turn Rider View Diagrams & Manuals
900 (53REHMTV050)(2016) Pro Z Efi 960-L Zero Turn Rider View Diagrams & Manuals
900 (53REHMUV050)(2016) Pro Z Efi 960-S Zero Turn Rider View Diagrams & Manuals
900 (53RIHMAV050)(2021) Pro Z Kw 960-S Surepath Zero Turn Rider View Diagrams & Manuals
900 (53RIHMAY050)(2021) Pro Z Kw 972-S Surepath Zero Turn Rider View Diagrams & Manuals
900 (53RIHMTV050)(2016) Pro Z Kw 960-L Zero Turn Rider View Diagrams & Manuals
900 (53RIHMTY050)(2016) Pro Z Kw 972-L Zero Turn Rider View Diagrams & Manuals
900 (53RIHMUV050)(2016) Pro Z Kw 960-S Zero Turn Rider View Diagrams & Manuals
900 (53RIHMUY050)(2017) Pro Z Kw 972-S Zero Turn Rider View Diagrams & Manuals
900 (53RLHMTV050)(2021) Pro Z Kw 960-L Zero Turn Rider View Diagrams & Manuals
900 (53RLHMTY050)(2021) Pro Z Kw 972-L Zero Turn Rider View Diagrams & Manuals
900 (53TIHMTV050)(2018) Pro Z Kw 960-L Zero Turn Rider View Diagrams & Manuals
900 (53TIHMTV050)(2019) Pro Z Kw 960-L Zero Turn Rider View Diagrams & Manuals
900 (53TIHMTV050)(2020) Pro Z Kw 960-L Zero Turn Rider View Diagrams & Manuals
900 (53TIHMTV050)(2021) Pro Z Kw 960-L Zero Turn Rider View Diagrams & Manuals
900 (53TIHMTY050)(2018) Pro Z Kw 972-L Zero Turn Rider View Diagrams & Manuals
900 (53TIHMTY050)(2019) Pro Z Kw 972-L Zero Turn Rider View Diagrams & Manuals
900 (53TIHMTY050)(2020) Pro Z Kw 972-L Zero Turn Rider View Diagrams & Manuals
900 (53TIHMTY050)(2021) Pro Z Kw 972-L Zero Turn Rider View Diagrams & Manuals
900 (53TIHMUV050)(2018) Pro Z Kw 960-S Zero Turn Rider View Diagrams & Manuals
900 (53TIHMUV050)(2019) Pro Z Kw 960-S Zero Turn Rider View Diagrams & Manuals
900 (53TIHMUV050)(2020) Pro Z Kw 960-S Zero Turn Rider View Diagrams & Manuals
900 (53TIHMUV050)(2021) Pro Z Kw 960-S Zero Turn Rider View Diagrams & Manuals
CC30E (13AZ27JD710)(2018) Electric Mini Rider View Diagrams & Manuals
CC30e (33AA27JD710)(2019) Electric Mini Rider View Diagrams & Manuals
CC30e (33AA27JDB10)(2021) Electric Mini Rider View Diagrams & Manuals
CC30e (33BA27JD710)(2020) Electric Mini Rider View Diagrams & Manuals
CC30H (13AC21JD010)(2021) Hydro Mini Rider View Diagrams & Manuals
CC30H (13B721JD010)(2018) Hydro Mini Rider View Diagrams & Manuals
CC30H (13B721JD056)(2018) Hydro Mini Rider View Diagrams & Manuals
CC30H (13C721JD010)(2019) Hydro Mini Rider View Diagrams & Manuals
CC30H (13C721JD010)(2020) Hydro Mini Rider View Diagrams & Manuals
GT1554 (14AK13CK) Courage Engine 010 Tractor View Diagrams & Manuals
24AE687F010 (2018) Cb 2900 Walk-Behind Blower View Diagrams & Manuals
24AE687F710 (2016) Cb 2900 Walk-Behind Blower View Diagrams & Manuals
24AE687F710 (2017) Cb 2900 Walk-Behind Blower View Diagrams & Manuals
24BF552B710 (2018) Ls25 Log Splitter View Diagrams & Manuals
24BF552B710 (2019) Ls 25 Cc Log Splitter View Diagrams & Manuals
24BF552B710 (2020) Ls 25 C Log Splitter View Diagrams & Manuals
24BF552B756 (2017) Ls25cc Log Splitter View Diagrams & Manuals
24BF552B756 (2018) Ls25 Log Splitter View Diagrams & Manuals
24BG55M1710 (2017) Log Splitter View Diagrams & Manuals
24BG5HM5710 (2017) Log Splitter View Diagrams & Manuals
24BG5HM5710 (2018) Ls27cc Log Splitter View Diagrams & Manuals
24BG5HM5710 (2019) Ls 27 Cc Log Splitter View Diagrams & Manuals
24BG5HM6710 (2020) Log Splitter View Diagrams & Manuals
Husky
13AI609H131 (1999) Lawn Tractor View Diagrams & Manuals
13AU609H131 (1999) Lawn Tractor View Diagrams & Manuals
13AS608H131 (2000) Lawn Tractor View Diagrams & Manuals
13AU607H131 (2000) Lawn Tractor View Diagrams & Manuals
13AI608H131 (2001) Lawn Tractor View Diagrams & Manuals
13AV607H131 (2001) Lawn Tractor View Diagrams & Manuals
13AJ608H131 (2002) Lawn Tractor View Diagrams & Manuals
13AF660G131 (2003) Lawn Tractor View Diagrams & Manuals
13AF693G131 (2003) Lawn Tractor View Diagrams & Manuals
13AQ608H131 (2003) Lawn Tractor View Diagrams & Manuals
13AS608H131 (2003) Lawn Tractor View Diagrams & Manuals
13AT688H131 (2003) Lawn Tractor View Diagrams & Manuals
13BM660F131 (2003) Lawn Tractor View Diagrams & Manuals
13BS608H131 (2003) Lawn Tractor View Diagrams & Manuals
13AL608G731 (2004) Lawn Tractor View Diagrams & Manuals
13AM680F731 (2004) Lawn Tractor View Diagrams & Manuals
13AM682G731 (2004) Lawn Tractor View Diagrams & Manuals
13AN682G731 (2004) Lawn Tractor View Diagrams & Manuals
13AP698G731 (2004) Lawn Tractor View Diagrams & Manuals
13AR608P731 (2004) Lawn Tractor View Diagrams & Manuals
13AS608H731 (2004) Lawn Tractor View Diagrams & Manuals
13AT688H731 (2004) Lawn Tractor View Diagrams & Manuals
13AZ608H131 (2004) Lawn Tractor View Diagrams & Manuals
13CS608H731 (2004) Lawn Tractor View Diagrams & Manuals
13AB606H730 (2005) Lawn Tractor View Diagrams & Manuals
13AJ791G731 (2005) Lawn Tractor View Diagrams & Manuals
13AL606G730 (2005) Lawn Tractor View Diagrams & Manuals
13AM771F731 (2005) Lawn Tractor View Diagrams & Manuals
13AN771G731 (2005) Lawn Tractor View Diagrams & Manuals
13AR606P730 (2005) Lawn Tractor View Diagrams & Manuals
13AD771G731 (2006) Lawn Tractor View Diagrams & Manuals
13AN771G731 (2006) Lawn Tractor View Diagrams & Manuals
13AX605H730 (2006) Lawn Tractor View Diagrams & Manuals
13AD771G731 (2007) Lawn Tractor View Diagrams & Manuals
13AP625K730 (2007) Lawn Tractor View Diagrams & Manuals
13AX615H730 (2007) Lawn Tractor View Diagrams & Manuals
13AX775H730 (2007) Lawn Tractor View Diagrams & Manuals
13AJ771G031 (2008) Lawn Tractor View Diagrams & Manuals
13AJ771G231 (2008) Lawn Tractor View Diagrams & Manuals
13AM762F031 (2008) Lawn Tractor View Diagrams & Manuals
13AX615H731 (2008) Lawn Tractor View Diagrams & Manuals
13AX775H031 (2008) Lawn Tractor View Diagrams & Manuals
13AX775H231 (2008) Lawn Tractor View Diagrams & Manuals
13AX795G031 (2008) Lawn Tractor View Diagrams & Manuals
13AJ771G031 (2009) Lawn Tractor View Diagrams & Manuals
13AJ771G231 (2009) Lawn Tractor View Diagrams & Manuals
13BX775H031 (2009) Lawn Tractor View Diagrams & Manuals
13AC76LF031 (2010) Lawn Tractor View Diagrams & Manuals
13AJ771S031 (2010) Lawn Tractor View Diagrams & Manuals
13AJ771S231 (2010) Lawn Tractor View Diagrams & Manuals
13WC76LF031 (2010) Lawn Tractor View Diagrams & Manuals
13WC76LF231 (2010) Lawn Tractor View Diagrams & Manuals
13WJ771S231 (2010) Lawn Tractor View Diagrams & Manuals
14AP849P131 (1997) Garden Tractor View Diagrams & Manuals
14AJ849P131 (1998) Garden Tractor View Diagrams & Manuals
14BS843H131 (1998) Garden Tractor View Diagrams & Manuals
14AI849H131 (1999) Garden Tractor View Diagrams & Manuals
14AV844P131 (1999) Garden Tractor View Diagrams & Manuals
14AJ848H131 (2000) Garden Tractor View Diagrams & Manuals
14AJ849H131 (2000) Garden Tractor View Diagrams & Manuals
14AV807P131 (2000) Garden Tractor View Diagrams & Manuals
14AJ848H131 (2001) Garden Tractor View Diagrams & Manuals
14AR807P131 (2001) Garden Tractor View Diagrams & Manuals
14AR808K131 (2002) Garden Tractor View Diagrams & Manuals
14AZ808K131 (2002) Garden Tractor View Diagrams & Manuals
14AR808K131 (2003) Garden Tractor View Diagrams & Manuals
14AI808H731 (2004) Garden Tractor View Diagrams & Manuals
14AR808K731 (2004) Garden Tractor View Diagrams & Manuals
14AT808H731 (2004) Garden Tractor View Diagrams & Manuals
14BR808K731 (2004) Garden Tractor View Diagrams & Manuals
14AP805K730 (2006) Garden Tractor View Diagrams & Manuals
314-180-131 (1994) Snowblower View Diagrams & Manuals
314-191-131 (1994) Snowblower View Diagrams & Manuals
314-616E131 (1994) Snowblower View Diagrams & Manuals
314-646F131 (1994) Snowblower View Diagrams & Manuals
314-666G131 (1994) Snowblower View Diagrams & Manuals
315-140-131 (1995) Snowblower View Diagrams & Manuals
315-613E131 (1995) Snowblower View Diagrams & Manuals
315E643F131 (1995) Snowblower View Diagrams & Manuals
315E663G131 (1995) Snowblower View Diagrams & Manuals
316-140-131 (1996) Snowblower View Diagrams & Manuals
316-613E131 (1996) Snowblower View Diagrams & Manuals
316E643F131 (1996) Snowblower View Diagrams & Manuals
316E663G131 (1996) Snowblower View Diagrams & Manuals
317-140-131 (1997) Snowblower View Diagrams & Manuals
317E613E131 (1997) Snowblower View Diagrams & Manuals
317E643F131 (1997) Snowblower View Diagrams & Manuals
317E663G131 (1997) Snowblower View Diagrams & Manuals
31A-140-131 (1998) Snowblower View Diagrams & Manuals
31AE613E131 (1998) Snowblower View Diagrams & Manuals
31AE643F131 (1998) Snowblower View Diagrams & Manuals
31AE644E131 (1998) Snowblower View Diagrams & Manuals
31AE663G131 (1998) Snowblower View Diagrams & Manuals
31A-611D131 (1999) Snowblower View Diagrams & Manuals
31AE6A4E131 (1999) Snowblower View Diagrams & Manuals
31A-611D131 (2000) Snowblower View Diagrams & Manuals
31AE6A4E131 (2000) Snowblower View Diagrams & Manuals
31A-140-131 (2001) Snowblower View Diagrams & Manuals
31AE663G131 (2001) Snowblower View Diagrams & Manuals
31A-150-131 (2002) Snowblower View Diagrams & Manuals
31AE663G131 (2002) Snowblower View Diagrams & Manuals
31BE600E131 (2002) Snowblower View Diagrams & Manuals
31AE643G131 (2003) Snowblower View Diagrams & Manuals
31AE663G131 (2003) Snowblower View Diagrams & Manuals
31AE6C3H131 (2003) Snowblower View Diagrams & Manuals
31AE640G131 (2004) Snowblower View Diagrams & Manuals
31AE6C3H131 (2004) Snowblower View Diagrams & Manuals
31BE600E131 (2004) Snowblower View Diagrams & Manuals
31AE6GKG731 (2005) Snowblower View Diagrams & Manuals
31AE6GKH730 (2005-2) Snowblower View Diagrams & Manuals
31AE6KKH731 (2005) Snowblower View Diagrams & Manuals
31AS6ACD731 (2005) Snowblower View Diagrams & Manuals
31AS6ACD731 (2005-2) Snowblower View Diagrams & Manuals
31AS6CEG731 (2005) Snowblower View Diagrams & Manuals
31AS6DEG731 (2005) Snowblower View Diagrams & Manuals
31AS6FEG731 (2005) Snowblower View Diagrams & Manuals
31AS6FEG731 (2005-2) Snowblower View Diagrams & Manuals
31AS6BEE731 (2006) Snowblower View Diagrams & Manuals
31AS6FEG731 (2006) Snowblower View Diagrams & Manuals
31AS6BEE731 (2007) Snowblower View Diagrams & Manuals
31BS6FEG731 (2007) Snowblower View Diagrams & Manuals
31AM62EE731 (2008) Snowblower View Diagrams & Manuals
31AH64FG731 (2009) Snowblower View Diagrams & Manuals
31AM62EE731 (2009) Snowblower View Diagrams & Manuals
31AS62EE731 (2010) Snowblower View Diagrams & Manuals
31AS62EE731 (2011) Snowblower View Diagrams & Manuals
31AS62EE731 (2012) Snowblower View Diagrams & Manuals
31AS62EE731 (2013) Snowblower View Diagrams & Manuals
31AS63EE731 (2014) Snowblower View Diagrams & Manuals
31AM63HE731 (2015) Snowblower View Diagrams & Manuals
31AM6BHE731 (2016) Snowblower View Diagrams & Manuals
31AM6BHE731 (2017) Snowblower View Diagrams & Manuals
Show More Compatible Models
This item works with the following types of products:
- Lawn Tractor Parts
- Snowblower Parts
- Edger Parts
- Trimmer Parts
- Lawn Mower Parts
- Log Splitter Parts
This part replaces obsolete part #: YS-741-0475, 741-0471, 741-0475, 735-0218, 7410475, 735-0218A, 741-0475
Customer Part Reviews ?
Average Rating (out of 5):
Click to filter by ratings:
5 stars
7
4 stars
0
3 stars
0
2 stars
0
1 stars
0
< PREV
- 1
Easy site to find my part
I ordered this bushing to tighten the steering back up on my 2006 Troybilt mower. Diagrams made it easy to find the part I needed and delivery was quick. Will definitely use again when I need parts for this mower.
Guest -
May 21, 2021
Verified Purchase
Easy replace, huge improvement!
Perfect fit. As advertised.
James -
September 23, 2019
Verified Purchase
Worked as expected
Was exactly what I ordered
Guest -
August 7, 2019
Verified Purchase
perfect fit
arrived quickly and was the correct part
Guest -
July 2, 2019
Verified Purchase
Looks good but have not used it yet!
Part arrived with other parts in very fast time. I will order from you folks again!
Guest -
July 2, 2019
Verified Purchase
Easy repair parts
The part came fast and in great condition. Our lawnmower is working great. Thank you
Guest -
July 2, 2019
Verified Purchase
Very Easy
Fit as expected, and removed most wandering in the steering control on my Troy-built riding mower.
Howard -
June 10, 2019
Verified Purchase
t
t
t -
t days ago
Verified Purchase
eReplacementParts Team
t
Questions & Answers ?
Our customer Service team is at the ready daily to answer your part and product questions.

Ask our Team
We have a dedicated staff with decades of collective experience in helping customers just like you purchase parts to repair their products.
Does this fit my product?Questions & Answers for Bushing-.380 Id
No questions have been asked yet
Customer Repair Instructions ?
All our customer repair instructions are solicited directly from other customers just like you who have purchased and replaced this exact part.
Steering was loose and skipped teeth at times
ANDREW - June 16, 2017
👍 6 of 7 people found this instruction helpful
Tool Type
Lawn Tractor
Difficulty
Medium
Time
1-2 hours
Tools Used
Screwdriver, Socket set, Wrench Set
Removed the gas tank for working space,then removed the dash and the shaft retainer to remove the steering wheel and shaft.
Replaced the gear and bushings and added the support plate that my early model did not have. This removed the play in the gear and allowed the steering shaft the fit tightly removing the looseness in the steering ,when it was reassembled, it was better than new.
Replaced the gear and bushings and added the support plate that my early model did not have. This removed the play in the gear and allowed the steering shaft the fit tightly removing the looseness in the steering ,when it was reassembled, it was better than new.
Did you find this story helpful?
Thanks for voting and helping fellow customers!
Steering problems in front wheels
Robert - June 25, 2017
👍 2 of 2 people found this instruction helpful
Tool Type
Lawn Tractor
Difficulty
Easy
Time
15-30 minutes
Tools Used
Pliers, Wrench Set
Removed front wheels and repalced bushings
Did you find this story helpful?
Thanks for voting and helping fellow customers!
Troy Bilt Super Bronco would not steer
Phillip - July 4, 2018
👍 1 of 1 people found this instruction helpful
Tool Type
Lawn Tractor
Difficulty
Medium
Time
15-30 minutes
Tools Used
Screwdriver, Wrench Set
Parts Used
Removed nut from bottom of steering rod, removed steering pinion gear. removed bracket from gas tank and moved it back out of the way, without disconnecting the lines, placed new bushing, steel this time instead of original plastic, in the slot for it; then I repositioned steering rod thru hole in bushing, installed steering pinion gear, washer and nut, and tightened until snug, and then set the gas tank back into place and secured it. It worked and the lawn tractor once again can be steered.
Did you find this story helpful?
Thanks for voting and helping fellow customers!
Worn bushings and drag link
Jeff - August 18, 2017
👍 1 of 1 people found this instruction helpful
Tool Type
Lawn Tractor
Difficulty
Easy
Time
1-2 hours
Tools Used
Pliers, Wrench Set, Adjustable Wrench
Removed wheel and axle, pushed out old bushings cleaned axle shaft greased and reassembled
Did you find this story helpful?
Thanks for voting and helping fellow customers!
flat drive Idler pully was bad replaced it and plastic steering bushing
John - September 19, 2020
Tool Type
Lawn Mower
Difficulty
Easy
Time
15-30 minutes
Tools Used
Socket set, Wrench Set
took off rear right wheel and removed nut holding the flat Idler pulley replaced it with the new one replaced nut.
Did you find this story helpful?
Thanks for voting and helping fellow customers!
Bushings were worn for steering mechanism
Mantro - June 16, 2019
Tool Type
Lawn Tractor
Difficulty
Easy
Time
Less than 15 minutes
Tools Used
Socket set
Parts Used
Using a 3/8 inch drive ratchet and a half inch socket remove retaining nuts pop out worn bushings and replace with new Bushings replaced nuts,working great.
Did you find this story helpful?
Thanks for voting and helping fellow customers!
Steering gear(s) stripped
Dennie - April 6, 2018
Tool Type
Lawn Tractor
Difficulty
Medium
Time
1-2 hours
Tools Used
Screwdriver, Wrench Set, Vise grips
1. Removed steering wheel by popping of cap and removing nut and washer.
2. Held steering shaft in place with vise grips towards the top of shaft by fuel tank and removed bottom screw with a big phillips head driver on a ratchet
3. Removed gear assy with ratchet wrenches and sockets (note the bushing that fits on the middle slot bolt)
4. Apply grease between the gear plates and assemble in reverse of removal.
5. Works great and will try not to dry steer to keep gear teeth intact for a long time.
Did you find this story helpful?
Thanks for voting and helping fellow customers!
Repaired bushing on steering gear and general tuneup & changed the oil
Byron - March 13, 2018
Tool Type
Lawn Tractor
Difficulty
Easy
Time
15-30 minutes
Tools Used
Pliers, Socket set, Adjustable Wrench
Replaced old sparkplug & replaced bushing and nut in steering gear, changed oil like I do every spring since I bought the lawn mower in 2008..
Did you find this story helpful?
Thanks for voting and helping fellow customers!
Gears just wore out.
stephen - October 2, 2017
Tool Type
Lawn Tractor
Difficulty
Easy
Time
30-60 minutes
Tools Used
Screwdriver, Pliers, Power Drill, Socket set, Wrench Set, Nutdriver, Adjustable Wrench
Parts Used
Removed the steering column and the gears. Most parts lasted 15 years. It was time to just update a few things.
Did you find this story helpful?
Thanks for voting and helping fellow customers!
Steering gear connection to tie-rod broke.
Richard - September 24, 2017
Tool Type
Lawn Tractor
Difficulty
Medium
Time
More than 2 hours
Tools Used
Screwdriver, Pliers, Socket set, Wrench Set
1. Lift the rear of the mower and insert the jack stands to hold up.
2. Remove the mower deck and slide out.
3. Disconnect the tie-rod ends from the steering gear.
4. Removed 4 side screws holding the plate that steering gear connects to.
5. Drain the gas tank.
6. Unbolt 4 bolts securing the gas tank and lift out the gas tank.
7. Backup the hex head bolt below the gas tank and unscrew the nut on the lower plate.
8. Remove the nut from the bottom of the steering wheel and push up the steering column to remove the pinion gear and the washer.
9. Remove screw securing PTO to drop PTO.
10. Use a socket and a box end wrench as a backup on bolts securing the steering gear. Need to tilt the plate to get to the bolts to backup to remove nuts.
11. Reassembled in reverse order.
12. Replaced the plastic pieces on the ends of the tie-rods through which the lock nuts secure the tie-rods to the steering gear.
Did you find this story helpful?
Thanks for voting and helping fellow customers!
Load More Install Stories
OEM stands for Original Equipment Manufacturer and means the part you’re buying is sourced directly from the manufacturer who made your product. At eReplacementParts, we sell only genuine OEM parts, guaranteeing the part you’re purchasing is of better design and of higher quality than aftermarket parts.
Our product descriptions are a combination of data sourced directly from the manufacturers who made your product as well as content researched and curated by our content & customer service teams. This content is edited and reviewed internally before being made public to customers.
Our customer service team are at the ready daily to answer your part and product questions. We have a dedicated staff with decades of collective experience in helping customers just like you purchase parts to repair their products.
All our part reviews are solicited directly from other customers who have purchased this exact part. While we moderate these reviews for profanity, offensive language or personally identifiable information, these reviews are posted exactly as submitted and no alterations are made by our team.
All our customer repair instructions are solicited directly from other customers just like you who have purchased and replaced this exact part. While we moderate these reviews for profanity, offensive language or personally identifiable information, these reviews are posted exactly as submitted and no alterations are made by our team.
Based on data from past customer purchasing behaviors, these parts are most commonly purchased together along with the part you are viewing. These parts may be necessary or helpful to replace to complete your current repair.
All our installation videos are created and produced in collaboration with our in-house repair technician, Mark Sodja, who has helped millions of eReplacementParts customers over the last 13 years repair their products. Mark has years of experience in selling and repairing both commercial and residential products with a specialty in gas-powered equipment.
This data is collected from customers who submitted a repair instruction after replacing this exact part. Customers can rate how easy the repair was to complete and how long it took. We aggregate this data to provide a repair rating that allows customers to quickly determine the difficulty and time needed to perform their own repair.