
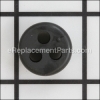
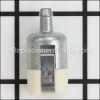
The intake gasket attaches to the intake insulator and helps to form a seal. This gasket is available as an individual replacement part. It is made of flexible material and will need replacing if it breaks. A screwdriver may be needed when replacing this part. This genuine item is supplied directly from the original equipment manufacturer for use with blowers made by Shindaiwa and Echo.
Intake Gasket 13001020560
OEM part for: Echo, Shindaiwa, Little Wonder
Part Number: 13001020560
$5.19
In Stock
Jump To:
Frequently Purchased Together ?

Compatibility
This part will fit the following 39 machines
Shindaiwa
EB212 (P02411001001-P02411999999) Power Blower View Diagrams & Manuals
SV212 (P02611001001-P02611999999) Shredder Vac Blower View Diagrams & Manuals
EB212 (P37212001001-P37212999999) Blowers Hand Held View Diagrams & Manuals
EB212 (P37311001001-P37311999999) Blowers Hand Held View Diagrams & Manuals
EB212 (P37413001001-P37413999999) Blowers Hand Held View Diagrams & Manuals
EB212 (P45114001001-P45114999999) Blowers Hand Held View Diagrams & Manuals
Echo
ES-210 (05001001 - 05999999) Shred 'N' Vac View Diagrams & Manuals
ES-210 (07001001 - 07999999) Shred 'N' Vac View Diagrams & Manuals
ES-210 (08001001 - 08999999) Shred 'N' Vac View Diagrams & Manuals
ES-210 (09001001 - 09999999) Shred 'N' Vac View Diagrams & Manuals
ES-210 (10001001 - 10999999) Shred 'N' Vac View Diagrams & Manuals
ES-210 (P07113001001 - P07113999999) Shred 'N' Vac View Diagrams & Manuals
ES-210 (P08711001001 - P08711999999) Shred 'N' Vac View Diagrams & Manuals
ES-211 (06001001 - 06999999) Shred 'N' Vac View Diagrams & Manuals
ES-210 (P11012001001 - P11012999999) Shred 'N' Vac View Diagrams & Manuals
ES-211 (09001001 - 09999999) Shred 'N' Vac View Diagrams & Manuals
ES-2100 (Type 1) Shred 'N' Vac View Diagrams & Manuals
ES-2100 (Type 1E) Shred 'N' Vac View Diagrams & Manuals
ES-211 (02001001 - 02999999) Shred 'N' Vac View Diagrams & Manuals
ES-2400 (Type 1) Shred 'N' Vac View Diagrams & Manuals
ES-2400 (Type 1E) Shred 'N' Vac View Diagrams & Manuals
PB-200 (05001001 - 05999999) Handheld Blower View Diagrams & Manuals
PB-200 (07001001 - 07999999) Handheld Blower View Diagrams & Manuals
PB-200 (08001001 - 08999999) Handheld Blower View Diagrams & Manuals
PB-200 (09001001 - 09999999) Handheld Blower View Diagrams & Manuals
PB-200 (10001001 - 10999999) Handheld Blower View Diagrams & Manuals
PB-200 (P06013001001 - P06013002770) Handheld Blower View Diagrams & Manuals
PB-200 (P06013002771 - P06013999999) Handheld Blower View Diagrams & Manuals
PB-200 (P08912001001 - P08912004600) Handheld Blower View Diagrams & Manuals
PB-200 (P08912004601 - P08912999999) Handheld Blower View Diagrams & Manuals
PB-201 (02001001 - 02999999) Handheld Blower View Diagrams & Manuals
PB-201 (06001001 - 06999999) Handheld Blower View Diagrams & Manuals
PB-201 (09001001 - 09999999) Handheld Blower View Diagrams & Manuals
PB-2100 (Type 1E) (After S/N 001001) Handheld Blower View Diagrams & Manuals
PB-2455 (P32720001001-P32720999999) Handheld Blower View Diagrams & Manuals
PB-2155 (P32620001001-P32620999999) Handheld Blower View Diagrams & Manuals
PB-200 (P06013001001-P06013999999) Handheld Blower Lawn Equipment View Diagrams & Manuals
PB-200 (P08912001001-P08912999999) Handheld Blower Lawn Equipment View Diagrams & Manuals
Little Wonder
9555 Mantis Blower/Shredder Vacuum View Diagrams & Manuals
Show More Compatible Models
This item works with the following types of products:
- Blower Parts
- Vacuum Parts
Questions & Answers ?
Our customer Service team is at the ready daily to answer your part and product questions.

Ask our Team
We have a dedicated staff with decades of collective experience in helping customers just like you purchase parts to repair their products.
Does this fit my product?Questions & Answers for Intake Gasket
No questions have been asked yet
Customer Repair Instructions ?
All our customer repair instructions are solicited directly from other customers just like you who have purchased and replaced this exact part.
blower was running bad.
Sidney - July 12, 2022
Tool Type
Blower
Difficulty
Hard
Time
More than 2 hours
Tools Used
Screwdriver, Socket set, Wrench Set
Had to dis assemble blower to attach throttle linkage.
Did you find this story helpful?
Thanks for voting and helping fellow customers!
Trimmer and blower repair
Bob - June 30, 2022
Tool Type
Blower
Difficulty
Easy
Time
1-2 hours
Tools Used
Screwdriver, Pliers
Carb cleaned and replace gaskets diaphram
Did you find this story helpful?
Thanks for voting and helping fellow customers!
The carb was still leaking after rebuilding it with new gaskets, installed new carburetor.
Brian - December 24, 2017
Tool Type
Blower
Difficulty
Easy
Time
30-60 minutes
Tools Used
Screwdriver, Pliers
Safety first, run the blower out of gas or empty the tank
1. Pull start cord and wrap around to move pull handle out of the way
2. Remove the air filter cover and filter
3. Remove 2 screws holding on the carb to the intake
4. Remove old carb gasket.
5. Good time to clean while carb is off.
Install is same in reverse order.
NOTE:
Be careful while working with the throttle rod, if it comes off, you will have to removed the outer case, not hard, but necessary.
Did you find this story helpful?
Thanks for voting and helping fellow customers!
High speed not working very well, poor motor performance.
Joseph - December 20, 2017
Tool Type
Blower
Difficulty
Easy
Time
30-60 minutes
Tools Used
Screwdriver
Removed the old carb and installed the new one, very easy! Blower runs great now.
Did you find this story helpful?
Thanks for voting and helping fellow customers!
Major tune up including carbuerator replacement and 2 of 3 plastic housing replacement.
Paul - December 14, 2017
Tool Type
Blower
Difficulty
Medium
Time
1-2 hours
Tools Used
Screwdriver, Pliers, Socket set, Wrench Set, Feeler gauge, air compressor, cleaning pan and brushes
1. Disassembly:
A) Outer housing with pull start and fan
B) Spark plug & plugged hole with a small piece of
clean shop towel
C) Middle housing
D) muffler assembly
E) Carburetor
2. Cleaning:
A) Flushed engine and muffler with solvent
B) All parts and housing wire wheel on bench
grinder
3. Assembly:
A) Checked spark plug gap and opened .002"
B) Basically reverse order off assembly
4. Start-up
A) Filled gas tank
B) Pushed primer bulb till full plus 3 more times
C) Turn on switch
D) Pulled starter cord and varoom
Did you find this story helpful?
Thanks for voting and helping fellow customers!
Carb was leaking and making a gas oil mess, wanted to clean it up and restore it to new
Brian - December 8, 2017
Tool Type
Blower
Difficulty
Easy
Time
1-2 hours
Tools Used
Screwdriver, Pliers, Allen wrench
Simple ran it dry
Removed filter
Removed carb
Removed carb seals
Removed bulb primer
Cleaned
Rebuilt in reverse order
Removed filter
Removed carb
Removed carb seals
Removed bulb primer
Cleaned
Rebuilt in reverse order
Did you find this story helpful?
Thanks for voting and helping fellow customers!
Engine would not run at full rpm
Thomas - May 25, 2017
Tool Type
Blower
Difficulty
Medium
Time
1-2 hours
Tools Used
Screwdriver, small tweezers
1. Removed spark plug and side cover.
2 Removed air cleaner and carburetor including fuel lines and throttle link.
3. Disassembled carburetor on a clean cloth and laid parts out in sequence.
4. Completely washed carburetor body and all parts with carburetor cleaner and compressed air.
5. Installed small needle and spring with tweezers.
6. Installed new diaphragm, purge bulb, and remaining carb kit parts.
7. Installed new spark arrester screen in the muffler.
8. Re-installed carb on the engine with new gasket / installed the new air filter.
9. Re-installed side cover and spark plug.
10. Started engine and adjusted high-speed jet for full rpm.
Did you find this story helpful?
Thanks for voting and helping fellow customers!
Hard to start and when it did it ran rough and you could see air bubbles in the fuel tank.
John - November 13, 2016
Tool Type
Blower
Difficulty
Easy
Time
15-30 minutes
Tools Used
Screwdriver, Pliers
Removed air cleaner cover and then remove the two screws holding the carburetor on.
After that you can position the carburetor so that you can remove the linkage and the fuel lines.
Assembling it is just as easy in reverse.
After that you can position the carburetor so that you can remove the linkage and the fuel lines.
Assembling it is just as easy in reverse.
Did you find this story helpful?
Thanks for voting and helping fellow customers!
OEM stands for Original Equipment Manufacturer and means the part you’re buying is sourced directly from the manufacturer who made your product. At eReplacementParts, we sell only genuine OEM parts, guaranteeing the part you’re purchasing is of better design and of higher quality than aftermarket parts.
Our product descriptions are a combination of data sourced directly from the manufacturers who made your product as well as content researched and curated by our content & customer service teams. This content is edited and reviewed internally before being made public to customers.
Our customer service team are at the ready daily to answer your part and product questions. We have a dedicated staff with decades of collective experience in helping customers just like you purchase parts to repair their products.
All our part reviews are solicited directly from other customers who have purchased this exact part. While we moderate these reviews for profanity, offensive language or personally identifiable information, these reviews are posted exactly as submitted and no alterations are made by our team.
All our customer repair instructions are solicited directly from other customers just like you who have purchased and replaced this exact part. While we moderate these reviews for profanity, offensive language or personally identifiable information, these reviews are posted exactly as submitted and no alterations are made by our team.
Based on data from past customer purchasing behaviors, these parts are most commonly purchased together along with the part you are viewing. These parts may be necessary or helpful to replace to complete your current repair.
All our installation videos are created and produced in collaboration with our in-house repair technician, Mark Sodja, who has helped millions of eReplacementParts customers over the last 13 years repair their products. Mark has years of experience in selling and repairing both commercial and residential products with a specialty in gas-powered equipment.
This data is collected from customers who submitted a repair instruction after replacing this exact part. Customers can rate how easy the repair was to complete and how long it took. We aggregate this data to provide a repair rating that allows customers to quickly determine the difficulty and time needed to perform their own repair.