
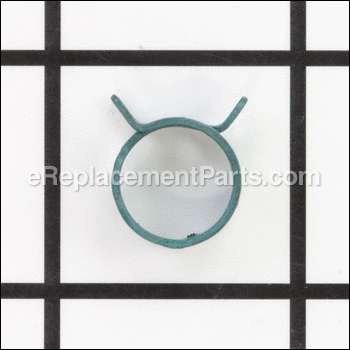
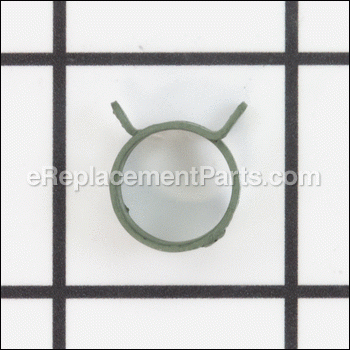
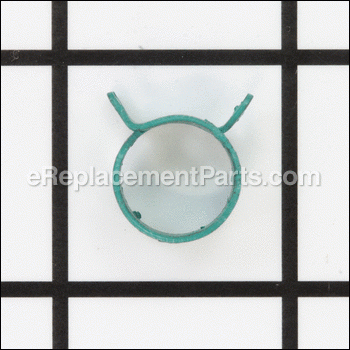


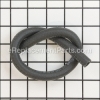
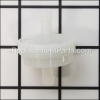
This is a genuine manufacturer-sourced part which is designed for use on lawn and garden equipment. It is an identical replacement for a missing or a damaged clamp that is used to secure the hose. Keep in mind this high-quality product is made of durable metal and is sold individually. Please make sure to check the appropriate diagrams for your model for the correct location and application of this hardware.
Clamp-hose 791850
OEM part for: Briggs and Stratton, Murray, Toro, Lawn Boy, Snapper, Simplicity, Craftsman, Vanguard - Briggs & Stratton
Part Number: 791850
$4.99
In Stock
Jump To:
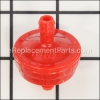
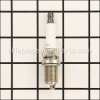
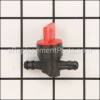
Frequently Purchased Together ?

Compatibility
This Clamp-hose will fit the following 51002 machines. Confirm this part works with your model, and view the detailed model diagrams and repair help we have to offer.
Briggs and Stratton
Murray
Toro
Lawn Boy
Snapper
Simplicity
Craftsman
Vanguard - Briggs & Stratton
Show More Compatible ModelsThis item works with the following types of products:
- Engine Parts
- Lawn Tractor Parts
- Generator Parts
- Lawn Mower Parts
- Snowblower Parts
- Blower Parts
- Vacuum Parts
- Edger Parts
- Trimmer Parts
This part replaces obsolete part #: 4263, 4171, 4229, 844304, 7012222SM, 7029900, 7029900SM, 095197MA, 91174MA, 91174, 091174MA, 95197, MU095197MA, 93053, 95162, 95162S
Repair Videos ?
Watch the Repair Video for
Clamp-hose

Customer Part Reviews ?
Average Rating (out of 5):
Click to filter by ratings:
5 stars
4
4 stars
1
3 stars
0
2 stars
0
1 stars
1
< PREV
- 1
Made repairs easy
Fit perfectly..
Guest -
November 30, 2023
Verified Purchase
Hose Clamp
Arrived very quickly and inexpensive shipping. This clamp is the perfect replacement for the old original! Thank you.
Guest -
September 18, 2019
Verified Purchase
It’s a clamp - what more can you say? It clamps.
See above
Guest -
August 16, 2019
Verified Purchase
easy repair
easy repair
Guest -
May 29, 2019
Verified Purchase
Parts were what was needed
Repaired mower working fine
Guest -
May 22, 2020
Verified Purchase
SLOW..SLOW..SLOW
I waited almost a month for my parts..I will order from somewhere else in the he future..disappointing..
Guest -
July 23, 2020
Verified Purchase
Questions & Answers ?
Our customer Service team is at the ready daily to answer your part and product questions.

Ask our Team
We have a dedicated staff with decades of collective experience in helping customers just like you purchase parts to repair their products.
Does this fit my product?Questions & Answers for Clamp-hose
No questions have been asked yet
Customer Repair Instructions ?
All our customer repair instructions are solicited directly from other customers just like you who have purchased and replaced this exact part.
Gas tank leaking from a crack on the bottom of the tank
Frank - July 31, 2023
Tool Type
Lawn Mower
Difficulty
Easy
Time
15-30 minutes
Tools Used
Screwdriver, Pliers, Power Drill
Removed 2 screws and loosen 2 screws on the top cover. Then removed 4 screws holding the tank in. Loosen and remove hose. Put everything back in reverse order. The tank was drained earlier.
Did you find this story helpful?
Thanks for voting and helping fellow customers!
bad carb
DOUGLAS - June 30, 2022
Tool Type
Lawn Tractor
Difficulty
Medium
Time
30-60 minutes
Tools Used
Wrench Set, Nutdriver
install another carb
Did you find this story helpful?
Thanks for voting and helping fellow customers!
Lawn mower would not start. Found crud in carb. Added fuel filter and cut off valve.
Mark - June 26, 2020
Tool Type
Lawn Mower
Difficulty
Easy
Time
15-30 minutes
Tools Used
Screwdriver, Pliers, Nutdriver
Drained fuel from fuel tank.
Removed air filter.
Marked the throttle cable position on the cable housing.
Removed the throttle cable clamp.
Removed air filter housing.
Disconnected old fuel line from tank and finished draining last bit of fuel.
Disconnected old fuel line from carb.
Determined where to position cut off valve.
Cut new fuel line to go from tank to cut off valve.
Added clamps to the fuel line.
Installed new fuel line between tank and cut off valve.
Determined where to position fuel filter.
Cut new fuel line to go from the cut off valve to the fuel filter.
Added clamps to the fuel line.
Installed new fuel line between the cut off valve and the fuel filter.
Determined how much fuel line was needed to go from the fuel filter to the carb.
Cut new fuel line to fit.
Added clamps to the fuel line.
Installed the fuel line from the filter to the carb.
Re-installed the air filter housing.
Re-installed the throttle cable clamp.
Re-installed the air filter.
Refilled the gas tank.
Checked for leaks.
Primed the carb with the bulb.
Started the mower.
Checked the throttle.
Closed the fuel cut off valve.
Let mower stop when fuel ran out in carb.
- Now I can better store the mower for winter with the carb drained.
Did you find this story helpful?
Thanks for voting and helping fellow customers!
Rickey - October 5, 2018
Tool Type
Lawn Mower
Difficulty
Easy
Time
30-60 minutes
Tools Used
Screwdriver, Pliers, Socket set, Wrench Set, Nutdriver, old tupperware pan for parts
Briggs& Stratton motor 190cc on craftsman brand mower
1. Removed rope pull mechanism cover air breather. several 5/16 hex screws
2. Removed springs from carburetor choke mechanism.
3. Removed fuel line and fuel tank used 3/8 bolt to plug fuel line. Drained carb into cup.
3. Removed engine cover to have access to auto choke and carburetor.
4. Removed carburetor two bolts.
5. Removed carburetor float bowl,float and needle.
6. Removed existing rubber seat below needle. used e-part number kit 398188 (see e-part diagram).
7. Reassembled all parts. added Fresh Non-Ethanol gas. Runs as good as when it was new. No more surging. No other adjustments needed. Thanks e-replacement parts!
Did you find this story helpful?
Thanks for voting and helping fellow customers!
Need a gas filter added. Did not come with one on machine.
Trish - May 30, 2017
Tool Type
Lawn Mower
Difficulty
Medium
Time
15-30 minutes
Tools Used
Screwdriver, Pliers, Socket set
Parts Used
1. Removed the air filter.
2. Removed the air filter plate.
3. Removed the top cover.
4. Removed the gas hose, with a drip pan under the machine for gas to runoff.
5. Cut the hose, inserted the gas filter.
6. Reconnected to the machine with clips.
I watched a video online before attempting the repair. Gave great information. Lawn mower runs like a dream now, and I am a 72 year old woman who did it herself for the first time!
Did you find this story helpful?
Thanks for voting and helping fellow customers!
The fuel tank on my Murray lawn tractor was leaking
Bill - August 15, 2016
Tool Type
Lawn Tractor
Difficulty
Easy
Time
15-30 minutes
Tools Used
Screwdriver, Pliers
Parts Used
Unclamped fuel line to drain gasoline from the tank into a catch bucket. Removed screws holding the fuel tank in place. Removed screws from metal fuel tank housing. Removed old fuel tank. Inserted new fuel tank. Replaced screws in reverse order. Clamped fuel line. Done.
Did you find this story helpful?
Thanks for voting and helping fellow customers!
OEM stands for Original Equipment Manufacturer and means the part you’re buying is sourced directly from the manufacturer who made your product. At eReplacementParts, we sell only genuine OEM parts, guaranteeing the part you’re purchasing is of better design and of higher quality than aftermarket parts.
Our product descriptions are a combination of data sourced directly from the manufacturers who made your product as well as content researched and curated by our content & customer service teams. This content is edited and reviewed internally before being made public to customers.
Our customer service team are at the ready daily to answer your part and product questions. We have a dedicated staff with decades of collective experience in helping customers just like you purchase parts to repair their products.
All our part reviews are solicited directly from other customers who have purchased this exact part. While we moderate these reviews for profanity, offensive language or personally identifiable information, these reviews are posted exactly as submitted and no alterations are made by our team.
All our customer repair instructions are solicited directly from other customers just like you who have purchased and replaced this exact part. While we moderate these reviews for profanity, offensive language or personally identifiable information, these reviews are posted exactly as submitted and no alterations are made by our team.
Based on data from past customer purchasing behaviors, these parts are most commonly purchased together along with the part you are viewing. These parts may be necessary or helpful to replace to complete your current repair.
All our installation videos are created and produced in collaboration with our in-house repair technician, Mark Sodja, who has helped millions of eReplacementParts customers over the last 13 years repair their products. Mark has years of experience in selling and repairing both commercial and residential products with a specialty in gas-powered equipment.
This data is collected from customers who submitted a repair instruction after replacing this exact part. Customers can rate how easy the repair was to complete and how long it took. We aggregate this data to provide a repair rating that allows customers to quickly determine the difficulty and time needed to perform their own repair.