Fuel Tank Vent A356000031 - OEM Echo - eReplacementParts.com
eReplacementParts.com
877-346-4815
Shindaiwa Parts

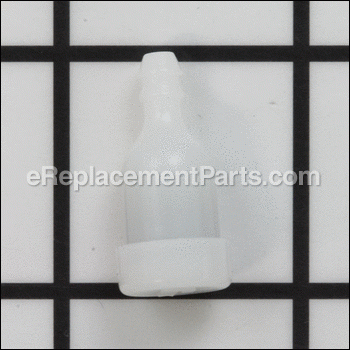
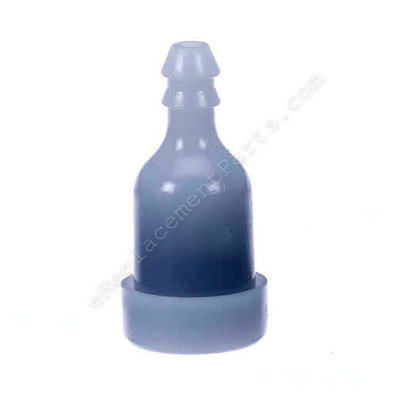
Fuel Tank Vent A356000031

OEM part for: Echo, Shindaiwa, Little Wonder

Part Number: A356000031


Install
Videos!
Fuel Tank Vent - A356000031:Echo 360 View
Fuel Tank Vent - A356000031:EchoFuel Tank Vent - A356000031:EchoFuel Tank Vent - A356000031:Echo 360 ViewFuel Tank Vent - A356000031:Echo
In Stock
Ships within 1 business day
Easy 15-30 minutes (66 rated repairs)?
OEM: Original Equipment Manufacturer ?
EchoShindaiwaLittle Wonder
Does this fit my product?

Product Description ?

The Fuel Tank Vent is connected to the Fuel Vent Tube.
The purpose of the vent tube is to allow air in to the fuel tank so that a vacuum is not created when the fuel is being fed through the fuel line.
Most of the time the Vent line is connected to a fuel line grommet that is installed on the fuel tank.
The fuel return line and the fuel line are also connected to the fuel line grommet.

The other way a fuel tank is vented in other engines is by use of a fuel cap with a air vent built into it.

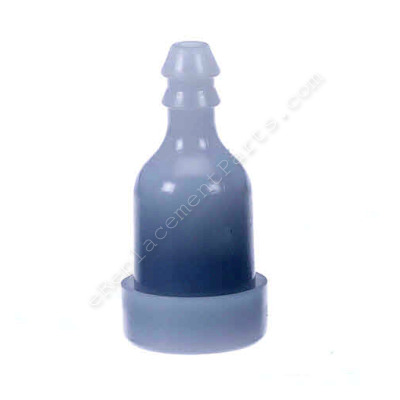
  • Classification: Part
  • Weight: 0.01 lbs.
  • Also Known As: Check Valve
  • Shipping: Ships Worldwide

Frequently Purchased Together ?

Compatibility

This Fuel Tank Vent will fit the following 1869 machines. Confirm this part works with your model, and view the detailed model diagrams and repair help we have to offer.

Shindaiwa

Echo

Little Wonder

Show More Compatible Models
Don't see yours? Try searching our site for :

This item works with the following types of products:

  • Hedge Trimmer Parts
  • Trimmer Parts
  • Blower Parts
  • Chain Saw Parts
  • Saw Parts
  • Edger Parts
  • Grass Trimmer Parts
  • Drill Parts
  • Cultivator Parts
  • Paint Sprayer Parts
  • Pruner Parts
  • Reciprocating Saw Parts
  • Pump Parts
  • Vacuum Parts

This part replaces obsolete part #: 13130040630, A356000030, 13130056430

Repair Videos ?

Watch the Repair Video for Fuel Tank Vent
Articles:
Remove and install the fuel tank vent on an Echo SRM-225 trimmer with simple, step-by-step instructions....
May 26, 2015
Filthy Filters? This article will show you how to install a filter kit on an Echo SRM-225 trimmer....
May 27, 2015

Customer Part Reviews ?

4.9
Average Rating (out of 5):
13 Reviews
Click to filter by ratings:
5 stars
12
4 stars
1
3 stars
0
2 stars
0
1 stars
0
  • Highest Rating
  • Most Recent
< PREV
  • 1
  • 2
NEXT >
  • Fit as advertised
    Exactly what I needed.
    Guest - July 28, 2023 Verified Purchase
    The right part for the job
    Easy to replace.
    David - July 17, 2023 Verified Purchase
    Success!
    I have always had great success with parts from ereplacementparts.com Definitely will continue to use this site and recommend to others
    KENNETH - August 30, 2021 Verified Purchase
    Solve the problem and Weedeater is working great that vent has to work properly
    The depart came speedy and I got it fixed
    Mark - August 19, 2021 Verified Purchase
    Worked as expected
    Weed wacker used to leak fuel when tipped on side. his part fixed it
    Guest - April 17, 2020 Verified Purchase
    The perfect part
    Received quickly, easy to install so up and running again- thanks
    Guest - July 2, 2019 Verified Purchase
    Everything works fine
    All the parts I've ordered have been exactly what I needed. And very easy to get
    Guest - June 10, 2019 Verified Purchase
    Echo Blower problem
    Your website gave me help in deciding and finding the parts I needed to fix my blower. It works great now, like new. Thanks for your suggestions on fixing it. I received my parts quickly and it took all of five minutes to install. I recommend you to anyone needing help fixing any Echo product.
    Guest - June 9, 2019 Verified Purchase
    Weed trimmer issues
    Part arrived quickly and was very easy to install
    Guest - June 4, 2019 Verified Purchase
    Fuel tank Vent
    Part was exact and fit and worked perfectly
    Guest - May 29, 2019 Verified Purchase

    Questions & Answers ?

    Our customer Service team is at the ready daily to answer your part and product questions.

    photo of team member
    Ask our Team

    We have a dedicated staff with decades of collective experience in helping customers just like you purchase parts to repair their products.

    Does this fit my product?

    Questions & Answers for Fuel Tank Vent


    No questions have been asked yet

    Customer Repair Instructions ?

    All our customer repair instructions are solicited directly from other customers just like you who have purchased and replaced this exact part.

    Easy 15-30 minutes (66 rated repairs)?

    Primer bulb was leaking, Trimmer was difficult to start and ran rough. Fuel lines and fuel line grommet were soft and sticky.

    Dennis - February 17, 2016
    👍 9 of 10 people found this instruction helpful
    Removed fuel lines from air purge body assembly. Removed the purge bulb retainer. Removed fuel line grommet from fuel tank by prying out with a screw drive. Inserted new fuel line, fuel vent line, and fuel return lines in new fuel line grommet. Inserted new grommet with lines into fuel tank by carefully using a screw driver to push grommet into the opening. Then inserted fuel tank vent into the vent line. As a precaution, I changed out the air purge body assembly. Attached the fuel line and the fuel return line to the air purge body assembly. I had taken a photo of the connections before dis-assembly to be sure I got the lines back in the right places. Installed the new purge bulb and reinstalled the purge bulb retainer. Hedger now runs great.
    Did you find this story helpful?
    Thanks for voting and helping fellow customers!

    Replaced tank grommet, fuel line vent

    Ken - December 1, 2015
    👍 10 of 13 people found this instruction helpful
    Tool Type

    Blower

    Difficulty

    Easy

    Time

    15-30 minutes

    Tools Used

    Screwdriver

    Echo PB-250 leaf blower, 5 years old. Removed fuel lines from carb, ( note the position of lines from carb,)
    I take a few close up pics of everything first ! Makes replacement of everything easier. Removed and cleaned tank, two screws holding it.
    Replaced grommet in tank and threaded fuel lines through it, ( I did not remove the filter from tank) replaced tank and connected fuel lines back to carb, added vent to third line.

    Added fuel and fired that bad boy up ! runs like new.
    Excellent powerful and balanced blower.
    Did you find this story helpful?
    Thanks for voting and helping fellow customers!

    Gas tank seam was cracked and leaking

    Edward - September 10, 2017
    👍 3 of 3 people found this instruction helpful
    Removed the gas tank and fuel lines from machine.
    Installed all new parts on new gas tank, then mounted assembly to the edger , connected lines to carb.
    FYI; Dish detergent helps when installing new fuel lines thru the rubber grommet, and getting the grommet installed in the gas tank
    Did you find this story helpful?
    Thanks for voting and helping fellow customers!

    Would idle but would not increase speed

    Gerry - September 2, 2017
    👍 3 of 3 people found this instruction helpful
    Tool Type

    Blower

    Difficulty

    Easy

    Time

    15-30 minutes

    Tools Used

    Socket set

    Made a hook out of a wire, then fished the fuel line from the tank and removed the old fuel filter and installed the new one, then placed it in the fuel tank. Removed the old fuel tank vent and replaced it with a new one on. Removed the air filter cover, then the old filter and replaced it with the new one. Removed the old spark plug and gapped the new one at 0.025 and installed it.
    Did you find this story helpful?
    Thanks for voting and helping fellow customers!

    Ethanol in fuel dissolved my fuel supply lines over time.

    Quinn - September 22, 2017
    👍 2 of 2 people found this instruction helpful
    It all started with the purge bulb failure on the bottom of the carburetor. I replaced that first and couldn't draw any fuel into the bulb. I then realized that the rubber fuel line and grommet and pretty much dissolved. I disconnected the two lines connected to the carburetor. loosened the screws holding the handle and removed the fuel tank from the Shred n Vac. I then removed all the fuel lines, filter and vent from the fuel tank and replaced all of the components. I then proceeded to reinstall the tank with the two screws tighten the handle and hook up the fuel lines to the carburetor. I replaced the spark plug and air filter element, purged some fuel to the carb and within two pulls hand it running like a charm. One note I would like to make is that I utilized a dab of grease to hold the two back washers for the fuel tank to the tank to ease re-installation of the fuel tank.
    Did you find this story helpful?
    Thanks for voting and helping fellow customers!

    Leaking gas from fuel tank. Tank grommet was especially worn from exposure to gas.

    Jerome - August 1, 2017
    👍 3 of 4 people found this instruction helpful
    Removed the air filter to make getting at fuel tank grommet with ease. Pulled all hoses out from the grommet. Used needle nose pliers to get the grommet out. Greased all hoses and the grommet to make ease of replacement. The wire was used to pull the gas line out and the sculpting tool to press in the grommet.
    Did you find this story helpful?
    Thanks for voting and helping fellow customers!

    trimmer would start but would stall.

    BARBARA - July 26, 2017
    👍 2 of 2 people found this instruction helpful
    replaced all of the fuel lines, return line, filter,and tank grommet, trimmer runs good as new.
    Did you find this story helpful?
    Thanks for voting and helping fellow customers!

    Replaced fuel line, filter, pump ball, and fuel tank vent.

    Steve - June 4, 2017
    👍 3 of 4 people found this instruction helpful
    Tool Type

    Edger

    Difficulty

    Medium

    Time

    15-30 minutes

    Tools Used

    Screwdriver

    Pulled off bad parts and replaced with new.
    Did you find this story helpful?
    Thanks for voting and helping fellow customers!

    Needed a general tune up and fuel was leaking from old lines and a small crack on top of tank

    Clint - March 27, 2018
    👍 1 of 1 people found this instruction helpful
    Contacted small engine repair person that I normally use and got price on what repairs would cost. Then decided to do it myself. Found most of what I needed on the eReplacementParts.com website. A short phone call cleared up a couple of issues that I wasn't sure on. Parts (including a fuel tank that was ordered separately) arrived in about 3-4 days. All parts were genuine Echo OEM parts, which was important to me.

    Used cordless drill with torx attachment, a screwdriver and needle nose pliers to remove fuel tank, old primer bulb and fuel lines pulled off easily with fingers. While everything was apart, used Chemtool spray carb cleaner to good old red shop rag to clean up seven years worth of grime.

    Reassembly with new parts was easy and quick. The only thing I would recommend if you think you might not remember.....take a pic of how the fuel pipe, fuel tank vent and vent tube are setup....just so you know you've got the right one in the right place. Very easy though.

    My seven year old Echo looks almost new and runs like a top with the tune up and replacement parts. Will for sure order from these guys again.
    Did you find this story helpful?
    Thanks for voting and helping fellow customers!

    Leaking fuel / maintenance

    Reid - March 20, 2018
    👍 1 of 1 people found this instruction helpful
    Removed old fuel lines,, replaced the same way they came off. Grommet was the only part that was a little difficult to get in the tank, put some grease on it and get one side started and roll it in with a screw driver tip.
    Did you find this story helpful?
    Thanks for voting and helping fellow customers!

    OEM stands for Original Equipment Manufacturer and means the part you’re buying is sourced directly from the manufacturer who made your product. At eReplacementParts, we sell only genuine OEM parts, guaranteeing the part you’re purchasing is of better design and of higher quality than aftermarket parts.

    Our product descriptions are a combination of data sourced directly from the manufacturers who made your product as well as content researched and curated by our content & customer service teams. This content is edited and reviewed internally before being made public to customers.

    Our customer service team are at the ready daily to answer your part and product questions. We have a dedicated staff with decades of collective experience in helping customers just like you purchase parts to repair their products.

    All our part reviews are solicited directly from other customers who have purchased this exact part. While we moderate these reviews for profanity, offensive language or personally identifiable information, these reviews are posted exactly as submitted and no alterations are made by our team.

    All our customer repair instructions are solicited directly from other customers just like you who have purchased and replaced this exact part. While we moderate these reviews for profanity, offensive language or personally identifiable information, these reviews are posted exactly as submitted and no alterations are made by our team.

    Based on data from past customer purchasing behaviors, these parts are most commonly purchased together along with the part you are viewing. These parts may be necessary or helpful to replace to complete your current repair.

    All our installation videos are created and produced in collaboration with our in-house repair technician, Mark Sodja, who has helped millions of eReplacementParts customers over the last 13 years repair their products. Mark has years of experience in selling and repairing both commercial and residential products with a specialty in gas-powered equipment.

    This data is collected from customers who submitted a repair instruction after replacing this exact part. Customers can rate how easy the repair was to complete and how long it took. We aggregate this data to provide a repair rating that allows customers to quickly determine the difficulty and time needed to perform their own repair.

    eReplacementParts.com
    7174 South 400 West
    Suite 5
    Midvale, UT 84047
    visa mastercard discover american express PayPal