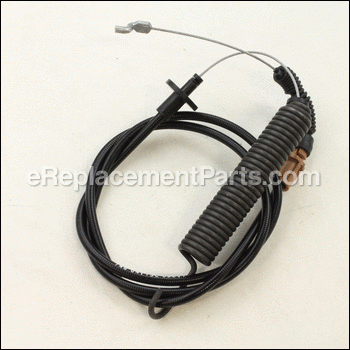
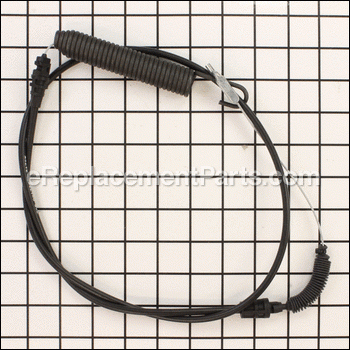
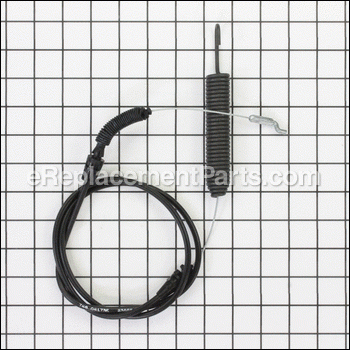
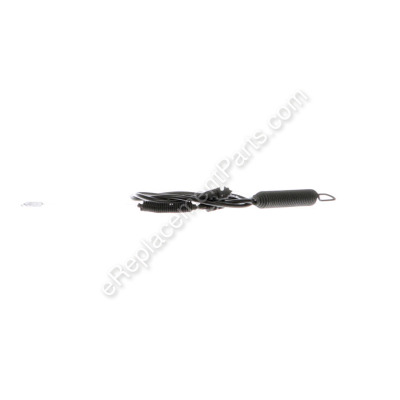
This cable is an original part from Craftsman for lawn tractors. This part pivots and pulls the belt idler pulley to fasten the belt and spins the cutting blades. It is recommended that you wear gloves before installing this part. You will need a pliers and a screw driver to replace this part. This cable is made of made of rubber, metal, and wire components.
Cable:engagement D 946-04173E
OEM part for: MTD, Yard Machines, Bolens, Yard Man, Craftsman, Troy-Bilt, Husky, Murray
Part Number: 946-04173E
Jump To:
Frequently Purchased Together ?
Compatibility
This Cable:engagement D will fit the following 1183 machines. Confirm this part works with your model, and view the detailed model diagrams and repair help we have to offer.
Yard Machines
MTD
Bolens
Yard Man
Craftsman
Troy-Bilt
Husky
Murray
Show More Compatible ModelsThis item works with the following types of products:
- Lawn Tractor Parts
- Lawn Mower Parts
This part replaces obsolete part #: 946-04173D, 746-04173, 946-04173C, 946-04173B, 746-04173B, 746-04173A
Customer Part Reviews ?
- 1
- 2
- 3
Questions & Answers ?
Our customer Service team is at the ready daily to answer your part and product questions.

Ask our Team
We have a dedicated staff with decades of collective experience in helping customers just like you purchase parts to repair their products.
Does this fit my product?Questions & Answers for Cable:engagement D
Customer Repair Instructions ?
All our customer repair instructions are solicited directly from other customers just like you who have purchased and replaced this exact part.
Deck engagement cable broke.
Tool Type
Lawn Tractor
Difficulty
Easy
Time
Less than 15 minutes
Tools Used
, Didn\'t need any tools
Parts Used
Remove the battery, this allows you to reach the cable at the engagement lever end.
Remove hair pin that holds the cable assembly to the rear of the deck.
There is a rod that goes over the top of the cable assembly that needs to be removed, it has a hair pin on one side to move it out of the way.
Unhook the spring from the deck.
The cable is clipped to the body about half way back under the seat on the "passenger side". Visible through the battery area.
Unhook the cable from the lever.
Compress the keepers just below the engagement lever and push the assembly out of the keeper.
Installation is revers of removal, pics might help but don't know if that's possible.
Blade Engagement Cable Broke
Tool Type
Lawn Tractor
Difficulty
Medium
Time
15-30 minutes
Tools Used
Screwdriver, Pliers
Parts Used
The hardest part is I have large hands and it can be hard to see what your doing.
Take your time and just repeat each disconnect with the reconnect.
Deck cable engagement spring snapped in half
Tool Type
Lawn Tractor
Difficulty
Easy
Time
1-2 hours
Tools Used
Screwdriver, Pliers, Socket set, Wrench Set
Parts Used
2. Pull pins to drop deck on ground
3. Slide deck out from under lawnmower
4. Remove lawnmower body by removing attachment hardware ie screws bolts lever nobs (After disconnecting battery cable and seat safety switch
5. Remove old spring and cable pay attention to cable routing so that you can run the new cable the same route
6. Route old cable and repeat disassembly steps in reverse
7. Start lawnmower and engage blade
Deck engagement cable broke
Tool Type
Lawn Tractor
Difficulty
Easy
Time
30-60 minutes
Tools Used
Screwdriver, Socket set, Wrench Set, Adjustable Wrench
Parts Used
Stretched cable
Tool Type
Lawn Tractor
Difficulty
Medium
Time
30-60 minutes
Tools Used
Screwdriver, Pliers, Socket set, Wrench Set, Adjustable Wrench
Parts Used
Blades did not engage
Tool Type
Lawn Tractor
Difficulty
Medium
Time
15-30 minutes
Tools Used
Screwdriver
Parts Used
Started in the back of the mower where the cable is attached to the lever that engages the blades.
Unhooked the the cable
Fed cable through the attached cable tie
Then tried to unhook the spring
For those smarter than me they probably lowered the deck all the way down...that helps the process go faster
Then after a few mistakes getting it back on I would suggest starting at the spring first with the deck still down.
Raise the deck and go backward on how we took it off.
It will cut down your time tremendously
Cable, Deck Engagement broke.
Tool Type
Lawn Tractor
Difficulty
Medium
Time
1-2 hours
Tools Used
Screwdriver, Pliers, Wrench Set
Parts Used
The cable section that fastened to the deck of the mower was missing a flat part that the old cable had, but lined up ok and seems to be working alright. Just guessing, but I suppose the new cable was designed to fit newer models.
Mower engagement cable broke on an Elderly neighbors Lawn Mower and we couldn't find one locally.
Tool Type
Lawn Tractor
Difficulty
Easy
Time
15-30 minutes
Tools Used
Pliers
Parts Used
PTO cable broke
Tool Type
Lawn Tractor
Difficulty
Medium
Time
1-2 hours
Tools Used
Screwdriver, Pliers, Wrench Set, wire cutters
Parts Used
2. I disconnected the battery cables and removed the battery.
3. I removed the broken PTO cable.
4. Reinstalling the PTO cable was rather difficult. I finally succeeded by mounting or attaching the PTO cable to the lever, then to the next attaching point.
5. I made sure that the cable was routed as before.
6. Attaching the spring side of the PTO cable to the pulley plate was somewhat difficult; as the cable seemed too short.
7. I got some wire and wrapped it around the far pulley and pulled it snug to the left side of the tractor; to provide more or enough cable length to attach the PTO cable to the small hole on the pulley plate. Make sure to attach the cable spring bottom ~ up. I attached the spring side of the PTO cable, then attached the cable to the cable mount and released the pulley; by loosening and removing the wire.
8. Lastly; make sure that the cable is routed properly and not rubbing on the pulley belts.
PTO cable broke at handle
Tool Type
Lawn Tractor
Difficulty
Easy
Time
30-60 minutes
Tools Used
Screwdriver, Pliers, Socket set, Wrench Set
Parts Used
OEM stands for Original Equipment Manufacturer and means the part you’re buying is sourced directly from the manufacturer who made your product. At eReplacementParts, we sell only genuine OEM parts, guaranteeing the part you’re purchasing is of better design and of higher quality than aftermarket parts.
Our product descriptions are a combination of data sourced directly from the manufacturers who made your product as well as content researched and curated by our content & customer service teams. This content is edited and reviewed internally before being made public to customers.
Our customer service team are at the ready daily to answer your part and product questions. We have a dedicated staff with decades of collective experience in helping customers just like you purchase parts to repair their products.
All our part reviews are solicited directly from other customers who have purchased this exact part. While we moderate these reviews for profanity, offensive language or personally identifiable information, these reviews are posted exactly as submitted and no alterations are made by our team.
All our customer repair instructions are solicited directly from other customers just like you who have purchased and replaced this exact part. While we moderate these reviews for profanity, offensive language or personally identifiable information, these reviews are posted exactly as submitted and no alterations are made by our team.
Based on data from past customer purchasing behaviors, these parts are most commonly purchased together along with the part you are viewing. These parts may be necessary or helpful to replace to complete your current repair.
All our installation videos are created and produced in collaboration with our in-house repair technician, Mark Sodja, who has helped millions of eReplacementParts customers over the last 13 years repair their products. Mark has years of experience in selling and repairing both commercial and residential products with a specialty in gas-powered equipment.
This data is collected from customers who submitted a repair instruction after replacing this exact part. Customers can rate how easy the repair was to complete and how long it took. We aggregate this data to provide a repair rating that allows customers to quickly determine the difficulty and time needed to perform their own repair.

