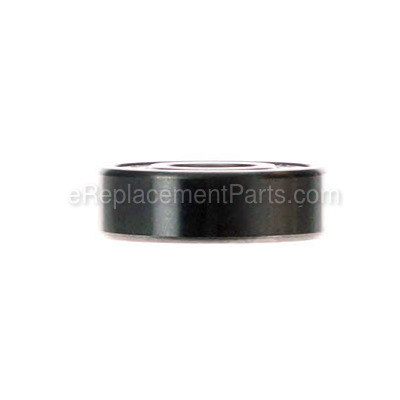
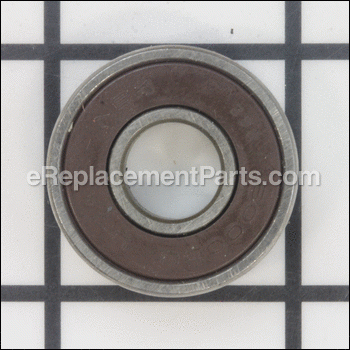
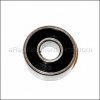
It is an original manufacturer supplied replacement item and is sold individually. This ball bearing is sealed on both sides. Ball bearings are made to reduce friction between two rotating parts. Because they experience constant pressure they would need to be checked and replaced periodically to ensure top performance. Please check diagrams for correct location and application of this bearing.
Ball Bearing (6000lu) 039176001012
OEM part for: Ryobi, Ridgid
Part Number: 039176001012
Jump To:
Frequently Purchased Together ?
Compatibility
This part will fit the following 24 machines
Ryobi
Ridgid
This item works with the following types of products:
- Miter Saw Parts
- Saw Parts
- Sander Parts
- Band Saw Parts
- Lathe Parts
- Planer Parts
- Circular Saw Parts
- Drill Parts
- Polisher Parts
This part replaces obsolete part #: 681717001, 089120406064, 989377-002, 989377004, 680070009, 989377002
Customer Part Reviews ?
- 1
Questions & Answers ?
Our customer Service team is at the ready daily to answer your part and product questions.

Ask our Team
We have a dedicated staff with decades of collective experience in helping customers just like you purchase parts to repair their products.
Does this fit my product?Questions & Answers for Ball Bearing (6000lu)
Customer Repair Instructions ?
All our customer repair instructions are solicited directly from other customers just like you who have purchased and replaced this exact part.
Bearing failure
Tool Type
Sander
Difficulty
Easy
Time
15-30 minutes
Tools Used
Screwdriver, Torx
ryobi sander - bearing; makita sander - switch
Tool Type
Sander
Difficulty
Medium
Time
30-60 minutes
Tools Used
Screwdriver
Makita - remove screws holding bottom plate. Important - remove screw on each side of plastic piece that centers the motor. Remove the 4 screws that hold the two housing halves together. Unscrew switch terminals to remove wires and insert wires into new switch. On mine, I had to repair the insulation on one of the wires pinched by the housing. If you need to replace the brushes, this would be a good time. Reassemble.
Stripped drive gears. Worn bearings.
Tool Type
Circular Saw
Difficulty
Medium
Time
More than 2 hours
Tools Used
Screwdriver, Socket set, Wrench Set, Channel locks. Hammer.
Lot of vibration, noise
Tool Type
Sander
Difficulty
Easy
Time
Less than 15 minutes
Tools Used
, Torx driver
Parts Used
The main bearing had disintegrated and the platen was no longer holding sandpaper properly.
Tool Type
Sander
Difficulty
Easy
Time
Less than 15 minutes
Tools Used
Screwdriver
2. Carefully remove the platen assembly from the housing.
3. Remove and discard the old bearing and any bearing fragments from the housing . Blow out any small fragments and dust with compressed air.
4. Install the new bearing on main drive shaft.
5. Align the the screw holes in the new platen assembly with the housing and carefully seat the new platen over the bearing.
6. Replace the four long screws to secure the new platen assembly to the housing.
Note: If a platen assembly is ordered, you do not need to order a the dust shield for the bearing as it is included in the new platen assembly. However, if the platen assembly is not being replaced, then a dust shield should be ordered when replacing the bearing.
Bearing worn / shattered
Tool Type
Sander
Difficulty
Easy
Time
Less than 15 minutes
Tools Used
Screwdriver
Malfunction due to parts wear and tear.
Tool Type
Sander
Difficulty
Medium
Time
More than 2 hours
Tools Used
Screwdriver, Pliers, Power Drill
Ball bearing had failed on motor shafts of sander
Tool Type
Sander
Difficulty
Easy
Time
15-30 minutes
Tools Used
Screwdriver
Parts Used
The bearing at the bottom of the armature fell apart. All that was left was the inner and outer races.
Tool Type
Sander
Difficulty
Easy
Time
15-30 minutes
Tools Used
Screwdriver, Pliers
2. Pried the inner race of the old bearing off the bottom of the armature
3. Pried the outer race of the old bearing out of the back plate
4. Pushed the new bearing into the back plate
5. Removed the pad assembly from the plate by removing two screws
6. Installed new pad assembly on the plate using two screws
7. Pushed the back plate and pad assembly onto the bottom of the armature and installed 4 screws
Note this repair does not require opening the sander case. I did purchase post cushions, but have not installed them. The existing ones still look good. Replacing the post cushions will require opening the sander case.
Excessive vibration couldn't keep sand paper on sander
Tool Type
Sander
Difficulty
Easy
Time
Less than 15 minutes
Tools Used
Screwdriver
Parts Used
OEM stands for Original Equipment Manufacturer and means the part you’re buying is sourced directly from the manufacturer who made your product. At eReplacementParts, we sell only genuine OEM parts, guaranteeing the part you’re purchasing is of better design and of higher quality than aftermarket parts.
Our product descriptions are a combination of data sourced directly from the manufacturers who made your product as well as content researched and curated by our content & customer service teams. This content is edited and reviewed internally before being made public to customers.
Our customer service team are at the ready daily to answer your part and product questions. We have a dedicated staff with decades of collective experience in helping customers just like you purchase parts to repair their products.
All our part reviews are solicited directly from other customers who have purchased this exact part. While we moderate these reviews for profanity, offensive language or personally identifiable information, these reviews are posted exactly as submitted and no alterations are made by our team.
All our customer repair instructions are solicited directly from other customers just like you who have purchased and replaced this exact part. While we moderate these reviews for profanity, offensive language or personally identifiable information, these reviews are posted exactly as submitted and no alterations are made by our team.
Based on data from past customer purchasing behaviors, these parts are most commonly purchased together along with the part you are viewing. These parts may be necessary or helpful to replace to complete your current repair.
All our installation videos are created and produced in collaboration with our in-house repair technician, Mark Sodja, who has helped millions of eReplacementParts customers over the last 13 years repair their products. Mark has years of experience in selling and repairing both commercial and residential products with a specialty in gas-powered equipment.
This data is collected from customers who submitted a repair instruction after replacing this exact part. Customers can rate how easy the repair was to complete and how long it took. We aggregate this data to provide a repair rating that allows customers to quickly determine the difficulty and time needed to perform their own repair.

