


This is a genuine Ridgid replacement part, it is sold individually.
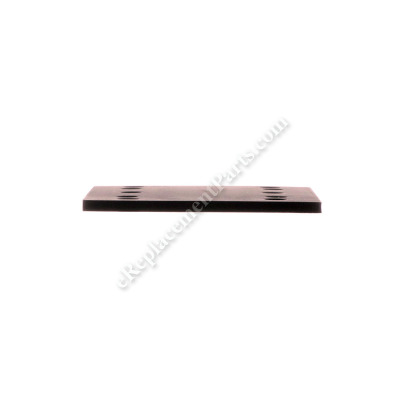
This is a soft foam pad which the sandpaper is attached to by the 300868001 Clamps.
It is held in place by attaching the 631977001 Aluminum Plate to it. This is not included with the pad.
The back of the pad has an adhesive that will stick to the Aluminum Plate.
It is secured to the sander by four screws.
The pad has six vacuum holes to be used with the dust bag assembly.
Sander Pad 591636001
OEM part for: Ridgid
Part Number: 591636001
$4.99
In Stock
Jump To:
Product Description ?
- Classification: Part
- Weight: 0.01 lbs.
- Also Known As: Sander Cushion, Backing Pad, Conversion Pad, Sanding Shoe, Base Plate
- Shipping: Ships Worldwide
Frequently Purchased Together ?

Compatibility
This item works with the following types of products:
- Sander Parts
Customer Part Reviews ?
Average Rating (out of 5):
Click to filter by ratings:
5 stars
6
4 stars
2
3 stars
0
2 stars
0
1 stars
0
< PREV
- 1
Lined up perfect.
The right part fast shipping and very good price. Looking for parts no need to look any further than eReplacement
Paul -
March 31, 2023
Verified Purchase
The Cure
My Dewalt sander was uncontrollable. part of the problem was severe edge wear only 1.5x1.5 center was making contact. the other was worn platform supports. now it's smooth as a "69" Caddy Thanks EReplacement parts. I'll be back. J.P. Enz Colorado
Phil -
July 31, 2022
Verified Purchase
Sander Pad
I was able to salvage 2 sanders with the pads I bought. They were perfect!!
Guest -
October 14, 2020
Verified Purchase
Repaired my palm sander
Prompt delivery of parts, easy to install. Removing old pad required some elbow grease but got it done. Nice!
Guest -
July 3, 2019
Verified Purchase
Product worked as expected and delivery was fast. I'm definitely happy.
Product worked as expected and delivery was fast. I'm definitely happy.
Guest -
June 18, 2019
Verified Purchase
Fit perfect, just like new!
Gave the details needed to replace parts, a Go-To replacement parts store!
Lawrence -
May 9, 2019
Verified Purchase
Great part, delivery way too expensive
I was happy to see you had the part I needed. It fit exactly as advertised. The cost of delivery was far too expensive and the time it took was far too long.
The price of the part was a fair price however.
Please refund the delivery cost I paid
Mike Boileau
Boileau.mike@gmail.com
iGlobal -
February 25, 2022
Verified Purchase
Works like new
Replacement pad was needed after sander returned with badly dameged pad. Perfect fit.Old palm sander works like new. Won't be loaning my tools to this guy any more!
Guest -
February 25, 2020
Verified Purchase
t
t
t -
t days ago
Verified Purchase
eReplacementParts Team
t
Questions & Answers ?
Our customer Service team is at the ready daily to answer your part and product questions.

Ask our Team
We have a dedicated staff with decades of collective experience in helping customers just like you purchase parts to repair their products.
Does this fit my product?Questions & Answers for Sander Pad
No questions have been asked yet
Customer Repair Instructions ?
All our customer repair instructions are solicited directly from other customers just like you who have purchased and replaced this exact part.
Worn pad
John - February 20, 2019
👍 1 of 1 people found this instruction helpful
Tool Type
Sander
Difficulty
Medium
Time
Less than 15 minutes
Tools Used
, Scrapers
Parts Used
Scraped of old pad, cleaned surface with acetone, remove adhesive covering and stick on new pad in the proper location
Did you find this story helpful?
Thanks for voting and helping fellow customers!
The sand pad was getting hard and rounded over on the edges. It became slick and the sand paper would slide on it
Anthony - December 1, 2016
👍 1 of 1 people found this instruction helpful
Tool Type
Sander
Difficulty
Easy
Time
Less than 15 minutes
Tools Used
, Allen wrench
Parts Used
1. Remove the (4) screws holding the aluminum plate on.
2. Pull the paper off the new sand pad
3. Stick the sand pad on the aluminum pad be careful and line up the holes
4. Install the (4) screws fastening the aluminum pad to the sander
2. Pull the paper off the new sand pad
3. Stick the sand pad on the aluminum pad be careful and line up the holes
4. Install the (4) screws fastening the aluminum pad to the sander
Did you find this story helpful?
Thanks for voting and helping fellow customers!
Rubber pad chewed up and aluminum base dented.
John - November 22, 2022
Tool Type
Sander
Difficulty
Easy
Time
Less than 15 minutes
Tools Used
, Allen driver
Parts Used
1. Use Allen wrench to remove screws and old pad.
2. Place aluminum base on sander and reinstall hex head screws.
3. Remove backing from new rubber pad and carefully align with holes in aluminum base, then press on.
4. That’s it.
2. Place aluminum base on sander and reinstall hex head screws.
3. Remove backing from new rubber pad and carefully align with holes in aluminum base, then press on.
4. That’s it.
Did you find this story helpful?
Thanks for voting and helping fellow customers!
Sander pad was worn unevenly. New pad makes it sand smoothly again.
Michael - September 14, 2022
Tool Type
Sander
Difficulty
Easy
Time
Less than 15 minutes
Tools Used
Screwdriver
Parts Used
Unplugged the sander. Removed old sandpaper. Removed 4 screws that attach pad to sander. Removed plastic covering the adhesive and stuck pad to aluminum plate. Pressed firmly to insure adhesion. Placed new pad/plate assembly onto sander and secured it with the 4 screws.
Did you find this story helpful?
Thanks for voting and helping fellow customers!
The sanding pads wore out from use
John - February 16, 2020
Tool Type
Sander
Difficulty
Easy
Time
Less than 15 minutes
Tools Used
Screwdriver
Parts Used
Attached new pads with 4 screws turned on sander pads stayed on. Added the sand paper really worked well. Easy to install no special instructions required.
Did you find this story helpful?
Thanks for voting and helping fellow customers!
Sander pad was damaged
Janee - May 16, 2019
Tool Type
Sander
Difficulty
Easy
Time
15-30 minutes
Tools Used
Screwdriver
Parts Used
Put new pad on
Did you find this story helpful?
Thanks for voting and helping fellow customers!
Pad was worn from use
Scott - February 15, 2018
Tool Type
Sander
Difficulty
Easy
Time
15-30 minutes
Tools Used
Screwdriver
Parts Used
Used allen wrench to remove 4 screws, pried off old pad, screwed new pad on.
Did you find this story helpful?
Thanks for voting and helping fellow customers!
Worn out pad and broken dust screen.
James - January 22, 2018
Tool Type
Sander
Difficulty
Easy
Time
15-30 minutes
Tools Used
Screwdriver, Torx screwdriver
1. Removed 8 screws.
2. Removed worn parts.
3. Replaced with new parts.
4. Replaced 8 screws.
2. Removed worn parts.
3. Replaced with new parts.
4. Replaced 8 screws.
Did you find this story helpful?
Thanks for voting and helping fellow customers!
Bearing worn / shattered
Joseph - November 30, 2017
Tool Type
Sander
Difficulty
Easy
Time
Less than 15 minutes
Tools Used
Screwdriver
R & R sanding plate containing bearing by removing four (4) mounting screws. Removed worn bearing by carefully prying it from its installed position within sanding plate; installed new bearing by carefully pressing it into place.
Did you find this story helpful?
Thanks for voting and helping fellow customers!
Sander pad was worn
Curtis - July 2, 2017
Tool Type
Sander
Difficulty
Easy
Time
Less than 15 minutes
Tools Used
Parts Used
Just pulled the old pad loose and installed the replacement
Did you find this story helpful?
Thanks for voting and helping fellow customers!
Load More Install Stories
OEM stands for Original Equipment Manufacturer and means the part you’re buying is sourced directly from the manufacturer who made your product. At eReplacementParts, we sell only genuine OEM parts, guaranteeing the part you’re purchasing is of better design and of higher quality than aftermarket parts.
Our product descriptions are a combination of data sourced directly from the manufacturers who made your product as well as content researched and curated by our content & customer service teams. This content is edited and reviewed internally before being made public to customers.
Our customer service team are at the ready daily to answer your part and product questions. We have a dedicated staff with decades of collective experience in helping customers just like you purchase parts to repair their products.
All our part reviews are solicited directly from other customers who have purchased this exact part. While we moderate these reviews for profanity, offensive language or personally identifiable information, these reviews are posted exactly as submitted and no alterations are made by our team.
All our customer repair instructions are solicited directly from other customers just like you who have purchased and replaced this exact part. While we moderate these reviews for profanity, offensive language or personally identifiable information, these reviews are posted exactly as submitted and no alterations are made by our team.
Based on data from past customer purchasing behaviors, these parts are most commonly purchased together along with the part you are viewing. These parts may be necessary or helpful to replace to complete your current repair.
All our installation videos are created and produced in collaboration with our in-house repair technician, Mark Sodja, who has helped millions of eReplacementParts customers over the last 13 years repair their products. Mark has years of experience in selling and repairing both commercial and residential products with a specialty in gas-powered equipment.
This data is collected from customers who submitted a repair instruction after replacing this exact part. Customers can rate how easy the repair was to complete and how long it took. We aggregate this data to provide a repair rating that allows customers to quickly determine the difficulty and time needed to perform their own repair.