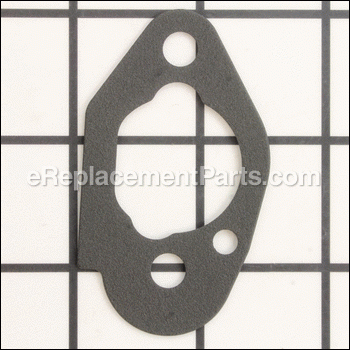
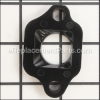
Genuine OEM replacement part, this item is sold individually.
The purpose of this Gasket is to create a seal between the air cleaner body and the carburetor.
If the air cleaner or carburetor are ever removed, it would be a good idea to replace this gasket.
Air Cleaner Gasket 17228-ZM0-000
OEM part for: Honda
Part Number: 17228-ZM0-000
Jump To:
Product Description ?
- Classification: Part
- Weight: 0.02 lbs.
- Shipping: Ships Worldwide
Frequently Purchased Together ?
Compatibility
This Air Cleaner Gasket will fit the following 291 machines. Confirm this part works with your model, and view the detailed model diagrams and repair help we have to offer.
This item works with the following types of products:
- Engine Parts
Customer Part Reviews ?
- 1
Questions & Answers ?
Our customer Service team is at the ready daily to answer your part and product questions.

Ask our Team
We have a dedicated staff with decades of collective experience in helping customers just like you purchase parts to repair their products.
Does this fit my product?Questions & Answers for Air Cleaner Gasket
Customer Repair Instructions ?
All our customer repair instructions are solicited directly from other customers just like you who have purchased and replaced this exact part.
Air cleaner housing damaged.
Tool Type
Lawn Mower
Difficulty
Easy
Time
15-30 minutes
Tools Used
Socket set
2. Removed the two bolts that held the inner air cleaner housing on.
3. Removed the old air cleaner gasket behind the inner air cleaner housing.
4. Replaced the new air cleaner gasket behind the inner air cleaner housing.
5. Replaced the inner air cleaner housing with the new one by replacing two bolts that I removed in step #2.
6. Installed the new air cleaner.
7. Installed the new air cleaner cover.
Carb. was foiled with ethanol crummy gas. Bought new carburetor locally but no gaskets included.
Tool Type
Lawn Mower
Difficulty
Medium
Time
1-2 hours
Tools Used
Nutdriver, Pictorial of exploded view for gasket placement order.
2. Remove air filter cover and remove air filter.
3. Remove two mounting bolts behind the air filter. Using 10mm socket.
4. Remove throttle spring and governor bail from carburetor throttle lever.
5. Remove vacuum hose from the filter housing.
6. For reassembly insert the two mounting screws through the plastic air filter housing and assemble two gaskets paying attention to orientation per exploded view.
7. Place carburetor on the two bolts making sure it is oriented correctly with the controls on top.
8. Continue installing gaskets paying attention to orientation.
9. When ready to put the carburetor on the body of the engine make sure the governor spring and bail are installed. Also be sure that the choke control lever is all the way to the right. The choke lever on the carburetor needs to be to the left of the control lever. Make sure the vacuum hose is back in place on the back of the air cleaner housing. Install the gasoline hose.
10. Tighten the two 10mm hex-head bolts up snuggly. The sleeve inserts will protect the air cleaner housing from being crushed. Make sure they are in place.
engine would not stay running
Tool Type
Engine
Difficulty
Medium
Time
30-60 minutes
Tools Used
Socket set
Pressure washer is running fine now.....
Would only run with the Choke. Air Guide Gasket Eroded. Running Lean.
Tool Type
Lawn Mower
Difficulty
Easy
Time
30-60 minutes
Tools Used
, 10 mm socket. Ratchet. Scraper.
Air cleaner clips that hold the cover on broke
Tool Type
Lawn Mower
Difficulty
Easy
Time
Less than 15 minutes
Tools Used
Socket set
2 Have someone hold the carb in place because the bolts holding the base also are the bolts holding the carb
3 Attach the new base with the bolts and tighten
I replaced the gasket since I had it torn apart
The hold down latch for the air cleaner broke on the engine of my Honda lawnmower
Tool Type
Lawn Mower
Difficulty
Medium
Time
30-60 minutes
Tools Used
Screwdriver, Socket set
Broken air cleaner case assembly.
Tool Type
Lawn Mower
Difficulty
Medium
Time
30-60 minutes
Tools Used
Socket set, Nutdriver
Thanks
Case assembly broke
Tool Type
Lawn Mower
Difficulty
Medium
Time
15-30 minutes
Tools Used
Socket set
Lawnmower would run for a minute then shutdown, missing aircleaner cover and chute.
Tool Type
Lawn Mower
Difficulty
Easy
Time
15-30 minutes
Tools Used
Screwdriver, Pliers, Nutdriver
I moved to higher elevation and my mower started running very rich.
Tool Type
Lawn Mower
Difficulty
Easy
Time
15-30 minutes
Tools Used
Screwdriver, Socket set
OEM stands for Original Equipment Manufacturer and means the part you’re buying is sourced directly from the manufacturer who made your product. At eReplacementParts, we sell only genuine OEM parts, guaranteeing the part you’re purchasing is of better design and of higher quality than aftermarket parts.
Our product descriptions are a combination of data sourced directly from the manufacturers who made your product as well as content researched and curated by our content & customer service teams. This content is edited and reviewed internally before being made public to customers.
Our customer service team are at the ready daily to answer your part and product questions. We have a dedicated staff with decades of collective experience in helping customers just like you purchase parts to repair their products.
All our part reviews are solicited directly from other customers who have purchased this exact part. While we moderate these reviews for profanity, offensive language or personally identifiable information, these reviews are posted exactly as submitted and no alterations are made by our team.
All our customer repair instructions are solicited directly from other customers just like you who have purchased and replaced this exact part. While we moderate these reviews for profanity, offensive language or personally identifiable information, these reviews are posted exactly as submitted and no alterations are made by our team.
Based on data from past customer purchasing behaviors, these parts are most commonly purchased together along with the part you are viewing. These parts may be necessary or helpful to replace to complete your current repair.
All our installation videos are created and produced in collaboration with our in-house repair technician, Mark Sodja, who has helped millions of eReplacementParts customers over the last 13 years repair their products. Mark has years of experience in selling and repairing both commercial and residential products with a specialty in gas-powered equipment.
This data is collected from customers who submitted a repair instruction after replacing this exact part. Customers can rate how easy the repair was to complete and how long it took. We aggregate this data to provide a repair rating that allows customers to quickly determine the difficulty and time needed to perform their own repair.

