
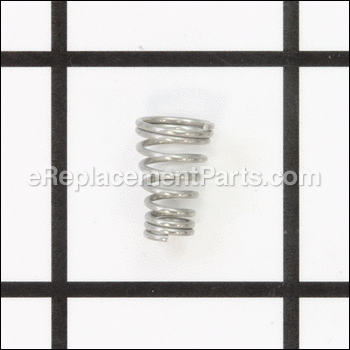
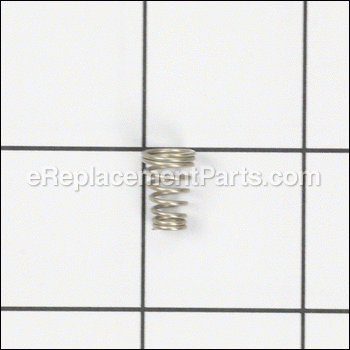
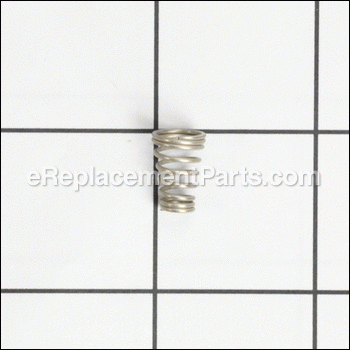
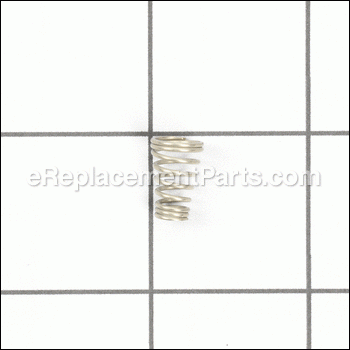
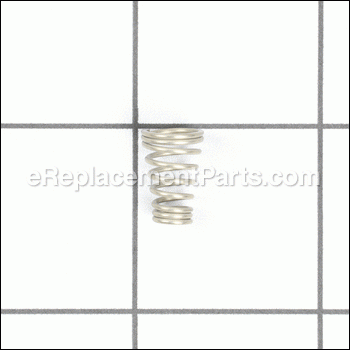
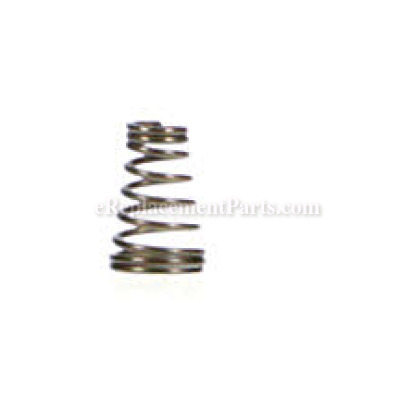


This is an authentic DeLonghi replacement part that has been sourced from the original manufacturer to be used with espresso/cappuccino/coffee makers. The metal spring is used to provide compression between the diffuser and the valve. This item is available as an individual replacement part.
Valva Spring 6113211931
OEM part for: DeLonghi
Part Number: 6113211931
$8.32
In Stock
Jump To:
Frequently Purchased Together ?


Compatibility
This part will fit the following 74 machines
DeLonghi
BARM100U Espresso/Cappuccino Maker View Diagrams & Manuals
BARM200 Espresso/Cappuccino Maker View Diagrams & Manuals
BARM29U Espresso/Cappuccino Maker View Diagrams & Manuals
BARM34 Espresso/Cappuccino Maker View Diagrams & Manuals
BARM36 Espresso/Cappuccino Maker View Diagrams & Manuals
BAR12 Espresso/Cappuccino Maker Black View Diagrams & Manuals
BAR12FU Espresso/Cappuccino Maker View Diagrams & Manuals
BAR14 Espresso/Cappuccino Maker View Diagrams & Manuals
BAR140 Espresso/Cappuccino Maker View Diagrams & Manuals
BAR16B Espresso/Cappuccino Maker Black View Diagrams & Manuals
BAR16W Espresso/Cappuccino Maker View Diagrams & Manuals
BAR17 Espresso/Cappuccino Maker View Diagrams & Manuals
BAR19B Espresso/Cappuccino Maker Black View Diagrams & Manuals
BAR19FU Espresso/Cappuccino Maker White View Diagrams & Manuals
BAR29 Espresso/Cappuccino Maker View Diagrams & Manuals
BAR30 Espresso/Cappuccino Maker View Diagrams & Manuals
BAR32 Espresso/Cappuccino Maker View Diagrams & Manuals
BAR41 Espresso/Cappuccino Maker View Diagrams & Manuals
BAR42 Espresso/Cappuccino Maker View Diagrams & Manuals
BAR52 Espresso/Cappuccino Maker View Diagrams & Manuals
BCO264B Espresso/Cappuccino/Coffee Combo Cafe Nero View Diagrams & Manuals
ECO310BK Coffee Maker View Diagrams & Manuals
EC140B Espresso Maker Black View Diagrams & Manuals
EC155 Cappuccino Maker View Diagrams & Manuals
EC270 Coffee Maker View Diagrams & Manuals
EC460 Cappuccino Maker View Diagrams & Manuals
EC610 Espresso/Cap Maker View Diagrams & Manuals
EC700 Espresso Maker View Diagrams & Manuals
EC701 Espresso Maker View Diagrams & Manuals
EC702 Coffee Maker View Diagrams & Manuals
EC710 Espresso Maker View Diagrams & Manuals
EC730 Espresso Maker View Diagrams & Manuals
BAR19FU Black Espresso/Cappuccino Maker View Diagrams & Manuals
EC860 Espresso Machine View Diagrams & Manuals
EC220CD Coffee Maker View Diagrams & Manuals
EC330 Coffee Maker View Diagrams & Manuals
EC610 (132154001) Espresso Pump View Diagrams & Manuals
ECO310BK Icona Pump Espresso Machine View Diagrams & Manuals
BAR12 (132103004) Espresso Pump View Diagrams & Manuals
EC270 (132103085) Espresso Pump View Diagrams & Manuals
ECP3630 Pump Espresso View Diagrams & Manuals
EC685W Dedica Deluxe Manual Espresso Machine View Diagrams & Manuals
EC330 (132106032) Espresso Pump View Diagrams & Manuals
BAR41 (132151003) Retro Espresso/Cappuccino Maker View Diagrams & Manuals
ECO310W (0132106089) Icona Manual Espresso Machine View Diagrams & Manuals
BAR32 (132151022) Espresso Pump View Diagrams & Manuals
EC860 Dedica Cappuccino Maker View Diagrams & Manuals
BCO430 Cappuccino Espresso And Coffee Maker View Diagrams & Manuals
BAR42 (132152004) Espresso Pump View Diagrams & Manuals
BAR18 (132103076) Espresso Pump View Diagrams & Manuals
EC460 (132104080) Espresso Maker View Diagrams & Manuals
EC155 Espresso Coffee Maker View Diagrams & Manuals
BAR140 (132103027) Espresso Coffee Maker View Diagrams & Manuals
EC685BK Dedica Deluxe Manual Espresso Machine View Diagrams & Manuals
EC140BEXC (132103072) Espresso Coffee Maker View Diagrams & Manuals
ECP3220 Espresso Coffee Maker View Diagrams & Manuals
EC140B (132103058) Espresso Coffee Maker View Diagrams & Manuals
EC680R Dedica Manual Espresso Machine Red View Diagrams & Manuals
EC680BK Dedica Manual Espresso Machine Black View Diagrams & Manuals
EC701 (132154011) Espresso/Cappuccino Maker View Diagrams & Manuals
ECP3420 Manual Espresso Machine View Diagrams & Manuals
BAR390 Bar Pump Espresso Machine View Diagrams & Manuals
BCO264B (132552001) Cafe Nero Combo Coffee And Espresso Maker View Diagrams & Manuals
EC220CD (132151070) 15-Bar Pump Driven Espresso Maker View Diagrams & Manuals
BCO430BM Cappuccino Espresso And Coffee Maker View Diagrams & Manuals
EC685R Dedica Deluxe Manual Espresso Machine View Diagrams & Manuals
BARM29U (132106007) Espresso Pump View Diagrams & Manuals
BAR51 (132150000) Espresso/Cappuccino Maker View Diagrams & Manuals
EC702 (132154017) Espresso/Cappuccino Maker View Diagrams & Manuals
BCO432 (132510002) Family Espresso Machine View Diagrams & Manuals
EC680M Dedica Manual Espresso Machine View Diagrams & Manuals
ECO310R (0132106088) Icona Manual Espresso Machine View Diagrams & Manuals
EC685M Dedica Deluxe Manual Espresso Machine View Diagrams & Manuals
BARM100U (132108001) Espresso Pump View Diagrams & Manuals
Show More Compatible Models
This item works with the following types of products:
- Espresso Parts
- Coffee Maker Parts
This part replaces obsolete part #: 611917, 611861, 6132101600
Customer Part Reviews ?
Average Rating (out of 5):
Click to filter by ratings:
5 stars
4
4 stars
1
3 stars
0
2 stars
0
1 stars
0
< PREV
- 1
Worked perfectly!
This fixed my latte machine! Completely satisfied! Five star all the way
Guest -
November 27, 2020
Verified Purchase
Perfect fit
Solved my leaking problem. (Make sure you also inspect the valve and dirt in between)
Guest -
November 4, 2020
Verified Purchase
Great part, just what I needed
The part fit perfectly. Happy camper. Thanks A++!
Nelson -
October 9, 2020
Verified Purchase
my espresso machine is up and running. new life
fast deliver
Guest -
November 15, 2019
Verified Purchase
.
Hi the screw didn't fit,I used the old one tkx.
Guest -
March 19, 2020
Verified Purchase
t
t
t -
t days ago
Verified Purchase
eReplacementParts Team
t
Questions & Answers ?
Our customer Service team is at the ready daily to answer your part and product questions.

Ask our Team
We have a dedicated staff with decades of collective experience in helping customers just like you purchase parts to repair their products.
Does this fit my product?Questions & Answers for Valva Spring
No questions have been asked yet
Customer Repair Instructions ?
All our customer repair instructions are solicited directly from other customers just like you who have purchased and replaced this exact part.
Dripping water when hot
Kirill - October 4, 2016
👍 2 of 2 people found this instruction helpful
Tool Type
Coffee Maker
Difficulty
Easy
Time
Less than 15 minutes
Tools Used
Screwdriver, Philips 2 mini screwdriver
Parts Used
Removed the Philips screw while the Delonghi EC15 coffeemaker was unplugged (they are all designed very similar so it applies to many other Delonghi coffee makers), removed the round mesh, then used a flat screwdriver to remove another screw which secures the spring and spring valve. At this time the spring valve with the spring will come out. Simply replaced them and reassembled. It's important to not screw in the flat screw all the way in as it affects the flow rate of hot water.
It stopped dripping hot water and now works perfectly.
It stopped dripping hot water and now works perfectly.
Did you find this story helpful?
Thanks for voting and helping fellow customers!
Valve was worn out and not seating properly.
Michael - June 23, 2016
👍 1 of 1 people found this instruction helpful
Tool Type
Coffee Maker
Difficulty
Medium
Time
15-30 minutes
Tools Used
Screwdriver
Parts Used
Using a Phillips screwdriver, remove the screw in the center of the diffuser and remove the diffuser. Using a regular screwdriver, remove the dowel. It may be really tight but should just unscrew. Remove and replace the valve and valve spring sitting on top of the dowel. Replace the dowel and diffuser. It may be necessary to remove the bottom for easier access.
Did you find this story helpful?
Thanks for voting and helping fellow customers!
The machine's lower-boiler output valve was leaking before running a cycle due to the lower boiler being broken and the valve spring missing.
Rylee - March 9, 2022
Tool Type
Coffee Maker
Difficulty
Easy
Time
Less than 15 minutes
Tools Used
Screwdriver
1.) Used a 3mm flathead bit on a long, but skinny screwdriver to unscrew the top heating base from the machine via the black base that surrounds where the water outputs.
2.) Used a Phillips Head #0 bit to remove the two small screws on the back of the machine connected to the top heating base.
3.) Removed the top heating base.
4.) [CAUTION]If there's water still in the boiler, it will leak. If the boiler is hot, steam may exit, so let the machine cool down before continuing this step[CAUTION] Used an H3.5 (Hex) bit to remove the lower boiler from the upper boiler. It may also help to unplug the connectors from the upper-boiler for easier removal. Take a picture as you go to make it easier to put the wires back in the right places.
5.) After removing the upper boiler, remove the lower boiler.
6.) Grab the new boiler and put together the spring valve contraption. Place the valve ring inside the smaller end of the spring, then the valve, and carefully place the spring into where the dowel would go, with the valve going in first.
7.) Then screw in the dowel.
8.) Place the repaired or newly put together lower boiler back into its position.
9.) Screw the top boiler back to the bottom boiler with the H3.5 (Hex) bit. If you removed the wires, place them back in their respectful positions.
10.) Re-attach the top heating base.
11.) Screw the two small screws back into the back of the heating base with the PH#0 bit.
12.) Screw the three screws that connect the black base to the heating base with a 3mm flathead.
Did you find this story helpful?
Thanks for voting and helping fellow customers!
The knob broke last time I took it apart to fix a leak and I also needed to replace the spring which was getting weak.
Joel - December 9, 2021
Tool Type
Coffee Maker
Difficulty
Easy
Time
Less than 15 minutes
Tools Used
Screwdriver
Parts Used
1. I simply pushed the knob right back onto the dial. Easy.
2. Next I unscrewed the shower head with a screwdriver then unscrewed the spring screw.
3. This allowed me to pull out the screw and remove the spring and bulb on the end.
4. I placed the new spring on the screw and put the bulb on the end.
5. Screw it back into the brew head ensuring the bulb stays inside the spring.
6. Screw the shower screen back on and tighten.
Did you find this story helpful?
Thanks for voting and helping fellow customers!
Leaking
Jose - December 3, 2021
Tool Type
Coffee Maker
Difficulty
Medium
Time
Less than 15 minutes
Tools Used
Screwdriver, Pliers
Parts Used
1. Remove screws where the portafilter goes
2. Remove plate
3. Remove other screwb and had access to old spring and valve
4. Replace new parts
5. Coffee maker kept leaking
6. Clean the circuit with vinegar and water and that stop the leak
2. Remove plate
3. Remove other screwb and had access to old spring and valve
4. Replace new parts
5. Coffee maker kept leaking
6. Clean the circuit with vinegar and water and that stop the leak
Did you find this story helpful?
Thanks for voting and helping fellow customers!
Espresso machine needed a new ball valve on the boiler outlet.
Dawn - May 16, 2021
Tool Type
Coffee Maker
Difficulty
Easy
Time
15-30 minutes
Tools Used
Screwdriver
My DeLonghi espresso machine was leaking 2/3rds cup of water about 15 seconds after turning off the pump, and the steam wand was operating poorly. I determined the boiler ball valve had broken into bits and was no longer functioning. I decided to replace the valve ring and valve spring at the same time.
Make sure the machine is not hot before starting.
1) With a Phillips head screwdriver, remove the screw in the center of the diffuser and remove the diffuser.
2) Using a flathead screwdriver, remove the dowel.
3) Remove what's left of the valve, valve spring, and valve ring.
4) Thoroughly clean the dowel and diffuser.
5) Turn machine upside down and replace the valve ring, valve, and valve spring, being careful to seat the valve correctly.
6) Replace the dowel by screwing it down with a flathead screwdriver. Screw in until just tight and then back off about a 1/4 to a 1/2 a turn.
7) Replace the diffuser using the Philips head screwdriver.
In addition I needed to descale my machine before it began operating as expected. My machine had sat empty and idle for several months and I believe this contributed to the degradation of my ball valve.
Did you find this story helpful?
Thanks for voting and helping fellow customers!
No crema, old difuser
Nelson - October 11, 2020
Tool Type
Coffee Maker
Difficulty
Easy
Time
Less than 15 minutes
Tools Used
Screwdriver
Parts Used
Removed and replaced diffuser and spring. Worked like a charm. Thanks
Did you find this story helpful?
Thanks for voting and helping fellow customers!
Very dim OK light, dripping from espresso outlet during milk steaming
Jesse - January 15, 2020
Tool Type
Coffee Maker
Difficulty
Medium
Time
30-60 minutes
Tools Used
Screwdriver, torx driver, soldering iron
1. Removed the top and bottom (philips screws on top and bottom of base, philips screws and torx screws from beneath upper section, small philips screws at top of back face) to access internals.
2. Slid cover plate over front buttons lights outward (sort of unhooks)
3. Clipped wires to green "OK" light, removed light from socket (old light was small light inside a cover; replacement had bulb shaped like cover so one piece). Soldered new light to clipped wires, covered with shrink wrap slid on before soldering. Note that there's a resistor inline with the new light, and probably under all the shrink wrap on the original. Make sure you don't trim that off when shortening the new light's leads if doing so. Note! Same as for one other person whose review I read, the replacement light labeled as green was actually orange. Whatever the cause, it's next to the OK label and much easier to see! The green was super-dim...
4. Turn machine onto its back and use philips screwdriver to remove espresso brew screen screw and pop screen off (it may stick to the rubber behind a bit).
5. Use flat blade screwdriver to remove the now-visible center fastener.
6. Extract the spring and valve. I was unable to remove the "valve ring" easily, and decided that replacing the old valve was probably adequate, and this appears to be true so far. The ring is brass or something, the valve is a plastic or rubber or similar which appears to have hardened over time.
7. Assembly is the reverse of disassembly (haha). But it really is, just using the new spring and valve.
Did you find this story helpful?
Thanks for voting and helping fellow customers!
Leaking with just one month old
Manuel - January 11, 2019
Tool Type
Coffee Maker
Difficulty
Easy
Time
Less than 15 minutes
Tools Used
Screwdriver
Parts Used
Remove the screws
Replace the spring and the valve
Replace the spring and the valve
Did you find this story helpful?
Thanks for voting and helping fellow customers!
DeLonghi Expresso Maker was leaking steam and water. The frothing wand stopped working.
Bob - December 26, 2018
Tool Type
Coffee Maker
Difficulty
Easy
Time
Less than 15 minutes
Tools Used
Screwdriver
1. Removed water reservoir.
2. Unplugged unit.
3. Turned upside down on a table.
4. Unscrewed and removed silver diffuser plate.
5. Next, unscrewed a large headed screw with a flat head screw driver. This screw has a hole in the center. This screw holds the valve spring, valve ring and valve in place.
6. After removing this large headed screw, I removed the "old" valve spring, valve ring and valve assembly.
7.On the small end of the new valve spring I inserted the new valve ring. I then inserted the new valve into the valve ring. NOTE that the valve is made of silicon rubber. After inserting the valve, the rounded head is on top of the valve ring.
8. I inserted the completed assembly from 7. into the chamber or slot.
9. I screwed the large headed screw back in place.
10. I screwed the silver diffuser plate back in place.
11. I attached the water reservoir and filled with water.
12. I plugged the unit back in and turned it on.
13. NO MORE leaking water or steam, and the frothing wand was functional once more.
Did you find this story helpful?
Thanks for voting and helping fellow customers!
Load More Install Stories
OEM stands for Original Equipment Manufacturer and means the part you’re buying is sourced directly from the manufacturer who made your product. At eReplacementParts, we sell only genuine OEM parts, guaranteeing the part you’re purchasing is of better design and of higher quality than aftermarket parts.
Our product descriptions are a combination of data sourced directly from the manufacturers who made your product as well as content researched and curated by our content & customer service teams. This content is edited and reviewed internally before being made public to customers.
Our customer service team are at the ready daily to answer your part and product questions. We have a dedicated staff with decades of collective experience in helping customers just like you purchase parts to repair their products.
All our part reviews are solicited directly from other customers who have purchased this exact part. While we moderate these reviews for profanity, offensive language or personally identifiable information, these reviews are posted exactly as submitted and no alterations are made by our team.
All our customer repair instructions are solicited directly from other customers just like you who have purchased and replaced this exact part. While we moderate these reviews for profanity, offensive language or personally identifiable information, these reviews are posted exactly as submitted and no alterations are made by our team.
Based on data from past customer purchasing behaviors, these parts are most commonly purchased together along with the part you are viewing. These parts may be necessary or helpful to replace to complete your current repair.
All our installation videos are created and produced in collaboration with our in-house repair technician, Mark Sodja, who has helped millions of eReplacementParts customers over the last 13 years repair their products. Mark has years of experience in selling and repairing both commercial and residential products with a specialty in gas-powered equipment.
This data is collected from customers who submitted a repair instruction after replacing this exact part. Customers can rate how easy the repair was to complete and how long it took. We aggregate this data to provide a repair rating that allows customers to quickly determine the difficulty and time needed to perform their own repair.