


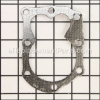
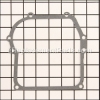
This is an authentic replacement part manufactured for use with small engines. This oil seal keeps oil inside the crankcase, and seals the shaft. It is recommended to replace the crankcase gasket when servicing the case, the gasket is available separately. The oil seal is sold individually.
Seal-oil 391483S
OEM part for: Briggs and Stratton, Toro
Part Number: 391483S
$28.63
In Stock
Jump To:
Frequently Purchased Together ?


Compatibility
This part will fit the following 10536 machines
Briggs and Stratton
90700 Series Engine View Diagrams & Manuals
91700 Series Engine View Diagrams & Manuals
82900 Series Engine View Diagrams & Manuals
9B900 Series Engine View Diagrams & Manuals
9C900 Series Engine View Diagrams & Manuals
9D900 Series Engine View Diagrams & Manuals
9E900 Series Engine View Diagrams & Manuals
9F900 Series Engine View Diagrams & Manuals
9G900 Series Engine View Diagrams & Manuals
9H900 Series Engine View Diagrams & Manuals
9J900 Series Engine View Diagrams & Manuals
9K900 Series Engine View Diagrams & Manuals
9L900 Series Engine View Diagrams & Manuals
9M900 Series Engine View Diagrams & Manuals
9S500 Series Engine View Diagrams & Manuals
9T500 Series Engine View Diagrams & Manuals
9T700 Series Engine View Diagrams & Manuals
9T800 Series Engine View Diagrams & Manuals
10E900 Series Engine View Diagrams & Manuals
10F900 Series Engine View Diagrams & Manuals
60500 Series Engine View Diagrams & Manuals
60700 Series Engine View Diagrams & Manuals
60900 Series Engine View Diagrams & Manuals
80700 Series Engine View Diagrams & Manuals
92500 Series Engine View Diagrams & Manuals
92900 Series Engine View Diagrams & Manuals
80600 Series Engine View Diagrams & Manuals
81600 Series Engine View Diagrams & Manuals
80800 Series Engine View Diagrams & Manuals
81800 Series Engine View Diagrams & Manuals
10A902-0015-01 Engine View Diagrams & Manuals
10A902-0016-01 Engine View Diagrams & Manuals
10A902-0018-01 Engine View Diagrams & Manuals
10A902-0101-01 Engine View Diagrams & Manuals
10A902-0106-01 Engine View Diagrams & Manuals
10A902-0107-01 Engine View Diagrams & Manuals
10A902-0108-01 Engine View Diagrams & Manuals
10A902-0109-01 Engine View Diagrams & Manuals
10A902-0151-01 Engine View Diagrams & Manuals
10A902-0156-01 Engine View Diagrams & Manuals
10A902-0157-01 Engine View Diagrams & Manuals
10A902-0158-01 Engine View Diagrams & Manuals
10A902-0160-01 Engine View Diagrams & Manuals
10A902-0161-01 Engine View Diagrams & Manuals
10A902-0162-01 Engine View Diagrams & Manuals
10A902-0163-01 Engine View Diagrams & Manuals
10A902-0164-01 Engine View Diagrams & Manuals
10A902-0164-02 Engine View Diagrams & Manuals
10A902-0164-03 Engine View Diagrams & Manuals
10A902-0166-01 Engine View Diagrams & Manuals
10A902-0168-01 Engine View Diagrams & Manuals
10A902-0171-01 Engine View Diagrams & Manuals
10A902-0172-01 Engine View Diagrams & Manuals
10A902-0175-01 Engine View Diagrams & Manuals
10A902-0178-01 Engine View Diagrams & Manuals
10A902-0179-01 Engine View Diagrams & Manuals
10A902-0180-01 Engine View Diagrams & Manuals
10A902-0181-01 Engine View Diagrams & Manuals
10A902-0181-02 Engine View Diagrams & Manuals
10A902-0181-03 Engine View Diagrams & Manuals
10A902-0182-01 Engine View Diagrams & Manuals
10A902-0182-02 Engine View Diagrams & Manuals
10A902-0182-03 Engine View Diagrams & Manuals
10A902-0183-01 Engine View Diagrams & Manuals
10A902-0184-01 Engine View Diagrams & Manuals
10A902-0187-01 Engine View Diagrams & Manuals
10A902-0188-01 Engine View Diagrams & Manuals
10A902-0189-01 Engine View Diagrams & Manuals
10A902-0190-01 Engine View Diagrams & Manuals
10A902-0192-01 Engine View Diagrams & Manuals
10A902-0194-01 Engine View Diagrams & Manuals
10A902-0195-01 Engine View Diagrams & Manuals
10A902-0196-01 Engine View Diagrams & Manuals
10A902-0196-02 Engine View Diagrams & Manuals
10A902-0198-01 Engine View Diagrams & Manuals
10A902-0203-01 Engine View Diagrams & Manuals
10A902-0204-01 Engine View Diagrams & Manuals
10A902-0205-01 Engine View Diagrams & Manuals
10A902-0207-01 Engine View Diagrams & Manuals
10A902-0208-01 Engine View Diagrams & Manuals
10A902-0212-01 Engine View Diagrams & Manuals
10A902-0213-01 Engine View Diagrams & Manuals
10A902-0215-01 Engine View Diagrams & Manuals
10A902-0217-01 Engine View Diagrams & Manuals
10A902-0221-01 Engine View Diagrams & Manuals
10A902-0222-01 Engine View Diagrams & Manuals
10A902-0223-01 Engine View Diagrams & Manuals
10A902-0224-01 Engine View Diagrams & Manuals
10A902-0226-01 Engine View Diagrams & Manuals
10A902-0227-01 Engine View Diagrams & Manuals
10A902-0228-01 Engine View Diagrams & Manuals
10A902-0229-01 Engine View Diagrams & Manuals
10A902-0232-01 Engine View Diagrams & Manuals
10A902-0233-01 Engine View Diagrams & Manuals
10A902-0235-01 Engine View Diagrams & Manuals
10A902-0236-81 Engine View Diagrams & Manuals
10A902-0239-01 Engine View Diagrams & Manuals
10A902-0240-01 Engine View Diagrams & Manuals
10A902-0241-01 Engine View Diagrams & Manuals
10A902-0242-01 Engine View Diagrams & Manuals
10A902-0242-02 Engine View Diagrams & Manuals
10A902-0244-01 Engine View Diagrams & Manuals
10A902-0245-01 Engine View Diagrams & Manuals
10A902-0246-01 Engine View Diagrams & Manuals
10A902-0248-02 Engine View Diagrams & Manuals
10A902-0250-81 Engine View Diagrams & Manuals
10A902-0423-A1 Engine View Diagrams & Manuals
10A902-0426-A1 Engine View Diagrams & Manuals
10A902-0439-A3 Engine View Diagrams & Manuals
10A902-0471-A1 Engine View Diagrams & Manuals
10A902-0478-A1 Engine View Diagrams & Manuals
10A902-0479-A1 Engine View Diagrams & Manuals
10A902-0483-A1 Engine View Diagrams & Manuals
10A902-0505-01 Engine View Diagrams & Manuals
10A902-0506-01 Engine View Diagrams & Manuals
10A902-0615-A1 Engine View Diagrams & Manuals
10A902-0616-A1 Engine View Diagrams & Manuals
10A902-0618-A1 Engine View Diagrams & Manuals
10A902-1020-81 Engine View Diagrams & Manuals
10A902-1021-81 Engine View Diagrams & Manuals
10A902-1022-81 Engine View Diagrams & Manuals
10A902-1023-01 Engine View Diagrams & Manuals
10A902-1024-01 Engine View Diagrams & Manuals
10A902-1025-81 Engine View Diagrams & Manuals
10A902-1026-81 Engine View Diagrams & Manuals
10A902-1028-81 Engine View Diagrams & Manuals
10A902-1605-B1 Engine View Diagrams & Manuals
10A902-1605-E1 Engine View Diagrams & Manuals
10A902-1615-B1 Engine View Diagrams & Manuals
10A902-1615-E1 Engine View Diagrams & Manuals
10A902-1616-B1 Engine View Diagrams & Manuals
10A902-1616-E1 Engine View Diagrams & Manuals
10A902-1618-B1 Engine View Diagrams & Manuals
10A902-1618-E1 Engine View Diagrams & Manuals
10A902-2001-B1 Engine View Diagrams & Manuals
10A902-2001-E1 Engine View Diagrams & Manuals
10A902-2003-B1 Engine View Diagrams & Manuals
10A902-2004-B1 Engine View Diagrams & Manuals
10A902-2005-B1 Engine View Diagrams & Manuals
10A902-2007-B1 Engine View Diagrams & Manuals
10A902-2008-B1 Engine View Diagrams & Manuals
10A902-2010-B1 Engine View Diagrams & Manuals
10A902-2011-B1 Engine View Diagrams & Manuals
10A902-2017-E1 Engine View Diagrams & Manuals
10A902-2027-B1 Engine View Diagrams & Manuals
10A902-2028-B1 Engine View Diagrams & Manuals
10A902-2028-B2 Engine View Diagrams & Manuals
10A902-2029-B1 Engine View Diagrams & Manuals
10A902-2031-B1 Engine View Diagrams & Manuals
10A902-2032-B1 Engine View Diagrams & Manuals
10A902-2033-B1 Engine View Diagrams & Manuals
10A902-2034-B1 Engine View Diagrams & Manuals
10A902-2035-B1 Engine View Diagrams & Manuals
10A902-2040-B1 Engine View Diagrams & Manuals
10A902-2040-E1 Engine View Diagrams & Manuals
10A902-2050-B1 Engine View Diagrams & Manuals
10A902-2052-B1 Engine View Diagrams & Manuals
10A902-2064-B1 Engine View Diagrams & Manuals
10A902-2064-E1 Engine View Diagrams & Manuals
10A902-2070-B1 Engine View Diagrams & Manuals
10A902-2070-E1 Engine View Diagrams & Manuals
10A902-2072-B1 Engine View Diagrams & Manuals
10A902-2072-E1 Engine View Diagrams & Manuals
10A902-2073-B1 Engine View Diagrams & Manuals
10A902-2075-B1 Engine View Diagrams & Manuals
10A902-2075-E1 Engine View Diagrams & Manuals
10A902-2082-B1 Engine View Diagrams & Manuals
10A902-2083-B1 Engine View Diagrams & Manuals
10A902-2083-E1 Engine View Diagrams & Manuals
10A902-2084-B1 Engine View Diagrams & Manuals
10A902-2087-B1 Engine View Diagrams & Manuals
10A902-2087-E1 Engine View Diagrams & Manuals
10A902-2090-B1 Engine View Diagrams & Manuals
10A902-2090-E1 Engine View Diagrams & Manuals
10A902-2092-E1 Engine View Diagrams & Manuals
10A902-2094-B1 Engine View Diagrams & Manuals
10A902-2101-E1 Engine View Diagrams & Manuals
10A902-2106-B1 Engine View Diagrams & Manuals
10A902-2106-B3 Engine View Diagrams & Manuals
10A902-2106-B4 Engine View Diagrams & Manuals
10A902-2106-E1 Engine View Diagrams & Manuals
10A902-2106-E2 Engine View Diagrams & Manuals
10A902-2106-E3 Engine View Diagrams & Manuals
10A902-2107-E1 Engine View Diagrams & Manuals
10A902-2108-B1 Engine View Diagrams & Manuals
10A902-2109-B1 Engine View Diagrams & Manuals
10A902-2110-B1 Engine View Diagrams & Manuals
10A902-2121-B1 Engine View Diagrams & Manuals
10A902-2121-E1 Engine View Diagrams & Manuals
10A902-2123-E1 Engine View Diagrams & Manuals
10A902-2124-B1 Engine View Diagrams & Manuals
10A902-2124-E1 Engine View Diagrams & Manuals
10A902-2126-E1 Engine View Diagrams & Manuals
10A902-2128-B1 Engine View Diagrams & Manuals
10A902-2128-E1 Engine View Diagrams & Manuals
10A902-2132-B1 Engine View Diagrams & Manuals
10A902-2132-E1 Engine View Diagrams & Manuals
10A902-2135-B1 Engine View Diagrams & Manuals
10A902-2135-E1 Engine View Diagrams & Manuals
10A902-2139-B1 Engine View Diagrams & Manuals
10A902-2139-E1 Engine View Diagrams & Manuals
10A902-2140-B1 Engine View Diagrams & Manuals
10A902-2140-B2 Engine View Diagrams & Manuals
10A902-2140-E1 Engine View Diagrams & Manuals
10A902-2140-E2 Engine View Diagrams & Manuals
10A902-2142-B2 Engine View Diagrams & Manuals
10A902-2142-E1 Engine View Diagrams & Manuals
10A902-2142-E2 Engine View Diagrams & Manuals
10A902-2143-B1 Engine View Diagrams & Manuals
10A902-2143-E1 Engine View Diagrams & Manuals
10A902-2145-B2 Engine View Diagrams & Manuals
10A902-2145-E1 Engine View Diagrams & Manuals
10A902-2145-E2 Engine View Diagrams & Manuals
10A902-2146-B1 Engine View Diagrams & Manuals
10A902-2146-E1 Engine View Diagrams & Manuals
10A902-2148-E2 Engine View Diagrams & Manuals
10A902-2149-B1 Engine View Diagrams & Manuals
10A902-2151-E1 Engine View Diagrams & Manuals
10A902-2152-B1 Engine View Diagrams & Manuals
10A902-2152-E1 Engine View Diagrams & Manuals
10A902-2153-B1 Engine View Diagrams & Manuals
10A902-2153-E1 Engine View Diagrams & Manuals
10A902-2164-B1 Engine View Diagrams & Manuals
10A902-2171-B1 Engine View Diagrams & Manuals
10A902-2171-E1 Engine View Diagrams & Manuals
10A902-2180-B1 Engine View Diagrams & Manuals
10A902-2189-B1 Engine View Diagrams & Manuals
10A902-2189-B2 Engine View Diagrams & Manuals
10A902-2189-B3 Engine View Diagrams & Manuals
10A902-2189-E1 Engine View Diagrams & Manuals
10A902-2189-E2 Engine View Diagrams & Manuals
10A902-2189-E3 Engine View Diagrams & Manuals
10A902-2190-B1 Engine View Diagrams & Manuals
10A902-2233-B1 Engine View Diagrams & Manuals
10A902-2233-E1 Engine View Diagrams & Manuals
10A902-2234-B1 Engine View Diagrams & Manuals
10A902-2250-B1 Engine View Diagrams & Manuals
10A902-2250-E1 Engine View Diagrams & Manuals
10A902-2251-E1 Engine View Diagrams & Manuals
10A902-2252-B1 Engine View Diagrams & Manuals
10A902-2252-E1 Engine View Diagrams & Manuals
10A902-2253-E1 Engine View Diagrams & Manuals
10A902-2255-B1 Engine View Diagrams & Manuals
10A902-2255-E1 Engine View Diagrams & Manuals
10A902-2256-E1 Engine View Diagrams & Manuals
10A902-2257-B1 Engine View Diagrams & Manuals
10A902-2257-E1 Engine View Diagrams & Manuals
10A902-2260-B1 Engine View Diagrams & Manuals
10A902-2260-E1 Engine View Diagrams & Manuals
10A902-2260-E2 Engine View Diagrams & Manuals
10A902-2262-B1 Engine View Diagrams & Manuals
10A902-2262-E1 Engine View Diagrams & Manuals
10A902-2263-E1 Engine View Diagrams & Manuals
10A902-2264-B1 Engine View Diagrams & Manuals
10A902-2264-E1 Engine View Diagrams & Manuals
10A902-2265-E1 Engine View Diagrams & Manuals
10A902-2267-B1 Engine View Diagrams & Manuals
10A902-2267-E1 Engine View Diagrams & Manuals
10A902-2268-B1 Engine View Diagrams & Manuals
10A902-2268-E1 Engine View Diagrams & Manuals
10A902-2269-E1 Engine View Diagrams & Manuals
10A902-2270-B1 Engine View Diagrams & Manuals
10A902-2270-E1 Engine View Diagrams & Manuals
10A902-2271-E1 Engine View Diagrams & Manuals
10A902-2272-B1 Engine View Diagrams & Manuals
10A902-2272-E1 Engine View Diagrams & Manuals
10A902-2273-B1 Engine View Diagrams & Manuals
10A902-2273-E1 Engine View Diagrams & Manuals
10A902-2274-E2 Engine View Diagrams & Manuals
10A902-2275-B1 Engine View Diagrams & Manuals
10A902-2275-B2 Engine View Diagrams & Manuals
10A902-2275-E1 Engine View Diagrams & Manuals
10A902-2276-81 Engine View Diagrams & Manuals
10A902-2277-B1 Engine View Diagrams & Manuals
10A902-2277-E1 Engine View Diagrams & Manuals
10A902-2278-E1 Engine View Diagrams & Manuals
10A902-2279-E1 Engine View Diagrams & Manuals
10A902-2280-81 Engine View Diagrams & Manuals
10A902-2281-E1 Engine View Diagrams & Manuals
10A902-2282-B1 Engine View Diagrams & Manuals
10A902-2282-E1 Engine View Diagrams & Manuals
10A902-2284-B1 Engine View Diagrams & Manuals
10A902-2284-E1 Engine View Diagrams & Manuals
10A902-2286-B1 Engine View Diagrams & Manuals
10A902-2286-E1 Engine View Diagrams & Manuals
10A902-2287-B1 Engine View Diagrams & Manuals
10A902-2287-E1 Engine View Diagrams & Manuals
10A902-2288-B1 Engine View Diagrams & Manuals
10A902-2288-E1 Engine View Diagrams & Manuals
10A902-2289-B1 Engine View Diagrams & Manuals
10A902-2289-E1 Engine View Diagrams & Manuals
10A902-2290-B1 Engine View Diagrams & Manuals
10A902-2290-E1 Engine View Diagrams & Manuals
10A902-2291-B1 Engine View Diagrams & Manuals
10A902-2291-E1 Engine View Diagrams & Manuals
10A902-2292-B1 Engine View Diagrams & Manuals
10A902-2293-B1 Engine View Diagrams & Manuals
10A902-2294-B1 Engine View Diagrams & Manuals
10A902-2295-B1 Engine View Diagrams & Manuals
10A902-2296-B1 Engine View Diagrams & Manuals
10A902-2297-B1 Engine View Diagrams & Manuals
10A902-2298-B1 Engine View Diagrams & Manuals
10A902-2299-B1 Engine View Diagrams & Manuals
10A912-2266-B1 Engine View Diagrams & Manuals
10A912-2266-E1 Engine View Diagrams & Manuals
10A982-0050-01 Engine View Diagrams & Manuals
10A982-0051-01 Engine View Diagrams & Manuals
10A982-0159-01 Engine View Diagrams & Manuals
10A982-0167-01 Engine View Diagrams & Manuals
10A982-0167-02 Engine View Diagrams & Manuals
10A982-0169-01 Engine View Diagrams & Manuals
10A982-0173-01 Engine View Diagrams & Manuals
10A982-0186-01 Engine View Diagrams & Manuals
10A982-0193-01 Engine View Diagrams & Manuals
10A982-0197-01 Engine View Diagrams & Manuals
10A982-0202-01 Engine View Diagrams & Manuals
10A982-0206-01 Engine View Diagrams & Manuals
10A982-0211-01 Engine View Diagrams & Manuals
10A982-0219-82 Engine View Diagrams & Manuals
10A982-0230-01 Engine View Diagrams & Manuals
10A982-0430-A1 Engine View Diagrams & Manuals
10A982-0650-A1 Engine View Diagrams & Manuals
10A982-0651-A1 Engine View Diagrams & Manuals
10A982-1019-82 Engine View Diagrams & Manuals
10A982-1650-B1 Engine View Diagrams & Manuals
10A982-1650-E1 Engine View Diagrams & Manuals
10A982-1651-B1 Engine View Diagrams & Manuals
10A982-1651-E1 Engine View Diagrams & Manuals
10A982-2067-B2 Engine View Diagrams & Manuals
10A982-2067-E2 Engine View Diagrams & Manuals
10A982-2130-B1 Engine View Diagrams & Manuals
10A982-2130-E1 Engine View Diagrams & Manuals
10A982-2169-B1 Engine View Diagrams & Manuals
10A982-2169-E1 Engine View Diagrams & Manuals
10A982-2254-B1 Engine View Diagrams & Manuals
10A982-2254-E1 Engine View Diagrams & Manuals
10A982-2258-B1 Engine View Diagrams & Manuals
10A982-2258-E1 Engine View Diagrams & Manuals
10A982-2259-E1 Engine View Diagrams & Manuals
10A982-2261-E1 Engine View Diagrams & Manuals
10A982-2285-B1 Engine View Diagrams & Manuals
10A982-2285-E1 Engine View Diagrams & Manuals
10B902-0050-01 Engine View Diagrams & Manuals
10B902-0110-01 Engine View Diagrams & Manuals
10B902-0111-01 Engine View Diagrams & Manuals
10B902-0130-01 Engine View Diagrams & Manuals
10B902-0131-01 Engine View Diagrams & Manuals
10B902-1650-E1 Engine View Diagrams & Manuals
10B902-2005-B1 Engine View Diagrams & Manuals
10B902-2005-E1 Engine View Diagrams & Manuals
10B902-2011-B1 Engine View Diagrams & Manuals
10B902-2011-E1 Engine View Diagrams & Manuals
10C902-0102-01 Engine View Diagrams & Manuals
10C902-0115-01 Engine View Diagrams & Manuals
10C902-0116-01 Engine View Diagrams & Manuals
10C902-0125-01 Engine View Diagrams & Manuals
10C902-0128-01 Engine View Diagrams & Manuals
10C902-0129-01 Engine View Diagrams & Manuals
10C902-0130-01 Engine View Diagrams & Manuals
10C902-0131-01 Engine View Diagrams & Manuals
10C902-0132-01 Engine View Diagrams & Manuals
10C902-0133-99 Engine View Diagrams & Manuals
10C902-0134-01 Engine View Diagrams & Manuals
10C902-2002-E1 Engine View Diagrams & Manuals
10C902-2009-E1 Engine View Diagrams & Manuals
10C902-2028-E1 Engine View Diagrams & Manuals
10C902-2029-E1 Engine View Diagrams & Manuals
10C902-2030-E1 Engine View Diagrams & Manuals
10C902-2032-E1 Engine View Diagrams & Manuals
10C902-2033-99 Engine View Diagrams & Manuals
10C902-2034-E1 Engine View Diagrams & Manuals
10C902-2035-E1 Engine View Diagrams & Manuals
10C902-2036-E1 Engine View Diagrams & Manuals
10C902-2037-B1 Engine View Diagrams & Manuals
10C902-2037-E1 Engine View Diagrams & Manuals
10C902-2038-E1 Engine View Diagrams & Manuals
10C982-0127-99 Engine View Diagrams & Manuals
10D902-0100-B1 Engine View Diagrams & Manuals
10D902-0111-B1 Engine View Diagrams & Manuals
10D902-0113-B1 Engine View Diagrams & Manuals
10D902-0114-B1 Engine View Diagrams & Manuals
10D902-0116-B1 Engine View Diagrams & Manuals
10D902-0116-B2 Engine View Diagrams & Manuals
10D902-0116-E1 Engine View Diagrams & Manuals
10D902-0117-B1 Engine View Diagrams & Manuals
10D902-0117-E1 Engine View Diagrams & Manuals
10D902-0118-B1 Engine View Diagrams & Manuals
10D902-0118-E1 Engine View Diagrams & Manuals
10D902-0119-B1 Engine View Diagrams & Manuals
10D902-0119-E1 Engine View Diagrams & Manuals
10D902-0120-B1 Engine View Diagrams & Manuals
10D902-0120-B2 Engine View Diagrams & Manuals
10D902-0120-E1 Engine View Diagrams & Manuals
10D902-0121-B1 Engine View Diagrams & Manuals
10D902-0121-E1 Engine View Diagrams & Manuals
10D902-0122-E1 Engine View Diagrams & Manuals
10D902-0127-B1 Engine View Diagrams & Manuals
10D902-0128-B1 Engine View Diagrams & Manuals
10D902-0129-B1 Engine View Diagrams & Manuals
10D902-0130-B1 Engine View Diagrams & Manuals
10D902-0131-B1 Engine View Diagrams & Manuals
10D902-0132-B1 Engine View Diagrams & Manuals
10D902-0133-B1 Engine View Diagrams & Manuals
10D902-0133-B2 Engine View Diagrams & Manuals
10D902-0133-D1 Engine View Diagrams & Manuals
10D902-0133-D2 Engine View Diagrams & Manuals
10D902-0135-B1 Engine View Diagrams & Manuals
10D902-0136-B1 Engine View Diagrams & Manuals
10D902-0139-B1 Engine View Diagrams & Manuals
10D902-0140-B1 Engine View Diagrams & Manuals
10D902-0141-B1 Engine View Diagrams & Manuals
10D902-0142-B1 Engine View Diagrams & Manuals
10D902-0143-B1 Engine View Diagrams & Manuals
10D902-0145-B1 Engine View Diagrams & Manuals
10D902-0146-B1 Engine View Diagrams & Manuals
10D902-0147-B1 Engine View Diagrams & Manuals
10D902-0148-B1 Engine View Diagrams & Manuals
10D902-0149-B1 Engine View Diagrams & Manuals
10D902-0150-B1 Engine View Diagrams & Manuals
10D902-0151-B1 Engine View Diagrams & Manuals
10D902-0152-B1 Engine View Diagrams & Manuals
10D902-0153-B1 Engine View Diagrams & Manuals
10D902-0155-B1 Engine View Diagrams & Manuals
10D902-0157-B1 Engine View Diagrams & Manuals
10D902-0158-B1 Engine View Diagrams & Manuals
10D902-0159-B1 Engine View Diagrams & Manuals
10D902-0160-B1 Engine View Diagrams & Manuals
10D902-0161-B1 Engine View Diagrams & Manuals
10D902-0162-B1 Engine View Diagrams & Manuals
10D902-0163-B1 Engine View Diagrams & Manuals
10D902-0166-B1 Engine View Diagrams & Manuals
10D902-0167-B1 Engine View Diagrams & Manuals
10D902-0168-B1 Engine View Diagrams & Manuals
10D902-0169-B1 Engine View Diagrams & Manuals
10D902-0170-B1 Engine View Diagrams & Manuals
10D902-0171-B1 Engine View Diagrams & Manuals
10D902-0172-B1 Engine View Diagrams & Manuals
10D902-0173-B1 Engine View Diagrams & Manuals
10D902-0174-B1 Engine View Diagrams & Manuals
10D902-0175-B1 Engine View Diagrams & Manuals
10D902-0176-B1 Engine View Diagrams & Manuals
10D902-0177-B1 Engine View Diagrams & Manuals
10D902-0179-B1 Engine View Diagrams & Manuals
10D902-0180-B1 Engine View Diagrams & Manuals
10D902-0181-B1 Engine View Diagrams & Manuals
10D902-0182-B1 Engine View Diagrams & Manuals
10D902-0183-B1 Engine View Diagrams & Manuals
10D902-0184-B1 Engine View Diagrams & Manuals
10D902-0186-B1 Engine View Diagrams & Manuals
10D902-0187-B1 Engine View Diagrams & Manuals
10D902-0188-B1 Engine View Diagrams & Manuals
10D902-0189-B1 Engine View Diagrams & Manuals
10D902-0190-B1 Engine View Diagrams & Manuals
10D902-0193-B1 Engine View Diagrams & Manuals
10D902-0195-B1 Engine View Diagrams & Manuals
10D902-0197-B1 Engine View Diagrams & Manuals
10D902-0198-B1 Engine View Diagrams & Manuals
10D902-0199-B1 Engine View Diagrams & Manuals
10D902-0246-B1 Engine View Diagrams & Manuals
10D902-0250-B1 Engine View Diagrams & Manuals
10D902-0251-B1 Engine View Diagrams & Manuals
10D902-0252-B1 Engine View Diagrams & Manuals
10D902-0253-B1 Engine View Diagrams & Manuals
10D902-0254-B1 Engine View Diagrams & Manuals
10D902-0255-B1 Engine View Diagrams & Manuals
10D902-5000-B1 Engine View Diagrams & Manuals
10D902-5000-D1 Engine View Diagrams & Manuals
10D912-0137-B1 Engine View Diagrams & Manuals
10D912-0137-D1 Engine View Diagrams & Manuals
10D912-0144-B1 Engine View Diagrams & Manuals
10D912-0144-D1 Engine View Diagrams & Manuals
10G902-0015-B1 Engine View Diagrams & Manuals
10G902-0016-B1 Engine View Diagrams & Manuals
10G902-0018-B1 Engine View Diagrams & Manuals
10G902-0100-B1 Engine View Diagrams & Manuals
10G902-0110-B1 Engine View Diagrams & Manuals
10G902-0111-B1 Engine View Diagrams & Manuals
10G902-0114-B1 Engine View Diagrams & Manuals
10G902-0115-B1 Engine View Diagrams & Manuals
10G902-0116-B1 Engine View Diagrams & Manuals
10G902-0118-B1 Engine View Diagrams & Manuals
10G902-0119-B1 Engine View Diagrams & Manuals
10G902-0120-B1 Engine View Diagrams & Manuals
10G902-0121-B1 Engine View Diagrams & Manuals
10G902-0122-B1 Engine View Diagrams & Manuals
10G902-0123-B1 Engine View Diagrams & Manuals
10G902-0124-B1 Engine View Diagrams & Manuals
10G902-0125-B1 Engine View Diagrams & Manuals
10G902-0126-B1 Engine View Diagrams & Manuals
10G902-0127-B1 Engine View Diagrams & Manuals
10G902-0128-B1 Engine View Diagrams & Manuals
10G902-0129-B1 Engine View Diagrams & Manuals
10G902-0130-B1 Engine View Diagrams & Manuals
10G902-0131-B1 Engine View Diagrams & Manuals
10G902-0132-B1 Engine View Diagrams & Manuals
10G902-0134-B1 Engine View Diagrams & Manuals
10G902-0135-B1 Engine View Diagrams & Manuals
10G902-0136-B1 Engine View Diagrams & Manuals
10G902-0138-B1 Engine View Diagrams & Manuals
10G902-0171-B1 Engine View Diagrams & Manuals
10G902-0173-B1 Engine View Diagrams & Manuals
10G902-0175-B1 Engine View Diagrams & Manuals
10G902-0176-B1 Engine View Diagrams & Manuals
10G902-0189-B1 Engine View Diagrams & Manuals
10G902-0192-B1 Engine View Diagrams & Manuals
10G902-0196-B1 Engine View Diagrams & Manuals
10G902-0217-B1 Engine View Diagrams & Manuals
10G902-0248-B1 Engine View Diagrams & Manuals
10G902-0249-B1 Engine View Diagrams & Manuals
10G902-0251-B1 Engine View Diagrams & Manuals
10G902-0254-B1 Engine View Diagrams & Manuals
10G902-0257-B1 Engine View Diagrams & Manuals
10G902-0260-B1 Engine View Diagrams & Manuals
10G902-0271-B1 Engine View Diagrams & Manuals
10G902-0272-B1 Engine View Diagrams & Manuals
10G902-0352-B1 Engine View Diagrams & Manuals
10G902-0367-B1 Engine View Diagrams & Manuals
10G902-0464-B1 Engine View Diagrams & Manuals
10G902-0465-B1 Engine View Diagrams & Manuals
10G902-0483-B1 Engine View Diagrams & Manuals
10G902-0570-B1 Engine View Diagrams & Manuals
10G902-0823-B1 Engine View Diagrams & Manuals
10G902-0825-B1 Engine View Diagrams & Manuals
10H902-0101-E1 Engine View Diagrams & Manuals
10H902-0111-E1 Engine View Diagrams & Manuals
10H902-0113-E1 Engine View Diagrams & Manuals
10H902-0114-E1 Engine View Diagrams & Manuals
10H902-0115-E1 Engine View Diagrams & Manuals
10H902-0116-E1 Engine View Diagrams & Manuals
10H902-0117-E1 Engine View Diagrams & Manuals
10H902-0120-E1 Engine View Diagrams & Manuals
10H902-0121-E1 Engine View Diagrams & Manuals
10H902-0216-E1 Engine View Diagrams & Manuals
10H902-0246-E1 Engine View Diagrams & Manuals
10H902-0285-E1 Engine View Diagrams & Manuals
10H902-0327-E1 Engine View Diagrams & Manuals
10H902-0333-E1 Engine View Diagrams & Manuals
10H902-0333-E2 Engine View Diagrams & Manuals
10H902-0437-E1 Engine View Diagrams & Manuals
10H902-0455-E1 Engine View Diagrams & Manuals
10H902-0522-E1 Engine View Diagrams & Manuals
10H902-0632-E1 Engine View Diagrams & Manuals
10H902-0641-E1 Engine View Diagrams & Manuals
10J902-0130-E1 Engine View Diagrams & Manuals
10J902-0131-E1 Engine View Diagrams & Manuals
10J902-0133-E1 Engine View Diagrams & Manuals
10J902-0138-E1 Engine View Diagrams & Manuals
10J902-0139-E1 Engine View Diagrams & Manuals
10J902-0140-E1 Engine View Diagrams & Manuals
10J902-0141-E1 Engine View Diagrams & Manuals
10J902-0293-E1 Engine View Diagrams & Manuals
10J902-0305-E1 Engine View Diagrams & Manuals
10J902-0315-E1 Engine View Diagrams & Manuals
10J902-0342-E1 Engine View Diagrams & Manuals
10J902-0520-E1 Engine View Diagrams & Manuals
10J902-0524-E1 Engine View Diagrams & Manuals
10J902-0527-E1 Engine View Diagrams & Manuals
10J902-0584-E1 Engine View Diagrams & Manuals
10J912-0137-E1 Engine View Diagrams & Manuals
10K902-0100-E1 Engine View Diagrams & Manuals
10K902-0110-E1 Engine View Diagrams & Manuals
10K902-0111-E1 Engine View Diagrams & Manuals
10K902-0343-E1 Engine View Diagrams & Manuals
10K902-0346-E1 Engine View Diagrams & Manuals
10K902-0354-E1 Engine View Diagrams & Manuals
10L502-0111-F1 Engine View Diagrams & Manuals
10L502-0112-F1 Engine View Diagrams & Manuals
10L502-0115-F1 Engine View Diagrams & Manuals
10L502-0457-F2 Engine View Diagrams & Manuals
10L502-0495-F2 Engine View Diagrams & Manuals
10L502-0501-F1 Engine View Diagrams & Manuals
10L502-0573-F2 Engine View Diagrams & Manuals
10L502-0583-F2 Engine View Diagrams & Manuals
10L502-0772-F1 Engine View Diagrams & Manuals
10L502-1011-F1 Engine View Diagrams & Manuals
10L502-1016-F1 Engine View Diagrams & Manuals
10L502-1427-F1 Engine View Diagrams & Manuals
10L502-1485-F1 Engine View Diagrams & Manuals
10L502-1532-F1 Engine View Diagrams & Manuals
10L502-1543-F1 Engine View Diagrams & Manuals
10L602-0111-F1 Engine View Diagrams & Manuals
10L602-0113-F1 Engine View Diagrams & Manuals
10L602-0576-F2 Engine View Diagrams & Manuals
10L602-0746-F1 Engine View Diagrams & Manuals
10L602-1077-F1 Engine View Diagrams & Manuals
10L602-1621-F1 Engine View Diagrams & Manuals
10L602-4016-F1 Engine View Diagrams & Manuals
10L602-4457-F2 Engine View Diagrams & Manuals
10L602-5746-F1 Engine View Diagrams & Manuals
10L702-0111-F1 Engine View Diagrams & Manuals
10L702-0112-F1 Engine View Diagrams & Manuals
10L802-0015-F1 Engine View Diagrams & Manuals
10L802-0111-F1 Engine View Diagrams & Manuals
10L802-0112-F1 Engine View Diagrams & Manuals
10L802-0113-F1 Engine View Diagrams & Manuals
10L802-0114-F1 Engine View Diagrams & Manuals
10L802-0115-F1 Engine View Diagrams & Manuals
10L802-0118-F1 Engine View Diagrams & Manuals
10L802-0119-F1 Engine View Diagrams & Manuals
10L802-0120-F1 Engine View Diagrams & Manuals
10L802-0121-F1 Engine View Diagrams & Manuals
10L802-0122-F1 Engine View Diagrams & Manuals
10L802-0547-F2 Engine View Diagrams & Manuals
10L802-0574-F2 Engine View Diagrams & Manuals
10L802-0694-F2 Engine View Diagrams & Manuals
10L802-0713-F1 Engine View Diagrams & Manuals
10L802-0775-F1 Engine View Diagrams & Manuals
10L802-0776-F1 Engine View Diagrams & Manuals
10L802-0780-F1 Engine View Diagrams & Manuals
10L802-0858-F1 Engine View Diagrams & Manuals
10L802-0878-F1 Engine View Diagrams & Manuals
10L802-1078-F1 Engine View Diagrams & Manuals
10L802-1079-F1 Engine View Diagrams & Manuals
10L802-1087-F1 Engine View Diagrams & Manuals
10L802-1258-F1 Engine View Diagrams & Manuals
10L802-1260-F1 Engine View Diagrams & Manuals
10L802-1328-F1 Engine View Diagrams & Manuals
10L802-5115-F1 Engine View Diagrams & Manuals
10L802-5258-F1 Engine View Diagrams & Manuals
10L802-5260-F1 Engine View Diagrams & Manuals
10L802-5547-F2 Engine View Diagrams & Manuals
10L802-5574-F2 Engine View Diagrams & Manuals
10L802-5713-F1 Engine View Diagrams & Manuals
10L802-5775-F1 Engine View Diagrams & Manuals
10L802-5776-F1 Engine View Diagrams & Manuals
10L802-5780-F1 Engine View Diagrams & Manuals
10L802-5858-F1 Engine View Diagrams & Manuals
10L802-5878-F1 Engine View Diagrams & Manuals
10L902-0110-B1 Engine View Diagrams & Manuals
10L902-0110-E1 Engine View Diagrams & Manuals
10L902-0441-E1 Engine View Diagrams & Manuals
10L902-0469-E1 Engine View Diagrams & Manuals
10L902-0480-E1 Engine View Diagrams & Manuals
10L902-0488-E1 Engine View Diagrams & Manuals
10L902-0517-E1 Engine View Diagrams & Manuals
10L902-0536-E1 Engine View Diagrams & Manuals
10L902-0536-E2 Engine View Diagrams & Manuals
10L902-0543-E1 Engine View Diagrams & Manuals
10M902-0015-E1 Engine View Diagrams & Manuals
10M902-0016-E1 Engine View Diagrams & Manuals
10M902-0018-E1 Engine View Diagrams & Manuals
10M902-0100-E1 Engine View Diagrams & Manuals
10M902-0111-E1 Engine View Diagrams & Manuals
10M902-0112-E1 Engine View Diagrams & Manuals
10M902-0113-E1 Engine View Diagrams & Manuals
10M902-0114-E1 Engine View Diagrams & Manuals
10M902-0115-E1 Engine View Diagrams & Manuals
10M902-0212-E1 Engine View Diagrams & Manuals
10M902-0289-E1 Engine View Diagrams & Manuals
10M902-0310-E1 Engine View Diagrams & Manuals
10M902-0364-E1 Engine View Diagrams & Manuals
10M902-0367-E1 Engine View Diagrams & Manuals
10M902-0388-E1 Engine View Diagrams & Manuals
10M902-0397-E1 Engine View Diagrams & Manuals
10M902-0435-E1 Engine View Diagrams & Manuals
10M902-0452-E1 Engine View Diagrams & Manuals
10M902-0452-E2 Engine View Diagrams & Manuals
10M902-0474-E1 Engine View Diagrams & Manuals
10M902-0489-E1 Engine View Diagrams & Manuals
10M902-0489-E2 Engine View Diagrams & Manuals
10M902-0521-E1 Engine View Diagrams & Manuals
10M902-0554-E1 Engine View Diagrams & Manuals
10M902-0621-E1 Engine View Diagrams & Manuals
10M902-0712-E1 Engine View Diagrams & Manuals
10M912-0005-E1 Engine View Diagrams & Manuals
10N902-0015-E1 Engine View Diagrams & Manuals
10N902-0018-E1 Engine View Diagrams & Manuals
10N902-0419-E1 Engine View Diagrams & Manuals
10N902-0441-E1 Engine View Diagrams & Manuals
10N902-0590-E1 Engine View Diagrams & Manuals
10N902-0622-E1 Engine View Diagrams & Manuals
10S902-0554-B1 Engine View Diagrams & Manuals
10S902-0833-B1 Engine View Diagrams & Manuals
10T502-0001-H1 Engine View Diagrams & Manuals
10T502-0002-H1 Engine View Diagrams & Manuals
10T502-0100-B1 Engine View Diagrams & Manuals
10T502-0111-B1 Engine View Diagrams & Manuals
10T502-0111-H1 Engine View Diagrams & Manuals
10T502-0112-B1 Engine View Diagrams & Manuals
10T502-0113-B1 Engine View Diagrams & Manuals
10T502-0114-B1 Engine View Diagrams & Manuals
10T502-0115-B1 Engine View Diagrams & Manuals
10T502-0116-B1 Engine View Diagrams & Manuals
10T502-0116-H1 Engine View Diagrams & Manuals
10T502-0117-B1 Engine View Diagrams & Manuals
10T502-0118-B1 Engine View Diagrams & Manuals
10T502-0118-H1 Engine View Diagrams & Manuals
10T502-0120-B1 Engine View Diagrams & Manuals
10T502-0120-B2 Engine View Diagrams & Manuals
10T502-0120-H2 Engine View Diagrams & Manuals
10T502-0121-B1 Engine View Diagrams & Manuals
10T502-0121-E1 Engine View Diagrams & Manuals
10T502-0123-B1 Engine View Diagrams & Manuals
10T502-0126-B1 Engine View Diagrams & Manuals
10T502-0127-B1 Engine View Diagrams & Manuals
10T502-0127-H1 Engine View Diagrams & Manuals
10T502-0130-B1 Engine View Diagrams & Manuals
10T502-0130-E1 Engine View Diagrams & Manuals
10T502-0132-B1 Engine View Diagrams & Manuals
10T502-0133-B1 Engine View Diagrams & Manuals
10T502-0133-H1 Engine View Diagrams & Manuals
10T502-0136-B1 Engine View Diagrams & Manuals
10T502-0137-B1 Engine View Diagrams & Manuals
10T502-0139-B1 Engine View Diagrams & Manuals
10T502-0139-H1 Engine View Diagrams & Manuals
10T502-0140-B1 Engine View Diagrams & Manuals
10T502-0140-H1 Engine View Diagrams & Manuals
10T502-0141-B1 Engine View Diagrams & Manuals
10T502-0142-B1 Engine View Diagrams & Manuals
10T502-0142-H1 Engine View Diagrams & Manuals
10T502-0143-B1 Engine View Diagrams & Manuals
10T502-0143-H1 Engine View Diagrams & Manuals
10T502-0144-B1 Engine View Diagrams & Manuals
10T502-0144-H1 Engine View Diagrams & Manuals
10T502-0145-B1 Engine View Diagrams & Manuals
10T502-0145-H1 Engine View Diagrams & Manuals
10T502-0146-B1 Engine View Diagrams & Manuals
10T502-0147-B1 Engine View Diagrams & Manuals
10T502-0147-H1 Engine View Diagrams & Manuals
10T502-0150-B1 Engine View Diagrams & Manuals
10T502-0150-H1 Engine View Diagrams & Manuals
10T502-0153-B1 Engine View Diagrams & Manuals
10T502-0155-B1 Engine View Diagrams & Manuals
10T502-0157-B1 Engine View Diagrams & Manuals
10T502-0158-B1 Engine View Diagrams & Manuals
10T502-0161-B1 Engine View Diagrams & Manuals
10T502-0162-B1 Engine View Diagrams & Manuals
10T502-0166-B1 Engine View Diagrams & Manuals
10T502-0168-B1 Engine View Diagrams & Manuals
10T502-0169-B1 Engine View Diagrams & Manuals
10T502-0170-B1 Engine View Diagrams & Manuals
10T502-0171-B1 Engine View Diagrams & Manuals
10T502-0172-B1 Engine View Diagrams & Manuals
10T502-0173-B1 Engine View Diagrams & Manuals
10T502-0174-B1 Engine View Diagrams & Manuals
10T502-0174-H1 Engine View Diagrams & Manuals
10T502-0175-B1 Engine View Diagrams & Manuals
10T502-0176-B1 Engine View Diagrams & Manuals
10T502-0177-B1 Engine View Diagrams & Manuals
10T502-0178-B1 Engine View Diagrams & Manuals
10T502-0179-B1 Engine View Diagrams & Manuals
10T502-0180-B1 Engine View Diagrams & Manuals
10T502-0180-H1 Engine View Diagrams & Manuals
10T502-0181-B1 Engine View Diagrams & Manuals
10T502-0183-B1 Engine View Diagrams & Manuals
10T502-0184-B1 Engine View Diagrams & Manuals
10T502-0184-H1 Engine View Diagrams & Manuals
10T502-0186-B1 Engine View Diagrams & Manuals
10T502-0186-H1 Engine View Diagrams & Manuals
10T502-0187-B1 Engine View Diagrams & Manuals
10T502-0187-H1 Engine View Diagrams & Manuals
10T502-0188-B1 Engine View Diagrams & Manuals
10T502-0188-H1 Engine View Diagrams & Manuals
10T502-0189-B1 Engine View Diagrams & Manuals
10T502-0189-H1 Engine View Diagrams & Manuals
10T502-0190-B1 Engine View Diagrams & Manuals
10T502-0191-B1 Engine View Diagrams & Manuals
10T502-0193-B1 Engine View Diagrams & Manuals
10T502-0195-B1 Engine View Diagrams & Manuals
10T502-0195-H1 Engine View Diagrams & Manuals
10T502-0197-B1 Engine View Diagrams & Manuals
10T502-0198-B1 Engine View Diagrams & Manuals
10T502-0199-B1 Engine View Diagrams & Manuals
10T502-0200-B1 Engine View Diagrams & Manuals
10T502-0202-B1 Engine View Diagrams & Manuals
10T502-0202-H1 Engine View Diagrams & Manuals
10T502-0203-B1 Engine View Diagrams & Manuals
10T502-0203-H1 Engine View Diagrams & Manuals
10T502-0204-B1 Engine View Diagrams & Manuals
10T502-0205-B1 Engine View Diagrams & Manuals
10T502-0206-B1 Engine View Diagrams & Manuals
10T502-0207-B1 Engine View Diagrams & Manuals
10T502-0208-B1 Engine View Diagrams & Manuals
10T502-0209-B1 Engine View Diagrams & Manuals
10T502-0210-B1 Engine View Diagrams & Manuals
10T502-0210-H1 Engine View Diagrams & Manuals
10T502-0212-B1 Engine View Diagrams & Manuals
10T502-0212-H1 Engine View Diagrams & Manuals
10T502-0213-B1 Engine View Diagrams & Manuals
10T502-0214-B1 Engine View Diagrams & Manuals
10T502-0215-B1 Engine View Diagrams & Manuals
10T502-0216-B1 Engine View Diagrams & Manuals
10T502-0217-B1 Engine View Diagrams & Manuals
10T502-0217-H1 Engine View Diagrams & Manuals
10T502-0218-B1 Engine View Diagrams & Manuals
10T502-0218-H1 Engine View Diagrams & Manuals
10T502-0219-B1 Engine View Diagrams & Manuals
10T502-0219-H1 Engine View Diagrams & Manuals
10T502-0220-B1 Engine View Diagrams & Manuals
10T502-0220-H1 Engine View Diagrams & Manuals
10T502-0221-B1 Engine View Diagrams & Manuals
10T502-0221-H1 Engine View Diagrams & Manuals
10T502-0222-B1 Engine View Diagrams & Manuals
10T502-0224-B1 Engine View Diagrams & Manuals
10T502-0224-H1 Engine View Diagrams & Manuals
10T502-0246-B1 Engine View Diagrams & Manuals
10T502-0250-B1 Engine View Diagrams & Manuals
10T502-0251-B1 Engine View Diagrams & Manuals
10T502-0252-B1 Engine View Diagrams & Manuals
10T502-0253-B1 Engine View Diagrams & Manuals
10T502-0254-B1 Engine View Diagrams & Manuals
10T502-0254-H1 Engine View Diagrams & Manuals
10T502-0255-B1 Engine View Diagrams & Manuals
10T502-0256-B1 Engine View Diagrams & Manuals
10T502-0257-B1 Engine View Diagrams & Manuals
10T502-0257-H1 Engine View Diagrams & Manuals
10T502-0258-B1 Engine View Diagrams & Manuals
10T502-0259-B1 Engine View Diagrams & Manuals
10T502-0260-B1 Engine View Diagrams & Manuals
10T502-0260-H1 Engine View Diagrams & Manuals
10T502-0262-B1 Engine View Diagrams & Manuals
10T502-0263-B1 Engine View Diagrams & Manuals
10T502-0263-H1 Engine View Diagrams & Manuals
10T502-0264-B1 Engine View Diagrams & Manuals
10T502-0265-B1 Engine View Diagrams & Manuals
10T502-0267-H1 Engine View Diagrams & Manuals
10T502-0457-B1 Engine View Diagrams & Manuals
10T502-0457-E1 Engine View Diagrams & Manuals
10T502-0495-B1 Engine View Diagrams & Manuals
10T502-0495-E1 Engine View Diagrams & Manuals
10T502-0500-B1 Engine View Diagrams & Manuals
10T502-0500-E1 Engine View Diagrams & Manuals
10T502-0501-B1 Engine View Diagrams & Manuals
10T502-0501-E1 Engine View Diagrams & Manuals
10T502-0550-B1 Engine View Diagrams & Manuals
10T502-0609-B1 Engine View Diagrams & Manuals
10T502-0764-B1 Engine View Diagrams & Manuals
10T502-0764-E1 Engine View Diagrams & Manuals
10T502-0833-B1 Engine View Diagrams & Manuals
10T502-0833-H1 Engine View Diagrams & Manuals
10T502-0838-E1 Engine View Diagrams & Manuals
10T502-0840-E1 Engine View Diagrams & Manuals
10T502-0869-B1 Engine View Diagrams & Manuals
10T502-0931-B1 Engine View Diagrams & Manuals
10T502-0965-H1 Engine View Diagrams & Manuals
10T502-0998-B1 Engine View Diagrams & Manuals
10T502-1000-B1 Engine View Diagrams & Manuals
10T502-1000-H1 Engine View Diagrams & Manuals
10T502-1022-B1 Engine View Diagrams & Manuals
10T502-1023-B1 Engine View Diagrams & Manuals
10T502-1041-B1 Engine View Diagrams & Manuals
10T502-1053-B1 Engine View Diagrams & Manuals
10T502-1056-B1 Engine View Diagrams & Manuals
10T502-1058-B1 Engine View Diagrams & Manuals
10T502-1096-B1 Engine View Diagrams & Manuals
10T502-1111-B1 Engine View Diagrams & Manuals
10T502-1264-B1 Engine View Diagrams & Manuals
10T502-1303-B1 Engine View Diagrams & Manuals
10T502-1316-B1 Engine View Diagrams & Manuals
10T502-1336-B1 Engine View Diagrams & Manuals
10T502-1336-H1 Engine View Diagrams & Manuals
10T502-1414-B1 Engine View Diagrams & Manuals
10T502-1414-H1 Engine View Diagrams & Manuals
10T502-1486-B1 Engine View Diagrams & Manuals
10T502-1542-B1 Engine View Diagrams & Manuals
10T502-2008-B1 Engine View Diagrams & Manuals
10T502-2010-B1 Engine View Diagrams & Manuals
10T502-2011-B1 Engine View Diagrams & Manuals
10T502-2027-B1 Engine View Diagrams & Manuals
10T502-2028-B1 Engine View Diagrams & Manuals
10T502-2028-B2 Engine View Diagrams & Manuals
10T502-2034-B1 Engine View Diagrams & Manuals
10T502-2035-B1 Engine View Diagrams & Manuals
10T502-2110-B1 Engine View Diagrams & Manuals
10T502-3000-H1 Engine View Diagrams & Manuals
10T502-3111-H1 Engine View Diagrams & Manuals
10T502-3116-H1 Engine View Diagrams & Manuals
10T502-3118-H1 Engine View Diagrams & Manuals
10T502-3120-H2 Engine View Diagrams & Manuals
10T502-3127-H1 Engine View Diagrams & Manuals
10T502-3133-H1 Engine View Diagrams & Manuals
10T502-3139-H1 Engine View Diagrams & Manuals
10T502-3140-H1 Engine View Diagrams & Manuals
10T502-3142-H1 Engine View Diagrams & Manuals
10T502-3143-H1 Engine View Diagrams & Manuals
10T502-3144-H1 Engine View Diagrams & Manuals
10T502-3145-H1 Engine View Diagrams & Manuals
10T502-3146-H1 Engine View Diagrams & Manuals
10T502-3147-H1 Engine View Diagrams & Manuals
10T502-3150-H1 Engine View Diagrams & Manuals
10T502-3180-H1 Engine View Diagrams & Manuals
10T502-3184-H1 Engine View Diagrams & Manuals
10T502-3202-H1 Engine View Diagrams & Manuals
10T502-3203-H1 Engine View Diagrams & Manuals
10T502-3210-H1 Engine View Diagrams & Manuals
10T502-3212-H1 Engine View Diagrams & Manuals
10T502-3218-H1 Engine View Diagrams & Manuals
10T502-3219-H1 Engine View Diagrams & Manuals
10T502-3220-H1 Engine View Diagrams & Manuals
10T502-3224-H1 Engine View Diagrams & Manuals
10T502-3257-H1 Engine View Diagrams & Manuals
10T502-3260-H1 Engine View Diagrams & Manuals
10T502-3263-H1 Engine View Diagrams & Manuals
10T502-3336-H1 Engine View Diagrams & Manuals
10T502-3414-H1 Engine View Diagrams & Manuals
10T502-3764-B1 Engine View Diagrams & Manuals
10T502-3833-H1 Engine View Diagrams & Manuals
10T502-3838-B1 Engine View Diagrams & Manuals
10T502-3840-B1 Engine View Diagrams & Manuals
10T602-0001-H1 Engine View Diagrams & Manuals
10T602-0110-H1 Engine View Diagrams & Manuals
10T602-0111-B1 Engine View Diagrams & Manuals
10T602-0111-E1 Engine View Diagrams & Manuals
10T602-0112-E1 Engine View Diagrams & Manuals
10T602-0113-B1 Engine View Diagrams & Manuals
10T602-0114-B1 Engine View Diagrams & Manuals
10T602-0115-B1 Engine View Diagrams & Manuals
10T602-0116-B1 Engine View Diagrams & Manuals
10T602-0117-B1 Engine View Diagrams & Manuals
10T602-0117-H1 Engine View Diagrams & Manuals
10T602-0119-B1 Engine View Diagrams & Manuals
10T602-0119-H1 Engine View Diagrams & Manuals
10T602-0120-B1 Engine View Diagrams & Manuals
10T602-0120-H1 Engine View Diagrams & Manuals
10T602-0121-B1 Engine View Diagrams & Manuals
10T602-0122-B1 Engine View Diagrams & Manuals
10T602-0124-H1 Engine View Diagrams & Manuals
10T602-0125-H1 Engine View Diagrams & Manuals
10T602-0127-B1 Engine View Diagrams & Manuals
10T602-0128-B1 Engine View Diagrams & Manuals
10T602-0130-B1 Engine View Diagrams & Manuals
10T602-0130-H1 Engine View Diagrams & Manuals
10T602-0131-B1 Engine View Diagrams & Manuals
10T602-0131-H1 Engine View Diagrams & Manuals
10T602-0132-B1 Engine View Diagrams & Manuals
10T602-0132-H1 Engine View Diagrams & Manuals
10T602-0132-H7 Engine View Diagrams & Manuals
10T602-0133-B1 Engine View Diagrams & Manuals
10T602-0133-H1 Engine View Diagrams & Manuals
10T602-0135-B1 Engine View Diagrams & Manuals
10T602-0135-H1 Engine View Diagrams & Manuals
10T602-0136-B1 Engine View Diagrams & Manuals
10T602-0137-B1 Engine View Diagrams & Manuals
10T602-0137-H1 Engine View Diagrams & Manuals
10T602-0140-B1 Engine View Diagrams & Manuals
10T602-0140-H1 Engine View Diagrams & Manuals
10T602-0141-B1 Engine View Diagrams & Manuals
10T602-0142-B1 Engine View Diagrams & Manuals
10T602-0142-H1 Engine View Diagrams & Manuals
10T602-0143-B1 Engine View Diagrams & Manuals
10T602-0143-H1 Engine View Diagrams & Manuals
10T602-0144-B1 Engine View Diagrams & Manuals
10T602-0144-H1 Engine View Diagrams & Manuals
10T602-0145-B1 Engine View Diagrams & Manuals
10T602-0146-B1 Engine View Diagrams & Manuals
10T602-0146-H1 Engine View Diagrams & Manuals
10T602-0147-H1 Engine View Diagrams & Manuals
10T602-0149-H1 Engine View Diagrams & Manuals
10T602-0150-H1 Engine View Diagrams & Manuals
10T602-0181-B1 Engine View Diagrams & Manuals
10T602-0181-H1 Engine View Diagrams & Manuals
10T602-0182-B1 Engine View Diagrams & Manuals
10T602-0182-H1 Engine View Diagrams & Manuals
10T602-0183-B1 Engine View Diagrams & Manuals
10T602-0183-H1 Engine View Diagrams & Manuals
10T602-0184-B1 Engine View Diagrams & Manuals
10T602-0184-H1 Engine View Diagrams & Manuals
10T602-0185-B1 Engine View Diagrams & Manuals
10T602-0185-H1 Engine View Diagrams & Manuals
10T602-0187-H1 Engine View Diagrams & Manuals
10T602-0189-H1 Engine View Diagrams & Manuals
10T602-0191-H1 Engine View Diagrams & Manuals
10T602-0193-H1 Engine View Diagrams & Manuals
10T602-0194-H1 Engine View Diagrams & Manuals
10T602-0195-H1 Engine View Diagrams & Manuals
10T602-0196-H1 Engine View Diagrams & Manuals
10T602-0199-H1 Engine View Diagrams & Manuals
10T602-0201-H1 Engine View Diagrams & Manuals
10T602-0556-B1 Engine View Diagrams & Manuals
10T602-0705-B1 Engine View Diagrams & Manuals
10T602-0705-E1 Engine View Diagrams & Manuals
10T602-0745-B1 Engine View Diagrams & Manuals
10T602-0916-B1 Engine View Diagrams & Manuals
10T602-0973-H1 Engine View Diagrams & Manuals
10T602-1010-B1 Engine View Diagrams & Manuals
10T602-1085-B1 Engine View Diagrams & Manuals
10T602-1622-H1 Engine View Diagrams & Manuals
10T602-3117-H1 Engine View Diagrams & Manuals
10T602-3119-H1 Engine View Diagrams & Manuals
10T602-3120-H1 Engine View Diagrams & Manuals
10T602-3130-H1 Engine View Diagrams & Manuals
10T602-3130-H7 Engine View Diagrams & Manuals
10T602-3131-H1 Engine View Diagrams & Manuals
10T602-3132-H1 Engine View Diagrams & Manuals
10T602-3133-H1 Engine View Diagrams & Manuals
10T602-3135-H1 Engine View Diagrams & Manuals
10T602-3137-H1 Engine View Diagrams & Manuals
10T602-3140-H1 Engine View Diagrams & Manuals
10T602-3142-H1 Engine View Diagrams & Manuals
10T602-3143-H1 Engine View Diagrams & Manuals
10T602-3144-H1 Engine View Diagrams & Manuals
10T602-3145-H1 Engine View Diagrams & Manuals
10T602-3181-H1 Engine View Diagrams & Manuals
10T602-3182-H1 Engine View Diagrams & Manuals
10T602-3183-H1 Engine View Diagrams & Manuals
10T602-3184-H1 Engine View Diagrams & Manuals
10T602-3705-B1 Engine View Diagrams & Manuals
10T602-4022-B1 Engine View Diagrams & Manuals
10T602-4222-B1 Engine View Diagrams & Manuals
10T602-4316-B1 Engine View Diagrams & Manuals
10T602-4457-B1 Engine View Diagrams & Manuals
10T602-5745-B1 Engine View Diagrams & Manuals
10T702-0113-B1 Engine View Diagrams & Manuals
10T702-0114-B1 Engine View Diagrams & Manuals
10T702-0114-H1 Engine View Diagrams & Manuals
10T702-0117-B1 Engine View Diagrams & Manuals
10T702-0123-B1 Engine View Diagrams & Manuals
10T702-0124-B1 Engine View Diagrams & Manuals
10T702-0127-B1 Engine View Diagrams & Manuals
10T702-0130-B1 Engine View Diagrams & Manuals
10T702-0131-B1 Engine View Diagrams & Manuals
10T702-0132-B1 Engine View Diagrams & Manuals
10T702-0498-B1 Engine View Diagrams & Manuals
10T702-0498-E1 Engine View Diagrams & Manuals
10T702-0735-B1 Engine View Diagrams & Manuals
10T702-0735-E1 Engine View Diagrams & Manuals
10T702-0808-B1 Engine View Diagrams & Manuals
10T702-0808-E1 Engine View Diagrams & Manuals
10T702-0843-B1 Engine View Diagrams & Manuals
10T702-0843-E1 Engine View Diagrams & Manuals
10T702-0857-B1 Engine View Diagrams & Manuals
10T702-0857-E1 Engine View Diagrams & Manuals
10T702-0870-B1 Engine View Diagrams & Manuals
10T702-0874-B1 Engine View Diagrams & Manuals
10T702-0934-B1 Engine View Diagrams & Manuals
10T702-0934-H1 Engine View Diagrams & Manuals
10T702-0944-B1 Engine View Diagrams & Manuals
10T702-1074-B1 Engine View Diagrams & Manuals
10T702-1507-B1 Engine View Diagrams & Manuals
10T702-1507-H1 Engine View Diagrams & Manuals
10T702-3114-H1 Engine View Diagrams & Manuals
10T702-3507-H1 Engine View Diagrams & Manuals
10T702-3735-B1 Engine View Diagrams & Manuals
10T702-3808-B1 Engine View Diagrams & Manuals
10T702-3843-B1 Engine View Diagrams & Manuals
10T702-3857-B1 Engine View Diagrams & Manuals
10T702-3934-H1 Engine View Diagrams & Manuals
10T802-0002-H1 Engine View Diagrams & Manuals
10T802-0004-B1 Engine View Diagrams & Manuals
10T802-0006-B1 Engine View Diagrams & Manuals
10T802-0015-B1 Engine View Diagrams & Manuals
10T802-0015-E1 Engine View Diagrams & Manuals
10T802-0015-H1 Engine View Diagrams & Manuals
10T802-0016-B1 Engine View Diagrams & Manuals
10T802-0016-E1 Engine View Diagrams & Manuals
10T802-0016-H1 Engine View Diagrams & Manuals
10T802-0018-B1 Engine View Diagrams & Manuals
10T802-0018-E1 Engine View Diagrams & Manuals
10T802-0110-B1 Engine View Diagrams & Manuals
10T802-0111-B1 Engine View Diagrams & Manuals
10T802-0112-B1 Engine View Diagrams & Manuals
10T802-0114-B1 Engine View Diagrams & Manuals
10T802-0115-B1 Engine View Diagrams & Manuals
10T802-0115-H1 Engine View Diagrams & Manuals
10T802-0116-B1 Engine View Diagrams & Manuals
10T802-0118-B1 Engine View Diagrams & Manuals
10T802-0119-B1 Engine View Diagrams & Manuals
10T802-0120-B1 Engine View Diagrams & Manuals
10T802-0121-B1 Engine View Diagrams & Manuals
10T802-0122-B1 Engine View Diagrams & Manuals
10T802-0123-B1 Engine View Diagrams & Manuals
10T802-0124-B1 Engine View Diagrams & Manuals
10T802-0125-B1 Engine View Diagrams & Manuals
10T802-0126-B1 Engine View Diagrams & Manuals
10T802-0127-B1 Engine View Diagrams & Manuals
10T802-0128-B1 Engine View Diagrams & Manuals
10T802-0128-H1 Engine View Diagrams & Manuals
10T802-0129-B1 Engine View Diagrams & Manuals
10T802-0130-B1 Engine View Diagrams & Manuals
10T802-0130-H1 Engine View Diagrams & Manuals
10T802-0131-B1 Engine View Diagrams & Manuals
10T802-0132-B1 Engine View Diagrams & Manuals
10T802-0132-H1 Engine View Diagrams & Manuals
10T802-0134-B1 Engine View Diagrams & Manuals
10T802-0135-B1 Engine View Diagrams & Manuals
10T802-0135-H1 Engine View Diagrams & Manuals
10T802-0136-B1 Engine View Diagrams & Manuals
10T802-0136-H1 Engine View Diagrams & Manuals
10T802-0137-B1 Engine View Diagrams & Manuals
10T802-0138-B1 Engine View Diagrams & Manuals
10T802-0139-B1 Engine View Diagrams & Manuals
10T802-0140-B1 Engine View Diagrams & Manuals
10T802-0142-B1 Engine View Diagrams & Manuals
10T802-0143-B1 Engine View Diagrams & Manuals
10T802-0145-B1 Engine View Diagrams & Manuals
10T802-0145-H1 Engine View Diagrams & Manuals
10T802-0147-B1 Engine View Diagrams & Manuals
10T802-0148-B1 Engine View Diagrams & Manuals
10T802-0149-B1 Engine View Diagrams & Manuals
10T802-0151-B1 Engine View Diagrams & Manuals
10T802-0152-B1 Engine View Diagrams & Manuals
10T802-0153-B1 Engine View Diagrams & Manuals
10T802-0153-H1 Engine View Diagrams & Manuals
10T802-0154-B1 Engine View Diagrams & Manuals
10T802-0154-H1 Engine View Diagrams & Manuals
10T802-0155-B1 Engine View Diagrams & Manuals
10T802-0155-H1 Engine View Diagrams & Manuals
10T802-0156-B1 Engine View Diagrams & Manuals
10T802-0157-B1 Engine View Diagrams & Manuals
10T802-0157-H1 Engine View Diagrams & Manuals
10T802-0158-B1 Engine View Diagrams & Manuals
10T802-0158-H1 Engine View Diagrams & Manuals
10T802-0159-B1 Engine View Diagrams & Manuals
10T802-0159-H1 Engine View Diagrams & Manuals
10T802-0161-B1 Engine View Diagrams & Manuals
10T802-0161-H1 Engine View Diagrams & Manuals
10T802-0164-B1 Engine View Diagrams & Manuals
10T802-0164-H1 Engine View Diagrams & Manuals
10T802-0165-B1 Engine View Diagrams & Manuals
10T802-0165-H1 Engine View Diagrams & Manuals
10T802-0169-B1 Engine View Diagrams & Manuals
10T802-0169-H1 Engine View Diagrams & Manuals
10T802-0170-B1 Engine View Diagrams & Manuals
10T802-0170-H1 Engine View Diagrams & Manuals
10T802-0172-B1 Engine View Diagrams & Manuals
10T802-0173-B1 Engine View Diagrams & Manuals
10T802-0175-B1 Engine View Diagrams & Manuals
10T802-0175-H1 Engine View Diagrams & Manuals
10T802-0176-B1 Engine View Diagrams & Manuals
10T802-0177-B1 Engine View Diagrams & Manuals
10T802-0180-B1 Engine View Diagrams & Manuals
10T802-0180-H1 Engine View Diagrams & Manuals
10T802-0183-B1 Engine View Diagrams & Manuals
10T802-0183-H1 Engine View Diagrams & Manuals
10T802-0185-B1 Engine View Diagrams & Manuals
10T802-0186-B1 Engine View Diagrams & Manuals
10T802-0186-H1 Engine View Diagrams & Manuals
10T802-0188-H1 Engine View Diagrams & Manuals
10T802-0190-H1 Engine View Diagrams & Manuals
10T802-0191-H1 Engine View Diagrams & Manuals
10T802-0192-B1 Engine View Diagrams & Manuals
10T802-0196-B1 Engine View Diagrams & Manuals
10T802-0197-B1 Engine View Diagrams & Manuals
10T802-0198-B1 Engine View Diagrams & Manuals
10T802-0198-H1 Engine View Diagrams & Manuals
10T802-0201-H1 Engine View Diagrams & Manuals
10T802-0202-H1 Engine View Diagrams & Manuals
10T802-0203-H1 Engine View Diagrams & Manuals
10T802-0204-H1 Engine View Diagrams & Manuals
10T802-0205-H1 Engine View Diagrams & Manuals
10T802-0206-H1 Engine View Diagrams & Manuals
10T802-0207-H1 Engine View Diagrams & Manuals
10T802-0208-H1 Engine View Diagrams & Manuals
10T802-0211-H1 Engine View Diagrams & Manuals
10T802-0248-B1 Engine View Diagrams & Manuals
10T802-0249-B1 Engine View Diagrams & Manuals
10T802-0257-H1 Engine View Diagrams & Manuals
10T802-0272-B1 Engine View Diagrams & Manuals
10T802-0462-B1 Engine View Diagrams & Manuals
10T802-0462-E1 Engine View Diagrams & Manuals
10T802-0483-B1 Engine View Diagrams & Manuals
10T802-0497-B1 Engine View Diagrams & Manuals
10T802-0497-E1 Engine View Diagrams & Manuals
10T802-0547-B1 Engine View Diagrams & Manuals
10T802-0547-B2 Engine View Diagrams & Manuals
10T802-0547-B3 Engine View Diagrams & Manuals
10T802-0694-B2 Engine View Diagrams & Manuals
10T802-0708-B1 Engine View Diagrams & Manuals
10T802-0708-E1 Engine View Diagrams & Manuals
10T802-0710-B1 Engine View Diagrams & Manuals
10T802-0711-B1 Engine View Diagrams & Manuals
10T802-0716-B1 Engine View Diagrams & Manuals
10T802-0716-E1 Engine View Diagrams & Manuals
10T802-0776-B1 Engine View Diagrams & Manuals
10T802-0778-B1 Engine View Diagrams & Manuals
10T802-0780-B1 Engine View Diagrams & Manuals
10T802-0793-B1 Engine View Diagrams & Manuals
10T802-0823-B1 Engine View Diagrams & Manuals
10T802-0878-B1 Engine View Diagrams & Manuals
10T802-0879-B1 Engine View Diagrams & Manuals
10T802-1025-B1 Engine View Diagrams & Manuals
10T802-1059-B1 Engine View Diagrams & Manuals
10T802-1086-B1 Engine View Diagrams & Manuals
10T802-1095-B1 Engine View Diagrams & Manuals
10T802-1095-E1 Engine View Diagrams & Manuals
10T802-1098-B1 Engine View Diagrams & Manuals
10T802-1130-B1 Engine View Diagrams & Manuals
10T802-1132-B1 Engine View Diagrams & Manuals
10T802-1162-B1 Engine View Diagrams & Manuals
10T802-1165-B1 Engine View Diagrams & Manuals
10T802-1166-H1 Engine View Diagrams & Manuals
10T802-1228-B1 Engine View Diagrams & Manuals
10T802-1228-H1 Engine View Diagrams & Manuals
10T802-1238-B1 Engine View Diagrams & Manuals
10T802-1244-B1 Engine View Diagrams & Manuals
10T802-1248-B1 Engine View Diagrams & Manuals
10T802-1253-B1 Engine View Diagrams & Manuals
10T802-1327-B1 Engine View Diagrams & Manuals
10T802-1332-B1 Engine View Diagrams & Manuals
10T802-1333-B1 Engine View Diagrams & Manuals
10T802-1341-B1 Engine View Diagrams & Manuals
10T802-1390-B1 Engine View Diagrams & Manuals
10T802-1397-B1 Engine View Diagrams & Manuals
10T802-1433-B1 Engine View Diagrams & Manuals
10T802-1450-B1 Engine View Diagrams & Manuals
10T802-1450-H1 Engine View Diagrams & Manuals
10T802-1570-B1 Engine View Diagrams & Manuals
10T802-1570-H1 Engine View Diagrams & Manuals
10T802-1585-B1 Engine View Diagrams & Manuals
10T802-1585-H1 Engine View Diagrams & Manuals
10T802-1626-H1 Engine View Diagrams & Manuals
10T802-3098-B1 Engine View Diagrams & Manuals
10T802-3238-B1 Engine View Diagrams & Manuals
10T802-3244-B1 Engine View Diagrams & Manuals
10T802-3253-B1 Engine View Diagrams & Manuals
10T802-3327-B1 Engine View Diagrams & Manuals
10T802-3390-B1 Engine View Diagrams & Manuals
10T802-3433-B1 Engine View Diagrams & Manuals
10T802-3497-B1 Engine View Diagrams & Manuals
10T802-3547-B2 Engine View Diagrams & Manuals
10T802-3708-B1 Engine View Diagrams & Manuals
10T802-3711-B1 Engine View Diagrams & Manuals
10T802-3716-B1 Engine View Diagrams & Manuals
10T802-3776-B1 Engine View Diagrams & Manuals
10T802-3778-B1 Engine View Diagrams & Manuals
10T802-3780-B1 Engine View Diagrams & Manuals
10T802-3793-B1 Engine View Diagrams & Manuals
10T802-4015-H1 Engine View Diagrams & Manuals
10T802-4016-H1 Engine View Diagrams & Manuals
10T802-4115-H1 Engine View Diagrams & Manuals
10T802-4128-H1 Engine View Diagrams & Manuals
10T802-4130-H1 Engine View Diagrams & Manuals
10T802-4132-H1 Engine View Diagrams & Manuals
10T802-4135-H1 Engine View Diagrams & Manuals
10T802-4136-H1 Engine View Diagrams & Manuals
10T802-4145-H1 Engine View Diagrams & Manuals
10T802-4145-H7 Engine View Diagrams & Manuals
10T802-4153-H1 Engine View Diagrams & Manuals
10T802-4154-H1 Engine View Diagrams & Manuals
10T802-4154-H7 Engine View Diagrams & Manuals
10T802-4155-H1 Engine View Diagrams & Manuals
10T802-4157-H1 Engine View Diagrams & Manuals
10T802-4158-H1 Engine View Diagrams & Manuals
10T802-4161-H1 Engine View Diagrams & Manuals
10T802-4164-H1 Engine View Diagrams & Manuals
10T802-4165-H1 Engine View Diagrams & Manuals
10T802-4175-H1 Engine View Diagrams & Manuals
10T802-4180-H1 Engine View Diagrams & Manuals
10T802-4183-H1 Engine View Diagrams & Manuals
10T802-4198-H1 Engine View Diagrams & Manuals
10T802-4228-H1 Engine View Diagrams & Manuals
10T802-4450-H1 Engine View Diagrams & Manuals
10T802-4570-H1 Engine View Diagrams & Manuals
10T802-4585-H1 Engine View Diagrams & Manuals
10T802-5098-B1 Engine View Diagrams & Manuals
10T802-5172-B1 Engine View Diagrams & Manuals
10T802-5238-B1 Engine View Diagrams & Manuals
10T802-5244-B1 Engine View Diagrams & Manuals
10T802-5253-B1 Engine View Diagrams & Manuals
10T802-5390-B1 Engine View Diagrams & Manuals
10T802-5433-B1 Engine View Diagrams & Manuals
10T802-5497-B1 Engine View Diagrams & Manuals
10T802-5547-B2 Engine View Diagrams & Manuals
10T802-5711-B1 Engine View Diagrams & Manuals
10T802-5776-B1 Engine View Diagrams & Manuals
10T802-5778-B1 Engine View Diagrams & Manuals
10T802-5780-B1 Engine View Diagrams & Manuals
10T802-5879-B1 Engine View Diagrams & Manuals
10T812-0005-B1 Engine View Diagrams & Manuals
10T812-0005-E1 Engine View Diagrams & Manuals
222496-0631-01 Engine View Diagrams & Manuals
110702-0015-01 Engine View Diagrams & Manuals
110702-0025-01 Engine View Diagrams & Manuals
110702-0026-01 Engine View Diagrams & Manuals
110702-0100-01 Engine View Diagrams & Manuals
110702-0102-01 Engine View Diagrams & Manuals
110702-0160-01 Engine View Diagrams & Manuals
110702-0161-01 Engine View Diagrams & Manuals
110702-0161-02 Engine View Diagrams & Manuals
110702-0164-01 Engine View Diagrams & Manuals
110702-0165-01 Engine View Diagrams & Manuals
110702-0172-01 Engine View Diagrams & Manuals
110702-0180-01 Engine View Diagrams & Manuals
110702-0180-02 Engine View Diagrams & Manuals
110702-0180-03 Engine View Diagrams & Manuals
110702-0181-01 Engine View Diagrams & Manuals
110702-0181-02 Engine View Diagrams & Manuals
110702-0181-03 Engine View Diagrams & Manuals
110702-0181-04 Engine View Diagrams & Manuals
110702-0181-05 Engine View Diagrams & Manuals
110702-0183-01 Engine View Diagrams & Manuals
110702-0187-01 Engine View Diagrams & Manuals
110702-0188-01 Engine View Diagrams & Manuals
110702-0195-01 Engine View Diagrams & Manuals
110702-0195-02 Engine View Diagrams & Manuals
110702-0207-01 Engine View Diagrams & Manuals
110702-0207-99 Engine View Diagrams & Manuals
110702-0209-01 Engine View Diagrams & Manuals
110702-0210-01 Engine View Diagrams & Manuals
110702-0211-01 Engine View Diagrams & Manuals
110702-0214-01 Engine View Diagrams & Manuals
110702-0214-02 Engine View Diagrams & Manuals
110702-0221-01 Engine View Diagrams & Manuals
110702-0223-01 Engine View Diagrams & Manuals
110702-0224-01 Engine View Diagrams & Manuals
110702-0225-01 Engine View Diagrams & Manuals
110702-0227-01 Engine View Diagrams & Manuals
110702-0227-02 Engine View Diagrams & Manuals
110702-0228-01 Engine View Diagrams & Manuals
110702-0237-99 Engine View Diagrams & Manuals
110702-0239-01 Engine View Diagrams & Manuals
110702-0242-01 Engine View Diagrams & Manuals
110702-0245-01 Engine View Diagrams & Manuals
110702-0246-01 Engine View Diagrams & Manuals
110702-0246-02 Engine View Diagrams & Manuals
110702-0246-03 Engine View Diagrams & Manuals
110702-0247-01 Engine View Diagrams & Manuals
110702-0247-02 Engine View Diagrams & Manuals
110702-0248-01 Engine View Diagrams & Manuals
110702-0250-01 Engine View Diagrams & Manuals
110702-0250-02 Engine View Diagrams & Manuals
110702-0251-01 Engine View Diagrams & Manuals
110702-0253-01 Engine View Diagrams & Manuals
110702-0255-01 Engine View Diagrams & Manuals
110702-0256-01 Engine View Diagrams & Manuals
110702-0260-01 Engine View Diagrams & Manuals
110702-0261-01 Engine View Diagrams & Manuals
110702-0262-01 Engine View Diagrams & Manuals
110702-0268-01 Engine View Diagrams & Manuals
110702-0268-02 Engine View Diagrams & Manuals
110702-0269-01 Engine View Diagrams & Manuals
110702-0270-01 Engine View Diagrams & Manuals
110702-0271-01 Engine View Diagrams & Manuals
110702-0274-01 Engine View Diagrams & Manuals
110702-0275-01 Engine View Diagrams & Manuals
110702-0304-01 Engine View Diagrams & Manuals
110702-3000-01 Engine View Diagrams & Manuals
110702-3060-01 Engine View Diagrams & Manuals
110702-3061-01 Engine View Diagrams & Manuals
110702-3066-01 Engine View Diagrams & Manuals
110702-3066-02 Engine View Diagrams & Manuals
110702-3067-01 Engine View Diagrams & Manuals
110702-3071-01 Engine View Diagrams & Manuals
110702-3071-02 Engine View Diagrams & Manuals
110702-3072-01 Engine View Diagrams & Manuals
110702-3073-01 Engine View Diagrams & Manuals
110702-3077-01 Engine View Diagrams & Manuals
110702-3077-02 Engine View Diagrams & Manuals
110702-3081-01 Engine View Diagrams & Manuals
110702-3083-01 Engine View Diagrams & Manuals
110702-3085-01 Engine View Diagrams & Manuals
110702-3087-01 Engine View Diagrams & Manuals
110702-3090-01 Engine View Diagrams & Manuals
110702-3090-02 Engine View Diagrams & Manuals
110702-3094-01 Engine View Diagrams & Manuals
110702-3097-01 Engine View Diagrams & Manuals
110702-3101-01 Engine View Diagrams & Manuals
110702-3103-01 Engine View Diagrams & Manuals
110702-3104-01 Engine View Diagrams & Manuals
110702-3104-02 Engine View Diagrams & Manuals
110702-3106-01 Engine View Diagrams & Manuals
110702-3106-02 Engine View Diagrams & Manuals
110702-3108-01 Engine View Diagrams & Manuals
110702-3109-01 Engine View Diagrams & Manuals
110702-3109-02 Engine View Diagrams & Manuals
110702-3109-03 Engine View Diagrams & Manuals
110702-3109-04 Engine View Diagrams & Manuals
110702-3110-01 Engine View Diagrams & Manuals
110702-3110-02 Engine View Diagrams & Manuals
110702-3112-01 Engine View Diagrams & Manuals
110702-3116-01 Engine View Diagrams & Manuals
110702-3118-01 Engine View Diagrams & Manuals
110702-3118-02 Engine View Diagrams & Manuals
110702-3119-01 Engine View Diagrams & Manuals
110702-3120-01 Engine View Diagrams & Manuals
110702-3121-01 Engine View Diagrams & Manuals
110702-3125-01 Engine View Diagrams & Manuals
110702-3128-01 Engine View Diagrams & Manuals
110702-3133-01 Engine View Diagrams & Manuals
110702-3134-01 Engine View Diagrams & Manuals
110702-3138-01 Engine View Diagrams & Manuals
110702-3147-01 Engine View Diagrams & Manuals
110702-3147-02 Engine View Diagrams & Manuals
110702-3148-01 Engine View Diagrams & Manuals
110702-3153-01 Engine View Diagrams & Manuals
110702-3153-02 Engine View Diagrams & Manuals
110702-3159-01 Engine View Diagrams & Manuals
110702-3160-99 Engine View Diagrams & Manuals
110702-3161-01 Engine View Diagrams & Manuals
110702-3162-01 Engine View Diagrams & Manuals
110702-3163-01 Engine View Diagrams & Manuals
110702-3164-01 Engine View Diagrams & Manuals
110702-3167-01 Engine View Diagrams & Manuals
110702-3171-01 Engine View Diagrams & Manuals
110702-3177-01 Engine View Diagrams & Manuals
110702-3177-02 Engine View Diagrams & Manuals
110702-3179-01 Engine View Diagrams & Manuals
110702-3180-01 Engine View Diagrams & Manuals
110702-3181-01 Engine View Diagrams & Manuals
110702-3183-01 Engine View Diagrams & Manuals
110702-3186-01 Engine View Diagrams & Manuals
110702-3188-01 Engine View Diagrams & Manuals
110702-3188-02 Engine View Diagrams & Manuals
110702-3190-01 Engine View Diagrams & Manuals
110702-3191-01 Engine View Diagrams & Manuals
110702-3193-01 Engine View Diagrams & Manuals
110702-3196-01 Engine View Diagrams & Manuals
110702-3196-02 Engine View Diagrams & Manuals
110702-3196-03 Engine View Diagrams & Manuals
110702-3199-01 Engine View Diagrams & Manuals
110702-3201-01 Engine View Diagrams & Manuals
110702-3202-01 Engine View Diagrams & Manuals
110702-3203-01 Engine View Diagrams & Manuals
110702-3203-02 Engine View Diagrams & Manuals
110702-3205-01 Engine View Diagrams & Manuals
110702-3205-02 Engine View Diagrams & Manuals
110702-3205-03 Engine View Diagrams & Manuals
110702-3209-01 Engine View Diagrams & Manuals
110702-3209-02 Engine View Diagrams & Manuals
110702-3213-01 Engine View Diagrams & Manuals
110702-3214-01 Engine View Diagrams & Manuals
110702-3219-01 Engine View Diagrams & Manuals
110702-3221-01 Engine View Diagrams & Manuals
110702-3222-01 Engine View Diagrams & Manuals
110702-3222-02 Engine View Diagrams & Manuals
110702-3225-01 Engine View Diagrams & Manuals
110702-3226-01 Engine View Diagrams & Manuals
110702-3715-01 Engine View Diagrams & Manuals
110702-3716-01 Engine View Diagrams & Manuals
110702-3717-01 Engine View Diagrams & Manuals
110702-3718-01 Engine View Diagrams & Manuals
110707-0101-01 Engine View Diagrams & Manuals
110707-0189-01 Engine View Diagrams & Manuals
110707-0189-02 Engine View Diagrams & Manuals
110707-0192-01 Engine View Diagrams & Manuals
110707-0192-02 Engine View Diagrams & Manuals
110707-0193-01 Engine View Diagrams & Manuals
110707-0200-01 Engine View Diagrams & Manuals
110707-0222-01 Engine View Diagrams & Manuals
110707-0232-01 Engine View Diagrams & Manuals
110707-0233-01 Engine View Diagrams & Manuals
110707-0244-01 Engine View Diagrams & Manuals
110707-0249-01 Engine View Diagrams & Manuals
110707-0254-01 Engine View Diagrams & Manuals
110707-0258-01 Engine View Diagrams & Manuals
110707-0273-01 Engine View Diagrams & Manuals
110707-0302-01 Engine View Diagrams & Manuals
110707-3036-01 Engine View Diagrams & Manuals
110707-3069-01 Engine View Diagrams & Manuals
110707-3099-01 Engine View Diagrams & Manuals
110708-0226-01 Engine View Diagrams & Manuals
110708-0235-01 Engine View Diagrams & Manuals
110708-0237-01 Engine View Diagrams & Manuals
110708-0252-01 Engine View Diagrams & Manuals
110708-0257-01 Engine View Diagrams & Manuals
110708-0263-01 Engine View Diagrams & Manuals
110708-0301-01 Engine View Diagrams & Manuals
110708-3006-01 Engine View Diagrams & Manuals
110708-3132-01 Engine View Diagrams & Manuals
110782-0050-01 Engine View Diagrams & Manuals
110782-0051-01 Engine View Diagrams & Manuals
110782-0052-01 Engine View Diagrams & Manuals
110782-0053-01 Engine View Diagrams & Manuals
110782-0162-01 Engine View Diagrams & Manuals
110782-0163-01 Engine View Diagrams & Manuals
110782-0163-02 Engine View Diagrams & Manuals
110782-0166-01 Engine View Diagrams & Manuals
110782-0167-01 Engine View Diagrams & Manuals
110782-0169-01 Engine View Diagrams & Manuals
110782-0177-01 Engine View Diagrams & Manuals
110782-0179-01 Engine View Diagrams & Manuals
110782-0179-02 Engine View Diagrams & Manuals
110782-0184-01 Engine View Diagrams & Manuals
110782-0191-01 Engine View Diagrams & Manuals
110782-0191-02 Engine View Diagrams & Manuals
110782-0194-01 Engine View Diagrams & Manuals
110782-0196-01 Engine View Diagrams & Manuals
110782-0196-02 Engine View Diagrams & Manuals
110782-0197-01 Engine View Diagrams & Manuals
110782-0198-01 Engine View Diagrams & Manuals
110782-0205-01 Engine View Diagrams & Manuals
110782-0206-01 Engine View Diagrams & Manuals
110782-0217-01 Engine View Diagrams & Manuals
110782-0218-01 Engine View Diagrams & Manuals
110782-0230-01 Engine View Diagrams & Manuals
110782-0234-01 Engine View Diagrams & Manuals
110782-0236-01 Engine View Diagrams & Manuals
110782-0241-01 Engine View Diagrams & Manuals
110782-0243-01 Engine View Diagrams & Manuals
110782-0259-01 Engine View Diagrams & Manuals
110782-0272-01 Engine View Diagrams & Manuals
110782-3062-01 Engine View Diagrams & Manuals
110782-3063-01 Engine View Diagrams & Manuals
110782-3063-02 Engine View Diagrams & Manuals
110782-3065-01 Engine View Diagrams & Manuals
110782-3068-01 Engine View Diagrams & Manuals
110782-3068-02 Engine View Diagrams & Manuals
110782-3076-01 Engine View Diagrams & Manuals
110782-3076-02 Engine View Diagrams & Manuals
110782-3078-01 Engine View Diagrams & Manuals
110782-3078-02 Engine View Diagrams & Manuals
110782-3080-01 Engine View Diagrams & Manuals
110782-3082-01 Engine View Diagrams & Manuals
110782-3086-01 Engine View Diagrams & Manuals
110782-3091-01 Engine View Diagrams & Manuals
110782-3095-01 Engine View Diagrams & Manuals
110782-3098-01 Engine View Diagrams & Manuals
110782-3105-01 Engine View Diagrams & Manuals
110782-3124-01 Engine View Diagrams & Manuals
110782-3129-01 Engine View Diagrams & Manuals
110782-3129-02 Engine View Diagrams & Manuals
110782-3136-01 Engine View Diagrams & Manuals
110782-3139-01 Engine View Diagrams & Manuals
110782-3146-01 Engine View Diagrams & Manuals
110782-3151-01 Engine View Diagrams & Manuals
110782-3155-01 Engine View Diagrams & Manuals
110782-3156-01 Engine View Diagrams & Manuals
110782-3157-01 Engine View Diagrams & Manuals
110782-3160-01 Engine View Diagrams & Manuals
110782-3166-01 Engine View Diagrams & Manuals
110782-3168-01 Engine View Diagrams & Manuals
110782-3169-01 Engine View Diagrams & Manuals
110782-3172-01 Engine View Diagrams & Manuals
110782-3173-01 Engine View Diagrams & Manuals
110782-3178-01 Engine View Diagrams & Manuals
110782-3184-01 Engine View Diagrams & Manuals
110782-3184-02 Engine View Diagrams & Manuals
110782-3187-01 Engine View Diagrams & Manuals
110782-3189-01 Engine View Diagrams & Manuals
110782-3192-01 Engine View Diagrams & Manuals
110782-3194-01 Engine View Diagrams & Manuals
110782-3197-01 Engine View Diagrams & Manuals
110782-3197-02 Engine View Diagrams & Manuals
110782-3197-03 Engine View Diagrams & Manuals
110782-3198-01 Engine View Diagrams & Manuals
110782-3198-02 Engine View Diagrams & Manuals
110782-3204-01 Engine View Diagrams & Manuals
110782-3206-01 Engine View Diagrams & Manuals
110782-3210-01 Engine View Diagrams & Manuals
110782-3212-01 Engine View Diagrams & Manuals
110782-3216-01 Engine View Diagrams & Manuals
110782-3217-01 Engine View Diagrams & Manuals
110782-3220-01 Engine View Diagrams & Manuals
110782-3223-01 Engine View Diagrams & Manuals
110782-3223-02 Engine View Diagrams & Manuals
110782-3750-01 Engine View Diagrams & Manuals
110782-3751-01 Engine View Diagrams & Manuals
110782-3752-01 Engine View Diagrams & Manuals
110782-3753-01 Engine View Diagrams & Manuals
110787-0185-01 Engine View Diagrams & Manuals
110787-0186-01 Engine View Diagrams & Manuals
110787-0199-01 Engine View Diagrams & Manuals
110787-0202-01 Engine View Diagrams & Manuals
110787-0208-01 Engine View Diagrams & Manuals
110787-0213-01 Engine View Diagrams & Manuals
110787-0213-02 Engine View Diagrams & Manuals
110787-0219-01 Engine View Diagrams & Manuals
110787-0240-01 Engine View Diagrams & Manuals
110787-3064-01 Engine View Diagrams & Manuals
110787-3070-01 Engine View Diagrams & Manuals
110787-3088-01 Engine View Diagrams & Manuals
110787-3089-01 Engine View Diagrams & Manuals
110787-3093-01 Engine View Diagrams & Manuals
110787-3096-01 Engine View Diagrams & Manuals
110787-3107-01 Engine View Diagrams & Manuals
110787-3131-01 Engine View Diagrams & Manuals
110787-3131-02 Engine View Diagrams & Manuals
110787-3137-01 Engine View Diagrams & Manuals
110787-3141-01 Engine View Diagrams & Manuals
110787-3158-01 Engine View Diagrams & Manuals
110787-3175-01 Engine View Diagrams & Manuals
110787-3175-02 Engine View Diagrams & Manuals
110787-3176-01 Engine View Diagrams & Manuals
110787-3185-01 Engine View Diagrams & Manuals
110787-3185-02 Engine View Diagrams & Manuals
110787-3195-01 Engine View Diagrams & Manuals
110787-3195-02 Engine View Diagrams & Manuals
110787-3218-01 Engine View Diagrams & Manuals
110787-3788-01 Engine View Diagrams & Manuals
110788-0061-01 Engine View Diagrams & Manuals
110788-0171-01 Engine View Diagrams & Manuals
110788-0175-01 Engine View Diagrams & Manuals
110788-0182-01 Engine View Diagrams & Manuals
110788-0201-01 Engine View Diagrams & Manuals
110788-0229-01 Engine View Diagrams & Manuals
110788-0231-01 Engine View Diagrams & Manuals
110788-0238-01 Engine View Diagrams & Manuals
110788-0264-01 Engine View Diagrams & Manuals
110788-0265-01 Engine View Diagrams & Manuals
110788-0276-01 Engine View Diagrams & Manuals
110788-0290-01 Engine View Diagrams & Manuals
110788-0300-01 Engine View Diagrams & Manuals
110902-1025-01 Engine View Diagrams & Manuals
110902-1026-01 Engine View Diagrams & Manuals
110902-1027-01 Engine View Diagrams & Manuals
110902-1028-01 Engine View Diagrams & Manuals
110902-1035-01 Engine View Diagrams & Manuals
110902-1044-01 Engine View Diagrams & Manuals
110902-1112-99 Engine View Diagrams & Manuals
110902-1113-99 Engine View Diagrams & Manuals
110902-1114-99 Engine View Diagrams & Manuals
110902-1180-99 Engine View Diagrams & Manuals
110902-1184-99 Engine View Diagrams & Manuals
110902-1185-99 Engine View Diagrams & Manuals
110902-1187-99 Engine View Diagrams & Manuals
110902-1189-99 Engine View Diagrams & Manuals
110902-1197-99 Engine View Diagrams & Manuals
110902-1199-99 Engine View Diagrams & Manuals
110902-1202-01 Engine View Diagrams & Manuals
110902-1205-99 Engine View Diagrams & Manuals
110902-1210-01 Engine View Diagrams & Manuals
110902-1227-01 Engine View Diagrams & Manuals
110902-1232-01 Engine View Diagrams & Manuals
110902-1232-02 Engine View Diagrams & Manuals
110902-1235-01 Engine View Diagrams & Manuals
110902-1243-01 Engine View Diagrams & Manuals
110902-1251-01 Engine View Diagrams & Manuals
110902-1256-01 Engine View Diagrams & Manuals
110902-1281-01 Engine View Diagrams & Manuals
110902-1288-01 Engine View Diagrams & Manuals
110902-1290-01 Engine View Diagrams & Manuals
110902-1292-01 Engine View Diagrams & Manuals
110902-1293-01 Engine View Diagrams & Manuals
110902-1299-01 Engine View Diagrams & Manuals
110902-1301-01 Engine View Diagrams & Manuals
110902-1302-01 Engine View Diagrams & Manuals
110902-1306-01 Engine View Diagrams & Manuals
110902-1307-01 Engine View Diagrams & Manuals
110902-1309-99 Engine View Diagrams & Manuals
110902-1312-01 Engine View Diagrams & Manuals
110902-1313-01 Engine View Diagrams & Manuals
110902-1314-01 Engine View Diagrams & Manuals
110902-1315-01 Engine View Diagrams & Manuals
110902-3015-01 Engine View Diagrams & Manuals
110902-3016-01 Engine View Diagrams & Manuals
110902-3017-01 Engine View Diagrams & Manuals
110902-3018-01 Engine View Diagrams & Manuals
110902-3111-01 Engine View Diagrams & Manuals
110902-3112-01 Engine View Diagrams & Manuals
110902-3113-01 Engine View Diagrams & Manuals
110902-3114-01 Engine View Diagrams & Manuals
110902-3168-01 Engine View Diagrams & Manuals
110902-3168-02 Engine View Diagrams & Manuals
110902-3172-01 Engine View Diagrams & Manuals
110902-3173-01 Engine View Diagrams & Manuals
110902-3174-01 Engine View Diagrams & Manuals
110902-3174-02 Engine View Diagrams & Manuals
110902-3176-01 Engine View Diagrams & Manuals
110902-3179-01 Engine View Diagrams & Manuals
110902-3180-01 Engine View Diagrams & Manuals
110902-3180-02 Engine View Diagrams & Manuals
110902-3181-01 Engine View Diagrams & Manuals
110902-3184-01 Engine View Diagrams & Manuals
110902-3185-01 Engine View Diagrams & Manuals
110902-3187-01 Engine View Diagrams & Manuals
110902-3189-01 Engine View Diagrams & Manuals
110902-3193-01 Engine View Diagrams & Manuals
110902-3197-01 Engine View Diagrams & Manuals
110902-3197-02 Engine View Diagrams & Manuals
110902-3199-01 Engine View Diagrams & Manuals
110902-3202-01 Engine View Diagrams & Manuals
110902-3203-01 Engine View Diagrams & Manuals
110902-3204-01 Engine View Diagrams & Manuals
110902-3205-01 Engine View Diagrams & Manuals
110902-3205-02 Engine View Diagrams & Manuals
110902-3207-01 Engine View Diagrams & Manuals
110902-3208-01 Engine View Diagrams & Manuals
110902-3209-99 Engine View Diagrams & Manuals
110902-3210-01 Engine View Diagrams & Manuals
110902-3212-01 Engine View Diagrams & Manuals
110902-3212-02 Engine View Diagrams & Manuals
110902-3213-01 Engine View Diagrams & Manuals
110902-3215-01 Engine View Diagrams & Manuals
110902-3216-01 Engine View Diagrams & Manuals
110902-3221-01 Engine View Diagrams & Manuals
110902-3223-01 Engine View Diagrams & Manuals
110902-3228-01 Engine View Diagrams & Manuals
110902-3234-01 Engine View Diagrams & Manuals
110902-3235-01 Engine View Diagrams & Manuals
110902-3236-01 Engine View Diagrams & Manuals
110902-3239-01 Engine View Diagrams & Manuals
110902-3240-01 Engine View Diagrams & Manuals
110902-3240-02 Engine View Diagrams & Manuals
110902-3241-01 Engine View Diagrams & Manuals
110902-3243-01 Engine View Diagrams & Manuals
110902-3244-01 Engine View Diagrams & Manuals
110902-3244-02 Engine View Diagrams & Manuals
110902-3248-01 Engine View Diagrams & Manuals
110902-3249-01 Engine View Diagrams & Manuals
110902-3253-01 Engine View Diagrams & Manuals
110902-3254-01 Engine View Diagrams & Manuals
110902-3255-01 Engine View Diagrams & Manuals
110902-3257-01 Engine View Diagrams & Manuals
110902-3258-01 Engine View Diagrams & Manuals
110902-3259-01 Engine View Diagrams & Manuals
110902-3911-01 Engine View Diagrams & Manuals
110902-3912-01 Engine View Diagrams & Manuals
110902-3914-01 Engine View Diagrams & Manuals
110902-3975-01 Engine View Diagrams & Manuals
110902-5913-01 Engine View Diagrams & Manuals
110905-0109-99 Engine View Diagrams & Manuals
110905-0248-99 Engine View Diagrams & Manuals
110905-0268-99 Engine View Diagrams & Manuals
110905-0281-99 Engine View Diagrams & Manuals
110905-0338-99 Engine View Diagrams & Manuals
110905-0357-99 Engine View Diagrams & Manuals
110905-0371-99 Engine View Diagrams & Manuals
110905-0383-99 Engine View Diagrams & Manuals
110905-0429-99 Engine View Diagrams & Manuals
110905-0432-99 Engine View Diagrams & Manuals
110905-0473-99 Engine View Diagrams & Manuals
110905-0521-99 Engine View Diagrams & Manuals
110905-0540-99 Engine View Diagrams & Manuals
110905-0579-99 Engine View Diagrams & Manuals
110907-1123-01 Engine View Diagrams & Manuals
110907-1170-99 Engine View Diagrams & Manuals
110907-1186-99 Engine View Diagrams & Manuals
110907-1226-01 Engine View Diagrams & Manuals
110907-1260-01 Engine View Diagrams & Manuals
110907-1263-01 Engine View Diagrams & Manuals
110907-1263-02 Engine View Diagrams & Manuals
110907-1276-01 Engine View Diagrams & Manuals
110907-1279-01 Engine View Diagrams & Manuals
110907-1282-01 Engine View Diagrams & Manuals
110907-1285-01 Engine View Diagrams & Manuals
110907-1296-01 Engine View Diagrams & Manuals
110907-1298-01 Engine View Diagrams & Manuals
110907-1303-01 Engine View Diagrams & Manuals
110907-3081-01 Engine View Diagrams & Manuals
110907-3082-01 Engine View Diagrams & Manuals
110907-3120-01 Engine View Diagrams & Manuals
110907-3170-01 Engine View Diagrams & Manuals
110907-3186-01 Engine View Diagrams & Manuals
110907-3219-01 Engine View Diagrams & Manuals
110907-3220-01 Engine View Diagrams & Manuals
110907-3222-01 Engine View Diagrams & Manuals
110907-3224-01 Engine View Diagrams & Manuals
110907-3230-01 Engine View Diagrams & Manuals
110907-3232-01 Engine View Diagrams & Manuals
110907-3238-01 Engine View Diagrams & Manuals
110907-3245-01 Engine View Diagrams & Manuals
110907-3913-01 Engine View Diagrams & Manuals
110908-0015-99 Engine View Diagrams & Manuals
110908-0016-99 Engine View Diagrams & Manuals
110908-0017-99 Engine View Diagrams & Manuals
110908-0018-99 Engine View Diagrams & Manuals
110908-0117-99 Engine View Diagrams & Manuals
110908-0118-99 Engine View Diagrams & Manuals
110908-0119-99 Engine View Diagrams & Manuals
110908-0120-99 Engine View Diagrams & Manuals
110908-0156-99 Engine View Diagrams & Manuals
110908-0167-99 Engine View Diagrams & Manuals
110908-0170-99 Engine View Diagrams & Manuals
110908-0172-99 Engine View Diagrams & Manuals
110908-0175-99 Engine View Diagrams & Manuals
110908-0177-99 Engine View Diagrams & Manuals
110908-0179-99 Engine View Diagrams & Manuals
110908-0181-99 Engine View Diagrams & Manuals
110908-0182-99 Engine View Diagrams & Manuals
110908-0184-99 Engine View Diagrams & Manuals
110908-0186-99 Engine View Diagrams & Manuals
110908-0187-99 Engine View Diagrams & Manuals
110908-0192-99 Engine View Diagrams & Manuals
110908-0194-99 Engine View Diagrams & Manuals
110908-0195-99 Engine View Diagrams & Manuals
110908-0197-99 Engine View Diagrams & Manuals
110908-0199-99 Engine View Diagrams & Manuals
110908-0200-99 Engine View Diagrams & Manuals
110908-0201-99 Engine View Diagrams & Manuals
110908-0202-99 Engine View Diagrams & Manuals
110908-0203-99 Engine View Diagrams & Manuals
110908-0204-99 Engine View Diagrams & Manuals
110908-0205-99 Engine View Diagrams & Manuals
110908-0206-99 Engine View Diagrams & Manuals
110908-0207-99 Engine View Diagrams & Manuals
110908-0208-99 Engine View Diagrams & Manuals
110908-0214-99 Engine View Diagrams & Manuals
110908-0218-99 Engine View Diagrams & Manuals
110908-0221-99 Engine View Diagrams & Manuals
110908-0223-99 Engine View Diagrams & Manuals
110908-0225-99 Engine View Diagrams & Manuals
110908-0226-99 Engine View Diagrams & Manuals
110908-0227-99 Engine View Diagrams & Manuals
110908-0230-99 Engine View Diagrams & Manuals
110908-0237-99 Engine View Diagrams & Manuals
110908-0238-99 Engine View Diagrams & Manuals
110908-0241-99 Engine View Diagrams & Manuals
110908-0242-99 Engine View Diagrams & Manuals
110908-0246-99 Engine View Diagrams & Manuals
110908-0247-99 Engine View Diagrams & Manuals
110908-0250-99 Engine View Diagrams & Manuals
110908-0251-99 Engine View Diagrams & Manuals
110908-0253-99 Engine View Diagrams & Manuals
110908-0254-99 Engine View Diagrams & Manuals
110908-0255-99 Engine View Diagrams & Manuals
110908-0258-99 Engine View Diagrams & Manuals
110908-0259-99 Engine View Diagrams & Manuals
110908-0260-99 Engine View Diagrams & Manuals
110908-0261-99 Engine View Diagrams & Manuals
110908-0262-99 Engine View Diagrams & Manuals
110908-0263-99 Engine View Diagrams & Manuals
110908-0266-99 Engine View Diagrams & Manuals
110908-0270-99 Engine View Diagrams & Manuals
110908-0271-99 Engine View Diagrams & Manuals
110908-0273-99 Engine View Diagrams & Manuals
110908-0274-99 Engine View Diagrams & Manuals
110908-0275-99 Engine View Diagrams & Manuals
110908-0278-99 Engine View Diagrams & Manuals
110908-0282-99 Engine View Diagrams & Manuals
110908-0283-99 Engine View Diagrams & Manuals
110908-0285-99 Engine View Diagrams & Manuals
110908-0291-99 Engine View Diagrams & Manuals
110908-0292-99 Engine View Diagrams & Manuals
110908-0295-99 Engine View Diagrams & Manuals
110908-0300-99 Engine View Diagrams & Manuals
110908-0301-99 Engine View Diagrams & Manuals
110908-0304-99 Engine View Diagrams & Manuals
110908-0305-99 Engine View Diagrams & Manuals
110908-0306-99 Engine View Diagrams & Manuals
110908-0307-99 Engine View Diagrams & Manuals
110908-0309-99 Engine View Diagrams & Manuals
110908-0311-99 Engine View Diagrams & Manuals
110908-0312-99 Engine View Diagrams & Manuals
110908-0313-99 Engine View Diagrams & Manuals
110908-0317-99 Engine View Diagrams & Manuals
110908-0318-99 Engine View Diagrams & Manuals
110908-0319-99 Engine View Diagrams & Manuals
110908-0322-99 Engine View Diagrams & Manuals
110908-0323-99 Engine View Diagrams & Manuals
110908-0326-99 Engine View Diagrams & Manuals
110908-0328-99 Engine View Diagrams & Manuals
110908-0329-99 Engine View Diagrams & Manuals
110908-0330-99 Engine View Diagrams & Manuals
110908-0332-99 Engine View Diagrams & Manuals
110908-0333-99 Engine View Diagrams & Manuals
110908-0334-99 Engine View Diagrams & Manuals
110908-0336-99 Engine View Diagrams & Manuals
110908-0340-99 Engine View Diagrams & Manuals
110908-0341-99 Engine View Diagrams & Manuals
110908-0343-99 Engine View Diagrams & Manuals
110908-0352-99 Engine View Diagrams & Manuals
110908-0353-99 Engine View Diagrams & Manuals
110908-0354-99 Engine View Diagrams & Manuals
110908-0355-99 Engine View Diagrams & Manuals
110908-0356-99 Engine View Diagrams & Manuals
110908-0358-99 Engine View Diagrams & Manuals
110908-0359-99 Engine View Diagrams & Manuals
110908-0361-99 Engine View Diagrams & Manuals
110908-0363-99 Engine View Diagrams & Manuals
110908-0364-99 Engine View Diagrams & Manuals
110908-0366-99 Engine View Diagrams & Manuals
110908-0367-99 Engine View Diagrams & Manuals
110908-0369-99 Engine View Diagrams & Manuals
110908-0370-99 Engine View Diagrams & Manuals
110908-0372-99 Engine View Diagrams & Manuals
110908-0373-99 Engine View Diagrams & Manuals
110908-0374-99 Engine View Diagrams & Manuals
110908-0375-99 Engine View Diagrams & Manuals
110908-0376-99 Engine View Diagrams & Manuals
110908-0379-99 Engine View Diagrams & Manuals
110908-0380-99 Engine View Diagrams & Manuals
110908-0384-99 Engine View Diagrams & Manuals
110908-0386-99 Engine View Diagrams & Manuals
110908-0387-99 Engine View Diagrams & Manuals
110908-0391-99 Engine View Diagrams & Manuals
110908-0392-99 Engine View Diagrams & Manuals
110908-0394-99 Engine View Diagrams & Manuals
110908-0395-99 Engine View Diagrams & Manuals
110908-0397-99 Engine View Diagrams & Manuals
110908-0398-99 Engine View Diagrams & Manuals
110908-0399-99 Engine View Diagrams & Manuals
110908-0401-99 Engine View Diagrams & Manuals
110908-0402-99 Engine View Diagrams & Manuals
110908-0404-99 Engine View Diagrams & Manuals
110908-0405-99 Engine View Diagrams & Manuals
110908-0409-99 Engine View Diagrams & Manuals
110908-0412-99 Engine View Diagrams & Manuals
110908-0415-99 Engine View Diagrams & Manuals
110908-0417-99 Engine View Diagrams & Manuals
110908-0418-99 Engine View Diagrams & Manuals
09D902-1607-B1 Engine View Diagrams & Manuals
09D902-1607-E1 Engine View Diagrams & Manuals
09D902-2000-B1 Engine View Diagrams & Manuals
09D902-2001-B1 Engine View Diagrams & Manuals
09D902-2001-E1 Engine View Diagrams & Manuals
09D902-2002-B1 Engine View Diagrams & Manuals
09D902-2003-B1 Engine View Diagrams & Manuals
09D902-2004-B1 Engine View Diagrams & Manuals
09D902-2005-B2 Engine View Diagrams & Manuals
09D902-2005-E1 Engine View Diagrams & Manuals
09D902-2005-E2 Engine View Diagrams & Manuals
09D902-2006-B1 Engine View Diagrams & Manuals
09D902-2006-B3 Engine View Diagrams & Manuals
09D902-2006-E1 Engine View Diagrams & Manuals
09D902-2006-E2 Engine View Diagrams & Manuals
09D902-2007-B1 Engine View Diagrams & Manuals
09D902-2007-E1 Engine View Diagrams & Manuals
09D902-2008-B1 Engine View Diagrams & Manuals
09D902-2009-B1 Engine View Diagrams & Manuals
09D902-2009-E1 Engine View Diagrams & Manuals
09D902-2011-B1 Engine View Diagrams & Manuals
09D902-2012-81 Engine View Diagrams & Manuals
09D902-2013-B1 Engine View Diagrams & Manuals
09D902-2015-B1 Engine View Diagrams & Manuals
09D902-2019-B1 Engine View Diagrams & Manuals
09D902-2019-E1 Engine View Diagrams & Manuals
09D902-2020-B1 Engine View Diagrams & Manuals
09D902-2021-B1 Engine View Diagrams & Manuals
09D902-2021-E1 Engine View Diagrams & Manuals
09D902-2022-B1 Engine View Diagrams & Manuals
09D902-2022-E1 Engine View Diagrams & Manuals
09D902-2023-E1 Engine View Diagrams & Manuals
09D902-2024-B4 Engine View Diagrams & Manuals
09D902-2024-E1 Engine View Diagrams & Manuals
09D902-2024-E4 Engine View Diagrams & Manuals
09D902-2024-E5 Engine View Diagrams & Manuals
09D902-2025-E1 Engine View Diagrams & Manuals
09D902-2026-B1 Engine View Diagrams & Manuals
09D902-2027-B1 Engine View Diagrams & Manuals
09D902-2027-E1 Engine View Diagrams & Manuals
09D902-2028-E1 Engine View Diagrams & Manuals
09D902-2029-B1 Engine View Diagrams & Manuals
09D902-2029-E1 Engine View Diagrams & Manuals
09D902-2031-B1 Engine View Diagrams & Manuals
09D902-2032-B1 Engine View Diagrams & Manuals
09D902-2033-B1 Engine View Diagrams & Manuals
09D902-2034-B1 Engine View Diagrams & Manuals
09D902-2035-B1 Engine View Diagrams & Manuals
09D902-2036-B1 Engine View Diagrams & Manuals
110908-0419-99 Engine View Diagrams & Manuals
110908-0420-99 Engine View Diagrams & Manuals
110908-0421-99 Engine View Diagrams & Manuals
110908-0422-99 Engine View Diagrams & Manuals
110908-0424-99 Engine View Diagrams & Manuals
110908-0425-99 Engine View Diagrams & Manuals
110908-0426-99 Engine View Diagrams & Manuals
110908-0428-99 Engine View Diagrams & Manuals
110908-0430-99 Engine View Diagrams & Manuals
110908-0433-99 Engine View Diagrams & Manuals
110908-0434-99 Engine View Diagrams & Manuals
110908-0437-99 Engine View Diagrams & Manuals
110908-0438-99 Engine View Diagrams & Manuals
110908-0440-99 Engine View Diagrams & Manuals
110908-0441-99 Engine View Diagrams & Manuals
110908-0448-99 Engine View Diagrams & Manuals
110908-0452-99 Engine View Diagrams & Manuals
110908-0456-99 Engine View Diagrams & Manuals
110908-0458-99 Engine View Diagrams & Manuals
110908-0459-99 Engine View Diagrams & Manuals
110908-0463-99 Engine View Diagrams & Manuals
110908-0465-99 Engine View Diagrams & Manuals
110908-0467-99 Engine View Diagrams & Manuals
110908-0471-99 Engine View Diagrams & Manuals
110908-0472-99 Engine View Diagrams & Manuals
110908-0475-99 Engine View Diagrams & Manuals
110908-0478-99 Engine View Diagrams & Manuals
110908-0479-99 Engine View Diagrams & Manuals
110908-0480-99 Engine View Diagrams & Manuals
110908-0482-99 Engine View Diagrams & Manuals
110908-0484-99 Engine View Diagrams & Manuals
110908-0486-99 Engine View Diagrams & Manuals
110908-0492-99 Engine View Diagrams & Manuals
110908-0494-99 Engine View Diagrams & Manuals
110908-0496-99 Engine View Diagrams & Manuals
110908-0497-99 Engine View Diagrams & Manuals
110908-0501-99 Engine View Diagrams & Manuals
110908-0504-99 Engine View Diagrams & Manuals
110908-0506-99 Engine View Diagrams & Manuals
110908-0507-99 Engine View Diagrams & Manuals
110908-0509-99 Engine View Diagrams & Manuals
110908-0511-99 Engine View Diagrams & Manuals
110908-0512-99 Engine View Diagrams & Manuals
110908-0516-99 Engine View Diagrams & Manuals
110908-0518-99 Engine View Diagrams & Manuals
110908-0520-99 Engine View Diagrams & Manuals
110908-0523-99 Engine View Diagrams & Manuals
110908-0524-99 Engine View Diagrams & Manuals
110908-0525-99 Engine View Diagrams & Manuals
110908-0526-99 Engine View Diagrams & Manuals
110908-0529-99 Engine View Diagrams & Manuals
110908-0532-99 Engine View Diagrams & Manuals
110908-0533-99 Engine View Diagrams & Manuals
110908-0535-99 Engine View Diagrams & Manuals
110908-0536-99 Engine View Diagrams & Manuals
110908-0537-99 Engine View Diagrams & Manuals
110908-0538-99 Engine View Diagrams & Manuals
110908-0541-99 Engine View Diagrams & Manuals
110908-0542-99 Engine View Diagrams & Manuals
110908-0545-99 Engine View Diagrams & Manuals
110908-0550-99 Engine View Diagrams & Manuals
110908-0551-99 Engine View Diagrams & Manuals
110908-0552-99 Engine View Diagrams & Manuals
110908-0554-99 Engine View Diagrams & Manuals
110908-0555-99 Engine View Diagrams & Manuals
110908-0558-99 Engine View Diagrams & Manuals
110908-0563-99 Engine View Diagrams & Manuals
110908-0567-99 Engine View Diagrams & Manuals
110908-0568-99 Engine View Diagrams & Manuals
110908-0569-99 Engine View Diagrams & Manuals
110908-0570-99 Engine View Diagrams & Manuals
110908-0571-99 Engine View Diagrams & Manuals
110908-0574-99 Engine View Diagrams & Manuals
110908-0575-99 Engine View Diagrams & Manuals
110908-0576-99 Engine View Diagrams & Manuals
110908-0577-99 Engine View Diagrams & Manuals
110908-0578-99 Engine View Diagrams & Manuals
110908-0581-99 Engine View Diagrams & Manuals
110908-0582-99 Engine View Diagrams & Manuals
110908-0584-99 Engine View Diagrams & Manuals
110908-0585-99 Engine View Diagrams & Manuals
110908-1005-01 Engine View Diagrams & Manuals
110908-1006-01 Engine View Diagrams & Manuals
110908-1008-01 Engine View Diagrams & Manuals
110908-1015-01 Engine View Diagrams & Manuals
110908-1016-01 Engine View Diagrams & Manuals
110908-1017-01 Engine View Diagrams & Manuals
110908-1018-01 Engine View Diagrams & Manuals
110908-1041-01 Engine View Diagrams & Manuals
110908-1117-01 Engine View Diagrams & Manuals
110908-1118-01 Engine View Diagrams & Manuals
110908-1119-01 Engine View Diagrams & Manuals
110908-1120-01 Engine View Diagrams & Manuals
110908-1121-99 Engine View Diagrams & Manuals
110908-1166-01 Engine View Diagrams & Manuals
110908-1168-01 Engine View Diagrams & Manuals
110908-1168-02 Engine View Diagrams & Manuals
110908-1169-01 Engine View Diagrams & Manuals
110908-1171-01 Engine View Diagrams & Manuals
110908-1188-01 Engine View Diagrams & Manuals
110908-1194-01 Engine View Diagrams & Manuals
110908-1194-02 Engine View Diagrams & Manuals
110908-1194-03 Engine View Diagrams & Manuals
110908-1198-01 Engine View Diagrams & Manuals
110908-1201-01 Engine View Diagrams & Manuals
110908-1203-01 Engine View Diagrams & Manuals
110908-1204-01 Engine View Diagrams & Manuals
110908-1207-01 Engine View Diagrams & Manuals
110908-1213-01 Engine View Diagrams & Manuals
110908-1213-02 Engine View Diagrams & Manuals
110908-1214-01 Engine View Diagrams & Manuals
110908-1215-01 Engine View Diagrams & Manuals
110908-1216-01 Engine View Diagrams & Manuals
110908-1216-02 Engine View Diagrams & Manuals
110908-1220-01 Engine View Diagrams & Manuals
110908-1223-01 Engine View Diagrams & Manuals
110908-1224-01 Engine View Diagrams & Manuals
110908-1225-01 Engine View Diagrams & Manuals
110908-1229-01 Engine View Diagrams & Manuals
110908-1230-01 Engine View Diagrams & Manuals
110908-1236-01 Engine View Diagrams & Manuals
110908-1240-01 Engine View Diagrams & Manuals
110908-1241-01 Engine View Diagrams & Manuals
110908-1245-01 Engine View Diagrams & Manuals
110908-1245-02 Engine View Diagrams & Manuals
110908-1245-03 Engine View Diagrams & Manuals
110908-1250-01 Engine View Diagrams & Manuals
110908-1258-01 Engine View Diagrams & Manuals
110908-1259-01 Engine View Diagrams & Manuals
110908-1261-01 Engine View Diagrams & Manuals
110908-1266-01 Engine View Diagrams & Manuals
110908-1277-01 Engine View Diagrams & Manuals
110908-1277-02 Engine View Diagrams & Manuals
110908-1278-01 Engine View Diagrams & Manuals
110908-1283-01 Engine View Diagrams & Manuals
110908-1287-01 Engine View Diagrams & Manuals
110908-1289-01 Engine View Diagrams & Manuals
110908-1297-01 Engine View Diagrams & Manuals
110908-1300-01 Engine View Diagrams & Manuals
110908-1308-01 Engine View Diagrams & Manuals
110908-1311-01 Engine View Diagrams & Manuals
110908-1316-01 Engine View Diagrams & Manuals
110908-1317-01 Engine View Diagrams & Manuals
110908-1320-01 Engine View Diagrams & Manuals
110908-3121-01 Engine View Diagrams & Manuals
110908-3198-01 Engine View Diagrams & Manuals
110908-3206-01 Engine View Diagrams & Manuals
110908-3242-01 Engine View Diagrams & Manuals
110908-3252-01 Engine View Diagrams & Manuals
110908-5911-01 Engine View Diagrams & Manuals
110908-5911-02 Engine View Diagrams & Manuals
110982-1125-99 Engine View Diagrams & Manuals
110982-1177-01 Engine View Diagrams & Manuals
110982-1196-99 Engine View Diagrams & Manuals
110982-1200-99 Engine View Diagrams & Manuals
110982-1228-01 Engine View Diagrams & Manuals
110982-3050-01 Engine View Diagrams & Manuals
09D902-2037-B1 Engine View Diagrams & Manuals
09D902-2038-E1 Engine View Diagrams & Manuals
09D902-2039-B1 Engine View Diagrams & Manuals
09D902-2039-E1 Engine View Diagrams & Manuals
09D902-2040-B1 Engine View Diagrams & Manuals
09D902-2041-B1 Engine View Diagrams & Manuals
09D902-2042-B1 Engine View Diagrams & Manuals
09D902-2043-B1 Engine View Diagrams & Manuals
09D902-2044-B1 Engine View Diagrams & Manuals
09D902-2045-B1 Engine View Diagrams & Manuals
09D902-2046-B1 Engine View Diagrams & Manuals
09D902-2047-B1 Engine View Diagrams & Manuals
09D902-2049-B1 Engine View Diagrams & Manuals
09D902-2050-B1 Engine View Diagrams & Manuals
09D902-2051-B1 Engine View Diagrams & Manuals
09D902-2052-B1 Engine View Diagrams & Manuals
09D902-2053-B1 Engine View Diagrams & Manuals
09D902-2054-B1 Engine View Diagrams & Manuals
09D902-2060-B1 Engine View Diagrams & Manuals
09D902-2061-B1 Engine View Diagrams & Manuals
09D902-2079-B1 Engine View Diagrams & Manuals
09D902-2079-E1 Engine View Diagrams & Manuals
09D902-2083-99 Engine View Diagrams & Manuals
09D902-2084-B1 Engine View Diagrams & Manuals
09D902-2084-E1 Engine View Diagrams & Manuals
09D902-2085-B1 Engine View Diagrams & Manuals
09D902-2085-E1 Engine View Diagrams & Manuals
09D902-2085-E2 Engine View Diagrams & Manuals
09D902-2087-B1 Engine View Diagrams & Manuals
09D902-2087-E1 Engine View Diagrams & Manuals
09D902-2088-B1 Engine View Diagrams & Manuals
09D902-2089-B1 Engine View Diagrams & Manuals
09D902-2090-B1 Engine View Diagrams & Manuals
09D902-2091-B1 Engine View Diagrams & Manuals
09D902-2092-B1 Engine View Diagrams & Manuals
09D902-2093-B1 Engine View Diagrams & Manuals
09D902-2094-B1 Engine View Diagrams & Manuals
09D902-2095-B1 Engine View Diagrams & Manuals
09D902-2096-B1 Engine View Diagrams & Manuals
09D902-2112-B1 Engine View Diagrams & Manuals
09D902-2112-E1 Engine View Diagrams & Manuals
09D902-2113-E1 Engine View Diagrams & Manuals
09D902-2113-E2 Engine View Diagrams & Manuals
09D902-2128-B1 Engine View Diagrams & Manuals
09D902-2128-E1 Engine View Diagrams & Manuals
09D902-2137-B1 Engine View Diagrams & Manuals
09D902-2137-E1 Engine View Diagrams & Manuals
09D902-2200-B1 Engine View Diagrams & Manuals
09D902-2200-E1 Engine View Diagrams & Manuals
09D902-2201-B1 Engine View Diagrams & Manuals
110982-3051-01 Engine View Diagrams & Manuals
110982-3052-01 Engine View Diagrams & Manuals
110982-3053-01 Engine View Diagrams & Manuals
110982-3125-01 Engine View Diagrams & Manuals
110982-3169-01 Engine View Diagrams & Manuals
110982-3175-01 Engine View Diagrams & Manuals
110982-3175-02 Engine View Diagrams & Manuals
110982-3177-01 Engine View Diagrams & Manuals
110982-3182-01 Engine View Diagrams & Manuals
110982-3183-01 Engine View Diagrams & Manuals
110982-3183-02 Engine View Diagrams & Manuals
110982-3194-01 Engine View Diagrams & Manuals
110982-3196-01 Engine View Diagrams & Manuals
110982-3200-99 Engine View Diagrams & Manuals
110982-3201-01 Engine View Diagrams & Manuals
110982-3201-02 Engine View Diagrams & Manuals
110982-3211-01 Engine View Diagrams & Manuals
110982-3214-01 Engine View Diagrams & Manuals
110982-3214-02 Engine View Diagrams & Manuals
110982-3226-01 Engine View Diagrams & Manuals
110982-3226-02 Engine View Diagrams & Manuals
110982-3227-01 Engine View Diagrams & Manuals
110982-3233-01 Engine View Diagrams & Manuals
110982-3237-01 Engine View Diagrams & Manuals
110982-3250-01 Engine View Diagrams & Manuals
110982-3260-01 Engine View Diagrams & Manuals
110982-5912-01 Engine View Diagrams & Manuals
110985-0228-99 Engine View Diagrams & Manuals
110985-0229-99 Engine View Diagrams & Manuals
110985-0234-99 Engine View Diagrams & Manuals
110985-0240-99 Engine View Diagrams & Manuals
110985-0243-99 Engine View Diagrams & Manuals
110985-0256-99 Engine View Diagrams & Manuals
110985-0272-99 Engine View Diagrams & Manuals
110985-0276-99 Engine View Diagrams & Manuals
110985-0287-99 Engine View Diagrams & Manuals
110985-0289-99 Engine View Diagrams & Manuals
110985-0294-99 Engine View Diagrams & Manuals
110985-0298-99 Engine View Diagrams & Manuals
110985-0314-99 Engine View Diagrams & Manuals
110985-0325-99 Engine View Diagrams & Manuals
110985-0331-99 Engine View Diagrams & Manuals
110985-0345-99 Engine View Diagrams & Manuals
110985-0389-99 Engine View Diagrams & Manuals
110985-0442-99 Engine View Diagrams & Manuals
110985-0460-99 Engine View Diagrams & Manuals
110985-0477-99 Engine View Diagrams & Manuals
110985-0488-99 Engine View Diagrams & Manuals
110985-0489-99 Engine View Diagrams & Manuals
110985-0503-99 Engine View Diagrams & Manuals
110985-0508-99 Engine View Diagrams & Manuals
110985-0514-99 Engine View Diagrams & Manuals
110985-0534-99 Engine View Diagrams & Manuals
110987-1179-99 Engine View Diagrams & Manuals
110987-1181-99 Engine View Diagrams & Manuals
110987-1182-99 Engine View Diagrams & Manuals
110987-1191-99 Engine View Diagrams & Manuals
110987-1192-99 Engine View Diagrams & Manuals
110987-1195-99 Engine View Diagrams & Manuals
110987-1253-01 Engine View Diagrams & Manuals
110987-1295-01 Engine View Diagrams & Manuals
110987-3088-01 Engine View Diagrams & Manuals
09D902-2201-E1 Engine View Diagrams & Manuals
09D902-2203-E1 Engine View Diagrams & Manuals
09D902-2205-E1 Engine View Diagrams & Manuals
09D902-2206-E1 Engine View Diagrams & Manuals
09D902-2207-B1 Engine View Diagrams & Manuals
09D902-2207-E1 Engine View Diagrams & Manuals
09D902-2209-E1 Engine View Diagrams & Manuals
09D902-2210-B1 Engine View Diagrams & Manuals
09D902-2210-E1 Engine View Diagrams & Manuals
09D902-2212-B1 Engine View Diagrams & Manuals
09D902-2212-E1 Engine View Diagrams & Manuals
09D902-2213-B1 Engine View Diagrams & Manuals
09D902-2213-E1 Engine View Diagrams & Manuals
09D902-2215-B1 Engine View Diagrams & Manuals
09D902-2215-E1 Engine View Diagrams & Manuals
09D902-2218-B1 Engine View Diagrams & Manuals
09D902-2218-E1 Engine View Diagrams & Manuals
09D902-2219-B1 Engine View Diagrams & Manuals
09D902-2219-E1 Engine View Diagrams & Manuals
09D902-2220-B1 Engine View Diagrams & Manuals
09D902-2222-B1 Engine View Diagrams & Manuals
09D902-2223-B1 Engine View Diagrams & Manuals
09D902-2224-B1 Engine View Diagrams & Manuals
09D902-2225-B1 Engine View Diagrams & Manuals
09D902-2226-B1 Engine View Diagrams & Manuals
09D902-2227-B1 Engine View Diagrams & Manuals
09D902-2228-B1 Engine View Diagrams & Manuals
09D902-2229-B1 Engine View Diagrams & Manuals
09D902-2230-B1 Engine View Diagrams & Manuals
09D902-2231-B1 Engine View Diagrams & Manuals
09D902-2233-B1 Engine View Diagrams & Manuals
09D902-2234-B1 Engine View Diagrams & Manuals
09D902-2235-B1 Engine View Diagrams & Manuals
09D902-2236-B1 Engine View Diagrams & Manuals
09D902-2237-B1 Engine View Diagrams & Manuals
09D902-2238-B1 Engine View Diagrams & Manuals
09D902-2239-B1 Engine View Diagrams & Manuals
09D902-2240-B1 Engine View Diagrams & Manuals
09D902-2241-B1 Engine View Diagrams & Manuals
08P502-0002-H1 Engine View Diagrams & Manuals
08P502-0003-H1 Engine View Diagrams & Manuals
08P502-0004-H1 Engine View Diagrams & Manuals
08P502-0005-H1 Engine View Diagrams & Manuals
08P502-0006-H1 Engine View Diagrams & Manuals
08P502-0007-H1 Engine View Diagrams & Manuals
08P502-0008-H1 Engine View Diagrams & Manuals
08P502-0009-H1 Engine View Diagrams & Manuals
08P502-0010-H1 Engine View Diagrams & Manuals
08P502-0011-H1 Engine View Diagrams & Manuals
08P502-0012-H1 Engine View Diagrams & Manuals
08P502-0013-H1 Engine View Diagrams & Manuals
08P502-0014-H1 Engine View Diagrams & Manuals
08P502-0015-H1 Engine View Diagrams & Manuals
08P502-0016-H1 Engine View Diagrams & Manuals
08P502-0017-H1 Engine View Diagrams & Manuals
08P502-0018-H1 Engine View Diagrams & Manuals
08P502-0019-H1 Engine View Diagrams & Manuals
08P502-0020-H1 Engine View Diagrams & Manuals
08P502-0021-H1 Engine View Diagrams & Manuals
08P502-0022-H1 Engine View Diagrams & Manuals
08P502-0023-H1 Engine View Diagrams & Manuals
08P502-0024-H1 Engine View Diagrams & Manuals
08P502-0025-H1 Engine View Diagrams & Manuals
08P502-0026-H1 Engine View Diagrams & Manuals
08P502-0027-H1 Engine View Diagrams & Manuals
08P502-0028-H1 Engine View Diagrams & Manuals
110988-0180-99 Engine View Diagrams & Manuals
110988-0183-99 Engine View Diagrams & Manuals
110988-0185-99 Engine View Diagrams & Manuals
110988-0188-99 Engine View Diagrams & Manuals
110988-0189-99 Engine View Diagrams & Manuals
110988-0190-99 Engine View Diagrams & Manuals
110988-0191-99 Engine View Diagrams & Manuals
110988-0193-99 Engine View Diagrams & Manuals
110988-0209-99 Engine View Diagrams & Manuals
110988-0210-99 Engine View Diagrams & Manuals
110988-0211-99 Engine View Diagrams & Manuals
110988-0212-99 Engine View Diagrams & Manuals
110988-0213-99 Engine View Diagrams & Manuals
110988-0215-99 Engine View Diagrams & Manuals
110988-0216-99 Engine View Diagrams & Manuals
110988-0217-99 Engine View Diagrams & Manuals
110988-0219-99 Engine View Diagrams & Manuals
110988-0220-99 Engine View Diagrams & Manuals
110988-0222-99 Engine View Diagrams & Manuals
110988-0224-99 Engine View Diagrams & Manuals
110988-0231-99 Engine View Diagrams & Manuals
110988-0232-99 Engine View Diagrams & Manuals
110988-0233-99 Engine View Diagrams & Manuals
110988-0235-99 Engine View Diagrams & Manuals
110988-0236-99 Engine View Diagrams & Manuals
110988-0239-99 Engine View Diagrams & Manuals
110988-0244-99 Engine View Diagrams & Manuals
110988-0245-99 Engine View Diagrams & Manuals
110988-0249-99 Engine View Diagrams & Manuals
110988-0257-99 Engine View Diagrams & Manuals
110988-0264-99 Engine View Diagrams & Manuals
110988-0265-99 Engine View Diagrams & Manuals
110988-0267-99 Engine View Diagrams & Manuals
110988-0269-99 Engine View Diagrams & Manuals
110988-0277-99 Engine View Diagrams & Manuals
110988-0279-99 Engine View Diagrams & Manuals
110988-0280-99 Engine View Diagrams & Manuals
110988-0284-99 Engine View Diagrams & Manuals
110988-0286-99 Engine View Diagrams & Manuals
110988-0288-99 Engine View Diagrams & Manuals
110988-0290-99 Engine View Diagrams & Manuals
09B902-0050-01 Engine View Diagrams & Manuals
09B902-0051-01 Engine View Diagrams & Manuals
09B902-1651-B1 Engine View Diagrams & Manuals
09B902-1651-E1 Engine View Diagrams & Manuals
09B902-1652-B1 Engine View Diagrams & Manuals
09B902-1652-B2 Engine View Diagrams & Manuals
09B902-1652-E1 Engine View Diagrams & Manuals
09B902-1652-E2 Engine View Diagrams & Manuals
09C902-0304-01 Engine View Diagrams & Manuals
09C902-0306-01 Engine View Diagrams & Manuals
09C902-0307-01 Engine View Diagrams & Manuals
09C902-0330-01 Engine View Diagrams & Manuals
09C902-0330-02 Engine View Diagrams & Manuals
09C902-0331-01 Engine View Diagrams & Manuals
09C902-0332-01 Engine View Diagrams & Manuals
09C902-0333-01 Engine View Diagrams & Manuals
09C902-2033-E1 Engine View Diagrams & Manuals
09C902-2104-E1 Engine View Diagrams & Manuals
09C902-2104-E3 Engine View Diagrams & Manuals
09C902-2129-B1 Engine View Diagrams & Manuals
09C902-2130-B1 Engine View Diagrams & Manuals
09C902-2131-E1 Engine View Diagrams & Manuals
09C902-2135-E1 Engine View Diagrams & Manuals
09C902-2136-B1 Engine View Diagrams & Manuals
09C982-0305-01 Engine View Diagrams & Manuals
110988-0293-99 Engine View Diagrams & Manuals
110988-0296-99 Engine View Diagrams & Manuals
110988-0297-99 Engine View Diagrams & Manuals
110988-0299-99 Engine View Diagrams & Manuals
110988-0302-99 Engine View Diagrams & Manuals
110988-0303-99 Engine View Diagrams & Manuals
110988-0308-99 Engine View Diagrams & Manuals
110988-0310-99 Engine View Diagrams & Manuals
110988-0315-99 Engine View Diagrams & Manuals
110988-0316-99 Engine View Diagrams & Manuals
110988-0320-99 Engine View Diagrams & Manuals
110988-0321-99 Engine View Diagrams & Manuals
110988-0324-99 Engine View Diagrams & Manuals
110988-0327-99 Engine View Diagrams & Manuals
110988-0335-99 Engine View Diagrams & Manuals
110988-0337-99 Engine View Diagrams & Manuals
110988-0339-99 Engine View Diagrams & Manuals
110988-0342-99 Engine View Diagrams & Manuals
110988-0344-99 Engine View Diagrams & Manuals
110988-0346-99 Engine View Diagrams & Manuals
110988-0347-99 Engine View Diagrams & Manuals
110988-0348-99 Engine View Diagrams & Manuals
110988-0349-99 Engine View Diagrams & Manuals
110988-0350-99 Engine View Diagrams & Manuals
110988-0351-99 Engine View Diagrams & Manuals
110988-0360-99 Engine View Diagrams & Manuals
110988-0362-99 Engine View Diagrams & Manuals
110988-0365-99 Engine View Diagrams & Manuals
110988-0368-99 Engine View Diagrams & Manuals
110988-0377-99 Engine View Diagrams & Manuals
110988-0378-99 Engine View Diagrams & Manuals
110988-0381-99 Engine View Diagrams & Manuals
110988-0382-99 Engine View Diagrams & Manuals
110988-0385-99 Engine View Diagrams & Manuals
110988-0388-99 Engine View Diagrams & Manuals
110988-0390-99 Engine View Diagrams & Manuals
110988-0393-99 Engine View Diagrams & Manuals
110988-0396-99 Engine View Diagrams & Manuals
110988-0400-99 Engine View Diagrams & Manuals
110988-0403-99 Engine View Diagrams & Manuals
110988-0406-99 Engine View Diagrams & Manuals
110988-0407-99 Engine View Diagrams & Manuals
110988-0408-99 Engine View Diagrams & Manuals
110988-0410-99 Engine View Diagrams & Manuals
110988-0411-99 Engine View Diagrams & Manuals
110988-0413-99 Engine View Diagrams & Manuals
110988-0414-99 Engine View Diagrams & Manuals
110988-0416-99 Engine View Diagrams & Manuals
110988-0423-99 Engine View Diagrams & Manuals
110988-0427-99 Engine View Diagrams & Manuals
110988-0431-99 Engine View Diagrams & Manuals
110988-0435-99 Engine View Diagrams & Manuals
110988-0436-99 Engine View Diagrams & Manuals
110988-0443-99 Engine View Diagrams & Manuals
110988-0444-99 Engine View Diagrams & Manuals
110988-0445-99 Engine View Diagrams & Manuals
110988-0446-99 Engine View Diagrams & Manuals
110988-0447-99 Engine View Diagrams & Manuals
110988-0449-99 Engine View Diagrams & Manuals
110988-0450-99 Engine View Diagrams & Manuals
110988-0451-99 Engine View Diagrams & Manuals
110988-0453-99 Engine View Diagrams & Manuals
110988-0454-99 Engine View Diagrams & Manuals
110988-0455-99 Engine View Diagrams & Manuals
110988-0457-99 Engine View Diagrams & Manuals
110988-0461-99 Engine View Diagrams & Manuals
110988-0462-99 Engine View Diagrams & Manuals
110988-0464-99 Engine View Diagrams & Manuals
110988-0466-99 Engine View Diagrams & Manuals
110988-0468-99 Engine View Diagrams & Manuals
110988-0469-99 Engine View Diagrams & Manuals
110988-0470-99 Engine View Diagrams & Manuals
110988-0474-99 Engine View Diagrams & Manuals
110988-0481-99 Engine View Diagrams & Manuals
110988-0483-99 Engine View Diagrams & Manuals
110988-0485-99 Engine View Diagrams & Manuals
110988-0487-99 Engine View Diagrams & Manuals
110988-0490-99 Engine View Diagrams & Manuals
110988-0491-99 Engine View Diagrams & Manuals
110988-0492-99 Engine View Diagrams & Manuals
110988-0493-99 Engine View Diagrams & Manuals
110988-0495-99 Engine View Diagrams & Manuals
110988-0498-99 Engine View Diagrams & Manuals
110988-0499-99 Engine View Diagrams & Manuals
110988-0500-99 Engine View Diagrams & Manuals
110988-0502-99 Engine View Diagrams & Manuals
110988-0505-99 Engine View Diagrams & Manuals
110988-0510-99 Engine View Diagrams & Manuals
110988-0513-99 Engine View Diagrams & Manuals
110988-0515-99 Engine View Diagrams & Manuals
110988-0517-99 Engine View Diagrams & Manuals
110988-0519-99 Engine View Diagrams & Manuals
110988-0522-99 Engine View Diagrams & Manuals
110988-0527-99 Engine View Diagrams & Manuals
110988-0528-99 Engine View Diagrams & Manuals
110988-0530-99 Engine View Diagrams & Manuals
110988-0531-99 Engine View Diagrams & Manuals
110988-0539-99 Engine View Diagrams & Manuals
110988-0543-99 Engine View Diagrams & Manuals
110988-0544-99 Engine View Diagrams & Manuals
110988-0546-99 Engine View Diagrams & Manuals
110988-0547-99 Engine View Diagrams & Manuals
110988-0548-99 Engine View Diagrams & Manuals
110988-0549-99 Engine View Diagrams & Manuals
110988-0553-99 Engine View Diagrams & Manuals
110988-0556-99 Engine View Diagrams & Manuals
110988-0557-99 Engine View Diagrams & Manuals
110988-0559-99 Engine View Diagrams & Manuals
110988-0560-99 Engine View Diagrams & Manuals
110988-0561-99 Engine View Diagrams & Manuals
110988-0562-99 Engine View Diagrams & Manuals
110988-0564-99 Engine View Diagrams & Manuals
110988-0565-99 Engine View Diagrams & Manuals
110988-0566-99 Engine View Diagrams & Manuals
110988-0572-99 Engine View Diagrams & Manuals
110988-0573-99 Engine View Diagrams & Manuals
110988-0580-99 Engine View Diagrams & Manuals
110988-0583-99 Engine View Diagrams & Manuals
110988-0586-99 Engine View Diagrams & Manuals
110988-1030-01 Engine View Diagrams & Manuals
110988-1050-01 Engine View Diagrams & Manuals
09E902-0100-B1 Engine View Diagrams & Manuals
09E902-0110-B1 Engine View Diagrams & Manuals
09E902-0214-B1 Engine View Diagrams & Manuals
09E902-0276-B1 Engine View Diagrams & Manuals
09E912-0112-B1 Engine View Diagrams & Manuals
09F902-0100-B1 Engine View Diagrams & Manuals
09F902-0111-B1 Engine View Diagrams & Manuals
09F902-0112-B1 Engine View Diagrams & Manuals
09F902-0113-B1 Engine View Diagrams & Manuals
09G902-0100-B1 Engine View Diagrams & Manuals
09G902-0144-B1 Engine View Diagrams & Manuals
09G902-0145-D1 Engine View Diagrams & Manuals
09G902-0145-E1 Engine View Diagrams & Manuals
09H902-0100-B1 Engine View Diagrams & Manuals
09H902-0146-D1 Engine View Diagrams & Manuals
09H902-0146-E1 Engine View Diagrams & Manuals
09J902-0100-E1 Engine View Diagrams & Manuals
09J902-0111-E1 Engine View Diagrams & Manuals
09J902-0115-E1 Engine View Diagrams & Manuals
09J902-0116-B1 Engine View Diagrams & Manuals
09J902-0116-E1 Engine View Diagrams & Manuals
09J902-0292-E1 Engine View Diagrams & Manuals
09J902-0304-E1 Engine View Diagrams & Manuals
09J902-0340-E1 Engine View Diagrams & Manuals
09J902-0341-E1 Engine View Diagrams & Manuals
09J902-0368-E1 Engine View Diagrams & Manuals
09J902-0415-E1 Engine View Diagrams & Manuals
09J902-0526-E1 Engine View Diagrams & Manuals
09J902-0559-E1 Engine View Diagrams & Manuals
09K502-1251-F1 Engine View Diagrams & Manuals
09K902-0100-E1 Engine View Diagrams & Manuals
09K902-0323-51 Engine View Diagrams & Manuals
09K902-0323-E1 Engine View Diagrams & Manuals
09L502-0112-F1 Engine View Diagrams & Manuals
09L502-0699-F1 Engine View Diagrams & Manuals
09L502-0705-F1 Engine View Diagrams & Manuals
09L502-1017-F1 Engine View Diagrams & Manuals
09L502-5017-F1 Engine View Diagrams & Manuals
09L602-0009-F1 Engine View Diagrams & Manuals
09L602-0110-F1 Engine View Diagrams & Manuals
09L602-0111-F1 Engine View Diagrams & Manuals
09L602-0924-F1 Engine View Diagrams & Manuals
09L602-0925-F1 Engine View Diagrams & Manuals
09L602-0927-F1 Engine View Diagrams & Manuals
09L602-1611-F1 Engine View Diagrams & Manuals
09L602-1623-F1 Engine View Diagrams & Manuals
09L702-0587-F1 Engine View Diagrams & Manuals
09L702-1018-F1 Engine View Diagrams & Manuals
09L902-0131-E1 Engine View Diagrams & Manuals
09L902-0132-E1 Engine View Diagrams & Manuals
09L902-0213-E1 Engine View Diagrams & Manuals
09L902-0221-E1 Engine View Diagrams & Manuals
09L902-0245-E1 Engine View Diagrams & Manuals
09L902-0283-E1 Engine View Diagrams & Manuals
09L902-0284-E1 Engine View Diagrams & Manuals
09L902-0305-E1 Engine View Diagrams & Manuals
09L902-0356-E1 Engine View Diagrams & Manuals
09L902-0359-E1 Engine View Diagrams & Manuals
09L902-0620-E1 Engine View Diagrams & Manuals
09M902-0005-E1 Engine View Diagrams & Manuals
09M902-0015-E1 Engine View Diagrams & Manuals
09M902-0016-E1 Engine View Diagrams & Manuals
09M902-0018-E1 Engine View Diagrams & Manuals
09M902-0112-E1 Engine View Diagrams & Manuals
09P602-0001-H1 Engine View Diagrams & Manuals
09P602-0002-H1 Engine View Diagrams & Manuals
09P602-0003-H1 Engine View Diagrams & Manuals
09P602-0004-H1 Engine View Diagrams & Manuals
09P602-0005-H1 Engine View Diagrams & Manuals
09P602-0006-H1 Engine View Diagrams & Manuals
09P602-0007-H1 Engine View Diagrams & Manuals
09P602-0008-H1 Engine View Diagrams & Manuals
09P602-0009-F1 Engine View Diagrams & Manuals
09P602-0010-F1 Engine View Diagrams & Manuals
09P602-0011-F1 Engine View Diagrams & Manuals
09P602-0012-H1 Engine View Diagrams & Manuals
09P602-0013-H1 Engine View Diagrams & Manuals
09P602-0014-H1 Engine View Diagrams & Manuals
09P602-0015-H1 Engine View Diagrams & Manuals
09P602-0016-H1 Engine View Diagrams & Manuals
09P602-0018-H1 Engine View Diagrams & Manuals
09P602-0019-F1 Engine View Diagrams & Manuals
09P602-0020-H1 Engine View Diagrams & Manuals
09P602-0021-H1 Engine View Diagrams & Manuals
09P602-0022-H1 Engine View Diagrams & Manuals
09P602-0023-F1 Engine View Diagrams & Manuals
09P602-0024-H1 Engine View Diagrams & Manuals
09P602-0025-H1 Engine View Diagrams & Manuals
09P602-0027-H1 Engine View Diagrams & Manuals
09P602-0029-H1 Engine View Diagrams & Manuals
09P602-0030-H1 Engine View Diagrams & Manuals
09P602-0031-H1 Engine View Diagrams & Manuals
09P602-0032-H1 Engine View Diagrams & Manuals
09P602-0033-H1 Engine View Diagrams & Manuals
09P602-0034-H1 Engine View Diagrams & Manuals
09P602-0035-H1 Engine View Diagrams & Manuals
09P602-0036-H1 Engine View Diagrams & Manuals
09P602-0037-H1 Engine View Diagrams & Manuals
09P602-0038-H1 Engine View Diagrams & Manuals
09P602-0039-F1 Engine View Diagrams & Manuals
09P602-0040-H1 Engine View Diagrams & Manuals
09P602-0041-H1 Engine View Diagrams & Manuals
09P602-0042-H1 Engine View Diagrams & Manuals
09P602-0043-H1 Engine View Diagrams & Manuals
09P602-0044-H1 Engine View Diagrams & Manuals
09P602-0045-H1 Engine View Diagrams & Manuals
09P602-0046-H1 Engine View Diagrams & Manuals
09P602-0047-H1 Engine View Diagrams & Manuals
09P602-0048-H1 Engine View Diagrams & Manuals
09P602-0049-H1 Engine View Diagrams & Manuals
09P602-0050-H1 Engine View Diagrams & Manuals
09P602-0051-H1 Engine View Diagrams & Manuals
09P602-0052-H1 Engine View Diagrams & Manuals
09P602-0053-H1 Engine View Diagrams & Manuals
09P602-0054-H1 Engine View Diagrams & Manuals
09P602-0055-H1 Engine View Diagrams & Manuals
09P602-0056-H1 Engine View Diagrams & Manuals
09P602-0057-H1 Engine View Diagrams & Manuals
09P602-0058-H1 Engine View Diagrams & Manuals
09P602-0059-H1 Engine View Diagrams & Manuals
09P702-0001-B1 Engine View Diagrams & Manuals
09P702-0002-B1 Engine View Diagrams & Manuals
09P702-0003-F1 Engine View Diagrams & Manuals
09P702-0004-F1 Engine View Diagrams & Manuals
09P702-0005-F1 Engine View Diagrams & Manuals
09P702-0006-B1 Engine View Diagrams & Manuals
09P702-0007-F1 Engine View Diagrams & Manuals
09P702-0008-F1 Engine View Diagrams & Manuals
09P702-0009-F1 Engine View Diagrams & Manuals
09P702-0010-F1 Engine View Diagrams & Manuals
09P702-0011-H1 Engine View Diagrams & Manuals
09P702-0012-H1 Engine View Diagrams & Manuals
09P702-0013-H1 Engine View Diagrams & Manuals
09P702-0014-H1 Engine View Diagrams & Manuals
09P702-0015-H1 Engine View Diagrams & Manuals
09P702-0016-H1 Engine View Diagrams & Manuals
09P702-0017-H1 Engine View Diagrams & Manuals
09P702-0018-H1 Engine View Diagrams & Manuals
09P702-0019-F1 Engine View Diagrams & Manuals
09P702-0020-H1 Engine View Diagrams & Manuals
09P702-0021-H1 Engine View Diagrams & Manuals
09P702-0022-H1 Engine View Diagrams & Manuals
09P702-0023-H1 Engine View Diagrams & Manuals
09P702-0024-F1 Engine View Diagrams & Manuals
09P702-0025-F1 Engine View Diagrams & Manuals
09P702-0026-H1 Engine View Diagrams & Manuals
09P702-0027-F1 Engine View Diagrams & Manuals
09P702-0028-H1 Engine View Diagrams & Manuals
09P702-0029-H1 Engine View Diagrams & Manuals
09P702-0030-F1 Engine View Diagrams & Manuals
09P702-0031-H1 Engine View Diagrams & Manuals
09P702-0032-H1 Engine View Diagrams & Manuals
09P702-0033-F1 Engine View Diagrams & Manuals
09P702-0034-H1 Engine View Diagrams & Manuals
09P702-0035-F1 Engine View Diagrams & Manuals
09P702-0036-F1 Engine View Diagrams & Manuals
09P702-0037-F1 Engine View Diagrams & Manuals
09P702-0038-H1 Engine View Diagrams & Manuals
09P702-0039-H1 Engine View Diagrams & Manuals
09P702-0040-F1 Engine View Diagrams & Manuals
09P702-0041-F1 Engine View Diagrams & Manuals
09P702-0042-F1 Engine View Diagrams & Manuals
09P702-0043-F1 Engine View Diagrams & Manuals
09P702-0044-F1 Engine View Diagrams & Manuals
09P702-0045-F1 Engine View Diagrams & Manuals
09P702-0046-F1 Engine View Diagrams & Manuals
09P702-0047-F1 Engine View Diagrams & Manuals
09P702-0048-H1 Engine View Diagrams & Manuals
09P702-0049-H1 Engine View Diagrams & Manuals
09P702-0050-H1 Engine View Diagrams & Manuals
09P702-0051-H1 Engine View Diagrams & Manuals
09P702-0052-H1 Engine View Diagrams & Manuals
09P702-0054-H1 Engine View Diagrams & Manuals
09P702-0055-F1 Engine View Diagrams & Manuals
09P702-0056-H1 Engine View Diagrams & Manuals
09P702-0057-H1 Engine View Diagrams & Manuals
09P702-0058-H1 Engine View Diagrams & Manuals
09P702-0059-H1 Engine View Diagrams & Manuals
09P702-0060-H1 Engine View Diagrams & Manuals
09P702-0061-H1 Engine View Diagrams & Manuals
09P702-0062-H1 Engine View Diagrams & Manuals
09P702-0063-H1 Engine View Diagrams & Manuals
09P702-0064-H1 Engine View Diagrams & Manuals
09P702-0065-H1 Engine View Diagrams & Manuals
09P702-0066-H1 Engine View Diagrams & Manuals
09P702-0067-H1 Engine View Diagrams & Manuals
09P702-0068-H1 Engine View Diagrams & Manuals
09P702-0069-H1 Engine View Diagrams & Manuals
09P702-0070-H1 Engine View Diagrams & Manuals
09P702-0071-H1 Engine View Diagrams & Manuals
09P702-0072-H1 Engine View Diagrams & Manuals
09P702-0073-H1 Engine View Diagrams & Manuals
09P702-0074-H1 Engine View Diagrams & Manuals
09P702-0075-F1 Engine View Diagrams & Manuals
09P702-0078-H1 Engine View Diagrams & Manuals
09P702-0079-H1 Engine View Diagrams & Manuals
09P702-0080-H7 Engine View Diagrams & Manuals
09P702-0081-H7 Engine View Diagrams & Manuals
09P702-0082-H1 Engine View Diagrams & Manuals
09P702-0084-H1 Engine View Diagrams & Manuals
09P702-0085-H1 Engine View Diagrams & Manuals
09P702-0086-H1 Engine View Diagrams & Manuals
09P702-0087-F1 Engine View Diagrams & Manuals
09P702-0088-H1 Engine View Diagrams & Manuals
09P702-0092-H1 Engine View Diagrams & Manuals
09P702-0093-H1 Engine View Diagrams & Manuals
09P702-0094-H1 Engine View Diagrams & Manuals
09P702-0095-H1 Engine View Diagrams & Manuals
09P702-0096-H1 Engine View Diagrams & Manuals
09P702-0097-H1 Engine View Diagrams & Manuals
09P702-0098-F1 Engine View Diagrams & Manuals
09P702-0099-H1 Engine View Diagrams & Manuals
09P702-0100-H1 Engine View Diagrams & Manuals
09P702-0101-H1 Engine View Diagrams & Manuals
09P702-0102-H1 Engine View Diagrams & Manuals
09P702-0103-H1 Engine View Diagrams & Manuals
09P702-0104-F1 Engine View Diagrams & Manuals
09P702-0105-H1 Engine View Diagrams & Manuals
09P702-0106-H1 Engine View Diagrams & Manuals
09P702-0107-H1 Engine View Diagrams & Manuals
09P702-0108-H1 Engine View Diagrams & Manuals
09P702-0109-H1 Engine View Diagrams & Manuals
09P702-0110-H1 Engine View Diagrams & Manuals
09P702-0111-H1 Engine View Diagrams & Manuals
09P702-0112-H1 Engine View Diagrams & Manuals
09P702-0113-H1 Engine View Diagrams & Manuals
09P702-0114-H1 Engine View Diagrams & Manuals
09P702-0115-F1 Engine View Diagrams & Manuals
09P702-0116-F1 Engine View Diagrams & Manuals
09P702-0117-F1 Engine View Diagrams & Manuals
09P702-0118-H1 Engine View Diagrams & Manuals
09P702-0119-F1 Engine View Diagrams & Manuals
09P702-0120-H1 Engine View Diagrams & Manuals
09P702-0121-H1 Engine View Diagrams & Manuals
09P702-0122-H1 Engine View Diagrams & Manuals
09P702-0123-H1 Engine View Diagrams & Manuals
09P702-0124-F1 Engine View Diagrams & Manuals
09P702-0125-H1 Engine View Diagrams & Manuals
09P702-0126-H1 Engine View Diagrams & Manuals
09P702-0127-H1 Engine View Diagrams & Manuals
09P702-0128-F1 Engine View Diagrams & Manuals
09S502-0520-B1 Engine View Diagrams & Manuals
09S502-0705-B1 Engine View Diagrams & Manuals
09S502-0707-B1 Engine View Diagrams & Manuals
09S502-0707-E1 Engine View Diagrams & Manuals
09S502-1019-B1 Engine View Diagrams & Manuals
09S502-1020-B1 Engine View Diagrams & Manuals
09S502-1042-B1 Engine View Diagrams & Manuals
09S502-1051-B1 Engine View Diagrams & Manuals
09S502-1109-B1 Engine View Diagrams & Manuals
09S502-3707-B1 Engine View Diagrams & Manuals
09T502-0002-H1 Engine View Diagrams & Manuals
09T502-0003-H1 Engine View Diagrams & Manuals
09T502-0111-B1 Engine View Diagrams & Manuals
09T502-0111-H1 Engine View Diagrams & Manuals
09T502-0112-B1 Engine View Diagrams & Manuals
09T502-0113-B1 Engine View Diagrams & Manuals
09T502-0113-H1 Engine View Diagrams & Manuals
09T502-0115-B1 Engine View Diagrams & Manuals
09T502-0116-B1 Engine View Diagrams & Manuals
09T502-0116-H1 Engine View Diagrams & Manuals
09T502-0117-B1 Engine View Diagrams & Manuals
09T502-0118-B1 Engine View Diagrams & Manuals
09T502-0120-B1 Engine View Diagrams & Manuals
09T502-0120-H1 Engine View Diagrams & Manuals
09T502-0121-B1 Engine View Diagrams & Manuals
09T502-0121-H1 Engine View Diagrams & Manuals
09T502-0124-B1 Engine View Diagrams & Manuals
09T502-0124-H1 Engine View Diagrams & Manuals
09T502-0126-B1 Engine View Diagrams & Manuals
09T502-0127-B1 Engine View Diagrams & Manuals
09T502-0127-H1 Engine View Diagrams & Manuals
09T502-0128-B1 Engine View Diagrams & Manuals
09T502-0128-H1 Engine View Diagrams & Manuals
09T502-0130-B1 Engine View Diagrams & Manuals
09T502-0130-H1 Engine View Diagrams & Manuals
09T502-0131-B1 Engine View Diagrams & Manuals
09T502-0133-B1 Engine View Diagrams & Manuals
09T502-0134-B1 Engine View Diagrams & Manuals
09T502-0134-H1 Engine View Diagrams & Manuals
09T502-0136-B1 Engine View Diagrams & Manuals
09T502-0136-H1 Engine View Diagrams & Manuals
09T502-0137-B1 Engine View Diagrams & Manuals
09T502-0137-H1 Engine View Diagrams & Manuals
09T502-0138-B1 Engine View Diagrams & Manuals
09T502-0138-H1 Engine View Diagrams & Manuals
09T502-0139-B1 Engine View Diagrams & Manuals
09T502-0139-H1 Engine View Diagrams & Manuals
09T502-0141-B1 Engine View Diagrams & Manuals
09T502-0141-H1 Engine View Diagrams & Manuals
09T502-0142-B1 Engine View Diagrams & Manuals
09T502-0142-H1 Engine View Diagrams & Manuals
09T502-0144-B1 Engine View Diagrams & Manuals
09T502-0145-B1 Engine View Diagrams & Manuals
09T502-0145-H1 Engine View Diagrams & Manuals
09T502-0147-B1 Engine View Diagrams & Manuals
09T502-0149-B1 Engine View Diagrams & Manuals
09T502-0151-B1 Engine View Diagrams & Manuals
09T502-0151-H1 Engine View Diagrams & Manuals
09T502-0152-B1 Engine View Diagrams & Manuals
09T502-0152-H1 Engine View Diagrams & Manuals
09T502-0153-B1 Engine View Diagrams & Manuals
09T502-0153-H1 Engine View Diagrams & Manuals
09T502-0154-B1 Engine View Diagrams & Manuals
09T502-0154-H1 Engine View Diagrams & Manuals
09T502-0155-B1 Engine View Diagrams & Manuals
09T502-0155-H1 Engine View Diagrams & Manuals
09T502-0156-B1 Engine View Diagrams & Manuals
09T502-0156-H1 Engine View Diagrams & Manuals
09T502-0157-B1 Engine View Diagrams & Manuals
09T502-0157-H1 Engine View Diagrams & Manuals
09T502-0158-B1 Engine View Diagrams & Manuals
09T502-0161-B1 Engine View Diagrams & Manuals
09T502-0161-H1 Engine View Diagrams & Manuals
09T502-0163-B1 Engine View Diagrams & Manuals
09T502-0163-H1 Engine View Diagrams & Manuals
09T502-0164-B1 Engine View Diagrams & Manuals
09T502-0164-H1 Engine View Diagrams & Manuals
09T502-0165-B1 Engine View Diagrams & Manuals
09T502-0165-H1 Engine View Diagrams & Manuals
09T502-0166-B1 Engine View Diagrams & Manuals
09T502-0166-H1 Engine View Diagrams & Manuals
09T502-0168-B1 Engine View Diagrams & Manuals
09T502-0168-H1 Engine View Diagrams & Manuals
09T502-0170-H1 Engine View Diagrams & Manuals
09T502-0171-H1 Engine View Diagrams & Manuals
09T502-0173-H1 Engine View Diagrams & Manuals
09T502-0174-H1 Engine View Diagrams & Manuals
09T502-0177-H1 Engine View Diagrams & Manuals
09T502-0178-H1 Engine View Diagrams & Manuals
09T502-0179-H1 Engine View Diagrams & Manuals
09T502-0180-H1 Engine View Diagrams & Manuals
09T502-0182-H1 Engine View Diagrams & Manuals
09T502-0509-B1 Engine View Diagrams & Manuals
09T502-0600-B1 Engine View Diagrams & Manuals
09T502-0600-H1 Engine View Diagrams & Manuals
09T502-0743-B1 Engine View Diagrams & Manuals
09T502-0792-B1 Engine View Diagrams & Manuals
09T502-0865-B1 Engine View Diagrams & Manuals
09T502-0912-B1 Engine View Diagrams & Manuals
09T502-0930-B1 Engine View Diagrams & Manuals
09T502-0930-H1 Engine View Diagrams & Manuals
09T502-0972-H1 Engine View Diagrams & Manuals
09T502-0982-B1 Engine View Diagrams & Manuals
09T502-0982-H1 Engine View Diagrams & Manuals
09T502-0995-B1 Engine View Diagrams & Manuals
09T502-1050-B1 Engine View Diagrams & Manuals
09T502-1218-B1 Engine View Diagrams & Manuals
09T502-1261-B1 Engine View Diagrams & Manuals
09T502-1322-B1 Engine View Diagrams & Manuals
09T502-1407-B1 Engine View Diagrams & Manuals
09T502-1407-H1 Engine View Diagrams & Manuals
09T502-1428-B1 Engine View Diagrams & Manuals
09T502-1434-B1 Engine View Diagrams & Manuals
09T502-1434-H1 Engine View Diagrams & Manuals
09T502-1444-B1 Engine View Diagrams & Manuals
09T502-1452-B1 Engine View Diagrams & Manuals
09T502-1452-H1 Engine View Diagrams & Manuals
09T502-1512-B1 Engine View Diagrams & Manuals
09T502-1512-H1 Engine View Diagrams & Manuals
09T502-1513-H1 Engine View Diagrams & Manuals
09T502-2000-B1 Engine View Diagrams & Manuals
09T502-2006-B1 Engine View Diagrams & Manuals
09T502-2006-H1 Engine View Diagrams & Manuals
09T502-2009-B1 Engine View Diagrams & Manuals
09T502-2018-B1 Engine View Diagrams & Manuals
09T502-2019-B1 Engine View Diagrams & Manuals
09T502-2027-B1 Engine View Diagrams & Manuals
09T502-2032-B1 Engine View Diagrams & Manuals
09T502-2033-B1 Engine View Diagrams & Manuals
09T502-2034-B1 Engine View Diagrams & Manuals
09T502-2035-B1 Engine View Diagrams & Manuals
09T502-2036-B1 Engine View Diagrams & Manuals
09T502-2037-B1 Engine View Diagrams & Manuals
09T502-2037-H1 Engine View Diagrams & Manuals
09T502-2040-B1 Engine View Diagrams & Manuals
09T502-2040-H1 Engine View Diagrams & Manuals
09T502-2041-B1 Engine View Diagrams & Manuals
09T502-2041-H1 Engine View Diagrams & Manuals
09T502-2042-B1 Engine View Diagrams & Manuals
09T502-2045-B1 Engine View Diagrams & Manuals
09T502-2046-B1 Engine View Diagrams & Manuals
09T502-2051-B1 Engine View Diagrams & Manuals
09T502-2052-B1 Engine View Diagrams & Manuals
09T502-2052-H1 Engine View Diagrams & Manuals
09T502-2053-B1 Engine View Diagrams & Manuals
09T502-2054-B1 Engine View Diagrams & Manuals
09T502-2061-B1 Engine View Diagrams & Manuals
09T502-2089-B1 Engine View Diagrams & Manuals
09T502-2089-B2 Engine View Diagrams & Manuals
09T502-2089-H1 Engine View Diagrams & Manuals
09T502-2089-H2 Engine View Diagrams & Manuals
09T502-2090-B1 Engine View Diagrams & Manuals
09T502-2091-B1 Engine View Diagrams & Manuals
09T502-2091-H1 Engine View Diagrams & Manuals
09T502-2092-B1 Engine View Diagrams & Manuals
09T502-2092-H1 Engine View Diagrams & Manuals
09T502-2093-B1 Engine View Diagrams & Manuals
09T502-2093-H1 Engine View Diagrams & Manuals
09T502-2094-B1 Engine View Diagrams & Manuals
09T502-2095-B1 Engine View Diagrams & Manuals
09T502-2095-H1 Engine View Diagrams & Manuals
09T502-2096-B1 Engine View Diagrams & Manuals
09T502-2137-B1 Engine View Diagrams & Manuals
09T502-2207-B1 Engine View Diagrams & Manuals
09T502-2222-B1 Engine View Diagrams & Manuals
09T502-2223-B1 Engine View Diagrams & Manuals
09T502-2224-B1 Engine View Diagrams & Manuals
09T502-2225-B1 Engine View Diagrams & Manuals
09T502-2226-B1 Engine View Diagrams & Manuals
09T502-2227-B1 Engine View Diagrams & Manuals
09T502-2228-B1 Engine View Diagrams & Manuals
09T502-2229-B1 Engine View Diagrams & Manuals
09T502-2229-H1 Engine View Diagrams & Manuals
09T502-2230-B1 Engine View Diagrams & Manuals
09T502-2230-H1 Engine View Diagrams & Manuals
09T502-2231-B1 Engine View Diagrams & Manuals
09T502-2233-B1 Engine View Diagrams & Manuals
09T502-2233-H1 Engine View Diagrams & Manuals
09T502-2234-B1 Engine View Diagrams & Manuals
09T502-2234-H1 Engine View Diagrams & Manuals
09T502-2235-B1 Engine View Diagrams & Manuals
09T502-2236-B1 Engine View Diagrams & Manuals
09T502-2237-B1 Engine View Diagrams & Manuals
09T502-2237-H1 Engine View Diagrams & Manuals
09T502-2238-B1 Engine View Diagrams & Manuals
09T502-2239-B1 Engine View Diagrams & Manuals
09T502-2239-H1 Engine View Diagrams & Manuals
09T502-2240-B1 Engine View Diagrams & Manuals
09T502-2240-H1 Engine View Diagrams & Manuals
09T502-2242-B1 Engine View Diagrams & Manuals
09T502-2242-H1 Engine View Diagrams & Manuals
09T502-3006-H1 Engine View Diagrams & Manuals
09T502-3037-H1 Engine View Diagrams & Manuals
09T502-3040-H1 Engine View Diagrams & Manuals
09T502-3041-H1 Engine View Diagrams & Manuals
09T502-3052-H1 Engine View Diagrams & Manuals
09T502-3089-H1 Engine View Diagrams & Manuals
09T502-3089-H2 Engine View Diagrams & Manuals
09T502-3091-H1 Engine View Diagrams & Manuals
09T502-3092-H1 Engine View Diagrams & Manuals
09T502-3093-H1 Engine View Diagrams & Manuals
09T502-3095-H1 Engine View Diagrams & Manuals
09T502-3111-H1 Engine View Diagrams & Manuals
09T502-3116-H1 Engine View Diagrams & Manuals
09T502-3120-H1 Engine View Diagrams & Manuals
09T502-3121-H1 Engine View Diagrams & Manuals
09T502-3124-H1 Engine View Diagrams & Manuals
09T502-3127-H1 Engine View Diagrams & Manuals
09T502-3128-H1 Engine View Diagrams & Manuals
09T502-3130-H1 Engine View Diagrams & Manuals
09T502-3134-H1 Engine View Diagrams & Manuals
09T502-3136-H1 Engine View Diagrams & Manuals
09T502-3138-H1 Engine View Diagrams & Manuals
09T502-3139-H1 Engine View Diagrams & Manuals
09T502-3141-H1 Engine View Diagrams & Manuals
09T502-3142-H1 Engine View Diagrams & Manuals
09T502-3145-H1 Engine View Diagrams & Manuals
09T502-3151-H1 Engine View Diagrams & Manuals
09T502-3152-H1 Engine View Diagrams & Manuals
09T502-3153-H1 Engine View Diagrams & Manuals
09T502-3154-H1 Engine View Diagrams & Manuals
09T502-3155-H1 Engine View Diagrams & Manuals
09T502-3156-H1 Engine View Diagrams & Manuals
09T502-3157-H1 Engine View Diagrams & Manuals
09T502-3163-H1 Engine View Diagrams & Manuals
09T502-3164-H1 Engine View Diagrams & Manuals
09T502-3165-H1 Engine View Diagrams & Manuals
09T502-3229-H1 Engine View Diagrams & Manuals
09T502-3233-H1 Engine View Diagrams & Manuals
09T502-3237-H1 Engine View Diagrams & Manuals
09T502-3239-H1 Engine View Diagrams & Manuals
09T502-3240-H1 Engine View Diagrams & Manuals
09T502-3242-H1 Engine View Diagrams & Manuals
09T502-3242-H7 Engine View Diagrams & Manuals
09T502-3407-H1 Engine View Diagrams & Manuals
09T502-3434-H1 Engine View Diagrams & Manuals
09T502-3452-H1 Engine View Diagrams & Manuals
09T502-3512-H1 Engine View Diagrams & Manuals
09T502-3600-H1 Engine View Diagrams & Manuals
09T502-3852-B1 Engine View Diagrams & Manuals
09T502-3930-H1 Engine View Diagrams & Manuals
09T502-3982-H1 Engine View Diagrams & Manuals
09T602-0110-H1 Engine View Diagrams & Manuals
09T602-0125-B1 Engine View Diagrams & Manuals
09T602-0126-B1 Engine View Diagrams & Manuals
09T602-0126-H1 Engine View Diagrams & Manuals
09T602-0127-B1 Engine View Diagrams & Manuals
09T602-0127-H1 Engine View Diagrams & Manuals
09T602-0128-B1 Engine View Diagrams & Manuals
09T602-0128-H1 Engine View Diagrams & Manuals
09T602-0130-B1 Engine View Diagrams & Manuals
09T602-0130-H1 Engine View Diagrams & Manuals
09T602-0131-B1 Engine View Diagrams & Manuals
09T602-0131-H1 Engine View Diagrams & Manuals
09T602-0132-B1 Engine View Diagrams & Manuals
09T602-0132-H1 Engine View Diagrams & Manuals
09T602-0133-B1 Engine View Diagrams & Manuals
09T602-0133-H1 Engine View Diagrams & Manuals
09T602-0134-H1 Engine View Diagrams & Manuals
09T602-0135-H1 Engine View Diagrams & Manuals
09T602-0929-B1 Engine View Diagrams & Manuals
09T602-1610-B1 Engine View Diagrams & Manuals
09T602-1618-H1 Engine View Diagrams & Manuals
09T602-1625-H1 Engine View Diagrams & Manuals
09T602-3040-H1 Engine View Diagrams & Manuals
09T602-3089-H1 Engine View Diagrams & Manuals
09T602-3089-H2 Engine View Diagrams & Manuals
09T602-3091-H1 Engine View Diagrams & Manuals
09T602-3095-H1 Engine View Diagrams & Manuals
09T602-3126-H1 Engine View Diagrams & Manuals
09T602-3127-H1 Engine View Diagrams & Manuals
09T602-3128-H1 Engine View Diagrams & Manuals
09T602-3130-H1 Engine View Diagrams & Manuals
09T602-3131-H1 Engine View Diagrams & Manuals
09T602-3132-H1 Engine View Diagrams & Manuals
09T602-3152-H1 Engine View Diagrams & Manuals
09T602-3157-H1 Engine View Diagrams & Manuals
09T602-4444-B1 Engine View Diagrams & Manuals
09T602-4743-B1 Engine View Diagrams & Manuals
09T602-4852-B1 Engine View Diagrams & Manuals
09T602-5019-B1 Engine View Diagrams & Manuals
09T602-5520-B1 Engine View Diagrams & Manuals
09T802-0112-B1 Engine View Diagrams & Manuals
09T802-0113-B1 Engine View Diagrams & Manuals
09T802-1075-B1 Engine View Diagrams & Manuals
093J02-0001-F1 Engine View Diagrams & Manuals
09T702-0111-B1 Engine View Diagrams & Manuals
09T702-0111-E1 Engine View Diagrams & Manuals
09T702-0112-B1 Engine View Diagrams & Manuals
09T702-0112-E1 Engine View Diagrams & Manuals
09T702-0114-B1 Engine View Diagrams & Manuals
09T702-0114-E1 Engine View Diagrams & Manuals
09T702-0115-B1 Engine View Diagrams & Manuals
09T702-0116-B1 Engine View Diagrams & Manuals
09T702-0117-B1 Engine View Diagrams & Manuals
09T702-0118-B1 Engine View Diagrams & Manuals
09T702-0119-B1 Engine View Diagrams & Manuals
09T702-0588-B1 Engine View Diagrams & Manuals
09T702-0858-E1 Engine View Diagrams & Manuals
09T702-0889-B1 Engine View Diagrams & Manuals
09T702-1615-B1 Engine View Diagrams & Manuals
09T702-1616-B1 Engine View Diagrams & Manuals
09T702-1618-B1 Engine View Diagrams & Manuals
09T702-1651-B1 Engine View Diagrams & Manuals
09T702-2011-B1 Engine View Diagrams & Manuals
09T702-2012-B1 Engine View Diagrams & Manuals
09T702-2013-B1 Engine View Diagrams & Manuals
09T702-2024-B1 Engine View Diagrams & Manuals
09T702-2030-B1 Engine View Diagrams & Manuals
09T702-2031-B1 Engine View Diagrams & Manuals
09T702-2032-B1 Engine View Diagrams & Manuals
09T702-2033-B1 Engine View Diagrams & Manuals
09T702-2047-B1 Engine View Diagrams & Manuals
09T702-2063-B1 Engine View Diagrams & Manuals
09T702-2065-B1 Engine View Diagrams & Manuals
09T702-2069-B1 Engine View Diagrams & Manuals
09T702-2070-B1 Engine View Diagrams & Manuals
09T702-2078-B1 Engine View Diagrams & Manuals
09T702-2086-B1 Engine View Diagrams & Manuals
09T702-2087-B1 Engine View Diagrams & Manuals
09T702-2101-B1 Engine View Diagrams & Manuals
09T702-2103-B1 Engine View Diagrams & Manuals
09T702-2129-B1 Engine View Diagrams & Manuals
09T702-2130-B1 Engine View Diagrams & Manuals
09T702-2136-B1 Engine View Diagrams & Manuals
09T702-2139-B1 Engine View Diagrams & Manuals
09T702-2163-B1 Engine View Diagrams & Manuals
09T702-2166-B1 Engine View Diagrams & Manuals
09T702-2180-B1 Engine View Diagrams & Manuals
09T702-2181-B1 Engine View Diagrams & Manuals
09T702-2210-B2 Engine View Diagrams & Manuals
09T702-2225-B1 Engine View Diagrams & Manuals
09T702-2232-B1 Engine View Diagrams & Manuals
09T702-2232-B2 Engine View Diagrams & Manuals
09T702-2239-B1 Engine View Diagrams & Manuals
09T702-2246-B1 Engine View Diagrams & Manuals
09T702-2249-B1 Engine View Diagrams & Manuals
09T702-2251-B1 Engine View Diagrams & Manuals
09T702-2252-B1 Engine View Diagrams & Manuals
09T702-2253-B1 Engine View Diagrams & Manuals
09T702-2254-B1 Engine View Diagrams & Manuals
09T702-3858-B1 Engine View Diagrams & Manuals
09T702-3858-E1 Engine View Diagrams & Manuals
09T702-3866-B1 Engine View Diagrams & Manuals
110988-1051-01 Engine View Diagrams & Manuals
110988-1060-01 Engine View Diagrams & Manuals
110988-1061-01 Engine View Diagrams & Manuals
110988-1062-01 Engine View Diagrams & Manuals
110988-1063-01 Engine View Diagrams & Manuals
110988-1137-01 Engine View Diagrams & Manuals
110988-1141-01 Engine View Diagrams & Manuals
110988-1172-99 Engine View Diagrams & Manuals
110988-1173-99 Engine View Diagrams & Manuals
110988-1176-01 Engine View Diagrams & Manuals
110988-1183-01 Engine View Diagrams & Manuals
110988-1190-01 Engine View Diagrams & Manuals
110988-1206-01 Engine View Diagrams & Manuals
110988-1206-02 Engine View Diagrams & Manuals
110988-1209-01 Engine View Diagrams & Manuals
110988-1211-01 Engine View Diagrams & Manuals
110988-1212-01 Engine View Diagrams & Manuals
110988-1218-01 Engine View Diagrams & Manuals
110988-1219-01 Engine View Diagrams & Manuals
110988-1221-01 Engine View Diagrams & Manuals
110988-1222-01 Engine View Diagrams & Manuals
110988-1231-01 Engine View Diagrams & Manuals
110988-1233-01 Engine View Diagrams & Manuals
110988-1234-01 Engine View Diagrams & Manuals
110988-1237-01 Engine View Diagrams & Manuals
110988-1237-02 Engine View Diagrams & Manuals
110988-1238-01 Engine View Diagrams & Manuals
110988-1239-01 Engine View Diagrams & Manuals
110988-1242-01 Engine View Diagrams & Manuals
110988-1244-01 Engine View Diagrams & Manuals
110988-1246-01 Engine View Diagrams & Manuals
110988-1247-01 Engine View Diagrams & Manuals
110988-1248-01 Engine View Diagrams & Manuals
110988-1249-01 Engine View Diagrams & Manuals
110988-1252-01 Engine View Diagrams & Manuals
110988-1254-01 Engine View Diagrams & Manuals
110988-1255-01 Engine View Diagrams & Manuals
110988-1257-01 Engine View Diagrams & Manuals
110988-1262-01 Engine View Diagrams & Manuals
110988-1264-01 Engine View Diagrams & Manuals
110988-1265-01 Engine View Diagrams & Manuals
110988-1267-01 Engine View Diagrams & Manuals
110988-1268-01 Engine View Diagrams & Manuals
110988-1269-01 Engine View Diagrams & Manuals
110988-1270-01 Engine View Diagrams & Manuals
110988-1271-01 Engine View Diagrams & Manuals
110988-1272-01 Engine View Diagrams & Manuals
110988-1273-01 Engine View Diagrams & Manuals
110988-1274-01 Engine View Diagrams & Manuals
110988-1275-01 Engine View Diagrams & Manuals
110988-1280-01 Engine View Diagrams & Manuals
110988-1284-01 Engine View Diagrams & Manuals
110988-1286-01 Engine View Diagrams & Manuals
110988-1291-01 Engine View Diagrams & Manuals
110988-1294-01 Engine View Diagrams & Manuals
110988-1304-01 Engine View Diagrams & Manuals
110988-1305-01 Engine View Diagrams & Manuals
110988-1310-01 Engine View Diagrams & Manuals
110988-1318-01 Engine View Diagrams & Manuals
110988-1319-01 Engine View Diagrams & Manuals
110988-1319-02 Engine View Diagrams & Manuals
110988-1321-01 Engine View Diagrams & Manuals
110988-3256-01 Engine View Diagrams & Manuals
111702-0102-01 Engine View Diagrams & Manuals
111702-0160-01 Engine View Diagrams & Manuals
111702-0164-01 Engine View Diagrams & Manuals
111702-0165-01 Engine View Diagrams & Manuals
111702-0166-01 Engine View Diagrams & Manuals
111702-0166-02 Engine View Diagrams & Manuals
111702-0182-01 Engine View Diagrams & Manuals
111702-0185-01 Engine View Diagrams & Manuals
111702-0187-01 Engine View Diagrams & Manuals
111702-0187-02 Engine View Diagrams & Manuals
111702-0188-01 Engine View Diagrams & Manuals
111702-0189-01 Engine View Diagrams & Manuals
111702-0197-01 Engine View Diagrams & Manuals
111702-0197-02 Engine View Diagrams & Manuals
111702-0201-01 Engine View Diagrams & Manuals
111702-3000-01 Engine View Diagrams & Manuals
111702-3041-01 Engine View Diagrams & Manuals
111702-3042-01 Engine View Diagrams & Manuals
111702-3043-01 Engine View Diagrams & Manuals
111702-3044-01 Engine View Diagrams & Manuals
111702-3045-01 Engine View Diagrams & Manuals
111702-3047-01 Engine View Diagrams & Manuals
111702-3047-02 Engine View Diagrams & Manuals
111702-3049-01 Engine View Diagrams & Manuals
111702-3050-01 Engine View Diagrams & Manuals
111702-3053-01 Engine View Diagrams & Manuals
111702-3054-01 Engine View Diagrams & Manuals
111702-3055-01 Engine View Diagrams & Manuals
111702-3057-01 Engine View Diagrams & Manuals
111707-0101-01 Engine View Diagrams & Manuals
111707-0163-01 Engine View Diagrams & Manuals
111707-0168-01 Engine View Diagrams & Manuals
111707-0195-01 Engine View Diagrams & Manuals
111707-0196-01 Engine View Diagrams & Manuals
111707-0199-01 Engine View Diagrams & Manuals
111707-0203-01 Engine View Diagrams & Manuals
111707-3036-01 Engine View Diagrams & Manuals
111707-3046-01 Engine View Diagrams & Manuals
111707-3048-01 Engine View Diagrams & Manuals
111707-3051-01 Engine View Diagrams & Manuals
111707-3052-99 Engine View Diagrams & Manuals
111707-3056-01 Engine View Diagrams & Manuals
111707-3058-01 Engine View Diagrams & Manuals
111708-0106-01 Engine View Diagrams & Manuals
111708-0177-01 Engine View Diagrams & Manuals
111708-0180-01 Engine View Diagrams & Manuals
111708-0180-02 Engine View Diagrams & Manuals
111708-0180-03 Engine View Diagrams & Manuals
111708-0181-01 Engine View Diagrams & Manuals
111708-0181-02 Engine View Diagrams & Manuals
111708-0184-01 Engine View Diagrams & Manuals
111708-0192-01 Engine View Diagrams & Manuals
111708-0194-01 Engine View Diagrams & Manuals
111708-0200-01 Engine View Diagrams & Manuals
111708-0204-01 Engine View Diagrams & Manuals
111782-0161-01 Engine View Diagrams & Manuals
111782-0167-01 Engine View Diagrams & Manuals
111782-0173-01 Engine View Diagrams & Manuals
111782-0173-02 Engine View Diagrams & Manuals
111782-0174-01 Engine View Diagrams & Manuals
111782-0175-01 Engine View Diagrams & Manuals
111782-0178-01 Engine View Diagrams & Manuals
111782-0183-01 Engine View Diagrams & Manuals
111782-0190-01 Engine View Diagrams & Manuals
111782-0191-99 Engine View Diagrams & Manuals
111782-0193-01 Engine View Diagrams & Manuals
111787-0162-01 Engine View Diagrams & Manuals
111787-0170-01 Engine View Diagrams & Manuals
111787-0176-01 Engine View Diagrams & Manuals
111787-0179-01 Engine View Diagrams & Manuals
111787-0198-01 Engine View Diagrams & Manuals
111788-0169-01 Engine View Diagrams & Manuals
111788-0171-01 Engine View Diagrams & Manuals
111788-0172-01 Engine View Diagrams & Manuals
111788-0186-01 Engine View Diagrams & Manuals
111788-0202-01 Engine View Diagrams & Manuals
111902-0015-99 Engine View Diagrams & Manuals
111902-0016-99 Engine View Diagrams & Manuals
111902-0017-99 Engine View Diagrams & Manuals
111902-0018-99 Engine View Diagrams & Manuals
111902-0101-99 Engine View Diagrams & Manuals
111902-0102-99 Engine View Diagrams & Manuals
111902-0103-99 Engine View Diagrams & Manuals
111902-0104-99 Engine View Diagrams & Manuals
111902-0130-99 Engine View Diagrams & Manuals
111902-0131-99 Engine View Diagrams & Manuals
111902-0132-99 Engine View Diagrams & Manuals
111902-0133-99 Engine View Diagrams & Manuals
111902-0134-02 Engine View Diagrams & Manuals
111902-0135-99 Engine View Diagrams & Manuals
111902-0136-99 Engine View Diagrams & Manuals
111902-0137-99 Engine View Diagrams & Manuals
111902-0138-99 Engine View Diagrams & Manuals
111902-0139-99 Engine View Diagrams & Manuals
111902-0140-99 Engine View Diagrams & Manuals
111902-0141-99 Engine View Diagrams & Manuals
111902-0142-99 Engine View Diagrams & Manuals
111902-0144-99 Engine View Diagrams & Manuals
111902-0145-99 Engine View Diagrams & Manuals
111902-0146-99 Engine View Diagrams & Manuals
111902-0147-99 Engine View Diagrams & Manuals
111902-0148-99 Engine View Diagrams & Manuals
111902-0149-99 Engine View Diagrams & Manuals
111902-0150-99 Engine View Diagrams & Manuals
111902-0151-99 Engine View Diagrams & Manuals
111902-0152-99 Engine View Diagrams & Manuals
111902-0153-99 Engine View Diagrams & Manuals
111902-0154-99 Engine View Diagrams & Manuals
111902-0155-99 Engine View Diagrams & Manuals
111902-0156-99 Engine View Diagrams & Manuals
111902-0157-99 Engine View Diagrams & Manuals
111902-0158-99 Engine View Diagrams & Manuals
111902-0159-99 Engine View Diagrams & Manuals
111902-0160-99 Engine View Diagrams & Manuals
111902-0161-99 Engine View Diagrams & Manuals
111902-0162-99 Engine View Diagrams & Manuals
111902-0163-99 Engine View Diagrams & Manuals
111902-0164-99 Engine View Diagrams & Manuals
111902-0166-99 Engine View Diagrams & Manuals
111902-0168-99 Engine View Diagrams & Manuals
111902-0169-99 Engine View Diagrams & Manuals
111982-0124-99 Engine View Diagrams & Manuals
111982-0143-99 Engine View Diagrams & Manuals
111982-0165-99 Engine View Diagrams & Manuals
111982-0167-99 Engine View Diagrams & Manuals
111982-0170-99 Engine View Diagrams & Manuals
112702-3060-01 Engine View Diagrams & Manuals
112702-3063-01 Engine View Diagrams & Manuals
112702-3063-02 Engine View Diagrams & Manuals
112702-3064-01 Engine View Diagrams & Manuals
112702-3064-02 Engine View Diagrams & Manuals
112702-3064-03 Engine View Diagrams & Manuals
112702-3065-01 Engine View Diagrams & Manuals
112702-3065-02 Engine View Diagrams & Manuals
112782-3061-01 Engine View Diagrams & Manuals
112782-3062-01 Engine View Diagrams & Manuals
112902-0111-01 Engine View Diagrams & Manuals
112902-3111-01 Engine View Diagrams & Manuals
112902-3130-01 Engine View Diagrams & Manuals
112902-3131-01 Engine View Diagrams & Manuals
112902-3133-01 Engine View Diagrams & Manuals
112902-3911-01 Engine View Diagrams & Manuals
112982-3134-01 Engine View Diagrams & Manuals
112982-3912-99 Engine View Diagrams & Manuals
112982-3913-01 Engine View Diagrams & Manuals
113907-0657-01 Engine View Diagrams & Manuals
113907-0658-01 Engine View Diagrams & Manuals
113907-0659-01 Engine View Diagrams & Manuals
113907-3107-01 Engine View Diagrams & Manuals
113908-0015-99 Engine View Diagrams & Manuals
113908-0016-99 Engine View Diagrams & Manuals
113908-0017-99 Engine View Diagrams & Manuals
113908-0117-99 Engine View Diagrams & Manuals
113908-0131-99 Engine View Diagrams & Manuals
113908-0132-99 Engine View Diagrams & Manuals
113908-0134-99 Engine View Diagrams & Manuals
113908-0135-99 Engine View Diagrams & Manuals
113908-0136-99 Engine View Diagrams & Manuals
113908-0137-99 Engine View Diagrams & Manuals
113908-0138-99 Engine View Diagrams & Manuals
113908-0139-99 Engine View Diagrams & Manuals
113908-0140-99 Engine View Diagrams & Manuals
113908-0142-99 Engine View Diagrams & Manuals
113908-0143-99 Engine View Diagrams & Manuals
113908-0145-99 Engine View Diagrams & Manuals
113908-0148-99 Engine View Diagrams & Manuals
113908-0158-99 Engine View Diagrams & Manuals
113908-0505-01 Engine View Diagrams & Manuals
113908-0515-01 Engine View Diagrams & Manuals
113908-0516-01 Engine View Diagrams & Manuals
113908-0517-01 Engine View Diagrams & Manuals
113908-0617-01 Engine View Diagrams & Manuals
113908-0618-01 Engine View Diagrams & Manuals
113908-0619-01 Engine View Diagrams & Manuals
113908-0620-01 Engine View Diagrams & Manuals
113908-0633-01 Engine View Diagrams & Manuals
113908-0634-01 Engine View Diagrams & Manuals
113908-0634-02 Engine View Diagrams & Manuals
113908-0635-01 Engine View Diagrams & Manuals
113908-0640-01 Engine View Diagrams & Manuals
113908-0641-01 Engine View Diagrams & Manuals
113908-0647-01 Engine View Diagrams & Manuals
113908-0648-01 Engine View Diagrams & Manuals
113908-0649-01 Engine View Diagrams & Manuals
113908-0650-01 Engine View Diagrams & Manuals
113908-0651-01 Engine View Diagrams & Manuals
113908-0651-02 Engine View Diagrams & Manuals
113908-0651-03 Engine View Diagrams & Manuals
113908-0652-01 Engine View Diagrams & Manuals
113908-0652-02 Engine View Diagrams & Manuals
113908-0654-01 Engine View Diagrams & Manuals
113908-0654-02 Engine View Diagrams & Manuals
113908-0656-01 Engine View Diagrams & Manuals
113908-0662-01 Engine View Diagrams & Manuals
113908-0667-01 Engine View Diagrams & Manuals
113908-0668-01 Engine View Diagrams & Manuals
113908-0669-01 Engine View Diagrams & Manuals
113908-0670-01 Engine View Diagrams & Manuals
113908-0671-01 Engine View Diagrams & Manuals
113908-0672-01 Engine View Diagrams & Manuals
113908-0673-01 Engine View Diagrams & Manuals
113908-0674-01 Engine View Diagrams & Manuals
113908-2999-01 Engine View Diagrams & Manuals
113908-2999-02 Engine View Diagrams & Manuals
113908-3121-01 Engine View Diagrams & Manuals
113908-5902-01 Engine View Diagrams & Manuals
113908-5902-02 Engine View Diagrams & Manuals
113908-5905-01 Engine View Diagrams & Manuals
113908-5911-01 Engine View Diagrams & Manuals
113908-5911-02 Engine View Diagrams & Manuals
113908-5912-01 Engine View Diagrams & Manuals
113908-5912-02 Engine View Diagrams & Manuals
113987-0660-01 Engine View Diagrams & Manuals
113987-0661-01 Engine View Diagrams & Manuals
113987-3132-01 Engine View Diagrams & Manuals
113987-3133-01 Engine View Diagrams & Manuals
113987-3138-01 Engine View Diagrams & Manuals
113988-0051-99 Engine View Diagrams & Manuals
113988-0052-99 Engine View Diagrams & Manuals
113988-0120-99 Engine View Diagrams & Manuals
113988-0130-99 Engine View Diagrams & Manuals
113988-0133-99 Engine View Diagrams & Manuals
113988-0141-99 Engine View Diagrams & Manuals
113988-0144-99 Engine View Diagrams & Manuals
113988-0146-99 Engine View Diagrams & Manuals
113988-0147-99 Engine View Diagrams & Manuals
113988-0156-99 Engine View Diagrams & Manuals
113988-0160-99 Engine View Diagrams & Manuals
113988-0521-01 Engine View Diagrams & Manuals
113988-0522-01 Engine View Diagrams & Manuals
113988-0551-01 Engine View Diagrams & Manuals
113988-0552-01 Engine View Diagrams & Manuals
113988-0622-01 Engine View Diagrams & Manuals
113988-0624-01 Engine View Diagrams & Manuals
113988-0632-01 Engine View Diagrams & Manuals
113988-0636-01 Engine View Diagrams & Manuals
113988-0637-01 Engine View Diagrams & Manuals
113988-0638-01 Engine View Diagrams & Manuals
113988-0639-01 Engine View Diagrams & Manuals
113988-0642-01 Engine View Diagrams & Manuals
113988-0642-02 Engine View Diagrams & Manuals
113988-0643-01 Engine View Diagrams & Manuals
113988-0644-01 Engine View Diagrams & Manuals
113988-0645-01 Engine View Diagrams & Manuals
113988-0645-02 Engine View Diagrams & Manuals
113988-0646-01 Engine View Diagrams & Manuals
113988-0655-01 Engine View Diagrams & Manuals
113988-0655-02 Engine View Diagrams & Manuals
113988-0663-01 Engine View Diagrams & Manuals
113988-0664-99 Engine View Diagrams & Manuals
113988-0665-01 Engine View Diagrams & Manuals
113988-0666-01 Engine View Diagrams & Manuals
113988-3130-01 Engine View Diagrams & Manuals
113988-5903-01 Engine View Diagrams & Manuals
113988-5904-01 Engine View Diagrams & Manuals
114702-0010-01 Engine View Diagrams & Manuals
114702-0020-01 Engine View Diagrams & Manuals
114702-0025-01 Engine View Diagrams & Manuals
114702-0026-01 Engine View Diagrams & Manuals
114702-0035-01 Engine View Diagrams & Manuals
114702-0036-01 Engine View Diagrams & Manuals
114702-0100-01 Engine View Diagrams & Manuals
114702-0120-01 Engine View Diagrams & Manuals
114702-0130-01 Engine View Diagrams & Manuals
114702-0130-02 Engine View Diagrams & Manuals
114702-0130-03 Engine View Diagrams & Manuals
114702-0131-01 Engine View Diagrams & Manuals
114702-0131-02 Engine View Diagrams & Manuals
114702-0131-03 Engine View Diagrams & Manuals
114702-0132-01 Engine View Diagrams & Manuals
114702-0134-99 Engine View Diagrams & Manuals
114702-0135-01 Engine View Diagrams & Manuals
114702-0136-01 Engine View Diagrams & Manuals
114702-0138-01 Engine View Diagrams & Manuals
114702-0139-01 Engine View Diagrams & Manuals
114702-0141-01 Engine View Diagrams & Manuals
114702-0142-01 Engine View Diagrams & Manuals
114702-0143-01 Engine View Diagrams & Manuals
114702-0145-01 Engine View Diagrams & Manuals
114702-0145-02 Engine View Diagrams & Manuals
114702-0145-03 Engine View Diagrams & Manuals
114702-0148-01 Engine View Diagrams & Manuals
060500-0137-99 Engine View Diagrams & Manuals
060500-9410-18 Engine View Diagrams & Manuals
060501-9410-10 Engine View Diagrams & Manuals
060501-9410-23 Engine View Diagrams & Manuals
060501-9410-24 Engine View Diagrams & Manuals
060501-9410-25 Engine View Diagrams & Manuals
060501-9410-37 Engine View Diagrams & Manuals
060501-9410-39 Engine View Diagrams & Manuals
060501-9410-42 Engine View Diagrams & Manuals
060501-9410-79 Engine View Diagrams & Manuals
060501-9410-91 Engine View Diagrams & Manuals
060501-9410-95 Engine View Diagrams & Manuals
060501-9411-94 Engine View Diagrams & Manuals
060501-9411-96 Engine View Diagrams & Manuals
060502-0115-99 Engine View Diagrams & Manuals
060502-0126-99 Engine View Diagrams & Manuals
060502-0132-99 Engine View Diagrams & Manuals
060502-0133-99 Engine View Diagrams & Manuals
060502-0134-99 Engine View Diagrams & Manuals
060502-0135-99 Engine View Diagrams & Manuals
060502-0136-99 Engine View Diagrams & Manuals
060502-0138-99 Engine View Diagrams & Manuals
060502-9410-11 Engine View Diagrams & Manuals
060502-9410-13 Engine View Diagrams & Manuals
060502-9410-15 Engine View Diagrams & Manuals
060502-9410-16 Engine View Diagrams & Manuals
060502-9410-17 Engine View Diagrams & Manuals
060502-9410-19 Engine View Diagrams & Manuals
060502-9410-20 Engine View Diagrams & Manuals
060502-9410-21 Engine View Diagrams & Manuals
060502-9410-22 Engine View Diagrams & Manuals
060502-9410-26 Engine View Diagrams & Manuals
060502-9410-27 Engine View Diagrams & Manuals
060502-9410-28 Engine View Diagrams & Manuals
060502-9410-29 Engine View Diagrams & Manuals
060502-9410-30 Engine View Diagrams & Manuals
060502-9410-31 Engine View Diagrams & Manuals
060502-9410-32 Engine View Diagrams & Manuals
060502-9410-33 Engine View Diagrams & Manuals
060502-9410-34 Engine View Diagrams & Manuals
060502-9410-35 Engine View Diagrams & Manuals
060502-9410-36 Engine View Diagrams & Manuals
060502-9410-38 Engine View Diagrams & Manuals
060502-9410-40 Engine View Diagrams & Manuals
060502-9410-41 Engine View Diagrams & Manuals
060502-9410-43 Engine View Diagrams & Manuals
060502-9410-44 Engine View Diagrams & Manuals
060502-9410-45 Engine View Diagrams & Manuals
060502-9410-46 Engine View Diagrams & Manuals
060502-9410-47 Engine View Diagrams & Manuals
060502-9410-49 Engine View Diagrams & Manuals
060502-9410-50 Engine View Diagrams & Manuals
060502-9410-51 Engine View Diagrams & Manuals
060502-9410-52 Engine View Diagrams & Manuals
060502-9410-54 Engine View Diagrams & Manuals
060502-9410-55 Engine View Diagrams & Manuals
060502-9410-57 Engine View Diagrams & Manuals
060502-9410-58 Engine View Diagrams & Manuals
060502-9410-59 Engine View Diagrams & Manuals
060502-9410-60 Engine View Diagrams & Manuals
060502-9410-61 Engine View Diagrams & Manuals
060502-9410-62 Engine View Diagrams & Manuals
060502-9410-63 Engine View Diagrams & Manuals
060502-9410-64 Engine View Diagrams & Manuals
060502-9410-65 Engine View Diagrams & Manuals
060502-9410-66 Engine View Diagrams & Manuals
060502-9410-67 Engine View Diagrams & Manuals
060502-9410-68 Engine View Diagrams & Manuals
060502-9410-69 Engine View Diagrams & Manuals
060502-9410-70 Engine View Diagrams & Manuals
060502-9410-71 Engine View Diagrams & Manuals
060502-9410-72 Engine View Diagrams & Manuals
060502-9410-73 Engine View Diagrams & Manuals
060502-9410-74 Engine View Diagrams & Manuals
060502-9410-75 Engine View Diagrams & Manuals
060502-9410-76 Engine View Diagrams & Manuals
060502-9410-77 Engine View Diagrams & Manuals
060502-9410-78 Engine View Diagrams & Manuals
060502-9410-80 Engine View Diagrams & Manuals
060502-9410-81 Engine View Diagrams & Manuals
060502-9410-82 Engine View Diagrams & Manuals
060502-9410-83 Engine View Diagrams & Manuals
060502-9410-84 Engine View Diagrams & Manuals
060502-9410-85 Engine View Diagrams & Manuals
060502-9410-86 Engine View Diagrams & Manuals
060502-9410-87 Engine View Diagrams & Manuals
060502-9410-88 Engine View Diagrams & Manuals
060502-9410-89 Engine View Diagrams & Manuals
060502-9410-90 Engine View Diagrams & Manuals
060502-9410-92 Engine View Diagrams & Manuals
060502-9410-93 Engine View Diagrams & Manuals
060502-9410-94 Engine View Diagrams & Manuals
060502-9410-96 Engine View Diagrams & Manuals
060502-9410-97 Engine View Diagrams & Manuals
060502-9410-98 Engine View Diagrams & Manuals
060502-9410-99 Engine View Diagrams & Manuals
060502-9411-00 Engine View Diagrams & Manuals
060502-9411-01 Engine View Diagrams & Manuals
060502-9411-02 Engine View Diagrams & Manuals
060502-9411-03 Engine View Diagrams & Manuals
060502-9411-04 Engine View Diagrams & Manuals
060502-9411-08 Engine View Diagrams & Manuals
060502-9411-11 Engine View Diagrams & Manuals
060502-9411-14 Engine View Diagrams & Manuals
060502-9411-15 Engine View Diagrams & Manuals
060502-9411-16 Engine View Diagrams & Manuals
060502-9411-17 Engine View Diagrams & Manuals
060502-9411-18 Engine View Diagrams & Manuals
060502-9411-20 Engine View Diagrams & Manuals
060502-9411-21 Engine View Diagrams & Manuals
060502-9411-22 Engine View Diagrams & Manuals
060502-9411-23 Engine View Diagrams & Manuals
060502-9411-25 Engine View Diagrams & Manuals
060502-9411-26 Engine View Diagrams & Manuals
060502-9411-27 Engine View Diagrams & Manuals
060502-9411-28 Engine View Diagrams & Manuals
060502-9411-29 Engine View Diagrams & Manuals
060502-9411-30 Engine View Diagrams & Manuals
060502-9411-31 Engine View Diagrams & Manuals
060502-9411-32 Engine View Diagrams & Manuals
060502-9411-36 Engine View Diagrams & Manuals
060502-9411-38 Engine View Diagrams & Manuals
060502-9411-40 Engine View Diagrams & Manuals
060502-9411-41 Engine View Diagrams & Manuals
060502-9411-42 Engine View Diagrams & Manuals
060502-9411-44 Engine View Diagrams & Manuals
060502-9411-45 Engine View Diagrams & Manuals
060502-9411-46 Engine View Diagrams & Manuals
060502-9411-48 Engine View Diagrams & Manuals
060502-9411-49 Engine View Diagrams & Manuals
060502-9411-50 Engine View Diagrams & Manuals
060502-9411-51 Engine View Diagrams & Manuals
060502-9411-53 Engine View Diagrams & Manuals
060502-9411-55 Engine View Diagrams & Manuals
060502-9411-56 Engine View Diagrams & Manuals
060502-9411-57 Engine View Diagrams & Manuals
060502-9411-59 Engine View Diagrams & Manuals
060502-9411-60 Engine View Diagrams & Manuals
060502-9411-61 Engine View Diagrams & Manuals
060502-9411-62 Engine View Diagrams & Manuals
060502-9411-63 Engine View Diagrams & Manuals
060502-9411-64 Engine View Diagrams & Manuals
060502-9411-65 Engine View Diagrams & Manuals
060502-9411-69 Engine View Diagrams & Manuals
060502-9411-72 Engine View Diagrams & Manuals
060502-9411-73 Engine View Diagrams & Manuals
060502-9411-74 Engine View Diagrams & Manuals
060502-9411-75 Engine View Diagrams & Manuals
060502-9411-76 Engine View Diagrams & Manuals
060502-9411-77 Engine View Diagrams & Manuals
060502-9411-78 Engine View Diagrams & Manuals
060502-9411-80 Engine View Diagrams & Manuals
060502-9411-81 Engine View Diagrams & Manuals
060502-9411-82 Engine View Diagrams & Manuals
060502-9411-84 Engine View Diagrams & Manuals
060502-9411-86 Engine View Diagrams & Manuals
060502-9411-87 Engine View Diagrams & Manuals
060502-9411-88 Engine View Diagrams & Manuals
060502-9411-89 Engine View Diagrams & Manuals
060502-9411-92 Engine View Diagrams & Manuals
060502-9411-93 Engine View Diagrams & Manuals
060502-9411-95 Engine View Diagrams & Manuals
060502-9411-97 Engine View Diagrams & Manuals
060502-9411-98 Engine View Diagrams & Manuals
060502-9411-99 Engine View Diagrams & Manuals
060503-9410-12 Engine View Diagrams & Manuals
060506-0129-99 Engine View Diagrams & Manuals
060506-0131-99 Engine View Diagrams & Manuals
060506-9411-05 Engine View Diagrams & Manuals
060506-9411-06 Engine View Diagrams & Manuals
060506-9411-07 Engine View Diagrams & Manuals
060506-9411-09 Engine View Diagrams & Manuals
060506-9411-10 Engine View Diagrams & Manuals
060506-9411-12 Engine View Diagrams & Manuals
060506-9411-13 Engine View Diagrams & Manuals
060506-9411-19 Engine View Diagrams & Manuals
060506-9411-24 Engine View Diagrams & Manuals
060506-9411-33 Engine View Diagrams & Manuals
060506-9411-34 Engine View Diagrams & Manuals
060506-9411-35 Engine View Diagrams & Manuals
060506-9411-37 Engine View Diagrams & Manuals
060506-9411-39 Engine View Diagrams & Manuals
060506-9411-43 Engine View Diagrams & Manuals
060506-9411-47 Engine View Diagrams & Manuals
060506-9411-52 Engine View Diagrams & Manuals
060506-9411-54 Engine View Diagrams & Manuals
060506-9411-58 Engine View Diagrams & Manuals
060506-9411-66 Engine View Diagrams & Manuals
060506-9411-67 Engine View Diagrams & Manuals
060506-9411-68 Engine View Diagrams & Manuals
060506-9411-71 Engine View Diagrams & Manuals
060506-9411-79 Engine View Diagrams & Manuals
060506-9411-83 Engine View Diagrams & Manuals
060506-9411-85 Engine View Diagrams & Manuals
060506-9411-90 Engine View Diagrams & Manuals
060506-9411-91 Engine View Diagrams & Manuals
114702-0151-01 Engine View Diagrams & Manuals
114702-0152-01 Engine View Diagrams & Manuals
114702-0156-01 Engine View Diagrams & Manuals
114702-0157-01 Engine View Diagrams & Manuals
114702-0161-01 Engine View Diagrams & Manuals
114702-0163-01 Engine View Diagrams & Manuals
114702-0163-02 Engine View Diagrams & Manuals
114702-0164-01 Engine View Diagrams & Manuals
114702-0165-01 Engine View Diagrams & Manuals
114702-0169-01 Engine View Diagrams & Manuals
114702-0170-01 Engine View Diagrams & Manuals
114702-0172-99 Engine View Diagrams & Manuals
114702-0173-01 Engine View Diagrams & Manuals
114702-0174-01 Engine View Diagrams & Manuals
114702-0174-02 Engine View Diagrams & Manuals
114702-0178-01 Engine View Diagrams & Manuals
114702-0179-01 Engine View Diagrams & Manuals
114702-3000-01 Engine View Diagrams & Manuals
114702-3020-01 Engine View Diagrams & Manuals
114702-3027-01 Engine View Diagrams & Manuals
114702-3028-01 Engine View Diagrams & Manuals
114702-3029-01 Engine View Diagrams & Manuals
114702-3030-01 Engine View Diagrams & Manuals
114702-3030-02 Engine View Diagrams & Manuals
114702-3032-01 Engine View Diagrams & Manuals
114702-3034-01 Engine View Diagrams & Manuals
114702-3037-01 Engine View Diagrams & Manuals
114702-3039-01 Engine View Diagrams & Manuals
114702-3040-01 Engine View Diagrams & Manuals
114702-3041-01 Engine View Diagrams & Manuals
114702-3715-01 Engine View Diagrams & Manuals
114707-0160-01 Engine View Diagrams & Manuals
114707-0167-01 Engine View Diagrams & Manuals
114707-0171-01 Engine View Diagrams & Manuals
114707-3031-01 Engine View Diagrams & Manuals
114707-3031-02 Engine View Diagrams & Manuals
114707-3033-01 Engine View Diagrams & Manuals
114708-0146-01 Engine View Diagrams & Manuals
114708-0147-01 Engine View Diagrams & Manuals
114708-0149-01 Engine View Diagrams & Manuals
114708-0155-01 Engine View Diagrams & Manuals
114708-0155-02 Engine View Diagrams & Manuals
114708-0155-03 Engine View Diagrams & Manuals
114708-0175-01 Engine View Diagrams & Manuals
114782-0050-01 Engine View Diagrams & Manuals
114782-0051-01 Engine View Diagrams & Manuals
114782-0133-01 Engine View Diagrams & Manuals
114782-0137-01 Engine View Diagrams & Manuals
114782-0140-01 Engine View Diagrams & Manuals
114782-0144-01 Engine View Diagrams & Manuals
114782-0153-01 Engine View Diagrams & Manuals
114782-0154-01 Engine View Diagrams & Manuals
114782-0158-01 Engine View Diagrams & Manuals
114782-0159-01 Engine View Diagrams & Manuals
114782-0166-01 Engine View Diagrams & Manuals
114782-0176-99 Engine View Diagrams & Manuals
114782-0177-01 Engine View Diagrams & Manuals
114782-3026-01 Engine View Diagrams & Manuals
114782-3038-01 Engine View Diagrams & Manuals
114782-3750-01 Engine View Diagrams & Manuals
114787-0168-01 Engine View Diagrams & Manuals
114788-0162-01 Engine View Diagrams & Manuals
114902-0025-01 Engine View Diagrams & Manuals
114902-0027-01 Engine View Diagrams & Manuals
114902-0029-01 Engine View Diagrams & Manuals
114902-0101-01 Engine View Diagrams & Manuals
114902-0111-99 Engine View Diagrams & Manuals
114902-0131-01 Engine View Diagrams & Manuals
114902-0134-01 Engine View Diagrams & Manuals
114902-0135-01 Engine View Diagrams & Manuals
114902-0136-01 Engine View Diagrams & Manuals
114902-0142-01 Engine View Diagrams & Manuals
114902-0153-01 Engine View Diagrams & Manuals
114902-0157-01 Engine View Diagrams & Manuals
114902-0170-01 Engine View Diagrams & Manuals
114902-0174-01 Engine View Diagrams & Manuals
114902-0178-01 Engine View Diagrams & Manuals
114902-0182-01 Engine View Diagrams & Manuals
114902-3015-01 Engine View Diagrams & Manuals
114902-3016-01 Engine View Diagrams & Manuals
114902-3111-01 Engine View Diagrams & Manuals
114902-3112-01 Engine View Diagrams & Manuals
114902-3113-01 Engine View Diagrams & Manuals
114902-3114-01 Engine View Diagrams & Manuals
114902-3130-01 Engine View Diagrams & Manuals
114902-3131-01 Engine View Diagrams & Manuals
114902-3131-02 Engine View Diagrams & Manuals
114902-3132-01 Engine View Diagrams & Manuals
114902-3133-01 Engine View Diagrams & Manuals
114902-3134-01 Engine View Diagrams & Manuals
114902-3135-01 Engine View Diagrams & Manuals
114902-3136-01 Engine View Diagrams & Manuals
114902-3137-01 Engine View Diagrams & Manuals
114902-3139-01 Engine View Diagrams & Manuals
114902-3140-01 Engine View Diagrams & Manuals
114902-3140-02 Engine View Diagrams & Manuals
114902-3141-01 Engine View Diagrams & Manuals
114902-3147-01 Engine View Diagrams & Manuals
114902-3148-01 Engine View Diagrams & Manuals
114902-3149-01 Engine View Diagrams & Manuals
114902-3150-01 Engine View Diagrams & Manuals
114902-3153-01 Engine View Diagrams & Manuals
114902-3154-01 Engine View Diagrams & Manuals
114902-3154-02 Engine View Diagrams & Manuals
114902-3156-01 Engine View Diagrams & Manuals
114902-3157-01 Engine View Diagrams & Manuals
114908-0015-01 Engine View Diagrams & Manuals
114908-0016-01 Engine View Diagrams & Manuals
114908-0018-01 Engine View Diagrams & Manuals
114908-0117-01 Engine View Diagrams & Manuals
114908-0137-01 Engine View Diagrams & Manuals
114908-0140-01 Engine View Diagrams & Manuals
114908-0141-01 Engine View Diagrams & Manuals
114908-0143-01 Engine View Diagrams & Manuals
114908-0143-02 Engine View Diagrams & Manuals
114908-0144-01 Engine View Diagrams & Manuals
114908-0145-01 Engine View Diagrams & Manuals
114908-0146-01 Engine View Diagrams & Manuals
114908-0149-01 Engine View Diagrams & Manuals
114908-0150-01 Engine View Diagrams & Manuals
114908-0151-01 Engine View Diagrams & Manuals
114908-0152-01 Engine View Diagrams & Manuals
114908-0155-01 Engine View Diagrams & Manuals
114908-0156-01 Engine View Diagrams & Manuals
114908-0172-01 Engine View Diagrams & Manuals
114908-0175-01 Engine View Diagrams & Manuals
114908-0177-01 Engine View Diagrams & Manuals
114908-0179-01 Engine View Diagrams & Manuals
114908-0183-01 Engine View Diagrams & Manuals
114908-0187-01 Engine View Diagrams & Manuals
114982-0132-01 Engine View Diagrams & Manuals
114982-0133-01 Engine View Diagrams & Manuals
114982-0139-01 Engine View Diagrams & Manuals
114982-0147-01 Engine View Diagrams & Manuals
114982-0148-01 Engine View Diagrams & Manuals
114982-0154-01 Engine View Diagrams & Manuals
114982-0171-01 Engine View Diagrams & Manuals
114982-0180-01 Engine View Diagrams & Manuals
114982-0180-02 Engine View Diagrams & Manuals
114982-0184-01 Engine View Diagrams & Manuals
114982-0186-01 Engine View Diagrams & Manuals
114982-3050-01 Engine View Diagrams & Manuals
114982-3051-01 Engine View Diagrams & Manuals
114982-3126-01 Engine View Diagrams & Manuals
114982-3138-01 Engine View Diagrams & Manuals
114982-3142-01 Engine View Diagrams & Manuals
114982-3143-01 Engine View Diagrams & Manuals
114982-3144-01 Engine View Diagrams & Manuals
114982-3146-01 Engine View Diagrams & Manuals
114982-3151-01 Engine View Diagrams & Manuals
114982-3152-99 Engine View Diagrams & Manuals
114982-3155-01 Engine View Diagrams & Manuals
114987-0185-01 Engine View Diagrams & Manuals
114987-0185-02 Engine View Diagrams & Manuals
114987-3145-01 Engine View Diagrams & Manuals
114988-0051-01 Engine View Diagrams & Manuals
114988-0138-01 Engine View Diagrams & Manuals
114988-0168-01 Engine View Diagrams & Manuals
114988-0169-01 Engine View Diagrams & Manuals
114988-0176-01 Engine View Diagrams & Manuals
114988-0181-01 Engine View Diagrams & Manuals
114988-3123-01 Engine View Diagrams & Manuals
061501-9415-10 Engine View Diagrams & Manuals
061501-9415-67 Engine View Diagrams & Manuals
061501-9415-73 Engine View Diagrams & Manuals
061502-0131-99 Engine View Diagrams & Manuals
061502-0132-99 Engine View Diagrams & Manuals
061502-9415-11 Engine View Diagrams & Manuals
061502-9415-13 Engine View Diagrams & Manuals
061502-9415-14 Engine View Diagrams & Manuals
061502-9415-15 Engine View Diagrams & Manuals
061502-9415-16 Engine View Diagrams & Manuals
061502-9415-18 Engine View Diagrams & Manuals
061502-9415-19 Engine View Diagrams & Manuals
061502-9415-20 Engine View Diagrams & Manuals
061502-9415-21 Engine View Diagrams & Manuals
061502-9415-22 Engine View Diagrams & Manuals
061502-9415-23 Engine View Diagrams & Manuals
061502-9415-24 Engine View Diagrams & Manuals
061502-9415-25 Engine View Diagrams & Manuals
061502-9415-26 Engine View Diagrams & Manuals
061502-9415-27 Engine View Diagrams & Manuals
061502-9415-28 Engine View Diagrams & Manuals
061502-9415-29 Engine View Diagrams & Manuals
061502-9415-30 Engine View Diagrams & Manuals
061502-9415-31 Engine View Diagrams & Manuals
061502-9415-32 Engine View Diagrams & Manuals
061502-9415-33 Engine View Diagrams & Manuals
061502-9415-34 Engine View Diagrams & Manuals
061502-9415-35 Engine View Diagrams & Manuals
061502-9415-36 Engine View Diagrams & Manuals
061502-9415-37 Engine View Diagrams & Manuals
061502-9415-38 Engine View Diagrams & Manuals
061502-9415-39 Engine View Diagrams & Manuals
061502-9415-40 Engine View Diagrams & Manuals
061502-9415-41 Engine View Diagrams & Manuals
061502-9415-42 Engine View Diagrams & Manuals
061502-9415-43 Engine View Diagrams & Manuals
061502-9415-44 Engine View Diagrams & Manuals
061502-9415-45 Engine View Diagrams & Manuals
061502-9415-46 Engine View Diagrams & Manuals
061502-9415-47 Engine View Diagrams & Manuals
061502-9415-48 Engine View Diagrams & Manuals
061502-9415-49 Engine View Diagrams & Manuals
061502-9415-50 Engine View Diagrams & Manuals
061502-9415-51 Engine View Diagrams & Manuals
061502-9415-52 Engine View Diagrams & Manuals
061502-9415-53 Engine View Diagrams & Manuals
061502-9415-54 Engine View Diagrams & Manuals
061502-9415-55 Engine View Diagrams & Manuals
061502-9415-56 Engine View Diagrams & Manuals
061502-9415-57 Engine View Diagrams & Manuals
061502-9415-58 Engine View Diagrams & Manuals
061502-9415-59 Engine View Diagrams & Manuals
061502-9415-60 Engine View Diagrams & Manuals
061502-9415-61 Engine View Diagrams & Manuals
061502-9415-63 Engine View Diagrams & Manuals
061502-9415-64 Engine View Diagrams & Manuals
061502-9415-65 Engine View Diagrams & Manuals
061502-9415-66 Engine View Diagrams & Manuals
061502-9415-68 Engine View Diagrams & Manuals
061502-9415-69 Engine View Diagrams & Manuals
061502-9415-70 Engine View Diagrams & Manuals
061502-9415-71 Engine View Diagrams & Manuals
061502-9415-72 Engine View Diagrams & Manuals
061502-9415-74 Engine View Diagrams & Manuals
061502-9415-75 Engine View Diagrams & Manuals
061502-9415-76 Engine View Diagrams & Manuals
061502-9415-77 Engine View Diagrams & Manuals
061502-9415-78 Engine View Diagrams & Manuals
061502-9415-79 Engine View Diagrams & Manuals
061502-9415-80 Engine View Diagrams & Manuals
061502-9415-81 Engine View Diagrams & Manuals
061502-9415-82 Engine View Diagrams & Manuals
061502-9415-83 Engine View Diagrams & Manuals
061502-9415-84 Engine View Diagrams & Manuals
061502-9415-85 Engine View Diagrams & Manuals
061502-9415-88 Engine View Diagrams & Manuals
061502-9415-89 Engine View Diagrams & Manuals
061502-9415-90 Engine View Diagrams & Manuals
061502-9415-94 Engine View Diagrams & Manuals
061502-9415-96 Engine View Diagrams & Manuals
061502-9415-98 Engine View Diagrams & Manuals
061502-9415-99 Engine View Diagrams & Manuals
061503-9415-12 Engine View Diagrams & Manuals
061506-9415-86 Engine View Diagrams & Manuals
061506-9415-87 Engine View Diagrams & Manuals
061506-9415-91 Engine View Diagrams & Manuals
061506-9415-92 Engine View Diagrams & Manuals
061506-9415-93 Engine View Diagrams & Manuals
061506-9415-95 Engine View Diagrams & Manuals
061506-9415-97 Engine View Diagrams & Manuals
080500-0198-99 Engine View Diagrams & Manuals
080501-0110-99 Engine View Diagrams & Manuals
080501-0146-99 Engine View Diagrams & Manuals
080501-0196-99 Engine View Diagrams & Manuals
080501-9090-10 Engine View Diagrams & Manuals
080501-9090-11 Engine View Diagrams & Manuals
080501-9090-12 Engine View Diagrams & Manuals
080501-9090-13 Engine View Diagrams & Manuals
080502-0126-99 Engine View Diagrams & Manuals
080502-0132-99 Engine View Diagrams & Manuals
080502-0133-99 Engine View Diagrams & Manuals
080502-0134-99 Engine View Diagrams & Manuals
080502-0136-99 Engine View Diagrams & Manuals
080502-0138-99 Engine View Diagrams & Manuals
080502-0139-99 Engine View Diagrams & Manuals
080502-0140-99 Engine View Diagrams & Manuals
080502-0141-99 Engine View Diagrams & Manuals
080502-0142-99 Engine View Diagrams & Manuals
080502-0143-99 Engine View Diagrams & Manuals
080502-0145-99 Engine View Diagrams & Manuals
080502-0147-99 Engine View Diagrams & Manuals
080502-0148-99 Engine View Diagrams & Manuals
080502-0149-99 Engine View Diagrams & Manuals
080502-0150-99 Engine View Diagrams & Manuals
080502-0152-99 Engine View Diagrams & Manuals
080502-0153-99 Engine View Diagrams & Manuals
080502-0154-99 Engine View Diagrams & Manuals
080502-0155-99 Engine View Diagrams & Manuals
080502-0157-99 Engine View Diagrams & Manuals
080502-0158-99 Engine View Diagrams & Manuals
080502-0159-99 Engine View Diagrams & Manuals
080502-0161-99 Engine View Diagrams & Manuals
080502-0162-99 Engine View Diagrams & Manuals
080502-0163-99 Engine View Diagrams & Manuals
080502-0164-99 Engine View Diagrams & Manuals
080502-0165-99 Engine View Diagrams & Manuals
080502-0167-99 Engine View Diagrams & Manuals
080502-0168-99 Engine View Diagrams & Manuals
080502-0170-99 Engine View Diagrams & Manuals
080502-0171-99 Engine View Diagrams & Manuals
080502-0175-99 Engine View Diagrams & Manuals
080502-0176-99 Engine View Diagrams & Manuals
080502-0177-99 Engine View Diagrams & Manuals
080502-0179-99 Engine View Diagrams & Manuals
080502-0182-99 Engine View Diagrams & Manuals
080502-0183-99 Engine View Diagrams & Manuals
080502-0184-99 Engine View Diagrams & Manuals
080502-0185-99 Engine View Diagrams & Manuals
080502-0186-99 Engine View Diagrams & Manuals
080502-0189-99 Engine View Diagrams & Manuals
080502-0190-99 Engine View Diagrams & Manuals
080502-0191-99 Engine View Diagrams & Manuals
080502-0195-99 Engine View Diagrams & Manuals
080502-0197-99 Engine View Diagrams & Manuals
080502-9090-14 Engine View Diagrams & Manuals
080502-9090-15 Engine View Diagrams & Manuals
080502-9090-16 Engine View Diagrams & Manuals
080502-9090-17 Engine View Diagrams & Manuals
080502-9090-18 Engine View Diagrams & Manuals
080502-9090-26 Engine View Diagrams & Manuals
080502-9090-27 Engine View Diagrams & Manuals
080502-9090-28 Engine View Diagrams & Manuals
080502-9090-29 Engine View Diagrams & Manuals
080502-9090-30 Engine View Diagrams & Manuals
080502-9090-31 Engine View Diagrams & Manuals
080502-9090-32 Engine View Diagrams & Manuals
080502-9090-33 Engine View Diagrams & Manuals
080502-9090-34 Engine View Diagrams & Manuals
080502-9090-35 Engine View Diagrams & Manuals
080502-9090-36 Engine View Diagrams & Manuals
080502-9090-37 Engine View Diagrams & Manuals
080502-9090-38 Engine View Diagrams & Manuals
080502-9090-39 Engine View Diagrams & Manuals
080502-9090-40 Engine View Diagrams & Manuals
080502-9090-41 Engine View Diagrams & Manuals
080502-9090-42 Engine View Diagrams & Manuals
080502-9090-43 Engine View Diagrams & Manuals
080502-9090-44 Engine View Diagrams & Manuals
080502-9090-45 Engine View Diagrams & Manuals
080502-9090-46 Engine View Diagrams & Manuals
080502-9090-47 Engine View Diagrams & Manuals
080502-9090-48 Engine View Diagrams & Manuals
080502-9090-49 Engine View Diagrams & Manuals
080502-9090-50 Engine View Diagrams & Manuals
080502-9090-51 Engine View Diagrams & Manuals
080502-9090-52 Engine View Diagrams & Manuals
080502-9090-53 Engine View Diagrams & Manuals
080502-9090-54 Engine View Diagrams & Manuals
080502-9090-55 Engine View Diagrams & Manuals
080502-9090-56 Engine View Diagrams & Manuals
080502-9090-57 Engine View Diagrams & Manuals
080502-9090-58 Engine View Diagrams & Manuals
080502-9090-59 Engine View Diagrams & Manuals
080502-9090-60 Engine View Diagrams & Manuals
080502-9090-61 Engine View Diagrams & Manuals
080502-9090-63 Engine View Diagrams & Manuals
080502-9090-64 Engine View Diagrams & Manuals
080502-9090-65 Engine View Diagrams & Manuals
080502-9090-66 Engine View Diagrams & Manuals
080502-9090-68 Engine View Diagrams & Manuals
080502-9090-69 Engine View Diagrams & Manuals
080502-9090-70 Engine View Diagrams & Manuals
080502-9090-71 Engine View Diagrams & Manuals
080502-9090-72 Engine View Diagrams & Manuals
080502-9090-73 Engine View Diagrams & Manuals
080502-9090-74 Engine View Diagrams & Manuals
080502-9090-76 Engine View Diagrams & Manuals
080502-9090-77 Engine View Diagrams & Manuals
080502-9090-78 Engine View Diagrams & Manuals
080502-9090-79 Engine View Diagrams & Manuals
080502-9090-80 Engine View Diagrams & Manuals
080502-9090-81 Engine View Diagrams & Manuals
080502-9090-82 Engine View Diagrams & Manuals
080502-9090-83 Engine View Diagrams & Manuals
080502-9090-84 Engine View Diagrams & Manuals
080502-9090-85 Engine View Diagrams & Manuals
080502-9090-86 Engine View Diagrams & Manuals
080502-9090-87 Engine View Diagrams & Manuals
080502-9090-88 Engine View Diagrams & Manuals
080502-9090-89 Engine View Diagrams & Manuals
080502-9090-90 Engine View Diagrams & Manuals
080502-9090-91 Engine View Diagrams & Manuals
080502-9090-92 Engine View Diagrams & Manuals
080502-9090-93 Engine View Diagrams & Manuals
080502-9090-94 Engine View Diagrams & Manuals
080502-9090-95 Engine View Diagrams & Manuals
080502-9090-96 Engine View Diagrams & Manuals
080502-9090-97 Engine View Diagrams & Manuals
080502-9090-98 Engine View Diagrams & Manuals
080502-9090-99 Engine View Diagrams & Manuals
080502-9091-00 Engine View Diagrams & Manuals
080502-9091-01 Engine View Diagrams & Manuals
080502-9091-02 Engine View Diagrams & Manuals
080502-9091-06 Engine View Diagrams & Manuals
080502-9091-11 Engine View Diagrams & Manuals
080502-9091-18 Engine View Diagrams & Manuals
080502-9091-21 Engine View Diagrams & Manuals
080502-9091-22 Engine View Diagrams & Manuals
080502-9091-23 Engine View Diagrams & Manuals
080502-9091-29 Engine View Diagrams & Manuals
080502-9091-30 Engine View Diagrams & Manuals
080502-9091-31 Engine View Diagrams & Manuals
080502-9091-32 Engine View Diagrams & Manuals
080502-9091-34 Engine View Diagrams & Manuals
080502-9091-35 Engine View Diagrams & Manuals
080502-9091-38 Engine View Diagrams & Manuals
080502-9091-40 Engine View Diagrams & Manuals
080502-9091-41 Engine View Diagrams & Manuals
080502-9091-44 Engine View Diagrams & Manuals
080502-9091-47 Engine View Diagrams & Manuals
080502-9091-49 Engine View Diagrams & Manuals
080502-9091-50 Engine View Diagrams & Manuals
080502-9091-53 Engine View Diagrams & Manuals
080502-9091-55 Engine View Diagrams & Manuals
080502-9091-57 Engine View Diagrams & Manuals
080502-9091-58 Engine View Diagrams & Manuals
080502-9091-59 Engine View Diagrams & Manuals
080502-9091-60 Engine View Diagrams & Manuals
080502-9091-62 Engine View Diagrams & Manuals
080502-9091-63 Engine View Diagrams & Manuals
080502-9091-64 Engine View Diagrams & Manuals
080502-9091-66 Engine View Diagrams & Manuals
080502-9091-67 Engine View Diagrams & Manuals
080502-9091-68 Engine View Diagrams & Manuals
080502-9091-73 Engine View Diagrams & Manuals
080502-9091-74 Engine View Diagrams & Manuals
080502-9091-75 Engine View Diagrams & Manuals
080502-9091-76 Engine View Diagrams & Manuals
080502-9091-80 Engine View Diagrams & Manuals
080502-9091-82 Engine View Diagrams & Manuals
080502-9091-83 Engine View Diagrams & Manuals
080502-9091-84 Engine View Diagrams & Manuals
080502-9091-86 Engine View Diagrams & Manuals
080502-9091-87 Engine View Diagrams & Manuals
080502-9091-89 Engine View Diagrams & Manuals
080502-9091-90 Engine View Diagrams & Manuals
080502-9091-95 Engine View Diagrams & Manuals
080502-9091-96 Engine View Diagrams & Manuals
080502-9091-98 Engine View Diagrams & Manuals
080502-9091-99 Engine View Diagrams & Manuals
080506-0192-99 Engine View Diagrams & Manuals
080506-0193-99 Engine View Diagrams & Manuals
080506-0194-99 Engine View Diagrams & Manuals
080506-9091-05 Engine View Diagrams & Manuals
080506-9091-07 Engine View Diagrams & Manuals
080506-9091-08 Engine View Diagrams & Manuals
080506-9091-13 Engine View Diagrams & Manuals
080506-9091-14 Engine View Diagrams & Manuals
080506-9091-17 Engine View Diagrams & Manuals
080506-9091-19 Engine View Diagrams & Manuals
080506-9091-24 Engine View Diagrams & Manuals
080506-9091-33 Engine View Diagrams & Manuals
080506-9091-36 Engine View Diagrams & Manuals
080506-9091-39 Engine View Diagrams & Manuals
080506-9091-42 Engine View Diagrams & Manuals
080506-9091-43 Engine View Diagrams & Manuals
080506-9091-45 Engine View Diagrams & Manuals
080506-9091-46 Engine View Diagrams & Manuals
080506-9091-48 Engine View Diagrams & Manuals
080506-9091-51 Engine View Diagrams & Manuals
080506-9091-54 Engine View Diagrams & Manuals
080506-9091-56 Engine View Diagrams & Manuals
080506-9091-61 Engine View Diagrams & Manuals
080506-9091-65 Engine View Diagrams & Manuals
080506-9091-69 Engine View Diagrams & Manuals
080506-9091-70 Engine View Diagrams & Manuals
080506-9091-77 Engine View Diagrams & Manuals
080506-9091-81 Engine View Diagrams & Manuals
080506-9091-85 Engine View Diagrams & Manuals
080506-9091-88 Engine View Diagrams & Manuals
080506-9091-91 Engine View Diagrams & Manuals
080506-9091-92 Engine View Diagrams & Manuals
080506-9091-94 Engine View Diagrams & Manuals
080503-9090-19 Engine View Diagrams & Manuals
080503-9090-21 Engine View Diagrams & Manuals
080503-9090-22 Engine View Diagrams & Manuals
080503-9090-23 Engine View Diagrams & Manuals
080503-9090-67 Engine View Diagrams & Manuals
080506-0129-99 Engine View Diagrams & Manuals
080506-0135-99 Engine View Diagrams & Manuals
080506-0137-99 Engine View Diagrams & Manuals
080506-0144-99 Engine View Diagrams & Manuals
080506-0151-99 Engine View Diagrams & Manuals
080506-0160-99 Engine View Diagrams & Manuals
080506-0166-99 Engine View Diagrams & Manuals
080506-0169-99 Engine View Diagrams & Manuals
080506-0174-99 Engine View Diagrams & Manuals
080506-0178-99 Engine View Diagrams & Manuals
080506-0180-99 Engine View Diagrams & Manuals
080506-0187-99 Engine View Diagrams & Manuals
080506-0188-99 Engine View Diagrams & Manuals
080582-9091-28 Engine View Diagrams & Manuals
080592-0131-99 Engine View Diagrams & Manuals
080592-0156-99 Engine View Diagrams & Manuals
080592-0181-99 Engine View Diagrams & Manuals
080592-9090-25 Engine View Diagrams & Manuals
080592-9090-62 Engine View Diagrams & Manuals
080592-9090-75 Engine View Diagrams & Manuals
080592-9091-03 Engine View Diagrams & Manuals
080592-9091-12 Engine View Diagrams & Manuals
080592-9091-20 Engine View Diagrams & Manuals
080592-9091-25 Engine View Diagrams & Manuals
080592-9091-26 Engine View Diagrams & Manuals
080592-9091-37 Engine View Diagrams & Manuals
080592-9091-52 Engine View Diagrams & Manuals
080592-9091-71 Engine View Diagrams & Manuals
080592-9091-78 Engine View Diagrams & Manuals
080592-9091-97 Engine View Diagrams & Manuals
080596-0130-99 Engine View Diagrams & Manuals
080596-9091-04 Engine View Diagrams & Manuals
080596-9091-09 Engine View Diagrams & Manuals
080596-9091-10 Engine View Diagrams & Manuals
080596-9091-15 Engine View Diagrams & Manuals
080596-9091-16 Engine View Diagrams & Manuals
080596-9091-27 Engine View Diagrams & Manuals
080596-9091-79 Engine View Diagrams & Manuals
080701-0010-99 Engine View Diagrams & Manuals
080701-0110-99 Engine View Diagrams & Manuals
080701-0176-99 Engine View Diagrams & Manuals
080701-9440-10 Engine View Diagrams & Manuals
080701-9440-20 Engine View Diagrams & Manuals
080701-9440-22 Engine View Diagrams & Manuals
080701-9440-60 Engine View Diagrams & Manuals
080701-9441-45 Engine View Diagrams & Manuals
080701-9441-53 Engine View Diagrams & Manuals
080702-0015-99 Engine View Diagrams & Manuals
080702-0016-99 Engine View Diagrams & Manuals
080702-0017-99 Engine View Diagrams & Manuals
080702-0018-99 Engine View Diagrams & Manuals
080702-0019-99 Engine View Diagrams & Manuals
080702-0020-99 Engine View Diagrams & Manuals
080702-0021-99 Engine View Diagrams & Manuals
080702-0115-99 Engine View Diagrams & Manuals
080702-0118-99 Engine View Diagrams & Manuals
080702-0126-99 Engine View Diagrams & Manuals
080702-0131-99 Engine View Diagrams & Manuals
080702-0140-99 Engine View Diagrams & Manuals
080702-0142-99 Engine View Diagrams & Manuals
080702-0143-99 Engine View Diagrams & Manuals
080702-0144-99 Engine View Diagrams & Manuals
080702-0145-99 Engine View Diagrams & Manuals
080702-0146-99 Engine View Diagrams & Manuals
080702-0147-99 Engine View Diagrams & Manuals
080702-0149-99 Engine View Diagrams & Manuals
080702-0150-99 Engine View Diagrams & Manuals
080702-0151-99 Engine View Diagrams & Manuals
080702-0153-99 Engine View Diagrams & Manuals
080702-0154-99 Engine View Diagrams & Manuals
080702-0155-99 Engine View Diagrams & Manuals
080702-0157-99 Engine View Diagrams & Manuals
080702-0158-99 Engine View Diagrams & Manuals
080702-0159-99 Engine View Diagrams & Manuals
080702-0160-99 Engine View Diagrams & Manuals
080702-0161-99 Engine View Diagrams & Manuals
080702-0164-99 Engine View Diagrams & Manuals
080702-0165-99 Engine View Diagrams & Manuals
080702-0166-99 Engine View Diagrams & Manuals
080702-0167-99 Engine View Diagrams & Manuals
080702-0168-99 Engine View Diagrams & Manuals
080702-0169-99 Engine View Diagrams & Manuals
080702-0171-99 Engine View Diagrams & Manuals
080702-0173-99 Engine View Diagrams & Manuals
080702-0174-99 Engine View Diagrams & Manuals
080702-0175-99 Engine View Diagrams & Manuals
080702-9440-11 Engine View Diagrams & Manuals
080702-9440-13 Engine View Diagrams & Manuals
080702-9440-15 Engine View Diagrams & Manuals
080702-9440-16 Engine View Diagrams & Manuals
080702-9440-19 Engine View Diagrams & Manuals
080702-9440-21 Engine View Diagrams & Manuals
080702-9440-23 Engine View Diagrams & Manuals
080702-9440-24 Engine View Diagrams & Manuals
080702-9440-25 Engine View Diagrams & Manuals
080702-9440-26 Engine View Diagrams & Manuals
080702-9440-27 Engine View Diagrams & Manuals
080702-9440-28 Engine View Diagrams & Manuals
080702-9440-31 Engine View Diagrams & Manuals
080702-9440-32 Engine View Diagrams & Manuals
080702-9440-33 Engine View Diagrams & Manuals
080702-9440-34 Engine View Diagrams & Manuals
080702-9440-35 Engine View Diagrams & Manuals
080702-9440-36 Engine View Diagrams & Manuals
080702-9440-37 Engine View Diagrams & Manuals
080702-9440-38 Engine View Diagrams & Manuals
080702-9440-39 Engine View Diagrams & Manuals
080702-9440-40 Engine View Diagrams & Manuals
080702-9440-42 Engine View Diagrams & Manuals
080702-9440-44 Engine View Diagrams & Manuals
080702-9440-45 Engine View Diagrams & Manuals
080702-9440-46 Engine View Diagrams & Manuals
080702-9440-49 Engine View Diagrams & Manuals
080702-9440-50 Engine View Diagrams & Manuals
080702-9440-52 Engine View Diagrams & Manuals
080702-9440-53 Engine View Diagrams & Manuals
080702-9440-54 Engine View Diagrams & Manuals
080702-9440-55 Engine View Diagrams & Manuals
080702-9440-57 Engine View Diagrams & Manuals
080702-9440-58 Engine View Diagrams & Manuals
080702-9440-59 Engine View Diagrams & Manuals
080702-9440-61 Engine View Diagrams & Manuals
080702-9440-65 Engine View Diagrams & Manuals
080702-9440-66 Engine View Diagrams & Manuals
080702-9440-67 Engine View Diagrams & Manuals
080702-9440-68 Engine View Diagrams & Manuals
080702-9440-71 Engine View Diagrams & Manuals
080702-9440-72 Engine View Diagrams & Manuals
080702-9440-73 Engine View Diagrams & Manuals
080702-9440-74 Engine View Diagrams & Manuals
080702-9440-75 Engine View Diagrams & Manuals
080702-9440-77 Engine View Diagrams & Manuals
080702-9440-78 Engine View Diagrams & Manuals
080702-9440-79 Engine View Diagrams & Manuals
080702-9440-80 Engine View Diagrams & Manuals
080702-9440-81 Engine View Diagrams & Manuals
080702-9440-83 Engine View Diagrams & Manuals
080702-9440-84 Engine View Diagrams & Manuals
080702-9440-85 Engine View Diagrams & Manuals
080702-9440-86 Engine View Diagrams & Manuals
080702-9440-87 Engine View Diagrams & Manuals
080702-9440-88 Engine View Diagrams & Manuals
080702-9440-89 Engine View Diagrams & Manuals
080702-9440-90 Engine View Diagrams & Manuals
080702-9440-91 Engine View Diagrams & Manuals
080702-9440-92 Engine View Diagrams & Manuals
080702-9440-93 Engine View Diagrams & Manuals
080702-9440-94 Engine View Diagrams & Manuals
080702-9440-96 Engine View Diagrams & Manuals
080702-9440-97 Engine View Diagrams & Manuals
080702-9440-99 Engine View Diagrams & Manuals
080702-9441-01 Engine View Diagrams & Manuals
080702-9441-03 Engine View Diagrams & Manuals
080702-9441-04 Engine View Diagrams & Manuals
080702-9441-05 Engine View Diagrams & Manuals
080702-9441-06 Engine View Diagrams & Manuals
080702-9441-07 Engine View Diagrams & Manuals
080702-9441-09 Engine View Diagrams & Manuals
080702-9441-10 Engine View Diagrams & Manuals
080702-9441-12 Engine View Diagrams & Manuals
080702-9441-14 Engine View Diagrams & Manuals
080702-9441-15 Engine View Diagrams & Manuals
080702-9441-16 Engine View Diagrams & Manuals
080702-9441-18 Engine View Diagrams & Manuals
080702-9441-19 Engine View Diagrams & Manuals
080702-9441-21 Engine View Diagrams & Manuals
080702-9441-22 Engine View Diagrams & Manuals
080702-9441-24 Engine View Diagrams & Manuals
080702-9441-25 Engine View Diagrams & Manuals
080702-9441-26 Engine View Diagrams & Manuals
080702-9441-27 Engine View Diagrams & Manuals
080702-9441-28 Engine View Diagrams & Manuals
080702-9441-29 Engine View Diagrams & Manuals
080702-9441-30 Engine View Diagrams & Manuals
080702-9441-31 Engine View Diagrams & Manuals
080702-9441-33 Engine View Diagrams & Manuals
080702-9441-34 Engine View Diagrams & Manuals
080702-9441-35 Engine View Diagrams & Manuals
080702-9441-36 Engine View Diagrams & Manuals
080702-9441-37 Engine View Diagrams & Manuals
080702-9441-38 Engine View Diagrams & Manuals
080702-9441-40 Engine View Diagrams & Manuals
080702-9441-41 Engine View Diagrams & Manuals
080702-9441-42 Engine View Diagrams & Manuals
080702-9441-43 Engine View Diagrams & Manuals
080702-9441-44 Engine View Diagrams & Manuals
080702-9441-47 Engine View Diagrams & Manuals
080702-9441-48 Engine View Diagrams & Manuals
080702-9441-49 Engine View Diagrams & Manuals
080702-9441-50 Engine View Diagrams & Manuals
080702-9441-52 Engine View Diagrams & Manuals
080702-9441-54 Engine View Diagrams & Manuals
080702-9441-55 Engine View Diagrams & Manuals
080702-9441-57 Engine View Diagrams & Manuals
080702-9441-58 Engine View Diagrams & Manuals
080702-9441-59 Engine View Diagrams & Manuals
080702-9441-60 Engine View Diagrams & Manuals
080702-9441-61 Engine View Diagrams & Manuals
080702-9441-62 Engine View Diagrams & Manuals
080702-9441-63 Engine View Diagrams & Manuals
080702-9441-68 Engine View Diagrams & Manuals
080702-9441-74 Engine View Diagrams & Manuals
080702-9441-75 Engine View Diagrams & Manuals
080702-9441-76 Engine View Diagrams & Manuals
080702-9441-77 Engine View Diagrams & Manuals
080702-9441-78 Engine View Diagrams & Manuals
080702-9441-80 Engine View Diagrams & Manuals
080702-9441-82 Engine View Diagrams & Manuals
080702-9441-83 Engine View Diagrams & Manuals
080702-9441-84 Engine View Diagrams & Manuals
080702-9441-88 Engine View Diagrams & Manuals
080702-9441-91 Engine View Diagrams & Manuals
080702-9441-92 Engine View Diagrams & Manuals
080702-9441-93 Engine View Diagrams & Manuals
080702-9441-94 Engine View Diagrams & Manuals
080703-9440-12 Engine View Diagrams & Manuals
080703-9440-17 Engine View Diagrams & Manuals
080703-9440-51 Engine View Diagrams & Manuals
080703-9440-64 Engine View Diagrams & Manuals
080703-9440-70 Engine View Diagrams & Manuals
080703-9441-02 Engine View Diagrams & Manuals
080706-0030-99 Engine View Diagrams & Manuals
080706-0031-99 Engine View Diagrams & Manuals
080706-0128-99 Engine View Diagrams & Manuals
080706-0129-99 Engine View Diagrams & Manuals
080706-0132-99 Engine View Diagrams & Manuals
080706-0139-99 Engine View Diagrams & Manuals
080706-0141-99 Engine View Diagrams & Manuals
080706-0148-99 Engine View Diagrams & Manuals
080706-0152-99 Engine View Diagrams & Manuals
080706-0156-99 Engine View Diagrams & Manuals
080706-0162-99 Engine View Diagrams & Manuals
080706-0163-99 Engine View Diagrams & Manuals
080706-0172-99 Engine View Diagrams & Manuals
080706-9441-64 Engine View Diagrams & Manuals
080706-9441-65 Engine View Diagrams & Manuals
080706-9441-70 Engine View Diagrams & Manuals
080706-9441-71 Engine View Diagrams & Manuals
080706-9441-73 Engine View Diagrams & Manuals
080706-9441-79 Engine View Diagrams & Manuals
080706-9441-81 Engine View Diagrams & Manuals
080706-9441-85 Engine View Diagrams & Manuals
080706-9441-87 Engine View Diagrams & Manuals
080793-9440-47 Engine View Diagrams & Manuals
080796-0136-99 Engine View Diagrams & Manuals
080796-0137-99 Engine View Diagrams & Manuals
080796-0138-99 Engine View Diagrams & Manuals
080796-9441-66 Engine View Diagrams & Manuals
080796-9441-67 Engine View Diagrams & Manuals
080796-9441-72 Engine View Diagrams & Manuals
080796-9441-86 Engine View Diagrams & Manuals
080796-9441-89 Engine View Diagrams & Manuals
080706-9441-90 Engine View Diagrams & Manuals
080706-9441-95 Engine View Diagrams & Manuals
080706-9441-99 Engine View Diagrams & Manuals
080732-0167-99 Engine View Diagrams & Manuals
080792-0127-99 Engine View Diagrams & Manuals
080792-0133-99 Engine View Diagrams & Manuals
080792-0135-99 Engine View Diagrams & Manuals
080792-0170-99 Engine View Diagrams & Manuals
080901-0110-99 Engine View Diagrams & Manuals
080901-0111-99 Engine View Diagrams & Manuals
080901-0112-99 Engine View Diagrams & Manuals
080901-0113-99 Engine View Diagrams & Manuals
080901-0125-99 Engine View Diagrams & Manuals
080902-0115-99 Engine View Diagrams & Manuals
080902-0116-99 Engine View Diagrams & Manuals
080902-0117-99 Engine View Diagrams & Manuals
080902-0118-99 Engine View Diagrams & Manuals
080902-0126-99 Engine View Diagrams & Manuals
080902-0133-99 Engine View Diagrams & Manuals
080902-0134-99 Engine View Diagrams & Manuals
080902-0135-99 Engine View Diagrams & Manuals
080902-0137-99 Engine View Diagrams & Manuals
080902-0138-99 Engine View Diagrams & Manuals
080902-0141-99 Engine View Diagrams & Manuals
080902-0143-99 Engine View Diagrams & Manuals
080902-0144-99 Engine View Diagrams & Manuals
080902-0146-99 Engine View Diagrams & Manuals
080902-0147-99 Engine View Diagrams & Manuals
080902-0148-99 Engine View Diagrams & Manuals
080902-0149-99 Engine View Diagrams & Manuals
080902-0150-99 Engine View Diagrams & Manuals
080902-0151-99 Engine View Diagrams & Manuals
080903-0121-99 Engine View Diagrams & Manuals
080903-0122-99 Engine View Diagrams & Manuals
080903-0123-99 Engine View Diagrams & Manuals
080906-0128-99 Engine View Diagrams & Manuals
080906-0129-99 Engine View Diagrams & Manuals
080906-0136-99 Engine View Diagrams & Manuals
080906-0139-99 Engine View Diagrams & Manuals
080906-0145-99 Engine View Diagrams & Manuals
080906-0152-99 Engine View Diagrams & Manuals
080992-0132-99 Engine View Diagrams & Manuals
080992-0140-99 Engine View Diagrams & Manuals
080992-0142-99 Engine View Diagrams & Manuals
080996-0130-99 Engine View Diagrams & Manuals
080996-0131-99 Engine View Diagrams & Manuals
081501-9095-10 Engine View Diagrams & Manuals
081501-9096-03 Engine View Diagrams & Manuals
081502-0115-99 Engine View Diagrams & Manuals
081502-0116-99 Engine View Diagrams & Manuals
081502-0131-99 Engine View Diagrams & Manuals
081502-0132-99 Engine View Diagrams & Manuals
081502-0134-99 Engine View Diagrams & Manuals
081502-0135-99 Engine View Diagrams & Manuals
081502-9095-11 Engine View Diagrams & Manuals
081502-9095-13 Engine View Diagrams & Manuals
081502-9095-14 Engine View Diagrams & Manuals
081502-9095-15 Engine View Diagrams & Manuals
081502-9095-16 Engine View Diagrams & Manuals
081502-9095-18 Engine View Diagrams & Manuals
081502-9095-20 Engine View Diagrams & Manuals
081502-9095-21 Engine View Diagrams & Manuals
081502-9095-22 Engine View Diagrams & Manuals
081502-9095-24 Engine View Diagrams & Manuals
081502-9095-26 Engine View Diagrams & Manuals
081502-9095-27 Engine View Diagrams & Manuals
081502-9095-29 Engine View Diagrams & Manuals
081502-9095-31 Engine View Diagrams & Manuals
081502-9095-32 Engine View Diagrams & Manuals
081502-9095-33 Engine View Diagrams & Manuals
081502-9095-34 Engine View Diagrams & Manuals
081502-9095-35 Engine View Diagrams & Manuals
081502-9095-36 Engine View Diagrams & Manuals
081502-9095-37 Engine View Diagrams & Manuals
081502-9095-38 Engine View Diagrams & Manuals
081502-9095-39 Engine View Diagrams & Manuals
081502-9095-40 Engine View Diagrams & Manuals
081502-9095-41 Engine View Diagrams & Manuals
081502-9095-42 Engine View Diagrams & Manuals
081502-9095-43 Engine View Diagrams & Manuals
081502-9095-44 Engine View Diagrams & Manuals
081502-9095-45 Engine View Diagrams & Manuals
081502-9095-46 Engine View Diagrams & Manuals
081502-9095-47 Engine View Diagrams & Manuals
081502-9095-48 Engine View Diagrams & Manuals
081502-9095-49 Engine View Diagrams & Manuals
081502-9095-50 Engine View Diagrams & Manuals
081502-9095-51 Engine View Diagrams & Manuals
081502-9095-52 Engine View Diagrams & Manuals
081502-9095-54 Engine View Diagrams & Manuals
081502-9095-56 Engine View Diagrams & Manuals
081502-9095-57 Engine View Diagrams & Manuals
081502-9095-58 Engine View Diagrams & Manuals
081502-9095-59 Engine View Diagrams & Manuals
081502-9095-60 Engine View Diagrams & Manuals
081502-9095-61 Engine View Diagrams & Manuals
081502-9095-62 Engine View Diagrams & Manuals
081502-9095-63 Engine View Diagrams & Manuals
081502-9095-64 Engine View Diagrams & Manuals
081502-9095-65 Engine View Diagrams & Manuals
081502-9095-66 Engine View Diagrams & Manuals
081502-9095-67 Engine View Diagrams & Manuals
081502-9095-68 Engine View Diagrams & Manuals
081502-9095-69 Engine View Diagrams & Manuals
081502-9095-70 Engine View Diagrams & Manuals
081502-9095-71 Engine View Diagrams & Manuals
081502-9095-74 Engine View Diagrams & Manuals
081502-9095-75 Engine View Diagrams & Manuals
081502-9095-76 Engine View Diagrams & Manuals
081502-9095-77 Engine View Diagrams & Manuals
081502-9095-78 Engine View Diagrams & Manuals
081502-9095-79 Engine View Diagrams & Manuals
081502-9095-80 Engine View Diagrams & Manuals
081502-9095-81 Engine View Diagrams & Manuals
081502-9095-82 Engine View Diagrams & Manuals
081502-9095-83 Engine View Diagrams & Manuals
081502-9095-84 Engine View Diagrams & Manuals
081502-9095-85 Engine View Diagrams & Manuals
081502-9095-86 Engine View Diagrams & Manuals
081502-9095-87 Engine View Diagrams & Manuals
081502-9095-89 Engine View Diagrams & Manuals
081502-9095-90 Engine View Diagrams & Manuals
081502-9095-91 Engine View Diagrams & Manuals
081502-9095-92 Engine View Diagrams & Manuals
081502-9095-93 Engine View Diagrams & Manuals
081502-9095-94 Engine View Diagrams & Manuals
081502-9095-95 Engine View Diagrams & Manuals
081502-9095-96 Engine View Diagrams & Manuals
081502-9095-97 Engine View Diagrams & Manuals
081502-9095-98 Engine View Diagrams & Manuals
081502-9095-99 Engine View Diagrams & Manuals
081502-9096-00 Engine View Diagrams & Manuals
081502-9096-01 Engine View Diagrams & Manuals
081502-9096-02 Engine View Diagrams & Manuals
081502-9096-04 Engine View Diagrams & Manuals
081502-9096-06 Engine View Diagrams & Manuals
081502-9096-07 Engine View Diagrams & Manuals
081502-9096-08 Engine View Diagrams & Manuals
081502-9096-09 Engine View Diagrams & Manuals
081502-9096-10 Engine View Diagrams & Manuals
081502-9096-11 Engine View Diagrams & Manuals
081502-9096-13 Engine View Diagrams & Manuals
081502-9096-14 Engine View Diagrams & Manuals
081502-9096-15 Engine View Diagrams & Manuals
081502-9096-16 Engine View Diagrams & Manuals
081502-9096-18 Engine View Diagrams & Manuals
081502-9096-19 Engine View Diagrams & Manuals
081502-9096-21 Engine View Diagrams & Manuals
081502-9096-22 Engine View Diagrams & Manuals
081502-9096-23 Engine View Diagrams & Manuals
081502-9096-24 Engine View Diagrams & Manuals
081502-9096-26 Engine View Diagrams & Manuals
081502-9096-32 Engine View Diagrams & Manuals
081502-9096-33 Engine View Diagrams & Manuals
081502-9096-34 Engine View Diagrams & Manuals
081502-9096-35 Engine View Diagrams & Manuals
081502-9096-36 Engine View Diagrams & Manuals
081502-9096-40 Engine View Diagrams & Manuals
081502-9096-41 Engine View Diagrams & Manuals
081502-9096-42 Engine View Diagrams & Manuals
081502-9096-43 Engine View Diagrams & Manuals
081502-9096-44 Engine View Diagrams & Manuals
081502-9096-45 Engine View Diagrams & Manuals
081502-9096-46 Engine View Diagrams & Manuals
081502-9096-49 Engine View Diagrams & Manuals
081502-9096-50 Engine View Diagrams & Manuals
081502-9096-51 Engine View Diagrams & Manuals
081502-9096-54 Engine View Diagrams & Manuals
081502-9096-55 Engine View Diagrams & Manuals
081502-9096-56 Engine View Diagrams & Manuals
081502-9096-58 Engine View Diagrams & Manuals
081502-9096-67 Engine View Diagrams & Manuals
081502-9096-69 Engine View Diagrams & Manuals
081502-9096-71 Engine View Diagrams & Manuals
081502-9096-72 Engine View Diagrams & Manuals
081502-9096-75 Engine View Diagrams & Manuals
081502-9096-76 Engine View Diagrams & Manuals
081502-9096-79 Engine View Diagrams & Manuals
081502-9096-81 Engine View Diagrams & Manuals
081502-9096-82 Engine View Diagrams & Manuals
081502-9096-83 Engine View Diagrams & Manuals
081502-9096-89 Engine View Diagrams & Manuals
081502-9096-93 Engine View Diagrams & Manuals
081502-9096-95 Engine View Diagrams & Manuals
081502-9096-97 Engine View Diagrams & Manuals
081502-9096-99 Engine View Diagrams & Manuals
081503-9095-23 Engine View Diagrams & Manuals
081503-9095-28 Engine View Diagrams & Manuals
081503-9096-05 Engine View Diagrams & Manuals
081506-0136-99 Engine View Diagrams & Manuals
081506-9096-17 Engine View Diagrams & Manuals
081506-9096-20 Engine View Diagrams & Manuals
081506-9096-25 Engine View Diagrams & Manuals
081506-9096-27 Engine View Diagrams & Manuals
081506-9096-28 Engine View Diagrams & Manuals
081506-9096-31 Engine View Diagrams & Manuals
081506-9096-37 Engine View Diagrams & Manuals
081506-9096-38 Engine View Diagrams & Manuals
081506-9096-39 Engine View Diagrams & Manuals
081506-9096-48 Engine View Diagrams & Manuals
081506-9096-52 Engine View Diagrams & Manuals
081506-9096-53 Engine View Diagrams & Manuals
081506-9096-59 Engine View Diagrams & Manuals
081506-9096-61 Engine View Diagrams & Manuals
081506-9096-64 Engine View Diagrams & Manuals
081506-9096-65 Engine View Diagrams & Manuals
081506-9096-66 Engine View Diagrams & Manuals
081506-9096-68 Engine View Diagrams & Manuals
081506-9096-70 Engine View Diagrams & Manuals
081506-9096-73 Engine View Diagrams & Manuals
081506-9096-74 Engine View Diagrams & Manuals
081506-9096-77 Engine View Diagrams & Manuals
081506-9096-78 Engine View Diagrams & Manuals
081506-9096-80 Engine View Diagrams & Manuals
081506-9096-84 Engine View Diagrams & Manuals
081506-9096-85 Engine View Diagrams & Manuals
081506-9096-87 Engine View Diagrams & Manuals
081506-9096-90 Engine View Diagrams & Manuals
081506-9096-92 Engine View Diagrams & Manuals
081506-9096-94 Engine View Diagrams & Manuals
081506-9096-96 Engine View Diagrams & Manuals
081506-9096-98 Engine View Diagrams & Manuals
081592-9095-25 Engine View Diagrams & Manuals
081592-9095-55 Engine View Diagrams & Manuals
081592-9095-72 Engine View Diagrams & Manuals
081592-9095-73 Engine View Diagrams & Manuals
081592-9095-88 Engine View Diagrams & Manuals
081592-9096-12 Engine View Diagrams & Manuals
081592-9096-57 Engine View Diagrams & Manuals
081592-9096-60 Engine View Diagrams & Manuals
081592-9096-62 Engine View Diagrams & Manuals
081592-9096-63 Engine View Diagrams & Manuals
081596-9096-29 Engine View Diagrams & Manuals
081596-9096-30 Engine View Diagrams & Manuals
081596-9096-88 Engine View Diagrams & Manuals
081596-9096-91 Engine View Diagrams & Manuals
081701-0110-99 Engine View Diagrams & Manuals
081701-0151-99 Engine View Diagrams & Manuals
081701-0169-99 Engine View Diagrams & Manuals
081701-9445-10 Engine View Diagrams & Manuals
081701-9446-17 Engine View Diagrams & Manuals
081701-9446-55 Engine View Diagrams & Manuals
081701-9447-24 Engine View Diagrams & Manuals
081701-9447-27 Engine View Diagrams & Manuals
081701-9447-37 Engine View Diagrams & Manuals
081701-9447-65 Engine View Diagrams & Manuals
081701-9447-76 Engine View Diagrams & Manuals
081701-9447-94 Engine View Diagrams & Manuals
081702-0115-99 Engine View Diagrams & Manuals
081702-0118-99 Engine View Diagrams & Manuals
081702-0126-99 Engine View Diagrams & Manuals
081702-0131-99 Engine View Diagrams & Manuals
081702-0132-99 Engine View Diagrams & Manuals
081702-0135-99 Engine View Diagrams & Manuals
081702-0138-99 Engine View Diagrams & Manuals
081702-0139-99 Engine View Diagrams & Manuals
081702-0142-99 Engine View Diagrams & Manuals
081702-0143-99 Engine View Diagrams & Manuals
081702-0144-99 Engine View Diagrams & Manuals
081702-0145-99 Engine View Diagrams & Manuals
081702-0146-99 Engine View Diagrams & Manuals
081702-0147-99 Engine View Diagrams & Manuals
081702-0148-99 Engine View Diagrams & Manuals
081702-0149-99 Engine View Diagrams & Manuals
081702-0150-99 Engine View Diagrams & Manuals
081702-0152-99 Engine View Diagrams & Manuals
081702-0154-99 Engine View Diagrams & Manuals
081702-0155-99 Engine View Diagrams & Manuals
081702-0156-99 Engine View Diagrams & Manuals
081702-0158-99 Engine View Diagrams & Manuals
081702-0159-99 Engine View Diagrams & Manuals
081702-0161-99 Engine View Diagrams & Manuals
081702-0165-99 Engine View Diagrams & Manuals
081702-0166-99 Engine View Diagrams & Manuals
081702-0171-99 Engine View Diagrams & Manuals
081702-9445-11 Engine View Diagrams & Manuals
081702-9445-13 Engine View Diagrams & Manuals
081702-9445-15 Engine View Diagrams & Manuals
081702-9445-17 Engine View Diagrams & Manuals
081702-9445-18 Engine View Diagrams & Manuals
081702-9445-19 Engine View Diagrams & Manuals
081702-9445-20 Engine View Diagrams & Manuals
081702-9445-21 Engine View Diagrams & Manuals
081702-9445-22 Engine View Diagrams & Manuals
081702-9445-25 Engine View Diagrams & Manuals
081702-9445-27 Engine View Diagrams & Manuals
081702-9445-29 Engine View Diagrams & Manuals
081702-9445-30 Engine View Diagrams & Manuals
081702-9445-33 Engine View Diagrams & Manuals
081702-9445-35 Engine View Diagrams & Manuals
081702-9445-36 Engine View Diagrams & Manuals
081702-9445-37 Engine View Diagrams & Manuals
081702-9445-39 Engine View Diagrams & Manuals
081702-9445-41 Engine View Diagrams & Manuals
081702-9445-44 Engine View Diagrams & Manuals
081702-9445-47 Engine View Diagrams & Manuals
081702-9445-48 Engine View Diagrams & Manuals
081702-9445-49 Engine View Diagrams & Manuals
081702-9445-50 Engine View Diagrams & Manuals
081702-9445-51 Engine View Diagrams & Manuals
081702-9445-52 Engine View Diagrams & Manuals
081702-9445-53 Engine View Diagrams & Manuals
081702-9445-55 Engine View Diagrams & Manuals
081702-9445-56 Engine View Diagrams & Manuals
081702-9445-57 Engine View Diagrams & Manuals
081702-9445-59 Engine View Diagrams & Manuals
081702-9445-60 Engine View Diagrams & Manuals
081702-9445-61 Engine View Diagrams & Manuals
081702-9445-62 Engine View Diagrams & Manuals
081702-9445-63 Engine View Diagrams & Manuals
081702-9445-65 Engine View Diagrams & Manuals
081702-9445-66 Engine View Diagrams & Manuals
081702-9445-67 Engine View Diagrams & Manuals
081702-9445-68 Engine View Diagrams & Manuals
081702-9445-70 Engine View Diagrams & Manuals
081702-9445-71 Engine View Diagrams & Manuals
081702-9445-72 Engine View Diagrams & Manuals
081702-9445-73 Engine View Diagrams & Manuals
081702-9445-74 Engine View Diagrams & Manuals
081702-9445-75 Engine View Diagrams & Manuals
081702-9445-76 Engine View Diagrams & Manuals
081702-9445-77 Engine View Diagrams & Manuals
081702-9445-79 Engine View Diagrams & Manuals
081702-9445-80 Engine View Diagrams & Manuals
081702-9445-83 Engine View Diagrams & Manuals
081702-9445-84 Engine View Diagrams & Manuals
081702-9445-88 Engine View Diagrams & Manuals
081702-9445-89 Engine View Diagrams & Manuals
081702-9445-90 Engine View Diagrams & Manuals
081702-9445-91 Engine View Diagrams & Manuals
081702-9445-92 Engine View Diagrams & Manuals
081702-9445-94 Engine View Diagrams & Manuals
081702-9445-95 Engine View Diagrams & Manuals
081702-9445-96 Engine View Diagrams & Manuals
081702-9445-98 Engine View Diagrams & Manuals
081702-9446-00 Engine View Diagrams & Manuals
081702-9446-01 Engine View Diagrams & Manuals
081702-9446-02 Engine View Diagrams & Manuals
081702-9446-03 Engine View Diagrams & Manuals
081702-9446-04 Engine View Diagrams & Manuals
081702-9446-05 Engine View Diagrams & Manuals
081702-9446-07 Engine View Diagrams & Manuals
081702-9446-08 Engine View Diagrams & Manuals
081702-9446-09 Engine View Diagrams & Manuals
081702-9446-10 Engine View Diagrams & Manuals
081702-9446-11 Engine View Diagrams & Manuals
081702-9446-12 Engine View Diagrams & Manuals
081702-9446-13 Engine View Diagrams & Manuals
081702-9446-14 Engine View Diagrams & Manuals
081702-9446-16 Engine View Diagrams & Manuals
081702-9446-18 Engine View Diagrams & Manuals
081702-9446-19 Engine View Diagrams & Manuals
081702-9446-21 Engine View Diagrams & Manuals
081702-9446-22 Engine View Diagrams & Manuals
081702-9446-24 Engine View Diagrams & Manuals
081702-9446-25 Engine View Diagrams & Manuals
081702-9446-26 Engine View Diagrams & Manuals
081702-9446-27 Engine View Diagrams & Manuals
081702-9446-28 Engine View Diagrams & Manuals
081702-9446-30 Engine View Diagrams & Manuals
081702-9446-31 Engine View Diagrams & Manuals
081702-9446-33 Engine View Diagrams & Manuals
081702-9446-34 Engine View Diagrams & Manuals
081702-9446-37 Engine View Diagrams & Manuals
081702-9446-38 Engine View Diagrams & Manuals
081702-9446-39 Engine View Diagrams & Manuals
081702-9446-40 Engine View Diagrams & Manuals
081702-9446-41 Engine View Diagrams & Manuals
081702-9446-42 Engine View Diagrams & Manuals
081702-9446-44 Engine View Diagrams & Manuals
081702-9446-45 Engine View Diagrams & Manuals
081702-9446-46 Engine View Diagrams & Manuals
081702-9446-50 Engine View Diagrams & Manuals
081702-9446-53 Engine View Diagrams & Manuals
081702-9446-54 Engine View Diagrams & Manuals
081702-9446-56 Engine View Diagrams & Manuals
081702-9446-57 Engine View Diagrams & Manuals
081702-9446-58 Engine View Diagrams & Manuals
081702-9446-59 Engine View Diagrams & Manuals
081702-9446-60 Engine View Diagrams & Manuals
081702-9446-62 Engine View Diagrams & Manuals
081702-9446-63 Engine View Diagrams & Manuals
081702-9446-64 Engine View Diagrams & Manuals
081702-9446-65 Engine View Diagrams & Manuals
081702-9446-66 Engine View Diagrams & Manuals
081702-9446-67 Engine View Diagrams & Manuals
081702-9446-68 Engine View Diagrams & Manuals
081702-9446-70 Engine View Diagrams & Manuals
081702-9446-74 Engine View Diagrams & Manuals
081702-9446-76 Engine View Diagrams & Manuals
081702-9446-77 Engine View Diagrams & Manuals
081702-9446-78 Engine View Diagrams & Manuals
081702-9446-79 Engine View Diagrams & Manuals
081702-9446-80 Engine View Diagrams & Manuals
081702-9446-81 Engine View Diagrams & Manuals
081702-9446-82 Engine View Diagrams & Manuals
081702-9446-83 Engine View Diagrams & Manuals
081702-9446-88 Engine View Diagrams & Manuals
081702-9446-89 Engine View Diagrams & Manuals
081702-9446-92 Engine View Diagrams & Manuals
081702-9446-93 Engine View Diagrams & Manuals
081702-9446-97 Engine View Diagrams & Manuals
081702-9446-99 Engine View Diagrams & Manuals
081702-9447-01 Engine View Diagrams & Manuals
081702-9447-02 Engine View Diagrams & Manuals
081702-9447-04 Engine View Diagrams & Manuals
081702-9447-08 Engine View Diagrams & Manuals
081702-9447-09 Engine View Diagrams & Manuals
081702-9447-11 Engine View Diagrams & Manuals
081702-9447-14 Engine View Diagrams & Manuals
081702-9447-15 Engine View Diagrams & Manuals
081702-9447-18 Engine View Diagrams & Manuals
081702-9447-19 Engine View Diagrams & Manuals
081702-9447-22 Engine View Diagrams & Manuals
081702-9447-23 Engine View Diagrams & Manuals
081702-9447-25 Engine View Diagrams & Manuals
081702-9447-28 Engine View Diagrams & Manuals
081702-9447-31 Engine View Diagrams & Manuals
081702-9447-32 Engine View Diagrams & Manuals
081702-9447-34 Engine View Diagrams & Manuals
081702-9447-36 Engine View Diagrams & Manuals
081702-9447-38 Engine View Diagrams & Manuals
081702-9447-45 Engine View Diagrams & Manuals
081702-9447-46 Engine View Diagrams & Manuals
081702-9447-47 Engine View Diagrams & Manuals
081702-9447-48 Engine View Diagrams & Manuals
081702-9447-49 Engine View Diagrams & Manuals
081702-9447-53 Engine View Diagrams & Manuals
081702-9447-59 Engine View Diagrams & Manuals
081702-9447-64 Engine View Diagrams & Manuals
081702-9447-66 Engine View Diagrams & Manuals
081702-9447-67 Engine View Diagrams & Manuals
081702-9447-68 Engine View Diagrams & Manuals
081702-9447-70 Engine View Diagrams & Manuals
081702-9447-71 Engine View Diagrams & Manuals
081702-9447-72 Engine View Diagrams & Manuals
081702-9447-75 Engine View Diagrams & Manuals
081702-9447-77 Engine View Diagrams & Manuals
081702-9447-84 Engine View Diagrams & Manuals
081702-9447-85 Engine View Diagrams & Manuals
081702-9447-86 Engine View Diagrams & Manuals
081702-9447-89 Engine View Diagrams & Manuals
081702-9447-90 Engine View Diagrams & Manuals
081702-9447-91 Engine View Diagrams & Manuals
081702-9447-93 Engine View Diagrams & Manuals
081702-9447-95 Engine View Diagrams & Manuals
081702-9447-96 Engine View Diagrams & Manuals
081702-9447-98 Engine View Diagrams & Manuals
081703-9445-12 Engine View Diagrams & Manuals
081703-9445-26 Engine View Diagrams & Manuals
081703-9445-28 Engine View Diagrams & Manuals
081703-9445-32 Engine View Diagrams & Manuals
081703-9445-58 Engine View Diagrams & Manuals
081703-9446-35 Engine View Diagrams & Manuals
081706-0128-99 Engine View Diagrams & Manuals
081706-0129-99 Engine View Diagrams & Manuals
081706-0136-99 Engine View Diagrams & Manuals
081706-0140-99 Engine View Diagrams & Manuals
081706-0141-99 Engine View Diagrams & Manuals
081706-0157-99 Engine View Diagrams & Manuals
081706-0164-99 Engine View Diagrams & Manuals
081706-0167-99 Engine View Diagrams & Manuals
081706-9446-84 Engine View Diagrams & Manuals
081706-9446-85 Engine View Diagrams & Manuals
081706-9446-90 Engine View Diagrams & Manuals
081706-9446-95 Engine View Diagrams & Manuals
081706-9446-96 Engine View Diagrams & Manuals
081706-9446-98 Engine View Diagrams & Manuals
081706-9447-03 Engine View Diagrams & Manuals
081706-9447-05 Engine View Diagrams & Manuals
081706-9447-10 Engine View Diagrams & Manuals
081706-9447-13 Engine View Diagrams & Manuals
081706-9447-16 Engine View Diagrams & Manuals
081706-9447-17 Engine View Diagrams & Manuals
081706-9447-20 Engine View Diagrams & Manuals
081706-9447-26 Engine View Diagrams & Manuals
081706-9447-33 Engine View Diagrams & Manuals
081706-9447-39 Engine View Diagrams & Manuals
081706-9447-40 Engine View Diagrams & Manuals
081706-9447-41 Engine View Diagrams & Manuals
081706-9447-42 Engine View Diagrams & Manuals
081706-9447-43 Engine View Diagrams & Manuals
081706-9447-44 Engine View Diagrams & Manuals
081706-9447-54 Engine View Diagrams & Manuals
081706-9447-55 Engine View Diagrams & Manuals
081706-9447-56 Engine View Diagrams & Manuals
081706-9447-57 Engine View Diagrams & Manuals
081706-9447-58 Engine View Diagrams & Manuals
081706-9447-60 Engine View Diagrams & Manuals
081706-9447-69 Engine View Diagrams & Manuals
081706-9447-73 Engine View Diagrams & Manuals
081706-9447-74 Engine View Diagrams & Manuals
081706-9447-78 Engine View Diagrams & Manuals
081706-9447-79 Engine View Diagrams & Manuals
081706-9447-80 Engine View Diagrams & Manuals
081706-9447-81 Engine View Diagrams & Manuals
081706-9447-82 Engine View Diagrams & Manuals
081706-9447-83 Engine View Diagrams & Manuals
081706-9447-87 Engine View Diagrams & Manuals
081706-9447-88 Engine View Diagrams & Manuals
081706-9447-92 Engine View Diagrams & Manuals
081706-9447-97 Engine View Diagrams & Manuals
081706-9447-99 Engine View Diagrams & Manuals
081792-0127-99 Engine View Diagrams & Manuals
081792-0133-99 Engine View Diagrams & Manuals
081792-9447-52 Engine View Diagrams & Manuals
081793-9445-31 Engine View Diagrams & Manuals
081793-9445-43 Engine View Diagrams & Manuals
081793-9446-36 Engine View Diagrams & Manuals
081796-0134-99 Engine View Diagrams & Manuals
081796-0163-99 Engine View Diagrams & Manuals
081796-9446-86 Engine View Diagrams & Manuals
081796-9446-87 Engine View Diagrams & Manuals
081796-9446-91 Engine View Diagrams & Manuals
081796-9446-94 Engine View Diagrams & Manuals
081796-9447-06 Engine View Diagrams & Manuals
081796-9447-12 Engine View Diagrams & Manuals
081796-9447-21 Engine View Diagrams & Manuals
081796-9447-35 Engine View Diagrams & Manuals
081796-9447-61 Engine View Diagrams & Manuals
081796-9447-63 Engine View Diagrams & Manuals
081792-0137-99 Engine View Diagrams & Manuals
081792-0153-99 Engine View Diagrams & Manuals
081792-0160-99 Engine View Diagrams & Manuals
081792-0162-99 Engine View Diagrams & Manuals
081792-0168-99 Engine View Diagrams & Manuals
081792-0170-99 Engine View Diagrams & Manuals
081792-9445-14 Engine View Diagrams & Manuals
081792-9445-16 Engine View Diagrams & Manuals
081792-9445-23 Engine View Diagrams & Manuals
081792-9445-24 Engine View Diagrams & Manuals
081792-9445-34 Engine View Diagrams & Manuals
081792-9445-38 Engine View Diagrams & Manuals
081792-9445-40 Engine View Diagrams & Manuals
081792-9445-42 Engine View Diagrams & Manuals
081792-9445-45 Engine View Diagrams & Manuals
081792-9445-46 Engine View Diagrams & Manuals
081792-9445-54 Engine View Diagrams & Manuals
081792-9445-64 Engine View Diagrams & Manuals
081792-9445-69 Engine View Diagrams & Manuals
081792-9445-78 Engine View Diagrams & Manuals
081792-9445-81 Engine View Diagrams & Manuals
081792-9445-82 Engine View Diagrams & Manuals
081792-9445-85 Engine View Diagrams & Manuals
081792-9445-86 Engine View Diagrams & Manuals
081792-9445-87 Engine View Diagrams & Manuals
081792-9445-93 Engine View Diagrams & Manuals
081792-9445-97 Engine View Diagrams & Manuals
081792-9446-06 Engine View Diagrams & Manuals
081792-9446-20 Engine View Diagrams & Manuals
081792-9446-29 Engine View Diagrams & Manuals
081792-9446-32 Engine View Diagrams & Manuals
081792-9446-43 Engine View Diagrams & Manuals
081792-9446-47 Engine View Diagrams & Manuals
081792-9446-48 Engine View Diagrams & Manuals
081792-9446-49 Engine View Diagrams & Manuals
081792-9446-51 Engine View Diagrams & Manuals
081792-9446-52 Engine View Diagrams & Manuals
081792-9446-61 Engine View Diagrams & Manuals
081792-9446-69 Engine View Diagrams & Manuals
081792-9446-71 Engine View Diagrams & Manuals
081792-9446-72 Engine View Diagrams & Manuals
081792-9446-73 Engine View Diagrams & Manuals
081792-9446-75 Engine View Diagrams & Manuals
081792-9447-00 Engine View Diagrams & Manuals
081792-9447-07 Engine View Diagrams & Manuals
081792-9447-29 Engine View Diagrams & Manuals
081792-9447-30 Engine View Diagrams & Manuals
081792-9447-50 Engine View Diagrams & Manuals
081792-9447-51 Engine View Diagrams & Manuals
081901-0110-99 Engine View Diagrams & Manuals
081901-0111-99 Engine View Diagrams & Manuals
081901-0112-99 Engine View Diagrams & Manuals
081901-0113-99 Engine View Diagrams & Manuals
081901-0125-99 Engine View Diagrams & Manuals
081901-9456-15 Engine View Diagrams & Manuals
081901-9456-16 Engine View Diagrams & Manuals
081902-0115-99 Engine View Diagrams & Manuals
081902-0116-99 Engine View Diagrams & Manuals
081902-0117-99 Engine View Diagrams & Manuals
081902-0118-99 Engine View Diagrams & Manuals
081902-0126-99 Engine View Diagrams & Manuals
081902-0131-99 Engine View Diagrams & Manuals
081902-0133-99 Engine View Diagrams & Manuals
081902-0135-99 Engine View Diagrams & Manuals
081902-0136-99 Engine View Diagrams & Manuals
081902-0138-99 Engine View Diagrams & Manuals
081902-0139-99 Engine View Diagrams & Manuals
081902-0140-99 Engine View Diagrams & Manuals
081902-0141-99 Engine View Diagrams & Manuals
081902-0143-99 Engine View Diagrams & Manuals
081902-0145-99 Engine View Diagrams & Manuals
081902-0149-99 Engine View Diagrams & Manuals
081902-0150-99 Engine View Diagrams & Manuals
081902-9455-11 Engine View Diagrams & Manuals
081902-9455-25 Engine View Diagrams & Manuals
081902-9455-27 Engine View Diagrams & Manuals
081902-9455-31 Engine View Diagrams & Manuals
081902-9455-33 Engine View Diagrams & Manuals
081902-9455-35 Engine View Diagrams & Manuals
081902-9455-37 Engine View Diagrams & Manuals
081902-9455-38 Engine View Diagrams & Manuals
081902-9455-39 Engine View Diagrams & Manuals
081902-9455-40 Engine View Diagrams & Manuals
081902-9455-43 Engine View Diagrams & Manuals
081902-9455-44 Engine View Diagrams & Manuals
081902-9455-47 Engine View Diagrams & Manuals
081902-9455-53 Engine View Diagrams & Manuals
081902-9455-56 Engine View Diagrams & Manuals
081902-9455-57 Engine View Diagrams & Manuals
081902-9455-58 Engine View Diagrams & Manuals
081902-9455-59 Engine View Diagrams & Manuals
081902-9455-60 Engine View Diagrams & Manuals
081902-9455-62 Engine View Diagrams & Manuals
081902-9455-63 Engine View Diagrams & Manuals
081902-9455-64 Engine View Diagrams & Manuals
081902-9455-66 Engine View Diagrams & Manuals
081902-9455-68 Engine View Diagrams & Manuals
081902-9455-71 Engine View Diagrams & Manuals
081902-9455-76 Engine View Diagrams & Manuals
081902-9455-77 Engine View Diagrams & Manuals
081902-9455-79 Engine View Diagrams & Manuals
081902-9455-80 Engine View Diagrams & Manuals
081902-9455-82 Engine View Diagrams & Manuals
081902-9455-83 Engine View Diagrams & Manuals
081902-9455-86 Engine View Diagrams & Manuals
081902-9455-88 Engine View Diagrams & Manuals
081902-9455-89 Engine View Diagrams & Manuals
081902-9455-96 Engine View Diagrams & Manuals
081902-9455-98 Engine View Diagrams & Manuals
081902-9455-99 Engine View Diagrams & Manuals
081902-9456-00 Engine View Diagrams & Manuals
081902-9456-02 Engine View Diagrams & Manuals
081902-9456-05 Engine View Diagrams & Manuals
081902-9456-06 Engine View Diagrams & Manuals
081902-9456-07 Engine View Diagrams & Manuals
081902-9456-08 Engine View Diagrams & Manuals
081902-9456-09 Engine View Diagrams & Manuals
081902-9456-11 Engine View Diagrams & Manuals
081902-9456-14 Engine View Diagrams & Manuals
081902-9456-17 Engine View Diagrams & Manuals
081902-9456-25 Engine View Diagrams & Manuals
081902-9456-27 Engine View Diagrams & Manuals
081902-9456-30 Engine View Diagrams & Manuals
081902-9456-37 Engine View Diagrams & Manuals
081902-9456-42 Engine View Diagrams & Manuals
081902-9456-43 Engine View Diagrams & Manuals
081902-9456-44 Engine View Diagrams & Manuals
081902-9456-47 Engine View Diagrams & Manuals
081902-9456-49 Engine View Diagrams & Manuals
081902-9456-50 Engine View Diagrams & Manuals
081902-9456-51 Engine View Diagrams & Manuals
081902-9456-52 Engine View Diagrams & Manuals
081902-9456-53 Engine View Diagrams & Manuals
081902-9456-54 Engine View Diagrams & Manuals
081902-9456-55 Engine View Diagrams & Manuals
081902-9456-56 Engine View Diagrams & Manuals
081902-9456-59 Engine View Diagrams & Manuals
081902-9456-66 Engine View Diagrams & Manuals
081902-9456-67 Engine View Diagrams & Manuals
081902-9456-70 Engine View Diagrams & Manuals
081902-9456-72 Engine View Diagrams & Manuals
081902-9456-74 Engine View Diagrams & Manuals
081902-9456-81 Engine View Diagrams & Manuals
081902-9456-82 Engine View Diagrams & Manuals
081902-9456-83 Engine View Diagrams & Manuals
081902-9456-85 Engine View Diagrams & Manuals
081902-9456-89 Engine View Diagrams & Manuals
081902-9456-91 Engine View Diagrams & Manuals
081902-9456-95 Engine View Diagrams & Manuals
081902-9456-96 Engine View Diagrams & Manuals
081902-9457-00 Engine View Diagrams & Manuals
081902-9457-01 Engine View Diagrams & Manuals
081902-9457-02 Engine View Diagrams & Manuals
081902-9457-05 Engine View Diagrams & Manuals
081902-9457-09 Engine View Diagrams & Manuals
081902-9457-10 Engine View Diagrams & Manuals
081902-9457-12 Engine View Diagrams & Manuals
081902-9457-13 Engine View Diagrams & Manuals
081902-9457-20 Engine View Diagrams & Manuals
081902-9457-26 Engine View Diagrams & Manuals
081902-9457-32 Engine View Diagrams & Manuals
081902-9457-35 Engine View Diagrams & Manuals
081902-9457-37 Engine View Diagrams & Manuals
081902-9457-38 Engine View Diagrams & Manuals
081902-9457-42 Engine View Diagrams & Manuals
081902-9457-45 Engine View Diagrams & Manuals
081902-9457-46 Engine View Diagrams & Manuals
081902-9457-48 Engine View Diagrams & Manuals
081902-9457-50 Engine View Diagrams & Manuals
081902-9457-52 Engine View Diagrams & Manuals
081902-9457-53 Engine View Diagrams & Manuals
081902-9457-54 Engine View Diagrams & Manuals
081902-9457-55 Engine View Diagrams & Manuals
081902-9457-56 Engine View Diagrams & Manuals
081902-9457-62 Engine View Diagrams & Manuals
081902-9457-67 Engine View Diagrams & Manuals
081902-9457-69 Engine View Diagrams & Manuals
081902-9457-70 Engine View Diagrams & Manuals
081902-9457-71 Engine View Diagrams & Manuals
081902-9457-72 Engine View Diagrams & Manuals
081902-9457-73 Engine View Diagrams & Manuals
081902-9457-74 Engine View Diagrams & Manuals
081902-9457-75 Engine View Diagrams & Manuals
081902-9457-77 Engine View Diagrams & Manuals
081902-9457-78 Engine View Diagrams & Manuals
081902-9457-79 Engine View Diagrams & Manuals
081902-9457-81 Engine View Diagrams & Manuals
081902-9457-83 Engine View Diagrams & Manuals
081902-9457-86 Engine View Diagrams & Manuals
081902-9457-88 Engine View Diagrams & Manuals
081902-9457-89 Engine View Diagrams & Manuals
081902-9457-90 Engine View Diagrams & Manuals
081902-9457-91 Engine View Diagrams & Manuals
081902-9457-95 Engine View Diagrams & Manuals
081902-9457-97 Engine View Diagrams & Manuals
081902-9457-98 Engine View Diagrams & Manuals
081903-0119-99 Engine View Diagrams & Manuals
081903-0121-99 Engine View Diagrams & Manuals
081903-0122-99 Engine View Diagrams & Manuals
081903-0123-99 Engine View Diagrams & Manuals
081903-9455-12 Engine View Diagrams & Manuals
081906-0128-99 Engine View Diagrams & Manuals
081906-0129-99 Engine View Diagrams & Manuals
081906-0132-99 Engine View Diagrams & Manuals
081906-0134-99 Engine View Diagrams & Manuals
081906-0137-99 Engine View Diagrams & Manuals
081906-0142-99 Engine View Diagrams & Manuals
081906-0146-99 Engine View Diagrams & Manuals
081906-0147-99 Engine View Diagrams & Manuals
081906-9455-29 Engine View Diagrams & Manuals
081906-9455-34 Engine View Diagrams & Manuals
081906-9455-42 Engine View Diagrams & Manuals
081906-9455-45 Engine View Diagrams & Manuals
081906-9455-48 Engine View Diagrams & Manuals
081906-9455-52 Engine View Diagrams & Manuals
081906-9455-54 Engine View Diagrams & Manuals
081906-9455-55 Engine View Diagrams & Manuals
081906-9455-65 Engine View Diagrams & Manuals
081906-9455-69 Engine View Diagrams & Manuals
081906-9455-72 Engine View Diagrams & Manuals
081906-9455-73 Engine View Diagrams & Manuals
081906-9455-74 Engine View Diagrams & Manuals
081906-9455-75 Engine View Diagrams & Manuals
081906-9455-78 Engine View Diagrams & Manuals
081906-9455-81 Engine View Diagrams & Manuals
081906-9455-85 Engine View Diagrams & Manuals
081906-9455-87 Engine View Diagrams & Manuals
081906-9455-90 Engine View Diagrams & Manuals
081906-9455-92 Engine View Diagrams & Manuals
081906-9455-93 Engine View Diagrams & Manuals
081906-9455-95 Engine View Diagrams & Manuals
081906-9456-03 Engine View Diagrams & Manuals
081906-9456-10 Engine View Diagrams & Manuals
081906-9456-12 Engine View Diagrams & Manuals
081906-9456-13 Engine View Diagrams & Manuals
081906-9456-18 Engine View Diagrams & Manuals
081906-9456-19 Engine View Diagrams & Manuals
081906-9456-21 Engine View Diagrams & Manuals
081906-9456-22 Engine View Diagrams & Manuals
081906-9456-26 Engine View Diagrams & Manuals
081906-9456-28 Engine View Diagrams & Manuals
081906-9456-29 Engine View Diagrams & Manuals
081906-9456-31 Engine View Diagrams & Manuals
081906-9456-32 Engine View Diagrams & Manuals
081906-9456-34 Engine View Diagrams & Manuals
081906-9456-38 Engine View Diagrams & Manuals
081906-9456-40 Engine View Diagrams & Manuals
081906-9456-45 Engine View Diagrams & Manuals
081906-9456-46 Engine View Diagrams & Manuals
081906-9456-48 Engine View Diagrams & Manuals
081906-9456-57 Engine View Diagrams & Manuals
081906-9456-58 Engine View Diagrams & Manuals
081906-9456-60 Engine View Diagrams & Manuals
081906-9456-63 Engine View Diagrams & Manuals
081906-9456-65 Engine View Diagrams & Manuals
081906-9456-68 Engine View Diagrams & Manuals
081906-9456-69 Engine View Diagrams & Manuals
081906-9456-71 Engine View Diagrams & Manuals
081906-9456-73 Engine View Diagrams & Manuals
081906-9456-75 Engine View Diagrams & Manuals
081906-9456-78 Engine View Diagrams & Manuals
081906-9456-79 Engine View Diagrams & Manuals
081906-9456-80 Engine View Diagrams & Manuals
081906-9456-86 Engine View Diagrams & Manuals
081906-9456-90 Engine View Diagrams & Manuals
081906-9456-92 Engine View Diagrams & Manuals
081906-9456-93 Engine View Diagrams & Manuals
081906-9456-94 Engine View Diagrams & Manuals
081906-9456-97 Engine View Diagrams & Manuals
081906-9456-98 Engine View Diagrams & Manuals
081906-9456-99 Engine View Diagrams & Manuals
081906-9457-06 Engine View Diagrams & Manuals
081906-9457-08 Engine View Diagrams & Manuals
081906-9457-11 Engine View Diagrams & Manuals
081906-9457-14 Engine View Diagrams & Manuals
081906-9457-15 Engine View Diagrams & Manuals
081906-9457-21 Engine View Diagrams & Manuals
081906-9457-22 Engine View Diagrams & Manuals
081906-9457-23 Engine View Diagrams & Manuals
081906-9457-24 Engine View Diagrams & Manuals
081906-9457-25 Engine View Diagrams & Manuals
081906-9457-27 Engine View Diagrams & Manuals
081906-9457-29 Engine View Diagrams & Manuals
081906-9457-31 Engine View Diagrams & Manuals
081906-9457-33 Engine View Diagrams & Manuals
081906-9457-36 Engine View Diagrams & Manuals
081906-9457-41 Engine View Diagrams & Manuals
081906-9457-47 Engine View Diagrams & Manuals
081906-9457-51 Engine View Diagrams & Manuals
081906-9457-57 Engine View Diagrams & Manuals
081906-9457-58 Engine View Diagrams & Manuals
081906-9457-59 Engine View Diagrams & Manuals
081906-9457-60 Engine View Diagrams & Manuals
081906-9457-61 Engine View Diagrams & Manuals
081906-9457-64 Engine View Diagrams & Manuals
081906-9457-68 Engine View Diagrams & Manuals
081906-9457-76 Engine View Diagrams & Manuals
081906-9457-80 Engine View Diagrams & Manuals
081906-9457-84 Engine View Diagrams & Manuals
081906-9457-85 Engine View Diagrams & Manuals
081906-9457-92 Engine View Diagrams & Manuals
081906-9457-99 Engine View Diagrams & Manuals
081991-0144-99 Engine View Diagrams & Manuals
081992-0127-99 Engine View Diagrams & Manuals
081992-0151-99 Engine View Diagrams & Manuals
081992-9455-26 Engine View Diagrams & Manuals
081992-9455-28 Engine View Diagrams & Manuals
081992-9455-30 Engine View Diagrams & Manuals
081992-9455-49 Engine View Diagrams & Manuals
081992-9455-61 Engine View Diagrams & Manuals
081992-9455-84 Engine View Diagrams & Manuals
081992-9455-97 Engine View Diagrams & Manuals
081992-9456-01 Engine View Diagrams & Manuals
081992-9456-20 Engine View Diagrams & Manuals
081992-9456-23 Engine View Diagrams & Manuals
081992-9456-24 Engine View Diagrams & Manuals
081992-9456-36 Engine View Diagrams & Manuals
081992-9456-41 Engine View Diagrams & Manuals
081992-9456-62 Engine View Diagrams & Manuals
081992-9456-87 Engine View Diagrams & Manuals
081992-9457-03 Engine View Diagrams & Manuals
081992-9457-16 Engine View Diagrams & Manuals
081992-9457-19 Engine View Diagrams & Manuals
081992-9457-28 Engine View Diagrams & Manuals
081992-9457-30 Engine View Diagrams & Manuals
081992-9457-39 Engine View Diagrams & Manuals
081992-9457-40 Engine View Diagrams & Manuals
081992-9457-44 Engine View Diagrams & Manuals
081992-9457-82 Engine View Diagrams & Manuals
081992-9457-93 Engine View Diagrams & Manuals
081992-9457-94 Engine View Diagrams & Manuals
081992-9457-96 Engine View Diagrams & Manuals
081996-0130-99 Engine View Diagrams & Manuals
081996-9455-32 Engine View Diagrams & Manuals
081996-9455-36 Engine View Diagrams & Manuals
081996-9455-46 Engine View Diagrams & Manuals
081996-9455-50 Engine View Diagrams & Manuals
081996-9455-51 Engine View Diagrams & Manuals
081996-9455-70 Engine View Diagrams & Manuals
081996-9455-94 Engine View Diagrams & Manuals
081996-9456-04 Engine View Diagrams & Manuals
081996-9456-35 Engine View Diagrams & Manuals
081996-9456-39 Engine View Diagrams & Manuals
081996-9456-61 Engine View Diagrams & Manuals
081996-9456-64 Engine View Diagrams & Manuals
081996-9456-76 Engine View Diagrams & Manuals
081996-9456-77 Engine View Diagrams & Manuals
081996-9456-84 Engine View Diagrams & Manuals
081996-9457-04 Engine View Diagrams & Manuals
081996-9457-07 Engine View Diagrams & Manuals
081996-9457-17 Engine View Diagrams & Manuals
081996-9457-18 Engine View Diagrams & Manuals
081996-9457-43 Engine View Diagrams & Manuals
081996-9457-49 Engine View Diagrams & Manuals
081996-9457-63 Engine View Diagrams & Manuals
081996-9457-65 Engine View Diagrams & Manuals
081996-9457-66 Engine View Diagrams & Manuals
090702-0015-01 Engine View Diagrams & Manuals
090702-0025-01 Engine View Diagrams & Manuals
090702-0026-01 Engine View Diagrams & Manuals
090702-0030-01 Engine View Diagrams & Manuals
090702-0100-01 Engine View Diagrams & Manuals
090702-0103-01 Engine View Diagrams & Manuals
090702-0113-01 Engine View Diagrams & Manuals
090702-0113-02 Engine View Diagrams & Manuals
090702-0114-01 Engine View Diagrams & Manuals
090702-0114-02 Engine View Diagrams & Manuals
090702-0115-01 Engine View Diagrams & Manuals
090702-0126-01 Engine View Diagrams & Manuals
090702-0130-01 Engine View Diagrams & Manuals
090702-0131-01 Engine View Diagrams & Manuals
090702-0132-01 Engine View Diagrams & Manuals
090702-0134-01 Engine View Diagrams & Manuals
090702-0135-01 Engine View Diagrams & Manuals
090702-0136-01 Engine View Diagrams & Manuals
090702-0137-01 Engine View Diagrams & Manuals
090702-0145-01 Engine View Diagrams & Manuals
090702-0147-01 Engine View Diagrams & Manuals
090702-0147-02 Engine View Diagrams & Manuals
090702-0148-02 Engine View Diagrams & Manuals
090702-0151-01 Engine View Diagrams & Manuals
090702-0152-01 Engine View Diagrams & Manuals
090702-0153-99 Engine View Diagrams & Manuals
090702-0154-99 Engine View Diagrams & Manuals
090702-0155-01 Engine View Diagrams & Manuals
090702-0156-01 Engine View Diagrams & Manuals
090702-0157-01 Engine View Diagrams & Manuals
090702-0159-01 Engine View Diagrams & Manuals
090702-0160-01 Engine View Diagrams & Manuals
090702-0161-01 Engine View Diagrams & Manuals
090702-0164-01 Engine View Diagrams & Manuals
090702-0165-01 Engine View Diagrams & Manuals
090702-0166-01 Engine View Diagrams & Manuals
090702-0168-01 Engine View Diagrams & Manuals
090702-0168-02 Engine View Diagrams & Manuals
090702-0170-01 Engine View Diagrams & Manuals
090702-0173-01 Engine View Diagrams & Manuals
090702-0174-01 Engine View Diagrams & Manuals
090702-0175-01 Engine View Diagrams & Manuals
090702-0176-01 Engine View Diagrams & Manuals
090702-0179-01 Engine View Diagrams & Manuals
090702-0180-01 Engine View Diagrams & Manuals
090702-0180-02 Engine View Diagrams & Manuals
090702-0180-03 Engine View Diagrams & Manuals
090702-0181-01 Engine View Diagrams & Manuals
090702-0181-02 Engine View Diagrams & Manuals
090702-0181-03 Engine View Diagrams & Manuals
090702-0182-01 Engine View Diagrams & Manuals
090702-0185-01 Engine View Diagrams & Manuals
090702-0190-01 Engine View Diagrams & Manuals
090702-0192-01 Engine View Diagrams & Manuals
090702-0192-02 Engine View Diagrams & Manuals
090702-0197-01 Engine View Diagrams & Manuals
090702-0197-02 Engine View Diagrams & Manuals
090702-0200-01 Engine View Diagrams & Manuals
090702-0205-01 Engine View Diagrams & Manuals
090702-0262-01 Engine View Diagrams & Manuals
090702-3000-01 Engine View Diagrams & Manuals
090702-3037-01 Engine View Diagrams & Manuals
090702-3038-01 Engine View Diagrams & Manuals
090702-3039-01 Engine View Diagrams & Manuals
090702-3042-01 Engine View Diagrams & Manuals
090702-3044-01 Engine View Diagrams & Manuals
090702-3044-02 Engine View Diagrams & Manuals
090702-3044-03 Engine View Diagrams & Manuals
090702-3047-01 Engine View Diagrams & Manuals
090702-3047-02 Engine View Diagrams & Manuals
090702-3048-01 Engine View Diagrams & Manuals
090702-3049-01 Engine View Diagrams & Manuals
090702-3049-02 Engine View Diagrams & Manuals
090702-3049-03 Engine View Diagrams & Manuals
090702-3049-04 Engine View Diagrams & Manuals
090702-3050-01 Engine View Diagrams & Manuals
090702-3050-02 Engine View Diagrams & Manuals
090702-3050-03 Engine View Diagrams & Manuals
090702-3052-01 Engine View Diagrams & Manuals
090702-3054-01 Engine View Diagrams & Manuals
090702-3056-01 Engine View Diagrams & Manuals
090702-3056-02 Engine View Diagrams & Manuals
090702-3058-01 Engine View Diagrams & Manuals
090702-3058-02 Engine View Diagrams & Manuals
090702-3060-01 Engine View Diagrams & Manuals
090702-3064-01 Engine View Diagrams & Manuals
090702-3065-01 Engine View Diagrams & Manuals
090702-3066-01 Engine View Diagrams & Manuals
090702-3069-01 Engine View Diagrams & Manuals
090702-3071-01 Engine View Diagrams & Manuals
090702-3072-01 Engine View Diagrams & Manuals
090702-3073-01 Engine View Diagrams & Manuals
090702-3076-01 Engine View Diagrams & Manuals
090702-3077-01 Engine View Diagrams & Manuals
090702-3078-01 Engine View Diagrams & Manuals
090702-3079-01 Engine View Diagrams & Manuals
090702-3080-01 Engine View Diagrams & Manuals
090702-3080-02 Engine View Diagrams & Manuals
090702-3081-01 Engine View Diagrams & Manuals
090702-3081-02 Engine View Diagrams & Manuals
090702-3083-01 Engine View Diagrams & Manuals
090702-3085-01 Engine View Diagrams & Manuals
090702-3089-01 Engine View Diagrams & Manuals
090702-3090-01 Engine View Diagrams & Manuals
090702-3092-01 Engine View Diagrams & Manuals
090702-3093-01 Engine View Diagrams & Manuals
090702-3093-02 Engine View Diagrams & Manuals
090702-3096-01 Engine View Diagrams & Manuals
090702-3096-02 Engine View Diagrams & Manuals
090702-3097-01 Engine View Diagrams & Manuals
090702-3099-01 Engine View Diagrams & Manuals
090702-3103-01 Engine View Diagrams & Manuals
090702-3105-01 Engine View Diagrams & Manuals
090702-3107-01 Engine View Diagrams & Manuals
090702-3108-01 Engine View Diagrams & Manuals
090702-3108-02 Engine View Diagrams & Manuals
090702-3110-01 Engine View Diagrams & Manuals
090702-3111-01 Engine View Diagrams & Manuals
090702-3113-01 Engine View Diagrams & Manuals
090702-3113-02 Engine View Diagrams & Manuals
090702-3115-01 Engine View Diagrams & Manuals
090702-3115-03 Engine View Diagrams & Manuals
090702-3116-01 Engine View Diagrams & Manuals
090702-3120-01 Engine View Diagrams & Manuals
090702-3121-01 Engine View Diagrams & Manuals
090702-3122-01 Engine View Diagrams & Manuals
090702-3122-02 Engine View Diagrams & Manuals
090702-3123-01 Engine View Diagrams & Manuals
090702-3123-02 Engine View Diagrams & Manuals
090702-3126-01 Engine View Diagrams & Manuals
090702-3130-01 Engine View Diagrams & Manuals
090702-3131-01 Engine View Diagrams & Manuals
090702-3132-01 Engine View Diagrams & Manuals
090702-3135-01 Engine View Diagrams & Manuals
090702-3137-01 Engine View Diagrams & Manuals
090702-3139-01 Engine View Diagrams & Manuals
090702-3139-02 Engine View Diagrams & Manuals
090702-3141-01 Engine View Diagrams & Manuals
090702-3715-01 Engine View Diagrams & Manuals
090702-3716-01 Engine View Diagrams & Manuals
090702-3718-01 Engine View Diagrams & Manuals
090706-0194-01 Engine View Diagrams & Manuals
090706-0196-01 Engine View Diagrams & Manuals
090706-0208-01 Engine View Diagrams & Manuals
090707-0121-01 Engine View Diagrams & Manuals
090707-0125-01 Engine View Diagrams & Manuals
090707-0138-01 Engine View Diagrams & Manuals
090707-0138-02 Engine View Diagrams & Manuals
090707-0149-01 Engine View Diagrams & Manuals
090707-0149-02 Engine View Diagrams & Manuals
090707-0167-01 Engine View Diagrams & Manuals
090707-0169-01 Engine View Diagrams & Manuals
090707-0171-01 Engine View Diagrams & Manuals
090707-0171-02 Engine View Diagrams & Manuals
090707-0177-01 Engine View Diagrams & Manuals
090707-0183-01 Engine View Diagrams & Manuals
090707-0193-01 Engine View Diagrams & Manuals
090707-0195-01 Engine View Diagrams & Manuals
090707-0212-01 Engine View Diagrams & Manuals
090707-3036-01 Engine View Diagrams & Manuals
090707-3041-01 Engine View Diagrams & Manuals
090707-3761-01 Engine View Diagrams & Manuals
090708-0071-01 Engine View Diagrams & Manuals
090708-0071-02 Engine View Diagrams & Manuals
090708-0072-01 Engine View Diagrams & Manuals
090708-0102-01 Engine View Diagrams & Manuals
090708-0116-01 Engine View Diagrams & Manuals
090708-0117-01 Engine View Diagrams & Manuals
090708-0120-01 Engine View Diagrams & Manuals
090708-0123-01 Engine View Diagrams & Manuals
090708-0127-01 Engine View Diagrams & Manuals
090708-0128-01 Engine View Diagrams & Manuals
090708-0129-01 Engine View Diagrams & Manuals
090708-0133-01 Engine View Diagrams & Manuals
090708-0150-01 Engine View Diagrams & Manuals
090708-0153-01 Engine View Diagrams & Manuals
090708-0162-01 Engine View Diagrams & Manuals
090708-0163-01 Engine View Diagrams & Manuals
090782-3055-02 Engine View Diagrams & Manuals
090782-3057-01 Engine View Diagrams & Manuals
090782-3059-01 Engine View Diagrams & Manuals
090782-3059-02 Engine View Diagrams & Manuals
090782-3061-01 Engine View Diagrams & Manuals
090782-3062-01 Engine View Diagrams & Manuals
090782-3063-01 Engine View Diagrams & Manuals
090782-3067-01 Engine View Diagrams & Manuals
090782-3068-01 Engine View Diagrams & Manuals
090782-3070-01 Engine View Diagrams & Manuals
090782-3070-02 Engine View Diagrams & Manuals
090782-3084-01 Engine View Diagrams & Manuals
090782-3086-01 Engine View Diagrams & Manuals
090782-3088-01 Engine View Diagrams & Manuals
090782-3088-02 Engine View Diagrams & Manuals
090782-3091-01 Engine View Diagrams & Manuals
090782-3091-02 Engine View Diagrams & Manuals
090782-3094-01 Engine View Diagrams & Manuals
090782-3095-01 Engine View Diagrams & Manuals
090782-3098-01 Engine View Diagrams & Manuals
090782-3101-01 Engine View Diagrams & Manuals
090782-3102-01 Engine View Diagrams & Manuals
090782-3102-02 Engine View Diagrams & Manuals
090782-3104-01 Engine View Diagrams & Manuals
090782-3109-01 Engine View Diagrams & Manuals
090782-3109-02 Engine View Diagrams & Manuals
090782-3112-01 Engine View Diagrams & Manuals
090782-3114-01 Engine View Diagrams & Manuals
090782-3114-02 Engine View Diagrams & Manuals
090782-3119-01 Engine View Diagrams & Manuals
090782-3125-01 Engine View Diagrams & Manuals
090708-0198-01 Engine View Diagrams & Manuals
090708-0202-01 Engine View Diagrams & Manuals
090708-0238-01 Engine View Diagrams & Manuals
090708-0238-02 Engine View Diagrams & Manuals
090708-0238-03 Engine View Diagrams & Manuals
090708-3006-01 Engine View Diagrams & Manuals
090708-3075-01 Engine View Diagrams & Manuals
090708-3136-01 Engine View Diagrams & Manuals
090708-3136-02 Engine View Diagrams & Manuals
090782-0050-01 Engine View Diagrams & Manuals
090782-0051-01 Engine View Diagrams & Manuals
090782-0052-01 Engine View Diagrams & Manuals
090782-0053-01 Engine View Diagrams & Manuals
090782-0111-01 Engine View Diagrams & Manuals
090782-0112-01 Engine View Diagrams & Manuals
090782-0118-01 Engine View Diagrams & Manuals
090782-0122-01 Engine View Diagrams & Manuals
090782-0140-01 Engine View Diagrams & Manuals
090782-0144-01 Engine View Diagrams & Manuals
090782-0186-01 Engine View Diagrams & Manuals
090782-0201-01 Engine View Diagrams & Manuals
090782-0204-01 Engine View Diagrams & Manuals
090782-0207-01 Engine View Diagrams & Manuals
090782-0251-01 Engine View Diagrams & Manuals
090782-0261-01 Engine View Diagrams & Manuals
090782-3040-01 Engine View Diagrams & Manuals
090782-3043-01 Engine View Diagrams & Manuals
090782-3045-01 Engine View Diagrams & Manuals
090782-3045-02 Engine View Diagrams & Manuals
090782-3051-01 Engine View Diagrams & Manuals
090782-3055-01 Engine View Diagrams & Manuals
090782-3125-02 Engine View Diagrams & Manuals
090782-3128-01 Engine View Diagrams & Manuals
090782-3129-01 Engine View Diagrams & Manuals
090782-3133-01 Engine View Diagrams & Manuals
090782-3138-01 Engine View Diagrams & Manuals
090782-3750-01 Engine View Diagrams & Manuals
090782-3751-01 Engine View Diagrams & Manuals
090782-3752-01 Engine View Diagrams & Manuals
090787-0119-01 Engine View Diagrams & Manuals
090787-0139-01 Engine View Diagrams & Manuals
090787-0141-01 Engine View Diagrams & Manuals
090787-0158-01 Engine View Diagrams & Manuals
090787-0187-01 Engine View Diagrams & Manuals
090787-3117-01 Engine View Diagrams & Manuals
090787-3118-01 Engine View Diagrams & Manuals
090787-3134-01 Engine View Diagrams & Manuals
090788-0065-01 Engine View Diagrams & Manuals
090788-0067-01 Engine View Diagrams & Manuals
090788-0124-01 Engine View Diagrams & Manuals
090788-0124-02 Engine View Diagrams & Manuals
090788-0184-01 Engine View Diagrams & Manuals
090788-0203-01 Engine View Diagrams & Manuals
090788-0211-01 Engine View Diagrams & Manuals
090788-0237-01 Engine View Diagrams & Manuals
090788-0237-02 Engine View Diagrams & Manuals
090788-0237-03 Engine View Diagrams & Manuals
090902-3309-99 Engine View Diagrams & Manuals
091702-0100-01 Engine View Diagrams & Manuals
091702-0103-01 Engine View Diagrams & Manuals
091702-0125-01 Engine View Diagrams & Manuals
091702-0126-01 Engine View Diagrams & Manuals
091702-0127-01 Engine View Diagrams & Manuals
091702-0127-02 Engine View Diagrams & Manuals
091702-0128-01 Engine View Diagrams & Manuals
091702-0130-01 Engine View Diagrams & Manuals
091702-0131-01 Engine View Diagrams & Manuals
091702-0132-01 Engine View Diagrams & Manuals
091702-0133-01 Engine View Diagrams & Manuals
091702-3000-01 Engine View Diagrams & Manuals
091707-0101-01 Engine View Diagrams & Manuals
091707-3036-01 Engine View Diagrams & Manuals
091708-0015-01 Engine View Diagrams & Manuals
091708-0025-01 Engine View Diagrams & Manuals
091708-0106-01 Engine View Diagrams & Manuals
091708-0120-01 Engine View Diagrams & Manuals
091708-0121-01 Engine View Diagrams & Manuals
091708-0122-01 Engine View Diagrams & Manuals
091708-0124-01 Engine View Diagrams & Manuals
091708-0129-01 Engine View Diagrams & Manuals
091708-0180-01 Engine View Diagrams & Manuals
091708-0180-02 Engine View Diagrams & Manuals
091708-0180-03 Engine View Diagrams & Manuals
091708-0181-01 Engine View Diagrams & Manuals
091708-0181-02 Engine View Diagrams & Manuals
091708-0181-03 Engine View Diagrams & Manuals
091708-0200-01 Engine View Diagrams & Manuals
091708-3006-01 Engine View Diagrams & Manuals
092501-0164-99 Engine View Diagrams & Manuals
092501-0186-99 Engine View Diagrams & Manuals
092501-0221-99 Engine View Diagrams & Manuals
092502-0115-99 Engine View Diagrams & Manuals
092502-0116-99 Engine View Diagrams & Manuals
092502-0117-99 Engine View Diagrams & Manuals
092502-0118-99 Engine View Diagrams & Manuals
092502-0133-99 Engine View Diagrams & Manuals
092502-0134-99 Engine View Diagrams & Manuals
092502-0135-99 Engine View Diagrams & Manuals
092502-0136-99 Engine View Diagrams & Manuals
092502-0139-99 Engine View Diagrams & Manuals
092502-0141-99 Engine View Diagrams & Manuals
092502-0142-99 Engine View Diagrams & Manuals
092502-0143-99 Engine View Diagrams & Manuals
092502-0144-99 Engine View Diagrams & Manuals
092502-0146-99 Engine View Diagrams & Manuals
092502-0147-99 Engine View Diagrams & Manuals
092502-0148-99 Engine View Diagrams & Manuals
092502-0149-99 Engine View Diagrams & Manuals
092502-0150-99 Engine View Diagrams & Manuals
092502-0151-99 Engine View Diagrams & Manuals
092502-0153-99 Engine View Diagrams & Manuals
092502-0154-99 Engine View Diagrams & Manuals
092502-0155-99 Engine View Diagrams & Manuals
092502-0156-99 Engine View Diagrams & Manuals
092502-0158-99 Engine View Diagrams & Manuals
092502-0159-99 Engine View Diagrams & Manuals
092502-0160-99 Engine View Diagrams & Manuals
092502-0162-99 Engine View Diagrams & Manuals
092502-0163-99 Engine View Diagrams & Manuals
092502-0167-99 Engine View Diagrams & Manuals
092502-0168-99 Engine View Diagrams & Manuals
092502-0169-99 Engine View Diagrams & Manuals
092502-0170-99 Engine View Diagrams & Manuals
092502-0172-99 Engine View Diagrams & Manuals
092502-0173-99 Engine View Diagrams & Manuals
092502-0174-99 Engine View Diagrams & Manuals
092502-0175-99 Engine View Diagrams & Manuals
092502-0176-99 Engine View Diagrams & Manuals
092502-0179-99 Engine View Diagrams & Manuals
092502-0180-99 Engine View Diagrams & Manuals
092502-0182-99 Engine View Diagrams & Manuals
092502-0183-99 Engine View Diagrams & Manuals
092502-0185-99 Engine View Diagrams & Manuals
092502-0187-99 Engine View Diagrams & Manuals
092502-0188-99 Engine View Diagrams & Manuals
092502-0189-99 Engine View Diagrams & Manuals
092502-0190-99 Engine View Diagrams & Manuals
092502-0191-99 Engine View Diagrams & Manuals
092502-0192-99 Engine View Diagrams & Manuals
092502-0193-99 Engine View Diagrams & Manuals
092502-0195-99 Engine View Diagrams & Manuals
092502-0197-99 Engine View Diagrams & Manuals
092502-0198-99 Engine View Diagrams & Manuals
092502-0200-99 Engine View Diagrams & Manuals
092502-0201-99 Engine View Diagrams & Manuals
092502-0202-99 Engine View Diagrams & Manuals
092502-0205-99 Engine View Diagrams & Manuals
092502-0206-99 Engine View Diagrams & Manuals
092502-0207-99 Engine View Diagrams & Manuals
092502-0208-99 Engine View Diagrams & Manuals
092502-0209-99 Engine View Diagrams & Manuals
092502-0210-99 Engine View Diagrams & Manuals
092502-0211-99 Engine View Diagrams & Manuals
092502-0212-99 Engine View Diagrams & Manuals
092502-0213-99 Engine View Diagrams & Manuals
092502-0214-99 Engine View Diagrams & Manuals
092502-0216-99 Engine View Diagrams & Manuals
092502-0217-99 Engine View Diagrams & Manuals
092502-0218-99 Engine View Diagrams & Manuals
092502-0220-99 Engine View Diagrams & Manuals
092502-0222-99 Engine View Diagrams & Manuals
092502-0223-99 Engine View Diagrams & Manuals
092502-0224-99 Engine View Diagrams & Manuals
092502-0226-99 Engine View Diagrams & Manuals
092502-0227-99 Engine View Diagrams & Manuals
092502-0229-99 Engine View Diagrams & Manuals
092502-0231-99 Engine View Diagrams & Manuals
092502-0233-99 Engine View Diagrams & Manuals
092502-0236-99 Engine View Diagrams & Manuals
092502-0237-99 Engine View Diagrams & Manuals
092502-0238-99 Engine View Diagrams & Manuals
092502-0241-99 Engine View Diagrams & Manuals
092502-0242-99 Engine View Diagrams & Manuals
092502-0245-99 Engine View Diagrams & Manuals
092502-0247-99 Engine View Diagrams & Manuals
092502-0249-99 Engine View Diagrams & Manuals
092502-0250-99 Engine View Diagrams & Manuals
092502-0253-99 Engine View Diagrams & Manuals
092502-0255-99 Engine View Diagrams & Manuals
092502-0256-99 Engine View Diagrams & Manuals
092502-0257-99 Engine View Diagrams & Manuals
092502-0258-99 Engine View Diagrams & Manuals
092502-0261-99 Engine View Diagrams & Manuals
092502-0262-99 Engine View Diagrams & Manuals
092502-0263-99 Engine View Diagrams & Manuals
092502-0265-99 Engine View Diagrams & Manuals
092502-0266-99 Engine View Diagrams & Manuals
092502-0267-99 Engine View Diagrams & Manuals
092502-0268-99 Engine View Diagrams & Manuals
092502-0269-99 Engine View Diagrams & Manuals
092502-0270-99 Engine View Diagrams & Manuals
092502-0271-99 Engine View Diagrams & Manuals
092502-0273-99 Engine View Diagrams & Manuals
092502-0274-99 Engine View Diagrams & Manuals
092502-0275-99 Engine View Diagrams & Manuals
092502-0276-99 Engine View Diagrams & Manuals
092502-0277-99 Engine View Diagrams & Manuals
092502-0278-99 Engine View Diagrams & Manuals
092502-0601-99 Engine View Diagrams & Manuals
092502-0602-99 Engine View Diagrams & Manuals
092502-0603-99 Engine View Diagrams & Manuals
092502-0604-99 Engine View Diagrams & Manuals
092502-0605-99 Engine View Diagrams & Manuals
092502-0606-99 Engine View Diagrams & Manuals
092502-0625-99 Engine View Diagrams & Manuals
092502-0627-99 Engine View Diagrams & Manuals
092502-0628-99 Engine View Diagrams & Manuals
092502-0643-99 Engine View Diagrams & Manuals
092502-0644-99 Engine View Diagrams & Manuals
092502-0652-99 Engine View Diagrams & Manuals
092502-0670-99 Engine View Diagrams & Manuals
092502-0673-99 Engine View Diagrams & Manuals
092502-0674-99 Engine View Diagrams & Manuals
092502-0675-99 Engine View Diagrams & Manuals
092502-0677-99 Engine View Diagrams & Manuals
092502-0679-99 Engine View Diagrams & Manuals
092502-0680-99 Engine View Diagrams & Manuals
092502-0681-99 Engine View Diagrams & Manuals
092502-0682-99 Engine View Diagrams & Manuals
092502-0683-99 Engine View Diagrams & Manuals
092502-0684-99 Engine View Diagrams & Manuals
092502-0685-99 Engine View Diagrams & Manuals
092502-0686-99 Engine View Diagrams & Manuals
092502-0689-99 Engine View Diagrams & Manuals
092502-0690-99 Engine View Diagrams & Manuals
092502-0691-99 Engine View Diagrams & Manuals
092502-0692-99 Engine View Diagrams & Manuals
092502-0693-99 Engine View Diagrams & Manuals
092502-0694-99 Engine View Diagrams & Manuals
092502-0695-99 Engine View Diagrams & Manuals
092502-0698-99 Engine View Diagrams & Manuals
092502-0699-99 Engine View Diagrams & Manuals
092502-0700-99 Engine View Diagrams & Manuals
092502-0701-99 Engine View Diagrams & Manuals
092502-0703-99 Engine View Diagrams & Manuals
092502-0704-99 Engine View Diagrams & Manuals
092502-0707-99 Engine View Diagrams & Manuals
092502-0708-99 Engine View Diagrams & Manuals
092502-0709-99 Engine View Diagrams & Manuals
092502-0711-99 Engine View Diagrams & Manuals
092502-0712-99 Engine View Diagrams & Manuals
092502-0715-99 Engine View Diagrams & Manuals
092502-0716-99 Engine View Diagrams & Manuals
092502-0717-99 Engine View Diagrams & Manuals
092502-0718-99 Engine View Diagrams & Manuals
092502-0719-99 Engine View Diagrams & Manuals
092502-0720-99 Engine View Diagrams & Manuals
092502-0721-99 Engine View Diagrams & Manuals
092502-0722-99 Engine View Diagrams & Manuals
092502-0723-99 Engine View Diagrams & Manuals
092502-0724-99 Engine View Diagrams & Manuals
092502-0725-99 Engine View Diagrams & Manuals
092502-0726-99 Engine View Diagrams & Manuals
092502-0728-99 Engine View Diagrams & Manuals
092502-0730-99 Engine View Diagrams & Manuals
092502-0731-99 Engine View Diagrams & Manuals
092502-0733-99 Engine View Diagrams & Manuals
092502-0734-99 Engine View Diagrams & Manuals
092502-0735-99 Engine View Diagrams & Manuals
092502-0737-99 Engine View Diagrams & Manuals
092502-0738-99 Engine View Diagrams & Manuals
092502-0740-99 Engine View Diagrams & Manuals
092502-0743-99 Engine View Diagrams & Manuals
092502-0744-99 Engine View Diagrams & Manuals
092502-0747-99 Engine View Diagrams & Manuals
092502-0748-99 Engine View Diagrams & Manuals
092502-0750-99 Engine View Diagrams & Manuals
092502-0753-99 Engine View Diagrams & Manuals
092502-0754-99 Engine View Diagrams & Manuals
092502-0756-99 Engine View Diagrams & Manuals
092502-0757-99 Engine View Diagrams & Manuals
092502-0759-99 Engine View Diagrams & Manuals
092502-0760-99 Engine View Diagrams & Manuals
092502-0761-99 Engine View Diagrams & Manuals
092502-0762-99 Engine View Diagrams & Manuals
092502-0763-99 Engine View Diagrams & Manuals
092502-0764-99 Engine View Diagrams & Manuals
092502-0765-99 Engine View Diagrams & Manuals
092502-0766-99 Engine View Diagrams & Manuals
092502-0769-99 Engine View Diagrams & Manuals
092502-0770-99 Engine View Diagrams & Manuals
092502-0771-99 Engine View Diagrams & Manuals
092502-0772-99 Engine View Diagrams & Manuals
092502-0773-99 Engine View Diagrams & Manuals
092502-0774-99 Engine View Diagrams & Manuals
092502-0775-99 Engine View Diagrams & Manuals
092502-0780-99 Engine View Diagrams & Manuals
092502-0781-99 Engine View Diagrams & Manuals
092502-0782-99 Engine View Diagrams & Manuals
092502-0783-99 Engine View Diagrams & Manuals
092502-0785-99 Engine View Diagrams & Manuals
092502-0786-99 Engine View Diagrams & Manuals
092502-0787-99 Engine View Diagrams & Manuals
092502-0789-99 Engine View Diagrams & Manuals
092502-0790-99 Engine View Diagrams & Manuals
092502-0791-99 Engine View Diagrams & Manuals
092502-0792-99 Engine View Diagrams & Manuals
092502-0793-99 Engine View Diagrams & Manuals
092502-0795-99 Engine View Diagrams & Manuals
092502-0842-99 Engine View Diagrams & Manuals
092502-0843-99 Engine View Diagrams & Manuals
092502-0846-99 Engine View Diagrams & Manuals
092502-0847-99 Engine View Diagrams & Manuals
092502-0850-99 Engine View Diagrams & Manuals
092502-0852-99 Engine View Diagrams & Manuals
092502-0853-99 Engine View Diagrams & Manuals
092502-0854-99 Engine View Diagrams & Manuals
092502-0855-99 Engine View Diagrams & Manuals
092502-0856-99 Engine View Diagrams & Manuals
092502-0858-99 Engine View Diagrams & Manuals
092502-0860-99 Engine View Diagrams & Manuals
092502-0861-99 Engine View Diagrams & Manuals
092502-0865-99 Engine View Diagrams & Manuals
092502-0866-99 Engine View Diagrams & Manuals
092502-0867-99 Engine View Diagrams & Manuals
092502-0868-99 Engine View Diagrams & Manuals
092502-0871-99 Engine View Diagrams & Manuals
092502-0872-99 Engine View Diagrams & Manuals
092502-0873-99 Engine View Diagrams & Manuals
092502-0874-99 Engine View Diagrams & Manuals
092502-0875-99 Engine View Diagrams & Manuals
092502-0876-99 Engine View Diagrams & Manuals
092502-0878-99 Engine View Diagrams & Manuals
092502-0879-99 Engine View Diagrams & Manuals
092502-0881-99 Engine View Diagrams & Manuals
092502-0882-99 Engine View Diagrams & Manuals
092502-0884-99 Engine View Diagrams & Manuals
092502-0885-99 Engine View Diagrams & Manuals
092502-0887-99 Engine View Diagrams & Manuals
092502-0796-99 Engine View Diagrams & Manuals
092502-0797-99 Engine View Diagrams & Manuals
092502-0798-99 Engine View Diagrams & Manuals
092502-0799-99 Engine View Diagrams & Manuals
092502-0801-99 Engine View Diagrams & Manuals
092502-0803-99 Engine View Diagrams & Manuals
092502-0805-99 Engine View Diagrams & Manuals
092502-0806-99 Engine View Diagrams & Manuals
092502-0807-99 Engine View Diagrams & Manuals
092502-0808-99 Engine View Diagrams & Manuals
092502-0811-99 Engine View Diagrams & Manuals
092502-0812-99 Engine View Diagrams & Manuals
092502-0813-99 Engine View Diagrams & Manuals
092502-0817-99 Engine View Diagrams & Manuals
092502-0819-99 Engine View Diagrams & Manuals
092502-0822-99 Engine View Diagrams & Manuals
092502-0823-99 Engine View Diagrams & Manuals
092502-0824-99 Engine View Diagrams & Manuals
092502-0826-99 Engine View Diagrams & Manuals
092502-0827-99 Engine View Diagrams & Manuals
092502-0828-99 Engine View Diagrams & Manuals
092502-0829-99 Engine View Diagrams & Manuals
092502-0831-99 Engine View Diagrams & Manuals
092502-0832-99 Engine View Diagrams & Manuals
092502-0833-99 Engine View Diagrams & Manuals
092502-0834-99 Engine View Diagrams & Manuals
092502-0835-99 Engine View Diagrams & Manuals
092502-0836-99 Engine View Diagrams & Manuals
092502-0839-99 Engine View Diagrams & Manuals
092502-0841-99 Engine View Diagrams & Manuals
092502-0932-99 Engine View Diagrams & Manuals
092502-0933-99 Engine View Diagrams & Manuals
092502-0936-99 Engine View Diagrams & Manuals
092502-0938-99 Engine View Diagrams & Manuals
092502-0939-99 Engine View Diagrams & Manuals
092502-0941-99 Engine View Diagrams & Manuals
092502-0942-99 Engine View Diagrams & Manuals
092502-0945-99 Engine View Diagrams & Manuals
092502-0948-99 Engine View Diagrams & Manuals
092502-0949-99 Engine View Diagrams & Manuals
092502-0955-99 Engine View Diagrams & Manuals
092502-0956-99 Engine View Diagrams & Manuals
092502-0957-99 Engine View Diagrams & Manuals
092502-0958-99 Engine View Diagrams & Manuals
092502-0959-99 Engine View Diagrams & Manuals
092502-0960-99 Engine View Diagrams & Manuals
092502-0961-99 Engine View Diagrams & Manuals
092502-0962-99 Engine View Diagrams & Manuals
092502-0963-99 Engine View Diagrams & Manuals
092502-0964-99 Engine View Diagrams & Manuals
092502-0965-99 Engine View Diagrams & Manuals
092502-0966-99 Engine View Diagrams & Manuals
092502-0967-99 Engine View Diagrams & Manuals
092502-0968-99 Engine View Diagrams & Manuals
092502-0969-99 Engine View Diagrams & Manuals
092502-0970-99 Engine View Diagrams & Manuals
092502-0971-99 Engine View Diagrams & Manuals
092502-0972-99 Engine View Diagrams & Manuals
092502-0973-99 Engine View Diagrams & Manuals
092502-0975-99 Engine View Diagrams & Manuals
092502-0976-99 Engine View Diagrams & Manuals
092502-0889-99 Engine View Diagrams & Manuals
092502-0890-99 Engine View Diagrams & Manuals
092502-0891-99 Engine View Diagrams & Manuals
092502-0892-99 Engine View Diagrams & Manuals
092502-0893-99 Engine View Diagrams & Manuals
092502-0895-99 Engine View Diagrams & Manuals
092502-0900-99 Engine View Diagrams & Manuals
092502-0902-99 Engine View Diagrams & Manuals
092502-0903-99 Engine View Diagrams & Manuals
092502-0905-99 Engine View Diagrams & Manuals
092502-0906-99 Engine View Diagrams & Manuals
092502-0907-99 Engine View Diagrams & Manuals
092502-0908-99 Engine View Diagrams & Manuals
092502-0909-99 Engine View Diagrams & Manuals
092502-0910-99 Engine View Diagrams & Manuals
092502-0912-99 Engine View Diagrams & Manuals
092502-0913-99 Engine View Diagrams & Manuals
092502-0914-99 Engine View Diagrams & Manuals
092502-0915-99 Engine View Diagrams & Manuals
092502-0916-99 Engine View Diagrams & Manuals
092502-0917-99 Engine View Diagrams & Manuals
092502-0919-99 Engine View Diagrams & Manuals
092502-0920-99 Engine View Diagrams & Manuals
092502-0922-99 Engine View Diagrams & Manuals
092502-0923-99 Engine View Diagrams & Manuals
092502-0924-99 Engine View Diagrams & Manuals
092502-0927-99 Engine View Diagrams & Manuals
092502-0928-99 Engine View Diagrams & Manuals
092502-0929-99 Engine View Diagrams & Manuals
092502-0931-99 Engine View Diagrams & Manuals
092502-1015-99 Engine View Diagrams & Manuals
092502-1016-99 Engine View Diagrams & Manuals
092502-1017-99 Engine View Diagrams & Manuals
092502-1018-99 Engine View Diagrams & Manuals
092502-1019-99 Engine View Diagrams & Manuals
092502-1021-99 Engine View Diagrams & Manuals
092502-1022-99 Engine View Diagrams & Manuals
092502-1023-99 Engine View Diagrams & Manuals
092502-1024-99 Engine View Diagrams & Manuals
092502-1025-99 Engine View Diagrams & Manuals
092502-1026-99 Engine View Diagrams & Manuals
092502-1027-99 Engine View Diagrams & Manuals
092502-1029-99 Engine View Diagrams & Manuals
092502-1031-99 Engine View Diagrams & Manuals
092502-1032-99 Engine View Diagrams & Manuals
092502-1034-99 Engine View Diagrams & Manuals
092502-1035-99 Engine View Diagrams & Manuals
092502-1036-99 Engine View Diagrams & Manuals
092502-1037-99 Engine View Diagrams & Manuals
092502-1039-99 Engine View Diagrams & Manuals
092502-1040-99 Engine View Diagrams & Manuals
092502-1041-99 Engine View Diagrams & Manuals
092502-1042-99 Engine View Diagrams & Manuals
092502-1043-99 Engine View Diagrams & Manuals
092502-1044-99 Engine View Diagrams & Manuals
092502-1045-99 Engine View Diagrams & Manuals
092502-1046-99 Engine View Diagrams & Manuals
092502-1048-99 Engine View Diagrams & Manuals
092502-1049-99 Engine View Diagrams & Manuals
092502-1050-99 Engine View Diagrams & Manuals
092502-1051-99 Engine View Diagrams & Manuals
092502-0977-99 Engine View Diagrams & Manuals
092502-0978-99 Engine View Diagrams & Manuals
092502-0979-99 Engine View Diagrams & Manuals
092502-0980-99 Engine View Diagrams & Manuals
092502-0982-99 Engine View Diagrams & Manuals
092502-0983-99 Engine View Diagrams & Manuals
092502-0984-99 Engine View Diagrams & Manuals
092502-0987-99 Engine View Diagrams & Manuals
092502-0988-99 Engine View Diagrams & Manuals
092502-0989-99 Engine View Diagrams & Manuals
092502-0991-99 Engine View Diagrams & Manuals
092502-0992-99 Engine View Diagrams & Manuals
092502-0993-99 Engine View Diagrams & Manuals
092502-0994-99 Engine View Diagrams & Manuals
092502-0995-99 Engine View Diagrams & Manuals
092502-0996-99 Engine View Diagrams & Manuals
092502-0997-99 Engine View Diagrams & Manuals
092502-0999-99 Engine View Diagrams & Manuals
092502-1002-99 Engine View Diagrams & Manuals
092502-1003-99 Engine View Diagrams & Manuals
092502-1004-99 Engine View Diagrams & Manuals
092502-1005-99 Engine View Diagrams & Manuals
092502-1006-99 Engine View Diagrams & Manuals
092502-1008-99 Engine View Diagrams & Manuals
092502-1009-99 Engine View Diagrams & Manuals
092502-1010-99 Engine View Diagrams & Manuals
092502-1011-99 Engine View Diagrams & Manuals
092502-1012-99 Engine View Diagrams & Manuals
092502-1013-99 Engine View Diagrams & Manuals
092502-1014-99 Engine View Diagrams & Manuals
092502-1052-99 Engine View Diagrams & Manuals
092502-1054-99 Engine View Diagrams & Manuals
092502-1055-99 Engine View Diagrams & Manuals
092502-1056-99 Engine View Diagrams & Manuals
092502-1057-99 Engine View Diagrams & Manuals
092502-1060-99 Engine View Diagrams & Manuals
092502-1061-99 Engine View Diagrams & Manuals
092502-1062-99 Engine View Diagrams & Manuals
092502-1063-99 Engine View Diagrams & Manuals
092502-1064-99 Engine View Diagrams & Manuals
092502-1066-99 Engine View Diagrams & Manuals
092502-1067-99 Engine View Diagrams & Manuals
092502-1068-99 Engine View Diagrams & Manuals
092502-1069-99 Engine View Diagrams & Manuals
092502-1070-99 Engine View Diagrams & Manuals
092502-1072-99 Engine View Diagrams & Manuals
092502-1073-99 Engine View Diagrams & Manuals
092502-1074-99 Engine View Diagrams & Manuals
092502-1075-99 Engine View Diagrams & Manuals
092502-1076-99 Engine View Diagrams & Manuals
092502-1077-99 Engine View Diagrams & Manuals
092502-1078-99 Engine View Diagrams & Manuals
092502-1079-99 Engine View Diagrams & Manuals
092502-1081-99 Engine View Diagrams & Manuals
092502-1082-99 Engine View Diagrams & Manuals
092502-1084-99 Engine View Diagrams & Manuals
092502-1086-99 Engine View Diagrams & Manuals
092502-1088-99 Engine View Diagrams & Manuals
092502-1089-99 Engine View Diagrams & Manuals
092502-1090-99 Engine View Diagrams & Manuals
092502-1091-99 Engine View Diagrams & Manuals
092502-1092-99 Engine View Diagrams & Manuals
092502-1093-99 Engine View Diagrams & Manuals
092502-1094-99 Engine View Diagrams & Manuals
092502-1095-99 Engine View Diagrams & Manuals
092502-1096-99 Engine View Diagrams & Manuals
092502-3101-02 Engine View Diagrams & Manuals
092502-3101-03 Engine View Diagrams & Manuals
092502-3101-04 Engine View Diagrams & Manuals
092502-3102-01 Engine View Diagrams & Manuals
092502-3102-02 Engine View Diagrams & Manuals
092502-3102-03 Engine View Diagrams & Manuals
092502-3102-04 Engine View Diagrams & Manuals
092502-3102-05 Engine View Diagrams & Manuals
092502-3103-01 Engine View Diagrams & Manuals
092502-3103-02 Engine View Diagrams & Manuals
092502-3104-01 Engine View Diagrams & Manuals
092502-3104-02 Engine View Diagrams & Manuals
092502-3104-03 Engine View Diagrams & Manuals
092502-3104-04 Engine View Diagrams & Manuals
092502-3104-05 Engine View Diagrams & Manuals
092502-3105-01 Engine View Diagrams & Manuals
092502-3106-01 Engine View Diagrams & Manuals
092502-3106-02 Engine View Diagrams & Manuals
092502-3106-03 Engine View Diagrams & Manuals
092502-3108-01 Engine View Diagrams & Manuals
092502-3134-01 Engine View Diagrams & Manuals
092502-3134-02 Engine View Diagrams & Manuals
092502-3136-01 Engine View Diagrams & Manuals
092502-3137-01 Engine View Diagrams & Manuals
092502-3138-01 Engine View Diagrams & Manuals
092502-3139-01 Engine View Diagrams & Manuals
092502-3140-01 Engine View Diagrams & Manuals
092502-3140-02 Engine View Diagrams & Manuals
092502-3141-01 Engine View Diagrams & Manuals
092502-3141-02 Engine View Diagrams & Manuals
092502-3141-03 Engine View Diagrams & Manuals
092502-3143-01 Engine View Diagrams & Manuals
092502-3144-01 Engine View Diagrams & Manuals
092502-3145-01 Engine View Diagrams & Manuals
092502-3145-02 Engine View Diagrams & Manuals
092502-3149-01 Engine View Diagrams & Manuals
092502-3149-02 Engine View Diagrams & Manuals
092502-3151-01 Engine View Diagrams & Manuals
092502-3151-02 Engine View Diagrams & Manuals
092502-3151-03 Engine View Diagrams & Manuals
092502-3151-04 Engine View Diagrams & Manuals
092502-3151-05 Engine View Diagrams & Manuals
092502-3152-01 Engine View Diagrams & Manuals
092502-3153-01 Engine View Diagrams & Manuals
092502-3154-01 Engine View Diagrams & Manuals
092502-3155-01 Engine View Diagrams & Manuals
092502-3156-01 Engine View Diagrams & Manuals
092502-3157-01 Engine View Diagrams & Manuals
092502-3157-02 Engine View Diagrams & Manuals
092502-3158-01 Engine View Diagrams & Manuals
092502-3159-01 Engine View Diagrams & Manuals
092502-3160-01 Engine View Diagrams & Manuals
092502-3161-01 Engine View Diagrams & Manuals
092502-3161-02 Engine View Diagrams & Manuals
092502-3164-01 Engine View Diagrams & Manuals
092502-3164-02 Engine View Diagrams & Manuals
092502-3165-01 Engine View Diagrams & Manuals
092502-3166-01 Engine View Diagrams & Manuals
092502-3168-01 Engine View Diagrams & Manuals
092502-3168-02 Engine View Diagrams & Manuals
092502-3169-01 Engine View Diagrams & Manuals
092502-3170-01 Engine View Diagrams & Manuals
092502-3172-01 Engine View Diagrams & Manuals
092502-3174-01 Engine View Diagrams & Manuals
092502-3175-01 Engine View Diagrams & Manuals
092502-3177-01 Engine View Diagrams & Manuals
092502-3177-02 Engine View Diagrams & Manuals
092502-3178-01 Engine View Diagrams & Manuals
092502-3178-02 Engine View Diagrams & Manuals
092502-3179-01 Engine View Diagrams & Manuals
092502-3180-01 Engine View Diagrams & Manuals
092502-3182-01 Engine View Diagrams & Manuals
092502-3183-01 Engine View Diagrams & Manuals
092502-3184-01 Engine View Diagrams & Manuals
092502-3185-01 Engine View Diagrams & Manuals
092502-3186-01 Engine View Diagrams & Manuals
092502-3187-01 Engine View Diagrams & Manuals
092502-3188-01 Engine View Diagrams & Manuals
092502-3189-01 Engine View Diagrams & Manuals
092502-3190-01 Engine View Diagrams & Manuals
092502-3191-01 Engine View Diagrams & Manuals
092502-3192-01 Engine View Diagrams & Manuals
092502-3193-01 Engine View Diagrams & Manuals
092502-3193-02 Engine View Diagrams & Manuals
092502-3194-01 Engine View Diagrams & Manuals
092502-3195-01 Engine View Diagrams & Manuals
092502-3196-01 Engine View Diagrams & Manuals
092502-3196-02 Engine View Diagrams & Manuals
092502-3197-01 Engine View Diagrams & Manuals
092502-3198-01 Engine View Diagrams & Manuals
092502-3199-01 Engine View Diagrams & Manuals
092502-3200-01 Engine View Diagrams & Manuals
092502-3201-01 Engine View Diagrams & Manuals
092502-3204-01 Engine View Diagrams & Manuals
092502-3205-01 Engine View Diagrams & Manuals
092502-3206-01 Engine View Diagrams & Manuals
092502-3207-01 Engine View Diagrams & Manuals
092502-3208-01 Engine View Diagrams & Manuals
092502-3209-01 Engine View Diagrams & Manuals
092502-3210-01 Engine View Diagrams & Manuals
092502-3211-01 Engine View Diagrams & Manuals
092502-5101-99 Engine View Diagrams & Manuals
092502-5105-01 Engine View Diagrams & Manuals
092502-5105-02 Engine View Diagrams & Manuals
092502-5106-01 Engine View Diagrams & Manuals
092502-5106-02 Engine View Diagrams & Manuals
092502-5107-01 Engine View Diagrams & Manuals
092502-5108-01 Engine View Diagrams & Manuals
092502-5109-01 Engine View Diagrams & Manuals
092502-5109-02 Engine View Diagrams & Manuals
092502-5109-03 Engine View Diagrams & Manuals
092502-5111-01 Engine View Diagrams & Manuals
092502-5112-01 Engine View Diagrams & Manuals
092502-5112-02 Engine View Diagrams & Manuals
092502-5112-03 Engine View Diagrams & Manuals
092502-5113-01 Engine View Diagrams & Manuals
092502-5130-01 Engine View Diagrams & Manuals
092502-5131-01 Engine View Diagrams & Manuals
092502-5132-99 Engine View Diagrams & Manuals
092502-5133-99 Engine View Diagrams & Manuals
092502-5134-99 Engine View Diagrams & Manuals
092502-5135-01 Engine View Diagrams & Manuals
092502-5136-99 Engine View Diagrams & Manuals
092502-5137-01 Engine View Diagrams & Manuals
092502-5138-99 Engine View Diagrams & Manuals
092502-5139-99 Engine View Diagrams & Manuals
092502-5140-01 Engine View Diagrams & Manuals
092502-5141-01 Engine View Diagrams & Manuals
092502-5142-01 Engine View Diagrams & Manuals
092502-5143-01 Engine View Diagrams & Manuals
092502-5144-01 Engine View Diagrams & Manuals
092502-5145-01 Engine View Diagrams & Manuals
092502-5146-01 Engine View Diagrams & Manuals
092502-5147-01 Engine View Diagrams & Manuals
092502-5148-01 Engine View Diagrams & Manuals
092502-5150-01 Engine View Diagrams & Manuals
092502-5156-01 Engine View Diagrams & Manuals
092502-5158-01 Engine View Diagrams & Manuals
092502-5159-01 Engine View Diagrams & Manuals
092502-5160-01 Engine View Diagrams & Manuals
092502-5162-01 Engine View Diagrams & Manuals
092502-5164-01 Engine View Diagrams & Manuals
092502-5167-01 Engine View Diagrams & Manuals
092502-5169-01 Engine View Diagrams & Manuals
092502-5170-01 Engine View Diagrams & Manuals
092502-5171-01 Engine View Diagrams & Manuals
092502-5171-02 Engine View Diagrams & Manuals
092502-5172-01 Engine View Diagrams & Manuals
092502-5173-01 Engine View Diagrams & Manuals
092502-5175-01 Engine View Diagrams & Manuals
092502-5179-01 Engine View Diagrams & Manuals
092502-5179-02 Engine View Diagrams & Manuals
092502-5181-01 Engine View Diagrams & Manuals
092502-5182-01 Engine View Diagrams & Manuals
092502-5183-01 Engine View Diagrams & Manuals
092502-5184-01 Engine View Diagrams & Manuals
092502-5184-02 Engine View Diagrams & Manuals
092502-5185-01 Engine View Diagrams & Manuals
092502-5186-01 Engine View Diagrams & Manuals
092502-5187-01 Engine View Diagrams & Manuals
092502-5188-01 Engine View Diagrams & Manuals
092502-5189-01 Engine View Diagrams & Manuals
092502-5191-01 Engine View Diagrams & Manuals
092502-5192-01 Engine View Diagrams & Manuals
092502-5193-01 Engine View Diagrams & Manuals
092502-5194-01 Engine View Diagrams & Manuals
092502-5195-01 Engine View Diagrams & Manuals
092502-5195-02 Engine View Diagrams & Manuals
092502-5197-01 Engine View Diagrams & Manuals
092502-5199-01 Engine View Diagrams & Manuals
092502-5203-01 Engine View Diagrams & Manuals
092502-5204-01 Engine View Diagrams & Manuals
092502-5500-99 Engine View Diagrams & Manuals
092502-5501-01 Engine View Diagrams & Manuals
092502-5501-99 Engine View Diagrams & Manuals
092505-0609-99 Engine View Diagrams & Manuals
092505-0610-99 Engine View Diagrams & Manuals
092505-0611-99 Engine View Diagrams & Manuals
092505-0612-99 Engine View Diagrams & Manuals
092505-0654-99 Engine View Diagrams & Manuals
092505-0713-99 Engine View Diagrams & Manuals
092505-0751-99 Engine View Diagrams & Manuals
092505-0755-99 Engine View Diagrams & Manuals
092505-0809-99 Engine View Diagrams & Manuals
092505-0820-99 Engine View Diagrams & Manuals
092505-0821-99 Engine View Diagrams & Manuals
092505-0838-99 Engine View Diagrams & Manuals
092505-0859-99 Engine View Diagrams & Manuals
092505-0862-99 Engine View Diagrams & Manuals
092506-0120-99 Engine View Diagrams & Manuals
092506-0121-99 Engine View Diagrams & Manuals
092506-0122-99 Engine View Diagrams & Manuals
092506-0123-99 Engine View Diagrams & Manuals
092506-0145-99 Engine View Diagrams & Manuals
092506-0152-99 Engine View Diagrams & Manuals
092506-0181-99 Engine View Diagrams & Manuals
092506-0184-99 Engine View Diagrams & Manuals
092506-0194-99 Engine View Diagrams & Manuals
092506-0196-99 Engine View Diagrams & Manuals
092506-0225-99 Engine View Diagrams & Manuals
092506-0228-99 Engine View Diagrams & Manuals
092506-0230-99 Engine View Diagrams & Manuals
092506-0232-99 Engine View Diagrams & Manuals
092506-0234-99 Engine View Diagrams & Manuals
092506-0235-99 Engine View Diagrams & Manuals
092506-0239-99 Engine View Diagrams & Manuals
092506-0240-99 Engine View Diagrams & Manuals
092506-0246-99 Engine View Diagrams & Manuals
092506-0248-99 Engine View Diagrams & Manuals
092506-0252-99 Engine View Diagrams & Manuals
092506-0260-99 Engine View Diagrams & Manuals
092506-0272-99 Engine View Diagrams & Manuals
092506-0613-99 Engine View Diagrams & Manuals
092506-0614-99 Engine View Diagrams & Manuals
092506-0615-99 Engine View Diagrams & Manuals
092506-0616-99 Engine View Diagrams & Manuals
092506-0671-99 Engine View Diagrams & Manuals
092506-0696-99 Engine View Diagrams & Manuals
092506-0705-99 Engine View Diagrams & Manuals
092506-0729-99 Engine View Diagrams & Manuals
092506-0741-99 Engine View Diagrams & Manuals
092506-0776-99 Engine View Diagrams & Manuals
092508-0617-99 Engine View Diagrams & Manuals
092508-0618-99 Engine View Diagrams & Manuals
092508-0619-99 Engine View Diagrams & Manuals
092508-0620-99 Engine View Diagrams & Manuals
092508-0656-99 Engine View Diagrams & Manuals
092508-0672-99 Engine View Diagrams & Manuals
092508-0676-99 Engine View Diagrams & Manuals
092508-0678-99 Engine View Diagrams & Manuals
092508-0687-99 Engine View Diagrams & Manuals
092508-0688-99 Engine View Diagrams & Manuals
092508-0702-99 Engine View Diagrams & Manuals
092508-0706-99 Engine View Diagrams & Manuals
092508-0710-99 Engine View Diagrams & Manuals
092508-0714-99 Engine View Diagrams & Manuals
092508-0727-99 Engine View Diagrams & Manuals
092508-0732-99 Engine View Diagrams & Manuals
092508-0736-99 Engine View Diagrams & Manuals
092508-0739-99 Engine View Diagrams & Manuals
092508-0742-99 Engine View Diagrams & Manuals
092508-0745-99 Engine View Diagrams & Manuals
092508-0877-99 Engine View Diagrams & Manuals
092508-0883-99 Engine View Diagrams & Manuals
092508-0886-99 Engine View Diagrams & Manuals
092508-0888-99 Engine View Diagrams & Manuals
092508-0894-99 Engine View Diagrams & Manuals
092508-0896-99 Engine View Diagrams & Manuals
092508-0898-99 Engine View Diagrams & Manuals
092508-0899-99 Engine View Diagrams & Manuals
092508-0901-99 Engine View Diagrams & Manuals
092508-0904-99 Engine View Diagrams & Manuals
092508-0911-99 Engine View Diagrams & Manuals
092508-0918-99 Engine View Diagrams & Manuals
092508-0921-99 Engine View Diagrams & Manuals
092508-0925-99 Engine View Diagrams & Manuals
092508-0926-99 Engine View Diagrams & Manuals
092508-0930-99 Engine View Diagrams & Manuals
092508-0934-99 Engine View Diagrams & Manuals
092508-0935-99 Engine View Diagrams & Manuals
092508-0937-99 Engine View Diagrams & Manuals
092508-0940-99 Engine View Diagrams & Manuals
092508-0943-99 Engine View Diagrams & Manuals
092508-0944-99 Engine View Diagrams & Manuals
092508-0946-99 Engine View Diagrams & Manuals
092508-0947-99 Engine View Diagrams & Manuals
092508-0950-99 Engine View Diagrams & Manuals
092508-0951-99 Engine View Diagrams & Manuals
092508-0952-99 Engine View Diagrams & Manuals
092508-0953-99 Engine View Diagrams & Manuals
092508-0954-99 Engine View Diagrams & Manuals
092508-0974-99 Engine View Diagrams & Manuals
092508-0746-99 Engine View Diagrams & Manuals
092508-0749-99 Engine View Diagrams & Manuals
092508-0752-99 Engine View Diagrams & Manuals
092508-0758-99 Engine View Diagrams & Manuals
092508-0767-99 Engine View Diagrams & Manuals
092508-0768-99 Engine View Diagrams & Manuals
092508-0777-99 Engine View Diagrams & Manuals
092508-0779-99 Engine View Diagrams & Manuals
092508-0784-99 Engine View Diagrams & Manuals
092508-0788-99 Engine View Diagrams & Manuals
092508-0794-99 Engine View Diagrams & Manuals
092508-0800-99 Engine View Diagrams & Manuals
092508-0802-99 Engine View Diagrams & Manuals
092508-0804-99 Engine View Diagrams & Manuals
092508-0810-99 Engine View Diagrams & Manuals
092508-0814-99 Engine View Diagrams & Manuals
092508-0816-99 Engine View Diagrams & Manuals
092508-0818-99 Engine View Diagrams & Manuals
092508-0830-99 Engine View Diagrams & Manuals
092508-0837-99 Engine View Diagrams & Manuals
092508-0840-99 Engine View Diagrams & Manuals
092508-0844-99 Engine View Diagrams & Manuals
092508-0845-99 Engine View Diagrams & Manuals
092508-0848-99 Engine View Diagrams & Manuals
092508-0849-99 Engine View Diagrams & Manuals
092508-0851-99 Engine View Diagrams & Manuals
092508-0863-99 Engine View Diagrams & Manuals
092508-0864-99 Engine View Diagrams & Manuals
092508-0869-99 Engine View Diagrams & Manuals
092508-0870-99 Engine View Diagrams & Manuals
092508-5174-01 Engine View Diagrams & Manuals
092508-5175-99 Engine View Diagrams & Manuals
092508-5176-01 Engine View Diagrams & Manuals
092508-5177-01 Engine View Diagrams & Manuals
092508-5177-02 Engine View Diagrams & Manuals
092508-5177-03 Engine View Diagrams & Manuals
092508-5178-01 Engine View Diagrams & Manuals
092508-5180-01 Engine View Diagrams & Manuals
092508-5190-01 Engine View Diagrams & Manuals
092508-5202-01 Engine View Diagrams & Manuals
092508-5206-01 Engine View Diagrams & Manuals
092508-5207-01 Engine View Diagrams & Manuals
092582-0127-99 Engine View Diagrams & Manuals
092582-0128-99 Engine View Diagrams & Manuals
092582-0129-99 Engine View Diagrams & Manuals
092582-0130-99 Engine View Diagrams & Manuals
092582-0157-99 Engine View Diagrams & Manuals
092582-0178-99 Engine View Diagrams & Manuals
092582-0243-99 Engine View Diagrams & Manuals
092582-0264-99 Engine View Diagrams & Manuals
092582-0279-99 Engine View Diagrams & Manuals
092582-0621-99 Engine View Diagrams & Manuals
092582-0622-99 Engine View Diagrams & Manuals
092582-0623-99 Engine View Diagrams & Manuals
092582-0624-99 Engine View Diagrams & Manuals
092582-0657-99 Engine View Diagrams & Manuals
092582-0668-99 Engine View Diagrams & Manuals
092582-0697-99 Engine View Diagrams & Manuals
092582-0880-99 Engine View Diagrams & Manuals
092582-3107-01 Engine View Diagrams & Manuals
092582-3107-02 Engine View Diagrams & Manuals
092582-3142-01 Engine View Diagrams & Manuals
092582-3146-01 Engine View Diagrams & Manuals
092582-3147-01 Engine View Diagrams & Manuals
092582-3148-01 Engine View Diagrams & Manuals
092508-0985-99 Engine View Diagrams & Manuals
092508-0986-99 Engine View Diagrams & Manuals
092508-0990-99 Engine View Diagrams & Manuals
092508-0998-99 Engine View Diagrams & Manuals
092508-1000-99 Engine View Diagrams & Manuals
092508-1001-99 Engine View Diagrams & Manuals
092508-1007-99 Engine View Diagrams & Manuals
092508-1020-99 Engine View Diagrams & Manuals
092508-1028-99 Engine View Diagrams & Manuals
092508-1030-99 Engine View Diagrams & Manuals
092508-1033-99 Engine View Diagrams & Manuals
092508-1038-99 Engine View Diagrams & Manuals
092508-1047-99 Engine View Diagrams & Manuals
092508-1053-99 Engine View Diagrams & Manuals
092508-1058-99 Engine View Diagrams & Manuals
092508-1065-99 Engine View Diagrams & Manuals
092508-1071-99 Engine View Diagrams & Manuals
092508-1080-99 Engine View Diagrams & Manuals
092508-1083-99 Engine View Diagrams & Manuals
092508-1085-99 Engine View Diagrams & Manuals
092508-1087-99 Engine View Diagrams & Manuals
092508-5015-01 Engine View Diagrams & Manuals
092508-5149-01 Engine View Diagrams & Manuals
092508-5149-02 Engine View Diagrams & Manuals
092508-5151-01 Engine View Diagrams & Manuals
092508-5152-01 Engine View Diagrams & Manuals
092508-5153-01 Engine View Diagrams & Manuals
092508-5154-01 Engine View Diagrams & Manuals
092508-5155-01 Engine View Diagrams & Manuals
092508-5157-01 Engine View Diagrams & Manuals
092508-5163-01 Engine View Diagrams & Manuals
092508-5165-01 Engine View Diagrams & Manuals
092508-5166-01 Engine View Diagrams & Manuals
092508-5166-02 Engine View Diagrams & Manuals
092585-0629-99 Engine View Diagrams & Manuals
092585-0630-99 Engine View Diagrams & Manuals
092585-0631-99 Engine View Diagrams & Manuals
092585-0632-99 Engine View Diagrams & Manuals
092585-0659-99 Engine View Diagrams & Manuals
092586-0131-99 Engine View Diagrams & Manuals
092586-0203-99 Engine View Diagrams & Manuals
092586-0244-99 Engine View Diagrams & Manuals
092586-0259-99 Engine View Diagrams & Manuals
092586-0633-99 Engine View Diagrams & Manuals
092586-0634-99 Engine View Diagrams & Manuals
092586-0635-99 Engine View Diagrams & Manuals
092586-0636-99 Engine View Diagrams & Manuals
092586-0660-99 Engine View Diagrams & Manuals
092588-0637-99 Engine View Diagrams & Manuals
092588-0638-99 Engine View Diagrams & Manuals
092588-0639-99 Engine View Diagrams & Manuals
092588-0640-99 Engine View Diagrams & Manuals
092588-0661-99 Engine View Diagrams & Manuals
092588-0815-99 Engine View Diagrams & Manuals
092901-0229-99 Engine View Diagrams & Manuals
092901-0265-99 Engine View Diagrams & Manuals
092901-0351-99 Engine View Diagrams & Manuals
092901-0419-99 Engine View Diagrams & Manuals
092901-0771-99 Engine View Diagrams & Manuals
092901-0928-99 Engine View Diagrams & Manuals
092901-1099-99 Engine View Diagrams & Manuals
092902-0015-99 Engine View Diagrams & Manuals
092902-0016-99 Engine View Diagrams & Manuals
092902-0017-99 Engine View Diagrams & Manuals
092902-0018-99 Engine View Diagrams & Manuals
092902-0019-99 Engine View Diagrams & Manuals
092902-0020-99 Engine View Diagrams & Manuals
092902-0021-99 Engine View Diagrams & Manuals
092902-0022-99 Engine View Diagrams & Manuals
092902-0023-99 Engine View Diagrams & Manuals
092902-0024-99 Engine View Diagrams & Manuals
092902-0028-99 Engine View Diagrams & Manuals
092902-0029-99 Engine View Diagrams & Manuals
092902-0090-99 Engine View Diagrams & Manuals
092902-0101-99 Engine View Diagrams & Manuals
092902-0115-99 Engine View Diagrams & Manuals
092902-0116-99 Engine View Diagrams & Manuals
092902-0117-99 Engine View Diagrams & Manuals
092902-0118-99 Engine View Diagrams & Manuals
092902-0132-99 Engine View Diagrams & Manuals
092902-0133-99 Engine View Diagrams & Manuals
092902-0134-99 Engine View Diagrams & Manuals
092902-0135-99 Engine View Diagrams & Manuals
092902-0136-99 Engine View Diagrams & Manuals
092902-0137-99 Engine View Diagrams & Manuals
092902-0139-99 Engine View Diagrams & Manuals
092902-0141-99 Engine View Diagrams & Manuals
092902-0142-99 Engine View Diagrams & Manuals
092902-0143-99 Engine View Diagrams & Manuals
092902-0144-99 Engine View Diagrams & Manuals
092902-0147-99 Engine View Diagrams & Manuals
092902-0148-99 Engine View Diagrams & Manuals
092902-0149-99 Engine View Diagrams & Manuals
092902-0152-99 Engine View Diagrams & Manuals
092902-0155-99 Engine View Diagrams & Manuals
092902-0156-99 Engine View Diagrams & Manuals
092902-0157-99 Engine View Diagrams & Manuals
092902-0158-99 Engine View Diagrams & Manuals
092902-0159-99 Engine View Diagrams & Manuals
092902-0160-99 Engine View Diagrams & Manuals
092902-0161-99 Engine View Diagrams & Manuals
092902-0163-99 Engine View Diagrams & Manuals
092902-0165-99 Engine View Diagrams & Manuals
092902-0166-99 Engine View Diagrams & Manuals
092902-0168-99 Engine View Diagrams & Manuals
092902-0170-99 Engine View Diagrams & Manuals
092902-0172-99 Engine View Diagrams & Manuals
092902-0173-99 Engine View Diagrams & Manuals
092902-0174-99 Engine View Diagrams & Manuals
092902-0178-99 Engine View Diagrams & Manuals
092902-0181-99 Engine View Diagrams & Manuals
092902-0182-99 Engine View Diagrams & Manuals
092902-0185-99 Engine View Diagrams & Manuals
092902-0186-99 Engine View Diagrams & Manuals
092902-0187-99 Engine View Diagrams & Manuals
092902-0191-99 Engine View Diagrams & Manuals
092902-0193-99 Engine View Diagrams & Manuals
092902-0195-99 Engine View Diagrams & Manuals
092902-0196-99 Engine View Diagrams & Manuals
092902-0197-99 Engine View Diagrams & Manuals
092902-0198-99 Engine View Diagrams & Manuals
092902-0200-99 Engine View Diagrams & Manuals
092902-0202-99 Engine View Diagrams & Manuals
092902-0203-99 Engine View Diagrams & Manuals
092902-0204-99 Engine View Diagrams & Manuals
092902-0205-99 Engine View Diagrams & Manuals
092902-0206-99 Engine View Diagrams & Manuals
092902-0207-99 Engine View Diagrams & Manuals
092902-0208-99 Engine View Diagrams & Manuals
092902-0210-99 Engine View Diagrams & Manuals
092902-0212-99 Engine View Diagrams & Manuals
092902-0213-99 Engine View Diagrams & Manuals
092902-0215-99 Engine View Diagrams & Manuals
092902-0217-99 Engine View Diagrams & Manuals
092902-0218-99 Engine View Diagrams & Manuals
092902-0219-99 Engine View Diagrams & Manuals
092902-0220-99 Engine View Diagrams & Manuals
092902-0222-99 Engine View Diagrams & Manuals
092902-0223-99 Engine View Diagrams & Manuals
092902-0224-99 Engine View Diagrams & Manuals
092902-0225-99 Engine View Diagrams & Manuals
092902-0230-99 Engine View Diagrams & Manuals
092902-0231-99 Engine View Diagrams & Manuals
092902-0235-99 Engine View Diagrams & Manuals
092902-0236-99 Engine View Diagrams & Manuals
092902-0237-99 Engine View Diagrams & Manuals
092902-0238-99 Engine View Diagrams & Manuals
092902-0244-99 Engine View Diagrams & Manuals
092902-0245-99 Engine View Diagrams & Manuals
092902-0246-99 Engine View Diagrams & Manuals
092902-0247-99 Engine View Diagrams & Manuals
092902-0248-99 Engine View Diagrams & Manuals
092902-0249-99 Engine View Diagrams & Manuals
092902-0254-99 Engine View Diagrams & Manuals
092902-0257-99 Engine View Diagrams & Manuals
092902-0260-99 Engine View Diagrams & Manuals
092902-0261-99 Engine View Diagrams & Manuals
092902-0262-99 Engine View Diagrams & Manuals
092902-0263-99 Engine View Diagrams & Manuals
092902-0264-99 Engine View Diagrams & Manuals
092902-0268-99 Engine View Diagrams & Manuals
092902-0273-99 Engine View Diagrams & Manuals
092902-0275-99 Engine View Diagrams & Manuals
092902-0276-99 Engine View Diagrams & Manuals
092902-0279-99 Engine View Diagrams & Manuals
092902-0281-99 Engine View Diagrams & Manuals
092902-0284-99 Engine View Diagrams & Manuals
092902-0285-99 Engine View Diagrams & Manuals
092902-0286-99 Engine View Diagrams & Manuals
092902-0287-99 Engine View Diagrams & Manuals
092902-0289-99 Engine View Diagrams & Manuals
092902-0290-99 Engine View Diagrams & Manuals
092902-0293-99 Engine View Diagrams & Manuals
092902-0294-99 Engine View Diagrams & Manuals
092902-0295-99 Engine View Diagrams & Manuals
092902-0296-99 Engine View Diagrams & Manuals
092902-0298-99 Engine View Diagrams & Manuals
092902-0299-99 Engine View Diagrams & Manuals
092902-0301-99 Engine View Diagrams & Manuals
092902-0302-99 Engine View Diagrams & Manuals
092902-0303-99 Engine View Diagrams & Manuals
092902-0304-99 Engine View Diagrams & Manuals
092902-0308-99 Engine View Diagrams & Manuals
092902-0309-99 Engine View Diagrams & Manuals
092902-0310-99 Engine View Diagrams & Manuals
092902-0311-99 Engine View Diagrams & Manuals
092902-0318-99 Engine View Diagrams & Manuals
092902-0322-99 Engine View Diagrams & Manuals
092902-0323-99 Engine View Diagrams & Manuals
092902-0328-99 Engine View Diagrams & Manuals
092902-0329-99 Engine View Diagrams & Manuals
092902-0330-99 Engine View Diagrams & Manuals
092902-0334-99 Engine View Diagrams & Manuals
092902-0337-99 Engine View Diagrams & Manuals
092902-0340-99 Engine View Diagrams & Manuals
092902-0342-99 Engine View Diagrams & Manuals
092902-0343-99 Engine View Diagrams & Manuals
092902-0346-99 Engine View Diagrams & Manuals
092902-0348-99 Engine View Diagrams & Manuals
092902-0349-99 Engine View Diagrams & Manuals
092902-0350-99 Engine View Diagrams & Manuals
092902-0352-99 Engine View Diagrams & Manuals
092902-0354-99 Engine View Diagrams & Manuals
092902-0355-99 Engine View Diagrams & Manuals
092902-0357-99 Engine View Diagrams & Manuals
092902-0358-99 Engine View Diagrams & Manuals
092902-0359-99 Engine View Diagrams & Manuals
092902-0360-99 Engine View Diagrams & Manuals
092902-0365-99 Engine View Diagrams & Manuals
092902-0367-99 Engine View Diagrams & Manuals
092902-0368-99 Engine View Diagrams & Manuals
092902-0369-99 Engine View Diagrams & Manuals
092902-0370-99 Engine View Diagrams & Manuals
092902-0372-99 Engine View Diagrams & Manuals
092902-0373-99 Engine View Diagrams & Manuals
092902-0374-99 Engine View Diagrams & Manuals
092902-0376-99 Engine View Diagrams & Manuals
092902-0377-99 Engine View Diagrams & Manuals
092902-0381-99 Engine View Diagrams & Manuals
092902-0382-99 Engine View Diagrams & Manuals
092902-0383-99 Engine View Diagrams & Manuals
092902-0386-99 Engine View Diagrams & Manuals
092902-0387-99 Engine View Diagrams & Manuals
092902-0388-99 Engine View Diagrams & Manuals
092902-0391-99 Engine View Diagrams & Manuals
092902-0392-99 Engine View Diagrams & Manuals
092902-0393-99 Engine View Diagrams & Manuals
092902-0395-99 Engine View Diagrams & Manuals
092902-0396-99 Engine View Diagrams & Manuals
092902-0397-99 Engine View Diagrams & Manuals
092902-0398-99 Engine View Diagrams & Manuals
092902-0400-99 Engine View Diagrams & Manuals
092902-0401-99 Engine View Diagrams & Manuals
092902-0405-99 Engine View Diagrams & Manuals
092902-0406-99 Engine View Diagrams & Manuals
092902-0407-99 Engine View Diagrams & Manuals
092902-0409-99 Engine View Diagrams & Manuals
092902-0411-99 Engine View Diagrams & Manuals
092902-0416-99 Engine View Diagrams & Manuals
092902-0421-99 Engine View Diagrams & Manuals
092902-0424-99 Engine View Diagrams & Manuals
092902-0425-99 Engine View Diagrams & Manuals
092902-0426-99 Engine View Diagrams & Manuals
092902-0428-99 Engine View Diagrams & Manuals
092902-0431-99 Engine View Diagrams & Manuals
092902-0432-99 Engine View Diagrams & Manuals
092902-0433-99 Engine View Diagrams & Manuals
092902-0435-99 Engine View Diagrams & Manuals
092902-0436-99 Engine View Diagrams & Manuals
092902-0437-99 Engine View Diagrams & Manuals
092902-0440-99 Engine View Diagrams & Manuals
092902-0441-99 Engine View Diagrams & Manuals
092902-0442-99 Engine View Diagrams & Manuals
092902-0444-99 Engine View Diagrams & Manuals
092902-0445-99 Engine View Diagrams & Manuals
092902-0446-99 Engine View Diagrams & Manuals
092902-0447-99 Engine View Diagrams & Manuals
092902-0448-99 Engine View Diagrams & Manuals
092902-0449-99 Engine View Diagrams & Manuals
092902-0451-99 Engine View Diagrams & Manuals
092902-0452-99 Engine View Diagrams & Manuals
092902-0515-99 Engine View Diagrams & Manuals
092902-0516-99 Engine View Diagrams & Manuals
092902-0517-99 Engine View Diagrams & Manuals
092902-0519-99 Engine View Diagrams & Manuals
092902-0521-99 Engine View Diagrams & Manuals
092902-0523-99 Engine View Diagrams & Manuals
092902-0524-99 Engine View Diagrams & Manuals
092902-0526-99 Engine View Diagrams & Manuals
092902-0528-99 Engine View Diagrams & Manuals
092902-0529-99 Engine View Diagrams & Manuals
092902-0535-99 Engine View Diagrams & Manuals
092902-0536-99 Engine View Diagrams & Manuals
092902-0601-99 Engine View Diagrams & Manuals
092902-0602-99 Engine View Diagrams & Manuals
092902-0603-99 Engine View Diagrams & Manuals
092902-0604-99 Engine View Diagrams & Manuals
092902-0605-99 Engine View Diagrams & Manuals
092902-0652-99 Engine View Diagrams & Manuals
092902-0670-99 Engine View Diagrams & Manuals
092902-0671-99 Engine View Diagrams & Manuals
092902-0673-99 Engine View Diagrams & Manuals
092902-0677-99 Engine View Diagrams & Manuals
092902-0678-99 Engine View Diagrams & Manuals
092902-0680-99 Engine View Diagrams & Manuals
092902-0682-99 Engine View Diagrams & Manuals
092902-0683-99 Engine View Diagrams & Manuals
092902-0685-99 Engine View Diagrams & Manuals
092902-0686-99 Engine View Diagrams & Manuals
092902-0687-99 Engine View Diagrams & Manuals
092902-0688-99 Engine View Diagrams & Manuals
092902-0689-99 Engine View Diagrams & Manuals
092902-0690-99 Engine View Diagrams & Manuals
092902-0691-99 Engine View Diagrams & Manuals
092902-0692-99 Engine View Diagrams & Manuals
092902-0693-99 Engine View Diagrams & Manuals
092902-0700-99 Engine View Diagrams & Manuals
092902-0702-99 Engine View Diagrams & Manuals
092902-0704-99 Engine View Diagrams & Manuals
092902-0705-99 Engine View Diagrams & Manuals
092902-0707-99 Engine View Diagrams & Manuals
092902-0709-99 Engine View Diagrams & Manuals
092902-0711-99 Engine View Diagrams & Manuals
092902-0715-99 Engine View Diagrams & Manuals
092902-0716-99 Engine View Diagrams & Manuals
092902-0718-99 Engine View Diagrams & Manuals
092902-0725-99 Engine View Diagrams & Manuals
092902-0727-99 Engine View Diagrams & Manuals
092902-0731-99 Engine View Diagrams & Manuals
092902-0732-99 Engine View Diagrams & Manuals
092902-0738-99 Engine View Diagrams & Manuals
092902-0739-99 Engine View Diagrams & Manuals
092902-0740-99 Engine View Diagrams & Manuals
092902-0741-99 Engine View Diagrams & Manuals
092902-0754-99 Engine View Diagrams & Manuals
092902-0755-99 Engine View Diagrams & Manuals
092902-0756-99 Engine View Diagrams & Manuals
092902-0757-99 Engine View Diagrams & Manuals
092902-0760-99 Engine View Diagrams & Manuals
092902-0764-99 Engine View Diagrams & Manuals
092902-0766-99 Engine View Diagrams & Manuals
092902-0768-99 Engine View Diagrams & Manuals
092902-0769-99 Engine View Diagrams & Manuals
092902-0770-99 Engine View Diagrams & Manuals
092902-0773-99 Engine View Diagrams & Manuals
092902-0774-99 Engine View Diagrams & Manuals
092902-0778-99 Engine View Diagrams & Manuals
092902-0780-99 Engine View Diagrams & Manuals
092902-0782-99 Engine View Diagrams & Manuals
092902-0783-99 Engine View Diagrams & Manuals
092902-0784-99 Engine View Diagrams & Manuals
092902-0785-99 Engine View Diagrams & Manuals
092902-0786-99 Engine View Diagrams & Manuals
092902-0787-99 Engine View Diagrams & Manuals
092902-0792-99 Engine View Diagrams & Manuals
092902-0795-99 Engine View Diagrams & Manuals
092902-0797-99 Engine View Diagrams & Manuals
092902-0801-99 Engine View Diagrams & Manuals
092902-0803-99 Engine View Diagrams & Manuals
092902-0805-99 Engine View Diagrams & Manuals
092902-0806-99 Engine View Diagrams & Manuals
092902-0811-99 Engine View Diagrams & Manuals
092902-0813-99 Engine View Diagrams & Manuals
092902-0816-99 Engine View Diagrams & Manuals
092902-0818-99 Engine View Diagrams & Manuals
092902-0819-99 Engine View Diagrams & Manuals
092902-0821-99 Engine View Diagrams & Manuals
092902-0822-99 Engine View Diagrams & Manuals
092902-0824-99 Engine View Diagrams & Manuals
092902-0825-99 Engine View Diagrams & Manuals
092902-0826-99 Engine View Diagrams & Manuals
092902-0843-99 Engine View Diagrams & Manuals
092902-0844-99 Engine View Diagrams & Manuals
092902-0845-99 Engine View Diagrams & Manuals
092902-0851-99 Engine View Diagrams & Manuals
092902-0855-99 Engine View Diagrams & Manuals
092902-0856-99 Engine View Diagrams & Manuals
092902-0857-99 Engine View Diagrams & Manuals
092902-0860-99 Engine View Diagrams & Manuals
092902-0865-99 Engine View Diagrams & Manuals
092902-0867-99 Engine View Diagrams & Manuals
092902-0871-99 Engine View Diagrams & Manuals
092902-0872-99 Engine View Diagrams & Manuals
092902-0875-99 Engine View Diagrams & Manuals
092902-0877-99 Engine View Diagrams & Manuals
092902-0878-99 Engine View Diagrams & Manuals
092902-0886-99 Engine View Diagrams & Manuals
092902-0893-99 Engine View Diagrams & Manuals
092902-0894-99 Engine View Diagrams & Manuals
092902-0901-99 Engine View Diagrams & Manuals
092902-0902-99 Engine View Diagrams & Manuals
092902-0913-99 Engine View Diagrams & Manuals
092902-0915-99 Engine View Diagrams & Manuals
092902-0916-99 Engine View Diagrams & Manuals
092902-0917-99 Engine View Diagrams & Manuals
092902-0918-99 Engine View Diagrams & Manuals
092902-0919-99 Engine View Diagrams & Manuals
092902-0920-99 Engine View Diagrams & Manuals
092902-0922-99 Engine View Diagrams & Manuals
092902-0923-99 Engine View Diagrams & Manuals
092902-0929-99 Engine View Diagrams & Manuals
092902-0933-99 Engine View Diagrams & Manuals
092902-0938-99 Engine View Diagrams & Manuals
092902-0939-99 Engine View Diagrams & Manuals
092902-0945-99 Engine View Diagrams & Manuals
092902-0948-99 Engine View Diagrams & Manuals
092902-0949-99 Engine View Diagrams & Manuals
092902-0950-99 Engine View Diagrams & Manuals
092902-0951-99 Engine View Diagrams & Manuals
092902-0953-99 Engine View Diagrams & Manuals
092902-0957-99 Engine View Diagrams & Manuals
092902-0962-99 Engine View Diagrams & Manuals
092902-0963-99 Engine View Diagrams & Manuals
092902-0964-99 Engine View Diagrams & Manuals
092902-0965-99 Engine View Diagrams & Manuals
092902-0967-99 Engine View Diagrams & Manuals
092902-0970-99 Engine View Diagrams & Manuals
092902-0971-99 Engine View Diagrams & Manuals
092902-0972-99 Engine View Diagrams & Manuals
092902-0973-99 Engine View Diagrams & Manuals
092902-0974-99 Engine View Diagrams & Manuals
092902-0975-99 Engine View Diagrams & Manuals
092902-0980-99 Engine View Diagrams & Manuals
092902-1057-99 Engine View Diagrams & Manuals
092902-1061-99 Engine View Diagrams & Manuals
092902-1062-99 Engine View Diagrams & Manuals
092902-1065-99 Engine View Diagrams & Manuals
092902-1066-99 Engine View Diagrams & Manuals
092902-1072-99 Engine View Diagrams & Manuals
092902-1073-99 Engine View Diagrams & Manuals
092902-1074-99 Engine View Diagrams & Manuals
092902-1076-05 Engine View Diagrams & Manuals
092902-1078-99 Engine View Diagrams & Manuals
092902-1082-99 Engine View Diagrams & Manuals
092902-1085-99 Engine View Diagrams & Manuals
092902-1087-99 Engine View Diagrams & Manuals
092902-1088-99 Engine View Diagrams & Manuals
092902-1097-99 Engine View Diagrams & Manuals
092902-1103-99 Engine View Diagrams & Manuals
092902-1113-99 Engine View Diagrams & Manuals
092902-1114-99 Engine View Diagrams & Manuals
092902-1115-99 Engine View Diagrams & Manuals
092902-1116-99 Engine View Diagrams & Manuals
092902-1119-99 Engine View Diagrams & Manuals
092902-1120-99 Engine View Diagrams & Manuals
092902-1125-99 Engine View Diagrams & Manuals
092902-1138-99 Engine View Diagrams & Manuals
092902-1140-99 Engine View Diagrams & Manuals
092902-1144-99 Engine View Diagrams & Manuals
092902-1147-99 Engine View Diagrams & Manuals
092902-1148-99 Engine View Diagrams & Manuals
092902-1149-99 Engine View Diagrams & Manuals
092902-1163-99 Engine View Diagrams & Manuals
092902-1166-99 Engine View Diagrams & Manuals
092902-1171-99 Engine View Diagrams & Manuals
092902-1173-99 Engine View Diagrams & Manuals
092902-1178-99 Engine View Diagrams & Manuals
092902-1181-99 Engine View Diagrams & Manuals
092902-1182-99 Engine View Diagrams & Manuals
092902-1183-99 Engine View Diagrams & Manuals
092902-1184-99 Engine View Diagrams & Manuals
092902-1186-99 Engine View Diagrams & Manuals
092902-1187-99 Engine View Diagrams & Manuals
092902-1199-99 Engine View Diagrams & Manuals
092902-1203-99 Engine View Diagrams & Manuals
092902-1205-99 Engine View Diagrams & Manuals
092902-1207-99 Engine View Diagrams & Manuals
092902-1208-99 Engine View Diagrams & Manuals
092902-1209-99 Engine View Diagrams & Manuals
092902-1212-99 Engine View Diagrams & Manuals
092902-1215-99 Engine View Diagrams & Manuals
092902-1216-99 Engine View Diagrams & Manuals
092902-1217-99 Engine View Diagrams & Manuals
092902-1219-99 Engine View Diagrams & Manuals
092902-1220-99 Engine View Diagrams & Manuals
092902-1221-99 Engine View Diagrams & Manuals
092902-1222-99 Engine View Diagrams & Manuals
092902-1225-99 Engine View Diagrams & Manuals
092902-1226-99 Engine View Diagrams & Manuals
092902-1229-99 Engine View Diagrams & Manuals
092902-1230-99 Engine View Diagrams & Manuals
092902-1238-99 Engine View Diagrams & Manuals
092902-1241-99 Engine View Diagrams & Manuals
092902-1244-99 Engine View Diagrams & Manuals
092902-1245-99 Engine View Diagrams & Manuals
092902-1246-99 Engine View Diagrams & Manuals
092902-1253-99 Engine View Diagrams & Manuals
092902-1254-99 Engine View Diagrams & Manuals
092902-1255-99 Engine View Diagrams & Manuals
092902-1256-99 Engine View Diagrams & Manuals
092902-1257-99 Engine View Diagrams & Manuals
092902-1258-99 Engine View Diagrams & Manuals
092902-1261-99 Engine View Diagrams & Manuals
092902-1262-99 Engine View Diagrams & Manuals
092902-1263-99 Engine View Diagrams & Manuals
092902-1267-99 Engine View Diagrams & Manuals
092902-1268-99 Engine View Diagrams & Manuals
092902-1271-99 Engine View Diagrams & Manuals
092902-1272-99 Engine View Diagrams & Manuals
092902-1274-99 Engine View Diagrams & Manuals
092902-1276-99 Engine View Diagrams & Manuals
092902-1279-99 Engine View Diagrams & Manuals
092902-1285-99 Engine View Diagrams & Manuals
092902-1286-99 Engine View Diagrams & Manuals
092902-1287-99 Engine View Diagrams & Manuals
092902-1288-99 Engine View Diagrams & Manuals
092902-1290-99 Engine View Diagrams & Manuals
092902-1291-99 Engine View Diagrams & Manuals
092902-1295-99 Engine View Diagrams & Manuals
092902-1303-99 Engine View Diagrams & Manuals
092902-1305-99 Engine View Diagrams & Manuals
092902-1306-99 Engine View Diagrams & Manuals
092902-1310-99 Engine View Diagrams & Manuals
092902-1314-99 Engine View Diagrams & Manuals
092902-1315-99 Engine View Diagrams & Manuals
092902-1316-99 Engine View Diagrams & Manuals
092902-1318-99 Engine View Diagrams & Manuals
092902-1327-99 Engine View Diagrams & Manuals
092902-1328-99 Engine View Diagrams & Manuals
092902-1329-99 Engine View Diagrams & Manuals
092902-1333-99 Engine View Diagrams & Manuals
092902-1337-99 Engine View Diagrams & Manuals
092902-1341-99 Engine View Diagrams & Manuals
092902-1346-99 Engine View Diagrams & Manuals
092902-1355-99 Engine View Diagrams & Manuals
092902-1357-99 Engine View Diagrams & Manuals
092902-1358-99 Engine View Diagrams & Manuals
092902-1363-99 Engine View Diagrams & Manuals
092902-1366-99 Engine View Diagrams & Manuals
092902-1370-99 Engine View Diagrams & Manuals
092902-1376-99 Engine View Diagrams & Manuals
092902-1380-99 Engine View Diagrams & Manuals
092902-1381-99 Engine View Diagrams & Manuals
092902-1383-99 Engine View Diagrams & Manuals
092902-1384-99 Engine View Diagrams & Manuals
092902-1390-99 Engine View Diagrams & Manuals
092902-1391-99 Engine View Diagrams & Manuals
092902-1392-99 Engine View Diagrams & Manuals
092902-1396-99 Engine View Diagrams & Manuals
092902-1398-99 Engine View Diagrams & Manuals
092902-1399-99 Engine View Diagrams & Manuals
092902-1407-99 Engine View Diagrams & Manuals
092902-1414-99 Engine View Diagrams & Manuals
092902-1417-99 Engine View Diagrams & Manuals
092902-1420-99 Engine View Diagrams & Manuals
092902-1421-99 Engine View Diagrams & Manuals
092902-1425-99 Engine View Diagrams & Manuals
092902-1430-99 Engine View Diagrams & Manuals
092902-1431-99 Engine View Diagrams & Manuals
092902-1432-99 Engine View Diagrams & Manuals
092902-1434-99 Engine View Diagrams & Manuals
092902-1435-99 Engine View Diagrams & Manuals
092902-1436-99 Engine View Diagrams & Manuals
092902-1439-99 Engine View Diagrams & Manuals
092902-1440-99 Engine View Diagrams & Manuals
092902-1442-99 Engine View Diagrams & Manuals
092902-1444-99 Engine View Diagrams & Manuals
092902-1446-99 Engine View Diagrams & Manuals
092902-1452-99 Engine View Diagrams & Manuals
092902-1458-99 Engine View Diagrams & Manuals
092902-1460-99 Engine View Diagrams & Manuals
092902-1461-99 Engine View Diagrams & Manuals
092902-1462-99 Engine View Diagrams & Manuals
092902-1463-99 Engine View Diagrams & Manuals
092902-1471-99 Engine View Diagrams & Manuals
092902-1474-99 Engine View Diagrams & Manuals
092902-1477-99 Engine View Diagrams & Manuals
092902-1484-99 Engine View Diagrams & Manuals
092902-1485-99 Engine View Diagrams & Manuals
092902-1490-99 Engine View Diagrams & Manuals
092902-1496-99 Engine View Diagrams & Manuals
092902-1497-99 Engine View Diagrams & Manuals
092902-1500-99 Engine View Diagrams & Manuals
092902-1502-99 Engine View Diagrams & Manuals
092902-1506-99 Engine View Diagrams & Manuals
092902-1509-99 Engine View Diagrams & Manuals
092902-1511-99 Engine View Diagrams & Manuals
092902-1514-99 Engine View Diagrams & Manuals
092902-1517-99 Engine View Diagrams & Manuals
092902-1519-99 Engine View Diagrams & Manuals
092902-1524-99 Engine View Diagrams & Manuals
092902-1528-99 Engine View Diagrams & Manuals
092902-1530-99 Engine View Diagrams & Manuals
092902-1531-99 Engine View Diagrams & Manuals
092902-1532-99 Engine View Diagrams & Manuals
092902-1533-99 Engine View Diagrams & Manuals
092902-1534-99 Engine View Diagrams & Manuals
092902-1541-99 Engine View Diagrams & Manuals
092902-1543-99 Engine View Diagrams & Manuals
092902-1555-99 Engine View Diagrams & Manuals
092902-1556-99 Engine View Diagrams & Manuals
092902-1558-99 Engine View Diagrams & Manuals
092902-1559-99 Engine View Diagrams & Manuals
092902-1565-99 Engine View Diagrams & Manuals
092902-1570-99 Engine View Diagrams & Manuals
092902-1579-99 Engine View Diagrams & Manuals
092902-1582-99 Engine View Diagrams & Manuals
092902-1586-99 Engine View Diagrams & Manuals
092902-1587-99 Engine View Diagrams & Manuals
092902-1588-99 Engine View Diagrams & Manuals
092902-1590-99 Engine View Diagrams & Manuals
092902-1598-99 Engine View Diagrams & Manuals
092902-1601-99 Engine View Diagrams & Manuals
092902-1607-99 Engine View Diagrams & Manuals
092902-1608-99 Engine View Diagrams & Manuals
092902-1609-99 Engine View Diagrams & Manuals
092902-1611-99 Engine View Diagrams & Manuals
092902-1612-99 Engine View Diagrams & Manuals
092902-1613-99 Engine View Diagrams & Manuals
092902-1614-99 Engine View Diagrams & Manuals
092902-1615-99 Engine View Diagrams & Manuals
092902-1616-99 Engine View Diagrams & Manuals
092902-1618-99 Engine View Diagrams & Manuals
092902-1620-99 Engine View Diagrams & Manuals
092902-1622-99 Engine View Diagrams & Manuals
092902-1623-99 Engine View Diagrams & Manuals
092902-1625-99 Engine View Diagrams & Manuals
092902-1626-99 Engine View Diagrams & Manuals
092902-1631-99 Engine View Diagrams & Manuals
092902-1633-99 Engine View Diagrams & Manuals
092902-1636-99 Engine View Diagrams & Manuals
092902-1638-99 Engine View Diagrams & Manuals
092902-1642-99 Engine View Diagrams & Manuals
092902-1643-99 Engine View Diagrams & Manuals
092902-1650-99 Engine View Diagrams & Manuals
092902-1661-99 Engine View Diagrams & Manuals
092902-1662-99 Engine View Diagrams & Manuals
092902-1665-99 Engine View Diagrams & Manuals
092902-1670-99 Engine View Diagrams & Manuals
092902-1673-99 Engine View Diagrams & Manuals
092902-1674-99 Engine View Diagrams & Manuals
092902-1679-99 Engine View Diagrams & Manuals
092902-1680-99 Engine View Diagrams & Manuals
092902-1682-99 Engine View Diagrams & Manuals
092902-1684-99 Engine View Diagrams & Manuals
092902-1686-99 Engine View Diagrams & Manuals
092902-1687-99 Engine View Diagrams & Manuals
092902-1688-99 Engine View Diagrams & Manuals
092902-1689-99 Engine View Diagrams & Manuals
092902-1692-99 Engine View Diagrams & Manuals
092902-1693-99 Engine View Diagrams & Manuals
092902-1695-99 Engine View Diagrams & Manuals
092902-1697-99 Engine View Diagrams & Manuals
092902-1698-99 Engine View Diagrams & Manuals
092902-1701-99 Engine View Diagrams & Manuals
092902-1712-99 Engine View Diagrams & Manuals
092902-1713-99 Engine View Diagrams & Manuals
092902-1722-99 Engine View Diagrams & Manuals
092902-1723-99 Engine View Diagrams & Manuals
092902-1724-99 Engine View Diagrams & Manuals
092902-1728-99 Engine View Diagrams & Manuals
092902-1729-99 Engine View Diagrams & Manuals
092902-1733-99 Engine View Diagrams & Manuals
092902-1737-99 Engine View Diagrams & Manuals
092902-1740-99 Engine View Diagrams & Manuals
092902-1750-99 Engine View Diagrams & Manuals
092902-1751-99 Engine View Diagrams & Manuals
092902-1755-99 Engine View Diagrams & Manuals
092902-1762-99 Engine View Diagrams & Manuals
092902-1769-99 Engine View Diagrams & Manuals
092902-1770-99 Engine View Diagrams & Manuals
092902-1774-99 Engine View Diagrams & Manuals
092902-1776-99 Engine View Diagrams & Manuals
092902-1777-99 Engine View Diagrams & Manuals
092902-1780-99 Engine View Diagrams & Manuals
092902-1781-99 Engine View Diagrams & Manuals
092902-1782-99 Engine View Diagrams & Manuals
092902-1783-99 Engine View Diagrams & Manuals
092902-1784-99 Engine View Diagrams & Manuals
092902-1787-99 Engine View Diagrams & Manuals
092902-1789-99 Engine View Diagrams & Manuals
092902-1796-99 Engine View Diagrams & Manuals
092902-1799-99 Engine View Diagrams & Manuals
092902-1800-99 Engine View Diagrams & Manuals
092902-1801-99 Engine View Diagrams & Manuals
092902-1802-99 Engine View Diagrams & Manuals
092902-1803-99 Engine View Diagrams & Manuals
092902-1805-99 Engine View Diagrams & Manuals
092902-1810-99 Engine View Diagrams & Manuals
092902-1812-99 Engine View Diagrams & Manuals
092902-1816-99 Engine View Diagrams & Manuals
092902-1817-99 Engine View Diagrams & Manuals
092902-1820-99 Engine View Diagrams & Manuals
092902-1823-99 Engine View Diagrams & Manuals
092902-1824-99 Engine View Diagrams & Manuals
092902-1830-99 Engine View Diagrams & Manuals
092902-1831-99 Engine View Diagrams & Manuals
092902-1837-99 Engine View Diagrams & Manuals
092902-1848-99 Engine View Diagrams & Manuals
092902-1856-99 Engine View Diagrams & Manuals
092902-1859-99 Engine View Diagrams & Manuals
092902-1860-99 Engine View Diagrams & Manuals
092902-1863-99 Engine View Diagrams & Manuals
092902-1865-99 Engine View Diagrams & Manuals
092902-1866-99 Engine View Diagrams & Manuals
092902-1868-99 Engine View Diagrams & Manuals
092902-1869-99 Engine View Diagrams & Manuals
092902-1875-99 Engine View Diagrams & Manuals
092902-1876-99 Engine View Diagrams & Manuals
092902-1877-99 Engine View Diagrams & Manuals
092902-1880-99 Engine View Diagrams & Manuals
092902-1881-99 Engine View Diagrams & Manuals
092902-1884-99 Engine View Diagrams & Manuals
092902-1885-99 Engine View Diagrams & Manuals
092902-1886-99 Engine View Diagrams & Manuals
092902-1889-99 Engine View Diagrams & Manuals
092902-1891-99 Engine View Diagrams & Manuals
092902-1899-99 Engine View Diagrams & Manuals
092902-1902-99 Engine View Diagrams & Manuals
092902-1905-99 Engine View Diagrams & Manuals
092902-1908-99 Engine View Diagrams & Manuals
092902-1909-99 Engine View Diagrams & Manuals
092902-1914-99 Engine View Diagrams & Manuals
092902-1915-99 Engine View Diagrams & Manuals
092902-1918-99 Engine View Diagrams & Manuals
092902-1920-99 Engine View Diagrams & Manuals
092902-1921-99 Engine View Diagrams & Manuals
092902-1922-99 Engine View Diagrams & Manuals
092902-1925-99 Engine View Diagrams & Manuals
092902-1927-99 Engine View Diagrams & Manuals
092902-1938-99 Engine View Diagrams & Manuals
092902-1939-99 Engine View Diagrams & Manuals
092902-1941-99 Engine View Diagrams & Manuals
092902-1944-99 Engine View Diagrams & Manuals
092902-1945-99 Engine View Diagrams & Manuals
092902-1946-99 Engine View Diagrams & Manuals
092902-1948-99 Engine View Diagrams & Manuals
092902-1957-99 Engine View Diagrams & Manuals
092902-1958-99 Engine View Diagrams & Manuals
092902-1960-99 Engine View Diagrams & Manuals
092902-1962-99 Engine View Diagrams & Manuals
092902-1965-99 Engine View Diagrams & Manuals
092902-1972-99 Engine View Diagrams & Manuals
092902-1975-99 Engine View Diagrams & Manuals
092902-1977-99 Engine View Diagrams & Manuals
092902-1979-99 Engine View Diagrams & Manuals
092902-1980-99 Engine View Diagrams & Manuals
092902-1981-99 Engine View Diagrams & Manuals
092902-1982-99 Engine View Diagrams & Manuals
092902-1988-99 Engine View Diagrams & Manuals
092902-1993-99 Engine View Diagrams & Manuals
092902-1994-99 Engine View Diagrams & Manuals
092902-1995-99 Engine View Diagrams & Manuals
092902-1999-99 Engine View Diagrams & Manuals
092902-2000-99 Engine View Diagrams & Manuals
092902-2004-99 Engine View Diagrams & Manuals
092902-2005-99 Engine View Diagrams & Manuals
092902-2009-99 Engine View Diagrams & Manuals
092902-2016-99 Engine View Diagrams & Manuals
092902-2017-99 Engine View Diagrams & Manuals
092902-2018-99 Engine View Diagrams & Manuals
092902-2020-99 Engine View Diagrams & Manuals
092902-2028-99 Engine View Diagrams & Manuals
092902-2031-99 Engine View Diagrams & Manuals
092902-2034-99 Engine View Diagrams & Manuals
092902-2035-99 Engine View Diagrams & Manuals
092902-2042-99 Engine View Diagrams & Manuals
092902-2043-99 Engine View Diagrams & Manuals
092902-2044-99 Engine View Diagrams & Manuals
092902-2046-99 Engine View Diagrams & Manuals
092902-2047-99 Engine View Diagrams & Manuals
092902-2056-99 Engine View Diagrams & Manuals
092902-2057-99 Engine View Diagrams & Manuals
092902-2058-99 Engine View Diagrams & Manuals
092902-2060-99 Engine View Diagrams & Manuals
092902-2061-99 Engine View Diagrams & Manuals
092902-2062-99 Engine View Diagrams & Manuals
092902-2063-99 Engine View Diagrams & Manuals
092902-2066-99 Engine View Diagrams & Manuals
092902-2067-99 Engine View Diagrams & Manuals
092902-2074-99 Engine View Diagrams & Manuals
092902-2081-99 Engine View Diagrams & Manuals
092902-2085-99 Engine View Diagrams & Manuals
092902-2086-99 Engine View Diagrams & Manuals
092902-2091-99 Engine View Diagrams & Manuals
092902-2101-99 Engine View Diagrams & Manuals
092902-2108-99 Engine View Diagrams & Manuals
092902-2109-99 Engine View Diagrams & Manuals
092902-2110-99 Engine View Diagrams & Manuals
092902-2114-99 Engine View Diagrams & Manuals
092902-2115-99 Engine View Diagrams & Manuals
092902-2116-99 Engine View Diagrams & Manuals
092902-2118-99 Engine View Diagrams & Manuals
092902-2120-99 Engine View Diagrams & Manuals
092902-2122-99 Engine View Diagrams & Manuals
092902-2123-99 Engine View Diagrams & Manuals
092902-2125-99 Engine View Diagrams & Manuals
092902-2130-99 Engine View Diagrams & Manuals
092902-2132-99 Engine View Diagrams & Manuals
092902-2133-99 Engine View Diagrams & Manuals
092902-2134-99 Engine View Diagrams & Manuals
092902-2135-99 Engine View Diagrams & Manuals
092902-2138-99 Engine View Diagrams & Manuals
092902-2139-99 Engine View Diagrams & Manuals
092902-2143-99 Engine View Diagrams & Manuals
092902-2145-99 Engine View Diagrams & Manuals
092902-2146-99 Engine View Diagrams & Manuals
092902-2160-99 Engine View Diagrams & Manuals
092902-2162-99 Engine View Diagrams & Manuals
092902-2163-99 Engine View Diagrams & Manuals
092902-2164-99 Engine View Diagrams & Manuals
092902-2167-99 Engine View Diagrams & Manuals
092902-2168-99 Engine View Diagrams & Manuals
092902-2170-99 Engine View Diagrams & Manuals
092902-2171-99 Engine View Diagrams & Manuals
092902-2174-99 Engine View Diagrams & Manuals
092902-2175-99 Engine View Diagrams & Manuals
092902-2176-99 Engine View Diagrams & Manuals
092902-2178-99 Engine View Diagrams & Manuals
092902-2187-99 Engine View Diagrams & Manuals
092902-2194-99 Engine View Diagrams & Manuals
092902-2195-99 Engine View Diagrams & Manuals
092902-2196-99 Engine View Diagrams & Manuals
092902-2200-99 Engine View Diagrams & Manuals
092902-2202-99 Engine View Diagrams & Manuals
092902-2205-99 Engine View Diagrams & Manuals
092902-2211-99 Engine View Diagrams & Manuals
092902-3015-01 Engine View Diagrams & Manuals
092902-3016-01 Engine View Diagrams & Manuals
092902-3017-01 Engine View Diagrams & Manuals
092902-3018-01 Engine View Diagrams & Manuals
092902-3019-01 Engine View Diagrams & Manuals
092902-3111-01 Engine View Diagrams & Manuals
092902-3112-01 Engine View Diagrams & Manuals
092902-3113-01 Engine View Diagrams & Manuals
092902-3114-01 Engine View Diagrams & Manuals
092902-3131-01 Engine View Diagrams & Manuals
092902-3132-01 Engine View Diagrams & Manuals
092902-3134-01 Engine View Diagrams & Manuals
092902-3134-02 Engine View Diagrams & Manuals
092902-3135-01 Engine View Diagrams & Manuals
092902-3135-02 Engine View Diagrams & Manuals
092902-3142-01 Engine View Diagrams & Manuals
092902-3143-01 Engine View Diagrams & Manuals
092902-3144-01 Engine View Diagrams & Manuals
092902-3146-01 Engine View Diagrams & Manuals
092902-3147-01 Engine View Diagrams & Manuals
092902-3149-01 Engine View Diagrams & Manuals
092902-3149-02 Engine View Diagrams & Manuals
092902-3150-01 Engine View Diagrams & Manuals
092902-3151-01 Engine View Diagrams & Manuals
092902-3151-02 Engine View Diagrams & Manuals
092902-3152-01 Engine View Diagrams & Manuals
092902-3153-01 Engine View Diagrams & Manuals
092902-3155-01 Engine View Diagrams & Manuals
092902-3156-01 Engine View Diagrams & Manuals
092902-3159-01 Engine View Diagrams & Manuals
092902-3163-01 Engine View Diagrams & Manuals
092902-3167-01 Engine View Diagrams & Manuals
092902-3168-01 Engine View Diagrams & Manuals
092902-3169-01 Engine View Diagrams & Manuals
092902-3171-01 Engine View Diagrams & Manuals
092902-3171-02 Engine View Diagrams & Manuals
092902-3171-03 Engine View Diagrams & Manuals
092902-3172-01 Engine View Diagrams & Manuals
092902-3172-02 Engine View Diagrams & Manuals
092902-3175-01 Engine View Diagrams & Manuals
092902-3176-01 Engine View Diagrams & Manuals
092902-3178-01 Engine View Diagrams & Manuals
092902-3179-01 Engine View Diagrams & Manuals
092902-3181-01 Engine View Diagrams & Manuals
092902-3185-01 Engine View Diagrams & Manuals
092902-3186-01 Engine View Diagrams & Manuals
092902-3186-02 Engine View Diagrams & Manuals
092902-3187-01 Engine View Diagrams & Manuals
092902-3187-02 Engine View Diagrams & Manuals
092902-3187-03 Engine View Diagrams & Manuals
092902-3188-01 Engine View Diagrams & Manuals
092902-3188-02 Engine View Diagrams & Manuals
092902-3188-03 Engine View Diagrams & Manuals
092902-3188-04 Engine View Diagrams & Manuals
092902-3191-01 Engine View Diagrams & Manuals
092902-3191-02 Engine View Diagrams & Manuals
092902-3191-03 Engine View Diagrams & Manuals
092902-3191-04 Engine View Diagrams & Manuals
092902-3192-01 Engine View Diagrams & Manuals
092902-3193-01 Engine View Diagrams & Manuals
092902-3193-02 Engine View Diagrams & Manuals
092902-3194-01 Engine View Diagrams & Manuals
092902-3197-01 Engine View Diagrams & Manuals
092902-3200-01 Engine View Diagrams & Manuals
092902-3201-01 Engine View Diagrams & Manuals
092902-3201-02 Engine View Diagrams & Manuals
092902-3203-01 Engine View Diagrams & Manuals
092902-3203-02 Engine View Diagrams & Manuals
092902-3204-01 Engine View Diagrams & Manuals
092902-3205-01 Engine View Diagrams & Manuals
092902-3205-02 Engine View Diagrams & Manuals
092902-3207-01 Engine View Diagrams & Manuals
092902-3209-01 Engine View Diagrams & Manuals
092902-3209-02 Engine View Diagrams & Manuals
092902-3210-01 Engine View Diagrams & Manuals
092902-3213-01 Engine View Diagrams & Manuals
092902-3213-02 Engine View Diagrams & Manuals
092902-3216-01 Engine View Diagrams & Manuals
092902-3218-01 Engine View Diagrams & Manuals
092902-3218-02 Engine View Diagrams & Manuals
092902-3219-01 Engine View Diagrams & Manuals
092902-3219-02 Engine View Diagrams & Manuals
092902-3222-01 Engine View Diagrams & Manuals
092902-3223-01 Engine View Diagrams & Manuals
092902-3225-01 Engine View Diagrams & Manuals
092902-3227-01 Engine View Diagrams & Manuals
092902-3232-01 Engine View Diagrams & Manuals
092902-3232-02 Engine View Diagrams & Manuals
092902-3235-01 Engine View Diagrams & Manuals
092902-3238-01 Engine View Diagrams & Manuals
092902-3239-01 Engine View Diagrams & Manuals
092902-3241-01 Engine View Diagrams & Manuals
092902-3242-01 Engine View Diagrams & Manuals
092902-3243-01 Engine View Diagrams & Manuals
092902-3244-01 Engine View Diagrams & Manuals
092902-3245-01 Engine View Diagrams & Manuals
092902-3247-01 Engine View Diagrams & Manuals
092902-3248-01 Engine View Diagrams & Manuals
092902-3249-01 Engine View Diagrams & Manuals
092902-3251-01 Engine View Diagrams & Manuals
092902-3252-01 Engine View Diagrams & Manuals
092902-3253-01 Engine View Diagrams & Manuals
092902-3257-01 Engine View Diagrams & Manuals
092902-3257-02 Engine View Diagrams & Manuals
092902-3259-01 Engine View Diagrams & Manuals
092902-3261-01 Engine View Diagrams & Manuals
092902-3262-01 Engine View Diagrams & Manuals
092902-3264-01 Engine View Diagrams & Manuals
092902-3265-01 Engine View Diagrams & Manuals
092902-3270-01 Engine View Diagrams & Manuals
092902-3270-02 Engine View Diagrams & Manuals
092902-3271-01 Engine View Diagrams & Manuals
092902-3273-01 Engine View Diagrams & Manuals
092902-3274-01 Engine View Diagrams & Manuals
092902-3275-01 Engine View Diagrams & Manuals
092902-3276-01 Engine View Diagrams & Manuals
092902-3277-01 Engine View Diagrams & Manuals
092902-3278-01 Engine View Diagrams & Manuals
092902-3279-01 Engine View Diagrams & Manuals
092902-3282-01 Engine View Diagrams & Manuals
092902-3283-01 Engine View Diagrams & Manuals
092902-3286-01 Engine View Diagrams & Manuals
092902-3288-01 Engine View Diagrams & Manuals
092902-3291-01 Engine View Diagrams & Manuals
092902-3295-01 Engine View Diagrams & Manuals
092902-3300-01 Engine View Diagrams & Manuals
092902-3300-02 Engine View Diagrams & Manuals
092902-3301-01 Engine View Diagrams & Manuals
092902-3303-01 Engine View Diagrams & Manuals
092902-3304-01 Engine View Diagrams & Manuals
092902-3305-01 Engine View Diagrams & Manuals
092902-3306-01 Engine View Diagrams & Manuals
092902-3308-01 Engine View Diagrams & Manuals
092902-3309-01 Engine View Diagrams & Manuals
092902-3310-01 Engine View Diagrams & Manuals
092902-3311-01 Engine View Diagrams & Manuals
092902-3311-02 Engine View Diagrams & Manuals
092902-3312-01 Engine View Diagrams & Manuals
092902-3312-02 Engine View Diagrams & Manuals
092902-3313-01 Engine View Diagrams & Manuals
092902-3911-01 Engine View Diagrams & Manuals
092902-3911-02 Engine View Diagrams & Manuals
092902-3912-01 Engine View Diagrams & Manuals
092902-3912-02 Engine View Diagrams & Manuals
092902-3914-01 Engine View Diagrams & Manuals
092902-5005-01 Engine View Diagrams & Manuals
092902-5007-01 Engine View Diagrams & Manuals
092902-5015-01 Engine View Diagrams & Manuals
092902-5015-02 Engine View Diagrams & Manuals
092902-5015-03 Engine View Diagrams & Manuals
092902-5016-01 Engine View Diagrams & Manuals
092902-5017-01 Engine View Diagrams & Manuals
092902-5019-01 Engine View Diagrams & Manuals
092902-5021-01 Engine View Diagrams & Manuals
092902-5023-01 Engine View Diagrams & Manuals
092902-5024-01 Engine View Diagrams & Manuals
092902-5026-01 Engine View Diagrams & Manuals
092902-5028-01 Engine View Diagrams & Manuals
092902-5029-01 Engine View Diagrams & Manuals
092902-5036-01 Engine View Diagrams & Manuals
092902-5101-01 Engine View Diagrams & Manuals
092902-5103-01 Engine View Diagrams & Manuals
092902-5105-01 Engine View Diagrams & Manuals
092902-5106-01 Engine View Diagrams & Manuals
092902-5124-01 Engine View Diagrams & Manuals
092902-5132-99 Engine View Diagrams & Manuals
092902-5134-99 Engine View Diagrams & Manuals
092902-5135-99 Engine View Diagrams & Manuals
092902-5149-99 Engine View Diagrams & Manuals
092902-5150-01 Engine View Diagrams & Manuals
092902-5150-02 Engine View Diagrams & Manuals
092902-5151-01 Engine View Diagrams & Manuals
092902-5152-99 Engine View Diagrams & Manuals
092902-5153-99 Engine View Diagrams & Manuals
092902-5155-99 Engine View Diagrams & Manuals
092902-5159-99 Engine View Diagrams & Manuals
092902-5163-99 Engine View Diagrams & Manuals
092902-5164-01 Engine View Diagrams & Manuals
092902-5166-01 Engine View Diagrams & Manuals
092902-5167-99 Engine View Diagrams & Manuals
092902-5169-99 Engine View Diagrams & Manuals
092902-5171-99 Engine View Diagrams & Manuals
092902-5176-99 Engine View Diagrams & Manuals
092902-5178-01 Engine View Diagrams & Manuals
092902-5181-99 Engine View Diagrams & Manuals
092902-5186-01 Engine View Diagrams & Manuals
092902-5187-99 Engine View Diagrams & Manuals
092902-5194-01 Engine View Diagrams & Manuals
092902-5195-01 Engine View Diagrams & Manuals
092902-5202-01 Engine View Diagrams & Manuals
092902-5209-01 Engine View Diagrams & Manuals
092902-5210-01 Engine View Diagrams & Manuals
092902-5211-01 Engine View Diagrams & Manuals
092902-5213-01 Engine View Diagrams & Manuals
092902-5213-02 Engine View Diagrams & Manuals
092902-5214-01 Engine View Diagrams & Manuals
092902-5215-01 Engine View Diagrams & Manuals
092902-5216-01 Engine View Diagrams & Manuals
092902-5218-01 Engine View Diagrams & Manuals
092902-5219-01 Engine View Diagrams & Manuals
092902-5220-01 Engine View Diagrams & Manuals
092902-5222-01 Engine View Diagrams & Manuals
092902-5222-02 Engine View Diagrams & Manuals
092902-5222-03 Engine View Diagrams & Manuals
092902-5223-01 Engine View Diagrams & Manuals
092902-5226-01 Engine View Diagrams & Manuals
092902-5227-01 Engine View Diagrams & Manuals
092902-5231-01 Engine View Diagrams & Manuals
092902-5234-01 Engine View Diagrams & Manuals
092902-5237-01 Engine View Diagrams & Manuals
092902-5239-01 Engine View Diagrams & Manuals
092902-5240-01 Engine View Diagrams & Manuals
092902-5244-01 Engine View Diagrams & Manuals
092902-5245-01 Engine View Diagrams & Manuals
092902-5248-01 Engine View Diagrams & Manuals
092902-5249-01 Engine View Diagrams & Manuals
092902-5250-01 Engine View Diagrams & Manuals
092902-5251-01 Engine View Diagrams & Manuals
092902-5252-01 Engine View Diagrams & Manuals
092902-5253-01 Engine View Diagrams & Manuals
092902-5254-01 Engine View Diagrams & Manuals
092902-5256-01 Engine View Diagrams & Manuals
092902-5259-01 Engine View Diagrams & Manuals
092902-5261-01 Engine View Diagrams & Manuals
092902-5261-02 Engine View Diagrams & Manuals
092902-5262-99 Engine View Diagrams & Manuals
092902-5263-01 Engine View Diagrams & Manuals
092902-5264-01 Engine View Diagrams & Manuals
092902-5265-01 Engine View Diagrams & Manuals
092902-5266-01 Engine View Diagrams & Manuals
092902-5270-01 Engine View Diagrams & Manuals
092902-5271-01 Engine View Diagrams & Manuals
092902-5273-01 Engine View Diagrams & Manuals
092902-5275-01 Engine View Diagrams & Manuals
092902-5277-01 Engine View Diagrams & Manuals
092902-5278-01 Engine View Diagrams & Manuals
092902-5281-01 Engine View Diagrams & Manuals
092902-5282-01 Engine View Diagrams & Manuals
092902-5284-01 Engine View Diagrams & Manuals
092902-5285-01 Engine View Diagrams & Manuals
092902-5286-01 Engine View Diagrams & Manuals
092902-5288-01 Engine View Diagrams & Manuals
092902-5288-02 Engine View Diagrams & Manuals
092902-5291-01 Engine View Diagrams & Manuals
092902-5291-02 Engine View Diagrams & Manuals
092902-5291-03 Engine View Diagrams & Manuals
092902-5292-01 Engine View Diagrams & Manuals
092902-5308-01 Engine View Diagrams & Manuals
092902-5309-01 Engine View Diagrams & Manuals
092902-5313-01 Engine View Diagrams & Manuals
092902-5314-01 Engine View Diagrams & Manuals
092902-5317-01 Engine View Diagrams & Manuals
092902-5318-01 Engine View Diagrams & Manuals
092902-5322-01 Engine View Diagrams & Manuals
092902-5323-01 Engine View Diagrams & Manuals
092902-5327-01 Engine View Diagrams & Manuals
092902-5327-02 Engine View Diagrams & Manuals
092902-5328-01 Engine View Diagrams & Manuals
092902-5329-01 Engine View Diagrams & Manuals
092902-5330-01 Engine View Diagrams & Manuals
092902-5331-01 Engine View Diagrams & Manuals
092902-5331-02 Engine View Diagrams & Manuals
092902-5332-01 Engine View Diagrams & Manuals
092902-5335-01 Engine View Diagrams & Manuals
092902-5337-01 Engine View Diagrams & Manuals
092902-5337-02 Engine View Diagrams & Manuals
092902-5337-03 Engine View Diagrams & Manuals
092902-5339-01 Engine View Diagrams & Manuals
092902-5340-01 Engine View Diagrams & Manuals
092902-5341-01 Engine View Diagrams & Manuals
092902-5342-01 Engine View Diagrams & Manuals
092902-5343-01 Engine View Diagrams & Manuals
092902-5345-01 Engine View Diagrams & Manuals
092902-5346-01 Engine View Diagrams & Manuals
092902-5351-01 Engine View Diagrams & Manuals
092902-5352-01 Engine View Diagrams & Manuals
092902-5353-01 Engine View Diagrams & Manuals
092902-5355-01 Engine View Diagrams & Manuals
092902-5362-01 Engine View Diagrams & Manuals
092902-5366-01 Engine View Diagrams & Manuals
092902-5367-01 Engine View Diagrams & Manuals
092902-5370-01 Engine View Diagrams & Manuals
092902-5375-01 Engine View Diagrams & Manuals
092902-5375-02 Engine View Diagrams & Manuals
092902-5379-01 Engine View Diagrams & Manuals
092902-5382-01 Engine View Diagrams & Manuals
092902-5383-01 Engine View Diagrams & Manuals
092902-5386-01 Engine View Diagrams & Manuals
092902-5386-02 Engine View Diagrams & Manuals
092902-5387-01 Engine View Diagrams & Manuals
092902-5388-01 Engine View Diagrams & Manuals
092902-5391-01 Engine View Diagrams & Manuals
092902-5392-01 Engine View Diagrams & Manuals
092902-5394-01 Engine View Diagrams & Manuals
092902-5394-02 Engine View Diagrams & Manuals
092902-5395-01 Engine View Diagrams & Manuals
092902-5396-01 Engine View Diagrams & Manuals
092902-5398-01 Engine View Diagrams & Manuals
092902-5399-01 Engine View Diagrams & Manuals
092902-5400-99 Engine View Diagrams & Manuals
092902-5401-01 Engine View Diagrams & Manuals
092903-2050-99 Engine View Diagrams & Manuals
092905-0609-99 Engine View Diagrams & Manuals
092905-0610-99 Engine View Diagrams & Manuals
092905-0611-99 Engine View Diagrams & Manuals
092905-0612-99 Engine View Diagrams & Manuals
092905-0654-99 Engine View Diagrams & Manuals
092905-0743-99 Engine View Diagrams & Manuals
092905-0750-99 Engine View Diagrams & Manuals
092905-0751-99 Engine View Diagrams & Manuals
092905-0753-99 Engine View Diagrams & Manuals
092905-0793-99 Engine View Diagrams & Manuals
092905-0796-99 Engine View Diagrams & Manuals
092905-0798-99 Engine View Diagrams & Manuals
092905-0803-99 Engine View Diagrams & Manuals
092905-0827-99 Engine View Diagrams & Manuals
092905-0828-99 Engine View Diagrams & Manuals
092905-0829-99 Engine View Diagrams & Manuals
092905-0830-99 Engine View Diagrams & Manuals
092905-0831-99 Engine View Diagrams & Manuals
092905-0832-99 Engine View Diagrams & Manuals
092905-0833-99 Engine View Diagrams & Manuals
092905-0834-99 Engine View Diagrams & Manuals
092905-0836-99 Engine View Diagrams & Manuals
092905-0837-99 Engine View Diagrams & Manuals
092905-0840-99 Engine View Diagrams & Manuals
092905-0876-99 Engine View Diagrams & Manuals
092905-0888-99 Engine View Diagrams & Manuals
092905-0890-99 Engine View Diagrams & Manuals
092905-0895-99 Engine View Diagrams & Manuals
092905-0898-99 Engine View Diagrams & Manuals
092905-0900-99 Engine View Diagrams & Manuals
092905-0906-99 Engine View Diagrams & Manuals
092905-0908-99 Engine View Diagrams & Manuals
092905-0941-99 Engine View Diagrams & Manuals
092905-0944-99 Engine View Diagrams & Manuals
092905-0946-99 Engine View Diagrams & Manuals
092905-0947-99 Engine View Diagrams & Manuals
092905-1000-99 Engine View Diagrams & Manuals
092905-1019-99 Engine View Diagrams & Manuals
092905-1037-99 Engine View Diagrams & Manuals
092905-1044-99 Engine View Diagrams & Manuals
092905-1084-99 Engine View Diagrams & Manuals
092905-1086-99 Engine View Diagrams & Manuals
092905-1100-99 Engine View Diagrams & Manuals
092905-1104-99 Engine View Diagrams & Manuals
092905-1107-99 Engine View Diagrams & Manuals
092905-1108-99 Engine View Diagrams & Manuals
092905-1112-99 Engine View Diagrams & Manuals
092905-1124-99 Engine View Diagrams & Manuals
092905-1143-99 Engine View Diagrams & Manuals
092905-1151-99 Engine View Diagrams & Manuals
092905-1154-99 Engine View Diagrams & Manuals
092905-1155-99 Engine View Diagrams & Manuals
092905-1156-99 Engine View Diagrams & Manuals
092905-1164-99 Engine View Diagrams & Manuals
092905-1195-99 Engine View Diagrams & Manuals
092905-1211-99 Engine View Diagrams & Manuals
092905-1289-99 Engine View Diagrams & Manuals
092905-1298-99 Engine View Diagrams & Manuals
092905-1312-99 Engine View Diagrams & Manuals
092905-1323-99 Engine View Diagrams & Manuals
092905-1335-99 Engine View Diagrams & Manuals
092905-1360-99 Engine View Diagrams & Manuals
092905-1374-99 Engine View Diagrams & Manuals
092905-1405-99 Engine View Diagrams & Manuals
092905-1453-99 Engine View Diagrams & Manuals
092905-1551-99 Engine View Diagrams & Manuals
092905-1605-99 Engine View Diagrams & Manuals
092905-1628-99 Engine View Diagrams & Manuals
092905-1667-99 Engine View Diagrams & Manuals
092905-1702-99 Engine View Diagrams & Manuals
092905-1825-99 Engine View Diagrams & Manuals
092905-1839-99 Engine View Diagrams & Manuals
092905-1851-99 Engine View Diagrams & Manuals
092905-1852-99 Engine View Diagrams & Manuals
092905-1992-99 Engine View Diagrams & Manuals
092905-2008-99 Engine View Diagrams & Manuals
092905-2019-99 Engine View Diagrams & Manuals
092905-2077-99 Engine View Diagrams & Manuals
092905-2078-99 Engine View Diagrams & Manuals
092905-2082-99 Engine View Diagrams & Manuals
092905-2131-99 Engine View Diagrams & Manuals
092905-2149-99 Engine View Diagrams & Manuals
092905-2159-99 Engine View Diagrams & Manuals
092905-2165-99 Engine View Diagrams & Manuals
092905-2206-99 Engine View Diagrams & Manuals
092906-0030-99 Engine View Diagrams & Manuals
092906-0031-99 Engine View Diagrams & Manuals
092906-0032-99 Engine View Diagrams & Manuals
092906-0033-99 Engine View Diagrams & Manuals
092906-0034-99 Engine View Diagrams & Manuals
092906-0120-99 Engine View Diagrams & Manuals
092906-0121-99 Engine View Diagrams & Manuals
092906-0122-99 Engine View Diagrams & Manuals
092906-0123-99 Engine View Diagrams & Manuals
092906-0140-99 Engine View Diagrams & Manuals
092906-0145-99 Engine View Diagrams & Manuals
092906-0151-99 Engine View Diagrams & Manuals
092906-0167-99 Engine View Diagrams & Manuals
092906-0175-99 Engine View Diagrams & Manuals
092906-0184-99 Engine View Diagrams & Manuals
092906-0189-99 Engine View Diagrams & Manuals
092906-0192-99 Engine View Diagrams & Manuals
092906-0194-99 Engine View Diagrams & Manuals
092906-0199-99 Engine View Diagrams & Manuals
092906-0211-99 Engine View Diagrams & Manuals
092906-0216-99 Engine View Diagrams & Manuals
092906-0221-99 Engine View Diagrams & Manuals
092906-0242-99 Engine View Diagrams & Manuals
092906-0255-99 Engine View Diagrams & Manuals
092906-0259-99 Engine View Diagrams & Manuals
092906-0269-99 Engine View Diagrams & Manuals
092906-0271-99 Engine View Diagrams & Manuals
092906-0272-99 Engine View Diagrams & Manuals
092906-0280-99 Engine View Diagrams & Manuals
092906-0292-99 Engine View Diagrams & Manuals
092906-0305-99 Engine View Diagrams & Manuals
092906-0307-99 Engine View Diagrams & Manuals
092906-0314-99 Engine View Diagrams & Manuals
092906-0319-99 Engine View Diagrams & Manuals
092906-0324-99 Engine View Diagrams & Manuals
092906-0325-99 Engine View Diagrams & Manuals
092906-0327-99 Engine View Diagrams & Manuals
092906-0338-99 Engine View Diagrams & Manuals
092906-0339-99 Engine View Diagrams & Manuals
092906-0347-99 Engine View Diagrams & Manuals
092906-0353-99 Engine View Diagrams & Manuals
092906-0366-99 Engine View Diagrams & Manuals
092906-0371-99 Engine View Diagrams & Manuals
092906-0378-99 Engine View Diagrams & Manuals
092906-0389-99 Engine View Diagrams & Manuals
092906-0390-99 Engine View Diagrams & Manuals
092906-0408-99 Engine View Diagrams & Manuals
092906-0423-99 Engine View Diagrams & Manuals
092906-0430-99 Engine View Diagrams & Manuals
092906-0443-99 Engine View Diagrams & Manuals
092906-0530-99 Engine View Diagrams & Manuals
092906-0532-99 Engine View Diagrams & Manuals
092906-0533-99 Engine View Diagrams & Manuals
092906-0534-99 Engine View Diagrams & Manuals
092906-0613-99 Engine View Diagrams & Manuals
092906-0614-99 Engine View Diagrams & Manuals
092906-0615-99 Engine View Diagrams & Manuals
092906-0616-99 Engine View Diagrams & Manuals
092906-0655-99 Engine View Diagrams & Manuals
092906-0674-99 Engine View Diagrams & Manuals
092906-0679-99 Engine View Diagrams & Manuals
092906-0708-99 Engine View Diagrams & Manuals
092906-0728-99 Engine View Diagrams & Manuals
092906-0761-99 Engine View Diagrams & Manuals
092906-0767-99 Engine View Diagrams & Manuals
092906-0775-99 Engine View Diagrams & Manuals
092906-0781-99 Engine View Diagrams & Manuals
092906-0814-99 Engine View Diagrams & Manuals
092906-0847-99 Engine View Diagrams & Manuals
092906-0858-99 Engine View Diagrams & Manuals
092906-0863-99 Engine View Diagrams & Manuals
092906-0866-99 Engine View Diagrams & Manuals
092906-0873-99 Engine View Diagrams & Manuals
092906-0891-99 Engine View Diagrams & Manuals
092906-0912-99 Engine View Diagrams & Manuals
092906-0955-99 Engine View Diagrams & Manuals
092906-0969-99 Engine View Diagrams & Manuals
092906-0995-99 Engine View Diagrams & Manuals
092906-1024-99 Engine View Diagrams & Manuals
092906-1056-99 Engine View Diagrams & Manuals
092906-1058-99 Engine View Diagrams & Manuals
092906-1090-99 Engine View Diagrams & Manuals
092906-1101-99 Engine View Diagrams & Manuals
092906-1106-99 Engine View Diagrams & Manuals
092906-5344-01 Engine View Diagrams & Manuals
092907-3060-01 Engine View Diagrams & Manuals
092907-3064-01 Engine View Diagrams & Manuals
092907-3081-01 Engine View Diagrams & Manuals
092907-3084-01 Engine View Diagrams & Manuals
092907-3106-01 Engine View Diagrams & Manuals
092907-3107-01 Engine View Diagrams & Manuals
092907-3107-02 Engine View Diagrams & Manuals
092907-3115-01 Engine View Diagrams & Manuals
092907-3120-01 Engine View Diagrams & Manuals
092907-3138-01 Engine View Diagrams & Manuals
092907-3138-02 Engine View Diagrams & Manuals
092907-3140-01 Engine View Diagrams & Manuals
092907-3157-01 Engine View Diagrams & Manuals
092907-3160-01 Engine View Diagrams & Manuals
092907-3161-01 Engine View Diagrams & Manuals
092907-3164-01 Engine View Diagrams & Manuals
092907-3165-01 Engine View Diagrams & Manuals
092907-3177-01 Engine View Diagrams & Manuals
092907-3211-01 Engine View Diagrams & Manuals
092907-3221-01 Engine View Diagrams & Manuals
092907-3226-01 Engine View Diagrams & Manuals
092907-3230-01 Engine View Diagrams & Manuals
092907-3236-01 Engine View Diagrams & Manuals
092907-3237-01 Engine View Diagrams & Manuals
092907-3267-01 Engine View Diagrams & Manuals
092907-5081-01 Engine View Diagrams & Manuals
092907-5084-01 Engine View Diagrams & Manuals
092907-5102-01 Engine View Diagrams & Manuals
092907-5122-01 Engine View Diagrams & Manuals
092907-5123-01 Engine View Diagrams & Manuals
092907-5142-99 Engine View Diagrams & Manuals
092907-5160-99 Engine View Diagrams & Manuals
092907-5165-01 Engine View Diagrams & Manuals
092907-5177-99 Engine View Diagrams & Manuals
092907-5269-01 Engine View Diagrams & Manuals
092907-5269-02 Engine View Diagrams & Manuals
092907-5269-03 Engine View Diagrams & Manuals
092907-5279-01 Engine View Diagrams & Manuals
092907-5280-01 Engine View Diagrams & Manuals
092907-5316-01 Engine View Diagrams & Manuals
092907-5326-01 Engine View Diagrams & Manuals
092907-5373-01 Engine View Diagrams & Manuals
092907-5374-01 Engine View Diagrams & Manuals
092907-5378-01 Engine View Diagrams & Manuals
092907-5378-02 Engine View Diagrams & Manuals
092907-5405-01 Engine View Diagrams & Manuals
092908-0571-99 Engine View Diagrams & Manuals
092908-0572-99 Engine View Diagrams & Manuals
092908-0573-99 Engine View Diagrams & Manuals
092908-0574-99 Engine View Diagrams & Manuals
092908-0575-99 Engine View Diagrams & Manuals
092908-0576-99 Engine View Diagrams & Manuals
092908-0577-99 Engine View Diagrams & Manuals
092908-0578-99 Engine View Diagrams & Manuals
092908-0579-99 Engine View Diagrams & Manuals
092908-0580-99 Engine View Diagrams & Manuals
092908-0617-99 Engine View Diagrams & Manuals
092908-0618-99 Engine View Diagrams & Manuals
092908-0619-99 Engine View Diagrams & Manuals
092908-0620-99 Engine View Diagrams & Manuals
092908-0656-99 Engine View Diagrams & Manuals
092908-0672-99 Engine View Diagrams & Manuals
092908-0681-99 Engine View Diagrams & Manuals
092908-0684-99 Engine View Diagrams & Manuals
092908-0694-99 Engine View Diagrams & Manuals
092908-0699-99 Engine View Diagrams & Manuals
092908-0703-99 Engine View Diagrams & Manuals
092908-0706-99 Engine View Diagrams & Manuals
092908-0710-99 Engine View Diagrams & Manuals
092908-0712-99 Engine View Diagrams & Manuals
092908-0719-99 Engine View Diagrams & Manuals
092908-0720-99 Engine View Diagrams & Manuals
092908-0722-99 Engine View Diagrams & Manuals
092908-0726-99 Engine View Diagrams & Manuals
092908-0733-99 Engine View Diagrams & Manuals
092908-0735-99 Engine View Diagrams & Manuals
092908-0744-99 Engine View Diagrams & Manuals
092908-0745-99 Engine View Diagrams & Manuals
092908-0749-99 Engine View Diagrams & Manuals
092908-0765-99 Engine View Diagrams & Manuals
092908-0776-99 Engine View Diagrams & Manuals
092908-0777-99 Engine View Diagrams & Manuals
092908-0790-99 Engine View Diagrams & Manuals
092908-0791-99 Engine View Diagrams & Manuals
092908-0794-99 Engine View Diagrams & Manuals
092908-0804-99 Engine View Diagrams & Manuals
092908-0815-99 Engine View Diagrams & Manuals
092908-0820-99 Engine View Diagrams & Manuals
092908-0846-99 Engine View Diagrams & Manuals
092908-0848-99 Engine View Diagrams & Manuals
092908-0850-99 Engine View Diagrams & Manuals
092908-0852-99 Engine View Diagrams & Manuals
092908-0853-99 Engine View Diagrams & Manuals
092908-0861-99 Engine View Diagrams & Manuals
092908-0864-99 Engine View Diagrams & Manuals
092908-0868-99 Engine View Diagrams & Manuals
092908-0881-99 Engine View Diagrams & Manuals
092908-0882-99 Engine View Diagrams & Manuals
092908-0884-99 Engine View Diagrams & Manuals
092908-0892-99 Engine View Diagrams & Manuals
092908-0904-99 Engine View Diagrams & Manuals
092908-0907-99 Engine View Diagrams & Manuals
092908-0909-99 Engine View Diagrams & Manuals
092908-0910-99 Engine View Diagrams & Manuals
092908-0921-99 Engine View Diagrams & Manuals
092908-0926-99 Engine View Diagrams & Manuals
092908-0934-99 Engine View Diagrams & Manuals
092908-0935-99 Engine View Diagrams & Manuals
092908-0936-99 Engine View Diagrams & Manuals
092908-0942-99 Engine View Diagrams & Manuals
092908-0952-99 Engine View Diagrams & Manuals
092908-0956-99 Engine View Diagrams & Manuals
092908-0961-99 Engine View Diagrams & Manuals
092908-0966-99 Engine View Diagrams & Manuals
092908-0968-99 Engine View Diagrams & Manuals
092908-0977-99 Engine View Diagrams & Manuals
092908-0990-99 Engine View Diagrams & Manuals
092908-0996-99 Engine View Diagrams & Manuals
092908-0998-99 Engine View Diagrams & Manuals
092908-1003-99 Engine View Diagrams & Manuals
092908-1004-99 Engine View Diagrams & Manuals
092908-1012-99 Engine View Diagrams & Manuals
092908-1013-99 Engine View Diagrams & Manuals
092908-1034-99 Engine View Diagrams & Manuals
092908-1035-99 Engine View Diagrams & Manuals
092908-1036-99 Engine View Diagrams & Manuals
092908-1040-99 Engine View Diagrams & Manuals
092908-1045-99 Engine View Diagrams & Manuals
092908-1053-99 Engine View Diagrams & Manuals
092908-1059-99 Engine View Diagrams & Manuals
092908-1063-99 Engine View Diagrams & Manuals
092908-1064-99 Engine View Diagrams & Manuals
092908-1066-99 Engine View Diagrams & Manuals
092908-1069-99 Engine View Diagrams & Manuals
092908-1075-99 Engine View Diagrams & Manuals
092908-1080-99 Engine View Diagrams & Manuals
092908-1081-99 Engine View Diagrams & Manuals
092908-1083-99 Engine View Diagrams & Manuals
092908-1094-99 Engine View Diagrams & Manuals
092908-1121-99 Engine View Diagrams & Manuals
092908-1126-99 Engine View Diagrams & Manuals
092908-1129-99 Engine View Diagrams & Manuals
092908-1130-99 Engine View Diagrams & Manuals
092908-1135-99 Engine View Diagrams & Manuals
092908-1136-99 Engine View Diagrams & Manuals
092908-1139-99 Engine View Diagrams & Manuals
092908-1146-99 Engine View Diagrams & Manuals
092908-1161-99 Engine View Diagrams & Manuals
092908-1162-99 Engine View Diagrams & Manuals
092908-1165-99 Engine View Diagrams & Manuals
092908-1167-99 Engine View Diagrams & Manuals
092908-1174-99 Engine View Diagrams & Manuals
092908-1179-99 Engine View Diagrams & Manuals
092908-1185-99 Engine View Diagrams & Manuals
092908-1190-99 Engine View Diagrams & Manuals
092908-1193-99 Engine View Diagrams & Manuals
092908-1194-99 Engine View Diagrams & Manuals
092908-1204-99 Engine View Diagrams & Manuals
092908-1210-99 Engine View Diagrams & Manuals
092908-1213-99 Engine View Diagrams & Manuals
092908-1218-99 Engine View Diagrams & Manuals
092908-1223-99 Engine View Diagrams & Manuals
092908-1224-99 Engine View Diagrams & Manuals
092908-1232-99 Engine View Diagrams & Manuals
092908-1242-99 Engine View Diagrams & Manuals
092908-1249-99 Engine View Diagrams & Manuals
092908-1252-99 Engine View Diagrams & Manuals
092908-1264-99 Engine View Diagrams & Manuals
092908-1265-99 Engine View Diagrams & Manuals
092908-1266-99 Engine View Diagrams & Manuals
092908-1278-99 Engine View Diagrams & Manuals
092908-1280-99 Engine View Diagrams & Manuals
092908-1281-99 Engine View Diagrams & Manuals
092908-1283-99 Engine View Diagrams & Manuals
092908-1297-99 Engine View Diagrams & Manuals
092908-1301-99 Engine View Diagrams & Manuals
092908-1302-99 Engine View Diagrams & Manuals
092908-1309-99 Engine View Diagrams & Manuals
092908-1311-99 Engine View Diagrams & Manuals
092908-1313-99 Engine View Diagrams & Manuals
092908-1317-99 Engine View Diagrams & Manuals
092908-1319-99 Engine View Diagrams & Manuals
092908-1324-99 Engine View Diagrams & Manuals
092908-1330-99 Engine View Diagrams & Manuals
092908-1334-99 Engine View Diagrams & Manuals
092908-1336-99 Engine View Diagrams & Manuals
092908-1338-99 Engine View Diagrams & Manuals
092908-1339-99 Engine View Diagrams & Manuals
092908-1340-99 Engine View Diagrams & Manuals
092908-1342-99 Engine View Diagrams & Manuals
092908-1344-99 Engine View Diagrams & Manuals
092908-1345-99 Engine View Diagrams & Manuals
092908-1351-99 Engine View Diagrams & Manuals
092908-1356-99 Engine View Diagrams & Manuals
092908-1359-99 Engine View Diagrams & Manuals
092908-1364-99 Engine View Diagrams & Manuals
092908-1365-99 Engine View Diagrams & Manuals
092908-1369-99 Engine View Diagrams & Manuals
092908-1371-99 Engine View Diagrams & Manuals
092908-1375-99 Engine View Diagrams & Manuals
092908-1378-99 Engine View Diagrams & Manuals
092908-1382-99 Engine View Diagrams & Manuals
092908-1385-99 Engine View Diagrams & Manuals
092908-1386-99 Engine View Diagrams & Manuals
092908-1387-99 Engine View Diagrams & Manuals
092908-1388-99 Engine View Diagrams & Manuals
092908-1393-99 Engine View Diagrams & Manuals
092908-1397-99 Engine View Diagrams & Manuals
092908-1401-99 Engine View Diagrams & Manuals
092908-1403-99 Engine View Diagrams & Manuals
092908-1404-99 Engine View Diagrams & Manuals
092908-1406-99 Engine View Diagrams & Manuals
092908-1409-99 Engine View Diagrams & Manuals
092908-1413-99 Engine View Diagrams & Manuals
092908-1415-99 Engine View Diagrams & Manuals
092908-1416-99 Engine View Diagrams & Manuals
092908-1418-99 Engine View Diagrams & Manuals
092908-1422-99 Engine View Diagrams & Manuals
092908-1423-99 Engine View Diagrams & Manuals
092908-1424-99 Engine View Diagrams & Manuals
092908-1426-99 Engine View Diagrams & Manuals
092908-1427-99 Engine View Diagrams & Manuals
092908-1433-99 Engine View Diagrams & Manuals
092908-1437-99 Engine View Diagrams & Manuals
092908-1438-99 Engine View Diagrams & Manuals
092908-1441-99 Engine View Diagrams & Manuals
092908-1447-99 Engine View Diagrams & Manuals
092908-1454-99 Engine View Diagrams & Manuals
092908-1456-99 Engine View Diagrams & Manuals
092908-1457-99 Engine View Diagrams & Manuals
092908-1459-99 Engine View Diagrams & Manuals
092908-1465-99 Engine View Diagrams & Manuals
092908-1466-99 Engine View Diagrams & Manuals
092908-1467-99 Engine View Diagrams & Manuals
092908-1468-99 Engine View Diagrams & Manuals
092908-1469-99 Engine View Diagrams & Manuals
092908-1472-99 Engine View Diagrams & Manuals
092908-1475-99 Engine View Diagrams & Manuals
092908-1476-99 Engine View Diagrams & Manuals
092908-1478-99 Engine View Diagrams & Manuals
092908-1479-99 Engine View Diagrams & Manuals
092908-1480-99 Engine View Diagrams & Manuals
092908-1481-99 Engine View Diagrams & Manuals
092908-1482-99 Engine View Diagrams & Manuals
092908-1489-99 Engine View Diagrams & Manuals
092908-1491-99 Engine View Diagrams & Manuals
092908-1493-99 Engine View Diagrams & Manuals
092908-1498-99 Engine View Diagrams & Manuals
092908-1503-99 Engine View Diagrams & Manuals
092908-1507-99 Engine View Diagrams & Manuals
092908-1513-99 Engine View Diagrams & Manuals
092908-1515-99 Engine View Diagrams & Manuals
092908-1516-99 Engine View Diagrams & Manuals
092908-1518-99 Engine View Diagrams & Manuals
092908-1520-99 Engine View Diagrams & Manuals
092908-1522-99 Engine View Diagrams & Manuals
092908-1523-99 Engine View Diagrams & Manuals
092908-1525-99 Engine View Diagrams & Manuals
092908-1526-99 Engine View Diagrams & Manuals
092908-1527-99 Engine View Diagrams & Manuals
092908-1529-99 Engine View Diagrams & Manuals
092908-1535-99 Engine View Diagrams & Manuals
092908-1538-99 Engine View Diagrams & Manuals
092908-1539-99 Engine View Diagrams & Manuals
092908-1540-99 Engine View Diagrams & Manuals
092908-1542-99 Engine View Diagrams & Manuals
092908-1550-99 Engine View Diagrams & Manuals
092908-1552-99 Engine View Diagrams & Manuals
092908-1553-99 Engine View Diagrams & Manuals
092908-1560-99 Engine View Diagrams & Manuals
092908-1566-99 Engine View Diagrams & Manuals
092908-1567-99 Engine View Diagrams & Manuals
092908-1568-99 Engine View Diagrams & Manuals
092908-1577-99 Engine View Diagrams & Manuals
092908-1580-99 Engine View Diagrams & Manuals
092908-1581-99 Engine View Diagrams & Manuals
092908-1583-99 Engine View Diagrams & Manuals
092908-1584-99 Engine View Diagrams & Manuals
092908-1594-99 Engine View Diagrams & Manuals
092908-1596-99 Engine View Diagrams & Manuals
092908-1599-99 Engine View Diagrams & Manuals
092908-1606-99 Engine View Diagrams & Manuals
092908-1617-99 Engine View Diagrams & Manuals
092908-1619-99 Engine View Diagrams & Manuals
092908-1621-99 Engine View Diagrams & Manuals
092908-1627-99 Engine View Diagrams & Manuals
092908-1629-99 Engine View Diagrams & Manuals
092908-1632-99 Engine View Diagrams & Manuals
092908-1634-99 Engine View Diagrams & Manuals
092908-1635-99 Engine View Diagrams & Manuals
092908-1639-99 Engine View Diagrams & Manuals
092908-1641-99 Engine View Diagrams & Manuals
092908-1644-99 Engine View Diagrams & Manuals
092908-1645-99 Engine View Diagrams & Manuals
092908-1646-99 Engine View Diagrams & Manuals
092908-1647-99 Engine View Diagrams & Manuals
092908-1649-99 Engine View Diagrams & Manuals
092908-1651-99 Engine View Diagrams & Manuals
092908-1653-99 Engine View Diagrams & Manuals
092908-1655-99 Engine View Diagrams & Manuals
092908-1656-99 Engine View Diagrams & Manuals
092908-1659-99 Engine View Diagrams & Manuals
092908-1666-99 Engine View Diagrams & Manuals
092908-1671-99 Engine View Diagrams & Manuals
092908-1675-99 Engine View Diagrams & Manuals
092908-1683-99 Engine View Diagrams & Manuals
092908-1685-99 Engine View Diagrams & Manuals
092908-1691-99 Engine View Diagrams & Manuals
092908-1694-99 Engine View Diagrams & Manuals
092908-1696-99 Engine View Diagrams & Manuals
092908-1699-99 Engine View Diagrams & Manuals
092908-1700-99 Engine View Diagrams & Manuals
092908-1703-99 Engine View Diagrams & Manuals
092908-1705-99 Engine View Diagrams & Manuals
092908-1707-99 Engine View Diagrams & Manuals
092908-1708-99 Engine View Diagrams & Manuals
092908-1709-99 Engine View Diagrams & Manuals
092908-1710-99 Engine View Diagrams & Manuals
092908-1711-99 Engine View Diagrams & Manuals
092908-1714-99 Engine View Diagrams & Manuals
092908-1715-99 Engine View Diagrams & Manuals
092908-1716-99 Engine View Diagrams & Manuals
092908-1717-99 Engine View Diagrams & Manuals
092908-1718-99 Engine View Diagrams & Manuals
092908-1727-99 Engine View Diagrams & Manuals
092908-1730-99 Engine View Diagrams & Manuals
092908-1731-99 Engine View Diagrams & Manuals
092908-1735-99 Engine View Diagrams & Manuals
092908-1736-99 Engine View Diagrams & Manuals
092908-1739-99 Engine View Diagrams & Manuals
092908-1742-99 Engine View Diagrams & Manuals
092908-1743-99 Engine View Diagrams & Manuals
092908-1744-99 Engine View Diagrams & Manuals
092908-1745-99 Engine View Diagrams & Manuals
092908-1746-99 Engine View Diagrams & Manuals
092908-1747-99 Engine View Diagrams & Manuals
092908-1748-99 Engine View Diagrams & Manuals
092908-1752-99 Engine View Diagrams & Manuals
092908-1756-99 Engine View Diagrams & Manuals
092908-1757-99 Engine View Diagrams & Manuals
092908-1759-99 Engine View Diagrams & Manuals
092908-1760-99 Engine View Diagrams & Manuals
092908-1761-99 Engine View Diagrams & Manuals
092908-1763-99 Engine View Diagrams & Manuals
092908-1767-99 Engine View Diagrams & Manuals
092908-1768-99 Engine View Diagrams & Manuals
092908-1771-99 Engine View Diagrams & Manuals
092908-1772-99 Engine View Diagrams & Manuals
092908-1773-99 Engine View Diagrams & Manuals
092908-1775-99 Engine View Diagrams & Manuals
092908-1778-99 Engine View Diagrams & Manuals
092908-1785-99 Engine View Diagrams & Manuals
092908-1786-99 Engine View Diagrams & Manuals
092908-1788-99 Engine View Diagrams & Manuals
092908-1790-99 Engine View Diagrams & Manuals
092908-1791-99 Engine View Diagrams & Manuals
092908-1792-99 Engine View Diagrams & Manuals
092908-1794-99 Engine View Diagrams & Manuals
092908-1795-99 Engine View Diagrams & Manuals
092908-1804-99 Engine View Diagrams & Manuals
092908-1806-99 Engine View Diagrams & Manuals
092908-1807-99 Engine View Diagrams & Manuals
092908-1808-99 Engine View Diagrams & Manuals
092908-1811-99 Engine View Diagrams & Manuals
092908-1813-99 Engine View Diagrams & Manuals
092908-1814-99 Engine View Diagrams & Manuals
092908-1818-99 Engine View Diagrams & Manuals
092908-1819-99 Engine View Diagrams & Manuals
092908-1821-99 Engine View Diagrams & Manuals
092908-1826-99 Engine View Diagrams & Manuals
092908-1827-99 Engine View Diagrams & Manuals
092908-1829-99 Engine View Diagrams & Manuals
092908-1832-99 Engine View Diagrams & Manuals
092908-1833-99 Engine View Diagrams & Manuals
092908-1838-99 Engine View Diagrams & Manuals
092908-1841-99 Engine View Diagrams & Manuals
092908-1842-99 Engine View Diagrams & Manuals
092908-1843-99 Engine View Diagrams & Manuals
092908-1844-99 Engine View Diagrams & Manuals
092908-1845-99 Engine View Diagrams & Manuals
092908-1846-99 Engine View Diagrams & Manuals
092908-1847-99 Engine View Diagrams & Manuals
092908-1849-99 Engine View Diagrams & Manuals
092908-1850-99 Engine View Diagrams & Manuals
092908-1853-99 Engine View Diagrams & Manuals
092908-1857-99 Engine View Diagrams & Manuals
092908-1858-99 Engine View Diagrams & Manuals
092908-1861-99 Engine View Diagrams & Manuals
092908-1864-99 Engine View Diagrams & Manuals
092908-1870-99 Engine View Diagrams & Manuals
092908-1871-99 Engine View Diagrams & Manuals
092908-1872-99 Engine View Diagrams & Manuals
092908-1873-99 Engine View Diagrams & Manuals
092908-1874-99 Engine View Diagrams & Manuals
092908-1878-99 Engine View Diagrams & Manuals
092908-1879-99 Engine View Diagrams & Manuals
092908-1882-99 Engine View Diagrams & Manuals
092908-1887-99 Engine View Diagrams & Manuals
092908-1890-99 Engine View Diagrams & Manuals
092908-1892-99 Engine View Diagrams & Manuals
092908-1893-99 Engine View Diagrams & Manuals
092908-1894-99 Engine View Diagrams & Manuals
092908-1895-99 Engine View Diagrams & Manuals
092908-1896-99 Engine View Diagrams & Manuals
092908-1897-99 Engine View Diagrams & Manuals
092908-1898-99 Engine View Diagrams & Manuals
092908-1900-99 Engine View Diagrams & Manuals
092908-1901-99 Engine View Diagrams & Manuals
092908-1903-99 Engine View Diagrams & Manuals
092908-1904-99 Engine View Diagrams & Manuals
092908-1906-99 Engine View Diagrams & Manuals
092908-1910-99 Engine View Diagrams & Manuals
092908-1911-99 Engine View Diagrams & Manuals
092908-1916-99 Engine View Diagrams & Manuals
092908-1919-99 Engine View Diagrams & Manuals
092908-1924-99 Engine View Diagrams & Manuals
092908-1926-99 Engine View Diagrams & Manuals
092908-1928-99 Engine View Diagrams & Manuals
092908-1929-99 Engine View Diagrams & Manuals
092908-1930-99 Engine View Diagrams & Manuals
092908-1931-99 Engine View Diagrams & Manuals
092908-1934-99 Engine View Diagrams & Manuals
092908-1937-99 Engine View Diagrams & Manuals
092908-1942-99 Engine View Diagrams & Manuals
092908-1943-99 Engine View Diagrams & Manuals
092908-1947-99 Engine View Diagrams & Manuals
092908-1949-99 Engine View Diagrams & Manuals
092908-1951-99 Engine View Diagrams & Manuals
092908-1954-99 Engine View Diagrams & Manuals
092908-1955-99 Engine View Diagrams & Manuals
092908-1956-99 Engine View Diagrams & Manuals
092908-1959-99 Engine View Diagrams & Manuals
092908-1963-99 Engine View Diagrams & Manuals
092908-1964-99 Engine View Diagrams & Manuals
092908-1967-99 Engine View Diagrams & Manuals
092908-1968-99 Engine View Diagrams & Manuals
092908-1969-99 Engine View Diagrams & Manuals
092908-1970-99 Engine View Diagrams & Manuals
092908-1973-99 Engine View Diagrams & Manuals
092908-1974-99 Engine View Diagrams & Manuals
092908-1976-99 Engine View Diagrams & Manuals
092908-1978-99 Engine View Diagrams & Manuals
092908-1984-99 Engine View Diagrams & Manuals
092908-1986-99 Engine View Diagrams & Manuals
092908-1989-99 Engine View Diagrams & Manuals
092908-1991-99 Engine View Diagrams & Manuals
092908-1996-99 Engine View Diagrams & Manuals
092908-1997-99 Engine View Diagrams & Manuals
092908-1998-99 Engine View Diagrams & Manuals
092908-2002-99 Engine View Diagrams & Manuals
092908-2003-99 Engine View Diagrams & Manuals
092908-2010-99 Engine View Diagrams & Manuals
092908-2012-99 Engine View Diagrams & Manuals
092908-2013-99 Engine View Diagrams & Manuals
092908-2014-99 Engine View Diagrams & Manuals
092908-2015-99 Engine View Diagrams & Manuals
092908-2021-99 Engine View Diagrams & Manuals
092908-2022-99 Engine View Diagrams & Manuals
092908-2024-99 Engine View Diagrams & Manuals
092908-2025-99 Engine View Diagrams & Manuals
092908-2026-99 Engine View Diagrams & Manuals
092908-2027-99 Engine View Diagrams & Manuals
092908-2030-99 Engine View Diagrams & Manuals
092908-2032-99 Engine View Diagrams & Manuals
092908-2033-99 Engine View Diagrams & Manuals
092908-2036-99 Engine View Diagrams & Manuals
092908-2040-99 Engine View Diagrams & Manuals
092908-2041-99 Engine View Diagrams & Manuals
092908-2048-99 Engine View Diagrams & Manuals
092908-2051-99 Engine View Diagrams & Manuals
092908-2052-99 Engine View Diagrams & Manuals
092908-2053-99 Engine View Diagrams & Manuals
092908-2054-99 Engine View Diagrams & Manuals
092908-2055-99 Engine View Diagrams & Manuals
092908-2059-99 Engine View Diagrams & Manuals
092908-2072-99 Engine View Diagrams & Manuals
092908-2076-99 Engine View Diagrams & Manuals
092908-2084-99 Engine View Diagrams & Manuals
092908-2087-99 Engine View Diagrams & Manuals
092908-2088-99 Engine View Diagrams & Manuals
092908-2090-99 Engine View Diagrams & Manuals
092908-2092-99 Engine View Diagrams & Manuals
092908-2096-99 Engine View Diagrams & Manuals
092908-2097-99 Engine View Diagrams & Manuals
092908-2098-99 Engine View Diagrams & Manuals
092908-2099-99 Engine View Diagrams & Manuals
092908-2100-99 Engine View Diagrams & Manuals
092908-2102-99 Engine View Diagrams & Manuals
092908-2104-99 Engine View Diagrams & Manuals
092908-2105-99 Engine View Diagrams & Manuals
092908-2106-99 Engine View Diagrams & Manuals
092908-2111-99 Engine View Diagrams & Manuals
092908-2112-99 Engine View Diagrams & Manuals
092908-2113-99 Engine View Diagrams & Manuals
092908-2117-99 Engine View Diagrams & Manuals
092908-2121-99 Engine View Diagrams & Manuals
092908-2124-99 Engine View Diagrams & Manuals
092908-2128-99 Engine View Diagrams & Manuals
092908-2129-99 Engine View Diagrams & Manuals
092908-2140-99 Engine View Diagrams & Manuals
092908-2141-99 Engine View Diagrams & Manuals
092908-2142-99 Engine View Diagrams & Manuals
092908-2147-99 Engine View Diagrams & Manuals
092908-2148-99 Engine View Diagrams & Manuals
092908-2150-99 Engine View Diagrams & Manuals
092908-2151-99 Engine View Diagrams & Manuals
092908-2155-99 Engine View Diagrams & Manuals
092908-2157-99 Engine View Diagrams & Manuals
092908-2158-99 Engine View Diagrams & Manuals
092908-2161-99 Engine View Diagrams & Manuals
092908-2169-99 Engine View Diagrams & Manuals
092908-2172-99 Engine View Diagrams & Manuals
092908-2173-99 Engine View Diagrams & Manuals
092908-2177-99 Engine View Diagrams & Manuals
092908-2179-99 Engine View Diagrams & Manuals
092908-2180-99 Engine View Diagrams & Manuals
092908-2182-99 Engine View Diagrams & Manuals
092908-2183-99 Engine View Diagrams & Manuals
092908-2184-99 Engine View Diagrams & Manuals
092908-2188-99 Engine View Diagrams & Manuals
092908-2191-99 Engine View Diagrams & Manuals
092908-2198-99 Engine View Diagrams & Manuals
092908-2199-99 Engine View Diagrams & Manuals
092908-2201-99 Engine View Diagrams & Manuals
092908-2204-99 Engine View Diagrams & Manuals
092908-2207-99 Engine View Diagrams & Manuals
092908-2208-99 Engine View Diagrams & Manuals
092908-2209-99 Engine View Diagrams & Manuals
092908-3109-01 Engine View Diagrams & Manuals
092908-3121-01 Engine View Diagrams & Manuals
092908-3195-01 Engine View Diagrams & Manuals
092908-3196-01 Engine View Diagrams & Manuals
092908-3199-01 Engine View Diagrams & Manuals
092908-3284-01 Engine View Diagrams & Manuals
092908-5001-01 Engine View Diagrams & Manuals
092908-5002-01 Engine View Diagrams & Manuals
092908-5004-01 Engine View Diagrams & Manuals
092908-5071-01 Engine View Diagrams & Manuals
092908-5071-02 Engine View Diagrams & Manuals
092908-5072-01 Engine View Diagrams & Manuals
092908-5072-02 Engine View Diagrams & Manuals
092908-5073-01 Engine View Diagrams & Manuals
092908-5074-01 Engine View Diagrams & Manuals
092908-5075-01 Engine View Diagrams & Manuals
092908-5078-01 Engine View Diagrams & Manuals
092908-5079-01 Engine View Diagrams & Manuals
092908-5080-01 Engine View Diagrams & Manuals
092908-5090-01 Engine View Diagrams & Manuals
092908-5091-01 Engine View Diagrams & Manuals
092908-5093-01 Engine View Diagrams & Manuals
092908-5104-01 Engine View Diagrams & Manuals
092908-5157-01 Engine View Diagrams & Manuals
092908-5162-01 Engine View Diagrams & Manuals
092908-5162-02 Engine View Diagrams & Manuals
092908-5162-03 Engine View Diagrams & Manuals
092908-5175-01 Engine View Diagrams & Manuals
092908-5175-02 Engine View Diagrams & Manuals
092908-5185-01 Engine View Diagrams & Manuals
092908-5185-02 Engine View Diagrams & Manuals
092908-5192-01 Engine View Diagrams & Manuals
092908-5192-02 Engine View Diagrams & Manuals
092908-5192-03 Engine View Diagrams & Manuals
092908-5193-01 Engine View Diagrams & Manuals
092908-5199-01 Engine View Diagrams & Manuals
092908-5200-01 Engine View Diagrams & Manuals
092908-5201-01 Engine View Diagrams & Manuals
092908-5203-01 Engine View Diagrams & Manuals
092908-5205-01 Engine View Diagrams & Manuals
092908-5208-01 Engine View Diagrams & Manuals
092908-5212-01 Engine View Diagrams & Manuals
092908-5221-01 Engine View Diagrams & Manuals
092908-5221-02 Engine View Diagrams & Manuals
092908-5224-01 Engine View Diagrams & Manuals
092908-5228-01 Engine View Diagrams & Manuals
092908-5228-02 Engine View Diagrams & Manuals
092908-5228-03 Engine View Diagrams & Manuals
092908-5229-01 Engine View Diagrams & Manuals
092908-5229-02 Engine View Diagrams & Manuals
092908-5230-01 Engine View Diagrams & Manuals
092908-5232-01 Engine View Diagrams & Manuals
092908-5238-01 Engine View Diagrams & Manuals
092908-5241-01 Engine View Diagrams & Manuals
092908-5243-01 Engine View Diagrams & Manuals
092908-5255-01 Engine View Diagrams & Manuals
092908-5260-01 Engine View Diagrams & Manuals
092908-5260-02 Engine View Diagrams & Manuals
092908-5260-03 Engine View Diagrams & Manuals
092908-5260-04 Engine View Diagrams & Manuals
092908-5260-05 Engine View Diagrams & Manuals
092908-5267-01 Engine View Diagrams & Manuals
092908-5268-01 Engine View Diagrams & Manuals
092908-5272-01 Engine View Diagrams & Manuals
092908-5274-01 Engine View Diagrams & Manuals
092908-5283-01 Engine View Diagrams & Manuals
092908-5287-01 Engine View Diagrams & Manuals
092908-5289-01 Engine View Diagrams & Manuals
092908-5289-02 Engine View Diagrams & Manuals
092908-5290-01 Engine View Diagrams & Manuals
092908-5293-01 Engine View Diagrams & Manuals
092908-5294-01 Engine View Diagrams & Manuals
092908-5297-01 Engine View Diagrams & Manuals
092908-5298-01 Engine View Diagrams & Manuals
092908-5298-02 Engine View Diagrams & Manuals
092908-5300-01 Engine View Diagrams & Manuals
092908-5300-02 Engine View Diagrams & Manuals
092908-5301-01 Engine View Diagrams & Manuals
092908-5301-02 Engine View Diagrams & Manuals
092908-5302-01 Engine View Diagrams & Manuals
092908-5302-02 Engine View Diagrams & Manuals
092908-5310-01 Engine View Diagrams & Manuals
092908-5312-01 Engine View Diagrams & Manuals
092908-5319-01 Engine View Diagrams & Manuals
092908-5320-01 Engine View Diagrams & Manuals
092908-5347-01 Engine View Diagrams & Manuals
092908-5348-01 Engine View Diagrams & Manuals
092908-5349-01 Engine View Diagrams & Manuals
092908-5356-01 Engine View Diagrams & Manuals
092908-5360-01 Engine View Diagrams & Manuals
092908-5369-01 Engine View Diagrams & Manuals
092908-5371-01 Engine View Diagrams & Manuals
092908-5372-01 Engine View Diagrams & Manuals
092908-5372-02 Engine View Diagrams & Manuals
092908-5372-03 Engine View Diagrams & Manuals
092908-5376-01 Engine View Diagrams & Manuals
092908-5377-01 Engine View Diagrams & Manuals
092908-5384-01 Engine View Diagrams & Manuals
092908-5389-01 Engine View Diagrams & Manuals
092908-5390-01 Engine View Diagrams & Manuals
092908-5397-01 Engine View Diagrams & Manuals
092908-5400-01 Engine View Diagrams & Manuals
092908-5402-01 Engine View Diagrams & Manuals
092908-5403-01 Engine View Diagrams & Manuals
092908-5404-01 Engine View Diagrams & Manuals
092908-5911-01 Engine View Diagrams & Manuals
092908-5911-02 Engine View Diagrams & Manuals
092908-5912-01 Engine View Diagrams & Manuals
092982-0050-99 Engine View Diagrams & Manuals
092982-0127-99 Engine View Diagrams & Manuals
092982-0128-99 Engine View Diagrams & Manuals
092982-0129-99 Engine View Diagrams & Manuals
092982-0130-99 Engine View Diagrams & Manuals
092982-0150-99 Engine View Diagrams & Manuals
092982-0176-99 Engine View Diagrams & Manuals
092982-0179-99 Engine View Diagrams & Manuals
092982-0188-99 Engine View Diagrams & Manuals
092982-0209-99 Engine View Diagrams & Manuals
092982-0228-99 Engine View Diagrams & Manuals
092982-0233-99 Engine View Diagrams & Manuals
092982-0240-99 Engine View Diagrams & Manuals
092982-0274-99 Engine View Diagrams & Manuals
092982-0282-99 Engine View Diagrams & Manuals
092982-0291-99 Engine View Diagrams & Manuals
092982-0306-99 Engine View Diagrams & Manuals
092982-0313-99 Engine View Diagrams & Manuals
092982-0317-99 Engine View Diagrams & Manuals
092982-0321-99 Engine View Diagrams & Manuals
092982-0326-99 Engine View Diagrams & Manuals
092982-0333-99 Engine View Diagrams & Manuals
092982-0344-99 Engine View Diagrams & Manuals
092982-0356-99 Engine View Diagrams & Manuals
092982-0361-99 Engine View Diagrams & Manuals
092982-0375-99 Engine View Diagrams & Manuals
092982-0380-99 Engine View Diagrams & Manuals
092982-0384-99 Engine View Diagrams & Manuals
092982-0385-99 Engine View Diagrams & Manuals
092982-0399-99 Engine View Diagrams & Manuals
092982-0403-99 Engine View Diagrams & Manuals
092982-0404-99 Engine View Diagrams & Manuals
092982-0410-99 Engine View Diagrams & Manuals
092982-0415-99 Engine View Diagrams & Manuals
092982-0417-99 Engine View Diagrams & Manuals
092982-0420-99 Engine View Diagrams & Manuals
092982-0427-99 Engine View Diagrams & Manuals
092982-0429-99 Engine View Diagrams & Manuals
092982-0438-99 Engine View Diagrams & Manuals
092982-0439-99 Engine View Diagrams & Manuals
092982-0450-99 Engine View Diagrams & Manuals
092982-0550-99 Engine View Diagrams & Manuals
092982-0551-99 Engine View Diagrams & Manuals
092982-0621-99 Engine View Diagrams & Manuals
092982-0622-99 Engine View Diagrams & Manuals
092982-0623-99 Engine View Diagrams & Manuals
092982-0624-99 Engine View Diagrams & Manuals
092982-0625-99 Engine View Diagrams & Manuals
092982-0657-99 Engine View Diagrams & Manuals
092982-0668-99 Engine View Diagrams & Manuals
092982-0675-99 Engine View Diagrams & Manuals
092982-0676-99 Engine View Diagrams & Manuals
092982-0695-99 Engine View Diagrams & Manuals
092982-0696-99 Engine View Diagrams & Manuals
092982-0697-99 Engine View Diagrams & Manuals
092982-0713-99 Engine View Diagrams & Manuals
092982-0717-99 Engine View Diagrams & Manuals
092982-0758-99 Engine View Diagrams & Manuals
092982-0772-99 Engine View Diagrams & Manuals
092982-0802-99 Engine View Diagrams & Manuals
092982-0807-99 Engine View Diagrams & Manuals
092982-0842-99 Engine View Diagrams & Manuals
092982-0879-99 Engine View Diagrams & Manuals
092982-0885-99 Engine View Diagrams & Manuals
092982-0897-99 Engine View Diagrams & Manuals
092982-0899-99 Engine View Diagrams & Manuals
092982-0903-99 Engine View Diagrams & Manuals
092982-0940-99 Engine View Diagrams & Manuals
092982-0943-99 Engine View Diagrams & Manuals
092982-0954-99 Engine View Diagrams & Manuals
092982-0976-99 Engine View Diagrams & Manuals
092982-0978-99 Engine View Diagrams & Manuals
092982-0979-99 Engine View Diagrams & Manuals
092982-0982-99 Engine View Diagrams & Manuals
092982-1001-99 Engine View Diagrams & Manuals
092982-1009-99 Engine View Diagrams & Manuals
092982-1021-99 Engine View Diagrams & Manuals
092982-1029-99 Engine View Diagrams & Manuals
092982-1030-99 Engine View Diagrams & Manuals
092982-1046-99 Engine View Diagrams & Manuals
092982-1051-99 Engine View Diagrams & Manuals
092982-1079-99 Engine View Diagrams & Manuals
092982-1096-99 Engine View Diagrams & Manuals
092982-1102-99 Engine View Diagrams & Manuals
092982-1105-99 Engine View Diagrams & Manuals
092982-1118-99 Engine View Diagrams & Manuals
092982-1122-99 Engine View Diagrams & Manuals
092982-1142-99 Engine View Diagrams & Manuals
092982-1150-99 Engine View Diagrams & Manuals
092982-1170-99 Engine View Diagrams & Manuals
092982-1176-99 Engine View Diagrams & Manuals
092982-1180-99 Engine View Diagrams & Manuals
092982-1188-99 Engine View Diagrams & Manuals
092982-1189-99 Engine View Diagrams & Manuals
092982-1196-99 Engine View Diagrams & Manuals
092982-1201-99 Engine View Diagrams & Manuals
092982-1231-99 Engine View Diagrams & Manuals
092982-1233-99 Engine View Diagrams & Manuals
092982-1234-99 Engine View Diagrams & Manuals
092982-1235-99 Engine View Diagrams & Manuals
092982-1251-99 Engine View Diagrams & Manuals
092982-1259-99 Engine View Diagrams & Manuals
092982-1273-99 Engine View Diagrams & Manuals
092982-1282-99 Engine View Diagrams & Manuals
092982-1284-99 Engine View Diagrams & Manuals
092982-1293-99 Engine View Diagrams & Manuals
092982-1332-99 Engine View Diagrams & Manuals
092982-1349-99 Engine View Diagrams & Manuals
092982-1352-99 Engine View Diagrams & Manuals
092982-1389-99 Engine View Diagrams & Manuals
092982-1394-99 Engine View Diagrams & Manuals
092982-1408-99 Engine View Diagrams & Manuals
092982-1410-99 Engine View Diagrams & Manuals
092982-1411-99 Engine View Diagrams & Manuals
092982-1445-99 Engine View Diagrams & Manuals
092982-1448-99 Engine View Diagrams & Manuals
092982-1450-99 Engine View Diagrams & Manuals
092982-1470-99 Engine View Diagrams & Manuals
092982-1488-99 Engine View Diagrams & Manuals
092982-1499-99 Engine View Diagrams & Manuals
092982-1505-99 Engine View Diagrams & Manuals
092982-1508-99 Engine View Diagrams & Manuals
092982-1521-99 Engine View Diagrams & Manuals
092982-1536-99 Engine View Diagrams & Manuals
092982-1537-99 Engine View Diagrams & Manuals
092982-1544-99 Engine View Diagrams & Manuals
092982-1545-99 Engine View Diagrams & Manuals
092982-1557-99 Engine View Diagrams & Manuals
092982-1561-99 Engine View Diagrams & Manuals
092982-1562-99 Engine View Diagrams & Manuals
092982-1563-99 Engine View Diagrams & Manuals
092982-1574-99 Engine View Diagrams & Manuals
092982-1578-99 Engine View Diagrams & Manuals
092982-1589-99 Engine View Diagrams & Manuals
092982-1592-99 Engine View Diagrams & Manuals
092982-1597-99 Engine View Diagrams & Manuals
092982-1637-99 Engine View Diagrams & Manuals
092982-1640-99 Engine View Diagrams & Manuals
092982-1648-99 Engine View Diagrams & Manuals
092982-1654-99 Engine View Diagrams & Manuals
092982-1663-99 Engine View Diagrams & Manuals
092982-1669-99 Engine View Diagrams & Manuals
092982-1677-99 Engine View Diagrams & Manuals
092982-1681-99 Engine View Diagrams & Manuals
092982-1704-99 Engine View Diagrams & Manuals
092982-1719-99 Engine View Diagrams & Manuals
092982-1734-99 Engine View Diagrams & Manuals
092982-1749-99 Engine View Diagrams & Manuals
092982-1765-99 Engine View Diagrams & Manuals
092982-1779-99 Engine View Diagrams & Manuals
092982-1793-99 Engine View Diagrams & Manuals
092982-1797-99 Engine View Diagrams & Manuals
092982-1835-99 Engine View Diagrams & Manuals
092982-1836-99 Engine View Diagrams & Manuals
092982-1854-99 Engine View Diagrams & Manuals
092982-1862-99 Engine View Diagrams & Manuals
092982-1867-99 Engine View Diagrams & Manuals
092982-1883-99 Engine View Diagrams & Manuals
092982-1888-99 Engine View Diagrams & Manuals
092982-1912-99 Engine View Diagrams & Manuals
092982-1913-99 Engine View Diagrams & Manuals
092982-1923-99 Engine View Diagrams & Manuals
092982-1961-99 Engine View Diagrams & Manuals
092982-1966-99 Engine View Diagrams & Manuals
092982-1983-99 Engine View Diagrams & Manuals
092982-1987-99 Engine View Diagrams & Manuals
092982-2011-99 Engine View Diagrams & Manuals
092982-2029-99 Engine View Diagrams & Manuals
092982-2037-99 Engine View Diagrams & Manuals
092982-2038-99 Engine View Diagrams & Manuals
092982-2039-99 Engine View Diagrams & Manuals
092982-2045-99 Engine View Diagrams & Manuals
092982-2064-99 Engine View Diagrams & Manuals
092982-2070-99 Engine View Diagrams & Manuals
092982-2071-99 Engine View Diagrams & Manuals
092982-2079-99 Engine View Diagrams & Manuals
092982-2080-99 Engine View Diagrams & Manuals
092982-2083-99 Engine View Diagrams & Manuals
092982-2089-99 Engine View Diagrams & Manuals
092982-2093-99 Engine View Diagrams & Manuals
092982-2094-99 Engine View Diagrams & Manuals
092982-2119-99 Engine View Diagrams & Manuals
092982-2126-99 Engine View Diagrams & Manuals
092982-2136-99 Engine View Diagrams & Manuals
092982-2137-99 Engine View Diagrams & Manuals
092982-2153-99 Engine View Diagrams & Manuals
092982-2181-99 Engine View Diagrams & Manuals
092982-2185-99 Engine View Diagrams & Manuals
092982-2190-99 Engine View Diagrams & Manuals
092982-2193-99 Engine View Diagrams & Manuals
092982-3050-01 Engine View Diagrams & Manuals
092982-3051-01 Engine View Diagrams & Manuals
092982-3052-01 Engine View Diagrams & Manuals
092982-3053-01 Engine View Diagrams & Manuals
092982-3125-01 Engine View Diagrams & Manuals
092982-3126-01 Engine View Diagrams & Manuals
092982-3127-01 Engine View Diagrams & Manuals
092982-3128-01 Engine View Diagrams & Manuals
092982-3130-01 Engine View Diagrams & Manuals
092982-3130-02 Engine View Diagrams & Manuals
092982-3133-01 Engine View Diagrams & Manuals
092982-3136-01 Engine View Diagrams & Manuals
092982-3137-01 Engine View Diagrams & Manuals
092982-3145-01 Engine View Diagrams & Manuals
092982-3148-01 Engine View Diagrams & Manuals
092982-3158-01 Engine View Diagrams & Manuals
092982-3170-01 Engine View Diagrams & Manuals
092982-3173-01 Engine View Diagrams & Manuals
092982-3173-02 Engine View Diagrams & Manuals
092982-3173-03 Engine View Diagrams & Manuals
092982-3174-01 Engine View Diagrams & Manuals
092982-3174-02 Engine View Diagrams & Manuals
092982-3180-01 Engine View Diagrams & Manuals
092982-3182-01 Engine View Diagrams & Manuals
092982-3183-01 Engine View Diagrams & Manuals
092982-3184-01 Engine View Diagrams & Manuals
092982-3189-01 Engine View Diagrams & Manuals
092982-3190-01 Engine View Diagrams & Manuals
092982-3198-01 Engine View Diagrams & Manuals
092982-3198-02 Engine View Diagrams & Manuals
092982-3202-01 Engine View Diagrams & Manuals
092982-3206-01 Engine View Diagrams & Manuals
092982-3208-01 Engine View Diagrams & Manuals
092982-3212-01 Engine View Diagrams & Manuals
092982-3214-01 Engine View Diagrams & Manuals
092982-3214-02 Engine View Diagrams & Manuals
092982-3214-03 Engine View Diagrams & Manuals
092982-3214-04 Engine View Diagrams & Manuals
092982-3214-05 Engine View Diagrams & Manuals
092982-3217-01 Engine View Diagrams & Manuals
092982-3220-01 Engine View Diagrams & Manuals
092982-3220-02 Engine View Diagrams & Manuals
092982-3220-03 Engine View Diagrams & Manuals
092982-3224-01 Engine View Diagrams & Manuals
092982-3224-02 Engine View Diagrams & Manuals
092982-3228-01 Engine View Diagrams & Manuals
092982-3229-01 Engine View Diagrams & Manuals
092982-3231-01 Engine View Diagrams & Manuals
092982-3233-01 Engine View Diagrams & Manuals
092982-3234-01 Engine View Diagrams & Manuals
092982-3240-01 Engine View Diagrams & Manuals
092982-3246-01 Engine View Diagrams & Manuals
092982-3250-01 Engine View Diagrams & Manuals
092982-3256-01 Engine View Diagrams & Manuals
092982-3266-01 Engine View Diagrams & Manuals
092982-3280-01 Engine View Diagrams & Manuals
092982-3285-01 Engine View Diagrams & Manuals
092982-3287-01 Engine View Diagrams & Manuals
092982-3289-01 Engine View Diagrams & Manuals
092982-3290-01 Engine View Diagrams & Manuals
092982-3293-01 Engine View Diagrams & Manuals
092982-3294-01 Engine View Diagrams & Manuals
092982-3314-01 Engine View Diagrams & Manuals
092982-3913-01 Engine View Diagrams & Manuals
092982-5050-01 Engine View Diagrams & Manuals
092982-5051-01 Engine View Diagrams & Manuals
092982-5125-99 Engine View Diagrams & Manuals
092982-5126-99 Engine View Diagrams & Manuals
092982-5127-99 Engine View Diagrams & Manuals
092982-5129-01 Engine View Diagrams & Manuals
092982-5130-99 Engine View Diagrams & Manuals
092982-5148-99 Engine View Diagrams & Manuals
092982-5170-99 Engine View Diagrams & Manuals
092982-5180-99 Engine View Diagrams & Manuals
092982-5182-99 Engine View Diagrams & Manuals
092982-5183-99 Engine View Diagrams & Manuals
092982-5197-01 Engine View Diagrams & Manuals
092982-5225-01 Engine View Diagrams & Manuals
092982-5233-01 Engine View Diagrams & Manuals
092982-5235-01 Engine View Diagrams & Manuals
092982-5246-01 Engine View Diagrams & Manuals
092982-5247-01 Engine View Diagrams & Manuals
092982-5256-01 Engine View Diagrams & Manuals
092982-5303-01 Engine View Diagrams & Manuals
092982-5305-01 Engine View Diagrams & Manuals
092982-5306-01 Engine View Diagrams & Manuals
092982-5307-01 Engine View Diagrams & Manuals
092982-5315-01 Engine View Diagrams & Manuals
092982-5333-01 Engine View Diagrams & Manuals
092982-5354-01 Engine View Diagrams & Manuals
092982-5357-01 Engine View Diagrams & Manuals
092982-5365-01 Engine View Diagrams & Manuals
092982-5368-01 Engine View Diagrams & Manuals
092982-5368-02 Engine View Diagrams & Manuals
092982-5380-01 Engine View Diagrams & Manuals
092985-0629-99 Engine View Diagrams & Manuals
092985-0630-99 Engine View Diagrams & Manuals
092985-0631-99 Engine View Diagrams & Manuals
092985-0632-99 Engine View Diagrams & Manuals
092985-0659-99 Engine View Diagrams & Manuals
092985-0698-99 Engine View Diagrams & Manuals
092985-0748-99 Engine View Diagrams & Manuals
092985-0799-99 Engine View Diagrams & Manuals
092985-0835-99 Engine View Diagrams & Manuals
092985-0896-99 Engine View Diagrams & Manuals
092985-0958-99 Engine View Diagrams & Manuals
092985-0993-99 Engine View Diagrams & Manuals
092985-1010-99 Engine View Diagrams & Manuals
092985-1022-99 Engine View Diagrams & Manuals
092985-1031-99 Engine View Diagrams & Manuals
092985-1038-99 Engine View Diagrams & Manuals
092985-1047-99 Engine View Diagrams & Manuals
092985-1067-99 Engine View Diagrams & Manuals
092985-1071-99 Engine View Diagrams & Manuals
092985-1109-99 Engine View Diagrams & Manuals
092985-1111-99 Engine View Diagrams & Manuals
092985-1128-99 Engine View Diagrams & Manuals
092985-1132-99 Engine View Diagrams & Manuals
092985-1141-99 Engine View Diagrams & Manuals
092985-1157-99 Engine View Diagrams & Manuals
092985-1159-99 Engine View Diagrams & Manuals
092985-1168-99 Engine View Diagrams & Manuals
092985-1191-99 Engine View Diagrams & Manuals
092985-1197-99 Engine View Diagrams & Manuals
092985-1236-99 Engine View Diagrams & Manuals
092985-1247-99 Engine View Diagrams & Manuals
092985-1260-99 Engine View Diagrams & Manuals
092985-1275-99 Engine View Diagrams & Manuals
092985-1294-99 Engine View Diagrams & Manuals
092985-1300-99 Engine View Diagrams & Manuals
092985-1308-99 Engine View Diagrams & Manuals
092985-1321-99 Engine View Diagrams & Manuals
092985-1326-99 Engine View Diagrams & Manuals
092985-1354-99 Engine View Diagrams & Manuals
092985-1362-99 Engine View Diagrams & Manuals
092985-1368-99 Engine View Diagrams & Manuals
092985-1372-99 Engine View Diagrams & Manuals
092985-1428-99 Engine View Diagrams & Manuals
092985-1486-99 Engine View Diagrams & Manuals
092985-1501-99 Engine View Diagrams & Manuals
092985-1512-99 Engine View Diagrams & Manuals
092985-1548-99 Engine View Diagrams & Manuals
092985-1591-99 Engine View Diagrams & Manuals
092985-1754-99 Engine View Diagrams & Manuals
092985-1798-99 Engine View Diagrams & Manuals
092985-1840-99 Engine View Diagrams & Manuals
092985-1990-99 Engine View Diagrams & Manuals
092985-2006-99 Engine View Diagrams & Manuals
092985-2095-99 Engine View Diagrams & Manuals
092986-0060-99 Engine View Diagrams & Manuals
092986-0131-99 Engine View Diagrams & Manuals
092986-0177-99 Engine View Diagrams & Manuals
092986-0214-99 Engine View Diagrams & Manuals
092986-0243-99 Engine View Diagrams & Manuals
092986-0251-99 Engine View Diagrams & Manuals
092986-0316-99 Engine View Diagrams & Manuals
092986-0320-99 Engine View Diagrams & Manuals
092986-0345-99 Engine View Diagrams & Manuals
092986-0414-99 Engine View Diagrams & Manuals
092986-0418-99 Engine View Diagrams & Manuals
092986-0434-99 Engine View Diagrams & Manuals
092986-0560-99 Engine View Diagrams & Manuals
092986-0633-99 Engine View Diagrams & Manuals
092986-0634-99 Engine View Diagrams & Manuals
092986-0635-99 Engine View Diagrams & Manuals
092986-0636-99 Engine View Diagrams & Manuals
092986-0660-99 Engine View Diagrams & Manuals
092986-0809-99 Engine View Diagrams & Manuals
092986-0911-99 Engine View Diagrams & Manuals
092987-3065-01 Engine View Diagrams & Manuals
092987-3088-01 Engine View Diagrams & Manuals
092987-3108-01 Engine View Diagrams & Manuals
092987-3110-01 Engine View Diagrams & Manuals
092987-3118-01 Engine View Diagrams & Manuals
092987-3119-01 Engine View Diagrams & Manuals
092987-3139-01 Engine View Diagrams & Manuals
092987-3141-01 Engine View Diagrams & Manuals
092987-3154-01 Engine View Diagrams & Manuals
092987-3166-01 Engine View Diagrams & Manuals
092987-3263-01 Engine View Diagrams & Manuals
092987-3268-01 Engine View Diagrams & Manuals
092987-5088-01 Engine View Diagrams & Manuals
092987-5133-01 Engine View Diagrams & Manuals
092987-5325-01 Engine View Diagrams & Manuals
092987-5334-01 Engine View Diagrams & Manuals
092987-5350-01 Engine View Diagrams & Manuals
092988-0565-99 Engine View Diagrams & Manuals
092988-0566-99 Engine View Diagrams & Manuals
092988-0567-99 Engine View Diagrams & Manuals
092988-0582-99 Engine View Diagrams & Manuals
092988-0637-99 Engine View Diagrams & Manuals
092988-0638-99 Engine View Diagrams & Manuals
092988-0639-99 Engine View Diagrams & Manuals
092988-0640-99 Engine View Diagrams & Manuals
092988-0661-99 Engine View Diagrams & Manuals
092988-0701-99 Engine View Diagrams & Manuals
092988-0721-99 Engine View Diagrams & Manuals
092988-0734-99 Engine View Diagrams & Manuals
092988-0742-99 Engine View Diagrams & Manuals
092988-0759-99 Engine View Diagrams & Manuals
092988-0808-99 Engine View Diagrams & Manuals
092988-0810-99 Engine View Diagrams & Manuals
092988-0862-99 Engine View Diagrams & Manuals
092988-0874-99 Engine View Diagrams & Manuals
092988-0924-99 Engine View Diagrams & Manuals
092988-0925-99 Engine View Diagrams & Manuals
092988-0927-99 Engine View Diagrams & Manuals
092988-0959-99 Engine View Diagrams & Manuals
092988-0960-99 Engine View Diagrams & Manuals
092988-0985-99 Engine View Diagrams & Manuals
092988-0994-99 Engine View Diagrams & Manuals
092988-1011-99 Engine View Diagrams & Manuals
092988-1015-99 Engine View Diagrams & Manuals
092988-1023-99 Engine View Diagrams & Manuals
092988-1032-99 Engine View Diagrams & Manuals
092988-1039-99 Engine View Diagrams & Manuals
092988-1048-99 Engine View Diagrams & Manuals
092988-1060-99 Engine View Diagrams & Manuals
092988-1068-99 Engine View Diagrams & Manuals
092988-1089-99 Engine View Diagrams & Manuals
092988-1095-99 Engine View Diagrams & Manuals
092988-1098-99 Engine View Diagrams & Manuals
092988-1110-99 Engine View Diagrams & Manuals
092988-1123-99 Engine View Diagrams & Manuals
092988-1127-99 Engine View Diagrams & Manuals
092988-1131-99 Engine View Diagrams & Manuals
092988-1133-99 Engine View Diagrams & Manuals
092988-1134-99 Engine View Diagrams & Manuals
092988-1137-99 Engine View Diagrams & Manuals
092988-1153-99 Engine View Diagrams & Manuals
092988-1158-99 Engine View Diagrams & Manuals
092988-1160-99 Engine View Diagrams & Manuals
092988-1169-99 Engine View Diagrams & Manuals
092988-1172-99 Engine View Diagrams & Manuals
092988-1192-99 Engine View Diagrams & Manuals
092988-1198-99 Engine View Diagrams & Manuals
092988-1200-99 Engine View Diagrams & Manuals
092988-1202-99 Engine View Diagrams & Manuals
092988-1214-99 Engine View Diagrams & Manuals
092988-1237-99 Engine View Diagrams & Manuals
092988-1239-99 Engine View Diagrams & Manuals
092988-1243-99 Engine View Diagrams & Manuals
092988-1248-99 Engine View Diagrams & Manuals
092988-1250-99 Engine View Diagrams & Manuals
092988-1269-99 Engine View Diagrams & Manuals
092988-1270-99 Engine View Diagrams & Manuals
092988-1299-99 Engine View Diagrams & Manuals
092988-1304-99 Engine View Diagrams & Manuals
092988-1307-99 Engine View Diagrams & Manuals
092988-1320-99 Engine View Diagrams & Manuals
092988-1322-99 Engine View Diagrams & Manuals
092988-1325-99 Engine View Diagrams & Manuals
092988-1331-99 Engine View Diagrams & Manuals
092988-1353-99 Engine View Diagrams & Manuals
092988-1361-99 Engine View Diagrams & Manuals
092988-1367-99 Engine View Diagrams & Manuals
092988-1373-99 Engine View Diagrams & Manuals
092988-1377-99 Engine View Diagrams & Manuals
092988-1379-99 Engine View Diagrams & Manuals
092988-1395-99 Engine View Diagrams & Manuals
092988-1400-99 Engine View Diagrams & Manuals
092988-1402-99 Engine View Diagrams & Manuals
092988-1412-99 Engine View Diagrams & Manuals
092988-1429-99 Engine View Diagrams & Manuals
092988-1443-99 Engine View Diagrams & Manuals
092988-1449-99 Engine View Diagrams & Manuals
092988-1451-99 Engine View Diagrams & Manuals
092988-1455-99 Engine View Diagrams & Manuals
092988-1464-99 Engine View Diagrams & Manuals
092988-1473-99 Engine View Diagrams & Manuals
092988-1483-99 Engine View Diagrams & Manuals
092988-1487-99 Engine View Diagrams & Manuals
092988-1494-99 Engine View Diagrams & Manuals
092988-1495-99 Engine View Diagrams & Manuals
092988-1504-99 Engine View Diagrams & Manuals
092988-1510-99 Engine View Diagrams & Manuals
092988-1546-99 Engine View Diagrams & Manuals
092988-1547-99 Engine View Diagrams & Manuals
092988-1549-99 Engine View Diagrams & Manuals
092988-1554-99 Engine View Diagrams & Manuals
092988-1564-99 Engine View Diagrams & Manuals
092988-1569-99 Engine View Diagrams & Manuals
092988-1572-99 Engine View Diagrams & Manuals
092988-1575-99 Engine View Diagrams & Manuals
092988-1585-99 Engine View Diagrams & Manuals
092988-1593-99 Engine View Diagrams & Manuals
092988-1595-99 Engine View Diagrams & Manuals
092988-1600-99 Engine View Diagrams & Manuals
092988-1602-99 Engine View Diagrams & Manuals
092988-1604-99 Engine View Diagrams & Manuals
092988-1610-99 Engine View Diagrams & Manuals
092988-1624-99 Engine View Diagrams & Manuals
092988-1652-99 Engine View Diagrams & Manuals
092988-1657-99 Engine View Diagrams & Manuals
092988-1658-99 Engine View Diagrams & Manuals
092988-1660-99 Engine View Diagrams & Manuals
092988-1664-99 Engine View Diagrams & Manuals
092988-1668-99 Engine View Diagrams & Manuals
092988-1678-99 Engine View Diagrams & Manuals
092988-1690-99 Engine View Diagrams & Manuals
092988-1706-99 Engine View Diagrams & Manuals
092988-1720-99 Engine View Diagrams & Manuals
092988-1721-99 Engine View Diagrams & Manuals
092988-1725-99 Engine View Diagrams & Manuals
092988-1726-99 Engine View Diagrams & Manuals
092988-1732-99 Engine View Diagrams & Manuals
092988-1738-99 Engine View Diagrams & Manuals
092988-1741-99 Engine View Diagrams & Manuals
092988-1753-99 Engine View Diagrams & Manuals
092988-1758-99 Engine View Diagrams & Manuals
092988-1764-99 Engine View Diagrams & Manuals
092988-1766-99 Engine View Diagrams & Manuals
092988-1809-99 Engine View Diagrams & Manuals
092988-1815-99 Engine View Diagrams & Manuals
092988-1822-99 Engine View Diagrams & Manuals
092988-1828-99 Engine View Diagrams & Manuals
092988-1855-99 Engine View Diagrams & Manuals
092988-1907-99 Engine View Diagrams & Manuals
092988-1917-99 Engine View Diagrams & Manuals
092988-1940-99 Engine View Diagrams & Manuals
092988-1950-99 Engine View Diagrams & Manuals
092988-1952-99 Engine View Diagrams & Manuals
092988-1953-99 Engine View Diagrams & Manuals
092988-1971-99 Engine View Diagrams & Manuals
092988-1985-99 Engine View Diagrams & Manuals
092988-2001-99 Engine View Diagrams & Manuals
092988-2007-99 Engine View Diagrams & Manuals
092988-2023-99 Engine View Diagrams & Manuals
092988-2049-99 Engine View Diagrams & Manuals
092988-2068-99 Engine View Diagrams & Manuals
092988-2069-99 Engine View Diagrams & Manuals
092988-2073-99 Engine View Diagrams & Manuals
092988-2103-99 Engine View Diagrams & Manuals
092988-2107-99 Engine View Diagrams & Manuals
092988-2127-99 Engine View Diagrams & Manuals
092988-2144-99 Engine View Diagrams & Manuals
092988-2152-99 Engine View Diagrams & Manuals
092988-2154-99 Engine View Diagrams & Manuals
092988-2156-99 Engine View Diagrams & Manuals
092988-2166-99 Engine View Diagrams & Manuals
092988-2186-99 Engine View Diagrams & Manuals
092988-2192-99 Engine View Diagrams & Manuals
092988-2197-99 Engine View Diagrams & Manuals
092988-2203-99 Engine View Diagrams & Manuals
092988-3215-01 Engine View Diagrams & Manuals
092988-5006-01 Engine View Diagrams & Manuals
092988-5008-01 Engine View Diagrams & Manuals
092988-5065-01 Engine View Diagrams & Manuals
092988-5066-01 Engine View Diagrams & Manuals
092988-5154-01 Engine View Diagrams & Manuals
092988-5156-01 Engine View Diagrams & Manuals
092988-5204-01 Engine View Diagrams & Manuals
092988-5217-01 Engine View Diagrams & Manuals
092988-5236-01 Engine View Diagrams & Manuals
092988-5242-01 Engine View Diagrams & Manuals
092988-5257-01 Engine View Diagrams & Manuals
092988-5258-01 Engine View Diagrams & Manuals
092988-5262-01 Engine View Diagrams & Manuals
092988-5276-01 Engine View Diagrams & Manuals
092988-5295-01 Engine View Diagrams & Manuals
092988-5296-01 Engine View Diagrams & Manuals
092988-5299-01 Engine View Diagrams & Manuals
092988-5304-01 Engine View Diagrams & Manuals
092988-5311-01 Engine View Diagrams & Manuals
092988-5311-02 Engine View Diagrams & Manuals
092988-5321-01 Engine View Diagrams & Manuals
092988-5324-01 Engine View Diagrams & Manuals
092988-5336-01 Engine View Diagrams & Manuals
092988-5361-01 Engine View Diagrams & Manuals
093502-0101-99 Engine View Diagrams & Manuals
093502-0151-99 Engine View Diagrams & Manuals
093502-0152-99 Engine View Diagrams & Manuals
093502-0163-99 Engine View Diagrams & Manuals
093502-0166-99 Engine View Diagrams & Manuals
093502-0167-99 Engine View Diagrams & Manuals
093502-0168-99 Engine View Diagrams & Manuals
093502-0170-99 Engine View Diagrams & Manuals
093502-0171-99 Engine View Diagrams & Manuals
093502-0172-99 Engine View Diagrams & Manuals
093502-0173-99 Engine View Diagrams & Manuals
093502-0174-99 Engine View Diagrams & Manuals
093502-0175-99 Engine View Diagrams & Manuals
093502-0184-99 Engine View Diagrams & Manuals
093502-0185-99 Engine View Diagrams & Manuals
093502-0187-99 Engine View Diagrams & Manuals
093502-0188-99 Engine View Diagrams & Manuals
093502-0199-99 Engine View Diagrams & Manuals
093502-0200-99 Engine View Diagrams & Manuals
093502-0201-99 Engine View Diagrams & Manuals
093502-0203-99 Engine View Diagrams & Manuals
093502-0212-99 Engine View Diagrams & Manuals
093502-0213-99 Engine View Diagrams & Manuals
093502-0228-99 Engine View Diagrams & Manuals
093502-0229-99 Engine View Diagrams & Manuals
093502-0235-99 Engine View Diagrams & Manuals
093502-0238-99 Engine View Diagrams & Manuals
093502-0239-99 Engine View Diagrams & Manuals
093502-0240-99 Engine View Diagrams & Manuals
093502-0241-99 Engine View Diagrams & Manuals
093502-0242-99 Engine View Diagrams & Manuals
093502-0247-99 Engine View Diagrams & Manuals
093502-0248-99 Engine View Diagrams & Manuals
093502-0250-99 Engine View Diagrams & Manuals
093502-0251-99 Engine View Diagrams & Manuals
093502-0255-99 Engine View Diagrams & Manuals
093502-0256-99 Engine View Diagrams & Manuals
093502-0261-99 Engine View Diagrams & Manuals
093502-0272-99 Engine View Diagrams & Manuals
093502-0273-99 Engine View Diagrams & Manuals
093502-0277-99 Engine View Diagrams & Manuals
093502-0278-99 Engine View Diagrams & Manuals
093502-0281-99 Engine View Diagrams & Manuals
093502-0283-99 Engine View Diagrams & Manuals
093502-0284-99 Engine View Diagrams & Manuals
093502-0288-99 Engine View Diagrams & Manuals
093502-0293-99 Engine View Diagrams & Manuals
093502-0294-99 Engine View Diagrams & Manuals
093502-0296-99 Engine View Diagrams & Manuals
093502-0300-99 Engine View Diagrams & Manuals
093502-0301-99 Engine View Diagrams & Manuals
093502-0302-99 Engine View Diagrams & Manuals
093502-0304-99 Engine View Diagrams & Manuals
093502-0311-99 Engine View Diagrams & Manuals
093502-0312-99 Engine View Diagrams & Manuals
093502-0313-99 Engine View Diagrams & Manuals
093502-0318-99 Engine View Diagrams & Manuals
093502-0326-99 Engine View Diagrams & Manuals
093502-0330-99 Engine View Diagrams & Manuals
093502-0331-99 Engine View Diagrams & Manuals
093502-0332-99 Engine View Diagrams & Manuals
093502-0333-99 Engine View Diagrams & Manuals
093502-0334-99 Engine View Diagrams & Manuals
093502-0335-99 Engine View Diagrams & Manuals
093502-0338-99 Engine View Diagrams & Manuals
093502-0339-99 Engine View Diagrams & Manuals
093502-0341-99 Engine View Diagrams & Manuals
093502-0343-99 Engine View Diagrams & Manuals
093502-0345-99 Engine View Diagrams & Manuals
093502-0353-99 Engine View Diagrams & Manuals
093502-0356-99 Engine View Diagrams & Manuals
093502-0359-99 Engine View Diagrams & Manuals
093502-0360-99 Engine View Diagrams & Manuals
093502-0362-99 Engine View Diagrams & Manuals
093502-0367-99 Engine View Diagrams & Manuals
093502-0369-99 Engine View Diagrams & Manuals
093502-0373-99 Engine View Diagrams & Manuals
093502-0375-99 Engine View Diagrams & Manuals
093502-0376-99 Engine View Diagrams & Manuals
093502-0378-99 Engine View Diagrams & Manuals
093502-0379-99 Engine View Diagrams & Manuals
093502-0381-99 Engine View Diagrams & Manuals
093502-0382-99 Engine View Diagrams & Manuals
093502-0383-99 Engine View Diagrams & Manuals
093502-0394-99 Engine View Diagrams & Manuals
093502-0396-99 Engine View Diagrams & Manuals
093502-0400-99 Engine View Diagrams & Manuals
093502-0401-99 Engine View Diagrams & Manuals
093502-0402-99 Engine View Diagrams & Manuals
093502-0404-99 Engine View Diagrams & Manuals
093502-0407-99 Engine View Diagrams & Manuals
093502-0410-99 Engine View Diagrams & Manuals
093502-0411-99 Engine View Diagrams & Manuals
093502-0413-99 Engine View Diagrams & Manuals
093502-0414-99 Engine View Diagrams & Manuals
093502-0417-99 Engine View Diagrams & Manuals
093502-0420-99 Engine View Diagrams & Manuals
093502-0424-99 Engine View Diagrams & Manuals
093502-0515-99 Engine View Diagrams & Manuals
093502-0516-99 Engine View Diagrams & Manuals
093502-0517-99 Engine View Diagrams & Manuals
093502-0519-99 Engine View Diagrams & Manuals
093502-0521-99 Engine View Diagrams & Manuals
093502-0523-99 Engine View Diagrams & Manuals
093502-0524-99 Engine View Diagrams & Manuals
093502-0526-99 Engine View Diagrams & Manuals
093502-0528-99 Engine View Diagrams & Manuals
093502-0529-99 Engine View Diagrams & Manuals
093502-0536-99 Engine View Diagrams & Manuals
093502-5112-99 Engine View Diagrams & Manuals
093502-5113-99 Engine View Diagrams & Manuals
093502-5114-99 Engine View Diagrams & Manuals
093502-5139-99 Engine View Diagrams & Manuals
093502-5140-99 Engine View Diagrams & Manuals
093502-5146-99 Engine View Diagrams & Manuals
093502-5151-99 Engine View Diagrams & Manuals
093502-5152-99 Engine View Diagrams & Manuals
093502-5170-99 Engine View Diagrams & Manuals
093502-5171-99 Engine View Diagrams & Manuals
093502-5215-99 Engine View Diagrams & Manuals
093502-5216-99 Engine View Diagrams & Manuals
093502-5217-99 Engine View Diagrams & Manuals
093502-5218-99 Engine View Diagrams & Manuals
0935020-5167-99 Engine View Diagrams & Manuals
093505-0204-99 Engine View Diagrams & Manuals
093505-0262-99 Engine View Diagrams & Manuals
093505-0352-99 Engine View Diagrams & Manuals
093505-0391-99 Engine View Diagrams & Manuals
093507-5107-99 Engine View Diagrams & Manuals
093507-5132-99 Engine View Diagrams & Manuals
093507-5133-99 Engine View Diagrams & Manuals
093507-5134-99 Engine View Diagrams & Manuals
093507-5135-99 Engine View Diagrams & Manuals
093507-5142-99 Engine View Diagrams & Manuals
093507-5143-99 Engine View Diagrams & Manuals
093507-5145-99 Engine View Diagrams & Manuals
093507-5147-99 Engine View Diagrams & Manuals
093507-5148-99 Engine View Diagrams & Manuals
093507-5155-99 Engine View Diagrams & Manuals
093507-5156-99 Engine View Diagrams & Manuals
093507-5158-99 Engine View Diagrams & Manuals
093507-5159-99 Engine View Diagrams & Manuals
093507-5161-99 Engine View Diagrams & Manuals
093507-5162-99 Engine View Diagrams & Manuals
093507-5164-99 Engine View Diagrams & Manuals
093507-5165-99 Engine View Diagrams & Manuals
093507-5166-99 Engine View Diagrams & Manuals
093507-5167-99 Engine View Diagrams & Manuals
093507-5168-99 Engine View Diagrams & Manuals
093507-5180-99 Engine View Diagrams & Manuals
093507-5182-99 Engine View Diagrams & Manuals
093507-5183-99 Engine View Diagrams & Manuals
093507-5184-99 Engine View Diagrams & Manuals
093507-5185-99 Engine View Diagrams & Manuals
093507-5186-99 Engine View Diagrams & Manuals
093507-5187-99 Engine View Diagrams & Manuals
093507-5188-99 Engine View Diagrams & Manuals
093507-5189-99 Engine View Diagrams & Manuals
093507-5190-99 Engine View Diagrams & Manuals
093507-5191-99 Engine View Diagrams & Manuals
093507-5192-99 Engine View Diagrams & Manuals
093507-5193-99 Engine View Diagrams & Manuals
093507-5194-99 Engine View Diagrams & Manuals
093507-5196-99 Engine View Diagrams & Manuals
093507-5197-99 Engine View Diagrams & Manuals
093507-5198-99 Engine View Diagrams & Manuals
093507-5199-99 Engine View Diagrams & Manuals
093507-5200-99 Engine View Diagrams & Manuals
093507-5202-99 Engine View Diagrams & Manuals
093507-5203-99 Engine View Diagrams & Manuals
093507-5207-99 Engine View Diagrams & Manuals
093507-5210-99 Engine View Diagrams & Manuals
093507-5211-99 Engine View Diagrams & Manuals
093507-5212-99 Engine View Diagrams & Manuals
093507-5213-99 Engine View Diagrams & Manuals
093508-0153-99 Engine View Diagrams & Manuals
093508-0158-99 Engine View Diagrams & Manuals
093508-0159-99 Engine View Diagrams & Manuals
093508-0160-99 Engine View Diagrams & Manuals
093508-0164-99 Engine View Diagrams & Manuals
093508-0165-99 Engine View Diagrams & Manuals
093508-0169-99 Engine View Diagrams & Manuals
093508-0176-99 Engine View Diagrams & Manuals
093508-0177-99 Engine View Diagrams & Manuals
093508-0182-99 Engine View Diagrams & Manuals
093508-0189-99 Engine View Diagrams & Manuals
093508-0190-99 Engine View Diagrams & Manuals
093508-0191-99 Engine View Diagrams & Manuals
093508-0192-99 Engine View Diagrams & Manuals
093508-0193-99 Engine View Diagrams & Manuals
093508-0194-99 Engine View Diagrams & Manuals
093508-0195-99 Engine View Diagrams & Manuals
093508-0196-99 Engine View Diagrams & Manuals
093508-0197-99 Engine View Diagrams & Manuals
093508-0198-99 Engine View Diagrams & Manuals
093508-0202-99 Engine View Diagrams & Manuals
093508-0205-99 Engine View Diagrams & Manuals
093508-0206-99 Engine View Diagrams & Manuals
093508-0207-99 Engine View Diagrams & Manuals
093508-0209-99 Engine View Diagrams & Manuals
093508-0214-99 Engine View Diagrams & Manuals
093508-0215-99 Engine View Diagrams & Manuals
093508-0216-99 Engine View Diagrams & Manuals
093508-0217-99 Engine View Diagrams & Manuals
093508-0218-99 Engine View Diagrams & Manuals
093508-0219-99 Engine View Diagrams & Manuals
093508-0230-99 Engine View Diagrams & Manuals
093508-0231-99 Engine View Diagrams & Manuals
093508-0232-99 Engine View Diagrams & Manuals
093508-0236-99 Engine View Diagrams & Manuals
093508-0237-99 Engine View Diagrams & Manuals
093508-0243-99 Engine View Diagrams & Manuals
093508-0244-99 Engine View Diagrams & Manuals
093508-0249-99 Engine View Diagrams & Manuals
093508-0252-99 Engine View Diagrams & Manuals
093508-0257-99 Engine View Diagrams & Manuals
093508-0258-99 Engine View Diagrams & Manuals
093508-0260-99 Engine View Diagrams & Manuals
093508-0263-99 Engine View Diagrams & Manuals
093508-0264-99 Engine View Diagrams & Manuals
093508-0265-99 Engine View Diagrams & Manuals
093508-0266-99 Engine View Diagrams & Manuals
093508-0267-99 Engine View Diagrams & Manuals
093508-0268-99 Engine View Diagrams & Manuals
093508-0269-99 Engine View Diagrams & Manuals
093508-0274-99 Engine View Diagrams & Manuals
093508-0275-99 Engine View Diagrams & Manuals
093508-0279-99 Engine View Diagrams & Manuals
093508-0282-99 Engine View Diagrams & Manuals
093508-0285-99 Engine View Diagrams & Manuals
093508-0286-99 Engine View Diagrams & Manuals
093508-0287-99 Engine View Diagrams & Manuals
093508-0291-99 Engine View Diagrams & Manuals
093508-0295-99 Engine View Diagrams & Manuals
093508-0297-99 Engine View Diagrams & Manuals
093508-0299-99 Engine View Diagrams & Manuals
093508-0305-99 Engine View Diagrams & Manuals
093508-0308-99 Engine View Diagrams & Manuals
093508-0310-99 Engine View Diagrams & Manuals
093508-0315-99 Engine View Diagrams & Manuals
093508-0319-99 Engine View Diagrams & Manuals
093508-0321-99 Engine View Diagrams & Manuals
093508-0322-99 Engine View Diagrams & Manuals
093508-0323-99 Engine View Diagrams & Manuals
093508-0324-99 Engine View Diagrams & Manuals
093508-0325-99 Engine View Diagrams & Manuals
093508-0328-99 Engine View Diagrams & Manuals
093508-0329-99 Engine View Diagrams & Manuals
093508-0336-99 Engine View Diagrams & Manuals
093508-0340-99 Engine View Diagrams & Manuals
093508-0342-99 Engine View Diagrams & Manuals
093508-0346-99 Engine View Diagrams & Manuals
093508-0348-99 Engine View Diagrams & Manuals
093508-0349-99 Engine View Diagrams & Manuals
093508-0350-99 Engine View Diagrams & Manuals
093508-0351-99 Engine View Diagrams & Manuals
093508-0355-99 Engine View Diagrams & Manuals
093508-0363-99 Engine View Diagrams & Manuals
093508-0365-99 Engine View Diagrams & Manuals
093508-0366-99 Engine View Diagrams & Manuals
093508-0368-99 Engine View Diagrams & Manuals
093508-0371-99 Engine View Diagrams & Manuals
093508-0372-99 Engine View Diagrams & Manuals
093508-0374-99 Engine View Diagrams & Manuals
093508-0377-99 Engine View Diagrams & Manuals
093508-0384-99 Engine View Diagrams & Manuals
093508-0385-99 Engine View Diagrams & Manuals
093508-0386-99 Engine View Diagrams & Manuals
093508-0389-99 Engine View Diagrams & Manuals
093508-0390-99 Engine View Diagrams & Manuals
093508-0392-99 Engine View Diagrams & Manuals
093508-0395-99 Engine View Diagrams & Manuals
093508-0397-99 Engine View Diagrams & Manuals
093508-0399-99 Engine View Diagrams & Manuals
093508-0403-99 Engine View Diagrams & Manuals
093508-0405-99 Engine View Diagrams & Manuals
093508-0408-99 Engine View Diagrams & Manuals
093508-0409-99 Engine View Diagrams & Manuals
093508-0412-99 Engine View Diagrams & Manuals
093508-0415-99 Engine View Diagrams & Manuals
093508-0416-99 Engine View Diagrams & Manuals
093508-0419-99 Engine View Diagrams & Manuals
093508-0421-99 Engine View Diagrams & Manuals
093508-0422-99 Engine View Diagrams & Manuals
093508-0571-99 Engine View Diagrams & Manuals
093508-0572-99 Engine View Diagrams & Manuals
093508-0573-99 Engine View Diagrams & Manuals
093508-0574-99 Engine View Diagrams & Manuals
093508-0575-99 Engine View Diagrams & Manuals
093508-0578-99 Engine View Diagrams & Manuals
093508-0579-99 Engine View Diagrams & Manuals
093508-0580-99 Engine View Diagrams & Manuals
093508-5130-99 Engine View Diagrams & Manuals
093508-5131-99 Engine View Diagrams & Manuals
093508-5136-99 Engine View Diagrams & Manuals
093508-5137-99 Engine View Diagrams & Manuals
093508-5138-99 Engine View Diagrams & Manuals
093508-5144-99 Engine View Diagrams & Manuals
093508-5150-99 Engine View Diagrams & Manuals
093508-5172-99 Engine View Diagrams & Manuals
093508-5173-99 Engine View Diagrams & Manuals
093582-0121-99 Engine View Diagrams & Manuals
093582-0122-99 Engine View Diagrams & Manuals
093582-0154-99 Engine View Diagrams & Manuals
093582-0155-99 Engine View Diagrams & Manuals
093582-0161-99 Engine View Diagrams & Manuals
093582-0178-99 Engine View Diagrams & Manuals
093582-0183-99 Engine View Diagrams & Manuals
093582-0186-99 Engine View Diagrams & Manuals
093582-0208-99 Engine View Diagrams & Manuals
093582-0210-99 Engine View Diagrams & Manuals
093582-0220-99 Engine View Diagrams & Manuals
093582-0221-99 Engine View Diagrams & Manuals
093582-0222-99 Engine View Diagrams & Manuals
093582-0233-99 Engine View Diagrams & Manuals
093582-0245-99 Engine View Diagrams & Manuals
093582-0253-99 Engine View Diagrams & Manuals
093582-0276-99 Engine View Diagrams & Manuals
093582-0298-99 Engine View Diagrams & Manuals
093582-0303-99 Engine View Diagrams & Manuals
093582-0344-99 Engine View Diagrams & Manuals
093582-0354-99 Engine View Diagrams & Manuals
093582-0358-99 Engine View Diagrams & Manuals
093582-0387-99 Engine View Diagrams & Manuals
093582-0406-99 Engine View Diagrams & Manuals
093582-0418-99 Engine View Diagrams & Manuals
093582-0423-99 Engine View Diagrams & Manuals
093582-0550-99 Engine View Diagrams & Manuals
093582-0551-99 Engine View Diagrams & Manuals
093582-5115-99 Engine View Diagrams & Manuals
093582-5116-99 Engine View Diagrams & Manuals
093582-5117-99 Engine View Diagrams & Manuals
093582-5174-99 Engine View Diagrams & Manuals
093582-5175-99 Engine View Diagrams & Manuals
093582-5214-99 Engine View Diagrams & Manuals
093582-5219-99 Engine View Diagrams & Manuals
093582-5220-99 Engine View Diagrams & Manuals
093585-0289-99 Engine View Diagrams & Manuals
093585-0581-99 Engine View Diagrams & Manuals
093587-5108-99 Engine View Diagrams & Manuals
093587-5110-99 Engine View Diagrams & Manuals
093587-5118-99 Engine View Diagrams & Manuals
093587-5119-99 Engine View Diagrams & Manuals
093587-5141-99 Engine View Diagrams & Manuals
093587-5149-99 Engine View Diagrams & Manuals
093587-5153-99 Engine View Diagrams & Manuals
093587-5154-99 Engine View Diagrams & Manuals
093587-5157-99 Engine View Diagrams & Manuals
093587-5160-99 Engine View Diagrams & Manuals
093587-5163-99 Engine View Diagrams & Manuals
093587-5169-99 Engine View Diagrams & Manuals
093587-5179-99 Engine View Diagrams & Manuals
093587-5181-99 Engine View Diagrams & Manuals
093587-5195-99 Engine View Diagrams & Manuals
093587-5201-99 Engine View Diagrams & Manuals
093587-5204-99 Engine View Diagrams & Manuals
093587-5205-99 Engine View Diagrams & Manuals
093587-5206-99 Engine View Diagrams & Manuals
093587-5209-99 Engine View Diagrams & Manuals
093588-0156-99 Engine View Diagrams & Manuals
093588-0157-99 Engine View Diagrams & Manuals
093588-0162-99 Engine View Diagrams & Manuals
093588-0179-99 Engine View Diagrams & Manuals
093588-0180-99 Engine View Diagrams & Manuals
093588-0181-99 Engine View Diagrams & Manuals
093588-0211-99 Engine View Diagrams & Manuals
093588-0223-99 Engine View Diagrams & Manuals
093588-0224-99 Engine View Diagrams & Manuals
093588-0225-99 Engine View Diagrams & Manuals
093588-0226-99 Engine View Diagrams & Manuals
093588-0227-99 Engine View Diagrams & Manuals
093588-0234-99 Engine View Diagrams & Manuals
093588-0246-99 Engine View Diagrams & Manuals
093588-0254-99 Engine View Diagrams & Manuals
093588-0259-99 Engine View Diagrams & Manuals
093588-0270-99 Engine View Diagrams & Manuals
093588-0271-99 Engine View Diagrams & Manuals
093588-0290-99 Engine View Diagrams & Manuals
093588-0292-99 Engine View Diagrams & Manuals
093588-0320-99 Engine View Diagrams & Manuals
093588-0327-99 Engine View Diagrams & Manuals
093588-0347-99 Engine View Diagrams & Manuals
093588-0357-99 Engine View Diagrams & Manuals
093588-0361-99 Engine View Diagrams & Manuals
093588-0364-99 Engine View Diagrams & Manuals
093588-0370-99 Engine View Diagrams & Manuals
093588-0380-99 Engine View Diagrams & Manuals
093588-0388-99 Engine View Diagrams & Manuals
093588-0393-99 Engine View Diagrams & Manuals
093588-0398-99 Engine View Diagrams & Manuals
093588-0565-99 Engine View Diagrams & Manuals
093588-0566-99 Engine View Diagrams & Manuals
093588-0808-99 Engine View Diagrams & Manuals
093588-5176-99 Engine View Diagrams & Manuals
093588-5177-99 Engine View Diagrams & Manuals
093592-0542-99 Engine View Diagrams & Manuals
093592-0543-99 Engine View Diagrams & Manuals
093598-0280-99 Engine View Diagrams & Manuals
093598-0545-99 Engine View Diagrams & Manuals
093902-0100-01 Engine View Diagrams & Manuals
093902-0101-01 Engine View Diagrams & Manuals
093902-0115-01 Engine View Diagrams & Manuals
093902-0115-02 Engine View Diagrams & Manuals
093902-0116-01 Engine View Diagrams & Manuals
093902-0116-02 Engine View Diagrams & Manuals
093902-0117-01 Engine View Diagrams & Manuals
093902-0118-01 Engine View Diagrams & Manuals
093902-0119-01 Engine View Diagrams & Manuals
093902-0119-02 Engine View Diagrams & Manuals
093902-0120-99 Engine View Diagrams & Manuals
093902-0121-01 Engine View Diagrams & Manuals
093902-0121-02 Engine View Diagrams & Manuals
093902-0121-03 Engine View Diagrams & Manuals
093902-0122-01 Engine View Diagrams & Manuals
093902-0122-02 Engine View Diagrams & Manuals
093902-0122-03 Engine View Diagrams & Manuals
093902-0123-01 Engine View Diagrams & Manuals
093902-0124-01 Engine View Diagrams & Manuals
093902-0125-01 Engine View Diagrams & Manuals
093902-0126-01 Engine View Diagrams & Manuals
093902-0127-01 Engine View Diagrams & Manuals
093902-0127-02 Engine View Diagrams & Manuals
093902-0128-01 Engine View Diagrams & Manuals
093902-0129-01 Engine View Diagrams & Manuals
093902-0130-01 Engine View Diagrams & Manuals
093902-0131-01 Engine View Diagrams & Manuals
093902-0133-01 Engine View Diagrams & Manuals
093902-0134-01 Engine View Diagrams & Manuals
093902-0135-01 Engine View Diagrams & Manuals
093902-0136-01 Engine View Diagrams & Manuals
093902-0137-01 Engine View Diagrams & Manuals
093902-0137-02 Engine View Diagrams & Manuals
093902-0138-01 Engine View Diagrams & Manuals
093902-0139-01 Engine View Diagrams & Manuals
093902-0140-01 Engine View Diagrams & Manuals
093902-0142-01 Engine View Diagrams & Manuals
093902-0143-01 Engine View Diagrams & Manuals
093902-0144-01 Engine View Diagrams & Manuals
093902-0145-01 Engine View Diagrams & Manuals
093902-0146-01 Engine View Diagrams & Manuals
093902-0147-01 Engine View Diagrams & Manuals
093902-0148-01 Engine View Diagrams & Manuals
093902-0149-01 Engine View Diagrams & Manuals
093902-0152-01 Engine View Diagrams & Manuals
093902-0154-01 Engine View Diagrams & Manuals
093902-0155-01 Engine View Diagrams & Manuals
093902-0157-01 Engine View Diagrams & Manuals
093902-0158-01 Engine View Diagrams & Manuals
093902-0159-01 Engine View Diagrams & Manuals
093902-0160-01 Engine View Diagrams & Manuals
093902-0200-01 Engine View Diagrams & Manuals
093902-0201-01 Engine View Diagrams & Manuals
093902-0201-99 Engine View Diagrams & Manuals
093902-0215-01 Engine View Diagrams & Manuals
093902-0216-01 Engine View Diagrams & Manuals
093902-0217-01 Engine View Diagrams & Manuals
093902-0223-01 Engine View Diagrams & Manuals
093902-0224-01 Engine View Diagrams & Manuals
093902-0225-01 Engine View Diagrams & Manuals
093902-0226-01 Engine View Diagrams & Manuals
093902-0229-01 Engine View Diagrams & Manuals
093902-0230-01 Engine View Diagrams & Manuals
093902-0232-01 Engine View Diagrams & Manuals
093902-0601-01 Engine View Diagrams & Manuals
093902-0611-01 Engine View Diagrams & Manuals
093902-0612-01 Engine View Diagrams & Manuals
093902-3100-01 Engine View Diagrams & Manuals
093902-3101-01 Engine View Diagrams & Manuals
093902-3111-01 Engine View Diagrams & Manuals
093902-3112-01 Engine View Diagrams & Manuals
093902-3113-01 Engine View Diagrams & Manuals
093902-3114-01 Engine View Diagrams & Manuals
093902-3116-01 Engine View Diagrams & Manuals
093902-3117-01 Engine View Diagrams & Manuals
093902-3119-01 Engine View Diagrams & Manuals
093902-3120-01 Engine View Diagrams & Manuals
093902-3121-01 Engine View Diagrams & Manuals
093902-3122-01 Engine View Diagrams & Manuals
093902-3125-01 Engine View Diagrams & Manuals
093902-3127-01 Engine View Diagrams & Manuals
093902-3129-01 Engine View Diagrams & Manuals
093902-3130-01 Engine View Diagrams & Manuals
093902-3131-01 Engine View Diagrams & Manuals
093902-3133-01 Engine View Diagrams & Manuals
093902-3134-01 Engine View Diagrams & Manuals
093902-3135-01 Engine View Diagrams & Manuals
093902-3136-01 Engine View Diagrams & Manuals
093902-3137-01 Engine View Diagrams & Manuals
093902-3177-01 Engine View Diagrams & Manuals
093902-3201-01 Engine View Diagrams & Manuals
093902-3601-01 Engine View Diagrams & Manuals
093902-3610-01 Engine View Diagrams & Manuals
093902-3611-01 Engine View Diagrams & Manuals
093902-3612-01 Engine View Diagrams & Manuals
093902-3613-01 Engine View Diagrams & Manuals
093902-3615-01 Engine View Diagrams & Manuals
093902-4001-01 Engine View Diagrams & Manuals
093902-4002-01 Engine View Diagrams & Manuals
093902-4004-01 Engine View Diagrams & Manuals
093902-4005-01 Engine View Diagrams & Manuals
093902-5501-01 Engine View Diagrams & Manuals
093902-5501-99 Engine View Diagrams & Manuals
093902-5505-01 Engine View Diagrams & Manuals
093902-5505-99 Engine View Diagrams & Manuals
093902-7001-01 Engine View Diagrams & Manuals
093906-0150-01 Engine View Diagrams & Manuals
093982-0120-01 Engine View Diagrams & Manuals
093982-0231-01 Engine View Diagrams & Manuals
093982-3115-01 Engine View Diagrams & Manuals
093982-3118-01 Engine View Diagrams & Manuals
093982-3123-01 Engine View Diagrams & Manuals
093982-3124-01 Engine View Diagrams & Manuals
093982-3126-01 Engine View Diagrams & Manuals
093982-3128-01 Engine View Diagrams & Manuals
093982-3132-01 Engine View Diagrams & Manuals
093982-3132-02 Engine View Diagrams & Manuals
093982-3178-01 Engine View Diagrams & Manuals
094502-5911-01 Engine View Diagrams & Manuals
094502-5911-02 Engine View Diagrams & Manuals
094502-5911-03 Engine View Diagrams & Manuals
094502-5912-01 Engine View Diagrams & Manuals
094502-5912-02 Engine View Diagrams & Manuals
094502-5912-03 Engine View Diagrams & Manuals
094502-5912-04 Engine View Diagrams & Manuals
094502-5913-01 Engine View Diagrams & Manuals
094502-5913-02 Engine View Diagrams & Manuals
094508-0105-99 Engine View Diagrams & Manuals
094508-0117-99 Engine View Diagrams & Manuals
094508-0150-99 Engine View Diagrams & Manuals
094508-0151-99 Engine View Diagrams & Manuals
094508-0152-99 Engine View Diagrams & Manuals
094508-0153-99 Engine View Diagrams & Manuals
094508-0154-99 Engine View Diagrams & Manuals
094508-0155-99 Engine View Diagrams & Manuals
094508-0156-99 Engine View Diagrams & Manuals
094508-0157-99 Engine View Diagrams & Manuals
094508-0158-99 Engine View Diagrams & Manuals
094508-0159-99 Engine View Diagrams & Manuals
094508-0160-99 Engine View Diagrams & Manuals
094508-0617-01 Engine View Diagrams & Manuals
094508-0617-02 Engine View Diagrams & Manuals
094508-0617-03 Engine View Diagrams & Manuals
094508-0618-01 Engine View Diagrams & Manuals
094508-0618-02 Engine View Diagrams & Manuals
094508-0618-03 Engine View Diagrams & Manuals
094508-0619-01 Engine View Diagrams & Manuals
094508-0620-01 Engine View Diagrams & Manuals
094508-5917-01 Engine View Diagrams & Manuals
094508-5917-02 Engine View Diagrams & Manuals
094508-5918-01 Engine View Diagrams & Manuals
094508-5918-02 Engine View Diagrams & Manuals
094508-5918-03 Engine View Diagrams & Manuals
094902-3131-01 Engine View Diagrams & Manuals
094907-0623-01 Engine View Diagrams & Manuals
094907-0625-01 Engine View Diagrams & Manuals
094907-0634-01 Engine View Diagrams & Manuals
094907-0647-01 Engine View Diagrams & Manuals
094907-0648-01 Engine View Diagrams & Manuals
094907-0648-02 Engine View Diagrams & Manuals
094907-3106-01 Engine View Diagrams & Manuals
094907-3107-01 Engine View Diagrams & Manuals
094908-0015-99 Engine View Diagrams & Manuals
094908-0016-99 Engine View Diagrams & Manuals
094908-0017-99 Engine View Diagrams & Manuals
094908-0117-99 Engine View Diagrams & Manuals
094908-0150-99 Engine View Diagrams & Manuals
094908-0151-99 Engine View Diagrams & Manuals
094908-0152-99 Engine View Diagrams & Manuals
094908-0153-99 Engine View Diagrams & Manuals
094908-0155-99 Engine View Diagrams & Manuals
094908-0156-99 Engine View Diagrams & Manuals
094908-0157-99 Engine View Diagrams & Manuals
094908-0159-99 Engine View Diagrams & Manuals
094908-0160-99 Engine View Diagrams & Manuals
094908-0162-99 Engine View Diagrams & Manuals
094908-0163-99 Engine View Diagrams & Manuals
094908-0164-99 Engine View Diagrams & Manuals
094908-0165-99 Engine View Diagrams & Manuals
094908-0166-99 Engine View Diagrams & Manuals
094908-0167-99 Engine View Diagrams & Manuals
094908-0170-99 Engine View Diagrams & Manuals
094908-0171-99 Engine View Diagrams & Manuals
094908-0173-99 Engine View Diagrams & Manuals
094908-0174-99 Engine View Diagrams & Manuals
094908-0176-99 Engine View Diagrams & Manuals
094908-0177-99 Engine View Diagrams & Manuals
094908-0178-99 Engine View Diagrams & Manuals
094908-0179-99 Engine View Diagrams & Manuals
094908-0180-99 Engine View Diagrams & Manuals
094908-0181-99 Engine View Diagrams & Manuals
094908-0182-99 Engine View Diagrams & Manuals
094908-0183-99 Engine View Diagrams & Manuals
094908-0184-99 Engine View Diagrams & Manuals
094908-0185-99 Engine View Diagrams & Manuals
094908-0186-99 Engine View Diagrams & Manuals
094908-0187-99 Engine View Diagrams & Manuals
094908-0188-99 Engine View Diagrams & Manuals
094908-0189-99 Engine View Diagrams & Manuals
094908-0190-99 Engine View Diagrams & Manuals
094908-0191-99 Engine View Diagrams & Manuals
094908-0192-99 Engine View Diagrams & Manuals
094908-0193-99 Engine View Diagrams & Manuals
094908-0194-99 Engine View Diagrams & Manuals
094908-0196-99 Engine View Diagrams & Manuals
094908-0198-99 Engine View Diagrams & Manuals
094908-0200-99 Engine View Diagrams & Manuals
094908-0201-99 Engine View Diagrams & Manuals
094908-0505-01 Engine View Diagrams & Manuals
094908-0506-01 Engine View Diagrams & Manuals
094908-0507-01 Engine View Diagrams & Manuals
094908-0515-01 Engine View Diagrams & Manuals
094908-0516-01 Engine View Diagrams & Manuals
094908-0517-01 Engine View Diagrams & Manuals
094908-0617-01 Engine View Diagrams & Manuals
094908-0618-01 Engine View Diagrams & Manuals
094908-0618-02 Engine View Diagrams & Manuals
094908-0619-01 Engine View Diagrams & Manuals
094908-0619-02 Engine View Diagrams & Manuals
094908-0631-01 Engine View Diagrams & Manuals
094908-0632-01 Engine View Diagrams & Manuals
094908-0635-01 Engine View Diagrams & Manuals
094908-0636-01 Engine View Diagrams & Manuals
094908-0638-01 Engine View Diagrams & Manuals
094908-0640-01 Engine View Diagrams & Manuals
094908-0641-01 Engine View Diagrams & Manuals
094908-0642-01 Engine View Diagrams & Manuals
094908-0645-01 Engine View Diagrams & Manuals
094908-0650-01 Engine View Diagrams & Manuals
094908-0653-01 Engine View Diagrams & Manuals
094908-0669-01 Engine View Diagrams & Manuals
094908-3121-01 Engine View Diagrams & Manuals
094908-5902-01 Engine View Diagrams & Manuals
094908-5902-02 Engine View Diagrams & Manuals
094908-5903-01 Engine View Diagrams & Manuals
094908-5911-01 Engine View Diagrams & Manuals
094908-5911-02 Engine View Diagrams & Manuals
094908-5912-01 Engine View Diagrams & Manuals
094908-5912-02 Engine View Diagrams & Manuals
094987-3108-01 Engine View Diagrams & Manuals
094988-0050-99 Engine View Diagrams & Manuals
094988-0051-99 Engine View Diagrams & Manuals
094988-0052-99 Engine View Diagrams & Manuals
094988-0135-99 Engine View Diagrams & Manuals
094988-0136-99 Engine View Diagrams & Manuals
094988-0154-99 Engine View Diagrams & Manuals
094988-0158-99 Engine View Diagrams & Manuals
094988-0161-99 Engine View Diagrams & Manuals
094988-0168-99 Engine View Diagrams & Manuals
094988-0169-99 Engine View Diagrams & Manuals
094988-0172-99 Engine View Diagrams & Manuals
094988-0175-99 Engine View Diagrams & Manuals
094988-0194-99 Engine View Diagrams & Manuals
094988-0195-99 Engine View Diagrams & Manuals
094988-0197-99 Engine View Diagrams & Manuals
094988-0550-01 Engine View Diagrams & Manuals
094988-0551-01 Engine View Diagrams & Manuals
094988-0552-01 Engine View Diagrams & Manuals
094988-0622-01 Engine View Diagrams & Manuals
094988-0637-01 Engine View Diagrams & Manuals
094988-0637-02 Engine View Diagrams & Manuals
094988-0639-01 Engine View Diagrams & Manuals
094988-0643-01 Engine View Diagrams & Manuals
094988-0644-01 Engine View Diagrams & Manuals
094988-0646-01 Engine View Diagrams & Manuals
094988-0649-01 Engine View Diagrams & Manuals
094988-0654-01 Engine View Diagrams & Manuals
094988-0655-01 Engine View Diagrams & Manuals
094988-3130-01 Engine View Diagrams & Manuals
094988-9137-99 Engine View Diagrams & Manuals
095508-0015-99 Engine View Diagrams & Manuals
095508-0016-99 Engine View Diagrams & Manuals
095508-0017-99 Engine View Diagrams & Manuals
095508-0117-99 Engine View Diagrams & Manuals
095508-0150-99 Engine View Diagrams & Manuals
095508-0151-99 Engine View Diagrams & Manuals
095508-0152-99 Engine View Diagrams & Manuals
095508-0153-99 Engine View Diagrams & Manuals
095508-0154-99 Engine View Diagrams & Manuals
095508-0155-99 Engine View Diagrams & Manuals
095508-0156-99 Engine View Diagrams & Manuals
095508-0157-99 Engine View Diagrams & Manuals
095508-0158-99 Engine View Diagrams & Manuals
095508-0159-99 Engine View Diagrams & Manuals
095508-0160-99 Engine View Diagrams & Manuals
095508-0161-99 Engine View Diagrams & Manuals
095508-0162-99 Engine View Diagrams & Manuals
095508-0164-99 Engine View Diagrams & Manuals
095508-0165-99 Engine View Diagrams & Manuals
095508-0167-99 Engine View Diagrams & Manuals
095508-0168-99 Engine View Diagrams & Manuals
095508-0171-99 Engine View Diagrams & Manuals
095508-0172-99 Engine View Diagrams & Manuals
095508-0173-99 Engine View Diagrams & Manuals
095508-0174-99 Engine View Diagrams & Manuals
095508-0175-99 Engine View Diagrams & Manuals
095508-0176-99 Engine View Diagrams & Manuals
095508-0177-99 Engine View Diagrams & Manuals
095508-0178-99 Engine View Diagrams & Manuals
095508-0180-99 Engine View Diagrams & Manuals
095508-0181-99 Engine View Diagrams & Manuals
095508-0182-99 Engine View Diagrams & Manuals
095508-0183-99 Engine View Diagrams & Manuals
095508-0184-99 Engine View Diagrams & Manuals
095508-0185-99 Engine View Diagrams & Manuals
095588-0050-99 Engine View Diagrams & Manuals
095588-0051-99 Engine View Diagrams & Manuals
095588-0052-99 Engine View Diagrams & Manuals
095588-0136-99 Engine View Diagrams & Manuals
095588-0137-99 Engine View Diagrams & Manuals
095588-0163-99 Engine View Diagrams & Manuals
095588-0166-99 Engine View Diagrams & Manuals
095588-0169-99 Engine View Diagrams & Manuals
095588-0170-99 Engine View Diagrams & Manuals
095588-0179-99 Engine View Diagrams & Manuals
095588-0186-99 Engine View Diagrams & Manuals
095588-0187-99 Engine View Diagrams & Manuals
095902-0100-01 Engine View Diagrams & Manuals
095902-0101-01 Engine View Diagrams & Manuals
095902-0102-01 Engine View Diagrams & Manuals
095902-0102-99 Engine View Diagrams & Manuals
095902-0106-01 Engine View Diagrams & Manuals
095902-0107-01 Engine View Diagrams & Manuals
095902-0108-01 Engine View Diagrams & Manuals
095902-0109-01 Engine View Diagrams & Manuals
095902-0110-01 Engine View Diagrams & Manuals
095902-0111-01 Engine View Diagrams & Manuals
095902-0112-01 Engine View Diagrams & Manuals
095902-0113-01 Engine View Diagrams & Manuals
095902-0114-01 Engine View Diagrams & Manuals
095902-0115-01 Engine View Diagrams & Manuals
095902-0115-02 Engine View Diagrams & Manuals
095902-0117-01 Engine View Diagrams & Manuals
095902-0118-01 Engine View Diagrams & Manuals
095902-0119-01 Engine View Diagrams & Manuals
095902-0120-01 Engine View Diagrams & Manuals
095902-0121-01 Engine View Diagrams & Manuals
095902-0122-01 Engine View Diagrams & Manuals
095902-0123-01 Engine View Diagrams & Manuals
095902-0124-01 Engine View Diagrams & Manuals
095902-0125-01 Engine View Diagrams & Manuals
095902-0126-01 Engine View Diagrams & Manuals
095902-0128-01 Engine View Diagrams & Manuals
095902-0129-01 Engine View Diagrams & Manuals
095902-0131-01 Engine View Diagrams & Manuals
095902-0133-01 Engine View Diagrams & Manuals
095902-0134-01 Engine View Diagrams & Manuals
095902-0135-01 Engine View Diagrams & Manuals
095902-0136-01 Engine View Diagrams & Manuals
095902-0137-01 Engine View Diagrams & Manuals
095902-0138-01 Engine View Diagrams & Manuals
095902-0139-01 Engine View Diagrams & Manuals
095902-0206-01 Engine View Diagrams & Manuals
095902-0206-02 Engine View Diagrams & Manuals
095902-0207-01 Engine View Diagrams & Manuals
095902-0210-01 Engine View Diagrams & Manuals
095902-0215-01 Engine View Diagrams & Manuals
095902-0217-01 Engine View Diagrams & Manuals
095902-0218-01 Engine View Diagrams & Manuals
095902-0219-01 Engine View Diagrams & Manuals
095902-0220-01 Engine View Diagrams & Manuals
095902-0221-01 Engine View Diagrams & Manuals
095902-0222-01 Engine View Diagrams & Manuals
095902-0225-01 Engine View Diagrams & Manuals
095902-0226-01 Engine View Diagrams & Manuals
095902-0227-01 Engine View Diagrams & Manuals
095902-0228-01 Engine View Diagrams & Manuals
095902-0229-01 Engine View Diagrams & Manuals
095902-3101-01 Engine View Diagrams & Manuals
095902-3102-01 Engine View Diagrams & Manuals
095902-3105-01 Engine View Diagrams & Manuals
095902-3106-01 Engine View Diagrams & Manuals
095902-3107-01 Engine View Diagrams & Manuals
095902-3107-02 Engine View Diagrams & Manuals
095902-3112-01 Engine View Diagrams & Manuals
095902-3115-01 Engine View Diagrams & Manuals
095902-3115-02 Engine View Diagrams & Manuals
095902-3117-01 Engine View Diagrams & Manuals
095902-3117-02 Engine View Diagrams & Manuals
095902-3117-03 Engine View Diagrams & Manuals
095902-3119-01 Engine View Diagrams & Manuals
095902-3119-02 Engine View Diagrams & Manuals
095902-3123-01 Engine View Diagrams & Manuals
095902-3124-01 Engine View Diagrams & Manuals
095902-3124-02 Engine View Diagrams & Manuals
095902-3124-03 Engine View Diagrams & Manuals
095902-3124-04 Engine View Diagrams & Manuals
095902-3124-05 Engine View Diagrams & Manuals
095902-3126-01 Engine View Diagrams & Manuals
095902-3128-01 Engine View Diagrams & Manuals
095902-3129-01 Engine View Diagrams & Manuals
095902-3130-01 Engine View Diagrams & Manuals
095902-3131-01 Engine View Diagrams & Manuals
095902-3132-01 Engine View Diagrams & Manuals
095902-3133-01 Engine View Diagrams & Manuals
095902-3133-02 Engine View Diagrams & Manuals
095902-3135-01 Engine View Diagrams & Manuals
095902-3137-01 Engine View Diagrams & Manuals
095902-3139-02 Engine View Diagrams & Manuals
095902-3140-01 Engine View Diagrams & Manuals
095902-3142-01 Engine View Diagrams & Manuals
095902-3148-01 Engine View Diagrams & Manuals
095902-3149-01 Engine View Diagrams & Manuals
095902-3151-01 Engine View Diagrams & Manuals
095902-3151-02 Engine View Diagrams & Manuals
095902-3152-01 Engine View Diagrams & Manuals
095902-3153-01 Engine View Diagrams & Manuals
095902-3154-01 Engine View Diagrams & Manuals
095902-3155-01 Engine View Diagrams & Manuals
095902-3156-01 Engine View Diagrams & Manuals
095902-3158-01 Engine View Diagrams & Manuals
095902-3168-02 Engine View Diagrams & Manuals
095902-3176-01 Engine View Diagrams & Manuals
095902-3177-01 Engine View Diagrams & Manuals
095902-3180-99 Engine View Diagrams & Manuals
095902-3181-01 Engine View Diagrams & Manuals
095902-3182-01 Engine View Diagrams & Manuals
095902-3183-01 Engine View Diagrams & Manuals
095902-3184-01 Engine View Diagrams & Manuals
095902-3185-01 Engine View Diagrams & Manuals
095902-3187-01 Engine View Diagrams & Manuals
095902-3211-01 Engine View Diagrams & Manuals
095902-3233-01 Engine View Diagrams & Manuals
095902-5500-01 Engine View Diagrams & Manuals
095902-5510-01 Engine View Diagrams & Manuals
095902-5512-01 Engine View Diagrams & Manuals
095902-5515-01 Engine View Diagrams & Manuals
095902-5517-02 Engine View Diagrams & Manuals
095902-5518-01 Engine View Diagrams & Manuals
095902-5518-02 Engine View Diagrams & Manuals
095902-5530-01 Engine View Diagrams & Manuals
095902-5531-01 Engine View Diagrams & Manuals
095902-5532-01 Engine View Diagrams & Manuals
095982-0216-01 Engine View Diagrams & Manuals
095982-3110-01 Engine View Diagrams & Manuals
095982-3118-01 Engine View Diagrams & Manuals
095982-3118-02 Engine View Diagrams & Manuals
095982-3138-01 Engine View Diagrams & Manuals
095982-3150-01 Engine View Diagrams & Manuals
095982-3180-01 Engine View Diagrams & Manuals
095982-3210-01 Engine View Diagrams & Manuals
095982-5516-01 Engine View Diagrams & Manuals
096502-0100-01 Engine View Diagrams & Manuals
096502-0101-01 Engine View Diagrams & Manuals
096502-0111-01 Engine View Diagrams & Manuals
096502-0113-01 Engine View Diagrams & Manuals
096502-0114-01 Engine View Diagrams & Manuals
096502-0115-01 Engine View Diagrams & Manuals
096502-3100-01 Engine View Diagrams & Manuals
096502-3101-01 Engine View Diagrams & Manuals
096502-3115-01 Engine View Diagrams & Manuals
096502-3117-01 Engine View Diagrams & Manuals
096502-3120-01 Engine View Diagrams & Manuals
096502-3123-01 Engine View Diagrams & Manuals
096502-3124-01 Engine View Diagrams & Manuals
096502-3126-01 Engine View Diagrams & Manuals
096502-3127-01 Engine View Diagrams & Manuals
096502-3128-01 Engine View Diagrams & Manuals
096502-3131-01 Engine View Diagrams & Manuals
096502-3132-01 Engine View Diagrams & Manuals
096502-3133-01 Engine View Diagrams & Manuals
096502-3135-01 Engine View Diagrams & Manuals
096502-3187-01 Engine View Diagrams & Manuals
096502-3188-01 Engine View Diagrams & Manuals
096502-3189-99 Engine View Diagrams & Manuals
096502-3190-01 Engine View Diagrams & Manuals
096502-3191-01 Engine View Diagrams & Manuals
096502-3199-01 Engine View Diagrams & Manuals
096502-3202-01 Engine View Diagrams & Manuals
096502-3510-01 Engine View Diagrams & Manuals
096502-3511-01 Engine View Diagrams & Manuals
096582-0110-01 Engine View Diagrams & Manuals
096582-3113-01 Engine View Diagrams & Manuals
096582-3114-01 Engine View Diagrams & Manuals
096582-3116-01 Engine View Diagrams & Manuals
096582-3118-01 Engine View Diagrams & Manuals
096582-3119-01 Engine View Diagrams & Manuals
096582-3121-01 Engine View Diagrams & Manuals
096582-3125-01 Engine View Diagrams & Manuals
096582-3130-01 Engine View Diagrams & Manuals
096582-3134-01 Engine View Diagrams & Manuals
096582-3136-01 Engine View Diagrams & Manuals
096582-3189-01 Engine View Diagrams & Manuals
096582-3200-01 Engine View Diagrams & Manuals
096902-0101-01 Engine View Diagrams & Manuals
096902-0105-01 Engine View Diagrams & Manuals
096902-0105-03 Engine View Diagrams & Manuals
096902-0105-04 Engine View Diagrams & Manuals
096902-0106-01 Engine View Diagrams & Manuals
096902-0106-02 Engine View Diagrams & Manuals
096902-0106-99 Engine View Diagrams & Manuals
096902-0107-01 Engine View Diagrams & Manuals
096902-0108-01 Engine View Diagrams & Manuals
096902-0108-02 Engine View Diagrams & Manuals
096902-0108-03 Engine View Diagrams & Manuals
096902-0109-01 Engine View Diagrams & Manuals
096902-0110-01 Engine View Diagrams & Manuals
096902-0113-01 Engine View Diagrams & Manuals
096902-0113-02 Engine View Diagrams & Manuals
096902-0115-01 Engine View Diagrams & Manuals
096902-0116-01 Engine View Diagrams & Manuals
096902-0117-01 Engine View Diagrams & Manuals
096902-0118-01 Engine View Diagrams & Manuals
096902-0119-01 Engine View Diagrams & Manuals
096902-0120-01 Engine View Diagrams & Manuals
096902-0122-01 Engine View Diagrams & Manuals
096902-0123-01 Engine View Diagrams & Manuals
096902-0124-01 Engine View Diagrams & Manuals
096902-0125-01 Engine View Diagrams & Manuals
096902-0125-02 Engine View Diagrams & Manuals
096902-0129-01 Engine View Diagrams & Manuals
096902-0130-01 Engine View Diagrams & Manuals
096902-0155-01 Engine View Diagrams & Manuals
096902-0156-01 Engine View Diagrams & Manuals
096902-0157-01 Engine View Diagrams & Manuals
096902-0159-01 Engine View Diagrams & Manuals
096902-0160-01 Engine View Diagrams & Manuals
096902-0213-01 Engine View Diagrams & Manuals
096902-3101-01 Engine View Diagrams & Manuals
096902-3104-01 Engine View Diagrams & Manuals
096902-3106-01 Engine View Diagrams & Manuals
096902-3111-01 Engine View Diagrams & Manuals
096902-3113-01 Engine View Diagrams & Manuals
096902-3116-01 Engine View Diagrams & Manuals
096902-3117-01 Engine View Diagrams & Manuals
096902-3118-01 Engine View Diagrams & Manuals
096902-3120-01 Engine View Diagrams & Manuals
096902-3120-02 Engine View Diagrams & Manuals
096902-3120-03 Engine View Diagrams & Manuals
096902-3124-01 Engine View Diagrams & Manuals
096902-3124-02 Engine View Diagrams & Manuals
096902-3126-01 Engine View Diagrams & Manuals
096902-3127-01 Engine View Diagrams & Manuals
096902-3127-02 Engine View Diagrams & Manuals
096902-3128-01 Engine View Diagrams & Manuals
096902-3129-01 Engine View Diagrams & Manuals
096902-3129-02 Engine View Diagrams & Manuals
096902-3130-01 Engine View Diagrams & Manuals
096902-3135-01 Engine View Diagrams & Manuals
096902-3136-01 Engine View Diagrams & Manuals
096902-3137-01 Engine View Diagrams & Manuals
096902-3137-02 Engine View Diagrams & Manuals
096902-3139-01 Engine View Diagrams & Manuals
096902-3140-01 Engine View Diagrams & Manuals
096902-3142-01 Engine View Diagrams & Manuals
096902-3144-01 Engine View Diagrams & Manuals
096902-3145-01 Engine View Diagrams & Manuals
096902-3146-01 Engine View Diagrams & Manuals
096902-3147-01 Engine View Diagrams & Manuals
096902-3148-01 Engine View Diagrams & Manuals
096902-3150-01 Engine View Diagrams & Manuals
096902-3151-01 Engine View Diagrams & Manuals
096902-3154-01 Engine View Diagrams & Manuals
096902-3155-01 Engine View Diagrams & Manuals
096902-3156-02 Engine View Diagrams & Manuals
096902-3158-01 Engine View Diagrams & Manuals
096902-3162-01 Engine View Diagrams & Manuals
096902-3163-01 Engine View Diagrams & Manuals
096902-4002-01 Engine View Diagrams & Manuals
096902-4004-01 Engine View Diagrams & Manuals
096902-4005-01 Engine View Diagrams & Manuals
096902-7000-01 Engine View Diagrams & Manuals
096902-7015-01 Engine View Diagrams & Manuals
096902-7016-01 Engine View Diagrams & Manuals
096902-7018-01 Engine View Diagrams & Manuals
096982-0111-01 Engine View Diagrams & Manuals
096982-0114-01 Engine View Diagrams & Manuals
096982-0127-01 Engine View Diagrams & Manuals
096982-3112-01 Engine View Diagrams & Manuals
096982-3114-01 Engine View Diagrams & Manuals
096982-3121-01 Engine View Diagrams & Manuals
096982-3131-01 Engine View Diagrams & Manuals
096982-3131-02 Engine View Diagrams & Manuals
096982-3133-01 Engine View Diagrams & Manuals
096982-3134-01 Engine View Diagrams & Manuals
096982-3143-01 Engine View Diagrams & Manuals
096982-3149-01 Engine View Diagrams & Manuals
096982-3152-01 Engine View Diagrams & Manuals
096982-3159-01 Engine View Diagrams & Manuals
096982-3164-02 Engine View Diagrams & Manuals
096982-3175-01 Engine View Diagrams & Manuals
096982-3180-01 Engine View Diagrams & Manuals
096982-7050-01 Engine View Diagrams & Manuals
096982-7051-01 Engine View Diagrams & Manuals
098902-0101-01 Engine View Diagrams & Manuals
098902-0110-01 Engine View Diagrams & Manuals
098902-0115-01 Engine View Diagrams & Manuals
098902-0119-01 Engine View Diagrams & Manuals
098902-0120-01 Engine View Diagrams & Manuals
098902-0124-01 Engine View Diagrams & Manuals
098902-0125-01 Engine View Diagrams & Manuals
098902-0125-02 Engine View Diagrams & Manuals
098902-0128-01 Engine View Diagrams & Manuals
098902-0129-01 Engine View Diagrams & Manuals
098902-0130-01 Engine View Diagrams & Manuals
098902-0131-01 Engine View Diagrams & Manuals
098902-0131-02 Engine View Diagrams & Manuals
098902-0131-03 Engine View Diagrams & Manuals
098902-0132-01 Engine View Diagrams & Manuals
098902-0134-01 Engine View Diagrams & Manuals
098902-0137-01 Engine View Diagrams & Manuals
098902-0138-01 Engine View Diagrams & Manuals
098902-0139-01 Engine View Diagrams & Manuals
098902-0140-01 Engine View Diagrams & Manuals
098902-0141-01 Engine View Diagrams & Manuals
098902-0142-01 Engine View Diagrams & Manuals
098902-0143-01 Engine View Diagrams & Manuals
098902-0144-02 Engine View Diagrams & Manuals
098902-0145-01 Engine View Diagrams & Manuals
098902-0148-01 Engine View Diagrams & Manuals
098902-0150-01 Engine View Diagrams & Manuals
098902-0150-02 Engine View Diagrams & Manuals
098902-0151-02 Engine View Diagrams & Manuals
098902-0167-01 Engine View Diagrams & Manuals
098902-0168-01 Engine View Diagrams & Manuals
098902-0170-01 Engine View Diagrams & Manuals
098902-0197-01 Engine View Diagrams & Manuals
098902-0198-01 Engine View Diagrams & Manuals
098902-0199-01 Engine View Diagrams & Manuals
098902-0300-01 Engine View Diagrams & Manuals
098902-0306-01 Engine View Diagrams & Manuals
098902-0306-02 Engine View Diagrams & Manuals
098902-0307-01 Engine View Diagrams & Manuals
098902-0308-01 Engine View Diagrams & Manuals
098902-0309-01 Engine View Diagrams & Manuals
098902-0309-02 Engine View Diagrams & Manuals
098902-0309-03 Engine View Diagrams & Manuals
098902-0310-01 Engine View Diagrams & Manuals
098902-0312-02 Engine View Diagrams & Manuals
098902-0313-01 Engine View Diagrams & Manuals
098902-0314-01 Engine View Diagrams & Manuals
098902-0314-02 Engine View Diagrams & Manuals
098902-0320-01 Engine View Diagrams & Manuals
098902-0321-01 Engine View Diagrams & Manuals
098902-0322-01 Engine View Diagrams & Manuals
098902-0323-01 Engine View Diagrams & Manuals
098902-0325-01 Engine View Diagrams & Manuals
098902-0326-01 Engine View Diagrams & Manuals
098902-0328-01 Engine View Diagrams & Manuals
098902-0330-01 Engine View Diagrams & Manuals
098902-0334-01 Engine View Diagrams & Manuals
098902-0334-02 Engine View Diagrams & Manuals
098902-0337-01 Engine View Diagrams & Manuals
098902-0338-01 Engine View Diagrams & Manuals
098902-0341-01 Engine View Diagrams & Manuals
098902-0344-01 Engine View Diagrams & Manuals
098902-0344-02 Engine View Diagrams & Manuals
098902-0345-01 Engine View Diagrams & Manuals
098902-0345-02 Engine View Diagrams & Manuals
098902-0346-01 Engine View Diagrams & Manuals
098902-0347-01 Engine View Diagrams & Manuals
098902-0349-01 Engine View Diagrams & Manuals
098902-0350-01 Engine View Diagrams & Manuals
098902-0352-01 Engine View Diagrams & Manuals
098902-0353-01 Engine View Diagrams & Manuals
098902-0354-01 Engine View Diagrams & Manuals
098902-0355-01 Engine View Diagrams & Manuals
098902-0356-01 Engine View Diagrams & Manuals
098902-0358-01 Engine View Diagrams & Manuals
098902-0359-01 Engine View Diagrams & Manuals
098902-0360-01 Engine View Diagrams & Manuals
098902-0361-01 Engine View Diagrams & Manuals
098902-0362-01 Engine View Diagrams & Manuals
098902-0363-01 Engine View Diagrams & Manuals
098902-0364-01 Engine View Diagrams & Manuals
098902-0365-01 Engine View Diagrams & Manuals
098902-0366-01 Engine View Diagrams & Manuals
098902-0367-01 Engine View Diagrams & Manuals
098902-0368-01 Engine View Diagrams & Manuals
098902-0369-01 Engine View Diagrams & Manuals
098902-0370-01 Engine View Diagrams & Manuals
098902-0372-01 Engine View Diagrams & Manuals
098902-0376-01 Engine View Diagrams & Manuals
098902-0377-01 Engine View Diagrams & Manuals
098902-0379-01 Engine View Diagrams & Manuals
098902-0380-01 Engine View Diagrams & Manuals
098902-0380-02 Engine View Diagrams & Manuals
098902-0380-03 Engine View Diagrams & Manuals
098902-0381-01 Engine View Diagrams & Manuals
098902-0382-01 Engine View Diagrams & Manuals
098902-0383-01 Engine View Diagrams & Manuals
098902-0385-05 Engine View Diagrams & Manuals
098902-0386-01 Engine View Diagrams & Manuals
098902-0388-02 Engine View Diagrams & Manuals
098902-0389-01 Engine View Diagrams & Manuals
098902-0391-01 Engine View Diagrams & Manuals
098902-0392-01 Engine View Diagrams & Manuals
098902-0393-01 Engine View Diagrams & Manuals
098902-0395-01 Engine View Diagrams & Manuals
098902-0397-01 Engine View Diagrams & Manuals
098902-0397-02 Engine View Diagrams & Manuals
098902-0398-01 Engine View Diagrams & Manuals
098902-0401-01 Engine View Diagrams & Manuals
098902-0402-01 Engine View Diagrams & Manuals
098902-0403-01 Engine View Diagrams & Manuals
098902-0404-01 Engine View Diagrams & Manuals
098902-0810-A1 Engine View Diagrams & Manuals
098902-0837-A1 Engine View Diagrams & Manuals
098902-0866-A1 Engine View Diagrams & Manuals
098902-0890-A1 Engine View Diagrams & Manuals
098902-0891-A1 Engine View Diagrams & Manuals
098902-0899-99 Engine View Diagrams & Manuals
098902-1110-B1 Engine View Diagrams & Manuals
098902-1110-E1 Engine View Diagrams & Manuals
098902-1110-E3 Engine View Diagrams & Manuals
098902-1144-01 Engine View Diagrams & Manuals
098902-1302-01 Engine View Diagrams & Manuals
098902-1303-01 Engine View Diagrams & Manuals
098902-1304-01 Engine View Diagrams & Manuals
098902-1305-01 Engine View Diagrams & Manuals
098902-1315-01 Engine View Diagrams & Manuals
098902-1316-01 Engine View Diagrams & Manuals
098902-1318-01 Engine View Diagrams & Manuals
098902-1446-A1 Engine View Diagrams & Manuals
098902-1472-A1 Engine View Diagrams & Manuals
098902-1477-A1 Engine View Diagrams & Manuals
098902-1515-A1 Engine View Diagrams & Manuals
098902-1516-A1 Engine View Diagrams & Manuals
098902-1518-A1 Engine View Diagrams & Manuals
098902-1602-B1 Engine View Diagrams & Manuals
098902-1602-E1 Engine View Diagrams & Manuals
098902-1603-B1 Engine View Diagrams & Manuals
098902-1603-E1 Engine View Diagrams & Manuals
098902-1607-B1 Engine View Diagrams & Manuals
098902-1610-E2 Engine View Diagrams & Manuals
098902-1612-E1 Engine View Diagrams & Manuals
098902-1615-B1 Engine View Diagrams & Manuals
098902-1615-E1 Engine View Diagrams & Manuals
098902-1615-E2 Engine View Diagrams & Manuals
098902-1616-B1 Engine View Diagrams & Manuals
098902-1616-E1 Engine View Diagrams & Manuals
098902-1618-B1 Engine View Diagrams & Manuals
098902-1618-E1 Engine View Diagrams & Manuals
098902-1644-A1 Engine View Diagrams & Manuals
098902-2000-B1 Engine View Diagrams & Manuals
098902-2001-B1 Engine View Diagrams & Manuals
098902-2001-E1 Engine View Diagrams & Manuals
098902-2002-B1 Engine View Diagrams & Manuals
098902-2004-E1 Engine View Diagrams & Manuals
098902-2010-E1 Engine View Diagrams & Manuals
098902-2011-B1 Engine View Diagrams & Manuals
098902-2012-B1 Engine View Diagrams & Manuals
098902-2013-B1 Engine View Diagrams & Manuals
098902-2023-B1 Engine View Diagrams & Manuals
098902-2024-B1 Engine View Diagrams & Manuals
098902-2025-B2 Engine View Diagrams & Manuals
098902-2025-E1 Engine View Diagrams & Manuals
098902-2025-E2 Engine View Diagrams & Manuals
098902-2028-B1 Engine View Diagrams & Manuals
098902-2029-B1 Engine View Diagrams & Manuals
098902-2030-B1 Engine View Diagrams & Manuals
098902-2031-B1 Engine View Diagrams & Manuals
098902-2032-B1 Engine View Diagrams & Manuals
098902-2033-B1 Engine View Diagrams & Manuals
098902-2042-99 Engine View Diagrams & Manuals
098902-2043-99 Engine View Diagrams & Manuals
098902-2044-B1 Engine View Diagrams & Manuals
098902-2044-E1 Engine View Diagrams & Manuals
098902-2045-B1 Engine View Diagrams & Manuals
098902-2047-B1 Engine View Diagrams & Manuals
098902-2050-D1 Engine View Diagrams & Manuals
098902-2063-B1 Engine View Diagrams & Manuals
098902-2063-E1 Engine View Diagrams & Manuals
098902-2064-B1 Engine View Diagrams & Manuals
098902-2065-B1 Engine View Diagrams & Manuals
098902-2068-99 Engine View Diagrams & Manuals
098902-2069-B1 Engine View Diagrams & Manuals
098902-2069-E1 Engine View Diagrams & Manuals
098902-2070-B1 Engine View Diagrams & Manuals
098902-2070-E1 Engine View Diagrams & Manuals
098902-2072-E1 Engine View Diagrams & Manuals
098902-2077-B1 Engine View Diagrams & Manuals
098902-2077-E1 Engine View Diagrams & Manuals
098902-2078-B1 Engine View Diagrams & Manuals
098902-2085-B1 Engine View Diagrams & Manuals
098902-2085-E1 Engine View Diagrams & Manuals
098902-2085-E5 Engine View Diagrams & Manuals
098902-2086-B1 Engine View Diagrams & Manuals
098902-2087-B1 Engine View Diagrams & Manuals
098902-2093-B1 Engine View Diagrams & Manuals
098902-2093-E1 Engine View Diagrams & Manuals
098902-2097-B2 Engine View Diagrams & Manuals
098902-2097-E2 Engine View Diagrams & Manuals
098902-2098-B1 Engine View Diagrams & Manuals
098902-2098-E1 Engine View Diagrams & Manuals
098902-2099-B1 Engine View Diagrams & Manuals
098902-2099-E1 Engine View Diagrams & Manuals
098902-2100-B1 Engine View Diagrams & Manuals
098902-2101-B1 Engine View Diagrams & Manuals
098902-2101-E1 Engine View Diagrams & Manuals
098902-2102-E1 Engine View Diagrams & Manuals
098902-2103-B1 Engine View Diagrams & Manuals
098902-2109-B1 Engine View Diagrams & Manuals
098902-2109-B3 Engine View Diagrams & Manuals
098902-2109-E1 Engine View Diagrams & Manuals
098902-2109-E3 Engine View Diagrams & Manuals
098902-2110-99 Engine View Diagrams & Manuals
098902-2111-E3 Engine View Diagrams & Manuals
098902-2125-B1 Engine View Diagrams & Manuals
098902-2125-E1 Engine View Diagrams & Manuals
098902-2137-B1 Engine View Diagrams & Manuals
098902-2137-E1 Engine View Diagrams & Manuals
098902-2139-B1 Engine View Diagrams & Manuals
098902-2144-E2 Engine View Diagrams & Manuals
098902-2146-99 Engine View Diagrams & Manuals
098902-2147-B1 Engine View Diagrams & Manuals
098902-2147-E1 Engine View Diagrams & Manuals
098902-2163-B1 Engine View Diagrams & Manuals
098902-2163-E1 Engine View Diagrams & Manuals
098902-2166-B1 Engine View Diagrams & Manuals
098902-2166-E1 Engine View Diagrams & Manuals
098902-2168-99 Engine View Diagrams & Manuals
098902-2179-B1 Engine View Diagrams & Manuals
098902-2179-E1 Engine View Diagrams & Manuals
098902-2180-B1 Engine View Diagrams & Manuals
098902-2180-B2 Engine View Diagrams & Manuals
098902-2180-E1 Engine View Diagrams & Manuals
098902-2181-B1 Engine View Diagrams & Manuals
098902-2185-E1 Engine View Diagrams & Manuals
098902-2185-E3 Engine View Diagrams & Manuals
098902-2186-B1 Engine View Diagrams & Manuals
098902-2186-E1 Engine View Diagrams & Manuals
098902-2191-99 Engine View Diagrams & Manuals
098902-2192-B1 Engine View Diagrams & Manuals
098902-2192-E1 Engine View Diagrams & Manuals
098902-2193-99 Engine View Diagrams & Manuals
098902-2197-E1 Engine View Diagrams & Manuals
098902-2198-B1 Engine View Diagrams & Manuals
098902-2198-E1 Engine View Diagrams & Manuals
098902-2202-E1 Engine View Diagrams & Manuals
098902-2203-E1 Engine View Diagrams & Manuals
098902-2204-B1 Engine View Diagrams & Manuals
098902-2209-E1 Engine View Diagrams & Manuals
098902-2210-B1 Engine View Diagrams & Manuals
098902-2210-B2 Engine View Diagrams & Manuals
098902-2210-B3 Engine View Diagrams & Manuals
098902-2210-B4 Engine View Diagrams & Manuals
098902-2210-E1 Engine View Diagrams & Manuals
098902-2210-E3 Engine View Diagrams & Manuals
098902-2212-B1 Engine View Diagrams & Manuals
098902-2212-E1 Engine View Diagrams & Manuals
098902-2213-B1 Engine View Diagrams & Manuals
098902-2213-E1 Engine View Diagrams & Manuals
098902-2214-E1 Engine View Diagrams & Manuals
098902-2215-B2 Engine View Diagrams & Manuals
098902-2215-E1 Engine View Diagrams & Manuals
098902-2215-E2 Engine View Diagrams & Manuals
098902-2216-B1 Engine View Diagrams & Manuals
098902-2216-E1 Engine View Diagrams & Manuals
098902-2217-B1 Engine View Diagrams & Manuals
098902-2217-E1 Engine View Diagrams & Manuals
098902-2222-E1 Engine View Diagrams & Manuals
098902-2224-B1 Engine View Diagrams & Manuals
098902-2224-E1 Engine View Diagrams & Manuals
098902-2225-B1 Engine View Diagrams & Manuals
098902-2225-E1 Engine View Diagrams & Manuals
098902-2226-E1 Engine View Diagrams & Manuals
098902-2227-B1 Engine View Diagrams & Manuals
098902-2227-E1 Engine View Diagrams & Manuals
098902-2228-B1 Engine View Diagrams & Manuals
098902-2228-B2 Engine View Diagrams & Manuals
098902-2228-E1 Engine View Diagrams & Manuals
098902-2228-E2 Engine View Diagrams & Manuals
098902-2229-E1 Engine View Diagrams & Manuals
098902-2231-E1 Engine View Diagrams & Manuals
098902-2232-B1 Engine View Diagrams & Manuals
098902-2232-B2 Engine View Diagrams & Manuals
098902-2232-E1 Engine View Diagrams & Manuals
098902-2233-E1 Engine View Diagrams & Manuals
098902-2234-B1 Engine View Diagrams & Manuals
098902-2234-E1 Engine View Diagrams & Manuals
098902-2235-B1 Engine View Diagrams & Manuals
098902-2235-E1 Engine View Diagrams & Manuals
098902-2236-B1 Engine View Diagrams & Manuals
098902-2236-E1 Engine View Diagrams & Manuals
098902-2237-B1 Engine View Diagrams & Manuals
098902-2237-E1 Engine View Diagrams & Manuals
098902-2238-B1 Engine View Diagrams & Manuals
098902-2238-E1 Engine View Diagrams & Manuals
098902-2239-B1 Engine View Diagrams & Manuals
098902-2240-B1 Engine View Diagrams & Manuals
098902-2240-E1 Engine View Diagrams & Manuals
098902-2241-E1 Engine View Diagrams & Manuals
098902-2242-E1 Engine View Diagrams & Manuals
098902-2243-B1 Engine View Diagrams & Manuals
098902-2243-E1 Engine View Diagrams & Manuals
098902-2244-B1 Engine View Diagrams & Manuals
098902-2244-E1 Engine View Diagrams & Manuals
098902-2246-B1 Engine View Diagrams & Manuals
098902-2247-B1 Engine View Diagrams & Manuals
098902-2248-B1 Engine View Diagrams & Manuals
098902-2249-B1 Engine View Diagrams & Manuals
098902-2250-B1 Engine View Diagrams & Manuals
098902-2251-B1 Engine View Diagrams & Manuals
098902-2252-B1 Engine View Diagrams & Manuals
098902-2253-B1 Engine View Diagrams & Manuals
098902-2254-B1 Engine View Diagrams & Manuals
098982-0114-01 Engine View Diagrams & Manuals
098982-0117-01 Engine View Diagrams & Manuals
098982-0121-01 Engine View Diagrams & Manuals
098982-0123-01 Engine View Diagrams & Manuals
098982-0126-01 Engine View Diagrams & Manuals
098982-0127-01 Engine View Diagrams & Manuals
098982-0133-01 Engine View Diagrams & Manuals
098982-0147-02 Engine View Diagrams & Manuals
098982-0149-01 Engine View Diagrams & Manuals
098982-0165-01 Engine View Diagrams & Manuals
098982-0165-03 Engine View Diagrams & Manuals
098982-0166-01 Engine View Diagrams & Manuals
098982-0317-01 Engine View Diagrams & Manuals
098982-0317-02 Engine View Diagrams & Manuals
098982-0317-03 Engine View Diagrams & Manuals
098982-0319-02 Engine View Diagrams & Manuals
098982-0371-01 Engine View Diagrams & Manuals
098982-0373-01 Engine View Diagrams & Manuals
098982-0374-01 Engine View Diagrams & Manuals
098982-0378-01 Engine View Diagrams & Manuals
098982-0390-01 Engine View Diagrams & Manuals
098982-0394-01 Engine View Diagrams & Manuals
098982-0396-01 Engine View Diagrams & Manuals
098982-0396-02 Engine View Diagrams & Manuals
098982-0399-01 Engine View Diagrams & Manuals
098982-0407-01 Engine View Diagrams & Manuals
098982-0849-A1 Engine View Diagrams & Manuals
098982-0865-A1 Engine View Diagrams & Manuals
098982-1350-01 Engine View Diagrams & Manuals
098982-1351-01 Engine View Diagrams & Manuals
098982-1550-A1 Engine View Diagrams & Manuals
098982-1551-A1 Engine View Diagrams & Manuals
098982-1650-B1 Engine View Diagrams & Manuals
098982-1650-E1 Engine View Diagrams & Manuals
098982-1651-B1 Engine View Diagrams & Manuals
098982-1651-E1 Engine View Diagrams & Manuals
098982-2026-B1 Engine View Diagrams & Manuals
098982-2026-E1 Engine View Diagrams & Manuals
098982-2027-B1 Engine View Diagrams & Manuals
098982-2027-E1 Engine View Diagrams & Manuals
098982-2049-99 Engine View Diagrams & Manuals
098982-2065-99 Engine View Diagrams & Manuals
098982-2066-B1 Engine View Diagrams & Manuals
098982-2066-E1 Engine View Diagrams & Manuals
098982-2178-B1 Engine View Diagrams & Manuals
098982-2178-E1 Engine View Diagrams & Manuals
098982-2194-B1 Engine View Diagrams & Manuals
098982-2194-E1 Engine View Diagrams & Manuals
098982-2196-E2 Engine View Diagrams & Manuals
098982-2207-B1 Engine View Diagrams & Manuals
098982-2207-E1 Engine View Diagrams & Manuals
098982-2211-E1 Engine View Diagrams & Manuals
09P602-0063-F1 Engine View Diagrams & Manuals
08P502-0029-H1 Engine View Diagrams & Manuals
08P502-0030-H1 Engine View Diagrams & Manuals
08P502-0031-H1 Engine View Diagrams & Manuals
08P502-0033-H1 Engine View Diagrams & Manuals
08P502-0034-F1 Engine View Diagrams & Manuals
08P502-0035-H1 Engine View Diagrams & Manuals
08P502-0036-H1 Engine View Diagrams & Manuals
08P502-0037-H1 Engine View Diagrams & Manuals
08P502-0038-H1 Engine View Diagrams & Manuals
08P502-0039-H1 Engine View Diagrams & Manuals
08P502-0040-H1 Engine View Diagrams & Manuals
08P502-0041-H1 Engine View Diagrams & Manuals
08P502-0042-F1 Engine View Diagrams & Manuals
08P502-0043-H1 Engine View Diagrams & Manuals
08P502-0044-H1 Engine View Diagrams & Manuals
08P502-0045-H1 Engine View Diagrams & Manuals
08P502-0046-F1 Engine View Diagrams & Manuals
08P502-0047-F1 Engine View Diagrams & Manuals
08P502-0048-H1 Engine View Diagrams & Manuals
08P502-0049-F1 Engine View Diagrams & Manuals
08P502-0050-H1 Engine View Diagrams & Manuals
08P502-0051-H1 Engine View Diagrams & Manuals
08P502-0052-H1 Engine View Diagrams & Manuals
08P502-0053-H1 Engine View Diagrams & Manuals
08P502-0054-F1 Engine View Diagrams & Manuals
08P502-0055-F1 Engine View Diagrams & Manuals
08P502-0056-H1 Engine View Diagrams & Manuals
08P502-0057-H1 Engine View Diagrams & Manuals
08P502-0058-H1 Engine View Diagrams & Manuals
08P502-0059-H1 Engine View Diagrams & Manuals
08P502-0060-H1 Engine View Diagrams & Manuals
08P502-0061-H1 Engine View Diagrams & Manuals
08P502-0062-H1 Engine View Diagrams & Manuals
08P502-0063-F1 Engine View Diagrams & Manuals
08P502-0064-F1 Engine View Diagrams & Manuals
08P502-0065-H1 Engine View Diagrams & Manuals
08P502-0066-H1 Engine View Diagrams & Manuals
08P502-0067-H1 Engine View Diagrams & Manuals
08P502-0068-H1 Engine View Diagrams & Manuals
08P502-0069-H1 Engine View Diagrams & Manuals
08P502-0070-H1 Engine View Diagrams & Manuals
08P502-0071-H1 Engine View Diagrams & Manuals
08P502-0072-H1 Engine View Diagrams & Manuals
08P502-0073-H1 Engine View Diagrams & Manuals
08P502-0074-H1 Engine View Diagrams & Manuals
08P502-0075-H1 Engine View Diagrams & Manuals
08P502-0076-H1 Engine View Diagrams & Manuals
08P502-0077-H1 Engine View Diagrams & Manuals
08P502-0078-H1 Engine View Diagrams & Manuals
08P502-0079-F1 Engine View Diagrams & Manuals
08P502-0080-H1 Engine View Diagrams & Manuals
08P502-0081-H1 Engine View Diagrams & Manuals
08P502-0082-H1 Engine View Diagrams & Manuals
08P502-0083-H1 Engine View Diagrams & Manuals
08P502-0084-H1 Engine View Diagrams & Manuals
08P502-0085-H1 Engine View Diagrams & Manuals
08P502-0086-H1 Engine View Diagrams & Manuals
08P502-0087-H1 Engine View Diagrams & Manuals
08P502-0088-H1 Engine View Diagrams & Manuals
08P502-0089-H1 Engine View Diagrams & Manuals
08P502-0090-H1 Engine View Diagrams & Manuals
08P502-0091-H1 Engine View Diagrams & Manuals
08P502-0092-H1 Engine View Diagrams & Manuals
08P502-0093-H1 Engine View Diagrams & Manuals
08P502-0094-H1 Engine View Diagrams & Manuals
08P502-0095-H1 Engine View Diagrams & Manuals
08P502-0096-H1 Engine View Diagrams & Manuals
08P502-0097-H1 Engine View Diagrams & Manuals
08P502-0098-H1 Engine View Diagrams & Manuals
08P502-0099-H1 Engine View Diagrams & Manuals
08P502-0100-H1 Engine View Diagrams & Manuals
08P502-0101-H1 Engine View Diagrams & Manuals
08P502-0102-H1 Engine View Diagrams & Manuals
08P502-0103-H1 Engine View Diagrams & Manuals
08P502-0104-H1 Engine View Diagrams & Manuals
08P502-0105-F1 Engine View Diagrams & Manuals
08P502-0106-H1 Engine View Diagrams & Manuals
08P502-0107-H1 Engine View Diagrams & Manuals
08P502-0108-H1 Engine View Diagrams & Manuals
08P502-0109-F1 Engine View Diagrams & Manuals
08P502-0110-F1 Engine View Diagrams & Manuals
08P502-0111-F1 Engine View Diagrams & Manuals
08P502-0112-H1 Engine View Diagrams & Manuals
08P502-0113-H1 Engine View Diagrams & Manuals
08P502-0114-H1 Engine View Diagrams & Manuals
08P502-0115-H1 Engine View Diagrams & Manuals
08P502-0116-H1 Engine View Diagrams & Manuals
08P502-0117-H1 Engine View Diagrams & Manuals
08P502-0118-H1 Engine View Diagrams & Manuals
08P502-0119-H1 Engine View Diagrams & Manuals
08P502-0120-H1 Engine View Diagrams & Manuals
08P502-0121-H1 Engine View Diagrams & Manuals
08P502-0122-H1 Engine View Diagrams & Manuals
08P502-0123-H1 Engine View Diagrams & Manuals
08P502-0124-H1 Engine View Diagrams & Manuals
08P502-0125-H1 Engine View Diagrams & Manuals
08P502-0126-H1 Engine View Diagrams & Manuals
08P502-0127-F1 Engine View Diagrams & Manuals
08P502-0128-H1 Engine View Diagrams & Manuals
08P502-0129-H1 Engine View Diagrams & Manuals
08P502-0130-H1 Engine View Diagrams & Manuals
08P502-0131-H1 Engine View Diagrams & Manuals
08P502-0132-H1 Engine View Diagrams & Manuals
08P502-0133-H1 Engine View Diagrams & Manuals
08P502-0134-H1 Engine View Diagrams & Manuals
093J02-0002-F1 Engine View Diagrams & Manuals
093J02-0003-F1 Engine View Diagrams & Manuals
093J02-0004-F1 Engine View Diagrams & Manuals
093J02-0005-H1 Engine View Diagrams & Manuals
093J02-0006-F1 Engine View Diagrams & Manuals
093J02-0007-H1 Engine View Diagrams & Manuals
093J02-0008-H1 Engine View Diagrams & Manuals
093J02-0009-H1 Engine View Diagrams & Manuals
093J02-0010-F1 Engine View Diagrams & Manuals
093J02-0011-F1 Engine View Diagrams & Manuals
093J02-0012-F1 Engine View Diagrams & Manuals
093J02-0013-H1 Engine View Diagrams & Manuals
093J02-0014-H1 Engine View Diagrams & Manuals
093J02-0015-H1 Engine View Diagrams & Manuals
093J02-0016-H1 Engine View Diagrams & Manuals
093J02-0017-H1 Engine View Diagrams & Manuals
093J02-0018-H1 Engine View Diagrams & Manuals
093J02-0019-H1 Engine View Diagrams & Manuals
093J02-0020-H1 Engine View Diagrams & Manuals
093J02-0021-F1 Engine View Diagrams & Manuals
093J02-0022-F1 Engine View Diagrams & Manuals
093J02-0023-F1 Engine View Diagrams & Manuals
093J02-0024-H1 Engine View Diagrams & Manuals
093J02-0025-H1 Engine View Diagrams & Manuals
093J02-0026-H1 Engine View Diagrams & Manuals
093J02-0027-H1 Engine View Diagrams & Manuals
093J02-0028-H1 Engine View Diagrams & Manuals
093J02-0029-H1 Engine View Diagrams & Manuals
093J02-0030-H1 Engine View Diagrams & Manuals
093J02-0031-H1 Engine View Diagrams & Manuals
093J02-0032-F1 Engine View Diagrams & Manuals
093J02-0033-H1 Engine View Diagrams & Manuals
093J02-0034-H1 Engine View Diagrams & Manuals
093J02-0035-F1 Engine View Diagrams & Manuals
093J02-0036-H1 Engine View Diagrams & Manuals
093J02-0037-H1 Engine View Diagrams & Manuals
093J02-0038-H1 Engine View Diagrams & Manuals
093J02-0039-H1 Engine View Diagrams & Manuals
093J02-0040-H1 Engine View Diagrams & Manuals
093J02-0041-H1 Engine View Diagrams & Manuals
093J02-0042-H1 Engine View Diagrams & Manuals
093J02-0043-H1 Engine View Diagrams & Manuals
093J02-0044-H1 Engine View Diagrams & Manuals
093J02-0045-H1 Engine View Diagrams & Manuals
093J02-0046-H1 Engine View Diagrams & Manuals
093J02-0047-H1 Engine View Diagrams & Manuals
093J02-0048-H1 Engine View Diagrams & Manuals
093J02-0049-H1 Engine View Diagrams & Manuals
093J02-0050-F1 Engine View Diagrams & Manuals
093J02-0051-F1 Engine View Diagrams & Manuals
093J02-0052-F1 Engine View Diagrams & Manuals
093J02-0053-H1 Engine View Diagrams & Manuals
093J02-0054-H1 Engine View Diagrams & Manuals
093J02-0055-H1 Engine View Diagrams & Manuals
093J02-0056-H1 Engine View Diagrams & Manuals
093J02-0057-F1 Engine View Diagrams & Manuals
093J02-0058-H1 Engine View Diagrams & Manuals
093J02-0059-H1 Engine View Diagrams & Manuals
093J02-0060-F1 Engine View Diagrams & Manuals
093J02-0061-H1 Engine View Diagrams & Manuals
093J02-0062-H1 Engine View Diagrams & Manuals
093J02-0063-F1 Engine View Diagrams & Manuals
093J02-0064-H1 Engine View Diagrams & Manuals
093J02-0065-H1 Engine View Diagrams & Manuals
093J02-0066-H1 Engine View Diagrams & Manuals
093J02-0067-H1 Engine View Diagrams & Manuals
093J02-0068-F1 Engine View Diagrams & Manuals
093J02-0069-H1 Engine View Diagrams & Manuals
093J02-0070-H1 Engine View Diagrams & Manuals
093J02-0071-H1 Engine View Diagrams & Manuals
093J02-0072-H1 Engine View Diagrams & Manuals
093J02-0073-H1 Engine View Diagrams & Manuals
093J02-0074-H1 Engine View Diagrams & Manuals
093J02-0075-F1 Engine View Diagrams & Manuals
093J02-0076-F1 Engine View Diagrams & Manuals
093J02-0077-H1 Engine View Diagrams & Manuals
093J02-0078-H1 Engine View Diagrams & Manuals
093J02-0079-H1 Engine View Diagrams & Manuals
093J02-0080-H1 Engine View Diagrams & Manuals
093J02-0081-H1 Engine View Diagrams & Manuals
093J02-0082-F1 Engine View Diagrams & Manuals
093J02-0083-H1 Engine View Diagrams & Manuals
093J02-0084-H1 Engine View Diagrams & Manuals
093J02-0085-H1 Engine View Diagrams & Manuals
093J02-0086-F1 Engine View Diagrams & Manuals
093J02-0087-H1 Engine View Diagrams & Manuals
093J02-0088-H1 Engine View Diagrams & Manuals
093J02-0089-H1 Engine View Diagrams & Manuals
093J02-0090-H1 Engine View Diagrams & Manuals
093J02-0091-H1 Engine View Diagrams & Manuals
093J02-0092-H1 Engine View Diagrams & Manuals
093J02-0093-F1 Engine View Diagrams & Manuals
093J02-0094-H1 Engine View Diagrams & Manuals
093J02-0095-H1 Engine View Diagrams & Manuals
093J02-0096-H1 Engine View Diagrams & Manuals
093J02-0097-H1 Engine View Diagrams & Manuals
093J02-0098-F1 Engine View Diagrams & Manuals
093J02-0099-H1 Engine View Diagrams & Manuals
093J02-0100-H1 Engine View Diagrams & Manuals
09P602-0060-F1 Engine View Diagrams & Manuals
09P602-0061-H1 Engine View Diagrams & Manuals
09P602-0062-H1 Engine View Diagrams & Manuals
09P602-0064-H1 Engine View Diagrams & Manuals
09P602-0065-H1 Engine View Diagrams & Manuals
09P602-0066-H1 Engine View Diagrams & Manuals
09P602-0067-H1 Engine View Diagrams & Manuals
09P602-0068-H1 Engine View Diagrams & Manuals
09P602-0069-H1 Engine View Diagrams & Manuals
09P602-0070-H1 Engine View Diagrams & Manuals
09P602-0071-H1 Engine View Diagrams & Manuals
09P602-0072-H1 Engine View Diagrams & Manuals
09P602-0073-H1 Engine View Diagrams & Manuals
09P602-0074-H1 Engine View Diagrams & Manuals
09P602-0075-H1 Engine View Diagrams & Manuals
09P602-0076-F1 Engine View Diagrams & Manuals
09P602-0077-F1 Engine View Diagrams & Manuals
09P602-0078-H1 Engine View Diagrams & Manuals
09P602-0079-H1 Engine View Diagrams & Manuals
09P602-0080-H1 Engine View Diagrams & Manuals
09P602-0081-H1 Engine View Diagrams & Manuals
09P602-0082-H1 Engine View Diagrams & Manuals
09P602-0083-H1 Engine View Diagrams & Manuals
09P602-0084-H1 Engine View Diagrams & Manuals
09P602-0085-F1 Engine View Diagrams & Manuals
09P602-0086-H1 Engine View Diagrams & Manuals
09P602-0087-H1 Engine View Diagrams & Manuals
09P602-0088-H1 Engine View Diagrams & Manuals
09P602-0089-H1 Engine View Diagrams & Manuals
09P602-0090-F1 Engine View Diagrams & Manuals
09P602-0091-H1 Engine View Diagrams & Manuals
09P602-0092-H1 Engine View Diagrams & Manuals
09P602-0093-H1 Engine View Diagrams & Manuals
09P602-0094-H1 Engine View Diagrams & Manuals
09P602-0095-F1 Engine View Diagrams & Manuals
09P602-0096-F1 Engine View Diagrams & Manuals
09P602-0097-H1 Engine View Diagrams & Manuals
09P602-0098-H1 Engine View Diagrams & Manuals
09P602-0099-H1 Engine View Diagrams & Manuals
09P602-0100-H1 Engine View Diagrams & Manuals
09P602-0101-H1 Engine View Diagrams & Manuals
09P602-0102-H1 Engine View Diagrams & Manuals
09P602-0103-H1 Engine View Diagrams & Manuals
09P602-0104-H1 Engine View Diagrams & Manuals
09P602-0105-H1 Engine View Diagrams & Manuals
09P602-0106-H1 Engine View Diagrams & Manuals
09P602-0107-H1 Engine View Diagrams & Manuals
09P602-0108-H1 Engine View Diagrams & Manuals
09P602-0109-H1 Engine View Diagrams & Manuals
09P602-0110-H1 Engine View Diagrams & Manuals
09P602-0111-F1 Engine View Diagrams & Manuals
09P602-0112-H1 Engine View Diagrams & Manuals
09P602-0113-H1 Engine View Diagrams & Manuals
09P602-0114-H1 Engine View Diagrams & Manuals
09P602-0115-F1 Engine View Diagrams & Manuals
09P602-0116-H1 Engine View Diagrams & Manuals
09P602-0117-F1 Engine View Diagrams & Manuals
09P602-0118-H1 Engine View Diagrams & Manuals
09P602-0119-H1 Engine View Diagrams & Manuals
09P602-0120-H1 Engine View Diagrams & Manuals
09P602-0121-H1 Engine View Diagrams & Manuals
09P702-0129-F1 Engine View Diagrams & Manuals
09P702-0130-H1 Engine View Diagrams & Manuals
09P702-0131-H1 Engine View Diagrams & Manuals
09P702-0132-H1 Engine View Diagrams & Manuals
09P702-0133-H1 Engine View Diagrams & Manuals
09P702-0134-H1 Engine View Diagrams & Manuals
09P702-0135-H1 Engine View Diagrams & Manuals
09P702-0136-H1 Engine View Diagrams & Manuals
09P702-0137-H1 Engine View Diagrams & Manuals
09P702-0138-H1 Engine View Diagrams & Manuals
09P702-0139-F1 Engine View Diagrams & Manuals
09P702-0140-H1 Engine View Diagrams & Manuals
09P702-0141-H1 Engine View Diagrams & Manuals
09P702-0142-H1 Engine View Diagrams & Manuals
09P702-0143-H1 Engine View Diagrams & Manuals
09P702-0144-F1 Engine View Diagrams & Manuals
09P702-0145-F1 Engine View Diagrams & Manuals
09P702-0146-F1 Engine View Diagrams & Manuals
09P702-0147-F1 Engine View Diagrams & Manuals
09P702-0148-F1 Engine View Diagrams & Manuals
09P702-0149-F1 Engine View Diagrams & Manuals
09P702-0150-H1 Engine View Diagrams & Manuals
09P702-0151-H1 Engine View Diagrams & Manuals
09P702-0152-H1 Engine View Diagrams & Manuals
09P702-0153-H1 Engine View Diagrams & Manuals
09P702-0154-H1 Engine View Diagrams & Manuals
09P702-0155-H1 Engine View Diagrams & Manuals
09P702-0156-H1 Engine View Diagrams & Manuals
09P702-0157-H1 Engine View Diagrams & Manuals
09P702-0158-H1 Engine View Diagrams & Manuals
09P702-0159-H1 Engine View Diagrams & Manuals
09P702-0160-H1 Engine View Diagrams & Manuals
09P702-0161-H1 Engine View Diagrams & Manuals
09P702-0162-F1 Engine View Diagrams & Manuals
09P702-0163-F1 Engine View Diagrams & Manuals
09P702-0164-F1 Engine View Diagrams & Manuals
09P702-0165-F1 Engine View Diagrams & Manuals
09P702-0166-F1 Engine View Diagrams & Manuals
09P702-0167-F1 Engine View Diagrams & Manuals
09P702-0168-F1 Engine View Diagrams & Manuals
09P702-0169-F1 Engine View Diagrams & Manuals
09P702-0170-H1 Engine View Diagrams & Manuals
09P702-0171-F1 Engine View Diagrams & Manuals
09P702-0172-H1 Engine View Diagrams & Manuals
09P702-0173-H1 Engine View Diagrams & Manuals
09P702-0174-H1 Engine View Diagrams & Manuals
09P702-0175-H1 Engine View Diagrams & Manuals
09P702-0176-H1 Engine View Diagrams & Manuals
09P702-0177-F1 Engine View Diagrams & Manuals
09P702-0178-F1 Engine View Diagrams & Manuals
09P702-0179-F1 Engine View Diagrams & Manuals
09P702-0180-F1 Engine View Diagrams & Manuals
09P702-0181-F1 Engine View Diagrams & Manuals
09P702-0182-H1 Engine View Diagrams & Manuals
09P702-0183-H1 Engine View Diagrams & Manuals
09P702-0184-H1 Engine View Diagrams & Manuals
09P702-0185-H1 Engine View Diagrams & Manuals
09P702-0186-H1 Engine View Diagrams & Manuals
09P702-0187-H1 Engine View Diagrams & Manuals
09P702-0188-H1 Engine View Diagrams & Manuals
09P702-0189-H1 Engine View Diagrams & Manuals
09P702-0190-F1 Engine View Diagrams & Manuals
09P702-0191-H1 Engine View Diagrams & Manuals
09P702-0192-H1 Engine View Diagrams & Manuals
09P702-0193-H1 Engine View Diagrams & Manuals
09P702-0194-F1 Engine View Diagrams & Manuals
09P702-0195-F1 Engine View Diagrams & Manuals
09P702-0196-H1 Engine View Diagrams & Manuals
09P702-0197-H1 Engine View Diagrams & Manuals
09P702-0198-F1 Engine View Diagrams & Manuals
09P702-0199-H1 Engine View Diagrams & Manuals
09P702-0200-H1 Engine View Diagrams & Manuals
09P702-0201-H1 Engine View Diagrams & Manuals
09P702-0202-H1 Engine View Diagrams & Manuals
09P702-0203-H1 Engine View Diagrams & Manuals
09P702-0204-H1 Engine View Diagrams & Manuals
09P702-0205-F1 Engine View Diagrams & Manuals
09P702-0206-F1 Engine View Diagrams & Manuals
09P702-0207-H1 Engine View Diagrams & Manuals
09P702-0208-H1 Engine View Diagrams & Manuals
09P702-0209-H1 Engine View Diagrams & Manuals
09P702-0210-H1 Engine View Diagrams & Manuals
09P702-0211-F1 Engine View Diagrams & Manuals
09P702-0212-F1 Engine View Diagrams & Manuals
09P702-0213-H1 Engine View Diagrams & Manuals
09P702-0214-H1 Engine View Diagrams & Manuals
09P702-0215-H1 Engine View Diagrams & Manuals
09P702-0216-H1 Engine View Diagrams & Manuals
09P702-0217-F1 Engine View Diagrams & Manuals
09P702-0218-H1 Engine View Diagrams & Manuals
09P702-0219-H1 Engine View Diagrams & Manuals
09P702-0220-H1 Engine View Diagrams & Manuals
09P702-0221-H1 Engine View Diagrams & Manuals
09P702-0222-H1 Engine View Diagrams & Manuals
10E902-0015-B1 Engine View Diagrams & Manuals
10E902-0018-B1 Engine View Diagrams & Manuals
10E902-0100-B1 Engine View Diagrams & Manuals
10E902-0111-B1 Engine View Diagrams & Manuals
10E902-0112-B1 Engine View Diagrams & Manuals
10E902-0113-B1 Engine View Diagrams & Manuals
10E902-0116-B1 Engine View Diagrams & Manuals
10E902-0117-B1 Engine View Diagrams & Manuals
10E902-0118-B1 Engine View Diagrams & Manuals
10E902-0119-B1 Engine View Diagrams & Manuals
10E902-0120-B1 Engine View Diagrams & Manuals
10E902-0121-B1 Engine View Diagrams & Manuals
10E902-0207-B1 Engine View Diagrams & Manuals
10E902-0459-B1 Engine View Diagrams & Manuals
10E902-0462-B1 Engine View Diagrams & Manuals
10E902-0550-B1 Engine View Diagrams & Manuals
10E902-0772-B1 Engine View Diagrams & Manuals
10E902-0826-B1 Engine View Diagrams & Manuals
10E902-0862-B1 Engine View Diagrams & Manuals
10F902-0110-B1 Engine View Diagrams & Manuals
10F902-0111-B1 Engine View Diagrams & Manuals
10F902-0112-B1 Engine View Diagrams & Manuals
10F902-0113-B1 Engine View Diagrams & Manuals
10F902-0114-B1 Engine View Diagrams & Manuals
10L802-0001-F1 Engine View Diagrams & Manuals
10T602-3184-H2 Engine View Diagrams & Manuals
08P502-0031-H5 Engine View Diagrams & Manuals
08P502-0037-H5 Engine View Diagrams & Manuals
08P502-0148-H5 Engine View Diagrams & Manuals
08P502-0151-F1 Engine View Diagrams & Manuals
08P502-0163-F1 Engine View Diagrams & Manuals
08P602-0006-H5 Engine View Diagrams & Manuals
08P602-0007-H5 Engine View Diagrams & Manuals
08P602-0008-H5 Engine View Diagrams & Manuals
08P602-0012-H5 Engine View Diagrams & Manuals
08P602-0014-H5 Engine View Diagrams & Manuals
08P602-0022-H5 Engine View Diagrams & Manuals
08P602-0023-H5 Engine View Diagrams & Manuals
09P602-0134-F1 Engine View Diagrams & Manuals
09P602-0143-F1 Engine View Diagrams & Manuals
09P702-0275-H5 Engine View Diagrams & Manuals
09P702-0291-F1 Engine View Diagrams & Manuals
09P702-0294-F1 Engine View Diagrams & Manuals
09P70B-0261-H5 Engine View Diagrams & Manuals
09P70B-0263-H5 Engine View Diagrams & Manuals
09P70B-0276-H5 Engine View Diagrams & Manuals
09P802-0002-H5 Engine View Diagrams & Manuals
09P802-0003-H5 Engine View Diagrams & Manuals
09P802-0004-H5 Engine View Diagrams & Manuals
09P802-0014-H5 Engine View Diagrams & Manuals
Toro
10502 (1000001-1999999)(1981) Lawn Mower View Diagrams & Manuals
16009 (9000001-9999999)(1979) Lawn Mower View Diagrams & Manuals
16067 (9000001-9999999)(1979) Lawn Mower View Diagrams & Manuals
16113 (9000001-9999999)(1979) Lawn Mower View Diagrams & Manuals
16155 (9000001-9999999)(1979) Lawn Mower View Diagrams & Manuals
16277 (9000001-9999999)(1979) Lawn Mower View Diagrams & Manuals
16287 (9000001-9999999)(1979) Lawn Mower View Diagrams & Manuals
16300 (9000001-9999999)(1979) Lawn Mower View Diagrams & Manuals
16300 (0000001-0999999)(1980) Lawn Mower View Diagrams & Manuals
16300 (1000001-1999999)(1981) Lawn Mower View Diagrams & Manuals
16300 (2000001-2999999)(1982) Lawn Mower View Diagrams & Manuals
16310 (9000001-9999999)(1979) Lawn Mower View Diagrams & Manuals
16310 (0000001-0999999)(1980) Lawn Mower View Diagrams & Manuals
16310 (1000001-1999999)(1981) Lawn Mower View Diagrams & Manuals
16320 (9000001-9999999)(1979) Lawn Mower View Diagrams & Manuals
16325 (3000001-3999999)(1983) Lawn Mower View Diagrams & Manuals
16330 (3000001-3999999)(1983) Lawn Mower View Diagrams & Manuals
16330 (4000001-4999999)(1984) Lawn Mower View Diagrams & Manuals
16330 (5000001-5999999)(1985) Lawn Mower View Diagrams & Manuals
16350 (9000001-9999999)(1979) Lawn Mower View Diagrams & Manuals
16350 (0000001-0999999)(1980) Lawn Mower View Diagrams & Manuals
16350 (1000001-1999999)(1981) Lawn Mower View Diagrams & Manuals
16360 (9000001-9999999)(1979) Lawn Mower View Diagrams & Manuals
16360 (0000001-0999999)(1980) Lawn Mower View Diagrams & Manuals
16370 (9000001-9999999)(1979) Lawn Mower View Diagrams & Manuals
16410 (3900001-3999999)(1993) Lawn Mower View Diagrams & Manuals
16411 (3900001-3999999)(1993) Lawn Mower View Diagrams & Manuals
16550 (8000001-8999999)(1978) Lawn Mower View Diagrams & Manuals
16600 (8000001-8999999)(1978) Lawn Mower View Diagrams & Manuals
16655 (8000001-8999999)(1978) Lawn Mower View Diagrams & Manuals
16800 (9000001-9999999)(1979) Lawn Mower View Diagrams & Manuals
16810 (9000001-9999999)(1979) Lawn Mower View Diagrams & Manuals
16820 (9000001-9999999)(1979) Lawn Mower View Diagrams & Manuals
16830 (9000001-9999999)(1979) Lawn Mower View Diagrams & Manuals
16860 (0000001-0999999)(1980) Lawn Mower View Diagrams & Manuals
16860 (1000001-1999999)(1981) Lawn Mower View Diagrams & Manuals
16870 (0000001-0999999)(1980) Lawn Mower View Diagrams & Manuals
16870 (1000001-1999999)(1981) Lawn Mower View Diagrams & Manuals
16870 (2000001-2999999)(1982) Lawn Mower View Diagrams & Manuals
16880 (0000001-0999999)(1980) Lawn Mower View Diagrams & Manuals
16880 (1000001-1999999)(1981) Lawn Mower View Diagrams & Manuals
16880 (2000001-2999999)(1982) Lawn Mower View Diagrams & Manuals
16890 (0000001-0999999)(1980) Lawn Mower View Diagrams & Manuals
16890 (1000001-1999999)(1981) Lawn Mower View Diagrams & Manuals
16890 (2000001-2999999)(1982) Lawn Mower View Diagrams & Manuals
16930 (0000001-0999999)(1980) Lawn Mower View Diagrams & Manuals
16940 (0000001-0999999)(1980) Lawn Mower View Diagrams & Manuals
20180 (2000001-2999999)(1992) Lawn Mower View Diagrams & Manuals
20181 (3900001-3999999)(1993) Lawn Mower View Diagrams & Manuals
20181 (4900001-4999999)(1994) Lawn Mower View Diagrams & Manuals
20181 (5900001-5999999)(1995) Lawn Mower View Diagrams & Manuals
20181 (6900001-6999999)(1996) Lawn Mower View Diagrams & Manuals
20181 (7900001-7999999)(1997) Lawn Mower View Diagrams & Manuals
20181WF (3900001-3999999)(1993) Lawn Mower View Diagrams & Manuals
20182 (39000001-39999999)(1993) Lawn Mower View Diagrams & Manuals
20431 (39000001-39999999)(1993) Lawn Mower View Diagrams & Manuals
20432 (39000001-39999999)(1993) Lawn Mower View Diagrams & Manuals
20560 (3000001-3999999)(1983) Lawn Mower View Diagrams & Manuals
20735 (9000001-9999999)(1979) Lawn Mower View Diagrams & Manuals
20735 (0000001-0999999)(1980) Lawn Mower View Diagrams & Manuals
20742 (4000001-4999999)(1984) Lawn Mower View Diagrams & Manuals
20742C (5000001-5999999)(1985) Lawn Mower View Diagrams & Manuals
20743C (5000001-5999999)(1985) Lawn Mower View Diagrams & Manuals
20750 (8000001-8999999)(1978) Lawn Mower View Diagrams & Manuals
20752 (2000001-2999999)(1982) Lawn Mower View Diagrams & Manuals
20661 (3000001-3999999)(1983) Lawn Mower View Diagrams & Manuals
20698 (2000001-2999999)(1982) Lawn Mower View Diagrams & Manuals
20815 (1000001-1999999)(1981) Lawn Mower View Diagrams & Manuals
20785 (9000001-9999999)(1979) Lawn Mower View Diagrams & Manuals
20785 (0000001-0999999)(1980) Lawn Mower View Diagrams & Manuals
20785 (1000001-1999999)(1981) Lawn Mower View Diagrams & Manuals
20785 (2000001-2999999)(1982) Lawn Mower View Diagrams & Manuals
23307 (7000001-7999999)(1977) Lawn Mower View Diagrams & Manuals
23307 (8000001-8999999)(1978) Lawn Mower View Diagrams & Manuals
23333 (7000001-7999999)(1977) Lawn Mower View Diagrams & Manuals
23333 (8000001-8999999)(1978) Lawn Mower View Diagrams & Manuals
23400 (0000001-0999999)(1980) Lawn Mower View Diagrams & Manuals
23400 (1000001-1999999)(1981) Lawn Mower View Diagrams & Manuals
23400 (2000001-2999999)(1982) Lawn Mower View Diagrams & Manuals
23450 (0000001-0999999)(1980) Lawn Mower View Diagrams & Manuals
23450 (1000001-1999999)(1981) Lawn Mower View Diagrams & Manuals
62835 (2000001-2999999) (1972) Shredder View Diagrams & Manuals
16390 (9000001-9999999) (1979) Whirlwind Pow-ft.r View Diagrams & Manuals
16390 (1000001-1999999) (1981) Whirlwind Pow-ft.r View Diagrams & Manuals
Show More Compatible Models
This item works with the following types of products:
- Engine Parts
- Lawn Mower Parts
This part replaces obsolete part #: 4118, 291841, 391483
Customer Part Reviews ?
Questions & Answers ?
Our customer Service team is at the ready daily to answer your part and product questions.

Ask our Team
We have a dedicated staff with decades of collective experience in helping customers just like you purchase parts to repair their products.
Does this fit my product?Questions & Answers for Seal-oil
What are the dimension of this part
JR
for model number M 500 304183
asked on 2023-12-22
Hi JR,
Thank you for your question. The oil seal has an inner diameter of approximately 15/16 inches, an outer diameter of 1-3/8 inches, and a diameter of 3/8 inches. We hope this helps!
eReplacementParts Team December 22, 2023
Customer Repair Instructions ?
All our customer repair instructions are solicited directly from other customers just like you who have purchased and replaced this exact part.
The oil seal between the crankshaft and oil sump
Tom - June 11, 2016
👍 6 of 8 people found this instruction helpful
Tool Type
Lawn Mower
Difficulty
Medium
Time
1-2 hours
Tools Used
Screwdriver, Socket set, Wrench Set, Nutdriver
Parts Used
Hardest part was getting the old oil seal out without marring the counterbore on the oil sump where it seats. "Marvel Mystery Oil" worked well to install new part and assemble the rest. No more adding oil every time to mow the lawn. Won't keep a pizza pan under lawn wower in the shed for the oil leak now. Next time will not mow over string that wrapped around the crankshaft and tore up the oil seal.
Did you find this story helpful?
Thanks for voting and helping fellow customers!
Leaking engine oil
Anthony - April 17, 2023
Tool Type
Lawn Mower
Difficulty
Medium
Time
1-2 hours
Tools Used
Socket set, Hammer and penetrating oil. Impact wrench
Parts Used
Remove blade
Remove blade adapter (most difficult to do)
Remove old seal
Clean and buff crankshaft
Drive in new seal
Replace blade adapter and blade
Remove blade adapter (most difficult to do)
Remove old seal
Clean and buff crankshaft
Drive in new seal
Replace blade adapter and blade
Did you find this story helpful?
Thanks for voting and helping fellow customers!
Bought mower for $20. Essentially new - previous owner hit pipe and broke sump ...
Leonard - May 26, 2022
Tool Type
Engine
Difficulty
Expert
Time
30-60 minutes
Tools Used
Screwdriver, Socket set, Wrench Set, Emery paper; torque wrench; miscellaneous
Parts Used
Comment: I worked in a lawn mower repair shop for about four years. This repair was very easy for me but may be a bit challenging for someone not really familiar with an engine from the inside ...
1. Drain oil and fuel; remove control cables, blade, and then remove engine from mower base.
2. Clean end of crankshaft with emery paper so shaft will move easily through old sump bearing. Put oil on shaft before you remove old sump.
3. Keep engine positioned with shaft upward; remove sump bolts. Tap sump to break seal and remove sump. (Always keep engine with shaft upward when sump is off! Otherwise camshaft will fall out and you'll have to re-time.)
4. Clean old gasket residue from block. A razor blade works nicely for this. Be careful not to score the soft aluminum mating surface during this operation.
5. Install new gasket - comes with sump - and reinstall sump. Torque bolts to 6 ft-lb.
6. Install new oil seal. Flat side goes to the outside. Use a large, deep socket or other sleeve to CAREFULLY drive the seal into place.
7. Reinstall engine to mower base; reinstall blade. Reconnect control(s) cables.
8. Add oil and fuel and you're ready to go ...
Did you find this story helpful?
Thanks for voting and helping fellow customers!
Crank case seal failed
walter - July 3, 2020
Tool Type
Engine
Difficulty
Medium
Time
30-60 minutes
Tools Used
Pliers, Socket set, Rubber mallet, seal puller
Parts Used
1. Remove blade
2. Removed 3 bolts holding motor from deck
3. Removed 6 bolts from crank case housing
4. Use rubber mallet to knock crank case cover.
5. Remove cover casefully.
6. Inspect speed governor.
7. Remove seal, and gasket from crank case / cover with a razor and plastic scraper (no
metal scrapers, wire brushes).
8. Clean out crank case
9. Replace seal and gasket.
10. Replace cover, ensure governor is in position.
10 torque crank case bolts to 90 inches pounds (7.5 foot pounds).
11. Reattach motor to deck
12. Reattach blade.
Let her rip.
Did you find this story helpful?
Thanks for voting and helping fellow customers!
Engine used lots of oil.
CLYDE - November 3, 2017
Tool Type
Engine
Difficulty
Medium
Time
More than 2 hours
Tools Used
Screwdriver, Socket set, Wrench Set, Nutdriver
Replaced the piston, the rings, the connecting rod, and gaskets. Just grunt work.
Did you find this story helpful?
Thanks for voting and helping fellow customers!
Crank shaft bent.
Allen - June 23, 2017
👍 1 of 2 people found this instruction helpful
Tool Type
Engine
Difficulty
Easy
Time
30-60 minutes
Tools Used
Socket set, Wrench Set, Nutdriver
1. Removed the engine from the lawn mower.
2. Split the case.
3. Removed the crank shaft.
4. Straightened the crank shaft.
5. Put the engine back together.
6. Installed the engine on the lawn mower.
7. Started on the first pull.
8. Runs like new.
2. Split the case.
3. Removed the crank shaft.
4. Straightened the crank shaft.
5. Put the engine back together.
6. Installed the engine on the lawn mower.
7. Started on the first pull.
8. Runs like new.
Did you find this story helpful?
Thanks for voting and helping fellow customers!
OEM stands for Original Equipment Manufacturer and means the part you’re buying is sourced directly from the manufacturer who made your product. At eReplacementParts, we sell only genuine OEM parts, guaranteeing the part you’re purchasing is of better design and of higher quality than aftermarket parts.
Our product descriptions are a combination of data sourced directly from the manufacturers who made your product as well as content researched and curated by our content & customer service teams. This content is edited and reviewed internally before being made public to customers.
Our customer service team are at the ready daily to answer your part and product questions. We have a dedicated staff with decades of collective experience in helping customers just like you purchase parts to repair their products.
All our part reviews are solicited directly from other customers who have purchased this exact part. While we moderate these reviews for profanity, offensive language or personally identifiable information, these reviews are posted exactly as submitted and no alterations are made by our team.
All our customer repair instructions are solicited directly from other customers just like you who have purchased and replaced this exact part. While we moderate these reviews for profanity, offensive language or personally identifiable information, these reviews are posted exactly as submitted and no alterations are made by our team.
Based on data from past customer purchasing behaviors, these parts are most commonly purchased together along with the part you are viewing. These parts may be necessary or helpful to replace to complete your current repair.
All our installation videos are created and produced in collaboration with our in-house repair technician, Mark Sodja, who has helped millions of eReplacementParts customers over the last 13 years repair their products. Mark has years of experience in selling and repairing both commercial and residential products with a specialty in gas-powered equipment.
This data is collected from customers who submitted a repair instruction after replacing this exact part. Customers can rate how easy the repair was to complete and how long it took. We aggregate this data to provide a repair rating that allows customers to quickly determine the difficulty and time needed to perform their own repair.